OPEL GT-R 1973 Service Manual
Manufacturer: OPEL, Model Year: 1973, Model line: GT-R, Model: OPEL GT-R 1973Pages: 625, PDF Size: 17.22 MB
Page 591 of 625

r98-82 1973 OPEL SERVICE MANUAL
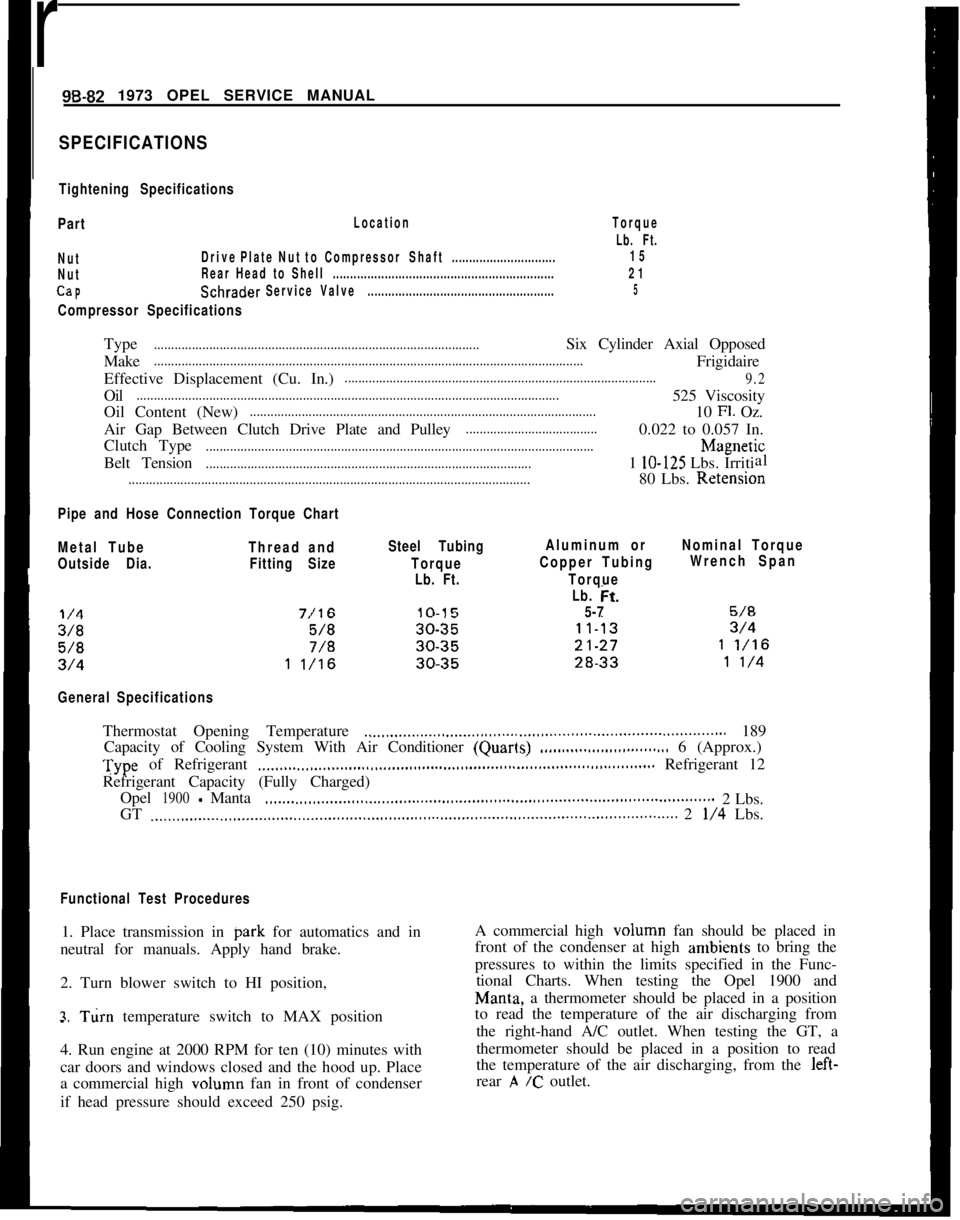
SPECIFICATIONS
Tightening Specifications
Part
Location
NutDrivePlateNut toCompressorShaft..............................
NutRear Head to Shell................................................................
CaPSchraderServiceValve......................................................
Compressor Specifications
Torque
Lb. Ft.
15
21
5Type
..............................................................................................Six Cylinder Axial Opposed
Make
............................................................................................................................Frigidaire
Effective Displacement (Cu. In.)
..........................................................................................
9.2Oil
..........................................................................................................................525 Viscosity
Oil Content (New)
....................................................................................................10 Fl. Oz.
Air Gap Between Clutch Drive Plate and Pulley
......................................0.022 to 0.057 In.
Clutch Type
................................................................................................................h4agnetic
Belt Tension
..............................................................................................1 lo-125 Lbs. Irritial
....................................................................................................................80 Lbs. Retension
Pipe and Hose Connection Torque Chart
Metal TubeThread andSteel TubingAluminum orNominal Torque
I
Outside Dia.Fitting SizeTorqueCopper TubingWrench Span
Lb. Ft.Torque
Lb. tit.
5-7
General SpecificationsThermostat Opening Temperature
.._.....,,,...__....,,.............................................................. 189
Capacity of Cooling System With Air Conditioner (Quarls)
.,,..___....___............... 6 (Approx.)Type of Refrigerant
.___,,,._...,.,,,.__.....,,,.......,,,,.......,,,...................,,,......,,,............ Refrigerant 12
Refrigerant Capacity (Fully Charged)
Opel
1900-Manta,,._....,,,,._...._.,,,,.......,,,........,,............................................................2 Lbs.
GT
,..__..,..,..__..,,,.......,,,,.......,,,........,,,.,......,,,,,......,,.,,........,,.......,,..........,,............... 2 l/4 Lbs.
Functional Test Procedures1. Place transmission in park for automatics and in
neutral for manuals. Apply hand brake.
2. Turn blower switch to HI position,
3. Turn temperature switch to MAX position-.
4. Run engine at 2000 RPM for ten (10) minutes with
car doors and windows closed and the hood up. Place
a commercial high volumn fan in front of condenser
if head pressure should exceed 250 psig.A commercial high volumn fan should be placed in
front of the condenser at high ambients to bring the
pressures to within the limits specified in the Func-
tional Charts. When testing the Opel 1900 and
Man& a thermometer should be placed in a position
to read the temperature of the air discharging from
the right-hand A/C outlet. When testing the GT, a
thermometer should be placed in a position to read
the temperature of the air discharging, from the left-
rear
,A /c outlet.
Page 592 of 625

REFRIGERANT COMPONENTS ALL MODELS9B- 83
FUNCTIONAL TEST - OPEL 1900.
MANTA
Temp. of Air Entering
Cond.
Engine RPM
Camp. Head Pressure*
Suction Press.’
Discharge Air Temperature*
*When compressor clutch disengages,
FUNCTIIONAL TEST - GT
Temp. of Air Entering Cond.
Engine RPM
Camp. Head Pressure”
Suction Press.”
Discharge~Air Temperature*
“When compressor clutch disengages70
8090100110
20002000200020002000
155.165195.205200-210
250.260270.280
1922222729
38-4340.4542-47
45-5047-52
708090100110
2000
2000200020002000
125.135145.155180-190
210-220150.260
1720202224
37-42
38.4339-4440-4545-50
Page 593 of 625

9B-84 1973 OPEL SERVICE MANUALtCOMPRESSOR
CONDENSEREVAPORATOR
q H.P. VAPORq H.P. LIQUIDq 1.p. LIQUIDq L.P. VAPORq H.P.T.X.V. POWER ELEMENTFigure 96-l 61 Cycle of Operation
Page 594 of 625

REFRIGERANT COMPONENTS ALL MODELSSB- 85
123 45 6 7a910 11 12 131415 lb1718 19
_202122232425 26 272a2930313233 34 35 3b
I. Rear Head13. Coil and Housing
Assemblv
2. Rear Head to Shell “0” Ring
3. Rear Discharge Valve Plate14. coil Housiq Retaining Ring25. Thrust Race
4. Rear Suction Reed Plate
15. Pulley and Bearing Assembly26. Thrust &zarin~27.16. Pulley BearingThrust Race
28.
5.
PistonRingCompressor Shell6. Piston Drive Ball17. Pulley Bearing Retainer Ring
18. Pulley and
Bearing Retainer Ring29. Cylinder Assembh30.Shaft Seal
7. Ball Seat (Shae Disc)
8. Piston
19. Clutch Hub and Drive Plate Assembly 31. Shaft Seal Seat “0” Rjn820. Oil Pump Gears
32. Shaft Seal sear
9. Front Suction Reed Plate
10. Front Discharge Valve Plate21. Mainshaft
Bearing (Rear)
22. Oil inlet Tube “0” Ring33. Shaft Seal Seat Rrrainer Ring
11. Fr&t Head to Shell “0” Rin8 23. Oil Inlet Tube34. Spacer
12. Front Head24. Wobble
(Skash) Plate and Mainshaft35. Clutch flub Retainer Ring36:Shaft Nut
Assembly98.131Figure 98.162 Compressor Section View
Page 595 of 625

REFRIGERANT COMPONENTS ALL MODELS9B- 87
SUCTION,011 INLET T”BE
REAR CYLINDER
’ REAR NEEDtE”q.PRESSURE RELIEF VALVE
THRUST BEARlNG
/IT DISCHARGE VALVE PLATE
fFRONT HEAD
,-SEAL SEAT O-RING
I,-SHAFT SEAL
~&SHELL TOHEAD O-RING
I,IPORTFRONT
CYLINDE<\., -I\,VALVE PLATE[SERVICE ONLYI(SERVICE ONLY1.TION VALVE REED DISC
Figure 96-l 64 Compressor Exploded View
Page 596 of 625

98-88 1973 OPEL SERVICE MANUAL
Figure gB-165 Special Tools
Page 597 of 625

AIR CONDITIONER SYSTEM -OPEL 1900 - MANTASB- 89
cJ 6084
J
14OVSJ
5428.03
,J 23390
J 23600 BELT IENSION GAUGE
J 6212.01 #4 MlJLTI.OPtNtR . 4 CAN RtFRIGtRANT OPENER
J 23400
tlKlRONIC LEAK DETECTOR
J 23575 COMPLHE MANIFOLD ASSfYBLY
J 6034 LEAK WtClORJ 5418-03 VACUUM PUMP
! ?!!~O~!~~~..~I~poIIRL~ REFRIGERANT CAN CONIROL VALVEI WI" 6A"Gt ADAPTEK
J 5453 GOGGLES
J 24095 COMPRESSOR OIL INJECTOR
J 6742.03 IHtRMOMETER
- DIAL TYPE (2S”.lZ5~)J 22132.02
I
J 9459
1J 5410
J 23500J 6171
141%360 GAUGt CHARGING LINE 36” BLUEi418 -36R ” ” ” -36” RED, J!I I, .J 5418.48W ””” 48” WHIIEJ5418.728
” ” ” 72” BLUI
J 5418.72s ”” I’ . 11” RtD
J 5418.7ZW ””” . 72” WWllt
J 23500 PORlARLt AIR ~ONDIlIONtR SERVlCt STAllON
J 22132.D2 SCWRADER VALVE
J 6271 FIlS.ALL VALVE98136I
IFigure 96-l 66 Special Tools
Page 598 of 625

System controls are the AIR knob controlling the
three speed blower motor switch and the TEMP
knob which controls the setting of the thermostatic
switch. When operating this system, the heater must
be off for maximum cooling.DIAGNOSIS
TROUBLE DIAGNOSIS GUIDE
Air Knob
Insufficient CoolingTurning the AIR knob clockwise operates the three-
speed blower motor.CHECK AIR FLOW9B-90 1973 OPEL SERVICE MANUAL
AIR CONDITIONER SYSTEM
OPEL 1900
- MANTA
CONTENTS
Subject
DESCRIPTION AND OPERATION:
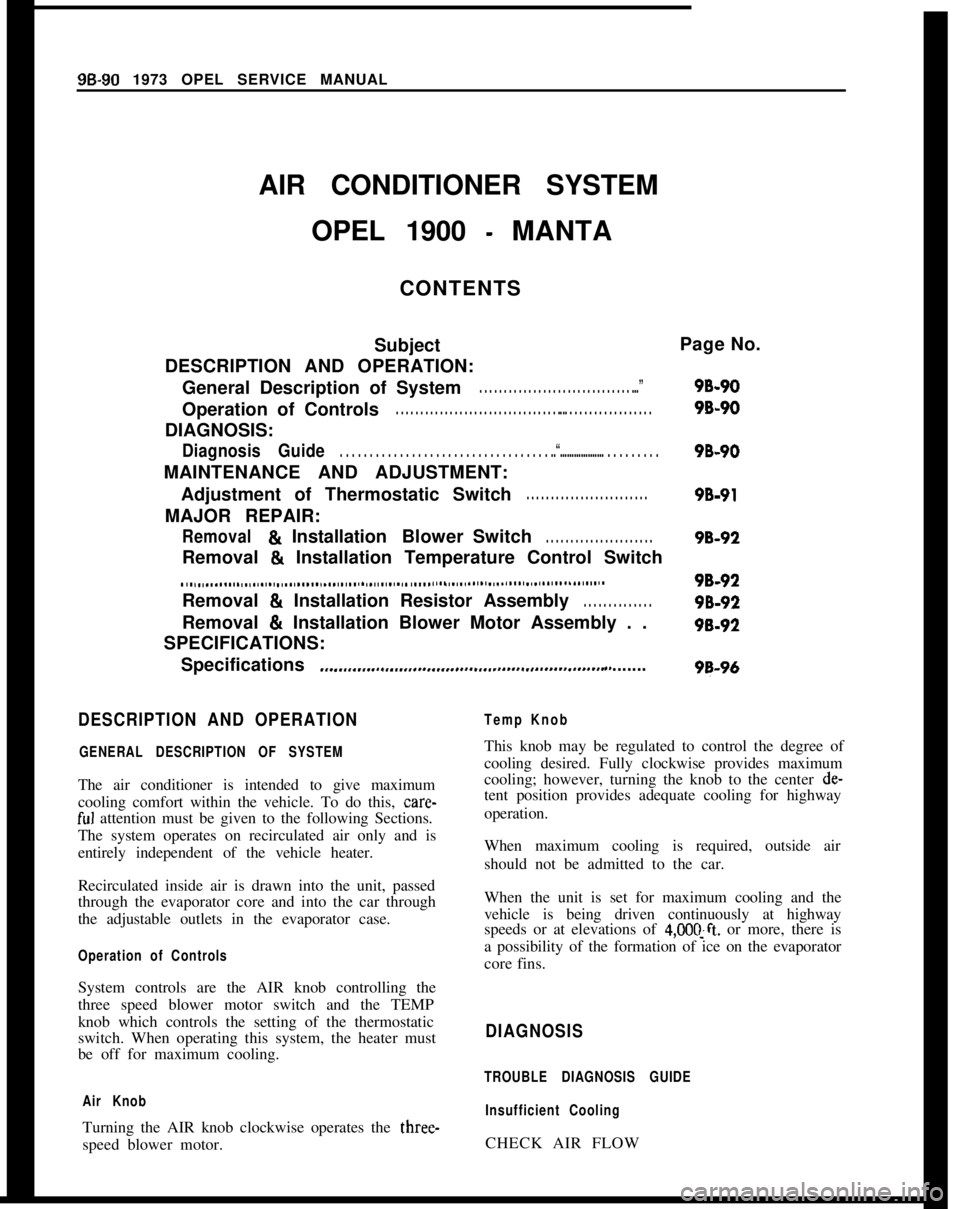
General Description of System
. . . . . . . . . . . . . . . . . . . . . . . . . . . . . . . ...”Operation of Controls
. . . . . . . . . . . . . . . . . . . . . . . . . . . . . . . . . . .. . . . . . . . . . . . . . . . . . .DIAGNOSIS:
DiagnosisGuide. . . . . . . . . . . . . . . . . . . . . . . . . . . . . . . . . . . ..“................... . . . . . . . . .MAINTENANCE AND ADJUSTMENT:
Adjustment of Thermostatic Switch
. . . . . . . . . . . . . . . . . . . . . . . . .MAJOR REPAIR:
Removal81InstallationBlowerSwitch. . . . . . . . . . . . . . . . . . . . . .Page No.
9B-90
9B-90
9B-90
9B-91
98-92Removal
& Installation Temperature Control Switch
. . . . . . . . . . . . . . . . . . . . . . . . . . . . . . . . . . . . . . . . . . . . . . . . . . . . . . . . . . . . * . . . . . . . . . . . . . . . . . . . . . . . . . . . . . . . . . . . . . . . . .Removal
& Installation Resistor Assembly. . . . . . . . . . . . . .Removal
& Installation Blower Motor Assembly . .
SPECIFICATIONS:
Specifications
.,...,,.,,..~.,.,..,,......,.,....,.,........,......,........ ,, . . . . . . .
98-92
98-92
98-92
98-96
DESCRIPTION AND OPERATION
GENERAL DESCRIPTION OF SYSTEMThe air conditioner is intended to give maximum
cooling comfort within the vehicle. To do this, care-
ful attention must be given to the following Sections.
The system operates on recirculated air only and is
entirely independent of the vehicle heater.
Temp KnobThis knob may be regulated to control the degree of
cooling desired. Fully clockwise provides maximum
cooling; however, turning the knob to the center de-
tent position provides adequate cooling for highway
operation.
When maximum cooling is required, outside air
should not be admitted to the car.
Recirculated inside air is drawn into the unit, passed
through the evaporator core and into the car through
the adjustable outlets in the evaporator case.
Operation of ControlsWhen the unit is set for maximum cooling and the
vehicle is being driven continuously at highway
speeds or at elevations of
4,OOC!ft. or more, there is
a possibility of the formation of ice on the evaporator
core fins.
Page 599 of 625

AIR CONDITIONER SYSTEM -OPEL 1900 - MANTA9B- 91FAN DOES NOT RUN Correct electrical fault.
FAN RUNS
- Check air velocity.
NOT OK Clean evaporator inlets.
Clean evaporator core.
Clean evaporator outlets.
OK Check refrigeration (refer to Refrigeration
Diagnosis Guide).
MAINTENANCE AND ADJUSTMENTS
ADJUSTMENT OF THERMOSTATIC SWITCHThe system makes use of a thermostatic switch with
a self-supporting air sensing capillary. This capillary
controls the switch by sensing the temperature of the
air leaving the evaporator fins.
Checking for Proper Operation
I. Install the gauge set and set up the vehicle as
described under FUNCTIONAL TESTING SYS-
TEM iti Refrigerant Components Section.
2. Movement of the temperature control knob
should result in a definite change in suction pressure
and cycling of the compressor clutch.
3. If compressor continues to operate regardless of
the knob adjustment, it indicates that the switch
points are fused, which will lead to evaporator
freeze- up. The switch should be replaced.
Adjusting Switch
If, after ihe foregoing checks, the switch seems to be
operating correctly, adjust for proper setting if neces-
sary, as
~follows:1. Set up car as described in FUNCTIONAL
TESTING SYSTEM in Refrigerant Components
Section.2. The suction side of the system, read on the low
pressure gauge, should pull down to the pressure
shown in the chart in SPECIFICATIONS in Refrig-
erant Components Section.
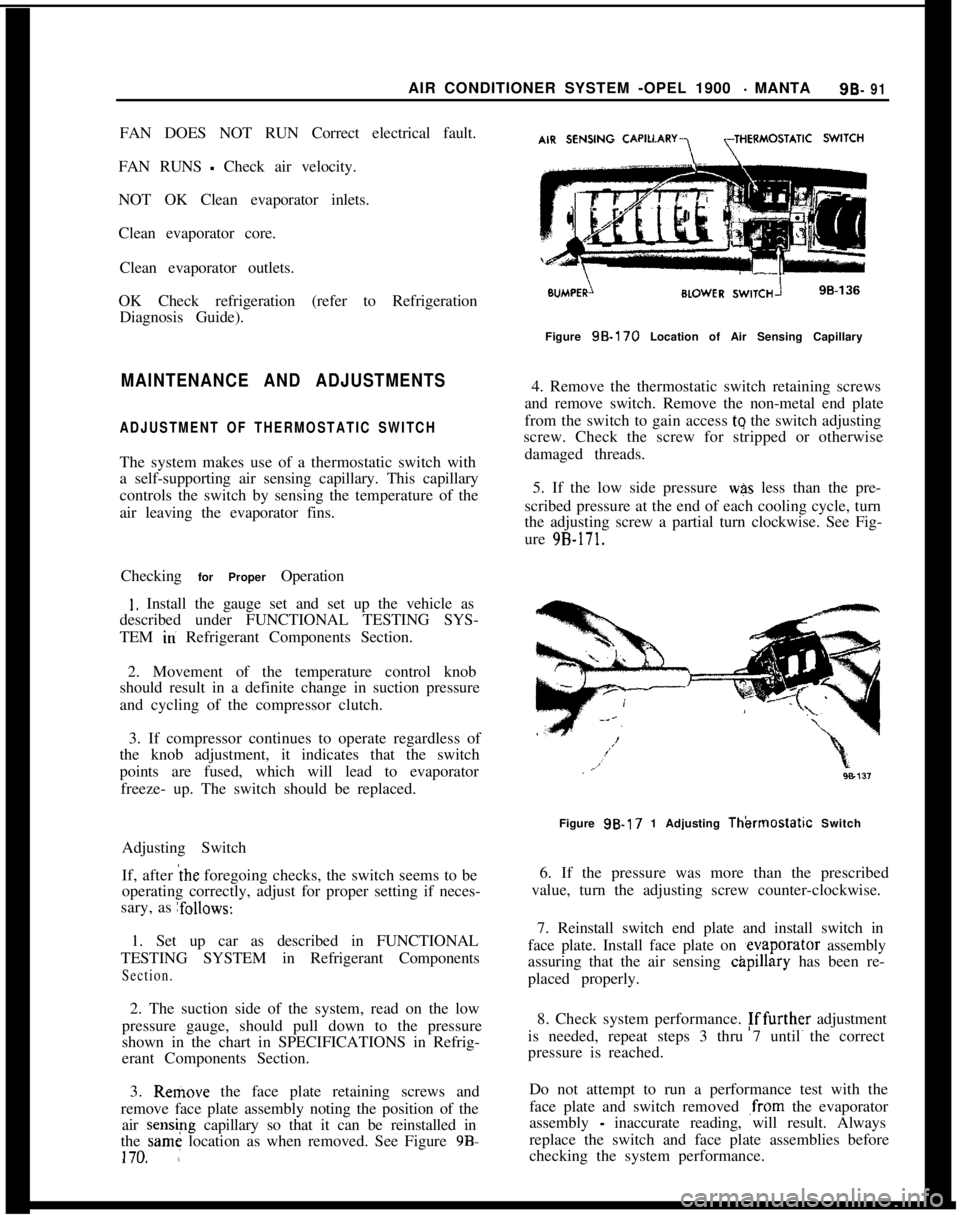
3. Remove the face plate retaining screws and
remove face plate assembly noting the position of the
air sensipg capillary so that it can be reinstalled in
the same location as when removed. See Figure 98.170. ,:Figure
98.170 Location of Air Sensing Capillary
4. Remove the thermostatic switch retaining screws
and remove switch. Remove the non-metal end plate
from the switch to gain access tq the switch adjusting
screw. Check the screw for stripped or otherwise
damaged threads.
5. If the low side pressure
was less than the pre-
scribed pressure at the end of each cooling cycle, turn
the adjusting screw a partial turn clockwise. See Fig-
ure
9B-171.Figure 9B-17 1 Adjusting
Thkmosfatic Switch
6. If the pressure was more than the prescribed
value, turn the adjusting screw counter-clockwise.
7. Reinstall switch end plate and install switch in
face plate. Install face plate on ,evaporator assembly
assuring that the air sensing
c&pillary has been re-
placed properly.
8. Check system performance. Fffurther adjustment
is needed, repeat steps 3 thru 7 until the correct
pressure is reached.
Do not attempt to run a performance test with the
face plate and switch removed
,from the evaporator
assembly
- inaccurate reading, will result. Always
replace the switch and face plate assemblies before
checking the system performance.
Page 600 of 625

98-92 1973 OPEL SERVICE MANUAL
MAJOR REPAIR
REMOVAL AND INSTALLATION OF BLOWER
SWITCH
Removal
I. Remove the face plate retaining screws and
remove the face plate assembly. See Figure 9B-172.
Figure SE-172 Face Plate Retaining Screws andcontrots
2. Remove the blower switch retaining screws and
remove switch.
Installation
1. Install the blower switch and retainer screws.
2. Install the face plate and secure with the retainer
screws. See Figure
9B-372.
REMOVAL AND INSTALLATION OF
TEMPERATURE CONTROL SWITCH
Removal
1. Remove the face plate retaining screws and
remove the face plate assembly noting the position of
the air sensing capillary so that it can be reinstalled
in the same location as when removed. See Figure
9B- 173.
2. Remove the temperature control switch retaining
screws and remove switch.
AIR SENSING CAPILLARY,yT,,ERMOSTATIC SWITCH
!IBUMPERBLOWER SWITCH98-136
Figure SB-173 Location of Air Sensing Capillary
Installation
1. Install the temperature control switch and secure
with the retaining screws.
2. Position the air sensing capillary in the exact
location as was noted when removing.
3. Install the face plate and secure with the retain-
ing screws. See Figure
9B-172.
REMOVAL AND INSTALLATION OF RESISTOR
ASSEMBLY
Removal
1. Disconnect the negative battery cable.
2. Remove the glove box assembly. 3. Disconnect the electrical plug from the resistor
assembly. See Figure
9B-176.
4. Remove two (2) screws and remove resistor as-
sembly.
Installation
1. Install the resistor assembly and secure with two
(2) screws.
2. Install the electrical plug onto the resistor assem-
bly. See Figure
9B-176.
3. Install the glove box assembly.
4. Connect the negative battery cable.
REMOVAL AND INSTALLATION OF BLOWER
MOTOR ASSEMBLY
REMOVAL
1. Remove the negative battery cable from the bat-
tery.