PEUGEOT 108 2016 Owners Manual
Manufacturer: PEUGEOT, Model Year: 2016, Model line: 108, Model: PEUGEOT 108 2016Pages: 268, PDF Size: 6.17 MB
Page 91 of 268
89
108_en_Chap04_conduite_ed01-2016
Speed limiter (Vti 68 engine)
System which prevents the vehicle from exceeding the speed programmed by the driver.
th
e speed limiter is switched on manually:
this can be done whatever the speed of the
vehicle. However, if you are driving at less than
20 mph (30 km/h), the programmed speed will
be fixed at 20 mph (30 km/h).
th
e speed limiter is paused by operation of the
control.
th
e programmed speed can be exceeded
temporarily by pressing the accelerator firmly
beyond the point of resistance.
to r
eturn to the programmed speed, simply
release the accelerator pedal until the vehicle
returns to the programmed speed limit.
th
e programmed limit speed is erased
when switching off the ignition.
Steering mounted controls
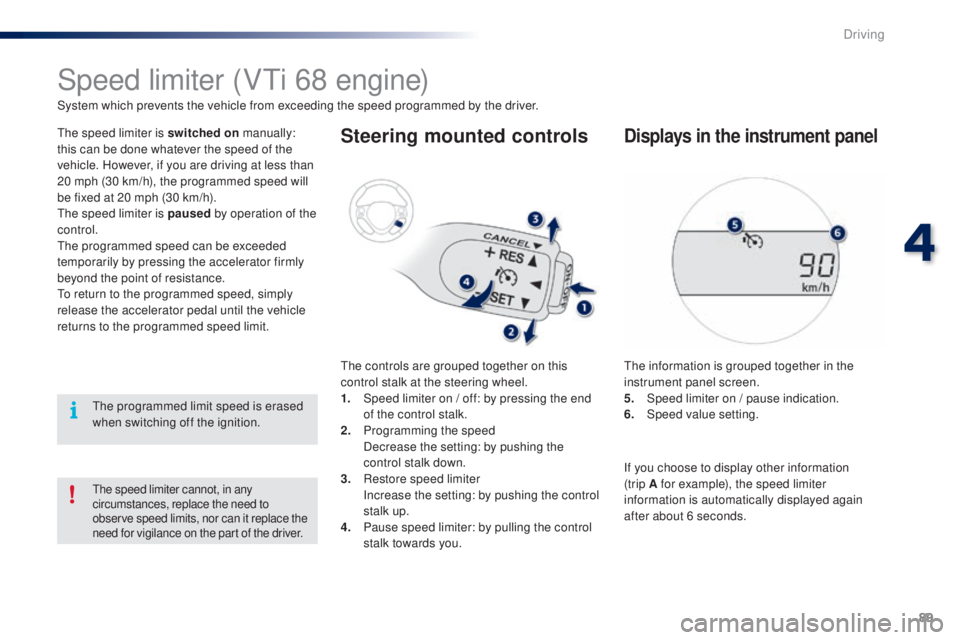
the controls are grouped together on this
control stalk at the steering wheel.
1.
S
peed limiter on / off: by pressing the end
of the control stalk.
2.
P
rogramming the speed
D
ecrease the setting: by pushing the
control stalk down.
3.
R
estore speed limiter
I
ncrease the setting: by pushing the control
stalk up.
4.
P
ause speed limiter: by pulling the control
stalk towards you.
Displays in the instrument panel
the information is grouped together in the
instrument panel screen.
5.
S
peed limiter on / pause indication.
6.
Spe
ed value setting.
the speed limiter cannot, in any
circumstances, replace the need to
observe speed limits, nor can it replace the
need for vigilance on the part of the driver.
If you choose to display other information
(trip A for example), the speed limiter
information is automatically displayed again
after about 6 seconds.
4
Driving
Page 92 of 268
90
108_en_Chap04_conduite_ed01-2016
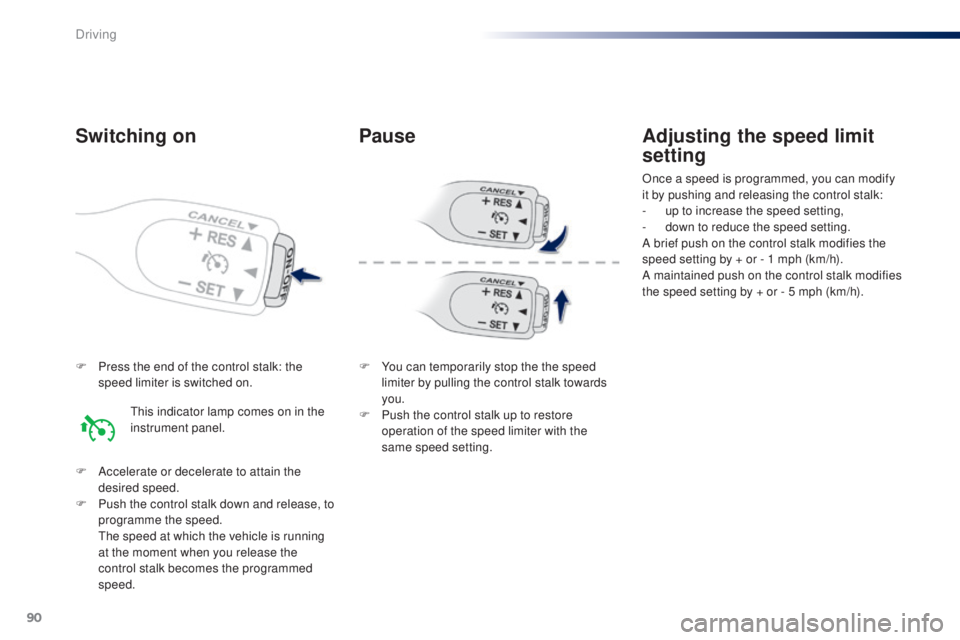
F Press the end of the control stalk: the speed limiter is switched on.
F
A
ccelerate or decelerate to attain the
desired speed.
F
P
ush the control stalk down and release, to
programme the speed.
t
h
e speed at which the vehicle is running
at the moment when you release the
control stalk becomes the programmed
speed.
Adjusting the speed limit
setting
Once a speed is programmed, you can modify
it by pushing and releasing the control stalk:
-
u
p to increase the speed setting,
-
d
own to reduce the speed setting.
A brief push on the control stalk modifies the
speed setting by + or - 1 mph (km/h).
A maintained push on the control stalk modifies
the speed setting by + or - 5 mph (km/h).
Switching on
this indicator lamp comes on in the
instrument panel.
Pause
F You can temporarily stop the the speed limiter by pulling the control stalk towards
you.
F
P
ush the control stalk up to restore
operation of the speed limiter with the
same speed setting.
Driving
Page 93 of 268
91
108_en_Chap04_conduite_ed01-2016
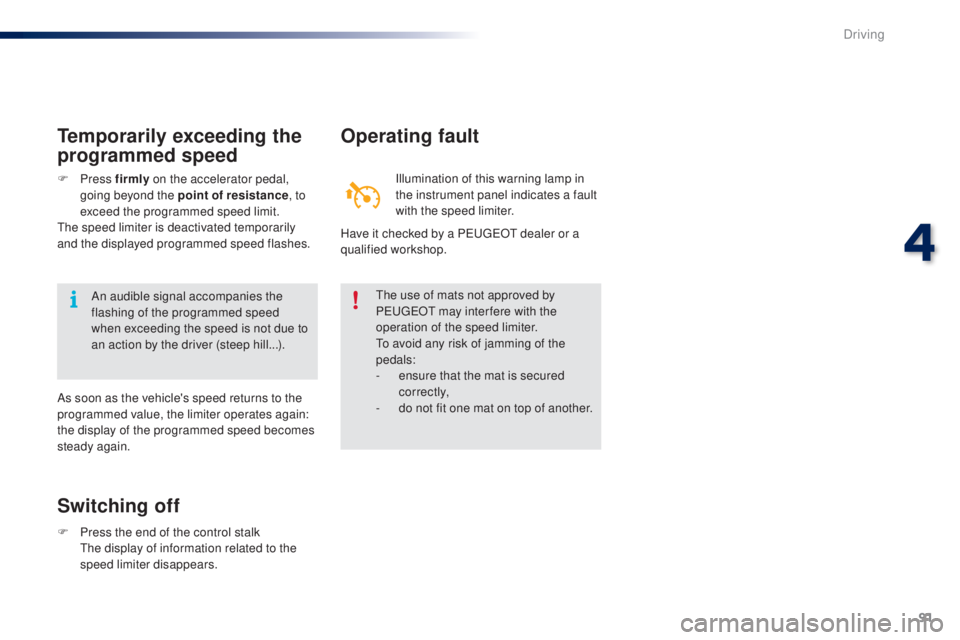
Switching off
F Press the end of the control stalk th e display of information related to the
speed limiter disappears.
operating fault
Illumination of this warning lamp in
the instrument panel indicates a fault
with the speed limiter.
th
e use of mats not approved by
P
e
uge
Ot
may inter fere with the
operation of the speed limiter.
to a
void any risk of jamming of the
pedals:
-
e
nsure that the mat is secured
c o r r e c t l y,
-
d
o not fit one mat on top of another.
temporarily exceeding the
programmed speed
F Press f irmly on the accelerator pedal,
going beyond the point of resistance ,
to
exceed the programmed speed limit.
th
e speed limiter is deactivated temporarily
and the displayed programmed speed flashes. Have it checked by a P
e
uge
Ot
dealer or a
qualified workshop.
An audible signal accompanies the
flashing of the programmed speed
when exceeding the speed is not due to
an action by the driver (steep hill...).
As soon as the vehicle's speed returns to the
programmed value, the limiter operates again:
the display of the programmed speed becomes
steady again.
4
Driving
Page 94 of 268
92
108_en_Chap04_conduite_ed01-2016
Reversing camera
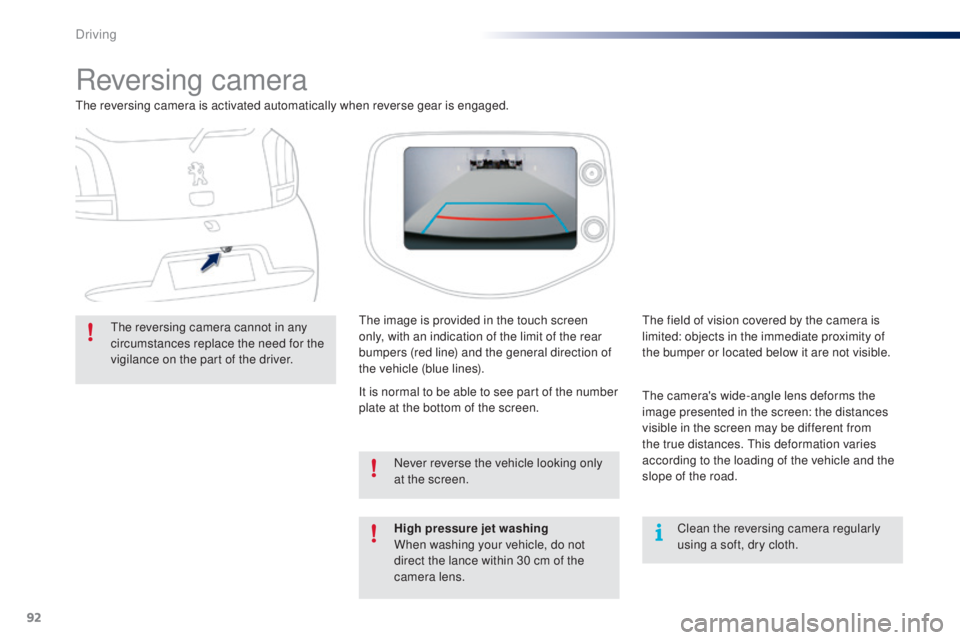
the reversing camera is activated automatically when reverse gear is engaged.
th
e reversing camera cannot in any
circumstances replace the need for the
vigilance on the part of the driver.
th
e image is provided in the touch screen
only, with an indication of the limit of the rear
bumpers (red line) and the general direction of
the vehicle (blue lines).
Clean the reversing camera regularly
using a soft, dry cloth.
th
e field of vision covered by the camera is
limited: objects in the immediate proximity of
the bumper or located below it are not visible.
th
e camera's wide-angle lens deforms the
image presented in the screen: the distances
visible in the screen may be different from
the true distances.
t
h
is deformation varies
according to the loading of the vehicle and the
slope of the road.
High pressure jet washing
When washing your vehicle, do not
direct the lance within 30 cm of the
camera lens. Never reverse the vehicle looking only
at the screen.
It is normal to be able to see part of the number
plate at the bottom of the screen.
Driving
Page 95 of 268
93
108_en_Chap04_conduite_ed01-2016
Lane departure warning system
System which detects the unintended crossing of longitudinal traffic lane markings on the ground, using a camera that recognises both solid and
broken lines.
to i
mprove your safety, the camera analyses the image and then triggers a warning if the vehicle wanders over a lane marking (speed higher than
30
mph (50 km/h)).
th
is system is particularly suitable for motorways and dual carriageways.
th
e lane departure warning system
cannot in any circumstances replace
the need for vigilance on the part of
the
driver.
It is necessary to observe driving
regulations and take a break every
two
hours.
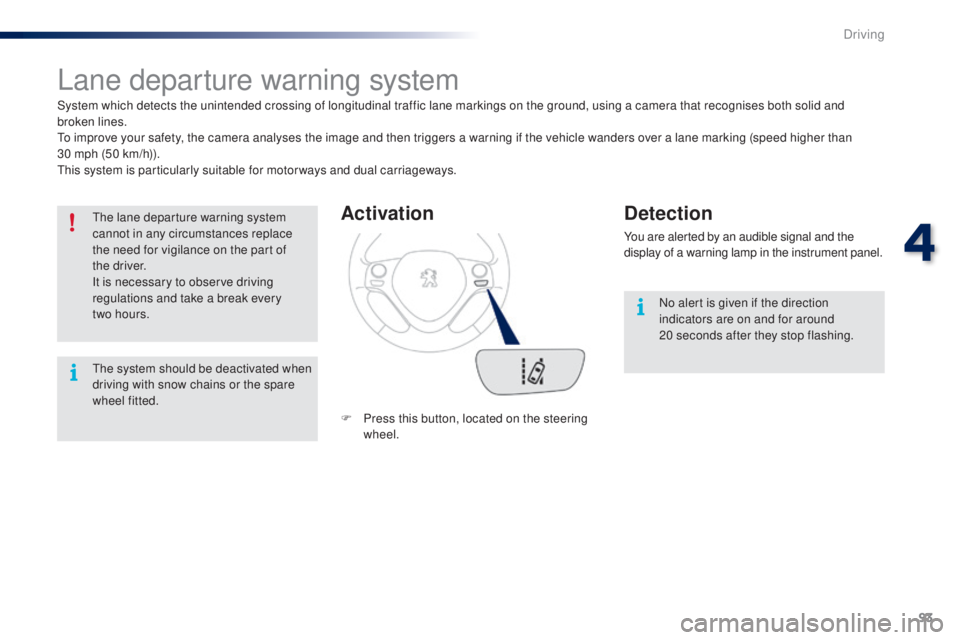
Activation
F Press this button, located on the steering wheel.
Detection
You are alerted by an audible signal and the
display of a warning lamp in the instrument panel.
No alert is given if the direction
indicators are on and for around
20
seconds after they stop flashing.
th
e system should be deactivated when
driving with snow chains or the spare
wheel fitted.
4
Driving
Page 96 of 268
94
108_en_Chap04_conduite_ed01-2016
Deactivation
op
erating fault
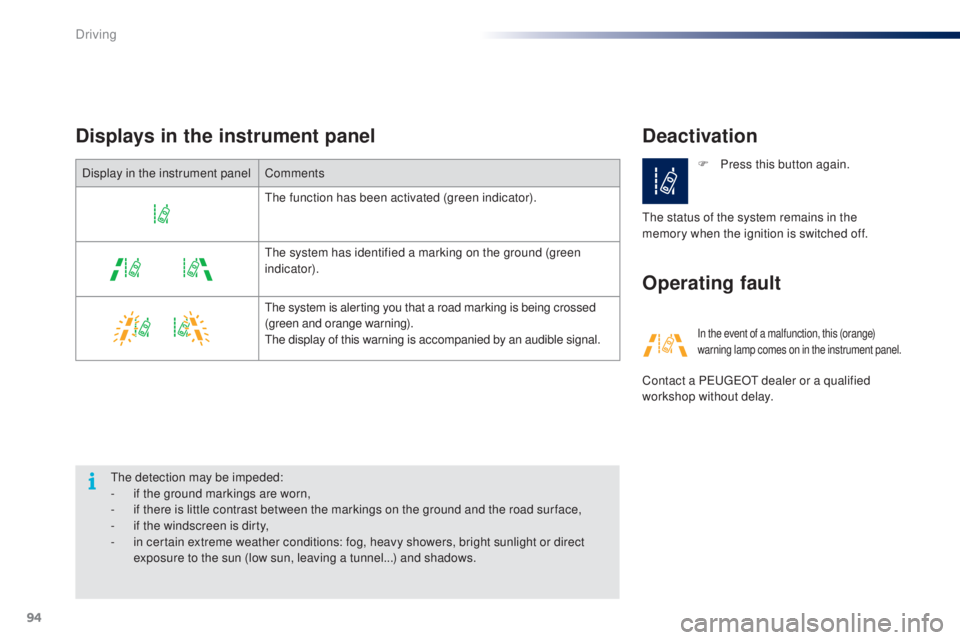
Displays in the instrument panel
the detection may be impeded:
-
i f the ground markings are worn,
-
i
f there is little contrast between the markings on the ground and the road sur face,
-
i
f the windscreen is dirty,
-
i
n certain extreme weather conditions: fog, heavy showers, bright sunlight or direct
exposure to the sun (low sun, leaving a tunnel...) and shadows. F
P
ress this button again.
th
e status of the system remains in the
memory when the ignition is switched off.
In the event of a malfunction, this (orange)
warning lamp comes on in the instrument panel.
Contact a Pe ugeOt dealer or a qualified
workshop without delay.
Display in the instrument panel
Comments
th
e function has been activated (green indicator).
th
e system has identified a marking on the ground (green
indicator).
the
system is alerting you that a road marking is being crossed
(green and orange warning).
th
e display of this warning is accompanied by an audible signal.
Driving
Page 97 of 268
95
108_en_Chap04_conduite_ed01-2016
Under-inflation detection
the system monitors the pressures in the four
tyres, once the vehicle is moving.
It compares the information given by the four
wheel speed sensors with reference values,
which must be reinitialised ever y time the
tyre pressures are adjusted or a wheel
changed.
th
e system triggers an alert as soon as it
detects a drop in the inflation pressure of one
or more tyres.
th
e under-inflation detection system
does not replace the need for vigilance
on the part of the driver.
th
is system does not avoid the need to
check the tyre pressures (including the
spare wheel) every month as well as
before a long journey.
Driving with under-inflated tyres impairs
road holding, extends braking distances
and causes premature tyre wear,
particularly under arduous condition
(high loading, high speed, long journey).
System which automatically checks the pressures of the tyres while driving.
th
e inflation pressures defined for
your vehicle can be found on the tyre
pressure label.
For more information on the
identification markings, refer to the
corresponding section.ty re pressures should be checked
when the tyres are "cold" (vehicle
stopped for 1 hour or after a journey of
less than 6 miles (10 km) at moderate
speeds).
Other wise (when hot), add 0.3 bar to
the pressures shown on the label. Driving with under-inflated tyres
increases fuel consumption.
4
Driving
Page 98 of 268
96
108_en_Chap04_conduite_ed01-2016
under-inflation alert
this is given by fixed illumination of
this warning lamp, accompanied by
an audible signal.
F
R
educe speed immediately, avoid
excessive steering movements and sudden
braking.
F
S
top the vehicle as soon as it is safe to
do
so.
th
e loss of pressure detected does not
always cause visible bulging of the tyre.
Do not satisfy yourself with just a visual
check.
F
I
f you have a compressor (such as the one
in the temporary puncture repair kit) check
the pressures of the four tyres when cold.
I
f it is not possible to carry out this check
straight away, drive carefully at reduced
speed.
or
F
I
n the event of a puncture, use the
temporary puncture repair kit or the spare
wheel (depending on equipment).
th
e alert is maintained until the system
is reinitialised.
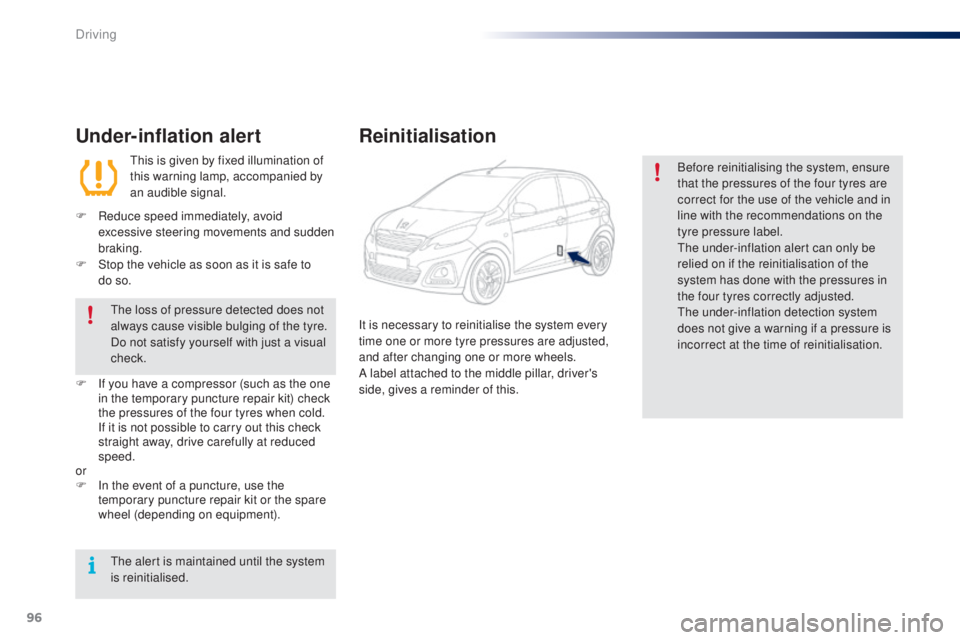
Reinitialisation
Before reinitialising the system, ensure
that the pressures of the four tyres are
correct for the use of the vehicle and in
line with the recommendations on the
tyre pressure label.
th
e under-inflation alert can only be
relied on if the reinitialisation of the
system has done with the pressures in
the four tyres correctly adjusted.
th
e under-inflation detection system
does not give a warning if a pressure is
incorrect at the time of reinitialisation.
It is necessary to reinitialise the system every
time one or more tyre pressures are adjusted,
and after changing one or more wheels.
A label attached to the middle pillar, driver's
side, gives a reminder of this.
Driving
Page 99 of 268
97
108_en_Chap04_conduite_ed01-2016
the under-inflation alert can only be
considered reliable if reinitialisation of
the system is done with the the four tyre
pressures correctly set.
Snow chains
the system does not have to be
reinitialised after fitting or removing
snow chains.
operating fault
the flashing and then fixed illumination
of the under-inflation warning lamp
indicates a fault with the system.
In this case, under-inflation monitoring of the
tyres is no longer assured.
Have the system checked by a P
e
uge
Ot
dealer or a qualified workshop.
Before doing anything to the system,
the pressures of the four tyres must be
checked and the system reinitialised.
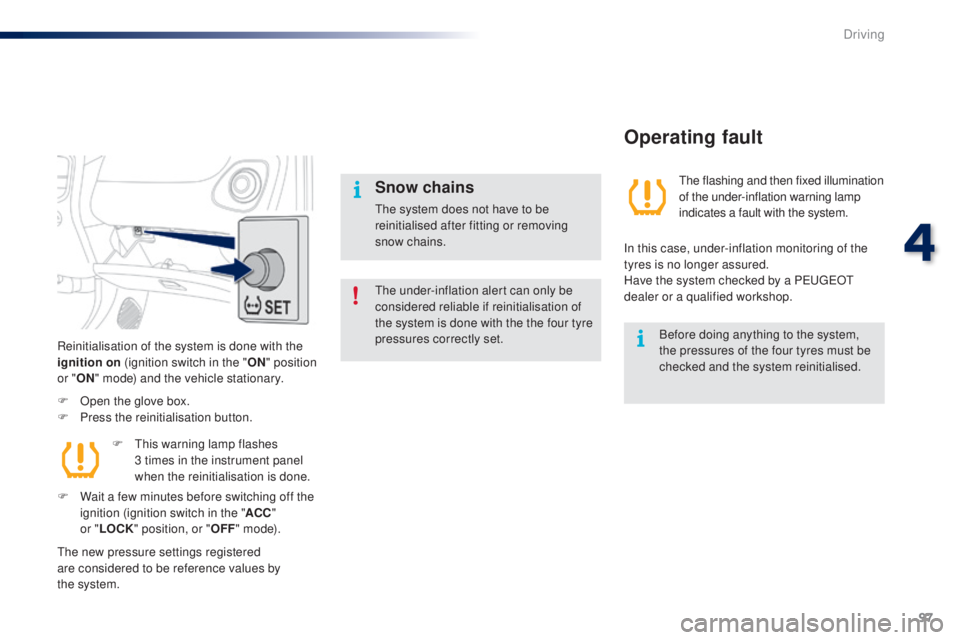
Reinitialisation of the system is done with the
ignition on
(ignition switch in the "
oN" p
osition
or "
oN " m
ode) and the vehicle stationary.
F
O
pen the glove box.
F
P
ress the reinitialisation button.
the
new pressure settings registered
are considered to be reference values by
the
system. F
t
h
is warning lamp flashes
3
times in the instrument panel
when the reinitialisation is done.
F
W
ait a few minutes before switching off the
ignition (ignition switch in the " ACC"
or " L
o
C
K " position, or "
oFF "
m o d e).
4
Driving
Page 100 of 268
98
108_en_Chap05_eclairage-visibilite_ed01-2016
exterior lighting control stalk
Main lighting
the various front and rear lamps of the vehicle
are designed to adapt the driver's visibility
progressively according to the ambient light
level and weather:
-
s
idelamps, to be seen,
-
d
ipped beam headlamps to see without
dazzling other drivers,
-
m
ain beam headlamps to see clearly when
the road is clear.
Additional lighting
Other lamps are provided to meet the
requirements of particular driving conditions:
-
a
rear foglamp,
-
f
ront foglamps,
-
d
aytime running lamps to be more visible
during the day. In some weather conditions (e.g. low
temperature or humidity), the presence
of misting on the internal sur face of the
glass of the headlamps and rear lamps
is normal; it disappears after the lamps
have been on for a few minutes.travelling abroad
If using your vehicle in a country that
drives on the other side of the road, the
headlamps must be adjusted to avoid
dazzling on-coming drivers.
Contact a P
e
uge
Ot
dealer or a
qualified workshop.
Lighting and visibility