PEUGEOT 2008 2016 Workshop Manual
Manufacturer: PEUGEOT, Model Year: 2016, Model line: 2008, Model: PEUGEOT 2008 2016Pages: 450, PDF Size: 14.16 MB
Page 51 of 450

49
2008_en_Chap02_ouvertures_ed01-2016
Back-up control
For mechanically locking and unlocking the
doors in the event of a fault with the central
locking system or a battery failure.Driver's door
Insert the key in the lock to lock or unlock
the door.
Passenger doors
Locking
F On the rear doors, check that the child lock is not on.
F
R
emove the black cap located on the edge
of the door, using the key.
F
I
nsert the key into the aperture without
forcing, then without turning, move the
latch sideways towards the inside of the
d o o r.
F
R
emove the key and refit the cap.
Unlocking
F Pull the interior door lever.
In the event of a fault with the central
locking, it is essential to disconnect the
battery to lock the boot and so assure
the complete locking of the vehicle.
2
Access
Page 52 of 450
50
2008_en_Chap02_ouvertures_ed01-2016
Boot
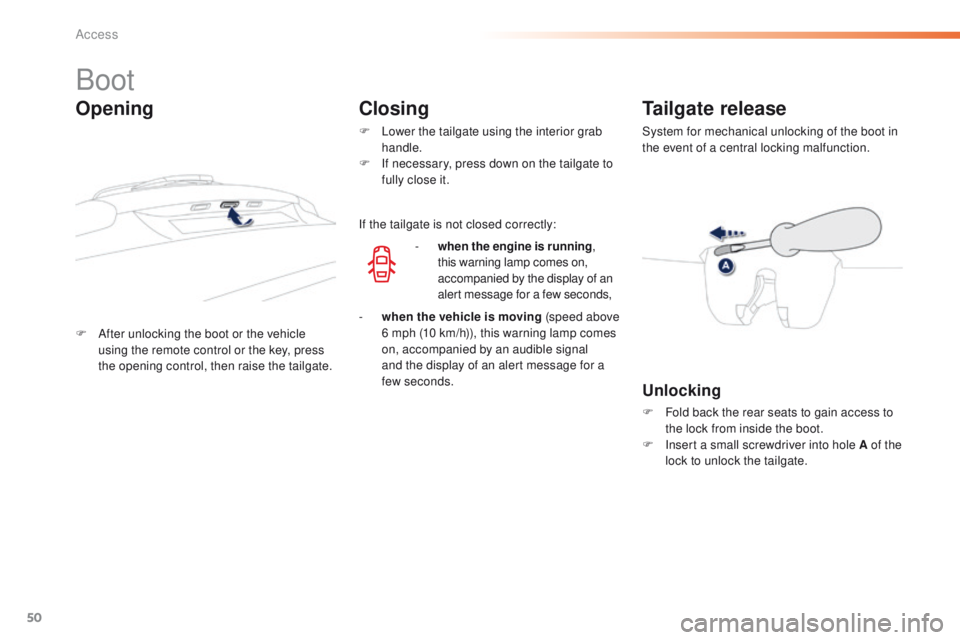
F After unlocking the boot or the vehicle using the remote control or the key, press
the opening control, then raise the tailgate.
Tailgate release
System for mechanical unlocking of the boot in
the event of a central locking malfunction.
Opening Closing
F Lower the tailgate using the interior grab
handle.
F
I
f necessary, press down on the tailgate to
fully close it.
-
w
hen the engine is running ,
this warning lamp comes on,
accompanied by the display of an
alert message for a few seconds,
-
w
hen the vehicle is moving (speed above
6 mph (10 km/h)), this warning lamp comes
on, accompanied by an audible signal
and the display of an alert message for a
few
seconds.
Unlocking
F Fold back the rear seats to gain access to the lock from inside the boot.
F
I
nsert a small screwdriver into hole A of the
lock to unlock the tailgate.
If the tailgate is not closed correctly:
Access
Page 53 of 450
51
2008_en_Chap02_ouvertures_ed01-2016
Locking / unlocking from the inside
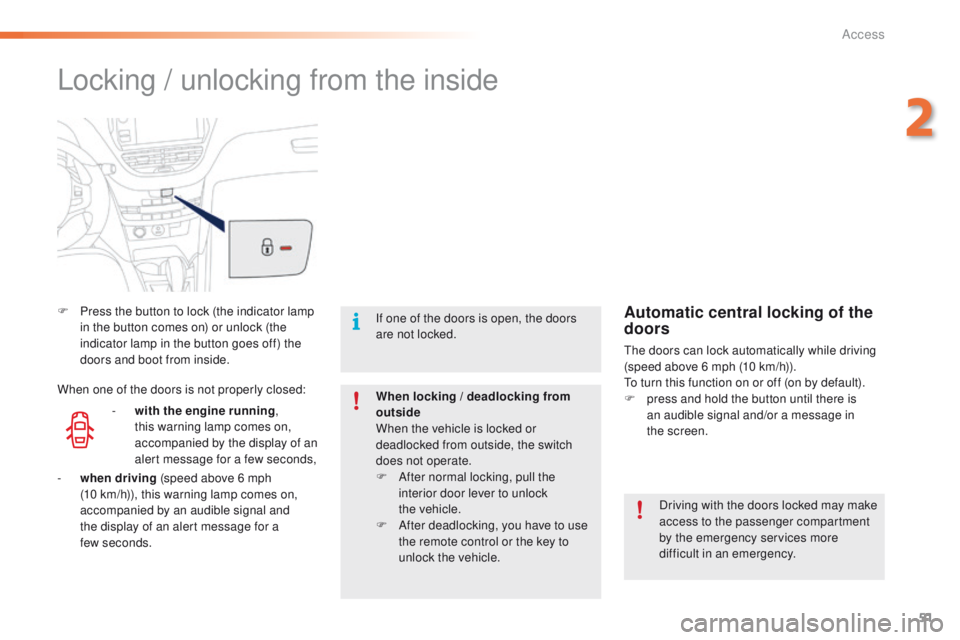
F Press the button to lock (the indicator lamp in the button comes on) or unlock (the
indicator lamp in the button goes off) the
doors and boot from inside.
Driving with the doors locked may make
access to the passenger compartment
by the emergency services more
difficult in an emergency.
If one of the doors is open, the doors
are not locked.
When locking / deadlocking from
outside
When the vehicle is locked or
deadlocked from outside, the switch
does not operate.
F
A
fter normal locking, pull the
interior door lever to unlock
the
vehicle.
F
A
fter deadlocking, you have to use
the remote control or the key to
unlock the vehicle.Automatic central locking of the
doors
The doors can lock automatically while driving
(speed above 6 mph (10 km/h)).
To turn this function on or off (on by default).
F
p
ress and hold the button until there is
an audible signal and/or a message in
the
screen.
-
w
ith the engine running ,
this warning lamp comes on,
accompanied by the display of an
alert message for a few seconds,
When one of the doors is not properly closed:
-
wh
en driving (speed above 6 mph
(10
km/h)), this warning lamp comes on,
accompanied by an audible signal and
the display of an alert message for a
few
seconds.
2
Access
Page 54 of 450
52
2008_en_Chap02_ouvertures_ed01-2016
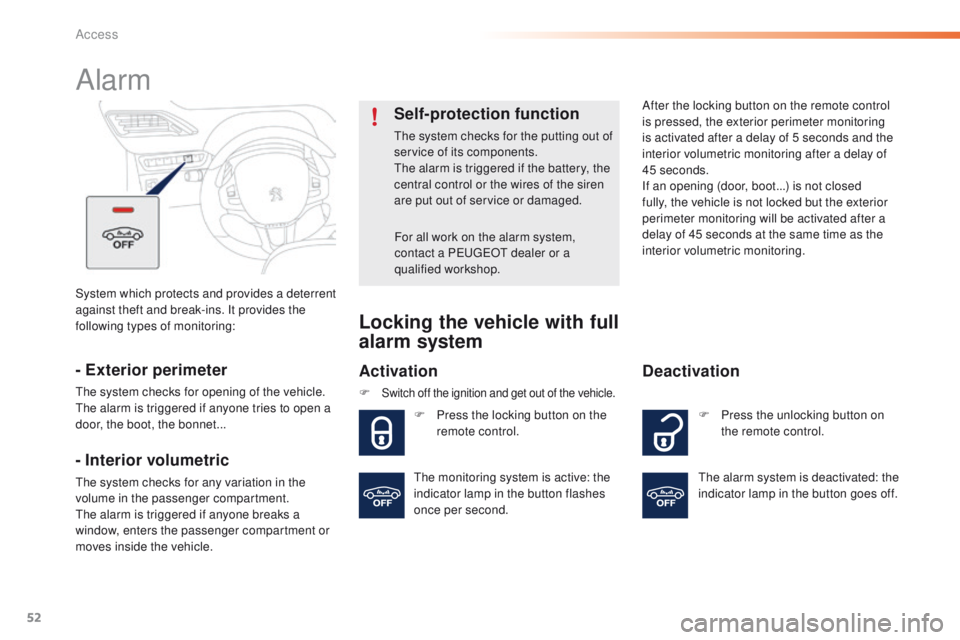
System which protects and provides a deterrent
against theft and break-ins. It provides the
following types of monitoring:
Alarm
- Exterior perimeter
The system checks for opening of the vehicle.
The alarm is triggered if anyone tries to open a
door, the boot, the bonnet...
- Interior volumetric
The system checks for any variation in the
volume in the passenger compartment.
The alarm is triggered if anyone breaks a
window, enters the passenger compartment or
moves inside the vehicle.
Self-protection function
The system checks for the putting out of
service of its components.
The alarm is triggered if the battery, the
central control or the wires of the siren
are put out of service or damaged.For all work on the alarm system,
contact a PEUGEOT dealer or a
qualified workshop.
Locking the vehicle with full
alarm system
Activation
F Switch off the ignition and get out of the vehicle.
F Press the locking button on the remote control. After the locking button on the remote control
is pressed, the exterior perimeter monitoring
is activated after a delay of 5 seconds and the
interior volumetric monitoring after a delay of
45 seconds.
If an opening (door, boot...) is not closed
fully, the vehicle is not locked but the exterior
perimeter monitoring will be activated after a
delay of 45 seconds at the same time as the
interior volumetric monitoring.
F P ress the unlocking button on
the remote control.
Deactivation
The alarm system is deactivated: the
indicator lamp in the button goes off.
The monitoring system is active: the
indicator lamp in the button flashes
once per second.
Access
Page 55 of 450
53
2008_en_Chap02_ouvertures_ed01-2016
Locking the vehicle
with exterior perimeter
monitoring only
Deactivate the interior volumetric monitoring
to avoid unwanted triggering of the alarm in
certain cases such as:
-
l
eaving a pet in the vehicle,
-
l
eaving a window partially open,
-
w
ashing your vehicle.
Deactivating the interior
volumetric monitoring
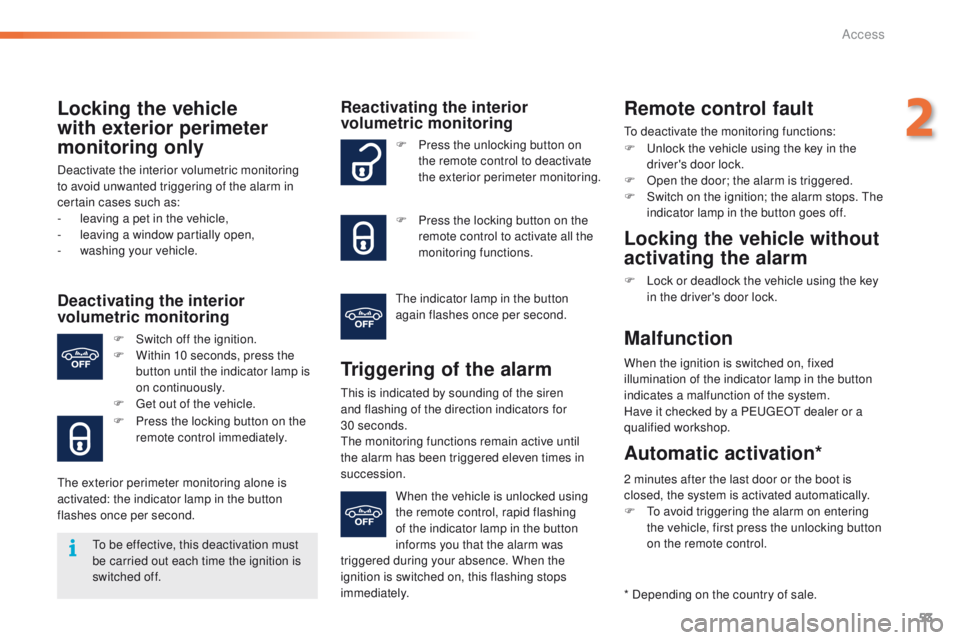
F Switch off the ignition.
F W ithin 10 seconds, press the
button until the indicator lamp is
on continuously.
F
G
et out of the vehicle.
F
P
ress the locking button on the
remote control immediately.
The exterior perimeter monitoring alone is
activated: the indicator lamp in the button
flashes once per second.
Reactivating the interior
volumetric monitoring
Triggering of the alarm
This is indicated by sounding of the siren
and flashing of the direction indicators for
30
seconds.
The monitoring functions remain active until
the alarm has been triggered eleven times in
succession. F
P
ress the unlocking button on
the remote control to deactivate
the exterior perimeter monitoring.
F
P
ress the locking button on the
remote control to activate all the
monitoring functions.
The indicator lamp in the button
again flashes once per second.
When the vehicle is unlocked using
the remote control, rapid flashing
of the indicator lamp in the button
informs you that the alarm was
triggered during your absence. When the
ignition is switched on, this flashing stops
immediately.
Remote control fault
To deactivate the monitoring functions:
F
U
nlock the vehicle using the key in the
driver's door lock.
F
O
pen the door; the alarm is triggered.
F
S
witch on the ignition; the alarm stops. The
indicator lamp in the button goes off.
Locking the vehicle without
activating the alarm
F Lock or deadlock the vehicle using the key in the driver's door lock.
Malfunction
When the ignition is switched on, fixed
illumination of the indicator lamp in the button
indicates a malfunction of the system.
Have it checked by a PEUGEOT dealer or a
qualified workshop.
* Depending on the country of sale.
Automatic activation*
2 minutes after the last door or the boot is
closed, the system is activated automatically.
F
T
o avoid triggering the alarm on entering
the vehicle, first press the unlocking button
on the remote control.
To be effective, this deactivation must
be carried out each time the ignition is
switched off.
2
Access
Page 56 of 450

54
2008_en_Chap02_ouvertures_ed01-2016
Electric windows
1. Left hand front electric window.
2. Right hand front electric window.
3.
R
ight hand rear electric window.
4.
Le
ft hand rear electric window.
5.
D
eactivating the rear electric window
switches .
Manual operation
To open or close the window, press or pull the
switch gently. The window stops as soon as the
switch is released.
Automatic one-touch
operation
(depending on version)
To open or close the window, press or pull
the switch fully: the window opens or closes
completely when the switch is released.
Pressing the switch again stops the movement
of the window.
The electric window switches remain
operational for approximately one minute after
the key has been removed.
Once this time has elapsed, the electric
windows will not operate. To reactivate them,
switch the ignition on again.
Safety anti-pinch
(depending on version)
When the window rises and meets an obstacle,
it stops and immediately partially lowers again.
In the event of unwanted opening of the window
when closing automatically, press the switch
until the window opens completely, then pull
the switch immediately until the window closes.
Continue to hold the switch for approximately
one second after the window has closed.
The safety anti-pinch function is not active
during this operation.
Deactivating the rear
window controls
For the safety of your children,
press switch 5 to prevent operation
of the windows of the rear doors,
irrespective of their position.
With the warning lamp on, the rear switches
are deactivated. With the warning lamp off, the
switches are active.
Access
Page 57 of 450
55
2008_en_Chap02_ouvertures_ed01-2016
Reinitialising the electric
windows
Following reconnection of the battery, the
safety anti-pinch function must be reinitialised.
The safety anti-pinch is not active during these
operations:
-
l
ower the window completely, then raise
it, it will rise in steps of a few centimetres
each time the switch is pressed. Repeat
the operation until the window closes
completely,
-
p
ress and hold the switch upwards for
at least one second after reaching this
position, window closed. Always remove the key when leaving the
vehicle, even for a short time.
In the event of contact during operation
of the windows, you must reverse the
movement of the window. To do this,
press the switch concerned.
When operating the passenger electric
window switches, the driver must ensure
that no one is preventing correct closing
of the windows.
The driver must ensure that the
passengers use the electric windows
c o r r e c t l y.
Be aware of children when operating
the
windows.
2
Access
Page 58 of 450
56
2008_en_Chap03_confort_ed01-2016
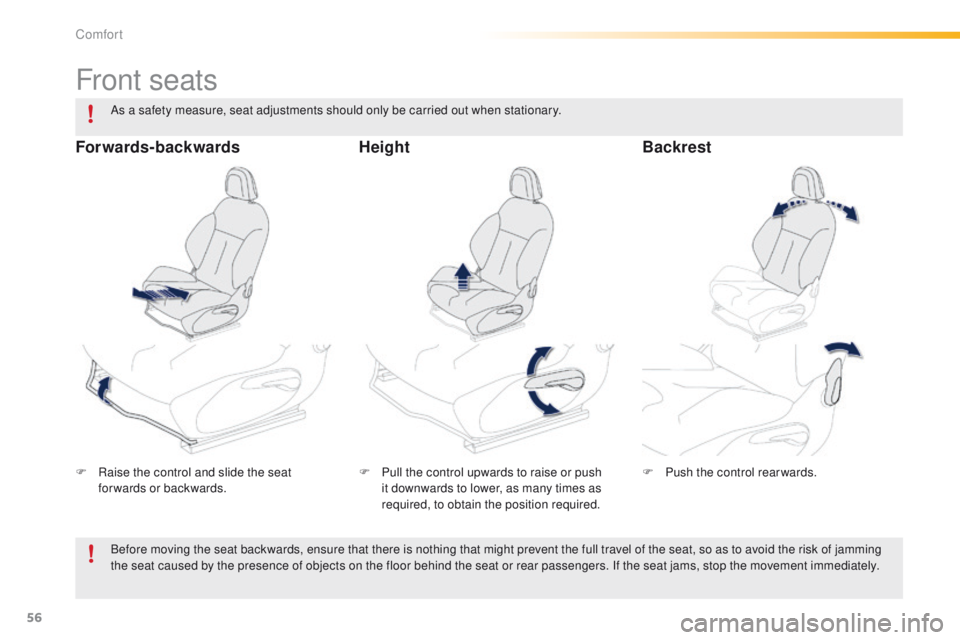
Front seats
F Raise the control and slide the seat forwards or backwards. F
P ull the control upwards to raise or push
it downwards to lower, as many times as
required, to obtain the position required. F
P ush the control rearwards.
Forwards-backwards
HeightBackrest
Before moving the seat backwards, ensure that there is nothing that might prevent the full travel of the seat, so as to avoid the risk of jamming
the seat caused by the presence of objects on the floor behind the seat or rear passengers. If the seat jams, stop the movement immediately. As a safety measure, seat adjustments should only be carried out when stationary.
Comfort
Page 59 of 450

57
2008_en_Chap03_confort_ed01-2016
With the engine running, the front seats can be
heated separately.
F
U
se the adjustment dial, placed on the side
of each front seat, to switch on and select
the level of heating required:
0 : Of f.
1 : Low.
2 : Medium.
3 : High.
F
T
o raise the head restraint, pull it upwards.
F
T
o remove the head restraint, press the
lug
A and pull the head restraint upwards.
F
T
o put the head restraint back in place,
engage the head restraint stems in the
openings, keeping them in line with the
seat back.
F
T
o lower the head restraint, press the lug A
and the head restraint at the same time. The head restraint has a frame with
notches which prevent it from lowering;
this is a safety device in case of impact.
The adjustment is correct when the
upper edge of the head restraint is
level with the top of the head.
Never drive with the head restraints
removed; they must be in place and
adjusted correctly.
Head restraintsHeated seats
3
Comfort
Page 60 of 450
58
2008_en_Chap03_confort_ed01-2016
Rear seats
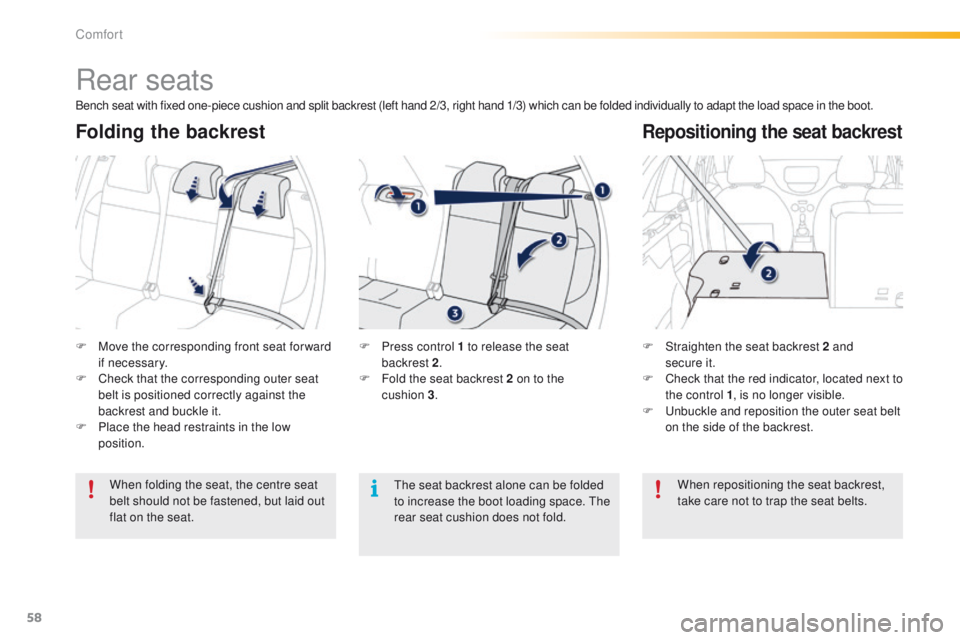
F Move the corresponding front seat for ward if necessary.
F
C
heck that the corresponding outer seat
belt is positioned correctly against the
backrest and buckle it.
F
P
lace the head restraints in the low
position. F
S traighten the seat backrest 2 and
secure it.
F
C
heck that the red indicator, located next to
the control 1 , is no longer visible.
F
U
nbuckle and reposition the outer seat belt
on the side of the backrest.
When folding the seat, the centre seat
belt should not be fastened, but laid out
flat on the seat. F
P ress control 1 to release the seat
backrest 2.
F
F
old the seat backrest 2 on to the
cushion
3.
Folding the backrestRepositioning the seat backrest
Bench seat with fixed one-piece cushion and split backrest (left hand 2/3, right hand 1/3) which can be folded individually to adapt the load space in the boot.
When repositioning the seat backrest,
take care not to trap the seat belts.
The seat backrest alone can be folded
to increase the boot loading space. The
rear seat cushion does not fold.
Comfort