Deadlock Peugeot 206 CC 2002.5 Owner's Manual
[x] Cancel search | Manufacturer: PEUGEOT, Model Year: 2002.5, Model line: 206 CC, Model: Peugeot 206 CC 2002.5Pages: 128, PDF Size: 1.73 MB
Page 71 of 128

07-10-2002
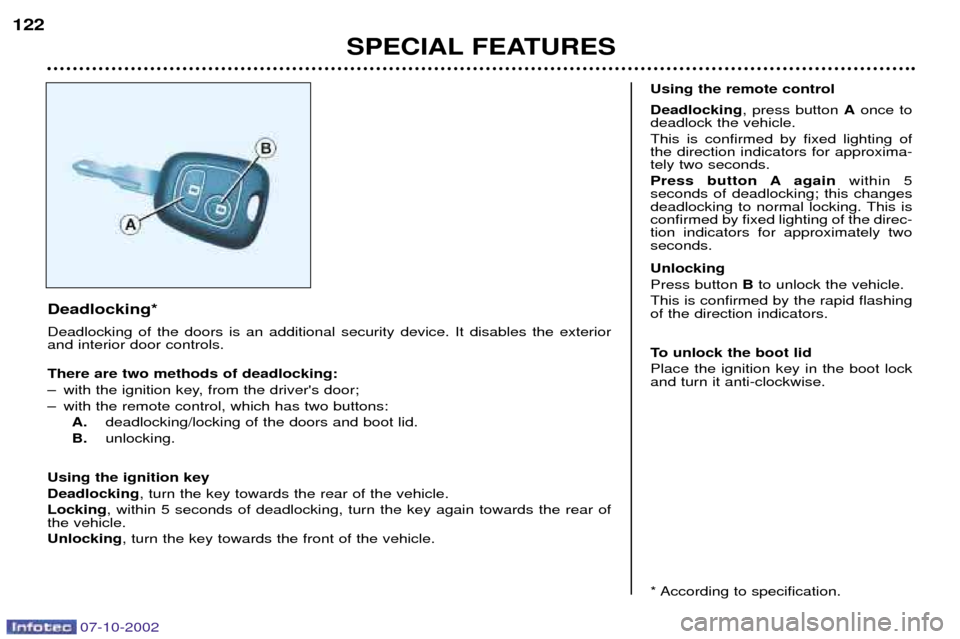
Deadlocking* Deadlocking of the doors is an additional security device. It disables the exterior and interior door controls. There are two methods of deadlocking:
Ð with the ignition key, from the driver's door;
Ð with the remote control, which has two buttons:A. deadlocking/locking of the doors and boot lid.
B. unlocking.
Using the ignition keyDeadlocking , turn the key towards the rear of the vehicle.
Locking , within 5 seconds of deadlocking, turn the key again towards the rear of
the vehicle.Unlocking , turn the key towards the front of the vehicle. Using the remote control Deadlocking
, press button Aonce to
deadlock the vehicle. This is confirmed by fixed lighting of the direction indicators for approxima-tely two seconds.
Press button A again within 5
seconds of deadlocking; this changes
deadlocking to normal locking. This isconfirmed by fixed lighting of the direc-tion indicators for approximately twoseconds. Unlocking Press button Bto unlock the vehicle.
This is confirmed by the rapid flashing of the direction indicators.
To unlock the boot lid Place the ignition key in the boot lock and turn it anti-clockwise.
* According to specification.
SPECIAL FEATURES
122
Page 72 of 128

07-10-2002
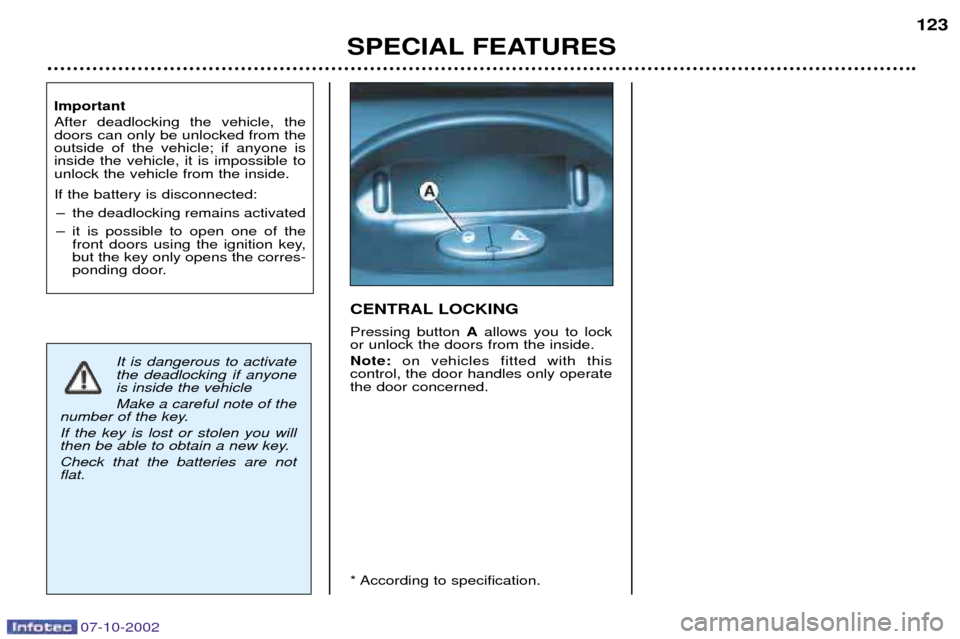
CENTRAL LOCKING Pressing button Aallows you to lock
or unlock the doors from the inside. Note: on vehicles fitted with this
control, the door handles only operate the door concerned.
* According to specification.
SPECIAL FEATURES
123
Important After deadlocking the vehicle, the doors can only be unlocked from theoutside of the vehicle; if anyone isinside the vehicle, it is impossible tounlock the vehicle from the inside. If the battery is disconnected:
Ð the deadlocking remains activated
Ð it is possible to open one of the front doors using the ignition key, but the key only opens the corres-
ponding door.
It is dangerous to activate the deadlocking if anyoneis inside the vehicle Make a careful note of the
number of the key. If the key is lost or stolen you will
then be able to obtain a new key. Check that the batteries are not flat.
Page 73 of 128

07-10-2002
The alarm Setting and deactivating the alarm system Switching off the siren. The alarm completes the security
equipment for your vehicle. It offerstwo types of protection. Ðexternal protection: when it is set,
the alarm sounds if one of the
doors, the boot lid or the bonnet is opened;
Ð internal protection: when it is set,
the alarm sounds if the sensors
detect air movement in the pas-senger compartment (a brokenwindow) or movement within the
car.
Note: the internal protection does not
operate when the vehicle roof is openor is not closed properly (e.g. catchesunlocked). The alarm also has an anti-tamper function. If there is an attempt to tamper with the wires to the siren, control unit or
the battery, the siren sounds and thedirection indicators light. Setting the alarm (external and internal protection)
Switch the ignition off and get out of the vehicle. Deadlock the vehicle.The doors lock.The direction indicators light for two seconds. The red light on the switch flashes once a second.
5 seconds later, internal protection is set.
45 seconds later, external protection is set. Note:
when the alarm is triggered, the
siren sounds for thirty seconds. After the thirty seconds it stops, but thealarm remains set.
Warning:
When the alarm is triggered, if a door, the boot lid, roof or bonnet are not clo-
sed correctly, the siren sounds for amoment. If the vehicle is closed cor-rectly in the following 45 seconds, thealarm is activated and the directionindicators remain on for two seconds.In all cases, the alarm is activatedafter 45 seconds. Disarming the alarm(internal and external protection) Press the release button of the remo-
te control key. The doors unlock.The direction indicators flash for two seconds. The red light on the switch goes out. Note:
if the warning light continues to
flash after de-activation of the alarm, it is a sign that the alarm has been trig-
gered. The flashing will stop when theignition is switched on.
* According to specification.
SPECIAL FEATURES
124
Page 74 of 128

07-10-2002
Emergency cut-off (If the remote control is notworking)
Unlock the doors with the key.
Open the door.The alarm is triggered.
Ð Turn on the ignition.
Ð The locking system recognises thekey.
Ð The siren stops and the alarm is disarmed. Selection of the type of protection
To set the alarm to external
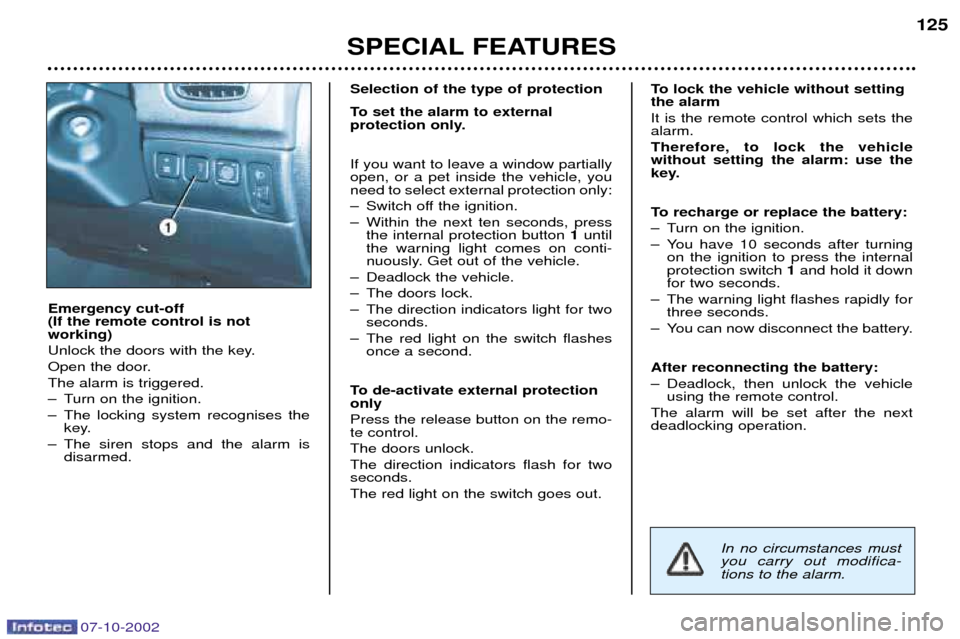
protection only. If you want to leave a window partially open, or a pet inside the vehicle, youneed to select external protection only:
Ð Switch off the ignition.
Ð Within the next ten seconds, press
the internal protection button 1until
the warning light comes on conti-
nuously. Get out of the vehicle.
Ð Deadlock the vehicle.
Ð The doors lock.
Ð The direction indicators light for two seconds.
Ð The red light on the switch flashes once a second.
To de-activate external protection only Press the release button on the remo- te control. The doors unlock.The direction indicators flash for two seconds. The red light on the switch goes out. To lock the vehicle without setting the alarm It is the remote control which sets the alarm. Therefore, to lock the vehicle without setting the alarm: use the
key.
To recharge or replace the battery:
Ð Turn on the ignition.
Ð You have 10 seconds after turning
on the ignition to press the internal protection switch 1and hold it down
for two seconds.
Ð The warning light flashes rapidly for three seconds.
Ð You can now disconnect the battery. After reconnecting the battery:
Ð Deadlock, then unlock the vehicle using the remote control.
The alarm will be set after the next deadlocking operation.
SPECIAL FEATURES
125
In no circumstances must you carry out modifica-tions to the alarm.
Page 113 of 128

07-10-2002
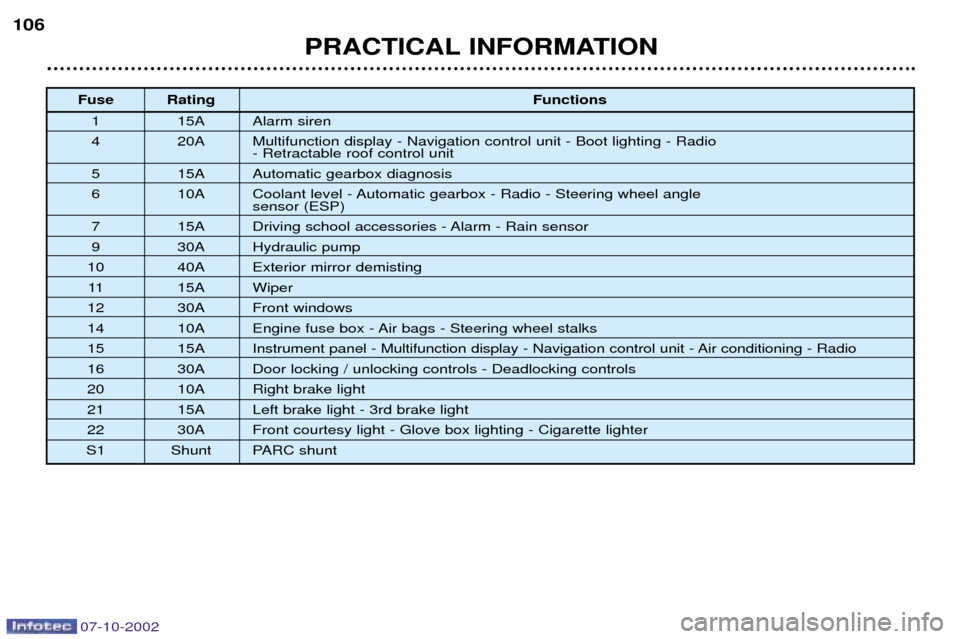
Fuse RatingFunctions
1 15A Alarm siren
4 20A Multifunction display - Navigation control unit - Boot lighting - Radio - Retractable roof control unit
5 15A Automatic gearbox diagnosis
6 10A Coolant level - Automatic gearbox - Radio - Steering wheel angle sensor (ESP)
7 15A Driving school accessories - Alarm - Rain sensor
9 30A Hydraulic pump
10 40A Exterior mirror demisting 11 15A Wiper
12 30A Front windows
14 10A Engine fuse box - Air bags - Steering wheel stalks
15 15A Instrument panel - Multifunction display - Navigation control unit - Air conditioning - Radio
16 30A Door locking / unlocking controls - Deadlocking controls
20 10A Right brake light
21 15A Left brake light - 3rd brake light
22 30A Front courtesy light - Glove box lighting - Cigarette lighter
S1 Shunt PARC shunt PRACTICAL INFORMATION
106