Peugeot 206 Dag 2002.5 Manual PDF
Manufacturer: PEUGEOT, Model Year: 2002.5, Model line: 206 Dag, Model: Peugeot 206 Dag 2002.5Pages: 156, PDF Size: 2.01 MB
Page 71 of 156
24-02-2003
YOUR 206 IN DETAIL71
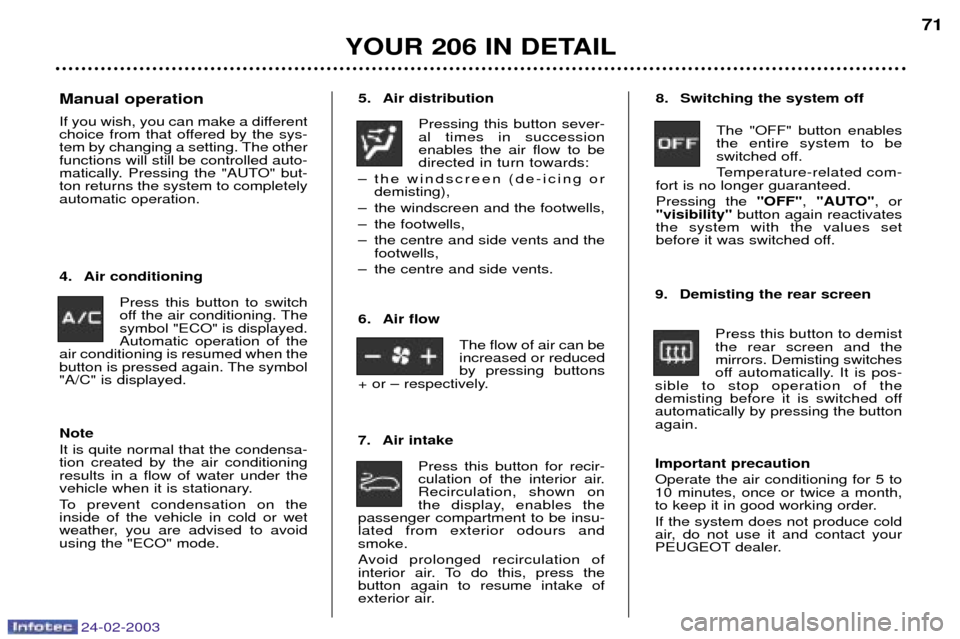
5. Air distribution
Pressing this button sever- al times in successionenables the air flow to bedirected in turn towards:
Ð the windscreen (de-icing or demisting),
Ð the windscreen and the footwells,
Ð the footwells,
Ð the centre and side vents and the footwells,
Ð the centre and side vents.
7. Air intake Press this button for recir-
culation of the interior air.Recirculation, shown on
the display, enables the
passenger compartment to be insu-lated from exterior odours andsmoke.
Avoid prolonged recirculation of
interior air. To do this, press thebutton again to resume intake of
exterior air.
4. Air conditioning
Press this button to switch
off the air conditioning. The
symbol "ECO" is displayed.Automatic operation of the
air conditioning is resumed when the
button is pressed again. The symbol
"A/C" is displayed. 8. Switching the system off
The "OFF" button enablesthe entire system to be
switched off.
Temperature-related com-
fort is no longer guaranteed.Pressing the "OFF", "AUTO" , or
"visibility" button again reactivates
the system with the values set
before it was switched off.
9. Demisting the rear screen Press this button to demistthe rear screen and themirrors. Demisting switches
off automatically. It is pos-
sible to stop operation of the
demisting before it is switched offautomatically by pressing the buttonagain. Important precaution Operate the air conditioning for 5 to 10 minutes, once or twice a month,
to keep it in good working order. If the system does not produce cold
air, do not use it and contact your
PEUGEOT dealer.
Manual operation
If you wish, you can make a different
choice from that offered by the sys-
tem by changing a setting. The otherfunctions will still be controlled auto-
matically. Pressing the "AUTO" but-ton returns the system to completelyautomatic operation.
6. Air flowThe flow of air can beincreased or reducedby pressing buttons
+ or Ð respectively.
Note It is quite normal that the condensa- tion created by the air conditioningresults in a flow of water under the
vehicle when it is stationary.
To prevent condensation on the inside of the vehicle in cold or wet
weather, you are advised to avoid
using the "ECO" mode.
Page 72 of 156
YOUR 206 IN DETAIL
72
24-02-2003
Page 73 of 156
24-02-2003
YOUR 206 IN DETAIL73
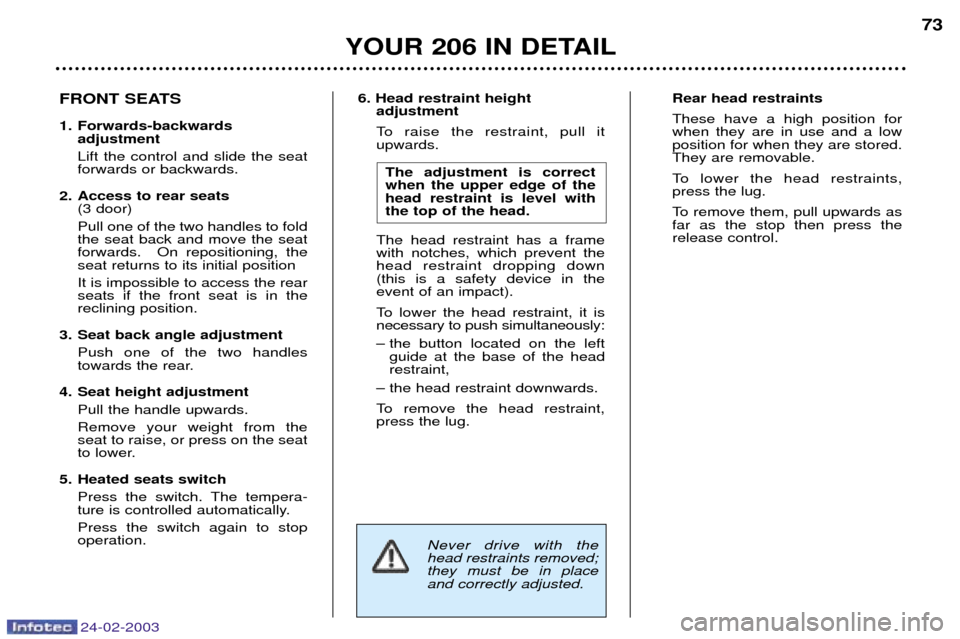
6. Head restraint height
adjustment
To raise the restraint, pull it upwards.
The adjustment is correctwhen the upper edge of thehead restraint is level withthe top of the head.
The head restraint has a framewith notches, which prevent thehead restraint dropping down(this is a safety device in theevent of an impact).
To lower the head restraint, it is necessary to push simultaneously:
Ð the button located on the left guide at the base of the head restraint,
Ð the head restraint downwards.
To remove the head restraint, press the lug.
Never drive with thehead restraints removed;they must be in placeand correctly adjusted. Rear head restraints These have a high position for when they are in use and a lowposition for when they are stored.They are removable.
To lower the head restraints, press the lug.
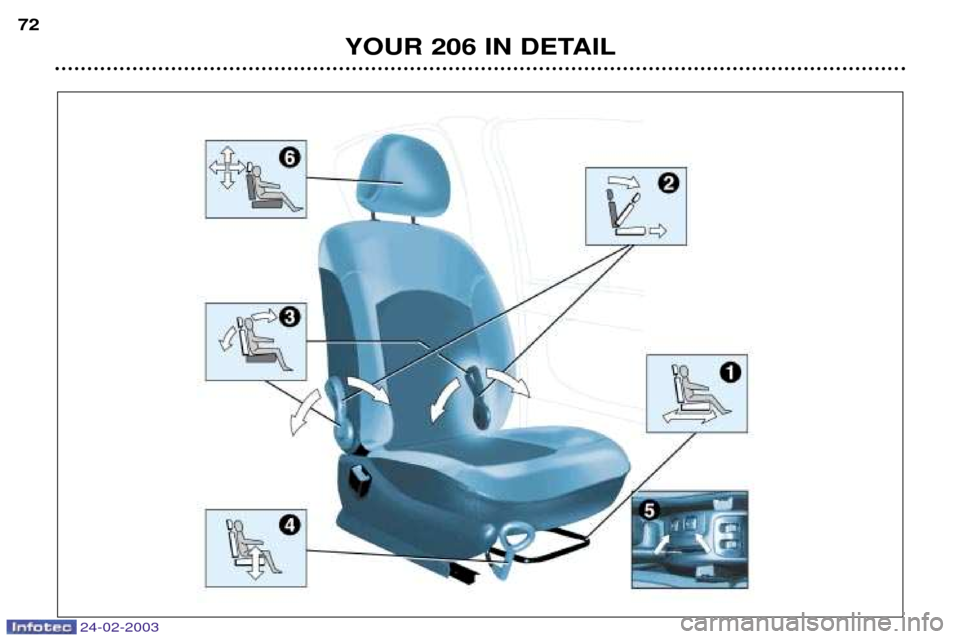
To remove them, pull upwards as far as the stop then press therelease control.FRONT SEATS
1. Forwards-backwards
adjustment Lift the control and slide the seat forwards or backwards.
2. Access to rear seats (3 door) Pull one of the two handles to fold the seat back and move the seatforwards. On repositioning, theseat returns to its initial position It is impossible to access the rear seats if the front seat is in thereclining position.
3. Seat back angle adjustment Push one of the two handles
towards the rear.
4. Seat height adjustment Pull the handle upwards. Remove your weight from the seat to raise, or press on the seat
to lower.
5. Heated seats switch Press the switch. The tempera-
ture is controlled automatically. Press the switch again to stop operation.
Page 74 of 156
24-02-2003
YOUR 206 IN DETAIL
74
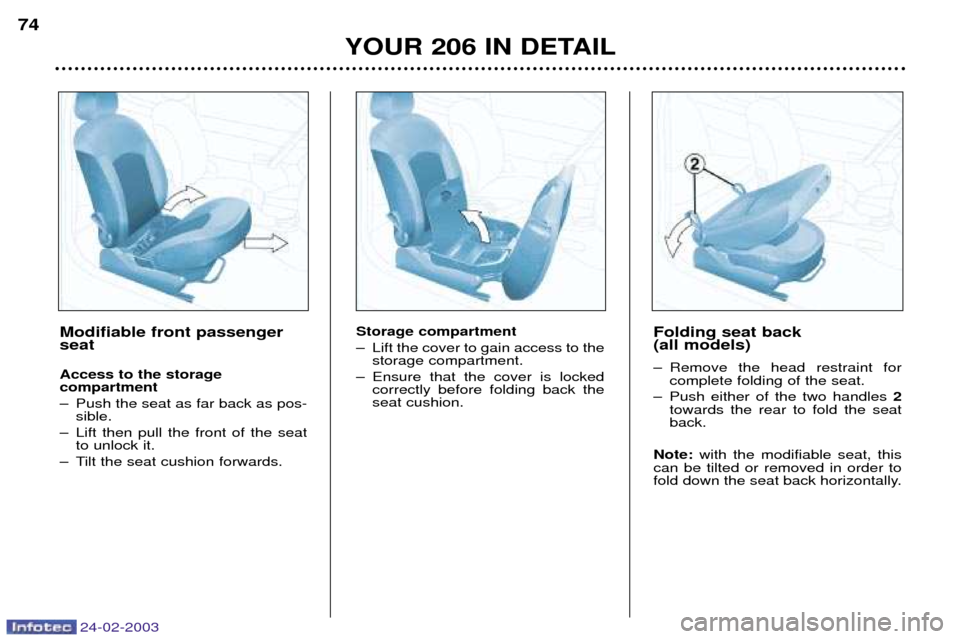
Storage compartment
Ð Lift the cover to gain access to the
storage compartment.
Ð Ensure that the cover is locked correctly before folding back the seat cushion. Folding seat back(all models)
Ð Remove the head restraint for
complete folding of the seat.
Ð Push either of the two handles 2
towards the rear to fold the seat back.
Note: with the modifiable seat, this
can be tilted or removed in order to
fold down the seat back horizontally.Modifiable front passenger seat Access to the storage compartment
Ð Push the seat as far back as pos- sible.
Ð Lift then pull the front of the seat to unlock it.
Ð Tilt the seat cushion forwards.
Page 75 of 156
24-02-2003
YOUR 206 IN DETAIL75
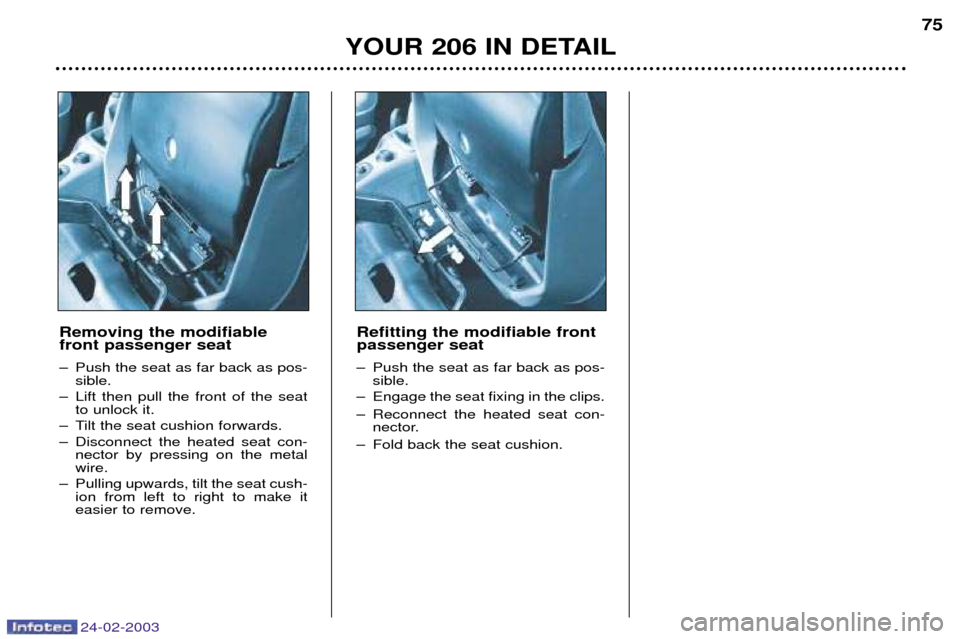
Removing the modifiable front passenger seat
Ð Push the seat as far back as pos- sible.
Ð Lift then pull the front of the seat to unlock it.
Ð Tilt the seat cushion forwards.
Ð Disconnect the heated seat con- nector by pressing on the metal wire.
Ð Pulling upwards, tilt the seat cush- ion from left to right to make iteasier to remove. Refitting the modifiable frontpassenger seat
Ð Push the seat as far back as pos-
sible.
Ð Engage the seat fixing in the clips.
Ð Reconnect the heated seat con- nector.
Ð Fold back the seat cushion.
Page 76 of 156
24-02-2003
YOUR 206 IN DETAIL73
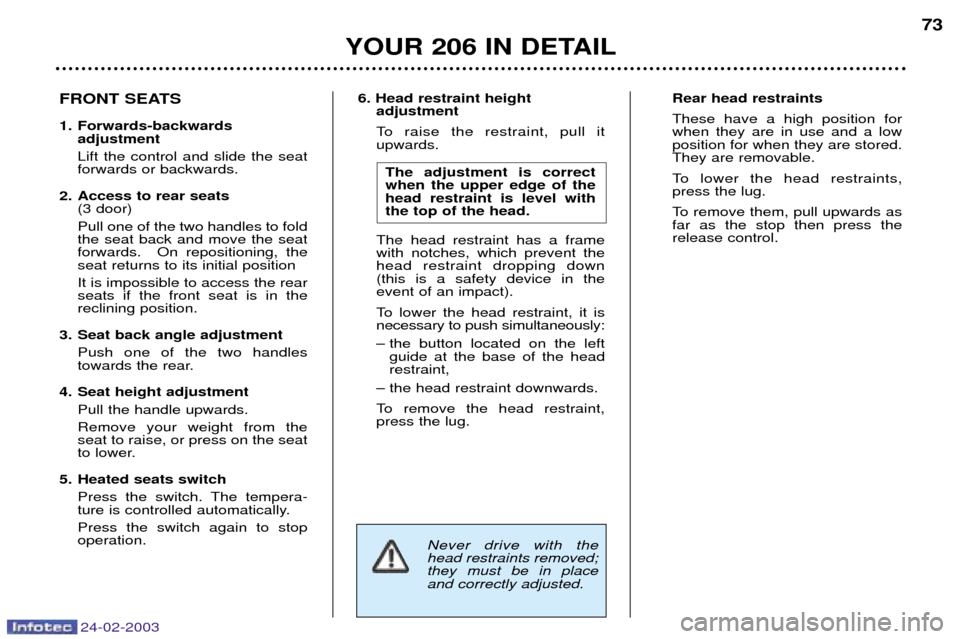
6. Head restraint height
adjustment
To raise the restraint, pull it upwards.
The adjustment is correctwhen the upper edge of thehead restraint is level withthe top of the head.
The head restraint has a framewith notches, which prevent thehead restraint dropping down(this is a safety device in theevent of an impact).
To lower the head restraint, it is necessary to push simultaneously:
Ð the button located on the left guide at the base of the head restraint,
Ð the head restraint downwards.
To remove the head restraint, press the lug.
Never drive with thehead restraints removed;they must be in placeand correctly adjusted. Rear head restraints These have a high position for when they are in use and a lowposition for when they are stored.They are removable.
To lower the head restraints, press the lug.
To remove them, pull upwards as far as the stop then press therelease control.FRONT SEATS
1. Forwards-backwards
adjustment Lift the control and slide the seat forwards or backwards.
2. Access to rear seats (3 door) Pull one of the two handles to fold the seat back and move the seatforwards. On repositioning, theseat returns to its initial position It is impossible to access the rear seats if the front seat is in thereclining position.
3. Seat back angle adjustment Push one of the two handles
towards the rear.
4. Seat height adjustment Pull the handle upwards. Remove your weight from the seat to raise, or press on the seat
to lower.
5. Heated seats switch Press the switch. The tempera-
ture is controlled automatically. Press the switch again to stop operation.
Page 77 of 156
24-02-2003
YOUR 206 IN DETAIL
76
REAR SEATS
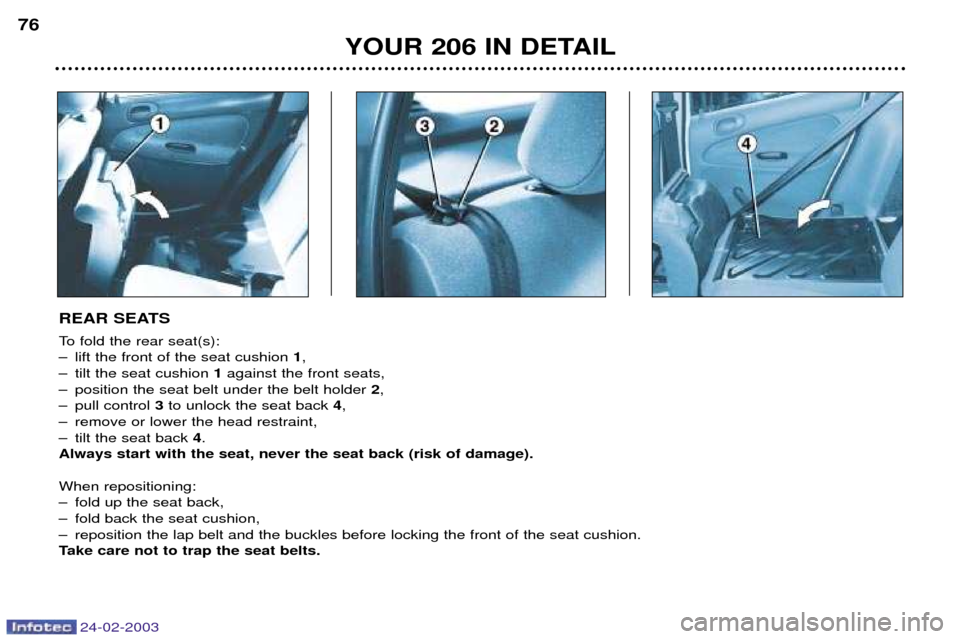
To fold the rear seat(s):
Ð lift the front of the seat cushion
1,
Ð tilt the seat cushion 1against the front seats,
Ð position the seat belt under the belt holder 2,
Ð pull control 3to unlock the seat back 4,
Ð remove or lower the head restraint,
Ð tilt the seat back 4.
Always start with the seat, never the seat back (risk of damage). When repositioning:
Ð fold up the seat back,
Ð fold back the seat cushion,
Ð reposition the lap belt and the buckles before locking the front of the seat cushion.
Take care not to trap the seat belts.
Page 78 of 156
24-02-2003
YOUR 206 IN DETAIL77
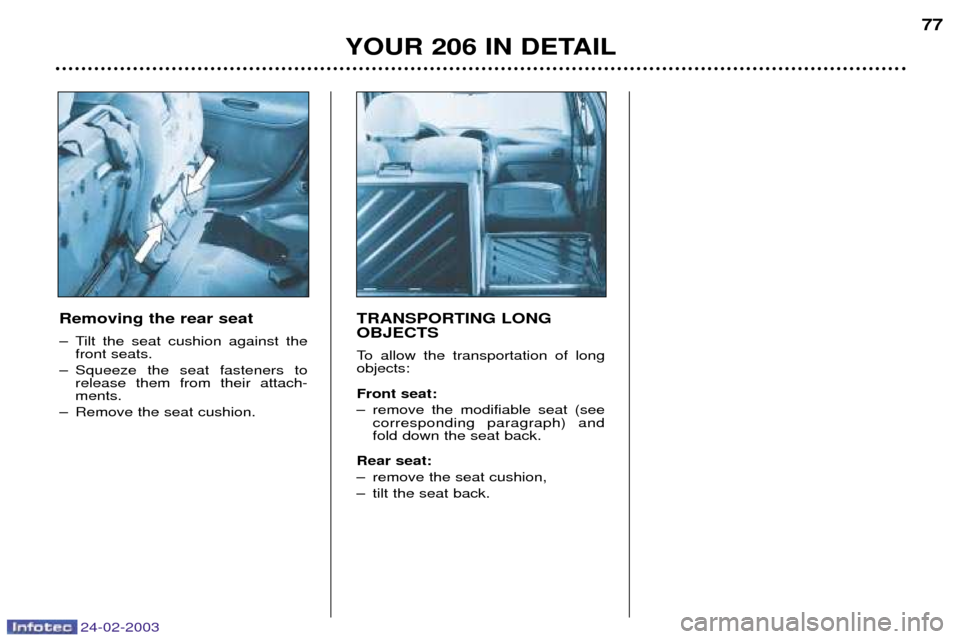
Removing the rear seat
Ð Tilt the seat cushion against the front seats.
Ð Squeeze the seat fasteners to release them from their attach- ments.
Ð Remove the seat cushion. TRANSPORTING LONG OBJECTS
To allow the transportation of long objects: Front seat:
Ð remove the modifiable seat (see
corresponding paragraph) and fold down the seat back.
Rear seat:
Ð remove the seat cushion,
Ð tilt the seat back.
Page 79 of 156
24-02-2003
YOUR 206 IN DETAIL
78
"ISOFIX" MOUNTINGS
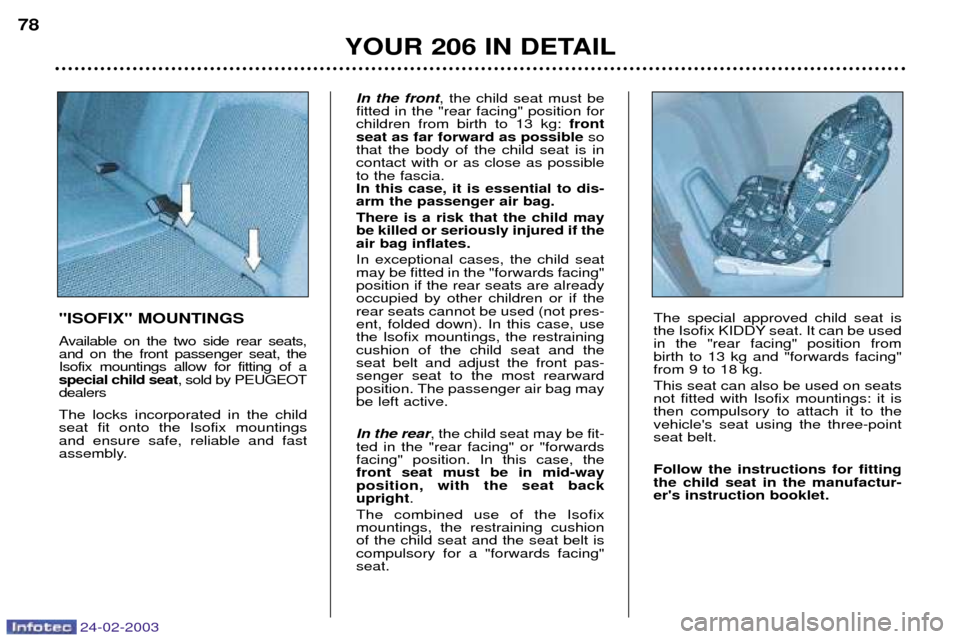
Available on the two side rear seats, and on the front passenger seat, theIsofix mountings allow for fitting of aspecial child seat , sold by PEUGEOT
dealers The locks incorporated in the child seat fit onto the Isofix mountingsand ensure safe, reliable and fast
assembly. In the front
, the child seat must be
fitted in the "rear facing" position forchildren from birth to 13 kg: front
seat as far forward as possible so
that the body of the child seat is incontact with or as close as possibleto the fascia.In this case, it is essential to dis-arm the passenger air bag. There is a risk that the child may be killed or seriously injured if theair bag inflates. In exceptional cases, the child seat may be fitted in the "forwards facing"position if the rear seats are alreadyoccupied by other children or if therear seats cannot be used (not pres-ent, folded down). In this case, usethe Isofix mountings, the restrainingcushion of the child seat and theseat belt and adjust the front pas-senger seat to the most rearward
position. The passenger air bag maybe left active. In the rear , the child seat may be fit-
ted in the "rear facing" or "forwards facing" position. In this case, thefront seat must be in mid-wayposition, with the seat backupright .
The combined use of the Isofixmountings, the restraining cushionof the child seat and the seat belt iscompulsory for a "forwards facing"seat. The special approved child seat is
the Isofix KIDDY seat. It can be usedin the "rear facing" position frombirth to 13 kg and "forwards facing"from 9 to 18 kg. This seat can also be used on seats not fitted with Isofix mountings: it isthen compulsory to attach it to thevehicle's seat using the three-pointseat belt. Follow the instructions for fitting the child seat in the manufactur-er's instruction booklet.
Page 80 of 156
24-02-2003
CHILD SEATS Although one of PEUGEOT's main concerns when designing your vehicle, the safety of your children also depends on you.
For maximum safety, please follow these precautions:
Ð All children under the age of 10 must travel in a special approved child seat*, adapted to their weight, in a seat fitted witha seat belt.
Ð Front passenger seat*: children under the age of 10 must not travel in the "forwards facing" position**. The 'rearwards fac- ing' position is permitted. In this position, it is compulsory to disarm the passenger air bag.
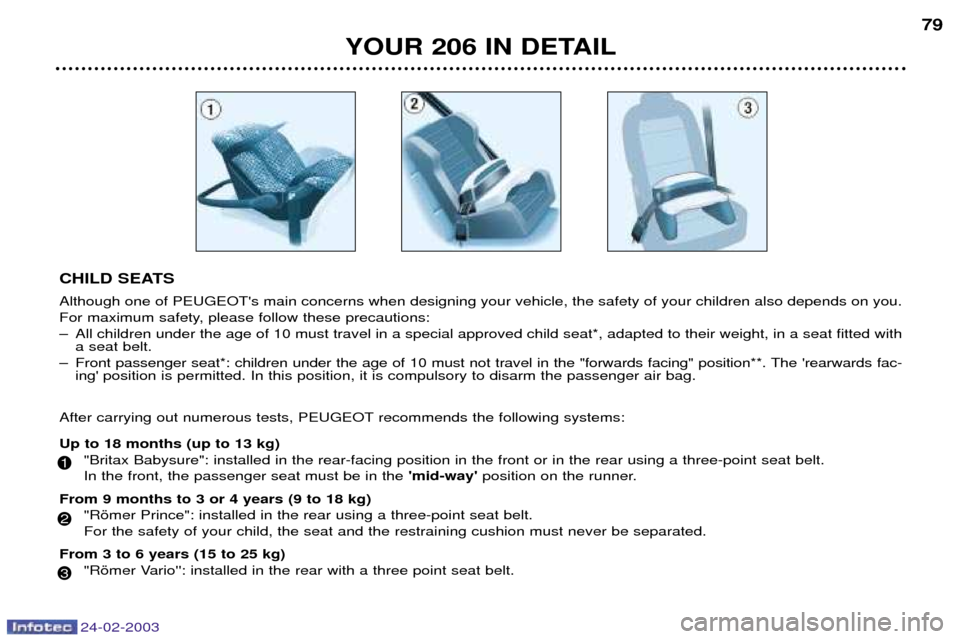
After carrying out numerous tests, PEUGEOT recommends the following systems: Up to 18 months (up to 13 kg) "Britax Babysure": installed in the rear-facing position in the front or in the rear using a three-point seat belt. In the front, the passenger seat must be in the 'mid-way'position on the runner.
From 9 months to 3 or 4 years (9 to 18 kg) "Ršmer Prince": installed in the rear using a three-point seat belt.For the safety of your child, the seat and the restraining cushion must never be separated.
From 3 to 6 years (15 to 25 kg) "Ršmer Vario'': installed in the rear with a three point seat belt.
3
2
YOUR 206 IN DETAIL
79
1