brake light Peugeot 3008 Hybrid 4 2014 Owner's Manual - RHD (UK. Australia)
[x] Cancel search | Manufacturer: PEUGEOT, Model Year: 2014, Model line: 3008 Hybrid 4, Model: Peugeot 3008 Hybrid 4 2014Pages: 378, PDF Size: 22.55 MB
Page 29 of 378
.Hybrid system27
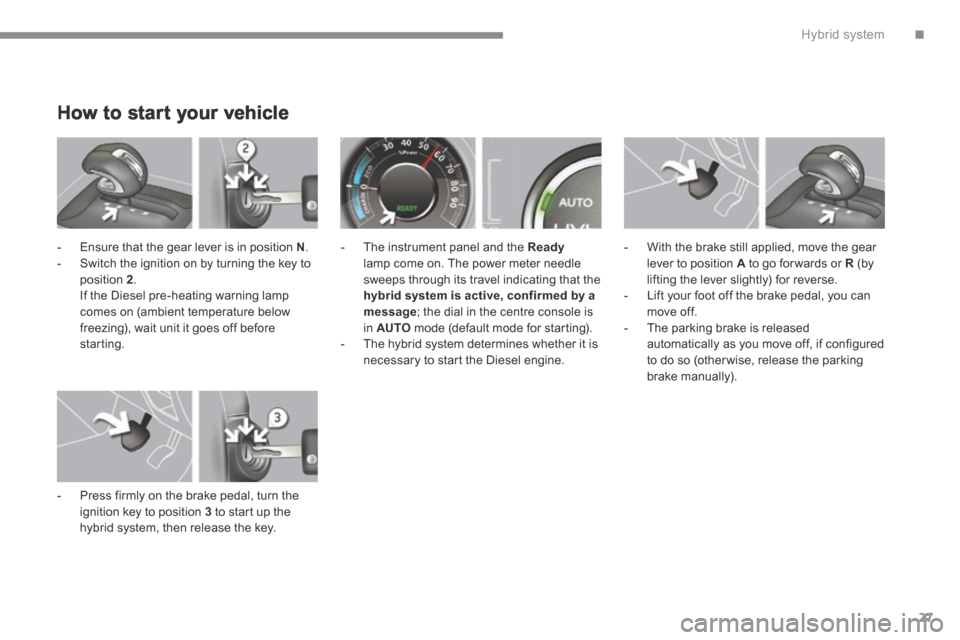
How to start your vehicle
- Ensure that the gear lever is in position N . - Switch the ignition on by turning the key to position 2 . If the Diesel pre-heating warning lamp comes on (ambient temperature below freezing), wait unit it goes off before starting.
- Press firmly on the brake pedal, turn the ignition key to position 3 to start up the hybrid system, then release the key.
- The instrument panel and the Readylamp come on. The power meter needle sweeps through its travel indicating that the hybrid system is active, confirmed by a message ; the dial in the centre console is in AUTO mode (default mode for starting). - The hybrid system determines whether it is necessary to start the Diesel engine.
- With the brake still applied, move the gear lever to position A to go for wards or R (by lifting the lever slightly) for reverse. - Lift your foot off the brake pedal, you can move off. - The parking brake is released automatically as you move off, if configured to do so (otherwise, release the parking brake manually).
Page 52 of 378
Monitoring
50
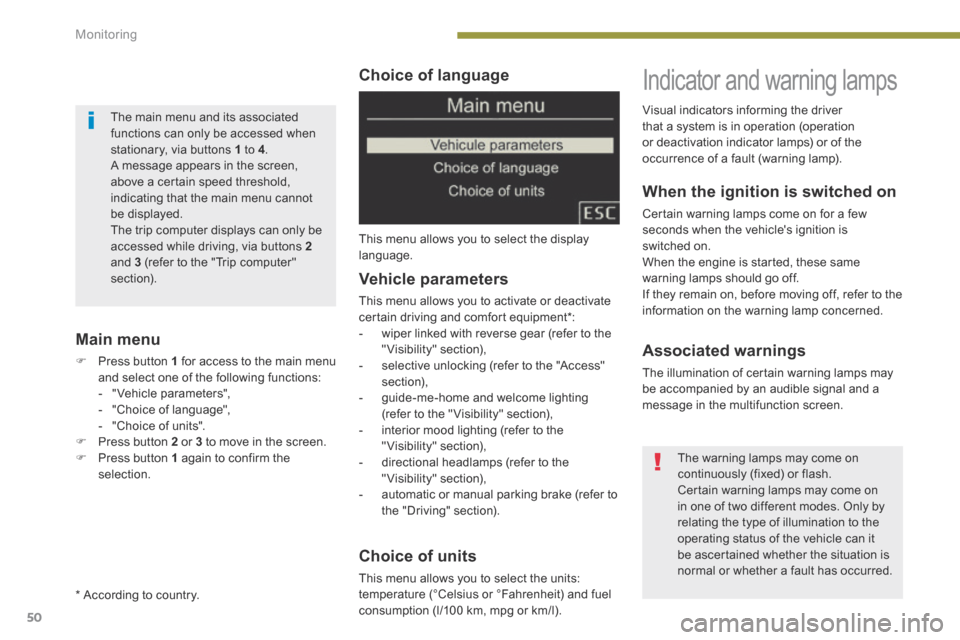
Choice of language
This menu allows you to select the display language.
Choice of units
This menu allows you to select the units:
temperature (°Celsius or °Fahrenheit) and fuel consumption (l/100 km, mpg or km/l).
Vehicle parameters
This menu allows you to activate or deactivate certain driving and comfort equipment * : - wiper linked with reverse gear (refer to the "Visibility" section), - selective unlocking (refer to the "Access" section), - guide-me-home and welcome lighting (refer to the " Visibility" section),
- interior mood lighting (refer to the "Visibility" section), - directional headlamps (refer to the "Visibility" section), - automatic or manual parking brake (refer to the "Driving" section).
Indicator and warning lamps
When the ignition is switched on
Certain warning lamps come on for a few seconds when the vehicle's ignition is switched on. When the engine is started, these same warning lamps should go off. If they remain on, before moving off, refer to the information on the warning lamp concerned.
Associated warnings
The illumination of certain warning lamps may be accompanied by an audible signal and a message in the multifunction screen.
Visual indicators informing the driver that a system is in operation (operation or deactivation indicator lamps) or of the occurrence of a fault (warning lamp).
The warning lamps may come on continuously (fixed) or flash. Certain warning lamps may come on in one of two different modes. Only by relating the type of illumination to the operating status of the vehicle can it be ascertained whether the situation is normal or whether a fault has occurred.
Main menu
Press button 1 for access to the main menu and select one of the following functions: - " Vehicle parameters", - "Choice of language", - "Choice of units". Press button 2 or 3 to move in the screen. Press button 1 again to confirm the selection.
The main menu and its associated functions can only be accessed when stationary, via buttons 1 to 4 . A message appears in the screen, above a certain speed threshold, indicating that the main menu cannot be displayed. The trip computer displays can only be accessed while driving, via buttons 2and 3 (refer to the "Trip computer" section).
* According to country.
Page 68 of 378
Multifunction screens
66
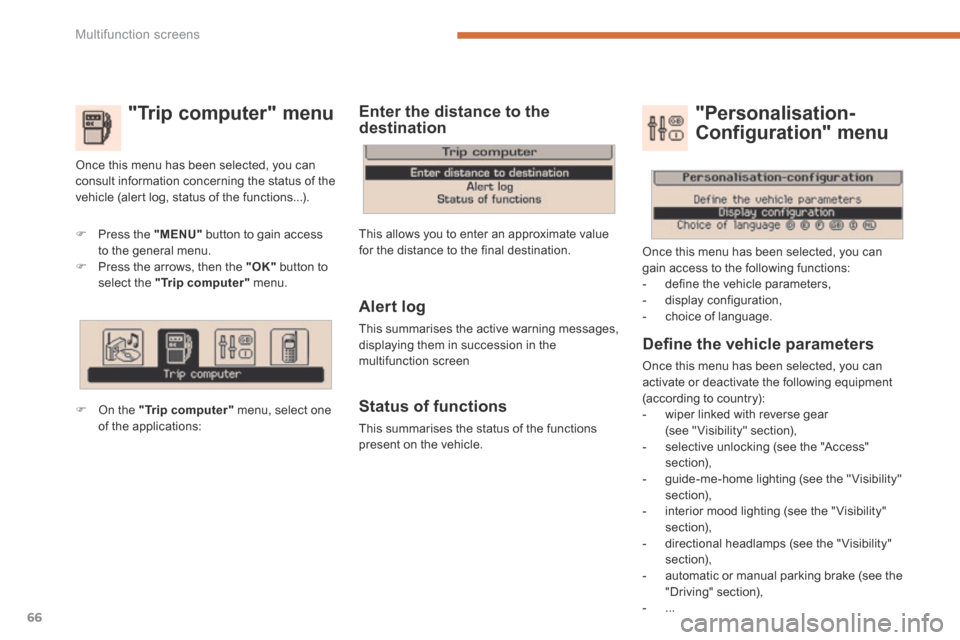
"Trip computer" menu
Press the "MENU" button to gain access to the general menu. Press the arrows, then the "OK" button to select the "Trip computer" menu.
On the "Trip computer" menu, select one of the applications:
Enter the distance to the destination
Once this menu has been selected, you can consult information concerning the status of the vehicle (alert log, status of the functions...).
Defi ne the vehicle parameters
Once this menu has been selected, you can activate or deactivate the following equipment (according to country): - wiper linked with reverse gear (see " Visibility" section), - selective unlocking (see the "Access" section), - guide-me-home lighting (see the " Visibility" section), - interior mood lighting (see the " Visibility" section),
- directional headlamps (see the "Visibility" section), - automatic or manual parking brake (see the "Driving" section), - ...
"Personalisation-
Configuration" menu
Once this menu has been selected, you can gain access to the following functions: - define the vehicle parameters, - display configuration, - choice of language. Alert log
This summarises the active warning messages, displaying them in succession in the multifunction screen
Status of functions
This summarises the status of the functions present on the vehicle.
This allows you to enter an approximate value for the distance to the final destination.
Page 71 of 378
2
Multifunction screens69
"SETUP" menu (PEUGEOT Connect Navigation (RT6)) PEUGEOT Connect Navigation (RT6)) PEUGEOT
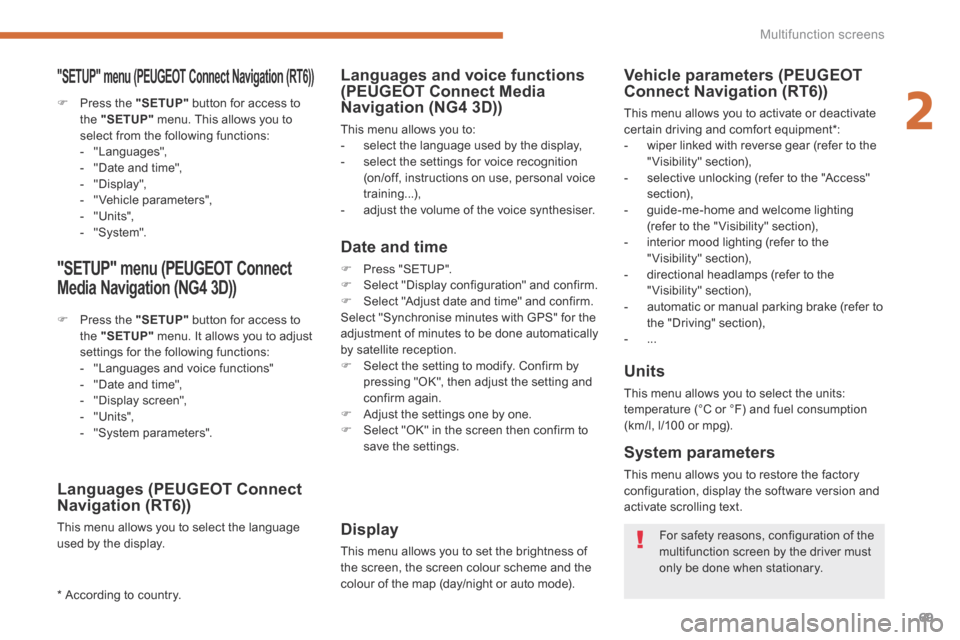
Press the "SETUP" button for access to the "SETUP" menu. This allows you to select from the following functions: - "Languages", - "Date and time", - "Display", - " Vehicle parameters", - "Units", - "System".
"SETUP" menu (PEUGEOT Connect
Media Navigation (NG4 3D))
Languages (PEUGEOT Connect Navigation (RT6))
This menu allows you to select the language
used by the display.
Languages and voice functions (PEUGEOT Connect Media Navigation (NG4 3D))
This menu allows you to: - select the language used by the display, - select the settings for voice recognition (on/off, instructions on use, personal voice training...), - adjust the volume of the voice synthesiser.
Display
This menu allows you to set the brightness of the screen, the screen colour scheme and the colour of the map (day/night or auto mode).
Vehicle parameters (PEUGEOTConnect Navigation (RT6))
This menu allows you to activate or deactivate certain driving and comfort equipment * : - wiper linked with reverse gear (refer to the "Visibility" section), - selective unlocking (refer to the "Access" section), - guide-me-home and welcome lighting
(refer to the " Visibility" section), - interior mood lighting (refer to the "Visibility" section), - directional headlamps (refer to the "Visibility" section), - automatic or manual parking brake (refer to the "Driving" section), - ...
Press the "SETUP" button for access to the "SETUP" menu. It allows you to adjust settings for the following functions: - "Languages and voice functions" - "Date and time", - "Display screen", - "Units", - "System parameters".
For safety reasons, configuration of the multifunction screen by the driver must only be done when stationary.
Date and time
Press "SETUP". Select "Display configuration" and confirm. Select "Adjust date and time" and confirm. Select "Synchronise minutes with GPS" for the adjustment of minutes to be done automatically by satellite reception. Select the setting to modify. Confirm by pressing "OK", then adjust the setting and confirm again. Adjust the settings one by one.
Select "OK" in the screen then confirm to save the settings.
Units
This menu allows you to select the units: temperature (°C or °F) and fuel consumption (km/l, l/100 or mpg).
System parameters
This menu allows you to restore the factory configuration, display the software version and activate scrolling text.
* According to country.
Page 157 of 378
8
Safety155
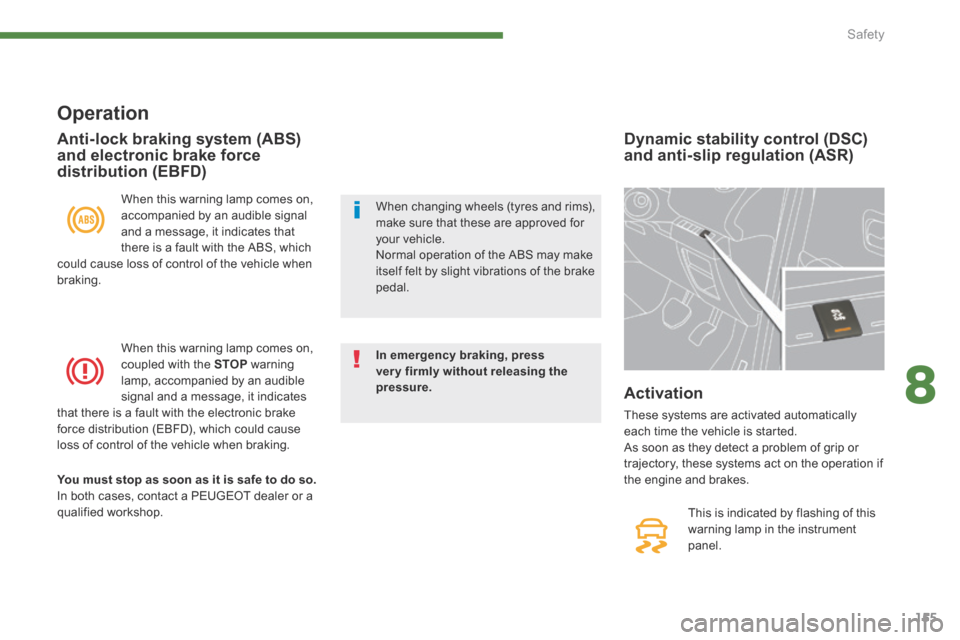
Dynamic stability control (DSC) and anti-slip regulation (ASR)
This is indicated by flashing of this warning lamp in the instrument panel.
Activation
These systems are activated automatically each time the vehicle is started. As soon as they detect a problem of grip or trajectory, these systems act on the operation if the engine and brakes.
Operation
When this warning lamp comes on, accompanied by an audible signal and a message, it indicates that there is a fault with the ABS, which could cause loss of control of the vehicle when braking.
When this warning lamp comes on, coupled with the STOP warning lamp, accompanied by an audible signal and a message, it indicates that there is a fault with the electronic brake force distribution (EBFD), which could cause loss of control of the vehicle when braking.
You must stop as soon as it is safe to do so. In both cases, contact a PEUGEOT dealer or a qualified workshop.
Anti-lock braking system (ABS) and electronic brake force distribution (EBFD)
In emergency braking, press very firmly without releasing the pressure.
When changing wheels (tyres and rims), make sure that these are approved for your vehicle. Normal operation of the ABS may make itself felt by slight vibrations of the brake pedal.
Page 167 of 378
9
165
Driving
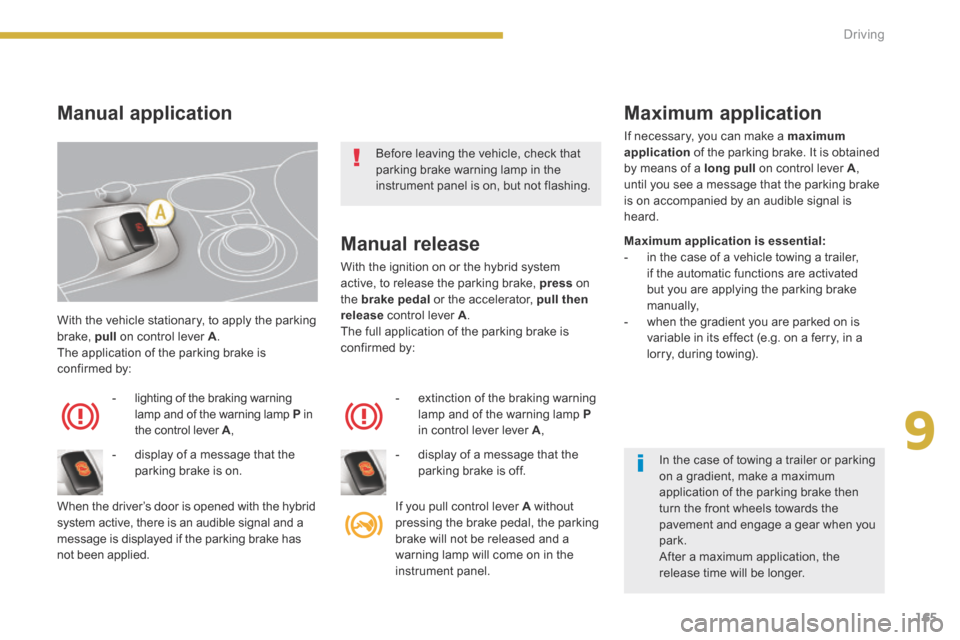
With the vehicle stationary, to apply the parking brake, pull on control lever A . The application of the parking brake is confirmed by:
- lighting of the braking warning lamp and of the warning lamp P in
the control lever A ,
When the driver’s door is opened with the hybrid system active, there is an audible signal and a
message is displayed if the parking brake has not been applied.
Manual release
With the ignition on or the hybrid system active, to release the parking brake, press on the brake pedal or the accelerator, pull then release control lever A . The full application of the parking brake is confirmed by:
- extinction of the braking warning lamp and of the warning lamp P
in control lever lever A ,
If you pull control lever A If you pull control lever A If you pull control lever without pressing the brake pedal, the parking
brake will not be released and a warning lamp will come on in the instrument panel.
Manual application Maximum application
If necessary, you can make a maximum application of the parking brake. It is obtained by means of a long pull on control lever A , until you see a message that the parking brake is on accompanied by an audible signal is heard.
Maximum application is essential: - in the case of a vehicle towing a trailer, if the automatic functions are activated but you are applying the parking brake manually, - when the gradient you are parked on is variable in its effect (e.g. on a ferry, in a lorry, during towing).
- display of a message that the parking brake is on. - display of a message that the parking brake is off.
Before leaving the vehicle, check that parking brake warning lamp in the instrument panel is on, but not flashing.
In the case of towing a trailer or parking on a gradient, make a maximum application of the parking brake then turn the front wheels towards the pavement and engage a gear when you park. After a maximum application, the release time will be longer.
Page 198 of 378
Checks
196
Brake disc wear
Brake pads
Brake wear depends on the style of driving, particularly in the case of vehicles used in town, over short distances. It may be necessary to have the condition of the brakes checked, even between vehicle services. Unless there is a leak in the circuit, a drop in the brake fluid level indicates that the brake pads are worn.
For information on checking brake disc wear, contact a PEUGEOT dealer or a qualified workshop.
Electronic gearbox
The gearbox does not require any maintenance (no oil change). Refer to the warranty and maintenance record for details of the checking interval for this component.
Electric parking brake
This system does not require any routine servicing. However, in the event of a problem, have the system checked by a PEUGEOT dealer or a qualified workshop.
Only use products recommended by PEUGEOT or products of equivalent quality and specification. In order to optimise the operation of units as important as those in the braking system, PEUGEOT selects and offers very specific products. After washing the vehicle, dampness, or in wintry conditions, ice can form on the brake discs and pads: braking efficiency may be reduced. Make light brake applications to dry and defrost the brakes.
For more information, refer to the "Electric parking brake - Operating faults" section.
Page 214 of 378
Practical information
212
Rear lamps
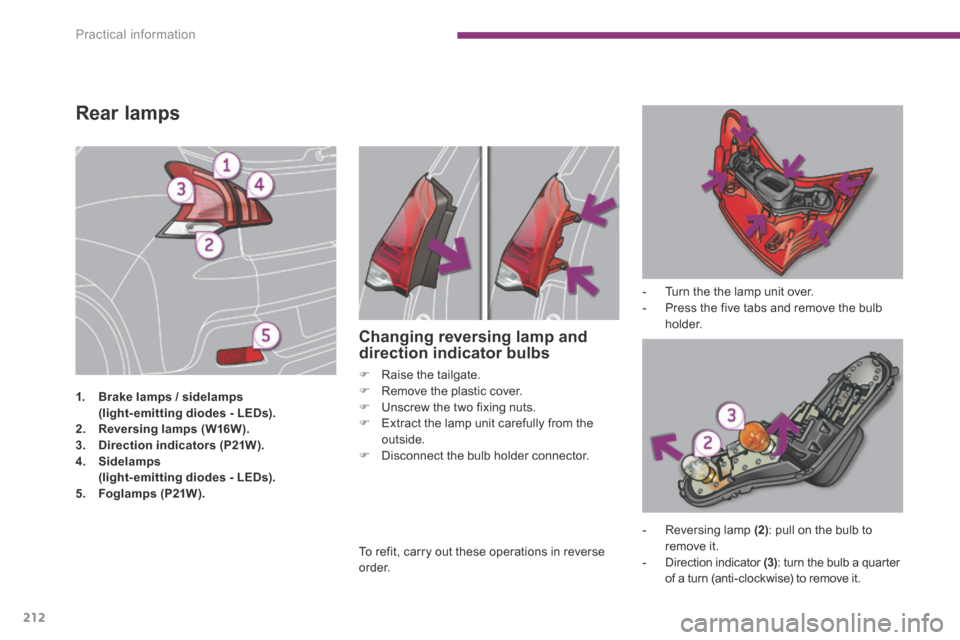
1. Brake lamps / sidelamps (light - emitting diodes - LEDs). 2. Reversing lamps (W16W).3. Direction indicators (P21W).4.S idelamps (light-emitting diodes - LEDs).5. Foglamps (P21W).
Changing reversing lamp and direction indicator bulbs
Raise the tailgate. Remove the plastic cover. Unscrew the two fixing nuts. Extract the lamp unit carefully from the outside. Disconnect the bulb holder connector.
- Turn the the lamp unit over. - Press the five tabs and remove the bulb h o l d e r.
- Reversing lamp (2) : pull on the bulb to
remove it. - Direction indicator (3) : turn the bulb a quarter of a turn (anti-clockwise) to remove it.
To refit, carry out these operations in reverse o r d e r.
Page 215 of 378
11
Practical information213
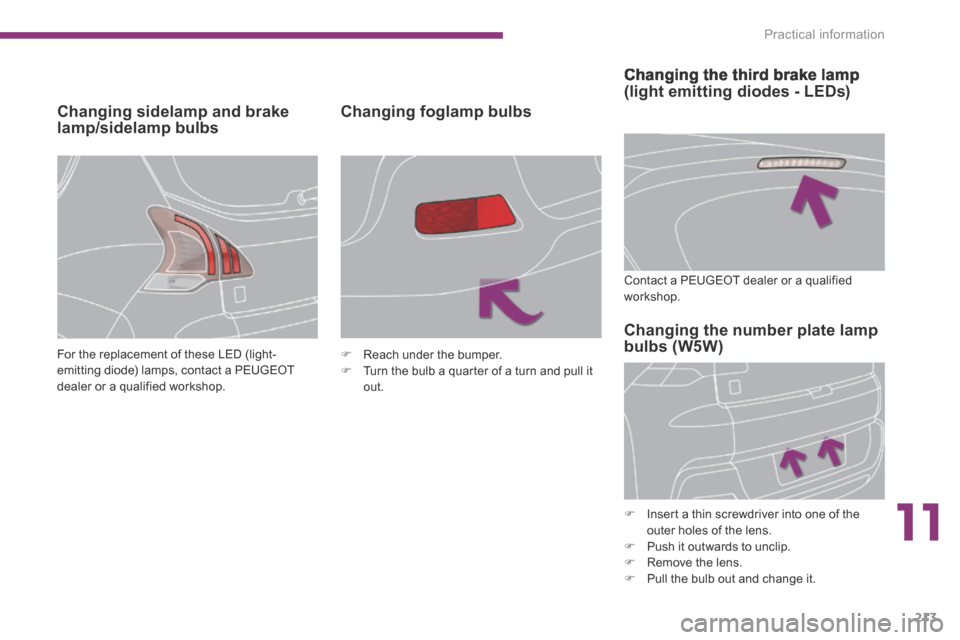
Changing the third brake lamp (light emitting diodes - LEDs)
Changing sidelamp and brake lamp/sidelamp bulbs Changing foglamp bulbs
For the replacement of these LED (light-emitting diode) lamps, contact a PEUGEOT dealer or a qualified workshop.
Reach under the bumper. Turn the bulb a quarter of a turn and pull it out.
Contact a PEUGEOT dealer or a qualified workshop.
Changing the number plate lamp bulbs (W5W)
Insert a thin screwdriver into one of the outer holes of the lens. Push it outwards to unclip. Remove the lens. Pull the bulb out and change it.
Page 239 of 378
12
Technical data237
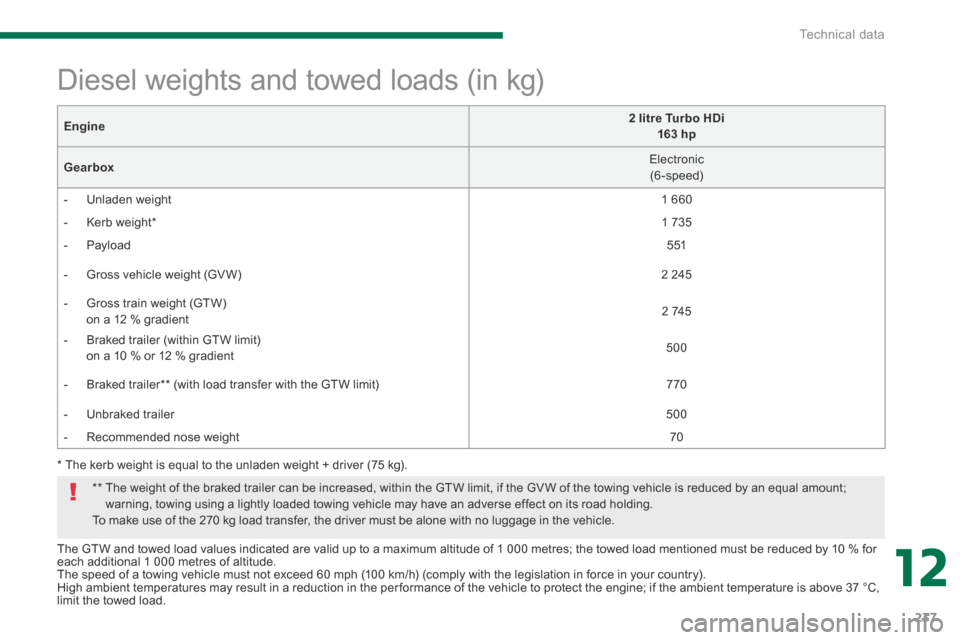
The GTW and towed load values indicated are valid up to a maximum altitude of 1 000 metres; the towed load mentioned must be reduced by 10 % for each additional 1 000 metres of altitude. The speed of a towing vehicle must not exceed 60 mph (100 km/h) (comply with the legislation in force in your country). High ambient temperatures may result in a reduction in the per formance of the vehicle to protect the engine; if the ambient temperature is above 37 °C, limit the towed load.
Diesel weights and towed loads (in kg)
* The kerb weight is equal to the unladen weight + driver (75 kg).
Engine2 litre Turbo HDi 163 hp
Gearbox Electronic (6-speed)
- Unladen weight 1 6 6 0
- Kerb weight * 1 7 3 5
- Payload 5 5 1
- Gross vehicle weight (GV W) 2 2 4 5
- Gross train weight (GTW) on a 12 % gradient 2 7 4 5
- Braked trailer (within GTW limit) on a 10 % or 12 % gradient 5 0 0
- Braked trailer ** (with load transfer with the GTW limit) 7 7 0
- Unbraked trailer 5 0 0
- Recommended nose weight 7 0
** The weight of the braked trailer can be increased, within the GTW limit, if the GV W of the towing vehicle is reduced by an equal amount; warning, towing using a lightly loaded towing vehicle may have an adverse effect on its road holding. To make use of the 270 kg load transfer, the driver must be alone with no luggage in the vehicle.