jack Peugeot 3008 Hybrid 4 2014 Owner's Manual
[x] Cancel search | Manufacturer: PEUGEOT, Model Year: 2014, Model line: 3008 Hybrid 4, Model: Peugeot 3008 Hybrid 4 2014Pages: 378, PDF Size: 22.5 MB
Page 16 of 378
82-83
87
126
84
Familiarisation
14
Sitting comfortably
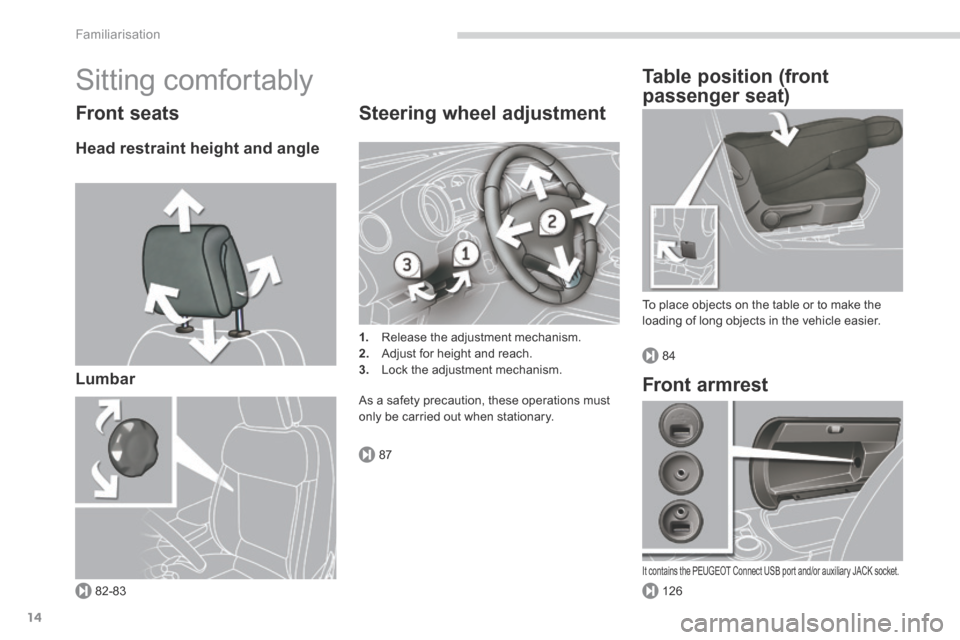
Front seats
Head restraint height and angle
Lumbar
Steering wheel adjustment
1. Release the adjustment mechanism. 2. Adjust for height and reach. 3. Lock the adjustment mechanism.
As a safety precaution, these operations must only be carried out when stationary.
Table position (front
passenger seat)
To place objects on the table or to make the loading of long objects in the vehicle easier.
Front armrest
It contains the PEUGEOT Connect USB port and/or auxiliary JACK socket. PEUGEOT Connect USB port and/or auxiliary JACK socket. PEUGEOT
Page 46 of 378
Hybrid system
44
This system does not work continuously, but adapts the force of the fan cooling to the
requirements of the battery. Its operation can be heard at the rear, even if the vehicle is stopped after a run. If the air intake is blocked, the battery may overheat, damaging the battery and causing a loss of per formance of the hybrid system.
Fan cooling of the high voltage battery
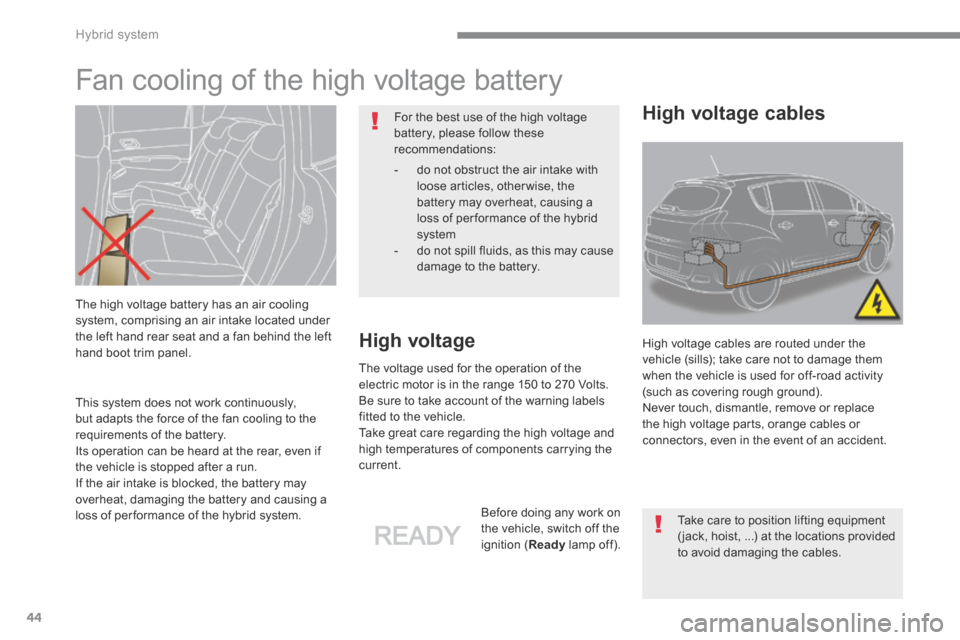
The high voltage battery has an air cooling system, comprising an air intake located under the left hand rear seat and a fan behind the left hand boot trim panel. High voltage
The voltage used for the operation of the electric motor is in the range 150 to 270 Volts. Be sure to take account of the warning labels fitted to the vehicle. Take great care regarding the high voltage and high temperatures of components carrying the current.
Before doing any work on the vehicle, switch off the ignition ( Ready lamp off).
High voltage cables are routed under the vehicle (sills); take care not to damage them when the vehicle is used for off-road activity (such as covering rough ground). Never touch, dismantle, remove or replace the high voltage parts, orange cables or
connectors, even in the event of an accident.
High voltage cables For the best use of the high voltage battery, please follow these recommendations:
- do not obstruct the air intake with loose articles, otherwise, the battery may overheat, causing a loss of per formance of the hybrid system - do not spill fluids, as this may cause damage to the battery.
Take care to position lifting equipment ( jack, hoist, ...) at the locations provided to avoid damaging the cables.
Page 128 of 378
Fittings
126
Front armrest
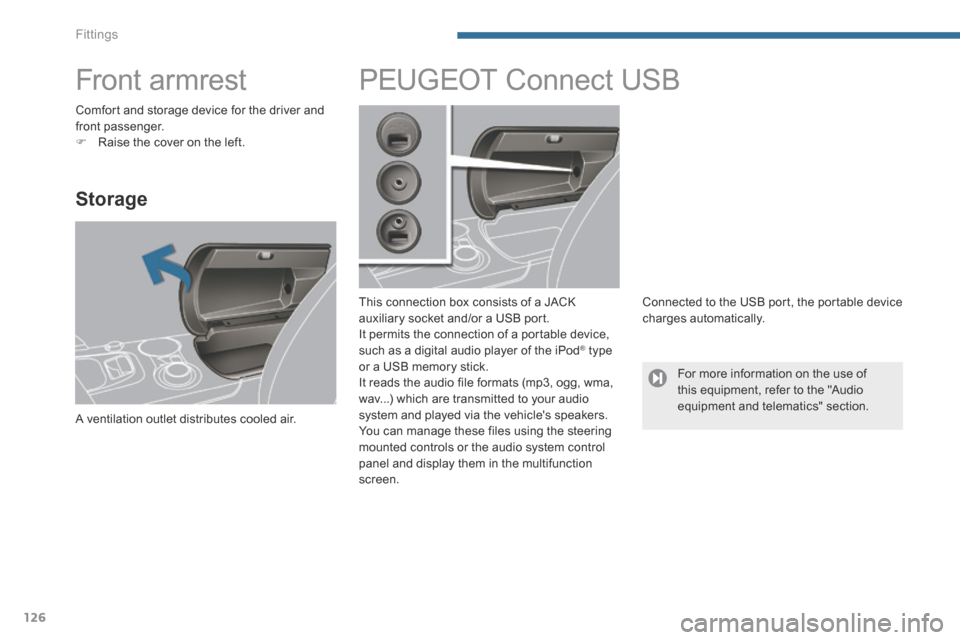
Storage
A ventilation outlet distributes cooled air.
PEUGEOT Connect USB
This connection box consists of a JACK auxiliary socket and/or a USB port. It permits the connection of a portable device, such as a digital audio player of the iPod ® type ® type ®
or a USB memory stick. It reads the audio file formats (mp3, ogg, wma, wav...) which are transmitted to your audio system and played via the vehicle's speakers.
You can manage these files using the steering mounted controls or the audio system control panel and display them in the multifunction screen.
Connected to the USB port, the portable device charges automatically.
Comfort and storage device for the driver and front passenger. Raise the cover on the left.
For more information on the use of this equipment, refer to the "Audio equipment and telematics" section.
Page 205 of 378
11
Practical information203
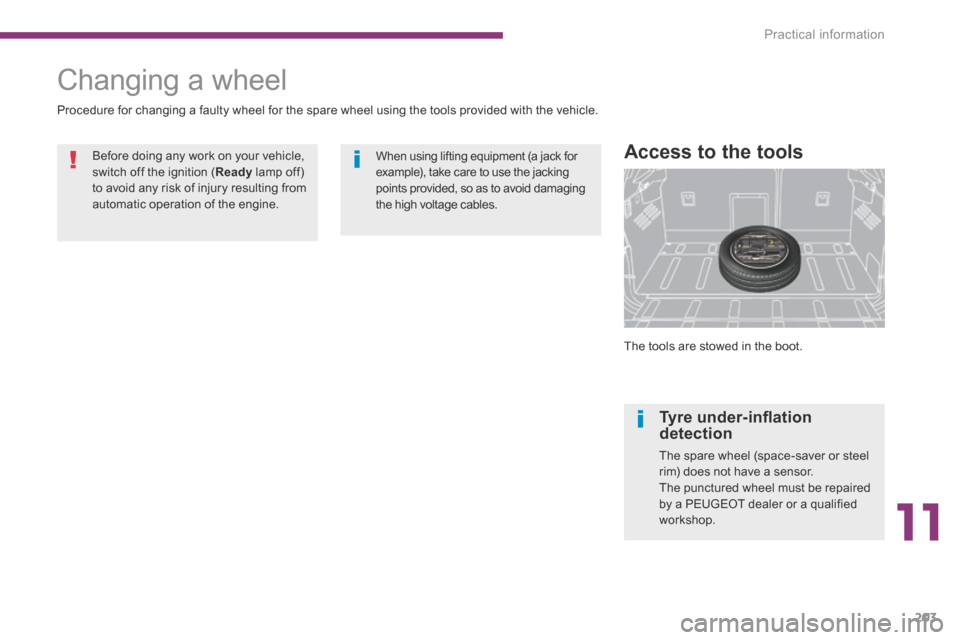
The tools are stowed in the boot.
Access to the tools
Changing a wheel
Procedure for changing a faulty wheel for the spare wheel using the tools provided with the vehicle.
Before doing any work on your vehicle, switch off the ignition ( Ready lamp off) to avoid any risk of injury resulting from automatic operation of the engine.
When using lifting equipment (a jack for example), take care to use the jacking points provided, so as to avoid damaging the high voltage cables.
Tyre under-infl ation detection
The spare wheel (space-saver or steel rim) does not have a sensor. The punctured wheel must be repaired by a PEUGEOT dealer or a qualified workshop.
Page 206 of 378
Practical information
204
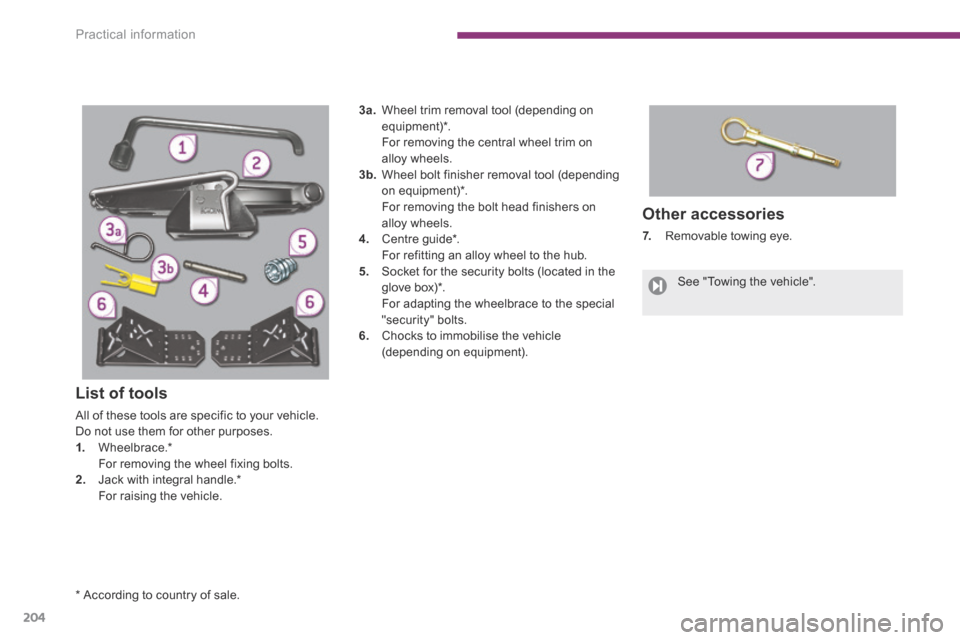
Other accessories
7. Removable towing eye.
* According to country of sale.
See "Towing the vehicle".
List of tools
All of these tools are specific to your vehicle. Do not use them for other purposes. 1. Wheelbrace. * For removing the wheel fixing bolts. 2. Jack with integral handle. * For raising the vehicle.
3a. Wheel trim removal tool (depending on equipment) * . For removing the central wheel trim on alloy wheels. 3b. Wheel bolt finisher removal tool (depending on equipment) * . For removing the bolt head finishers on alloy wheels. 4. Centre guide * . For refitting an alloy wheel to the hub. 5. Socket for the security bolts (located in the glove box) * . For adapting the wheelbrace to the special "security" bolts. 6. Chocks to immobilise the vehicle (depending on equipment).
Page 207 of 378
11
Practical information205
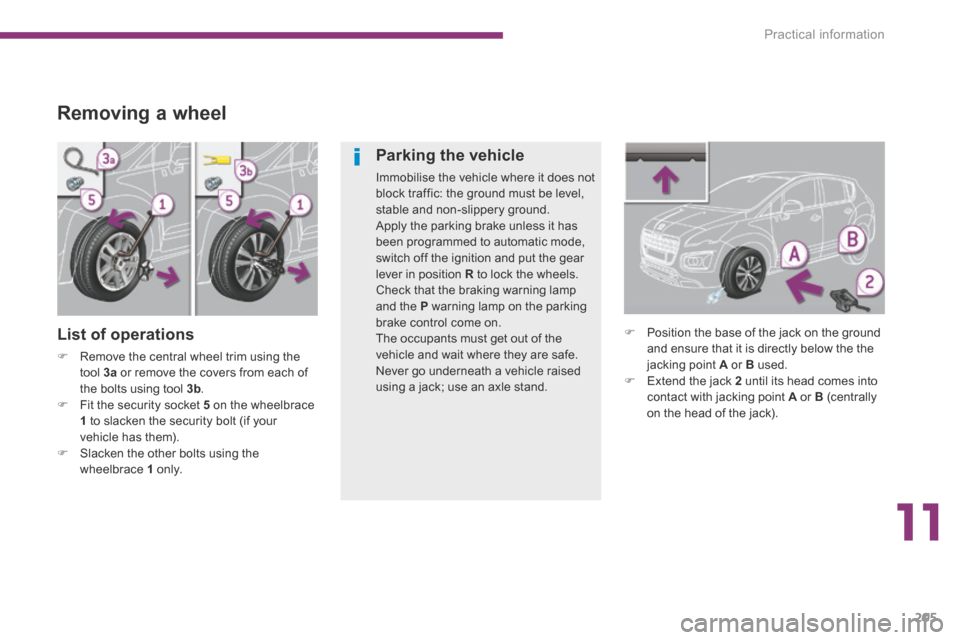
Removing a wheel
List of operations
Remove the central wheel trim using the tool 3a or remove the covers from each of the bolts using tool 3b . Fit the security socket 5 on the wheelbrace 1 to slacken the security bolt (if your
vehicle has them).
Slacken the other bolts using the wheelbrace 1 o n l y.
Position the base of the jack on the ground and ensure that it is directly below the the jacking point A or B used. Extend the jack 2 until its head comes into contact with jacking point A or B (centrally on the head of the jack).
Parking the vehicle
Immobilise the vehicle where it does not block traffic: the ground must be level, stable and non-slippery ground. Apply the parking brake unless it has been programmed to automatic mode, switch off the ignition and put the gear lever in position R to lock the wheels. Check that the braking warning lamp and the P warning lamp on the parking brake control come on. The occupants must get out of the vehicle and wait where they are safe. Never go underneath a vehicle raised using a jack; use an axle stand.
Page 209 of 378
11
Practical information207
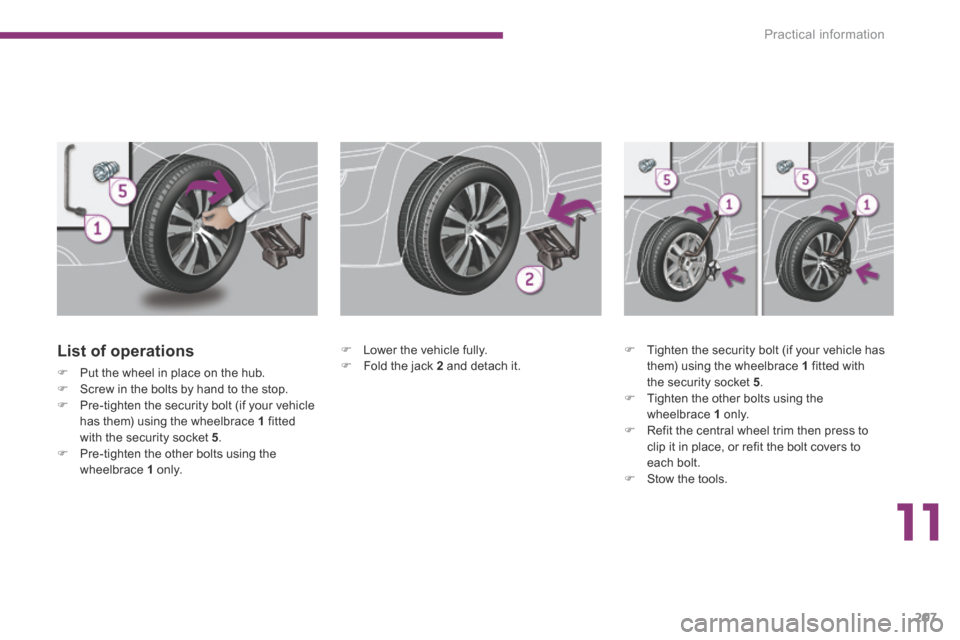
List of operations
Put the wheel in place on the hub. Screw in the bolts by hand to the stop. Pre-tighten the security bolt (if your vehicle has them) using the wheelbrace 1 fitted with the security socket 5 . Pre-tighten the other bolts using the wheelbrace 1 o n l y.
Lower the vehicle fully. Fold the jack 2 and detach it. Tighten the security bolt (if your vehicle has them) using the wheelbrace 1 fitted with the security socket 5 . Tighten the other bolts using the wheelbrace 1 o n l y. Refit the central wheel trim then press to clip it in place, or refit the bolt covers to each bolt. Stow the tools.
Page 274 of 378
07
MEDIA
2ABC3DEF5JKL4GHI6MNO8TU V7PQRS9WXYZ0*#
1RADIOM EDIA NA
V ESC TRAFFIC
SETUPADDR
BOOK
MEDIA
2AB C3DEF5JKL4GHI6MNO8TUV7PQR S9WXYZ0*#
1RADIO MEDIA NA
V TRAFFIC
SETUPADDR
BOOK
2ABC3DEF5JKL4GHI6MNO8TUV7PQR S9WXYZ0*#
1RADIO MEDIA NA
V TRAFFIC
SETUPADDR
BOOK
2ABC3DEF5JKL4GHI6MNO8TUV7PQR S9WXYZ0*#
1RADIO MEDIA NA
V TRAFFIC
SETUPADDR
BOOK
RADIO NA
V TRAFFICMEDIA
RADIO NA
V TRAFFICMEDIA
272
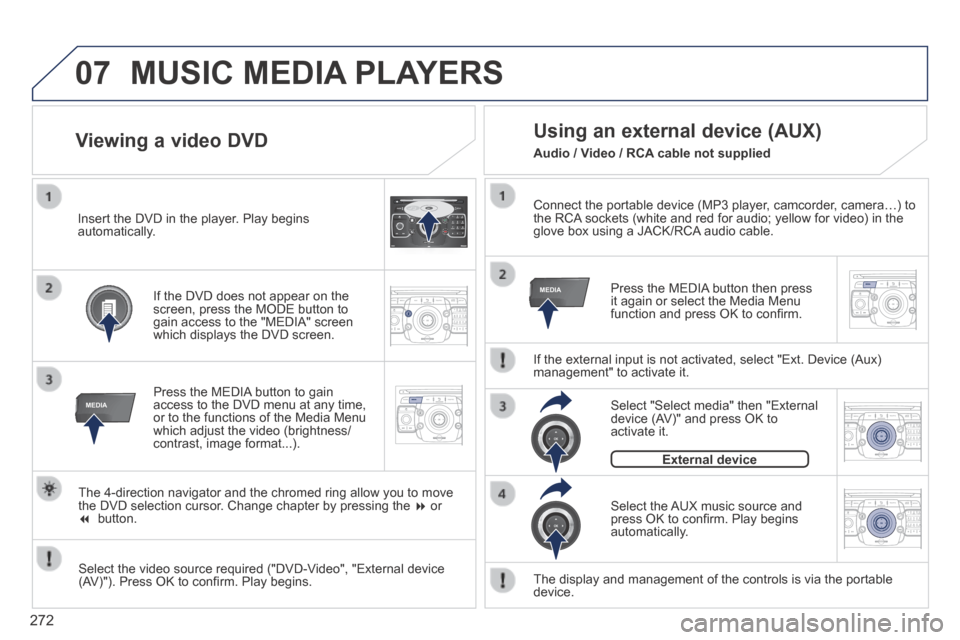
Connect the portable device (MP3 player, camcorder, camera…) to the RCA sockets (white and red for audio; yellow for video) in the glove box using a JACK/RCA audio cable.
Press the MEDIA button then press it again or select the Media Menu function and press OK to confi rm.
Select the AUX music source and press OK to confi rm. Play begins automatically.
Select "Select media" then "External device (AV)" and press OK to activate it.
External device
The display and management of the controls is via the portable device.
Using an external device (AUX)
If the external input is not activated, select "Ext. Device (Aux) management" to activate it.
Viewing a video DVD
Select the video source required ("DVD-Video", "External device (AV)"). Press OK to confi rm. Play begins.
Press the MEDIA button to gain access to the DVD menu at any time, or to the functions of the Media Menu which adjust the video (brightness/contrast, image format...).
If the DVD does not appear on the screen, press the MODE button to gain access to the "MEDIA" screen which displays the DVD screen.
Insert the DVD in the player. Play begins automatically.
The 4-direction navigator and the chromed ring allow you to move the DVD selection cursor. Change chapter by pressing the or button.
MUSIC MEDIA PLAYERS
Audio / Video / RCA cable not supplied
Page 327 of 378
08
325
CD, MP3 CD / USB player
The audio equipment will only play audio fi les with".wma, .aac, .fl ac, .ogg and .mp3" fi le extensions and with a bit rate of between 32 Kbps and 320 Kbps.
It also supports VBR (Variable Bit Rate) mode.
No other type of fi le (.mp4, .m3u…) can be played.
WMA fi les must be of the standard wma 9 type.
The sampling rates supported are greater than 32 KHz.
It is advisable to restrict fi le names to 20 characters, without using of special characters (e.g.: " " ? ; ù) to avoid any playing and displ\
aying problems.
In order to be able to play a recorded CDR or CDRW, when recording it is preferable to select the ISO 9660 level 1, 2 or Joliet standard.
If the disc is recorded in another format (udf, …), it may not be p\
layed correctly.
It is recommended that the same recording standard is always used for an individual disc, with as low a speed as possible (4x maximum) for optimum sound quality.
In the particular case of a multi-session CD, the Joliet standard is recommended.
Information and advice
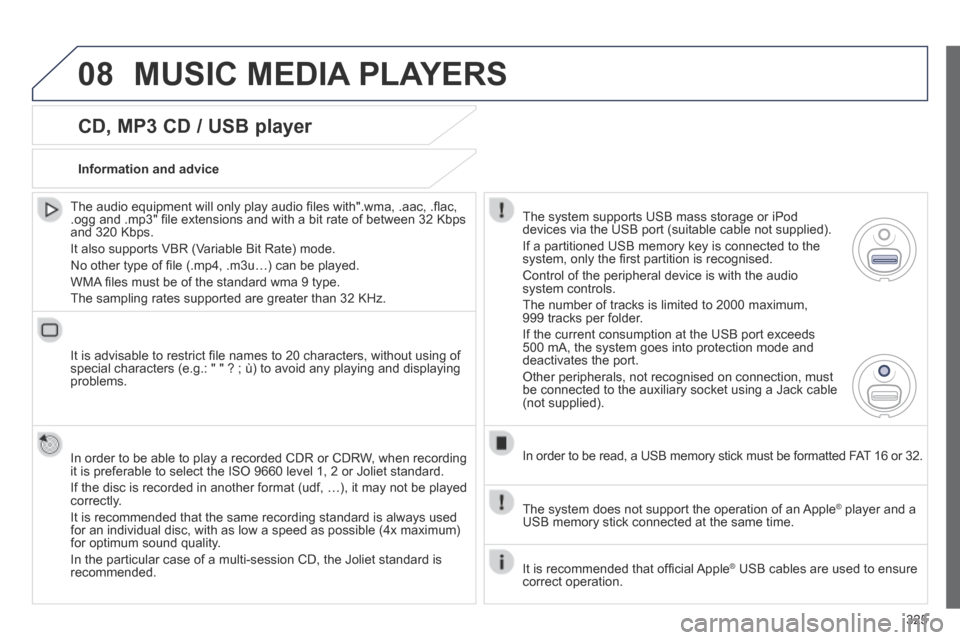
The system supports USB mass storage or iPod devices via the USB port (suitable cable not supplied).
If a partitioned USB memory key is connected to the system, only the fi rst partition is recognised.
Control of the peripheral device is with the audio system controls.
The number of tracks is limited to 2000 maximum, 999 tracks per folder.
If the current consumption at the USB port exceeds 500 mA, the system goes into protection mode and deactivates the port.
Other peripherals, not recognised on connection, must be connected to the auxiliary socket using a Jack cable (not supplied).
In order to be read, a USB memory stick must be formatted FAT 16 or 32.
The system does not support the operation of an Apple ® player and a ® player and a ®
USB memory stick connected at the same time.
It is recommended that offi cial Apple ® USB cables are used to ensure ® USB cables are used to ensure ®
correct operation.
MUSIC MEDIA PLAYERS
Page 331 of 378
08
329
MUSIC MEDIA PLAYERS
Using the auxiliary input (AUX)
JACK/USB audio cable not supplied
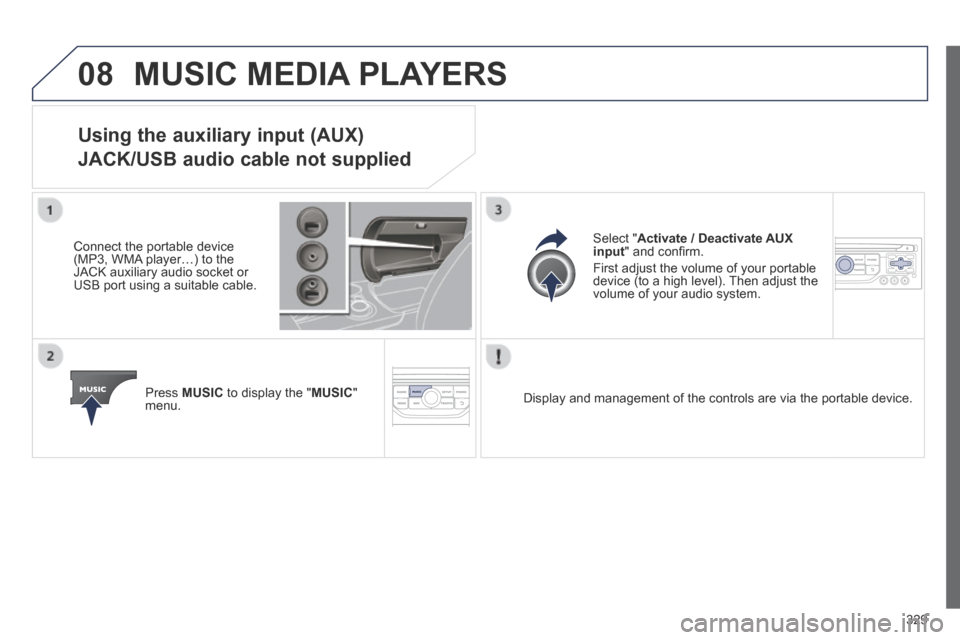
Connect the portable device (MP3, WMA player…) to the JACK auxiliary audio socket or USB port using a suitable cable.
Press MUSIC to display the " MUSIC " menu.
Select " Activate / Deactivate AUX input " and confi rm.
First adjust the volume of your portable device (to a high level). Then adjust the volume of your audio system.
Display and management of the controls are via the portable device.