Peugeot 308 SW BL 2009.5 Owner's Manual
Manufacturer: PEUGEOT, Model Year: 2009.5, Model line: 308 SW BL, Model: Peugeot 308 SW BL 2009.5Pages: 329, PDF Size: 25.38 MB
Page 111 of 329
!
i
i
100
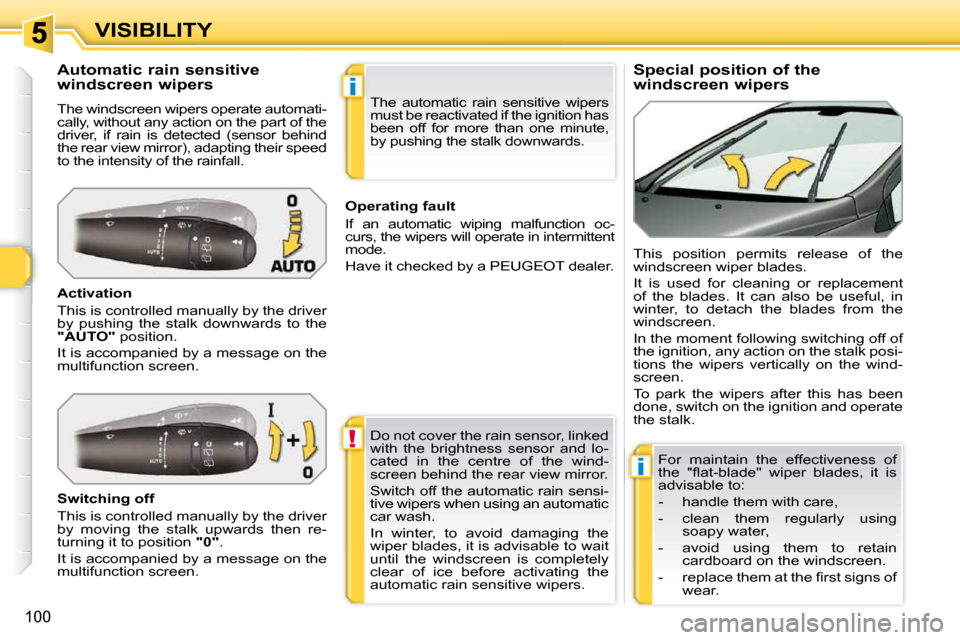
VISIBILITY Special position of the
windscreen wipers
Automatic rain sensitive
windscreen wipers
The windscreen wipers operate automati-
cally, without any action on the part of the
driver, if rain is detected (sensor behind
�t�h�e� �r�e�a�r� �v�i�e�w� �m�i�r�r�o�r�)�,� �a�d�a�p�t�i�n�g� �t�h�e�i�r� �s�p�e�e�d�
to the intensity of the rainfall.
Activation
This is controlled manually by the driver
by pushing the stalk downwards to the
"AUTO" position.
It is accompanied by a message on the
multifunction screen. This position permits release of the
windscreen wiper blades.
It is used for cleaning or replacement
of the blades. It can also be useful, in
winter, to detach the blades from the
windscreen.
In the moment following switching off of
the ignition, any action on the stalk posi-
tions the wipers vertically on the wind-
screen.
To park the wipers after this has been
done, switch on the ignition and operate
the stalk.
Do not cover the rain sensor, linked
with the brightness sensor and lo-
cated in the centre of the wind-
screen behind the rear view mirror.
Switch off the automatic rain sensi-
tive wipers when using an automatic
car wash.
In winter, to avoid damaging the
wiper blades, it is advisable to wait
until the windscreen is completely
clear of ice before activating the
automatic rain sensitive wipers. The automatic rain sensitive wipers
must be reactivated if the ignition has
been off for more than one minute,
by pushing the stalk downwards.
Switching off
This is controlled manually by the driver
by moving the stalk upwards then re-
turning it to position "0" .
It is accompanied by a message on the
multifunction screen. Operating fault
If an automatic wiping malfunction oc-
curs, the wipers will operate in intermittent
mode.
Have it checked by a PEUGEOT dealer.
For maintain the effectiveness of
�t�h�e� �"�fl� �a�t�-�b�l�a�d�e�"� �w�i�p�e�r� �b�l�a�d�e�s�,� �i�t� �i�s�
advisable to:
- handle them with care,
- clean them regularly using soapy water,
- avoid using them to retain cardboard on the windscreen.
� � �-� � �r�e�p�l�a�c�e� �t�h�e�m� �a�t� �t�h�e� �fi� �r�s�t� �s�i�g�n�s� �o�f� wear.
Page 112 of 329

i
i
!
101
VISIBILITY
COURTESY LAMPS
1. Front courtesy
lamp
2. Map reading
lamps
3. Rear side reading
lamps
4. Rear courtesy
lamp Front and rear courtesy lamps
In this position, the courtesy
lamp comes on gradually:
Map reading lamps
� With the ignition on, press the
corresponding switch. With the "permanent lighting" mode,
the duration of lighting varies de-
pending on the context:
- with the ignition off, approximately ten minutes,
- in energy economy mode, approximately thirty seconds,
-
with the engine running, unlimited.
- when the vehicle is unlocked,
- when the key is removed from the ignition,
- when a door is opened,
- when the remote control locking button is activated, in order to locate
your vehicle.
Permanently off.
Permanent lighting. When the front courtesy lamp is in
the "permanent lighting" position,
the rear courtesy lamp will also
come on, unless it is in the "perma-
nently off" position.
To switch off the rear courtesy
lamp, place it in the "permanently
off" position.
Rear side reading
lamps
It switches off gradually:
- when the vehicle is locked,
- when the ignition is switched on,
- 30 seconds after the last door is
closed.
Take care not to place anything in
contact with the courtesy lamps.
� � � �W�i�t�h� �t�h�e� �i�g�n�i�t�i�o�n� �o�n�,� �t�h�e� �fi� �r�s�t� �p�r�e�s�s�
of the reading lamp switch switches
on the reading lamp in "permanent
lighting" mode.
�
Following a second press, it comes on:
- when the vehicle is unlocked,
- when the key is removed from the
ignition,
- when a door is opened,
- when the remote control locking button is pressed, in order to
locate your vehicle.
It switches off gradually:
- when the vehicle is locked,
- when the ignition is switched on,
- 30 seconds after the last door is closed.
Page 113 of 329
i
i
102
VISIBILITY
INTERIOR MOOD LIGHTING
The dimmed passenger compartment
lighting improves visibility in the vehicle
when the light is poor. Different lighting times are avail-
able:
- when the ignition is off, approximately ten minutes,
- in energy economy mode, approximately thirty seconds,
- when the engine is running, no limit.
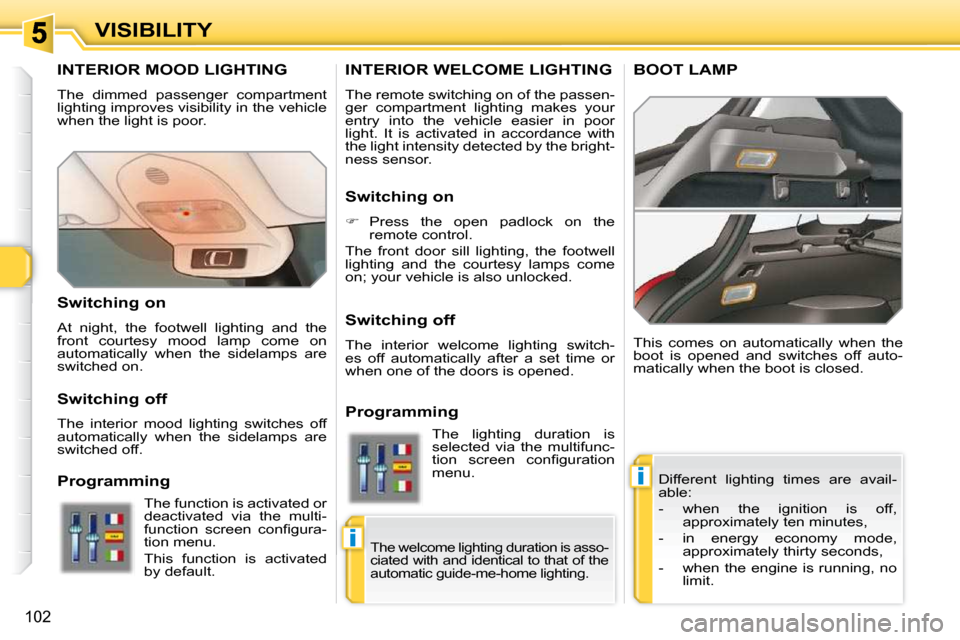
This comes on automatically when the
boot is opened and switches off auto-
matically when the boot is closed.
INTERIOR WELCOME LIGHTING
The remote switching on of the passen-
ger compartment lighting makes your
entry into the vehicle easier in poor
light. It is activated in accordance with
the light intensity detected by the bright-
ness sensor.
BOOT LAMP
Switching on
� Press the open padlock on the
remote control.
The front door sill lighting, the footwell
lighting and the courtesy lamps come
on; your vehicle is also unlocked.
Switching off
The interior welcome lighting switch-
es off automatically after a set time or
when one of the doors is opened.
Programming
Switching on
At night, the footwell lighting and the
front courtesy mood lamp come on
automatically when the sidelamps are
switched on.
Switching off
The interior mood lighting switches off
automatically when the sidelamps are
switched off.
Programming
The welcome lighting duration is asso-
ciated with and identical to that of the
automatic guide-me-home lighting.
The function is activated or
deactivated via the multi-
�f�u�n�c�t�i�o�n� �s�c�r�e�e�n� �c�o�n�fi� �g�u�r�a�-
tion menu.
This function is activated
by default. The lighting duration is
selected via the multifunc-
�t�i�o�n� �s�c�r�e�e�n� �c�o�n�fi� �g�u�r�a�t�i�o�n�
menu.
Page 114 of 329

103
FITTINGS
INTERIOR FITTINGS
1. Spectacles storage
2. Sun visor
(see details on following page)
3. Grab handle with coat hook
4. Toll card/car park ticket windows
(see details on following page)
5. Storage compartment
6. Oddments box
7. Illuminated glove
box
(see details on following page)
8. Door trays
9. Illuminated ashtray
(see details on following page)
10. Storage compartment with
non-slip
mat
11. 12 V accessories socket
(see details on following page)
12. Cup
holder
13. Front armrest
(see details on following page)
14. Storage box
Page 115 of 329
i
104
FITTINGS
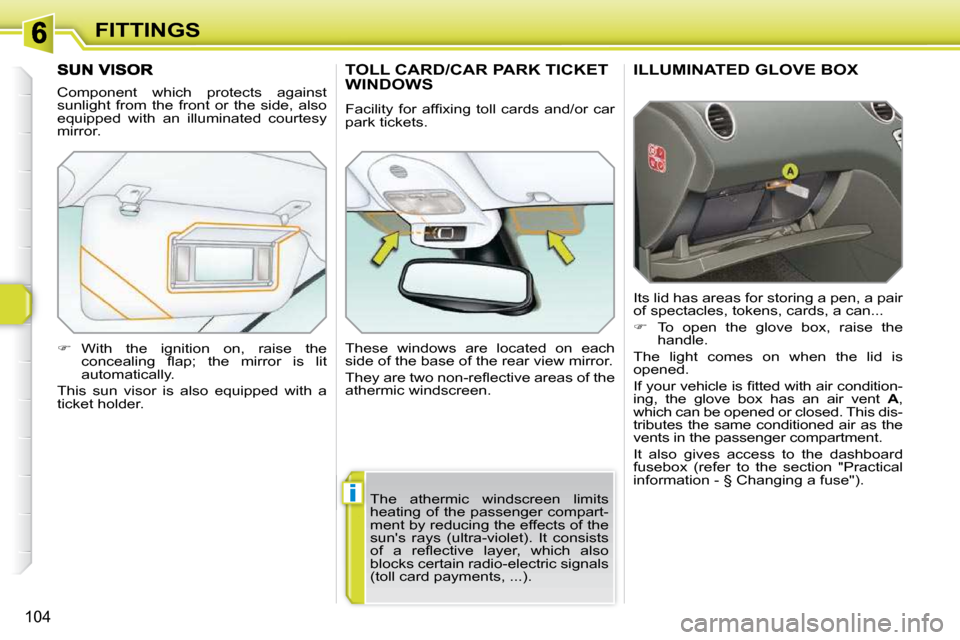
ILLUMINATED GLOVE BOX
Its lid has areas for storing a pen, a pair
of spectacles, tokens, cards, a can...
� To open the glove box, raise the
handle.
The light comes on when the lid is
opened.
� �I�f� �y�o�u�r� �v�e�h�i�c�l�e� �i�s� �fi� �t�t�e�d� �w�i�t�h� �a�i�r� �c�o�n�d�i�t�i�o�n�-
ing, the glove box has an air vent A ,
�w�h�i�c�h� �c�a�n� �b�e� �o�p�e�n�e�d� �o�r� �c�l�o�s�e�d�.� �T�h�i�s� �d�i�s�-
tributes the same conditioned air as the
vents in the passenger compartment.
It also gives access to the dashboard
fusebox (refer to the section "Practical
�i�n�f�o�r�m�a�t�i�o�n� �-� �§� �C�h�a�n�g�i�n�g� �a� �f�u�s�e�"�)�.�
� �C�o�m�p�o�n�e�n�t� �w�h�i�c�h� �p�r�o�t�e�c�t�s� �a�g�a�i�n�s�t�
sunlight from the front or the side, also
equipped with an illuminated courtesy
mirror.
� With the ignition on, raise the
�c�o�n�c�e�a�l�i�n�g� �fl� �a�p�;� �t�h�e� �m�i�r�r�o�r� �i�s� �l�i�t�
automatically.
This sun visor is also equipped with a
ticket holder.
TOLL CARD/CAR PARK TICKET WINDOWS
� �F�a�c�i�l�i�t�y� �f�o�r� �a�f�fi� �x�i�n�g� �t�o�l�l� �c�a�r�d�s� �a�n�d�/�o�r� �c�a�r�
park tickets.
These windows are located on each
side of the base of the rear view mirror.
� �T�h�e�y� �a�r�e� �t�w�o� �n�o�n�-�r�e�fl� �e�c�t�i�v�e� �a�r�e�a�s� �o�f� �t�h�e�
athermic windscreen.
The athermic windscreen limits
�h�e�a�t�i�n�g� �o�f� �t�h�e� �p�a�s�s�e�n�g�e�r� �c�o�m�p�a�r�t�-
ment by reducing the effects of the
�s�u�n�'�s� �r�a�y�s� �(�u�l�t�r�a�-�v�i�o�l�e�t�)�.� �I�t� �c�o�n�s�i�s�t�s�
�o�f� �a� �r�e�fl� �e�c�t�i�v�e� �l�a�y�e�r�,� �w�h�i�c�h� �a�l�s�o�
�b�l�o�c�k�s� �c�e�r�t�a�i�n� �r�a�d�i�o�-�e�l�e�c�t�r�i�c� �s�i�g�n�a�l�s�
(toll card payments, ...).
Page 116 of 329
FITTINGS
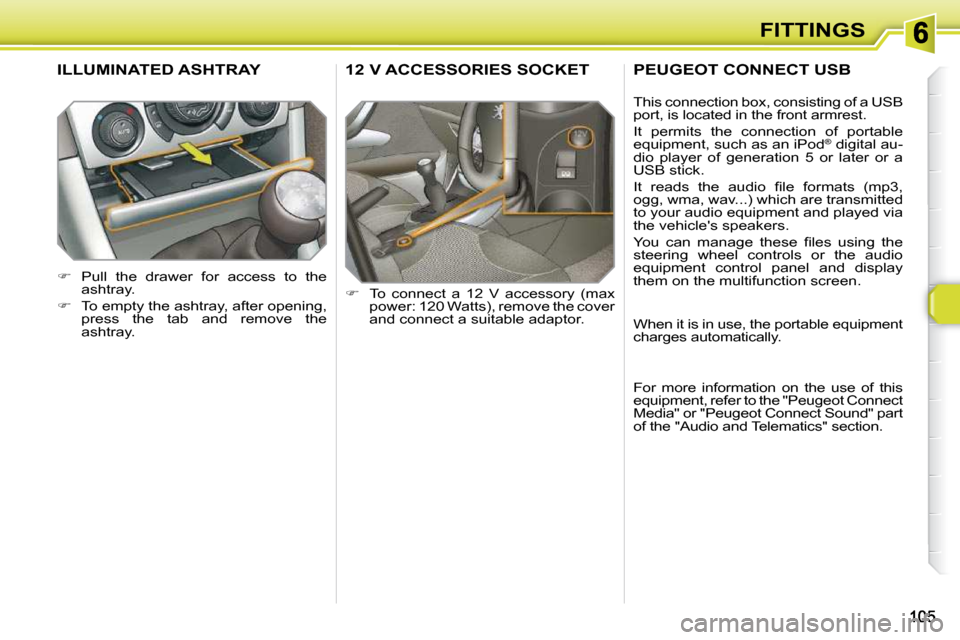
12 V ACCESSORIES SOCKET
� To connect a 12 V accessory (max
power: 120 Watts), remove the cover
and connect a suitable adaptor.
ILLUMINATED ASHTRAY
� Pull the drawer for access to the
ashtray.
� To empty the ashtray, after opening,
press the tab and remove the
ashtray.
PEUGEOT CONNECT USB
This connection box, consisting of a USB
port, is located in the front armrest.
It permits the connection of portable
equipment, such as an iPod ®
� � �d�i�g�i�t�a�l� �a�u�-
dio player of generation 5 or later or a
USB stick.
� �I�t� �r�e�a�d�s� �t�h�e� �a�u�d�i�o� �fi� �l�e� �f�o�r�m�a�t�s� �(�m�p�3�,�
ogg, wma, wav...) which are transmitted
to your audio equipment and played via
the vehicle's speakers.
� �Y�o�u� �c�a�n� �m�a�n�a�g�e� �t�h�e�s�e� �fi� �l�e�s� �u�s�i�n�g� �t�h�e�
steering wheel controls or the audio
equipment control panel and display
them on the multifunction screen.
When it is in use, the portable equipment
charges automatically.
For more information on the use of this
�e�q�u�i�p�m�e�n�t�,� �r�e�f�e�r� �t�o� �t�h�e� �"�P�e�u�g�e�o�t� �C�o�n�n�e�c�t�
�M�e�d�i�a�"� �o�r� �"�P�e�u�g�e�o�t� �C�o�n�n�e�c�t� �S�o�u�n�d�"� �p�a�r�t�
of the "Audio and Telematics" section.
Page 117 of 329
106
FITTINGS
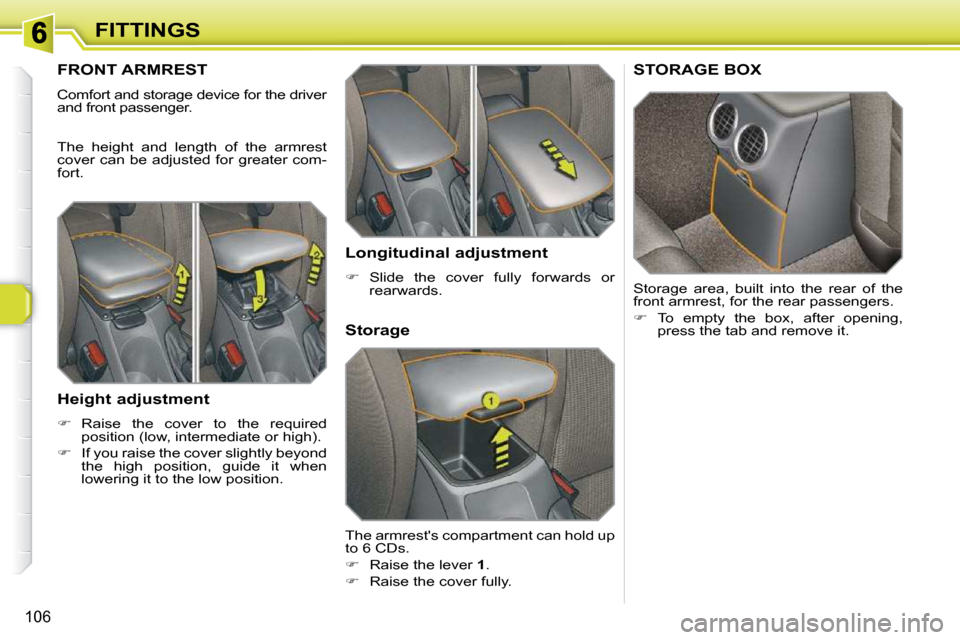
FRONT ARMREST
� �C�o�m�f�o�r�t� �a�n�d� �s�t�o�r�a�g�e� �d�e�v�i�c�e� �f�o�r� �t�h�e� �d�r�i�v�e�r�
and front passenger.
The height and length of the armrest
�c�o�v�e�r� �c�a�n� �b�e� �a�d�j�u�s�t�e�d� �f�o�r� �g�r�e�a�t�e�r� �c�o�m�-
fort.
Height adjustment
� Raise the cover to the required
position (low, intermediate or high).
� If you raise the cover slightly beyond
the high position, guide it when
lowering it to the low position.
STORAGE BOX
Storage area, built into the rear of the
front armrest, for the rear passengers.
� To empty the box, after opening,
press the tab and remove it.
Storage
The armrest's compartment can hold up
�t�o� �6� �C�D�s�.�
� Raise the lever 1 .
� Raise the cover fully.
Longitudinal adjustment
� Slide the cover fully forwards or
rearwards.
Page 118 of 329
FITTINGS
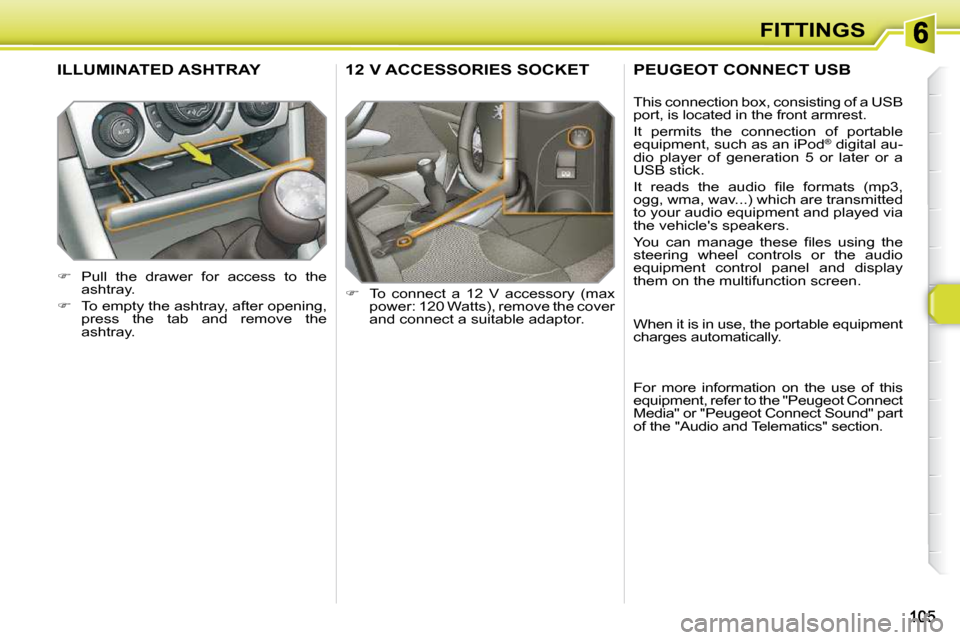
12 V ACCESSORIES SOCKET
� To connect a 12 V accessory (max
power: 120 Watts), remove the cover
and connect a suitable adaptor.
ILLUMINATED ASHTRAY
� Pull the drawer for access to the
ashtray.
� To empty the ashtray, after opening,
press the tab and remove the
ashtray.
PEUGEOT CONNECT USB
This connection box, consisting of a USB
port, is located in the front armrest.
It permits the connection of portable
equipment, such as an iPod ®
� � �d�i�g�i�t�a�l� �a�u�-
dio player of generation 5 or later or a
USB stick.
� �I�t� �r�e�a�d�s� �t�h�e� �a�u�d�i�o� �fi� �l�e� �f�o�r�m�a�t�s� �(�m�p�3�,�
ogg, wma, wav...) which are transmitted
to your audio equipment and played via
the vehicle's speakers.
� �Y�o�u� �c�a�n� �m�a�n�a�g�e� �t�h�e�s�e� �fi� �l�e�s� �u�s�i�n�g� �t�h�e�
steering wheel controls or the audio
equipment control panel and display
them on the multifunction screen.
When it is in use, the portable equipment
charges automatically.
For more information on the use of this
�e�q�u�i�p�m�e�n�t�,� �r�e�f�e�r� �t�o� �t�h�e� �"�P�e�u�g�e�o�t� �C�o�n�n�e�c�t�
�M�e�d�i�a�"� �o�r� �"�P�e�u�g�e�o�t� �C�o�n�n�e�c�t� �S�o�u�n�d�"� �p�a�r�t�
of the "Audio and Telematics" section.
Page 119 of 329
!
!
107
FITTINGS
To avoid any risk of jamming of the
pedals:
� � � �-� � �o�n�l�y� �u�s�e� �m�a�t�s� �w�h�i�c�h� �a�r�e� �s�u�i�t�e�d� �t�o� �t�h�e� �fi� �x�i�n�g�s� �a�l�r�e�a�d�y� �p�r�e�s�e�n�t�
�i�n� �t�h�e� �v�e�h�i�c�l�e�;� �t�h�e�i�r� �u�s�e� �i�s�
essential,
� � �-� � �n�e�v�e�r� �fi� �t� �o�n�e� �m�a�t� �o�n� �t�o�p� �o�f� another.
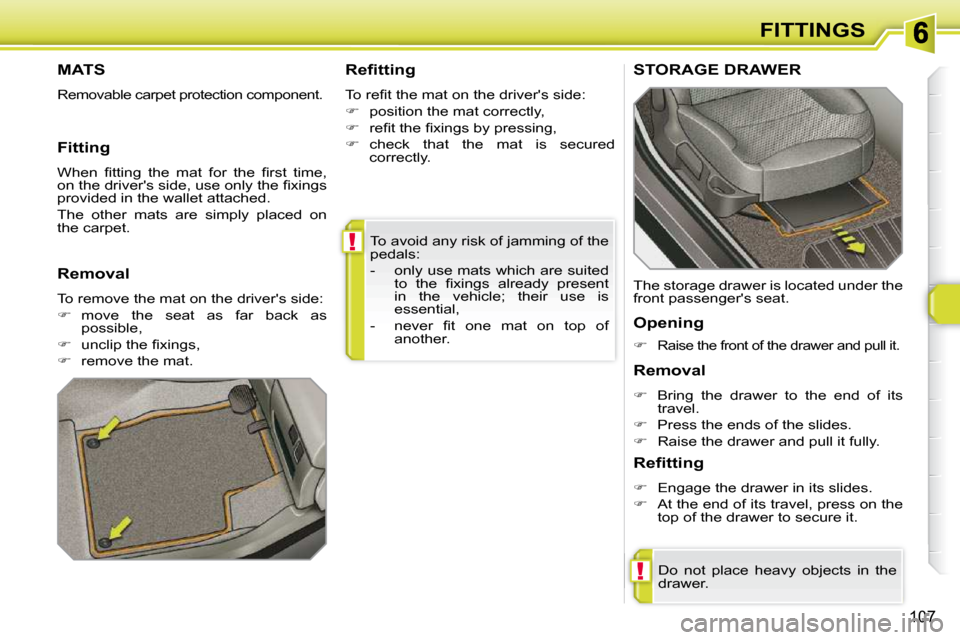
MATS
Removable carpet protection component. Refitting
� �T�o� �r�e�fi� �t� �t�h�e� �m�a�t� �o�n� �t�h�e� �d�r�i�v�e�r�'�s� �s�i�d�e�:�
� position the mat correctly,
� � � �r�e�fi� �t� �t�h�e� �fi� �x�i�n�g�s� �b�y� �p�r�e�s�s�i�n�g�,�
� check that the mat is secured
correctly.
Fitting
� �W�h�e�n� �fi� �t�t�i�n�g� �t�h�e� �m�a�t� �f�o�r� �t�h�e� �fi� �r�s�t� �t�i�m�e�,�
�o�n� �t�h�e� �d�r�i�v�e�r�'�s� �s�i�d�e�,� �u�s�e� �o�n�l�y� �t�h�e� �fi� �x�i�n�g�s�
provided in the wallet attached.
The other mats are simply placed on
the carpet.
Removal
To remove the mat on the driver's side:
� move the seat as far back as
possible,
� � � �u�n�c�l�i�p� �t�h�e� �fi� �x�i�n�g�s�,�
� remove the mat.
STORAGE DRAWER
Opening
�
Raise the front of the drawer and pull it.
� �D�o� �n�o�t� �p�l�a�c�e� �h�e�a�v�y� �o�b�j�e�c�t�s� �i�n� �t�h�e�
drawer.
Removal
� Bring the drawer to the end of its
travel.
� Press the ends of the slides.
� Raise the drawer and pull it fully.
Refitting
� Engage the drawer in its slides.
� At the end of its travel, press on the
top of the drawer to secure it.
The storage drawer is located under the
front passenger's seat.
Page 120 of 329
!
108
FITTINGS
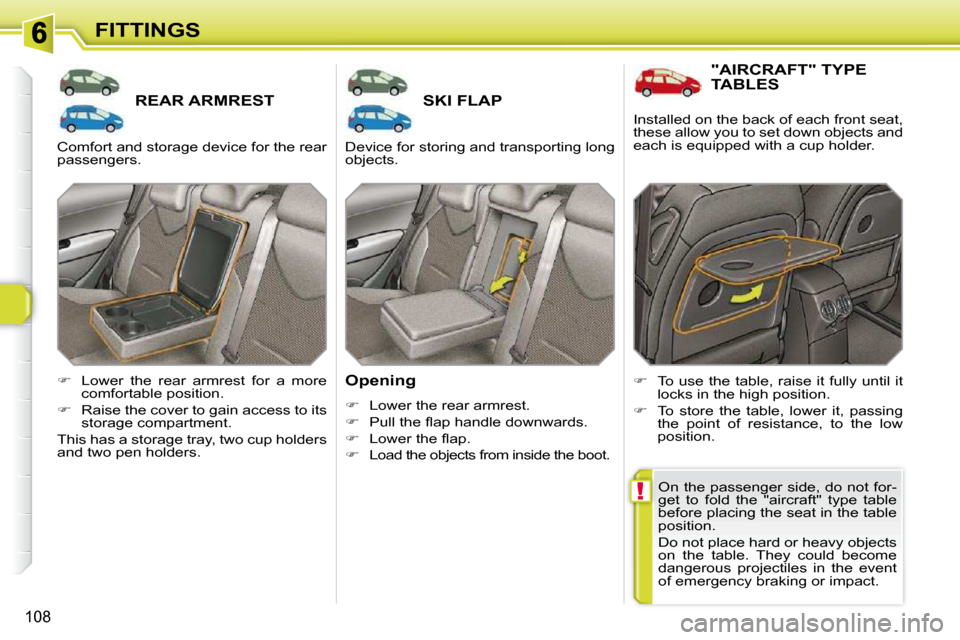
REAR ARMREST SKI FLAP
Opening
� Lower the rear armrest.
� � � �P�u�l�l� �t�h�e� �fl� �a�p� �h�a�n�d�l�e� �d�o�w�n�w�a�r�d�s�.�
� � � �L�o�w�e�r� �t�h�e� �fl� �a�p�.�
� Load the objects from inside the boot.
� Lower the rear armrest for a more
comfortable position.
� Raise the cover to gain access to its
storage compartment.
This has a storage tray, two cup holders
and two pen holders.
"AIRCRAFT" TYPE TABLES
� To use the table, raise it fully until it
locks in the high position.
� To store the table, lower it, passing
the point of resistance, to the low
position.
� �O�n� �t�h�e� �p�a�s�s�e�n�g�e�r� �s�i�d�e�,� �d�o� �n�o�t� �f�o�r�-
get to fold the "aircraft" type table
before placing the seat in the table
position.
� �D�o� �n�o�t� �p�l�a�c�e� �h�a�r�d� �o�r� �h�e�a�v�y� �o�b�j�e�c�t�s�
on the table. They could become
dangerous projectiles in the event
of emergency braking or impact.
� �C�o�m�f�o�r�t� �a�n�d� �s�t�o�r�a�g�e� �d�e�v�i�c�e� �f�o�r� �t�h�e� �r�e�a�r�
passengers.
� �D�e�v�i�c�e� �f�o�r� �s�t�o�r�i�n�g� �a�n�d� �t�r�a�n�s�p�o�r�t�i�n�g� �l�o�n�g�
objects. Installed on the back of each front seat,
these allow you to set down objects and
each is equipped with a cup holder.