fuse box Peugeot 406 Break 2003 Owner's Manual
[x] Cancel search | Manufacturer: PEUGEOT, Model Year: 2003, Model line: 406 Break, Model: Peugeot 406 Break 2003Pages: 177, PDF Size: 2.2 MB
Page 3 of 177

17-02-2003
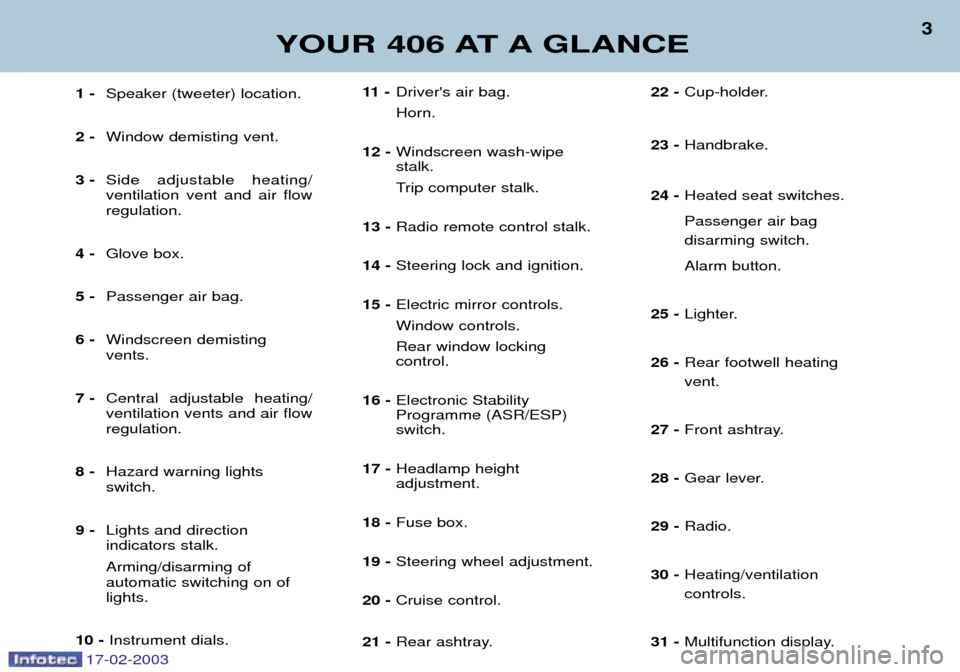
11 -Driver's air bag. Horn.
12 - Windscreen wash-wipe stalk.
Trip computer stalk.
13 - Radio remote control stalk.
14 - Steering lock and ignition.
15 - Electric mirror controls.Window controls.Rear window locking control.
16 - Electronic Stability Programme (ASR/ESP)switch.
17 - Headlamp height adjustment.
18 - Fuse box.
19 - Steering wheel adjustment.
20 - Cruise control.
21 - Rear ashtray. 22 -
Cup-holder.
23 - Handbrake.
24 - Heated seat switches. Passenger air bag disarming switch. Alarm button.
25 - Lighter.
26 - Rear footwell heating vent.
27 - Front ashtray.
28 - Gear lever.
29 - Radio.
30 - Heating/ventilation controls.
31 - Multifunction display.
YOUR 406 AT A GLANCE
3
1 - Speaker (tweeter) location.
2 - Window demisting vent.
3 - Side adjustable heating/ ventilation vent and air flowregulation.
4 - Glove box.
5 - Passenger air bag.
6 - Windscreen demistingvents.
7 - Central adjustable heating/ventilation vents and air flowregulation.
8 - Hazard warning lightsswitch.
9 - Lights and directionindicators stalk. Arming/disarming of automatic switching on oflights.
10 - Instrument dials.
Page 146 of 177

17-02-2003
PETROL/LPG TWIN FUEL VERSION169
Puncture Insulated storage compartment This is located in the boot and con- tains:
Ð the temporary tyre repair cans 1
(your 406 LPG does not have a spare wheel),
Ð the adaptors 2necessary for filling
the LPG tank in some countries,
Ð the towing eye 3.
Fuses The LPG functions are protected by the two fuses Ain the fuse box
located in the engine compartment.
Using the repair cans (Refer to the directions on the cans also)
Ð if possible, remove the object
which caused the puncture,
Ð rotate the wheel so that the valve is in the same position as the figures 2 or 10 on a clock,
Ð shake the cans vigorously before use. In very cold weather, warmthe cans between your hands forfew minutes,
Ð hold the valve with one hand and with the other press the injectionnozzle on the can firmly onto thevalve, holding it straight,
Ð maintain the pressure firmly for one minute, Ð carry out the same operation with
the second can, then drive imme-
diately, at a moderate speed , to
the nearest garage.
The cans enable you to carry out
a temporary repair. After use, the tyre must be changed. As the cans are pressurized, they must not be exposed to a temper-ature above 50 ¡C. Store them away from heat in the insulated storage compartment.
Page 152 of 177

17-02-2003
CHANGING A FUSE The fuse boxes are under the fascia and in the engine compartment. Fascia fuse box
Turn the three screws a quarter turn with a coin. Pull at Aand tilt the
cover to access the fuses. Removing and changing a fuse Before changing a fuse you must find out the cause of the fault and have it put
right. The fuse numbers are indicated on the fuse box. Use the special pliers
Aattached to the box.
Always change a faulty fuse for one of the same rating.
Correct Incorrect Pliers A
Remove the fascia panel lower trim to access the built-in systems interface.
Fuse n o
. Rating Functions
A 20 A Locking/Unlocking, Deadlock- ing.
B 10 A Rear fog lamps.
C 40 A Demisting the mirrors.
D 15 A Rear screen wiper.
E 30 A Electric windows.
F 15 A Supply to instrument panel -
Display - Audio equipment - Satellite navigation system - Air conditioning.
MAINTENANCE OF YOUR 406 41
Page 153 of 177

17-02-2003
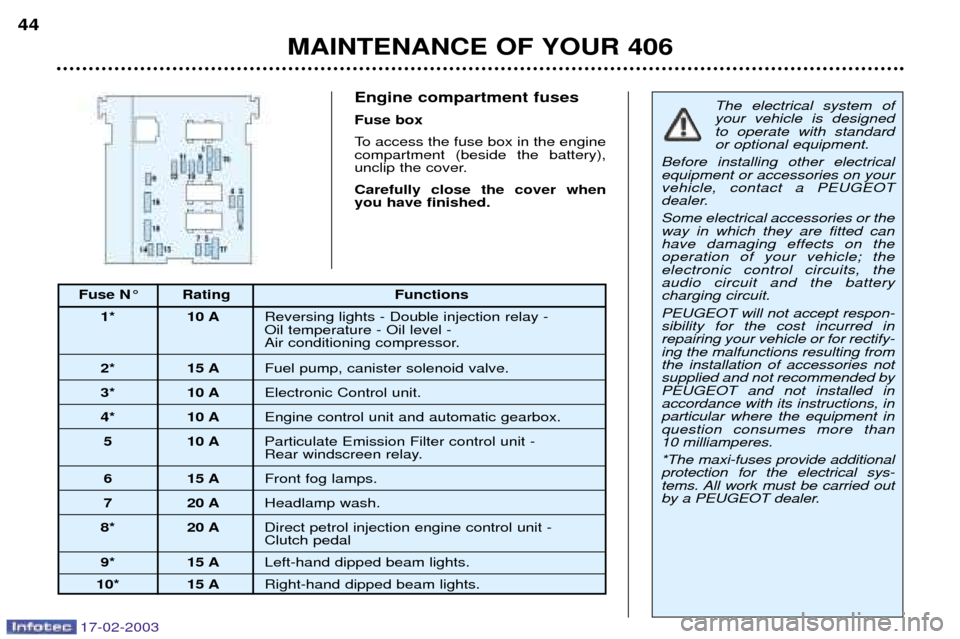
Fuse N¡ Rating Functions1* 10 A Reversing lights - Double injection relay - Oil temperature - Oil level -
Air conditioning compressor.
2* 15 A Fuel pump, canister solenoid valve.
3* 10 AElectronic Control unit.
4* 10 AEngine control unit and automatic gearbox.
5 10 A Particulate Emission Filter control unit -
Rear windscreen relay.
6 15 A Front fog lamps.
7 20 AHeadlamp wash.
8* 20 A Direct petrol injection engine control unit -
Clutch pedal
9* 15 A Left-hand dipped beam lights.
10* 15 A Right-hand dipped beam lights.
Engine compartment fuses Fuse box
To access the fuse box in the engine compartment (beside the battery),
unclip the cover. Carefully close the cover when you have finished.The electrical system of your vehicle is designedto operate with standardor optional equipment.
Before installing other electricalequipment or accessories on yourvehicle, contact a PEUGEOT
dealer. Some electrical accessories or the way in which they are fitted canhave damaging effects on theoperation of your vehicle; theelectronic control circuits, theaudio circuit and the batterycharging circuit. PEUGEOT will not accept respon- sibility for the cost incurred inrepairing your vehicle or for rectify-ing the malfunctions resulting fromthe installation of accessories notsupplied and not recommended byPEUGEOT and not installed inaccordance with its instructions, inparticular where the equipment inquestion consumes more than
10 milliamperes. *The maxi-fuses provide additional protection for the electrical sys-
tems. All work must be carried out
by a PEUGEOT dealer.
MAINTENANCE OF YOUR 406
44
Page 155 of 177

17-02-2003
PETROL/LPG TWIN FUEL VERSION169
Puncture Insulated storage compartment This is located in the boot and con- tains:
Ð the temporary tyre repair cans 1
(your 406 LPG does not have a spare wheel),
Ð the adaptors 2necessary for filling
the LPG tank in some countries,
Ð the towing eye 3.
Fuses The LPG functions are protected by the two fuses Ain the fuse box
located in the engine compartment.
Using the repair cans (Refer to the directions on the cans also)
Ð if possible, remove the object
which caused the puncture,
Ð rotate the wheel so that the valve is in the same position as the figures 2 or 10 on a clock,
Ð shake the cans vigorously before use. In very cold weather, warmthe cans between your hands forfew minutes,
Ð hold the valve with one hand and with the other press the injectionnozzle on the can firmly onto thevalve, holding it straight,
Ð maintain the pressure firmly for one minute, Ð carry out the same operation with
the second can, then drive imme-
diately, at a moderate speed , to
the nearest garage.
The cans enable you to carry out
a temporary repair. After use, the tyre must be changed. As the cans are pressurized, they must not be exposed to a temper-ature above 50 ¡C. Store them away from heat in the insulated storage compartment.
Page 156 of 177

17-02-2003
CHANGING A FUSE The fuse boxes are under the fascia and in the engine compartment. Fascia fuse box
Turn the three screws a quarter turn with a coin. Pull at Aand tilt the
cover to access the fuses. Removing and changing a fuse Before changing a fuse you must find out the cause of the fault and have it put
right. The fuse numbers are indicated on the fuse box. Use the special pliers
Aattached to the box.
Always change a faulty fuse for one of the same rating.
Correct Incorrect Pliers A
Remove the fascia panel lower trim to access the built-in systems interface.
Fuse n o
. Rating Functions
A 20 A Locking/Unlocking, Deadlock- ing.
B 10 A Rear fog lamps.
C 40 A Demisting the mirrors.
D 15 A Rear screen wiper.
E 30 A Electric windows.
F 15 A Supply to instrument panel -
Display - Audio equipment - Satellite navigation system - Air conditioning.
MAINTENANCE OF YOUR 406 41
Page 157 of 177

17-02-2003
Fuse N¡ RatingFunctions
1 shuntCentral air bag.
25 AVentilation controls.
3 10 A Instrument panel.
45 AIgnition +ve signal for Built-in Systems Interface.
5Ð Not used.
6 10 ASteering wheel stalk.
7 15 AAlarm siren.
8 10 ASatellite navigation system.
95 ABattery +ve signal for Built-in Systems Interface.
10 15 A Audio equipment.
11 10 AThird brake light.
12 10 A Right-hand brake light.
13 20 ADriver's electric window.
14 30 ARear window power.
15 ÐBattery +ve towing socket.
16 20 AMemorisation of seats.
17 20 APassenger's electric seat.
18 10 A Lighter lighting - Display - Lighting for switches and ash tray, automatic gearbox selector lever.
Fascia fuse box
MAINTENANCE OF YOUR 406
42
Page 158 of 177

17-02-2003
Fuse N¡ RatingFunctions
19 10 ARear fog lamps.
20 10 ARear right and front left side light.
21 10 ARear left and front right side light.
22 10 A Glove box lighting - Map reading light - Courtesy mirror light - Front and rear courtesy lights.
Lighting for electric window pad - Electrochrome rear view mirror.
23 20 A Lighter.
24 ÐNot used.
25 20 AAudio equipment.
26 ÐNot used.
27 5 ARear window relay.
28 15 AHeated seats.
R5 AReplacement fuse.
R2 10 A Replacement fuse.
R3 30 AReplacement fuse.
R4 20 AReplacement fuse.
R5 15 A Replacement fuse.
MAINTENANCE OF YOUR 406 43