ESP Peugeot 508 2016 Service Manual
[x] Cancel search | Manufacturer: PEUGEOT, Model Year: 2016, Model line: 508, Model: Peugeot 508 2016Pages: 371, PDF Size: 12.12 MB
Page 144 of 371
142
508_en_Chap05_securite_ed01-2016
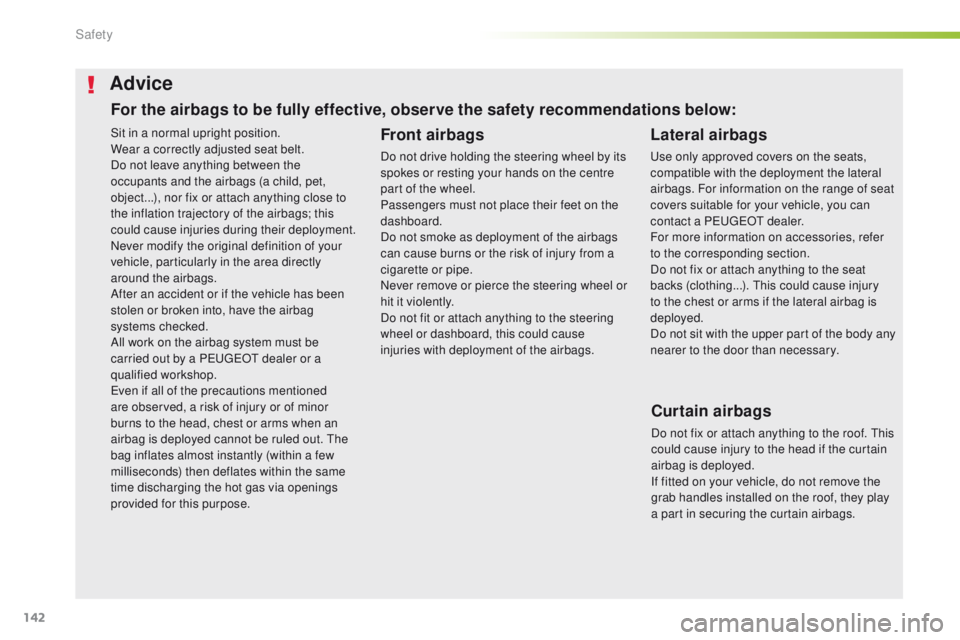
Sit in a normal upright position.
Wear a correctly adjusted seat belt.
Do not leave anything between the
occupants and the airbags (a child, pet,
object...), nor fix or attach anything close to
the inflation trajectory of the airbags; this
could cause injuries during their deployment.
Never modify the original definition of your
vehicle, particularly in the area directly
around the airbags.
After an accident or if the vehicle has been
stolen or broken into, have the airbag
systems checked.
All work on the airbag system must be
carried out by a P
e
uge
Ot
dealer or a
qualified workshop.
ev
en if all of the precautions mentioned
are observed, a risk of injury or of minor
burns to the head, chest or arms when an
airbag is deployed cannot be ruled out.
t
h
e
bag inflates almost instantly (within a few
milliseconds) then deflates within the same
time discharging the hot gas via openings
provided for this purpose.Lateral airbags
use only approved covers on the seats,
compatible with the deployment the lateral
airbags. For information on the range of seat
covers suitable for your vehicle, you can
contact a P
e
uge
Ot
dealer.
For more information on accessories, refer
to the corresponding section.
Do not fix or attach anything to the seat
backs (clothing...).
t
h
is could cause injury
to the chest or arms if the lateral airbag is
deployed.
Do not sit with the upper part of the body any
nearer to the door than necessary.
Front airbags
Do not drive holding the steering wheel by its
spokes or resting your hands on the centre
part of the wheel.
Passengers must not place their feet on the
dashboard.
Do not smoke as deployment of the airbags
can cause burns or the risk of injury from a
cigarette or pipe.
Never remove or pierce the steering wheel or
hit it violently.
Do not fit or attach anything to the steering
wheel or dashboard, this could cause
injuries with deployment of the airbags.
Advice
Curtain airbags
Do not fix or attach anything to the roof. th is
could cause injury to the head if the curtain
airbag is deployed.
If fitted on your vehicle, do not remove the
grab handles installed on the roof, they play
a part in securing the curtain airbags.
For the airbags to be fully effective, observe the safety recommendations below:
Safety
Page 149 of 371
147
AR
B g
ąØąśąÜą×ąōąÉ ąØąĢ ąĖąĮčüčéą░ą╗ąĖčĆą░ą╣č鹥 ą┤ąĄčéčüą║ąŠ čüč鹊ą╗č湥 ąĮą░ čüąĄą┤ą░ą╗ą║ą░ čü ąÉąÜąóąśąÆąśąĀąÉąØąÉ ą┐čĆąĄą┤ąĮą░ ąÆą¬ąŚąöąŻą©ąØąÉ ąÆą¬ąŚąōąøąÉąÆąØąśą” ąÉ. ąóąŠą▓ą░ ą╝ąŠąČąĄ ą┤ą░ ą┐čĆąĖčćąĖąĮąĖ
ąĪą£ą¬ąĀąó ąĖą╗ąĖ ąĪąĢąĀąśą×ąŚąØą× ąØąÉąĀąÉąØą»ąÆąÉąØąĢ ąĮą░ ą┤ąĄč鹥č鹊.
CSNIKDY neumis┼źujte d─øtsk├® z├Īdr┼Šn├® za┼Ö├Łzen├Ł orientovan├® sm─ørem dozadu na sedadlo chr├Īn─øn├® AKTIVOVAN├ØM ─Źeln├Łm AIRBAGEM. Hroz├Ł
nebezpe─Ź├Ł SMRTI D├ŹT─ÜTE nebo V├ü ┼ĮN├ēHO ZR AN─ÜN├Ź.
DABrug ALDRIg en bagudvendt barnestol p├ź et s├”de, der er beskyttet af en AKtI V AIRBAg. B ARNe t risikerer at blive ALVORLIg t
K VÆSt et eller DR ÆBt.
DeMontieren Sie auf einem Sitz mit AKtI VIeRt eM F ront-Airbag NIeM ALS einen Kindersitz oder eine Babyschale entgegen der
Fahrtrichtung, das Kind k├Čnnte schwere oder sogar t├Čdliche Verletzungen erleiden.
eL╬£╬Ę ŽćŽü╬ĘŽā╬╣╬╝╬┐ŽĆ╬┐╬╣╬Ą╬»Žä╬Ą ╬Ā╬¤╬ż╬Ģ ŽĆ╬▒╬╣╬┤╬╣╬║Žī ╬║╬¼╬Ė╬╣Žā╬╝╬▒ ╬╝╬Ą Žä╬Ę╬Į ŽĆ╬╗╬¼Žä╬Ę Žä╬┐Žģ ŽĆŽü╬┐Žé Žä╬┐ ╬Ą╬╝ŽĆŽüŽīŽé ╬╝╬ŁŽü╬┐Žé Žä╬┐Žģ ╬▒ŽģŽä╬┐╬║╬╣╬Į╬«Žä╬┐Žģ, Žā╬Ą ╬╝╬╣╬▒ ╬Ė╬ŁŽā╬Ę ŽĆ╬┐Žģ ŽĆŽü╬┐ŽāŽä╬▒Žä╬ĄŽŹ╬ĄŽä╬▒╬╣ ╬▒ŽĆŽī
╬£╬Ģ╬ż╬®╬Ā╬Ö╬Ü╬¤ ╬▒╬ĄŽüŽīŽā╬▒╬║╬┐ ŽĆ╬┐Žģ ╬Ą╬»╬Į╬▒╬╣ ╬Ģ╬Ø╬Ģ╬Ī╬ō╬¤╬Ż. ╬æŽģŽäŽī ╬╝ŽĆ╬┐Žü╬Ą╬» ╬Į╬▒ ╬ŁŽć╬Ą╬╣ Žā╬▒╬Į ŽāŽģ╬Į╬ŁŽĆ╬Ą╬╣╬▒ Žä╬┐ ╬ś╬æ╬Ø╬æ╬ż╬¤ ╬« Žä╬┐ ╬Ż╬¤╬Æ╬æ╬Ī╬¤ ╬ż╬Ī╬æ╬ź╬£╬æ╬ż╬Ö╬Ż╬£╬¤ Žä╬┐Žģ ╬Ā╬æ╬Ö╬ö╬Ö╬¤╬ź
eNNeVeR use a rear ward facing child restraint on a seat protected by an ACtI Ve AIRBAg in front of it, DeAtH o r SeR IOuS I NJuR Y to the
CHILD can occur
eSNO INStALAR NuN CA un sistema de retenci├│n para ni├▒os de espaldas al sentido de la marcha en un asiento protegido mediante un
AIRBAG frontal ACTIVADO, ya que podr├Ła causar lesiones GR AVES o incluso la MUERTE del ni├▒o.
et├ärge MItte KuN AgI paigaldage "seljaga s├Ąidusuunas" lapseistet juhi k├Ąrvalistmele, mille eS I tuR VAPADI on AKt IVe eR I tuD . tu
r vapadja avanemine v├Ąib last t├Ģ SISeLt v├Ąi eLuO HtL IKuLt vigastada.
FI├äL├ä KOSK A AN aseta lapsen tur vaistuinta selk├ż ajosuuntaan istuimelle, jonka edess├ż suojana on k├żytt├Č├Čn aktivoitu tuR VAtY YNY. Sen
laukeaminen voi aiheuttaa LAPSeN KuO LeM AN tai VAK AVAN LOuK K A ANt uM ISeN .
FRNE JAMAIS installer de syst├©me de retenue pour enfants faisant face vers lŌĆÖarri├©re sur un si├©ge prot├®g├® par un COUSSIN GONFLABLE
frontal ACTIV├ē.
Cela peut provoquer la MOR
t
de lŌĆÖ
eN
FAN
t
ou le BL
eS
S
eR
g
R
AV
eMeNt
HRNIK ADA ne postavljati dje─Źju sjedalicu le─æima u smjeru vo┼Šnje na sjedalo za┼Īti─ćeno UKLJU─īENIM prednjim ZR A─īNIM JASTUKOM. To bi
moglo uzrokovati SMRT ili TE┼ĀKU OZLJEDU djeteta.
HuSOHA ne haszn├Īljon menetir├Īnynak h├Īttal beszerelt gyermek├╝l├®st AKTIV├üLT (BEK APCSOLT) FRONTL├ēGZS├üKK AL v├®dett ├╝l├®sen. Ez a
gyermek HAL├üL├üT vagy S├ÜLYOS S├ēR├£L├ēS├ēT okozhatja.
ItNON installare MAI seggiolini per bambini posizionati in senso contrario a quello di marcia su un sedile protetto da un AIRBAg frontale
At tI VAtO . Ci├▓ potrebbe provocare la MORt e o FeR It e gR AVI al bambino.
508_en_Chap05_securite_ed01-2016
5
Safety
Page 162 of 371
160
508_en_Chap06_conduite_ed01-2016
When towing
Distribution of loads
F Distribute the load in the trailer so that the heaviest items are as close as possible to
the axle and the nose weight approaches
the maximum permitted without
exceeding
it.
Air density decreases with altitude, thus
reducing engine performance. Above
1
000 metres, the maximum towed load must
be reduced by 10
% for every 1 000 metres of
altitude.
Side wind
F take into account the increased sensitivity to side wind.
Cooling
towing a trailer on a slope increases the
temperature of the coolant.
As the fan is electrically controlled, its cooling
capacity is not dependent on the engine speed.
F
t
o l
ower the engine speed, reduce your
speed.
th
e maximum towed load on a long incline
depends on the gradient and the ambient
temperature.
In all cases, keep a check on the coolant
temperature.
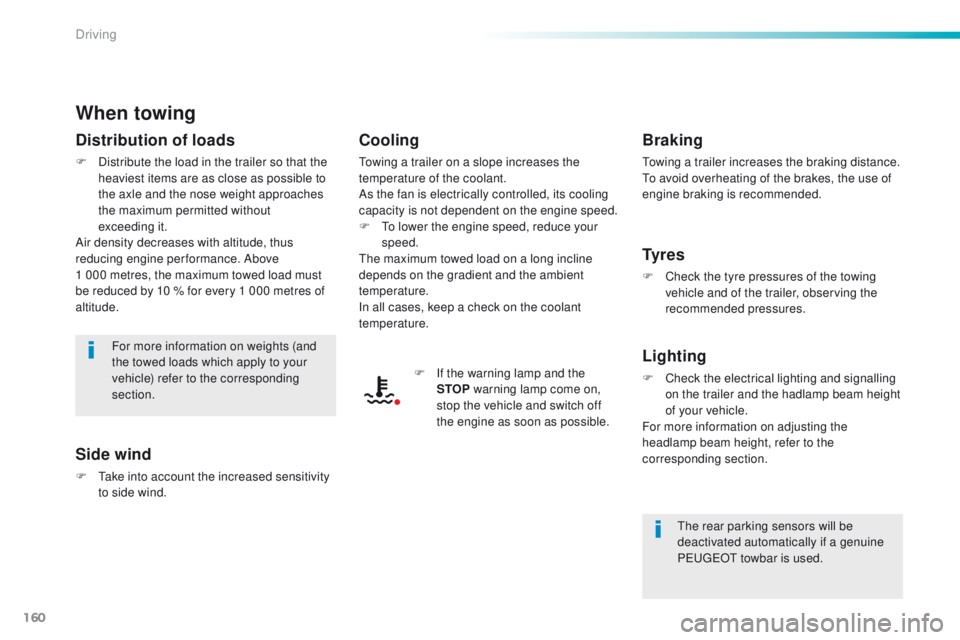
F
I
f the warning lamp and the
STOP warning lamp come on,
stop the vehicle and switch off
the engine as soon as possible.
Braking
towing a trailer increases the braking distance.to a void overheating of the brakes, the use of
engine braking is recommended.
Ty r e s
F Check the tyre pressures of the towing vehicle and of the trailer, observing the
recommended pressures.
Lighting
F Check the electrical lighting and signalling on the trailer and the hadlamp beam height
of your vehicle.
For more information on adjusting the
headlamp beam height, refer to the
corresponding section.
th
e rear parking sensors will be
deactivated automatically if a genuine
P
e
uge
Ot
towbar is used.
For more information on weights (and
the towed loads which apply to your
vehicle) refer to the corresponding
section.
Driving
Page 177 of 371
175
508_en_Chap06_conduite_ed01-2016
gear shift indicator*
Operation
Depending on the driving situation and your
vehicle's equipment, the system may advise
you to skip one (or more) gear(s). You can
follow this instruction without engaging the
intermediate gears.
the
gear engagement recommendations must
not be considered compulsory. In fact, the
configuration of the road, the amount of traffic
and safety remain determining factors when
choosing the best gear.
t
her
efore, the driver
remains responsible for deciding whether or not
to follow the advice given by the system.
th
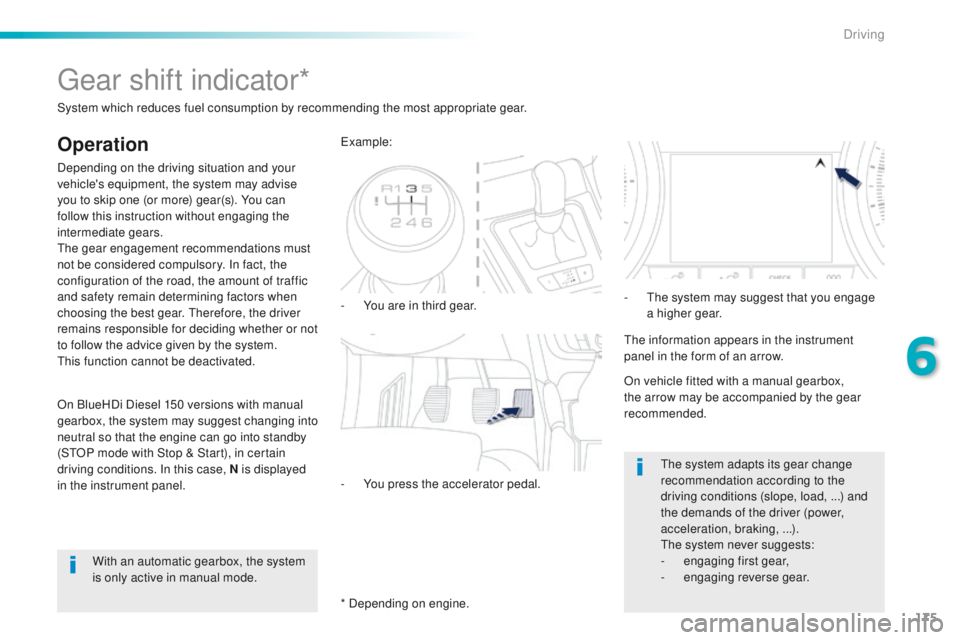
is function cannot be deactivated. -
Y
ou are in third gear.
ex
ample:
-
Y
ou press the accelerator pedal.
System which reduces fuel consumption by recommending the most appropriate gear.
With an automatic gearbox, the system
is only active in manual mode. * Depending on engine.
th
e information appears in the instrument
panel in the form of an arrow.
th
e system adapts its gear change
recommendation according to the
driving conditions (slope, load, ...) and
the demands of the driver (power,
acceleration, braking, ...).
th
e system never suggests:
-
e
ngaging first gear,
-
enga
ging reverse gear.
On vehicle fitted with a manual gearbox,
the arrow may be accompanied by the gear
recommended.
On BlueHDi Diesel 150 versions with manual
gearbox, the system may suggest changing into
neutral so that the engine can go into standby
(S
tO
P mode with Stop & Start), in certain
driving conditions. In this case, N is displayed
in the instrument panel. -
t
h
e system may suggest that you engage
a higher gear.
6
Driving
Page 179 of 371
177
508_en_Chap06_conduite_ed01-2016
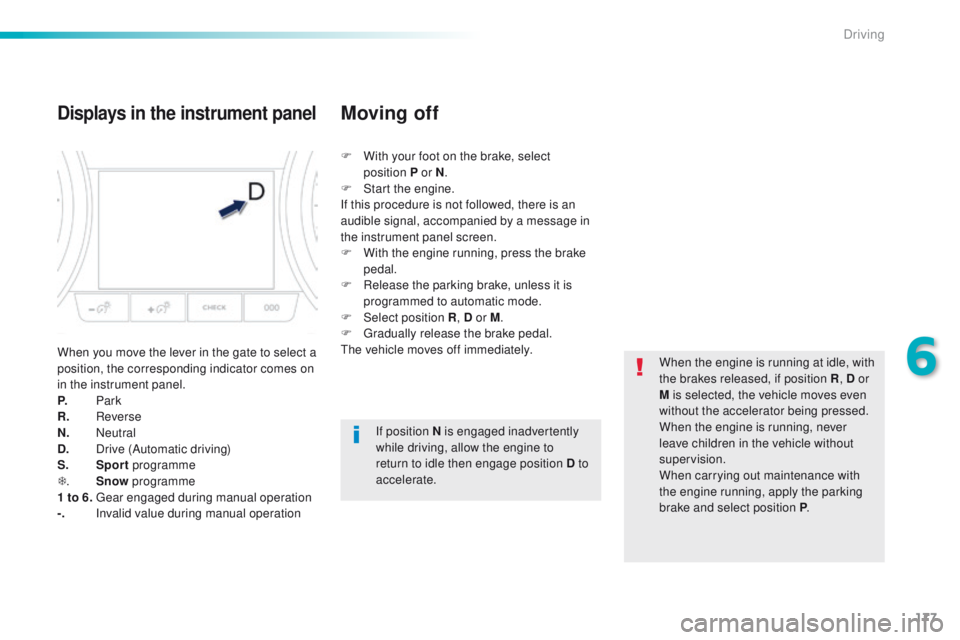
Displays in the instrument panel
When you move the lever in the gate to select a
position, the corresponding indicator comes on
in the instrument panel.
P.
Park
R.
Reverse
N.
Neutral
D.
D
rive (Automatic driving)
S.
Sport programme
T .
Sn ow pro
gramme
1 to 6.
g
ea
r engaged during manual operation
-.
I
nvalid value during manual operation F
W
ith your foot on the brake, select
position
P or N
.
F
S
tart the engine.
If this procedure is not followed, there is an
audible signal, accompanied by a message in
the instrument panel screen.
F
W
ith the engine running, press the brake
pedal.
F
R
elease the parking brake, unless it is
programmed to automatic mode.
F
Sel
ect position R
, D or M.
F g
r
adually release the brake pedal.th
e vehicle moves off immediately.
Moving off
When the engine is running at idle, with
the brakes released, if position R
, D or
M is selected, the vehicle moves even
without the accelerator being pressed.
When the engine is running, never
leave children in the vehicle without
supervision.
When carrying out maintenance with
the engine running, apply the parking
brake and select position P .
If position N is engaged inadvertently
while driving, allow the engine to
return to idle then engage position D to
accelerate.
6
Driving
Page 188 of 371
186
508_en_Chap06_conduite_ed01-2016
Tyre under-inflation detection
System which automatically checks the pressures of the tyres while driving.the system continuously monitors the pressures of the four tyres, as soon as the vehicle is moving.
th
e tyre under-inflation detection
system is an aid to driving which does
not replace the need for vigilance on
the part of the driver.
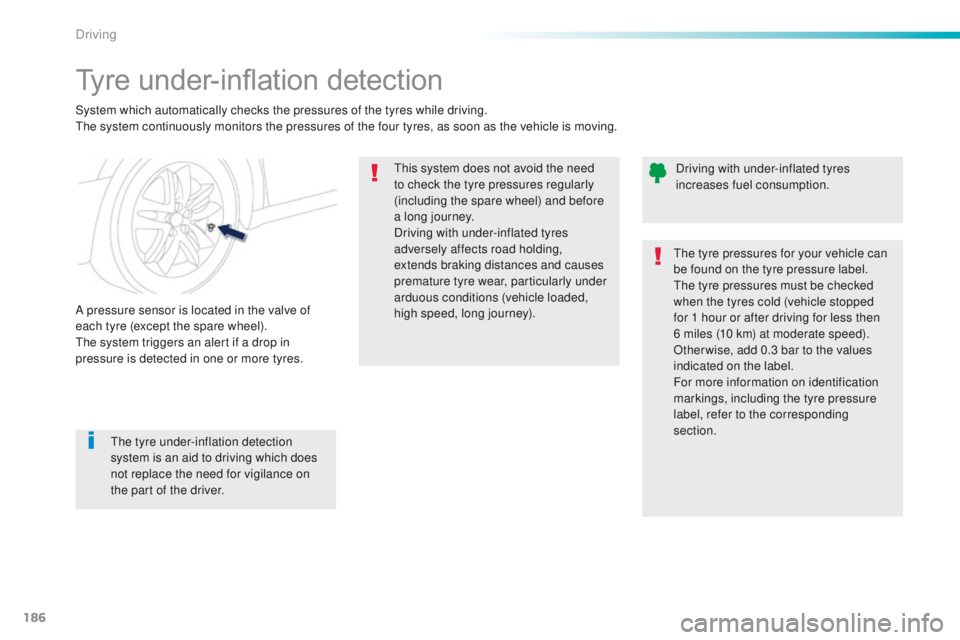
A pressure sensor is located in the valve of
each tyre (except the spare wheel).
th
e system triggers an alert if a drop in
pressure is detected in one or more tyres.
th
is system does not avoid the need
to check the tyre pressures regularly
(including the spare wheel) and before
a long journey.
Driving with under-inflated tyres
adversely affects road holding,
extends braking distances and causes
premature tyre wear, particularly under
arduous conditions (vehicle loaded,
high speed, long journey). Driving with under-inflated tyres
increases fuel consumption.
th
e tyre pressures for your vehicle can
be found on the tyre pressure label.
th
e tyre pressures must be checked
when the tyres cold (vehicle stopped
for 1 hour or after driving for less then
6 miles (10 km) at moderate speed).
Other wise, add 0.3 bar to the values
indicated on the label.
For more information on identification
markings, including the tyre pressure
label, refer to the corresponding
section.
Driving
Page 190 of 371
188
508_en_Chap06_conduite_ed01-2016
Speed limiter
System which prevents the vehicle from
exceeding the speed programmed by the
driver.
When the programmed speed limit is reached,
pressing the accelerator pedal no longer
has any effect unless it is pressed firmly,
which allows you to temporarily exceed the
programmed speed.
to r
eturn to the programmed speed, simply
slow down to a speed below the programmed
speed by releasing the accelerator.
th
e speed limiter is switched on manually:
it requires a programmed speed of at least
20
mph (30 km/h).
th
e speed limiter is switched off by manual
operation of the control.
th
e programmed speed remains in the memory
when the ignition is switched off.
th
e speed limiter cannot, in any
circumstances, replace the need to
observe speed limits, nor can it replace
the need for vigilance and responsibility
on the part of the driver.
th
is information also appears in the
head-up display.
For more information, refer to the
"Head-up display" section.
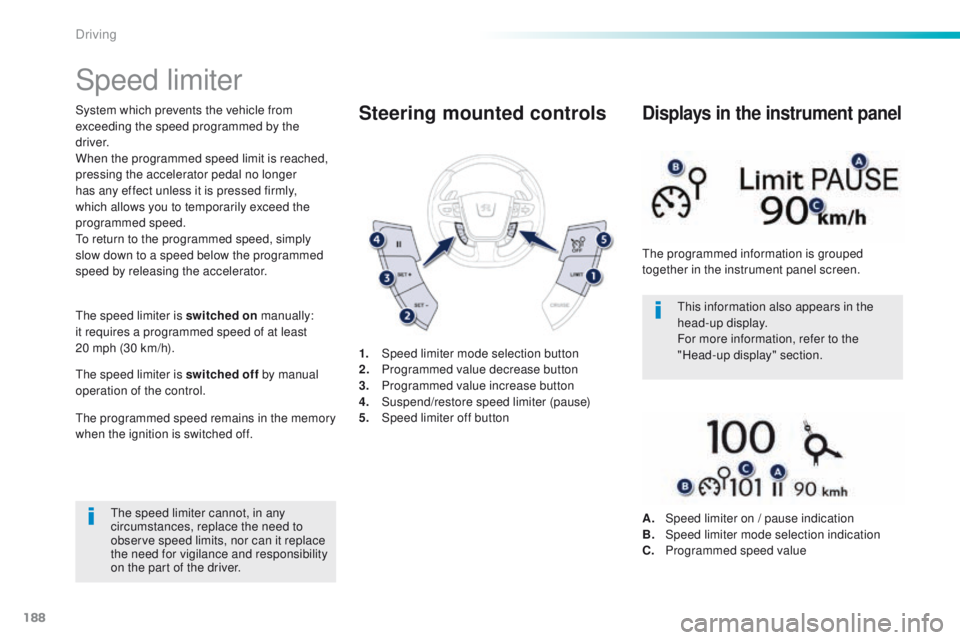
1.
Spe
ed limiter mode selection button
2.
P
rogrammed value decrease button
3.
P
rogrammed value increase button
4.
S
uspend/restore speed limiter (pause)
5.
Spe
ed limiter off buttonSteering mounted controls
the programmed information is grouped
together in the instrument panel screen.
Displays in the instrument panel
A. Speed limiter on / pause indication
B. Spe ed limiter mode selection indication
C.
P
rogrammed speed value
Driving
Page 192 of 371
190
508_en_Chap06_conduite_ed01-2016
Cruise control
System which automatically maintains the
speed of the vehicle at the value programmed
by the driver, without any action on the
accelerator pedal.
th
e cruise control is switched on manually: it
requires a minimum vehicle speed of 25 mph
(40 km/h) and the engagement of:
-
4
th gear or higher with a manual gearbox,
-
2nd gear or higher with an automatic
gearbox,
-
position D with an automatic gearbox.
th
e cruise control is switched off manually
or by pressing the brake or clutch pedal or
on triggering of the
e SC system for safety
reasons.
It is possible to exceed the programmed speed
temporarily by pressing the accelerator pedal.
to r
eturn to the programmed speed, simply
release the accelerator pedal.
Switching off the ignition cancels any
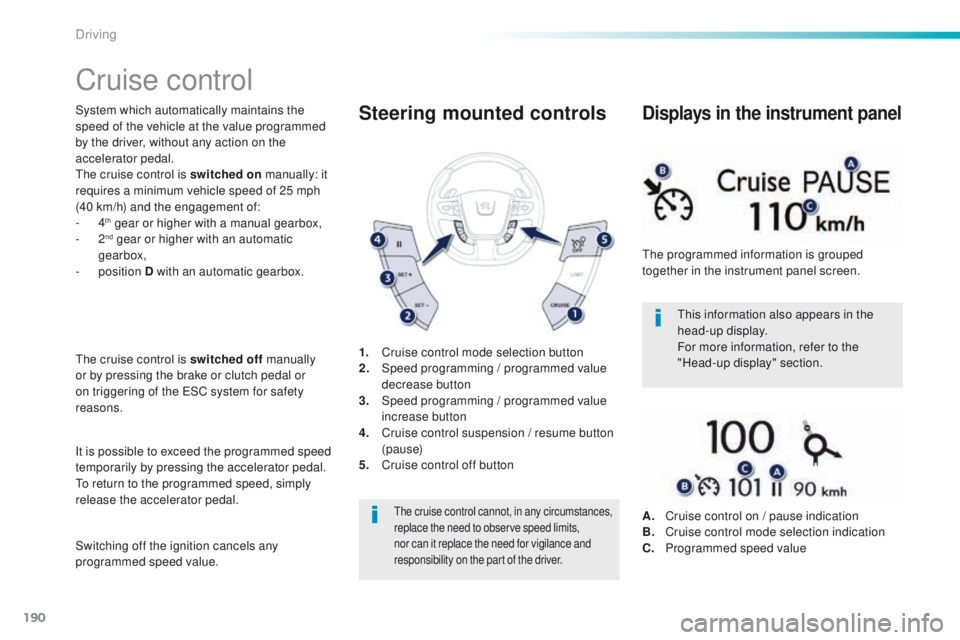
programmed speed value. 1.
C
ruise control mode selection button
2.
S
peed programming
/ programmed value
decrease button
3.
S
peed programming
/ programmed value
increase button
4.
C
ruise control suspension / resume button
(pause)
5.
C
ruise control off button
Steering mounted controls
the cruise control cannot, in any circumstances,
replace the need to observe speed limits,
nor can it replace the need for vigilance and
responsibility on the part of the driver.
this information also appears in the
head-up display.
For more information, refer to the
"Head-up display" section.
th
e programmed information is grouped
together in the instrument panel screen.
Displays in the instrument panel
A. Cruise control on / pause indication
B. C ruise control mode selection indication
C.
P
rogrammed speed value
Driving
Page 198 of 371
196
508_en_Chap06_conduite_ed01-2016
Blind spot monitoring system
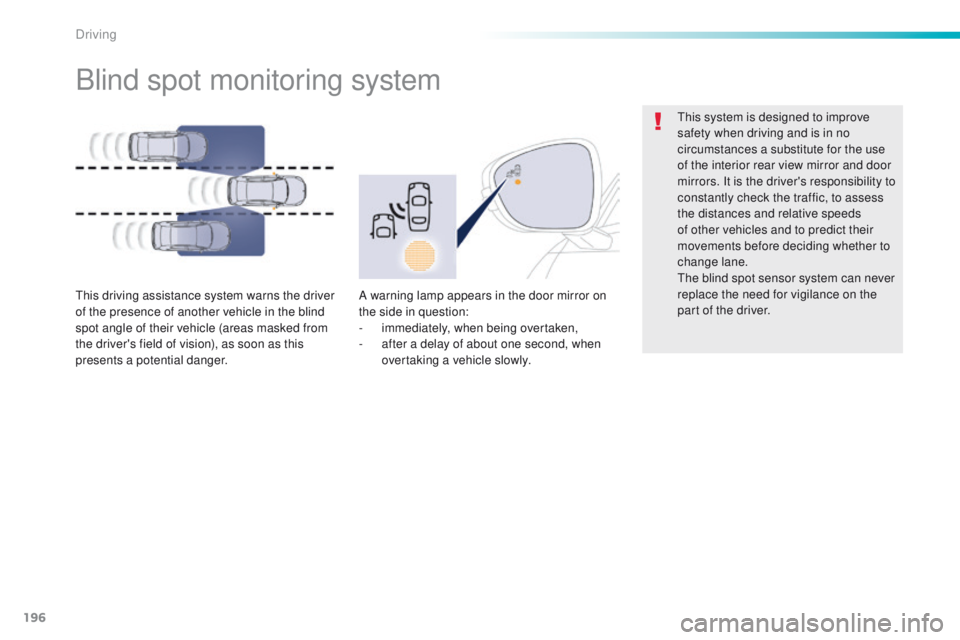
this driving assistance system warns the driver
of the presence of another vehicle in the blind
spot angle of their vehicle (areas masked from
the driver's field of vision), as soon as this
presents a potential danger.A warning lamp appears in the door mirror on
the side in question:
-
i
mmediately, when being overtaken,
-
a
fter a delay of about one second, when
overtaking a vehicle slowly.
th
is system is designed to improve
safety when driving and is in no
circumstances a substitute for the use
of the interior rear view mirror and door
mirrors. It is the driver's responsibility to
constantly check the traffic, to assess
the distances and relative speeds
of other vehicles and to predict their
movements before deciding whether to
change lane.
th
e blind spot sensor system can never
replace the need for vigilance on the
part of the driver.
Driving
Page 201 of 371
199
508_en_Chap06_conduite_ed01-2016
Reversing camera
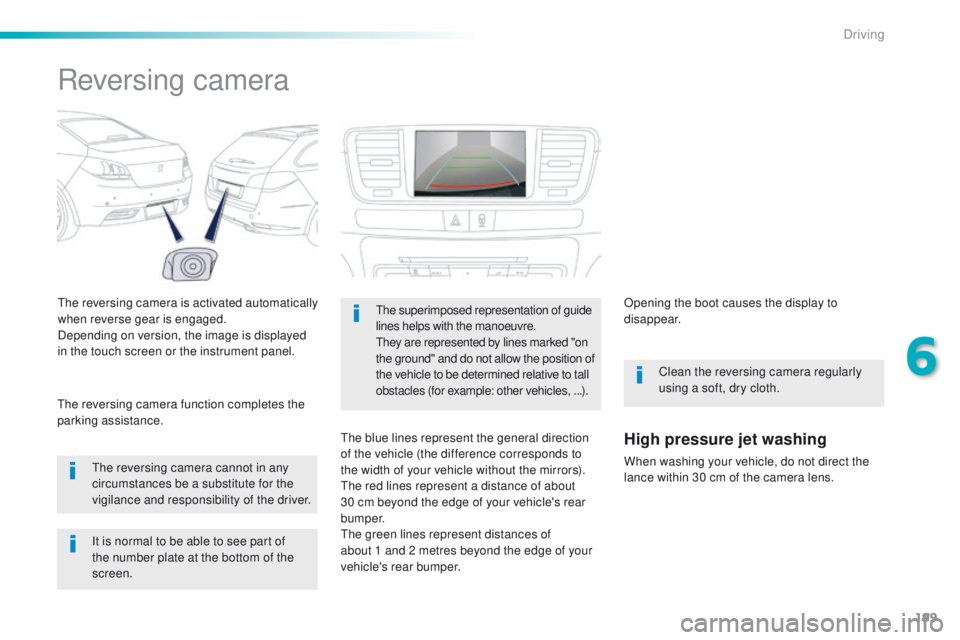
the reversing camera is activated automatically
when reverse gear is engaged.
Depending on version, the image is displayed
in the touch screen or the instrument panel.
th
e reversing camera cannot in any
circumstances be a substitute for the
vigilance and responsibility of the driver.
th
e reversing camera function completes the
parking assistance.the superimposed representation of guide
lines helps with the manoeuvre.
th
ey are represented by lines marked "on
the ground" and do not allow the position of
the vehicle to be determined relative to tall
obstacles (for example: other vehicles, ...).
the blue lines represent the general direction
of the vehicle (the difference corresponds to
the width of your vehicle without the mirrors).
th
e red lines represent a distance of about
30 cm beyond the edge of your vehicle's rear
b u m p e r.
th
e green lines represent distances of
about 1
and 2 metres beyond the edge of your
vehicle's rear bumper. Opening the boot causes the display to
disappear.
Clean the reversing camera regularly
using a soft, dry cloth.High pressure jet washing
When washing your vehicle, do not direct the
lance within 30 cm of the camera lens.
It is normal to be able to see part of
the number plate at the bottom of the
screen.
6
Driving