change wheel Peugeot 508 RXH 2014 Owner's Manual
[x] Cancel search | Manufacturer: PEUGEOT, Model Year: 2014, Model line: 508 RXH, Model: Peugeot 508 RXH 2014Pages: 338, PDF Size: 10.81 MB
Page 22 of 338
20
508RXH_en_Chap00c_systeme-hybride_ed01-2014
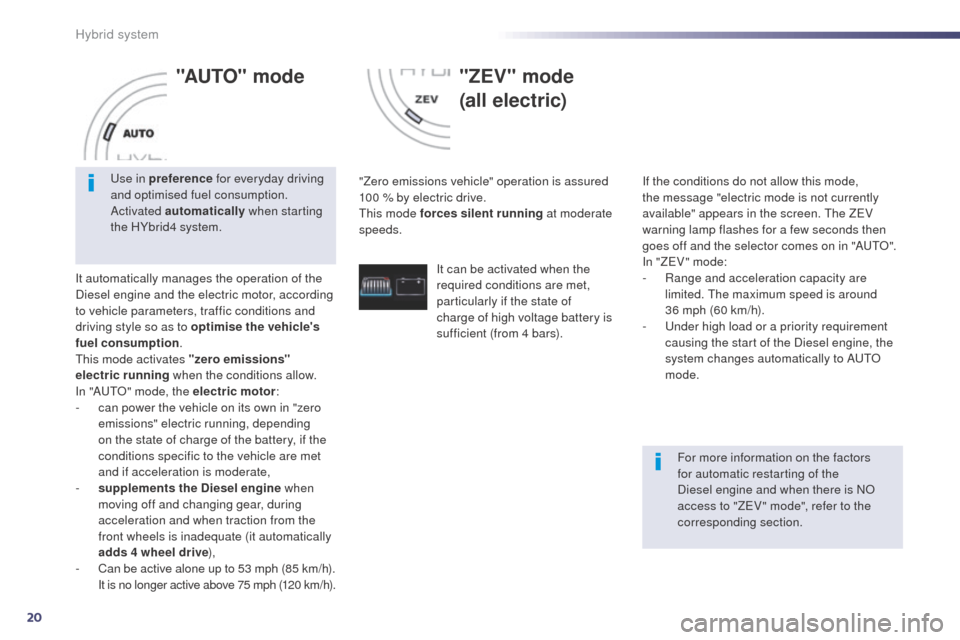
"AUTO" mode
It automatically manages the operation of the
Diesel engine and the electric motor, according
to vehicle parameters, traffic conditions and
driving style so as to optimise the vehicle's
fuel consumption.
th
is mode activates "zero emissions"
electric running when the conditions allow.
In "A
u
t
O
" mode, the electric motor :
-
c
an power the vehicle on its own in "zero
emissions" electric running, depending
on the state of charge of the battery, if the
conditions specific to the vehicle are met
and if acceleration is moderate,
-
s
upplements the Diesel engine when
moving off and changing gear, during
acceleration and when traction from the
front wheels is inadequate (it automatically
adds 4 wheel drive ),
-
C
an be active alone up to 53 mph (85 km/h).
I
t is no longer active above 75 mph (120 km/h).
"ZEV" mode
(all electric)
"Zero emissions vehicle" operation is assured
100 % by electric drive.
th
is mode forces silent running at moderate
speeds. If the conditions do not allow this mode,
the message "electric mode is not currently
available" appears in the screen.
t
h
e Z
eV
w
arning lamp flashes for a few seconds then
goes off and the selector comes on in "A
u
t
O
".
In "Z
eV
" mode:
-
R
ange and acceleration capacity are
limited.
t
h
e maximum speed is around
36 mph (60 km/h).
-
u
n
der high load or a priority requirement
causing the start of the Diesel engine, the
system changes automatically to A
u
t
O
m
ode.us
e in preference
for everyday driving
and optimised fuel consumption.
Activated automatically when starting
the HYbrid4 system.
For more information on the factors
for automatic restarting of the
Diesel engine and when there is NO
access to "Z
eV
" mode", refer to the
corresponding section.
It can be activated when the
required conditions are met,
particularly if the state of
charge of high voltage battery is
sufficient (from 4 bars).
Hybrid system
Page 33 of 338
31
508RXH_en_Chap00c_systeme-hybride_ed01-2014
Limit the causes of excess
consumption
Spread loads throughout the vehicle; place
the heaviest items in the bottom of the boot,
as close as possible to the rear seats.
Limit the loads carried in the vehicle and
reduce wind resistance (roof bars, roof rack,
bicycle carrier, trailer...). u
s
e a roof box in
preference.
Remove roof bars and roof racks after use.
At the end of winter, remove snow tyres and
refit your summer tyres.
Observe the recommendations
on maintenance
Check the tyre pressures regularly, when cold,
referring to the label in the door aperture,
driver's side.
Carry out this check in particular:
-
b
efore a long journey,
-
a
t each change of season,
-
a
fter a long period out of use. When refuelling, do not continue after the
3rd cut-off of the nozzle to avoid any over flow.
Have your vehicle serviced regularly (engine
oil, oil filter, air filter, passenger compartment
filter...) and observe the schedule of
operations recommended in the warranty and
maintenance record. At the wheel of your new vehicle, it is only after
the first 1 800 miles (3 000 kilometres) that you
will see the fuel consumption settle down to a
consistent average.
.
Hybrid system
Page 97 of 338
95
508RXH_en_Chap03_confort_ed01-2014
Automatic day/night model
By means of a sensor, which measures the
light from the rear of the vehicle, this system
automatically and progressively changes
between the day and night uses.
Adjustable mirror providing a central rearward
view.
eq
uipped with an anti-dazzle system, which
darkens the mirror glass and reduces the
nuisance to the driver caused by the sun,
headlamps from other vehicles...
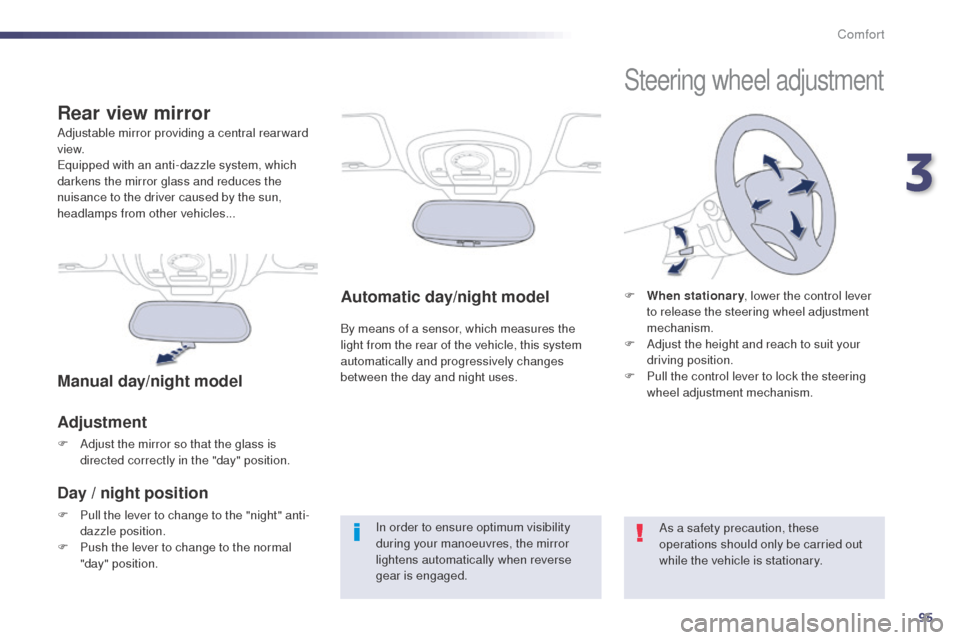
Rear view mirror
Manual day/night model
Adjustment
F Adjust the mirror so that the glass is directed correctly in the "day" position.
Day / night position
F Pull the lever to change to the "night" anti-dazzle position.
F
P
ush the lever to change to the normal
"day" position. In order to ensure optimum visibility
during your manoeuvres, the mirror
lightens automatically when reverse
gear is engaged.
Steering wheel adjustment
F When stationary
, lower the control lever
to release the steering wheel adjustment
mechanism.
F
A
djust the height and reach to suit your
driving position.
F
P
ull the control lever to lock the steering
wheel adjustment mechanism.
As a safety precaution, these
operations should only be carried out
while the vehicle is stationary.
3
Comfort
Page 126 of 338
124
508RXH_en_Chap04_conduite_ed01-2014
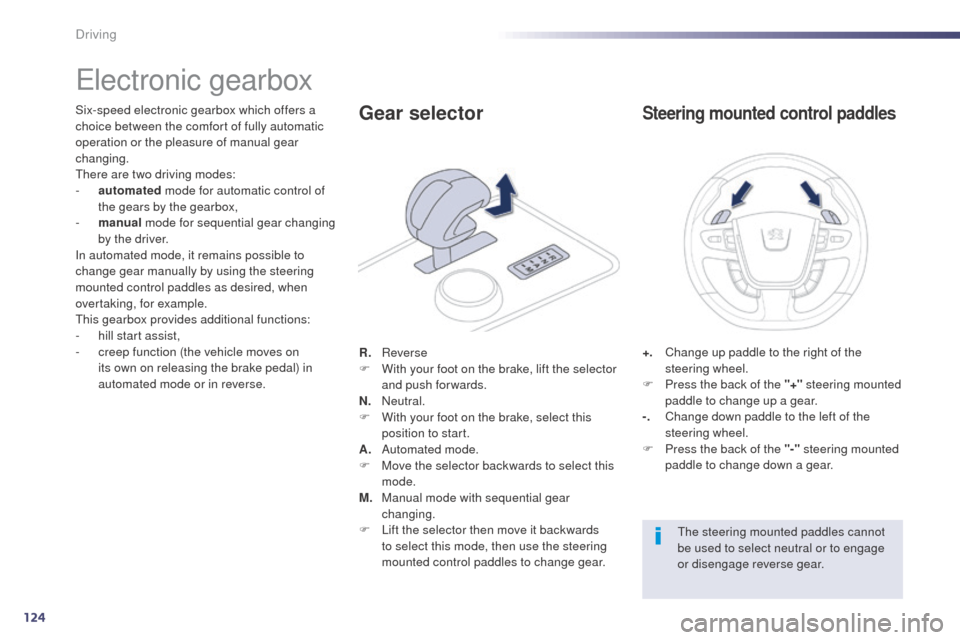
electronic gearbox
Six-speed electronic gearbox which offers a
choice between the comfort of fully automatic
operation or the pleasure of manual gear
changing.
th
ere are two driving modes:
-
a
utomated mode for automatic control of
the gears by the gearbox,
-
m
anual mode for sequential gear changing
by the driver.
In automated mode, it remains possible to
change gear manually by using the steering
mounted control paddles as desired, when
overtaking, for example.
th
is gearbox provides additional functions:
-
h
ill start assist,
-
c
reep function (the vehicle moves on
its own on releasing the brake pedal) in
automated mode or in reverse. R.
R
everse
F
W
ith your foot on the brake, lift the selector
and push forwards.
N.
N
eutral.
F
W
ith your foot on the brake, select this
position to start.
A.
A
utomated mode.
F
M
ove the selector backwards to select this
mode.
M.
M
anual mode with sequential gear
changing.
F
L
ift the selector then move it backwards
to select this mode, then use the steering
mounted control paddles to change gear.Gear selector
+. Change up paddle to the right of the steering wheel.
F
P
ress the back of the "+" steering mounted
paddle to change up a gear.
-.
C
hange down paddle to the left of the
steering wheel.
F
P
ress the back of the "-" steering mounted
paddle to change down a gear.
Steering mounted control paddles
the steering mounted paddles cannot
be used to select neutral or to engage
or disengage reverse gear.
Driving
Page 197 of 338
195
508RXH_en_Chap08_info-pratiques_ed01-2014
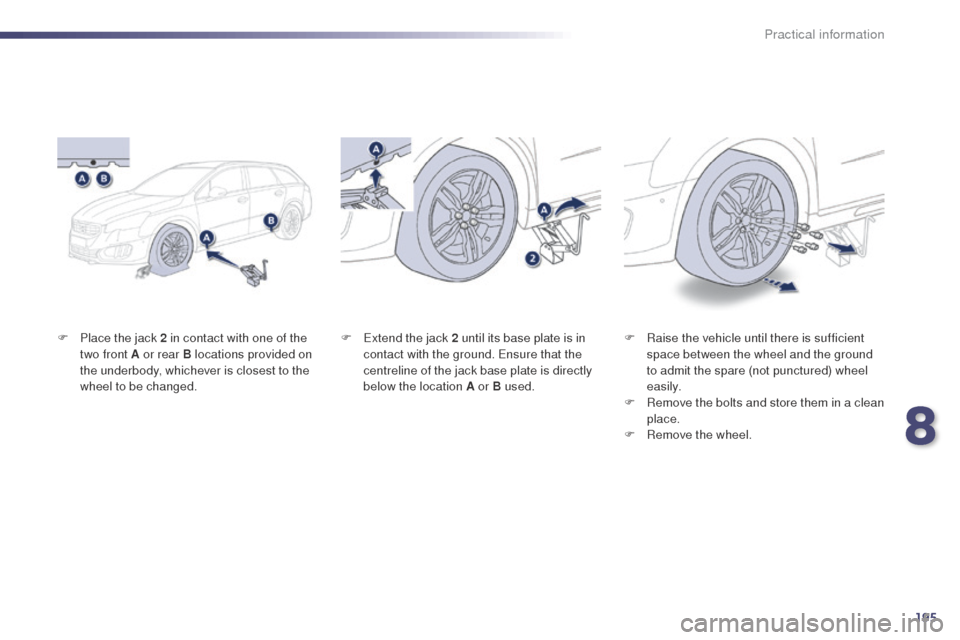
F Place the jack 2 in contact with one of the two front A or rear B locations provided on
the underbody, whichever is closest to the
wheel to be changed. F
Ra ise the vehicle until there is sufficient
space between the wheel and the ground
to admit the spare (not punctured) wheel
easily.
F
R
emove the bolts and store them in a clean
place.
F
R
emove the wheel.
F
ex tend the jack 2 until its base plate is in
contact with the ground. en sure that the
centreline of the jack base plate is directly
below the location A or B used.
8
Practical information
Page 324 of 338
322
508RXH_en_Chap13_index-alpha_ed01-2014
Main beam .............................. 42, 142, 199 -201
Maintenance ................................................... 30
Map reading lamps
....................................... 15 6
Markings, identification
.................................240
Massage function
........................................... 90
Mat
.................................................................. 97
Menu
................... 244, 250, 252, 254, 266, 268,
270, 286, 298, 300
Mirror, rear view
.............................................. 95
Mirrors, door ...................................... 93, 94, 131
Motorised tailgate
..................................... 80, 81
Mountings for ISOFIX seats
.........................166
Navigation
..................................................... 266
Number plate lamps
...................................... 20
4
M
N
Oil change ..................................................... 230
Oil consumption ............................................ 230
Oil filter
...............
........................................... 233
Oil level ................................................... 56, 230
Opening the boot
..............................
........68, 79
Opening the doors
...............................
...........65
Opening the panoramic sunroof blind
............83
Operation indicator lamps
.........................41- 51Radio
.............................................................
256
RDS
...............................................................
259
Ready
...............
...............................................
19
Ready lamp
...............................................
19, 8 4
Rear foglamp ......................................... 14 4, 202
Rear screen (demisting) ..........................
9 3 , 114
Recharging the battery ................................. 2 11
Reduction of electrical load ..........................216
Regeneration of the particle filter
.................23
4
Reinitialising the remote control
............... 7
2, 73
Remote control
..................................... 6
5 -7 0 , 74
Removable screen (snow shield)......... 220, 223
Removing a wheel
........................................19 4
Removing the battery .................................... 212
Paint colour code
..........................................
240
Panoramic glass sunroof
................................
83
Parking brake, electric
....................
48, 117, 235
Parking lamps
...............................................
146
Parking sensors, front
...................................
140
Parking sensors, rear .................................... 13 9
Particle emission filter
.........................
232, 234
Passenger compartment filter
......................
233
P
e
uge
Ot C
ONN
eCt A
PPS
.......................
2
97
Peuge
O
t
Connect Assistance
...........
173 , 242
Peuge
O
t Connect SOS
.....................
17
3 , 242
Port, u
S
B
........................................................
98
Po
wer
..............................................................
22
Priming the fuel system ................................
228
Programmable heating (Webasto) ................115
Protecting children
.................
15 8 -171, 182, 18 4
Puncture
........................................................
187
O
R
P
Keeping children safe ............1 5 8 -171, 182, 18 4
Key ........................................... 18, 65 -70, 72-74
Keyless
e
n
try and Starting .................66, 70, 74
Key not recognised
......................................... 18
Key with remote control
..................................17
Labels, identification
..................................... 24
0
Lamps, warning and indicator
...................41- 51
L
e
D
daytime running lamps
.........................145
L
eD
s - light-emitting diodes
.................19 9, 202
Level, brake fluid
........................................... 2
31
Level, headlamp wash
..........................153, 232
Level, power steering fluid
............................2
31
Levels and checks
................................ 229-232
Light-emitting diodes - L
eD
s
................19 9, 202
Lighting bulbs (replacement)
................ 19
9 -20 4
Lighting control stalk
.............................142, 146
Lighting, guide-me home
......................146, 147
Lighting, interior
.................................... 15 6, 157
Lighting on reminder
..................................... 14 4
Loading
.................................................. 30, 222
Load reduction mode
.................................... 216
Load space cover
...............................
...........101
Locating your vehicle
...................................... 71
L
ong objects, transporting
.............................. 98
L
ow fuel level .................................................. 84
K
L
Alphabetical index