key Peugeot Bipper 2015 Owner's Guide
[x] Cancel search | Manufacturer: PEUGEOT, Model Year: 2015, Model line: Bipper, Model: Peugeot Bipper 2015Pages: 192, PDF Size: 7.97 MB
Page 135 of 192
133
Bipper_en_Chap06_securite_ed02-2014
ADVICE ON CHILD SEATS
Children
at the front
the legislation on carrying a child on the
front passenger seat is specific to each
country. Refer to the legislation in force in
your country.
Deactivate the passenger's airbag when a
"rearward facing" child seat is installed on
the front seat.
Otherwise, the child would risk being
seriously injured or killed if the airbag were
deployed.
t
he incorrect installation of a child seat in a
vehicle compromises the child's protection in
the event of an accident.
Check that there is no seat belt or seat belt
buckle under the child seat, as this could
destabilise the seat.
Remember to fasten the seat belts or the
child seat harnesses keeping the slack
relative to the child's body to a minimum,
even for short journeys.
For the installation of a child seat using
the seat belt, ensure that the seat belt is
well tensioned on the child seat and that
it is holding the child seat firmly against
the vehicle's seat. If the passenger seat is
adjustable, move it forward if necessary.
Installing a booster seat
the chest part of the seat belt must be
positioned on the child's shoulder without
touching the neck.
e
nsure that the lap part of the seat belt
passes correctly over the child's thighs.
P
euge O t
recommends the use of a
booster seat which has a back, fitted with a
seat belt guide at shoulder level.
For the optimum installation of a "forward
facing" child seat, ensure that the back of
the child seat is as close as possible to the
backrest of the vehicle's seat, or in contact
if possible.
t
he head restraint must be removed before
installing a child seat with a backrest on the
passenger seat.
e
nsure that the head restraint is stowed or
attached securely so that it is not thrown
around the vehicle in the event of sharp
braking.
Refit the head restraint as soon as the child
seat is removed. As a safety precaution, never leave:
-
one or more children alone and
unsupervised in a vehicle,
-
a child or an animal in a vehicle which
is exposed to the sun, with the windows
closed,
-
the keys within reach of children inside
the vehicle.
to prevent accidental opening of the doors,
use the "Child
l ock".
take care not to open the rear windows by
more than one third.
to protect young children from the rays of
the sun, fit side blinds to the rear windows.
At the rear, always leave sufficient space
between the front seat and:
-
a "rearward facing" child seat,
-
the feet of a child seated in a "forward
facing" child seat.
For this, move the front seat forward and, if
necessary, straighten its backrest as well.
6
SAFETY
Child safety
Page 143 of 192

141
Bipper_en_Chap08_verifications_ed02-2014
PeugeOt & t O tAl,
A PARtNeRSHIP tO De lI Ve R
Be
tte R
P
e
RFORMANC
e
!
Innovation, the key to success
the tOtAl Research and Development and
Pe ugeOt teams work together to develop high
quality lubricants that meet the requirements
of P
e
uge
Ot
vehicles. For you, this is the
assurance that the performance of your engine
is optimised while also ensuring its durability.
The 208 HYbrid FE demonstrates the ability of
P
e
uge
Ot
and
tOtAl
to develop innovative
technologies and provide other ways of moving
towards the future.
208 HYbrid FE, a technology demonstrator with exceptional characteristics:
1.9 l/100 km (148.7 mpg) and 0 to 100 km/h (0 to 62 mph) in 8 seconds.
Reduced exhaust emissions,
a true reality
tOtAl lubricants are formulated to optimise the
efficiency of engines and the protection of the
emissions post-treatment systems. It is important
to observe the servicing recommendations
made by P
e
uge
Ot
to assure correct operation.
RECOMMENDS
8
CHECKS
Maintenance with TOTAL
Page 144 of 192
142
Bipper_en_Chap08_verifications_ed02-2014
FILLING WITH FUEL
Capacity of the fuel tank: approximately 45 litres.
Low fuel level
When the minimum fuel tank level
is reached, this warning lamp
comes on. When it first comes on,
you have approximately 6 litres
of fuel remaining. Refuel without delay to
avoid running out of fuel.
An arrow in the instrument panel indicates
which side of the vehicle the filler flap is
located.
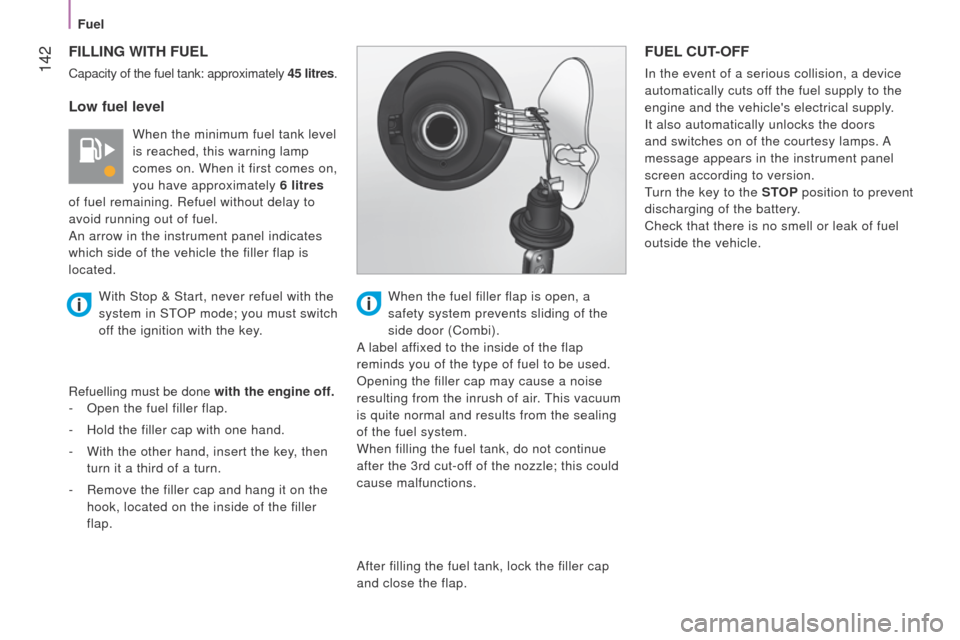
Refuelling must be done with the engine off.
-
Open the fuel filler flap.
-
Hold the filler cap with one hand.
-
With the other hand, insert the key
, then
turn it a third of a turn.
-
Remove the filler cap and hang it on the
hook, located on the inside of the filler
flap.
FUEL CUT-OFF
In the event of a serious collision, a device
automatically cuts off the fuel supply to the
engine and the vehicle's electrical supply.
It also automatically unlocks the doors
and switches on of the courtesy lamps. A
message appears in the instrument panel
screen according to version.
turn the key to the
STOP position to prevent
discharging of the battery.
Check that there is no smell or leak of fuel
outside the vehicle.
With Stop & Start, never refuel with the
system in S
t
OP
mode; you must switch
off the ignition with the key. When the fuel filler flap is open, a
safety system prevents sliding of the
side door (Combi).
A label affixed to the inside of the flap
reminds you of the type of fuel to be used.
Opening the filler cap may cause a noise
resulting from the inrush of air.
t
his vacuum
is quite normal and results from the sealing
of the fuel system.
When filling the fuel tank, do not continue
after the 3rd cut-off of the nozzle; this could
cause malfunctions.
After filling the fuel tank, lock the filler cap
and close the flap.
Fuel
Page 145 of 192
143
Bipper_en_Chap08_verifications_ed02-2014
Resetting
to set off again, restore the fuel supply and
the electrical supply manually:
-
with the key in the
STOP position, turn
the key to the RUNNING position,
-
push the direction indicator control stalk
fully upwards,
-
place it in the "Of
f" position,
-
press the direction indicator control stalk
fully downwards,
-
return it to the "Of
f" position,
-
push it fully upwards again,
-
return it to the "Of
f" position,
-
press it fully downwards again,
-
return it to the "Of
f" position,
-
turn the key to the
STOP position.
Fuel used for petrol engines
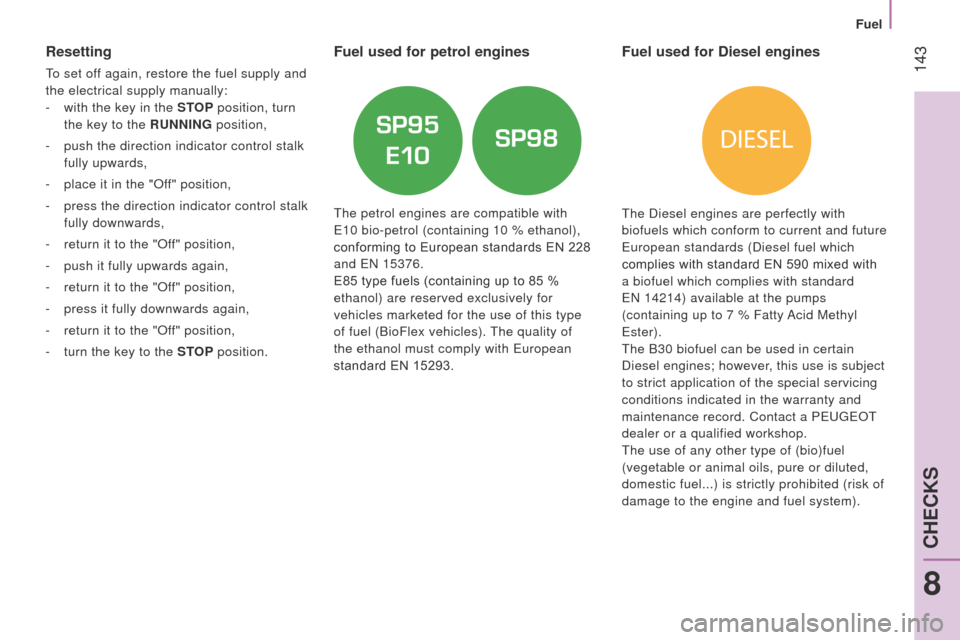
the petrol engines are compatible with
e
10 bio-petrol (containing 10 % ethanol),
conforming to European standards EN 228
and
e N 15376.
E85 type fuels (containing up to 85 %
ethanol) are reserved exclusively for
vehicles marketed for the use of this type
of fuel (BioFlex vehicles).
t
he quality of
the ethanol must comply with
e uropean
standard EN 15293.
Fuel used for Diesel engines
the Diesel engines are perfectly with
biofuels which conform to current and future
e
uropean standards (Diesel fuel which
complies with standard EN 590 mixed with
a biofuel which complies with standard
e
N 14214) available at the pumps
(containing up to 7 % Fatty Acid Methyl
e
ster).
t
he B30 biofuel can be used in certain
Diesel engines; however, this use is subject
to strict application of the special servicing
conditions indicated in the warranty and
maintenance record. Contact a P
euge O t
dealer or a qualified workshop.
t
he use of any other type of (bio)fuel
(vegetable or animal oils, pure or diluted,
domestic fuel...) is strictly prohibited (risk of
damage to the engine and fuel system).
8
CHECKS
Fuel
Page 146 of 192
144
Bipper_en_Chap08_verifications_ed02-2014
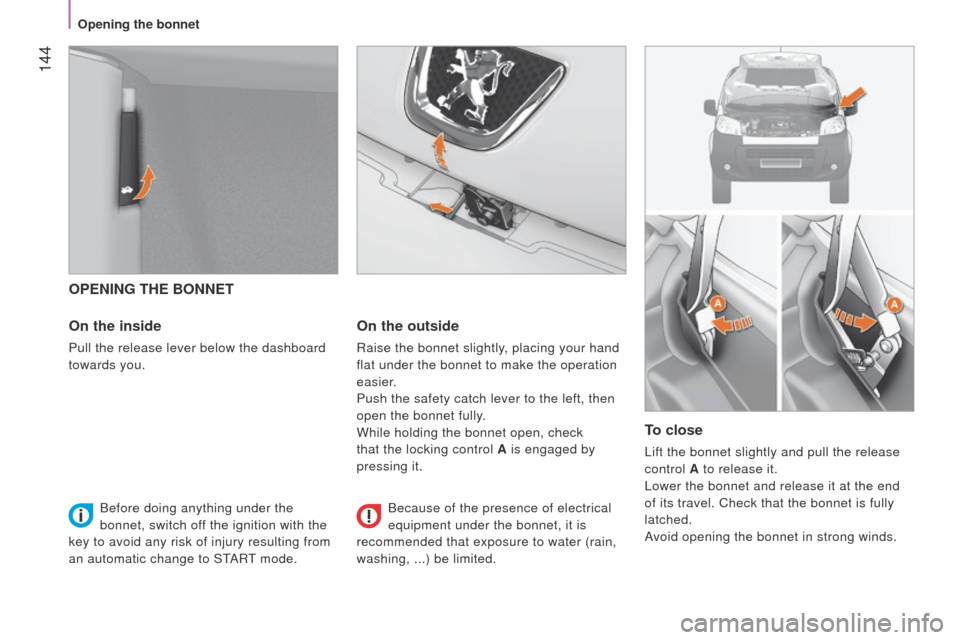
OPENING THE BONNET
On the inside
Pull the release lever below the dashboard
towards you.
On the outside
Raise the bonnet slightly, placing your hand
flat under the bonnet to make the operation
easier.
Push the safety catch lever to the left, then
open the bonnet fully.
While holding the bonnet open, check
that the locking control A is engaged by
pressing it.
To close
lift the bonnet slightly and pull the release
control A to release it.
l
ower the bonnet and release it at the end
of its travel. Check that the bonnet is fully
latched.
Avoid opening the bonnet in strong winds.
Before doing anything under the
bonnet, switch off the ignition with the
key to avoid any risk of injury resulting from
an automatic change to S
t
ARt mode. Because of the presence of electrical
equipment under the bonnet, it is
recommended that exposure to water (rain,
washing, ...) be limited.
Opening the bonnet
Page 150 of 192
148
Bipper_en_Chap08_verifications_ed02-2014
Engine coolant level
Only use the fluid recommended by the
manufacturer. Otherwise, you risk seriously
damaging your engine. When the engine
is warm, the temperature of the coolant is
controlled by the engine cooling fan. As this fan
can operate with the ignition key removed and
because the cooling system is pressurised,
wait for at least one hour after the engine has
stopped before carrying out any work.
Topping up
t
he level must be between the MIN and
MAX marks on the header tank. If more than
1 litre of fluid is required to top up the level,
have the system checked by a P
euge O t
dealer or a qualified workshop.
Power steering fluid level
the vehicle must be parked on level ground
with the engine cold. u nscrew the cap with
integral gauge and check the level which
must be between the MIN and MAX marks.
Screenwash fluid level
For optimum cleaning and to avoid freezing,
topping up or replacement of this fluid
should never be with plain water; we
recommend the use of products available
from P
euge O t
dealers.
Capacity of the reservoir: approximately
3
litres.
Slacken the cap by two turns to release the
pressure to prevent any risk of scalding.
When the pressure has dropped, remove the
cap and top up the level with coolant.
If fluid has to be added frequently, this
indicates a fault which must be checked by a
P
euge
O
t
dealer or a qualified workshop as
soon as possible.
Used products
Avoid prolonged contact of used oil with the
skin.
Brake fluid is harmful to health and very
corrosive.
Do not dispose of used oil, brake fluid or
coolant into drains or into the ground, but
into the containers provided for this purpose
at P
euge O t
dealers (France) or at an
authorised waste disposal site.
Levels
Page 169 of 192
167
Bipper_en_Chap09_aide-rapide_ed02-2014
CHANGING A FUSE
the two fuseboxes are placed on the
dashboard on the driver ’s side and under
the bonnet.
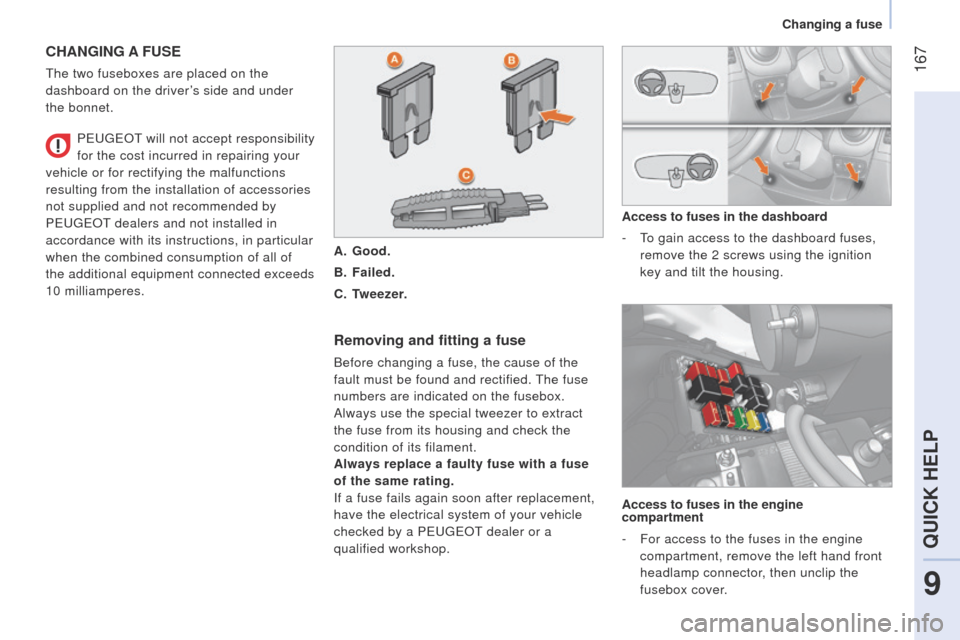
Removing and fitting a fuse
Before changing a fuse, the cause of the
fault must be found and rectified.
t
he fuse
numbers are indicated on the fusebox.
Always use the special tweezer to extract
the fuse from its housing and check the
condition of its filament.
Always replace a faulty fuse with a fuse
of the same rating.
If a fuse fails again soon after replacement,
have the electrical system of your vehicle
checked by a P
euge O t
dealer or a
qualified workshop. Access to fuses in the dashboard
-
t
o gain access to the dashboard fuses,
remove the 2 screws using the ignition
key and tilt the housing.
P
euge
O
t
will not accept responsibility
for the cost incurred in repairing your
vehicle or for rectifying the malfunctions
resulting from the installation of accessories
not supplied and not recommended by
P
euge
O
t
dealers and not installed in
accordance with its instructions, in particular
when the combined consumption of all of
the additional equipment connected exceeds
10
milliamperes.
A.
Good.
B.
Failed.
C.
T
weezer.
Access to fuses in the engine
compartment
-
For access to the fuses in the engine
compartment, remove the left hand front
headlamp connector, then unclip the
fusebox cover.
9
QUICK HELP
Changing a fuse
Page 174 of 192
172
Bipper_en_Chap09_aide-rapide_ed02-2014
TOWING
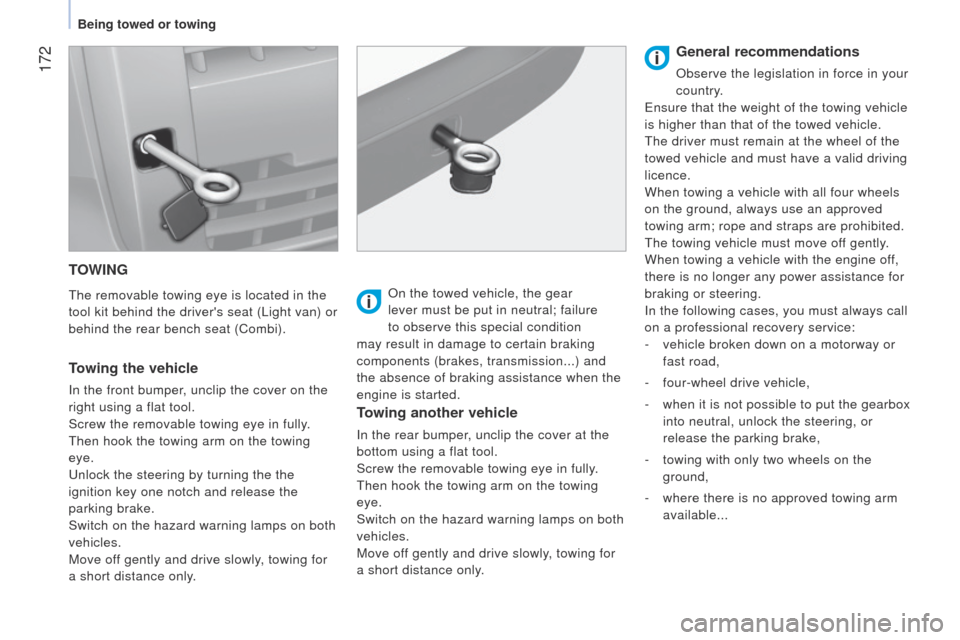
the removable towing eye is located in the
tool kit behind the driver's seat ( l ight van) or
behind the rear bench seat (Combi).
Towing the vehicle
In the front bumper, unclip the cover on the
right using a flat tool.
Screw the removable towing eye in fully.
t
hen hook the towing arm on the towing
eye.
u
nlock the steering by turning the the
ignition key one notch and release the
parking brake.
Switch on the hazard warning lamps on both
vehicles.
Move off gently and drive slowly, towing for
a short distance only. On the towed vehicle, the gear
lever must be put in neutral; failure
to observe this special condition
may result in damage to certain braking
components (brakes, transmission...) and
the absence of braking assistance when the
engine is started.
Towing another vehicle
In the rear bumper, unclip the cover at the
bottom using a flat tool.
Screw the removable towing eye in fully.
t
hen hook the towing arm on the towing
eye.
Switch on the hazard warning lamps on both
vehicles.
Move off gently and drive slowly, towing for
a short distance only.
General recommendations
Observe the legislation in force in your
country.
e
nsure that the weight of the towing vehicle
is higher than that of the towed vehicle.
t
he driver must remain at the wheel of the
towed vehicle and must have a valid driving
licence.
When towing a vehicle with all four wheels
on the ground, always use an approved
towing arm; rope and straps are prohibited.
t
he towing vehicle must move off gently.
When towing a vehicle with the engine off,
there is no longer any power assistance for
braking or steering.
In the following cases, you must always call
on a professional recovery service:
-
vehicle broken down on a motorway or
fast road,
-
four-wheel drive vehicle,
-
when it is not possible to put the gearbox
into neutral, unlock the steering, or
release the parking brake,
-
towing with only two wheels on the
ground,
-
where there is no approved towing arm
available...
Being towed or towing