load Peugeot Boxer 2018 Owner's Manual
[x] Cancel search | Manufacturer: PEUGEOT, Model Year: 2018, Model line: Boxer, Model: Peugeot Boxer 2018Pages: 232, PDF Size: 9.09 MB
Page 2 of 232
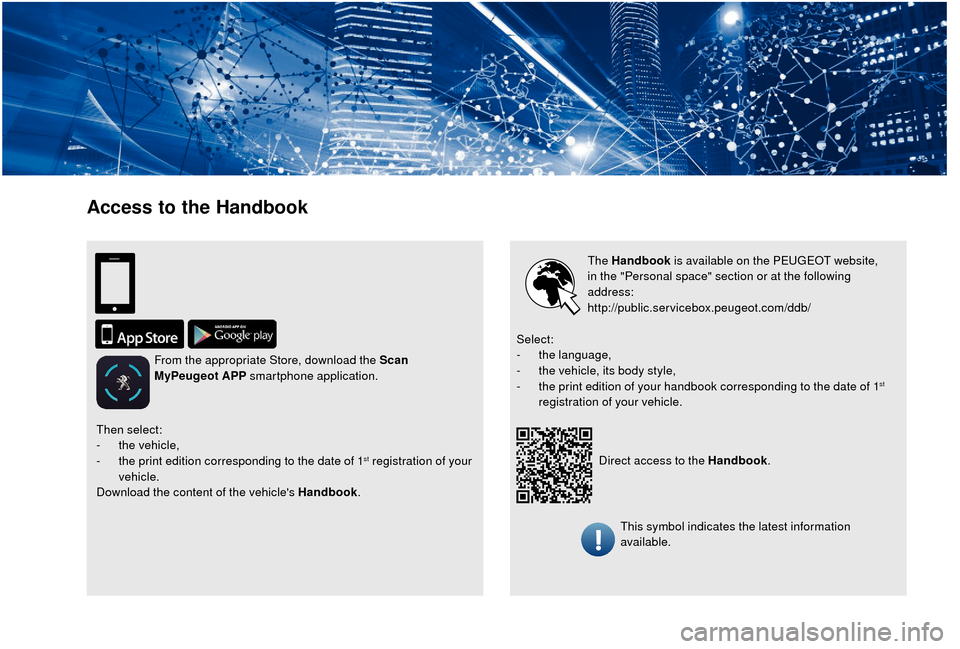
Access to the Handbook
The Handbook is available on the PEUGEOT website,
in the "Personal space" section or at the following
address:
http://public.servicebox.peugeot.com/ddb/
Direct access to the Handbook .
Select:
-
t
he language,
-
t
he vehicle, its body style,
-
t
he print edition of your handbook corresponding to the date of 1
st
registration of your vehicle.
Then select:
-
t
he vehicle,
-
t
he print edition corresponding to the date of 1
st registration of your
vehicle.
Download the content of the vehicle's Handbook .
From the appropriate Store, download the Scan
MyPeugeot APP smartphone application.
This symbol indicates the latest information
available.
Page 5 of 232
3
.
.
10
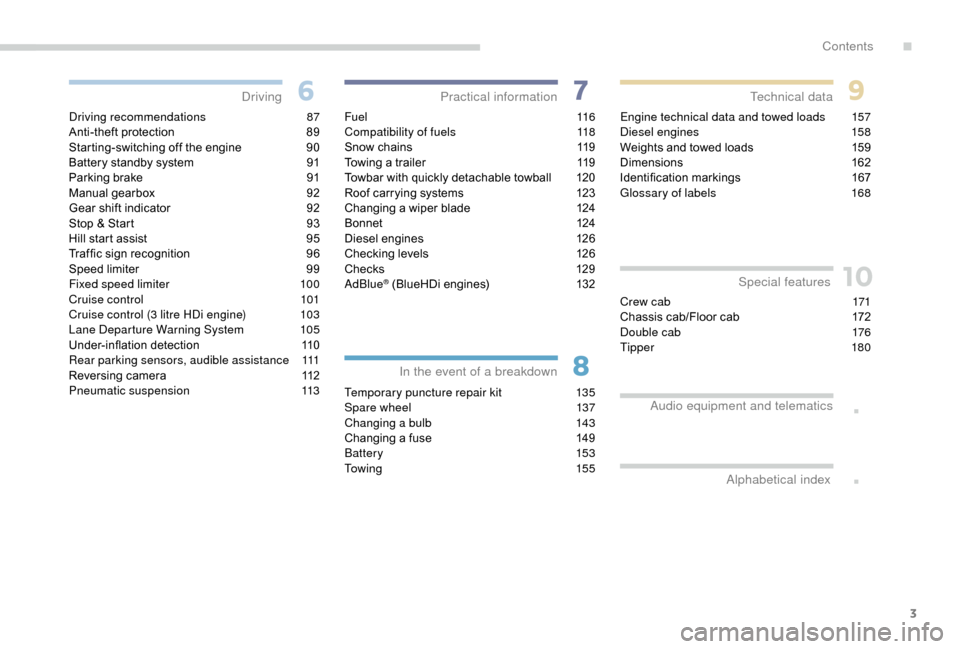
Driving recommendations 87
Anti-theft protection 8 9
Starting-switching off the engine
9
0
Battery standby system
9
1
Parking brake
9
1
Manual gearbox
9
2
Gear shift indicator
9
2
Stop & Start
9
3
Hill start assist
9
5
Traf fic sign recognition
9
6
Speed limiter
9
9
Fixed speed limiter
1
00
Cruise control
1
01
Cruise control (3
litre HDi engine)
1
03
Lane Departure Warning System
1
05
Under-inflation detection
1
10
Rear parking sensors, audible assistance
1
11
Reversing camera
1
12
Pneumatic suspension
1
13F u e l
11 6
Compatibility of fuels 1 18
Snow chains
1
19
Towing a
trailer
1
19
Towbar with quickly detachable towball
1
20
Roof carrying systems
1
23
Changing a
wiper blade
1
24
Bonnet
12
4
Diesel engines
1
26
Checking levels
1
26
Chec ks
12
9
AdBlue
® (BlueHDi engines) 1 32
Temporary puncture repair kit
1
35
Spare wheel
1
37
Changing a
bulb
1
43
Changing a
fuse
1
49
Battery
153
To w i n g
15 5Engine technical data and towed loads
1
57
Diesel engines
1
58
Weights and towed loads
1
59
Dimensions
1
62
Identification markings
1
67
Glossary of labels
1
68
Driving
Practical information
In the event of a breakdown Technical data
Alphabetical index Special features
Crew cab 1
71
Chassis cab/Floor cab 1 72
Double cab
1
76
Tipper
18
0
Audio equipment and telematics
.
Contents
Page 8 of 232
6
Limit the causes of excess
consumption
Spread loads throughout the vehicle; place
the heaviest items in the bottom of the boot,
as close as possible to the rear seats.
Limit the loads carried in the vehicle and
reduce wind resistance (roof bars, roof rack,
bicycle carrier, trailer, etc.). Preferably, use a
roof box.
Remove roof bars and roof racks after use.
At the end of winter, remove snow tyres and
refit your summer tyres.
Observe the recommendations
on maintenance
Check the tyre pressures regularly, when cold,
referring to the label in the door aperture,
driver's side.
Carry out this check in particular:
-
b
efore a long journey,
-
a
t each change of season,
-
a
fter a long period out of use.
Do not forget the spare wheel and the tyres on
any trailer or caravan. Have your vehicle ser viced regularly (engine
oil, oil filter, air filter, cabin filter, etc.) and
obser ve the schedule of operations in the
manufacturer's service schedule.
When filling the tank, do not continue after the
3
rd cut-off of the nozzle to avoid over flow.
At the wheel of your new vehicle, it is only
after the first 1,900
miles (3,000 kilometres)
that you will see the fuel consumption settle
down to a
consistent average.
With a
BlueHDi Diesel engine, if the SCR
system is faulty, your vehicle becomes
polluting. As soon as possible, visit
a
PEUGEOT dealer or a qualified workshop
to make your vehicle's level of nitrogen oxides
emissions compliant to the standard.
Eco-driving
Page 19 of 232
17
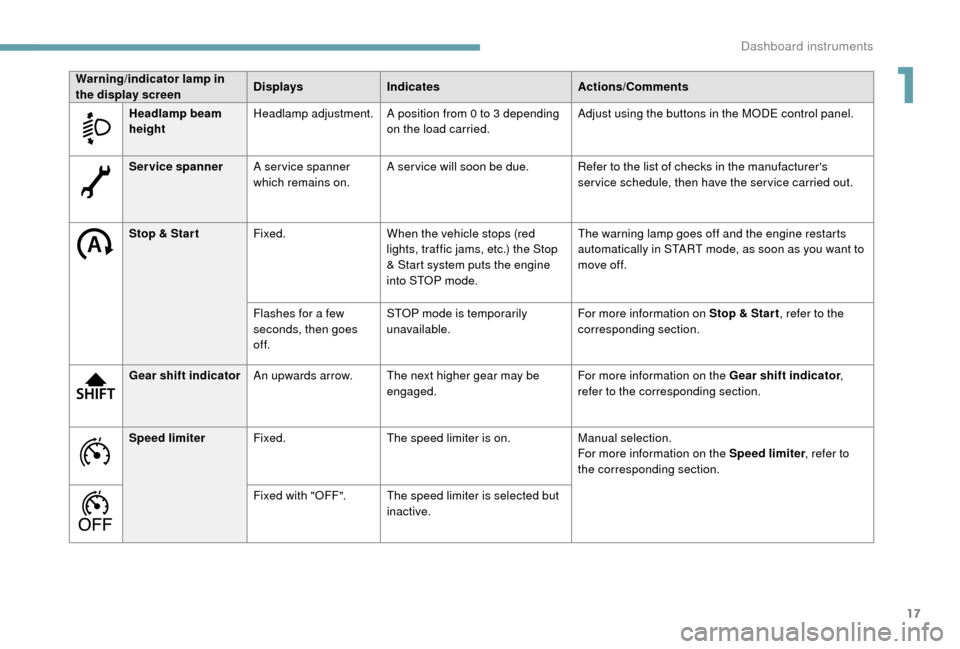
Service spannerA ser vice spanner
which remains on. A ser vice will soon be due. Refer to the list of checks in the manufacturer's
service schedule, then have the service carried out.
Stop & Star t Fixed. When the vehicle stops (red
lights, traffic jams, etc.) the Stop
& Start system puts the engine
into STOP mode. The warning lamp goes off and the engine restarts
automatically in START mode, as soon as you want to
move off.
Flashes for a
few
seconds, then goes
of f. STOP mode is temporarily
unavailable.
For more information on Stop & Star t
, refer to the
corresponding section.
Gear shift indicator An upwards arrow. The next higher gear may be
engaged. For more information on the Gear shift indicator
,
refer to the corresponding section.
Speed limiter Fixed. The speed limiter is on. Manual selection.
For more information on the Speed limiter , refer to
the corresponding section.
Fixed with "OFF". The speed limiter is selected but inactive.
Warning/indicator
lamp in
the display screen Displays
Indicates Actions/Comments
Headlamp beam
height Headlamp adjustment.
A position from 0 to 3 depending
on the load carried. Adjust using the buttons in the MODE control panel.
1
Dashboard instruments
Page 32 of 232
30
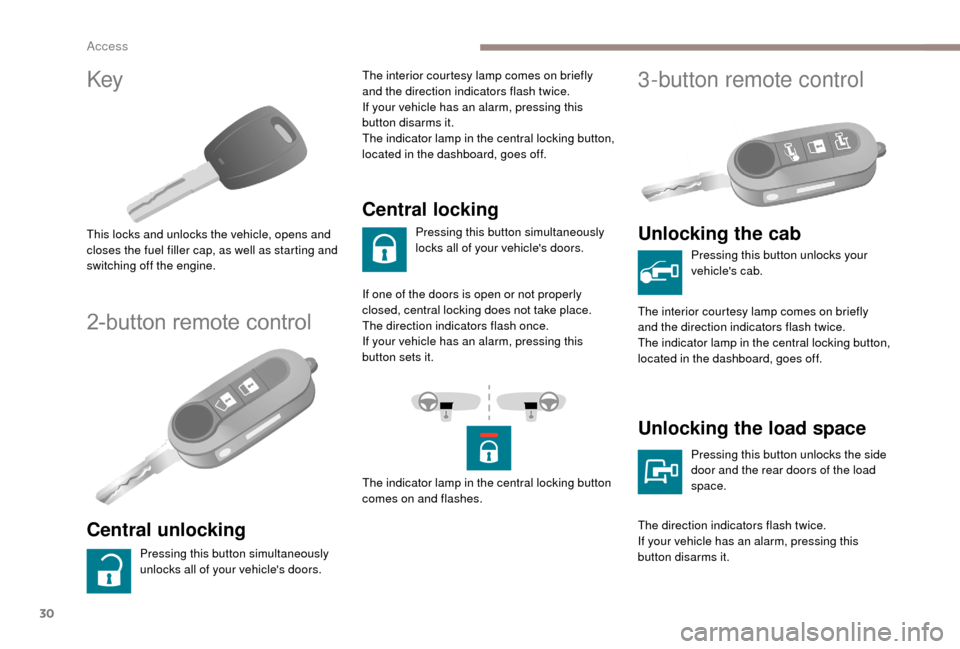
Key
This locks and unlocks the vehicle, opens and
closes the fuel filler cap, as well as starting and
switching off the engine.
2-button remote control
Central unlocking
Pressing this button simultaneously
unlocks all of your vehicle's doors.The interior courtesy lamp comes on briefly
and the direction indicators flash twice.
If your vehicle has an alarm, pressing this
button disarms it.
The indicator lamp in the central locking button,
located in the dashboard, goes off.
Central locking
Pressing this button simultaneously
locks all of your vehicle's doors.
If one of the doors is open or not properly
closed, central locking does not take place.
The direction indicators flash once.
If your vehicle has an alarm, pressing this
button sets it.
The indicator lamp in the central locking button
comes on and flashes.
3-button remote control
Unlocking the cab
Pressing this button unlocks your
vehicle's cab.
The interior courtesy lamp comes on briefly
and the direction indicators flash twice.
The indicator lamp in the central locking button,
located in the dashboard, goes off.
Unlocking the load space
Pressing this button unlocks the side
door and the rear doors of the load
space.
The direction indicators flash twice.
If your vehicle has an alarm, pressing this
button disarms it.
Access
Page 33 of 232
31
If one of the doors is open or not properly
closed, central locking does not take place.
The direction indicators flash once.
If your vehicle has an alarm, pressing this
button sets it.
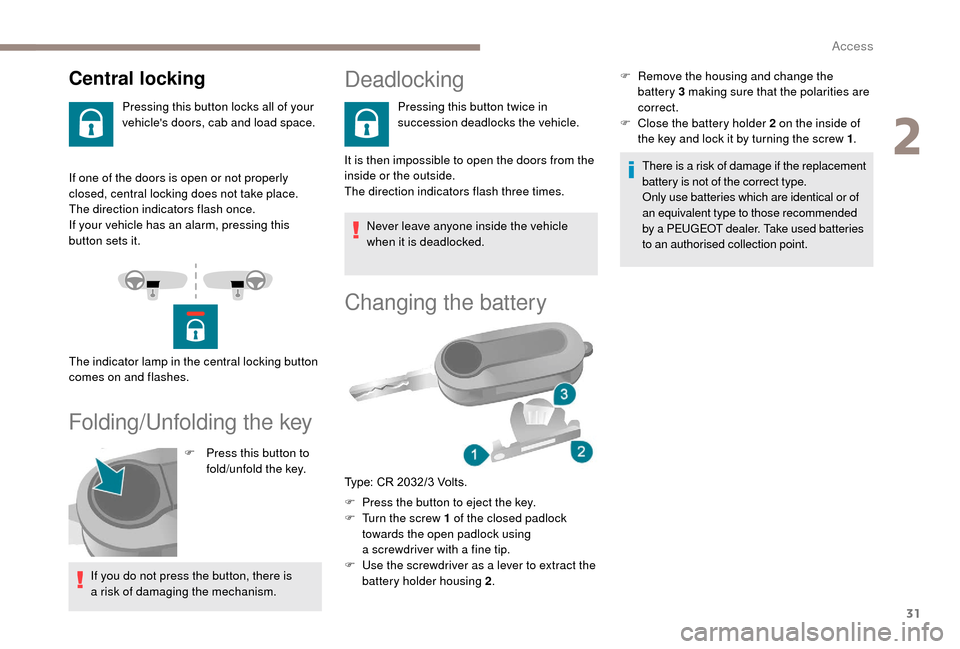
Folding/Unfolding the key
F Press this button to fold/unfold the key.
If you do not press the button, there is
a
risk of damaging the mechanism.
Central locking
Pressing this button locks all of your
vehicle's doors, cab and load space.
The indicator lamp in the central locking button
comes on and flashes.
Deadlocking
Pressing this button twice in
succession deadlocks the vehicle.
It is then impossible to open the doors from the
inside or the outside.
The direction indicators flash three times. Never leave anyone inside the vehicle
when it is deadlocked.
Changing the battery
F Press the button to eject the key.
F T urn the screw 1 of the closed padlock
towards the open padlock using
a
screwdriver with a fine tip.
F
U
se the screwdriver as a lever to extract the
battery holder housing 2 . There is a
risk of damage if the replacement
battery is not of the correct type.
Only use batteries which are identical or of
an equivalent type to those recommended
by a PEUGEOT dealer. Take used batteries
to an authorised collection point.
Type: CR 2032/3 Volts. F
R
emove the housing and change the
battery 3 making sure that the polarities are
correct.
F
C
lose the battery holder 2 on the inside of
the key and lock it by turning the screw 1 .
2
Access
Page 34 of 232
32
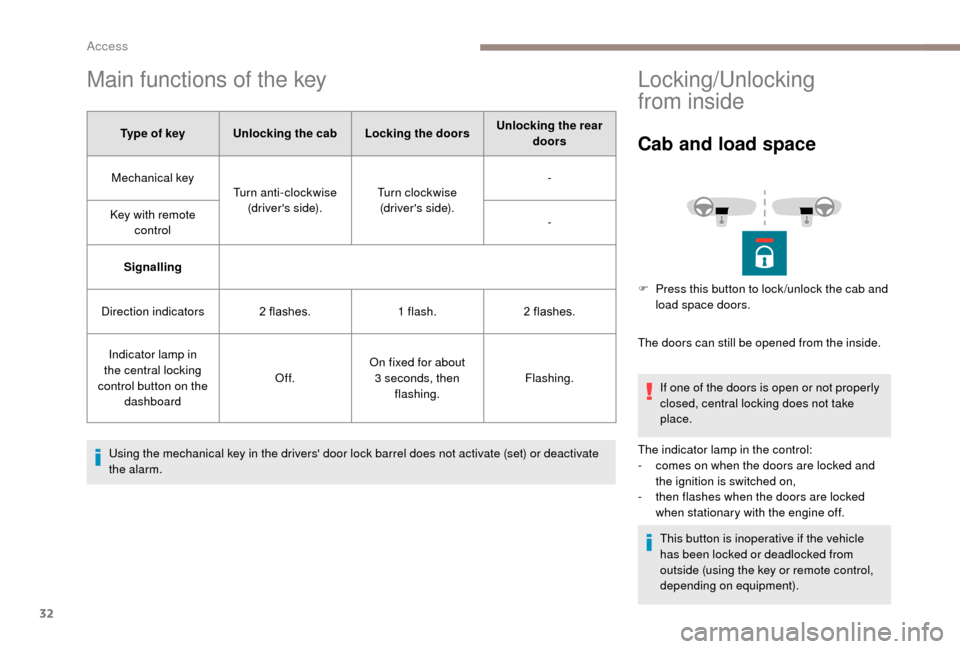
Main functions of the key
Type of keyUnlocking the cab Locking the doorsUnlocking the rear
doors
Mechanical key Turn anti-clockwise
(driver's side). Turn clockwise
(driver's side). -
Key with remote control -
Signalling
Direction indicators 2
flashes.1
flash.2
flashes.
Indicator lamp in
the central locking
control button on the dashboard Of f.
On fixed for about
3
seconds, then flashing. Flashing.
Using the mechanical key in the drivers' door lock barrel does not activate (set) or deactivate
the alarm.
Locking/Unlocking
from inside
Cab and load space
The doors can still be opened from the inside. If one of the doors is open or not properly
closed, central locking does not take
place.
The indicator lamp in the control:
-
c
omes on when the doors are locked and
the ignition is switched on,
-
t
hen flashes when the doors are locked
when stationary with the engine off.
This button is inoperative if the vehicle
has been locked or deadlocked from
outside (using the key or remote control,
depending on equipment).
F
P
ress this button to lock /unlock the cab and
load space doors.
Access
Page 35 of 232
33
If you decide to drive with the doors
locked, be aware that this could make
access to the vehicle by the emergency
services more difficult in an emergency.
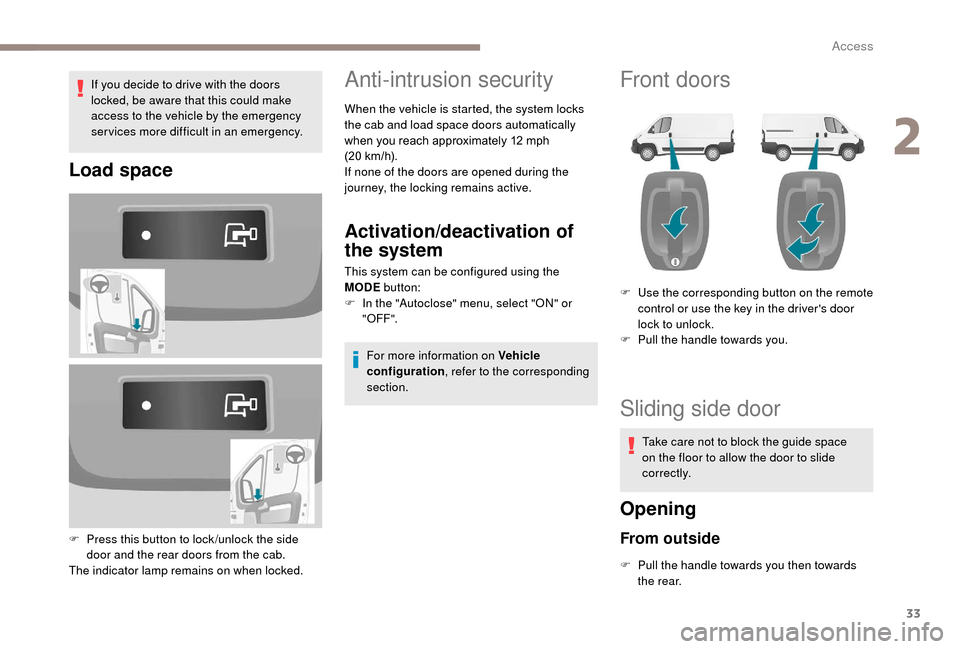
Load space
F Press this button to lock /unlock the side door and the rear doors from the cab.
The indicator lamp remains on when locked.
Anti-intrusion security
When the vehicle is started, the system locks
the cab and load space doors automatically
when you reach approximately 12
mph
(20
km/h).
If none of the doors are opened during the
journey, the locking remains active.
Activation/deactivation of
the system
This system can be configured using the
MODE button:
F
I
n the "Autoclose" menu, select "ON" or
"OFF".
For more information on Vehicle
configuration , refer to the corresponding
section.
Front doors
F Use the corresponding button on the remote control or use the key in the driver's door
lock to unlock.
F
P
ull the handle towards you.
Sliding side door
Take care not to block the guide space
on the floor to allow the door to slide
c o r r e c t l y.
Opening
From outside
F Pull the handle towards you then towards the rear.
2
Access
Page 52 of 232
50
To avoid the risks of poisoning or
asphyxia, the additional heating must
not be used, even for short periods, in
a closed environment such as a garage or
workshop which are not equipped with an
exhaust gas extraction system.
The additional heating switches off when
the battery voltage is low, so as to allow
engine starting.
The additional heating is fed by the
vehicle's fuel tank. Ensure that the low fuel
warning lamp is not on.
Always switch off the additional heating
when refuelling to avoid any risk of fire or
explosion!
The temperature near the heating
system must not exceed 120°C. A higher
temperature (e.g. when baking the
paint) could damage the components of
electronic circuits.
The additional heating is fitted with
a
temperature limiter which cuts off
the combustion in the event of engine
overheating due to a
lack of coolant.
Check the level and top up if necessary.
For more information on Checking levels ,
refer to the corresponding section.
Then press the programme selection
button before switching the heating on
again.Recommendations for ventilation and air conditioning
In order for these systems to be fully effective,
follow the operation and maintenance
guidelines below:
F
T
o ensure that the air is distributed evenly,
keep the external air intake grilles at the
base of the windscreen, the nozzles, the
vents, the air outlets and the air extractor
in the boot free from obstructions.
F
D
o not cover the sunshine sensor,
located on the dashboard; this is used for
regulation of the automatic air conditioning
system.
F
O
perate the air conditioning system for
at least 5
to 10 minutes once or twice
a
month to keep it in per fect working order.
F
E
nsure that the passenger compartment
filter is in good condition and replace
the filter elements periodically. We
recommend the use of a
combined
passenger compartment filter. Thanks to
its special active additive, it helps both to
purify the air breathed by the occupants
and to keep the passenger compartment
clean (reduction of allergic symptoms, bad
odours and greasy deposits). F
T o ensure correct operation of the
air conditioning system, you are also
advised to have it checked regularly
as recommended in the Warranty and
Maintenance Record.
F
I
f the system does not produce cold air,
switch it off and contact a
PEUGEOT
dealer or a
qualified workshop.
When towing the maximum load on a
steep
gradient in high temperatures, switching off
the air conditioning increases the available
engine power and so improves the towing
ability.
To avoid the windows misting up and
deterioration in the quality of the air:
-
d
o not drive for too long with the
ventilation switched off.
-
d
o not keep air recirculation set for an
extended period.
Ease of use and comfort
Page 58 of 232
56
Portable ashtray
F After opening the ashtray, pull it upwards then empty it into a bin.
Overhead storage
This is located above the sun visors.
Maximum load: approximately 20 kg.
Reading lamps
Controls located at the bottom
of the dashboard on the driver's
side allow the driver to switch
the passenger reading lamp on
or of f.
These are controlled by the switches.
The driver's switch controls both reading lamps
simultaneously.
The passenger switch controls either the
driver's reading lamp or the passenger's
reading lamp.
Courtesy lamp
It can be activated by means of:
-
t he switches on the courtesy lamp, with the
ignition on – MAR position,
-
o
pening or closing one of the front doors,
-
l
ocking/unlocking the vehicle.
It switches off automatically:
-
i
f the switch is not pressed to the right or to
the left,
-
i
n all cases after 15 minutes, if the doors
remain open,
-
o
r when the ignition is switched on.
Ease of use and comfort