check engine Peugeot Boxer 2020 Owner's Manual
[x] Cancel search | Manufacturer: PEUGEOT, Model Year: 2020, Model line: Boxer, Model: Peugeot Boxer 2020Pages: 196, PDF Size: 5.1 MB
Page 5 of 196
3
Contents
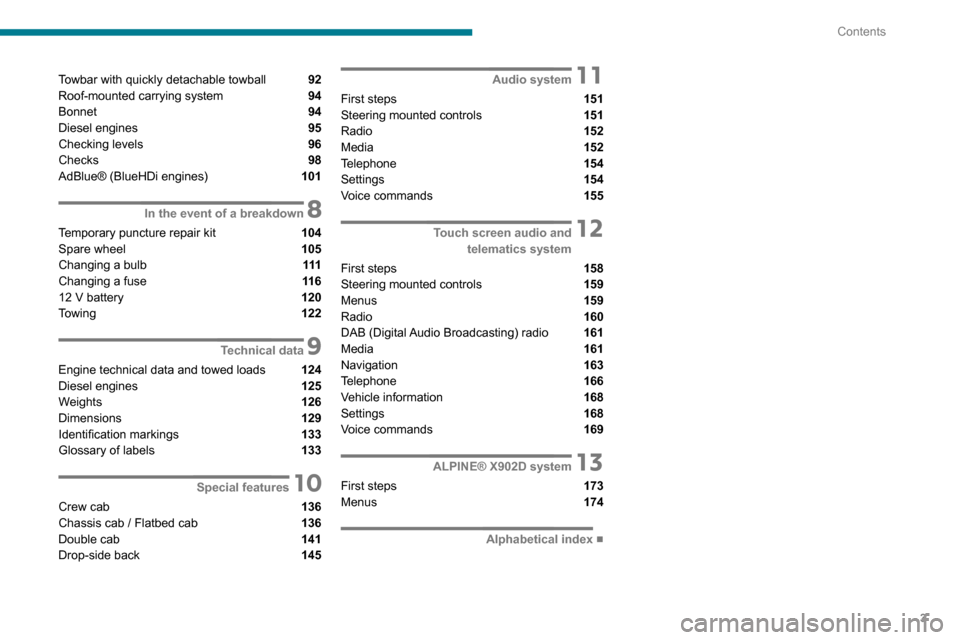
Towbar with quickly detachable towball 92
Roof-mounted carrying system 94
Bonnet 94
Diesel engines 95
Checking levels 96
Checks 98
AdBlue® (BlueHDi engines) 101
8In the event of a breakdown
Temporary puncture repair kit 104
Spare wheel 105
Changing a bulb 111
Changing a fuse 11 612 V battery 120
Towing 122
9Technical data
Engine technical data and towed loads 124
Diesel engines 125
Weights 126
Dimensions 129
Identification markings 133
Glossary of labels 133
10Special features
Crew cab 136
Chassis cab / Flatbed cab 136
Double cab 141
Drop-side back 145
11Audio system
First steps 151
Steering mounted controls 151
Radio 152
Media 152
Telephone 154
Settings 154
Voice commands 155
12 Touch screen audio and telematics system
First steps
158
Steering mounted controls 159
Menus 159
Radio 160
DAB (Digital Audio Broadcasting) radio 161
Media 161
Navigation 163
Telephone 166
Vehicle information 168
Settings 168
Voice commands 169
13ALPINE® X902D system
First steps 173
Menus 174
■
Alphabetical index
Page 7 of 196
5
Eco-driving
Eco-driving
Eco-driving refers to a range of everyday
practices that allow the motorist to optimise their
fuel consumption and CO
2emissions.
Optimise your use of the gearbox
With a manual gearbox, move off gently and
change up promptly. While accelerating, change
up early.
The gear efficiency indicator prompts you to
engage the most suitable gear: whenever this
indication is displayed on the instrument panel,
follow it straight away.
Drive smoothly
Maintain a safe distance between vehicles, use
engine braking rather than the brake pedal and
press the accelerator gradually. These attitudes
help to save fuel, reduce CO
2 emissions and
decrease general traffic noise.
If the vehicle has the steering-mounted
"CRUISE" control, use cruise control at speeds
above 19 mph (30 km/h) when traffic is flowing
smoothly.
Use electrical equipment wisely
Before moving off, if the passenger compartment
is too warm, ventilate it by opening the windows
and air vents before using the air conditioning.
At speeds above 31 mph (50 km/h), close the windows and leave the air vents open. Consider using equipment that can help keep
the temperature in the passenger compartment
down.
Unless automatically regulated, switch off the air
conditioning as soon as the desired temperature
has been reached.
Switch off the demisting and defrosting functions,
if they are not managed automatically.
Switch off the heated seat as soon as possible.
Switch off the headlamps and foglamps when
the visibility conditions do not require their use.
Avoid running the engine before moving off,
particularly in winter; your vehicle will warm up
much faster while driving.
As a passenger, avoid connecting your
multimedia devices (film, music, video game,
etc.) to help reduce consumption of electrical
energy, and hence fuel.
Disconnect all portable devices before leaving
the vehicle.
Limit the causes of excess consumption
Spread loads throughout the vehicle.
Limit the loads carried in the vehicle and
minimise wind resistance (roof bars, roof rack,
bicycle carrier, trailer, etc.). Preferably, use a
roof box.
Remove roof bars and roof racks after use.
At the end of winter, remove snow tyres and refit
summer tyres.
Comply with servicing instructions
Check tyre pressures regularly, with the tyres
cold, referring to the label in the door aperture on
the driver's side.
Carry out this check in particular:
– before a long journey
.– at each change of season.– after a long period out of use.Do not overlook the spare wheel and, where
applicable, the tyres on your trailer or caravan.
Have your vehicle serviced regularly (engine oil,
oil filter, air filter, passenger compartment filter,
etc.) and observe the schedule of operations in
the manufacturer's service schedule.
With a BlueHDi Diesel engine, if the SCR system
is faulty, your vehicle will emit pollution. Visit
a PEUGEOT dealer or a qualified workshop
as soon as possible to restore your vehicle’s
nitrogen oxide emissions to regulatory
compliance.
When filling the fuel tank, do not continue after
the third nozzle cut-out, to avoid overflow.
You will only see the fuel consumption of your
new vehicle settle down to a consistent average
after the first 1,900 miles (3,000 kilometres).
Page 9 of 196
7
Instruments
1For more information on a system or a function,
refer to the corresponding section.
Warning lamp continuously
lit
The illumination of a red or orange warning lamp
indicates the occurrence of a fault that needs
further investigation.
If a warning lamp remains lit
The references (1), (2) and (3) in the warning
and indicator lamp description indicate whether
you should contact a qualified professional in
addition to the immediate recommended actions.
(1): You must stop the vehicle.
Stop as soon as it is safe to do so and switch off
the ignition.
(2): Contact a PEUGEOT dealer or a qualified
workshop.
(3): Visit a PEUGEOT dealer or a qualified
workshop.
List of warning and
indicator lamps
Red warning/indicator lamps
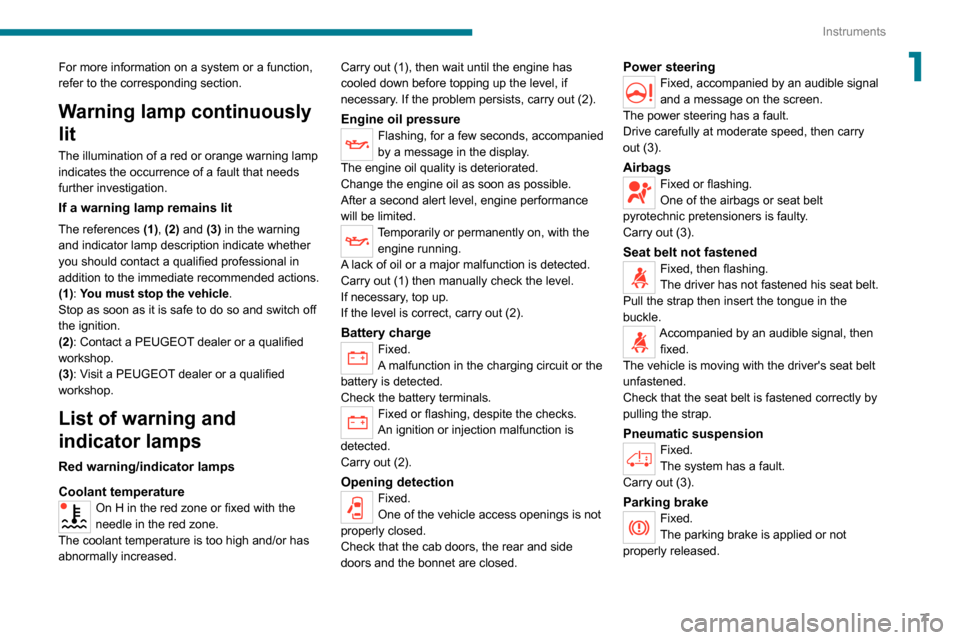
Coolant temperature
On H in the red zone or fixed with the
needle in the red zone.
The coolant temperature is too high and/or has
abnormally increased. Carry out (1), then wait until the engine has
cooled down before topping up the level, if
necessary. If the problem persists, carry out (2).
Engine oil pressureFlashing, for a few seconds, accompanied
by a message in the display.
The engine oil quality is deteriorated.
Change the engine oil as soon as possible.
After a second alert level, engine performance
will be limited.
Temporarily or permanently on, with the engine running.
A lack of oil or a major malfunction is detected.
Carry out (1) then manually check the level.
If necessary, top up.
If the level is correct, carry out (2).
Battery chargeFixed.
A malfunction in the charging circuit or the
battery is detected.
Check the battery terminals.
Fixed or flashing, despite the checks.
An ignition or injection malfunction is
detected.
Carry out (2).
Opening detectionFixed.
One of the vehicle access openings is not
properly closed.
Check that the cab doors, the rear and side
doors and the bonnet are closed.
Power steeringFixed, accompanied by an audible signal
and a message on the screen.
The power steering has a fault.
Drive carefully at moderate speed, then carry
out (3).
AirbagsFixed or flashing.
One of the airbags or seat belt
pyrotechnic pretensioners is faulty.
Carry out (3).
Seat belt not fastenedFixed, then flashing.
The driver has not fastened his seat belt.
Pull the strap then insert the tongue in the
buckle.
Accompanied by an audible signal, then fixed.
The vehicle is moving with the driver's seat belt
unfastened.
Check that the seat belt is fastened correctly by
pulling the strap.
Pneumatic suspensionFixed.
The system has a fault.
Carry out (3).
Parking brakeFixed.
The parking brake is applied or not
properly released.
Page 11 of 196
9
Instruments
1Fixed.
A sensor is faulty.
Carry out (3).
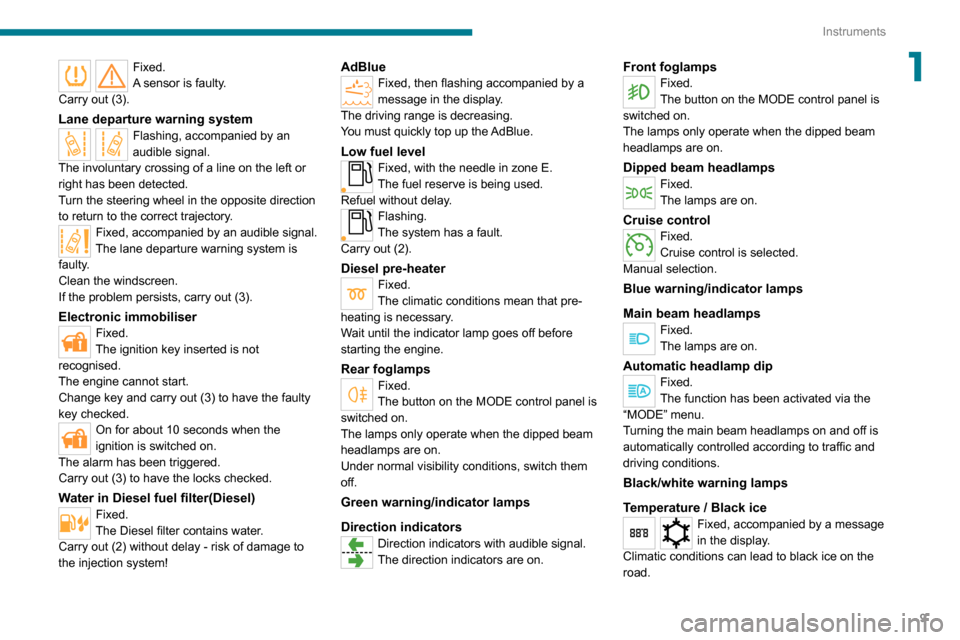
Lane departure warning systemFlashing, accompanied by an
audible signal.
The involuntary crossing of a line on the left or
right has been detected.
Turn the steering wheel in the opposite direction
to return to the correct trajectory.
Fixed, accompanied by an audible signal.
The lane departure warning system is
faulty.
Clean the windscreen.
If the problem persists, carry out (3).
Electronic immobiliserFixed.
The ignition key inserted is not
recognised.
The engine cannot start.
Change key and carry out (3) to have the faulty
key checked.
On for about 10 seconds when the
ignition is switched on.
The alarm has been triggered.
Carry out (3) to have the locks checked.
Water in Diesel fuel filter(Diesel)Fixed.
The Diesel filter contains water.
Carry out (2) without delay - risk of damage to
the injection system!
AdBlueFixed, then flashing accompanied by a
message in the display.
The driving range is decreasing.
You must quickly top up the AdBlue.
Low fuel levelFixed, with the needle in zone E.The fuel reserve is being used.Refuel without delay.Flashing.
The system has a fault.
Carry out (2).
Diesel pre-heaterFixed.
The climatic conditions mean that pre-
heating is necessary.
Wait until the indicator lamp goes off before
starting the engine.
Rear foglampsFixed.
The button on the MODE control panel is
switched on.
The lamps only operate when the dipped beam
headlamps are on.
Under normal visibility conditions, switch them
off.
Green warning/indicator lamps
Direction indicators
Direction indicators with audible signal.
The direction indicators are on.
Front foglampsFixed.
The button on the MODE control panel is
switched on.
The lamps only operate when the dipped beam
headlamps are on.
Dipped beam headlampsFixed.
The lamps are on.
Cruise controlFixed.
Cruise control is selected.
Manual selection.
Blue warning/indicator lamps
Main beam headlamps
Fixed.
The lamps are on.
Automatic headlamp dipFixed.
The function has been activated via the
“MODE” menu.
Turning the main beam headlamps on and off is
automatically controlled according to traffic and
driving conditions.
Black/white warning lamps
Temperature / Black ice
Fixed, accompanied by a message
in the display.
Climatic conditions can lead to black ice on the
road.
Page 12 of 196
10
Instruments
Be extra vigilant and avoid sudden braking.
Date / TimeFixed.
It is set via the “MODE” menu.
Beam heightFixed.
The headlamps are adjusted from position
0 to 3 depending on the load transported.
Adjust with the buttons on the MODE control
module.
Service spannerFixed.
Service is due.
Refer to the list of checks in the manufacturer's
service schedule then have the service carried
out.
Stop & StartFixed.
With the vehicle stationary (traffic lights,
stop sign, congestion, etc.), the Stop & Start
system puts the engine in STOP mode.
The indicator lamp goes off and the engine
restarts automatically in START mode, as soon
as you move off.
Flashing for a few seconds, then goes off.
STOP mode is temporarily unavailable.
Gear shift indicatorFixed.
The next higher gear may be engaged.
Speed limiterFixed.
The limiter is activated.
Fixed with "OFF".
The limiter is selected and not active.
Indicators
Service information
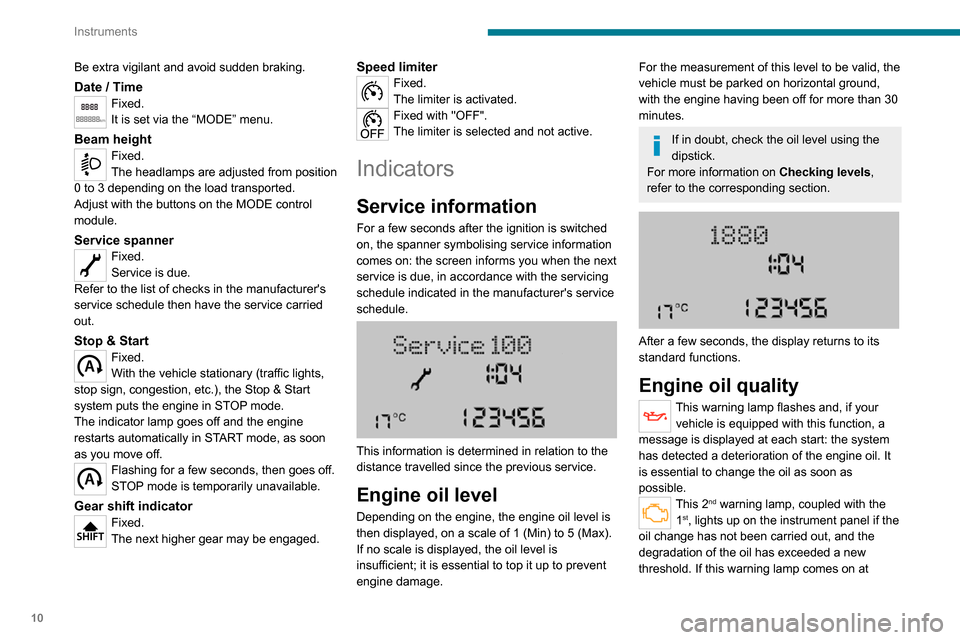
For a few seconds after the ignition is switched
on, the spanner symbolising service information
comes on: the screen informs you when the next
service is due, in accordance with the servicing
schedule indicated in the manufacturer's service
schedule.
This information is determined in relation to the
distance travelled since the previous service.
Engine oil level
Depending on the engine, the engine oil level is
then displayed, on a scale of 1 (Min) to 5 (Max).
If no scale is displayed, the oil level is
insufficient; it is essential to top it up to prevent
engine damage.
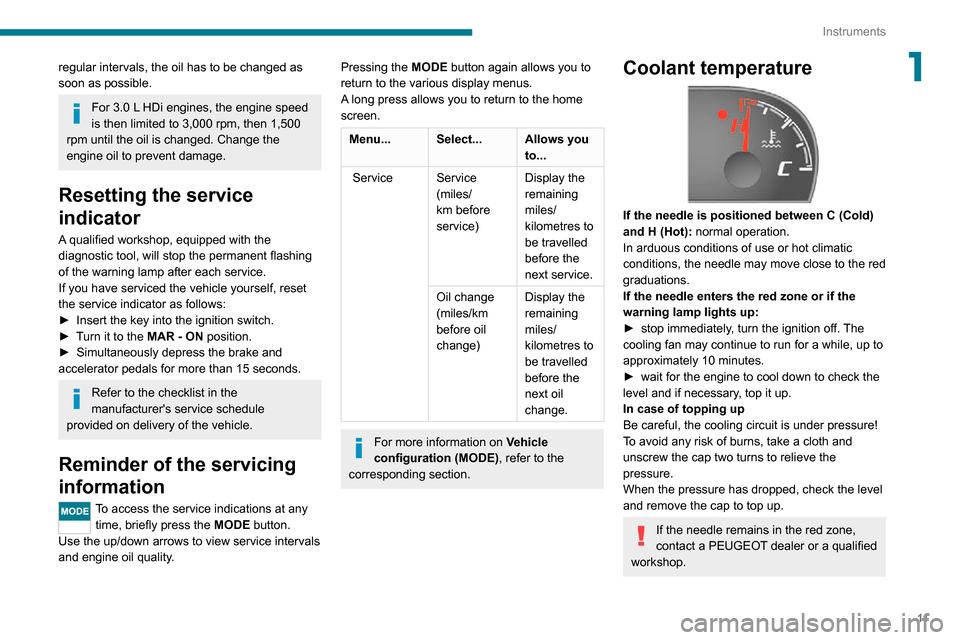
For the measurement of this level to be valid, the
vehicle must be parked on horizontal ground,
with the engine having been off for more than 30
minutes.
If in doubt, check the oil level using the
dipstick.
For more information on Checking levels,
refer to the corresponding section.
After a few seconds, the display returns to its
standard functions.
Engine oil quality
This warning lamp flashes and, if your vehicle is equipped with this function, a
message is displayed at each start: the system
has detected a deterioration of the engine oil. It
is essential to change the oil as soon as
possible.
This 2nd warning lamp, coupled with the
1st, lights up on the instrument panel if the
oil change has not been carried out, and the
degradation of the oil has exceeded a new
threshold. If this warning lamp comes on at
Page 13 of 196
11
Instruments
1regular intervals, the oil has to be changed as
soon as possible.
For 3.0 L HDi engines, the engine speed
is then limited to 3,000 rpm, then 1,500
rpm until the oil is changed. Change the
engine oil to prevent damage.
Resetting the service
indicator
A qualified workshop, equipped with the
diagnostic tool, will stop the permanent flashing
of the warning lamp after each service.
If you have serviced the vehicle yourself, reset
the service indicator as follows:
► Insert the key into the ignition switch.► Turn it to the MAR - ON position.► Simultaneously depress the brake and accelerator pedals for more than 15 seconds.
Refer to the checklist in the
manufacturer's service schedule
provided on delivery of the vehicle.
Reminder of the servicing
information
To access the service indications at any time, briefly press the MODE button.
Use the up/down arrows to view service intervals
and engine oil quality.
Pressing the MODE button again allows you to return to the various display menus.
A long press allows you to return to the home
screen.
Menu... Select... Allows you
to...
Service Service
(miles/
km before
service) Display the
remaining
miles/
kilometres to
be travelled
before the
next service.
Oil change
(miles/km
before oil
change) Display the
remaining
miles/
kilometres to
be travelled
before the
next oil
change.
For more information on
Vehicle
configuration (MODE) , refer to the
corresponding section.
Coolant temperature
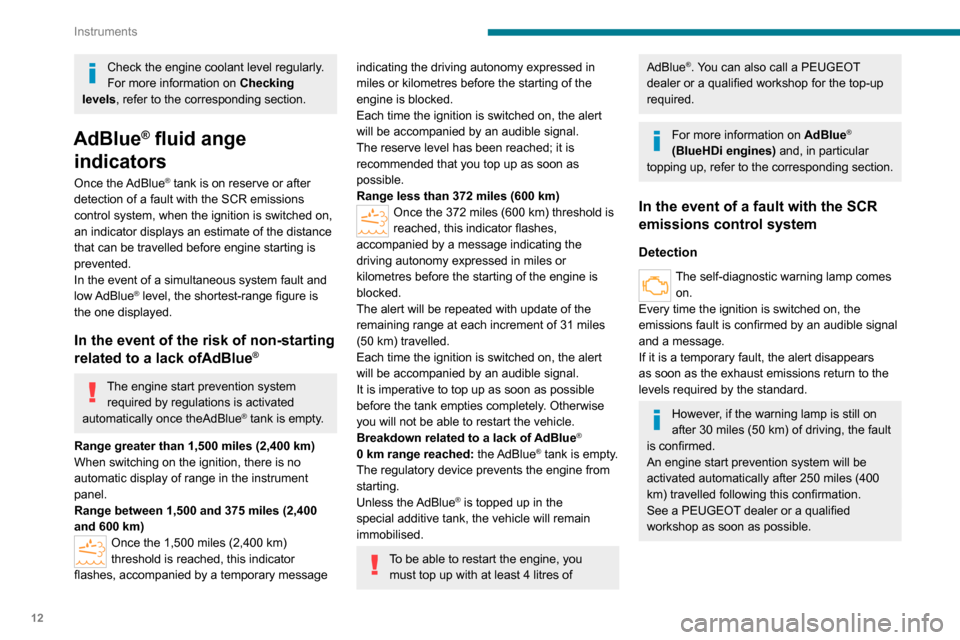
If the needle is positioned between C (Cold)
and H (Hot): normal operation.In arduous conditions of use or hot climatic
conditions, the needle may move close to the red
graduations.
If the needle enters the red zone or if the
warning lamp lights up:
► stop immediately , turn the ignition off. The cooling fan may continue to run for a while, up to
approximately 10 minutes.
► wait for the engine to cool down to check the level and if necessary, top it up.
In case of topping up
Be careful, the cooling circuit is under pressure!
To avoid any risk of burns, take a cloth and
unscrew the cap two turns to relieve the
pressure.
When the pressure has dropped, check the level
and remove the cap to top up.
If the needle remains in the red zone,
contact a PEUGEOT dealer or a qualified
workshop.
Page 14 of 196
12
Instruments
Check the engine coolant level regularly.
For more information on Checking
levels, refer to the corresponding section.
AdBlue® fluid ange
indicators
Once the AdBlue® tank is on reserve or after
detection of a fault with the SCR emissions
control system, when the ignition is switched on,
an indicator displays an estimate of the distance
that can be travelled before engine starting is
prevented.
In the event of a simultaneous system fault and
low AdBlue
® level, the shortest-range figure is
the one displayed.
In the event of the risk of non-starting
related to a lack ofAdBlue®
The engine start prevention system
required by regulations is activated
automatically once theAdBlue
® tank is empty.
Range greater than 1,500 miles (2,400 km)
When switching on the ignition, there is no
automatic display of range in the instrument
panel.
Range between 1,500 and 375 miles (2,400
and 600 km)
Once the 1,500 miles (2,400 km)
threshold is reached, this indicator
flashes, accompanied by a temporary message
indicating the driving autonomy expressed in
miles or kilometres before the starting of the
engine is blocked.
Each time the ignition is switched on, the alert
will be accompanied by an audible signal.
The reserve level has been reached; it is
recommended that you top up as soon as
possible.
Range less than 372 miles (600 km)
Once the 372 miles (600 km) threshold is
reached, this indicator flashes,
accompanied by a message indicating the
driving autonomy expressed in miles or
kilometres before the starting of the engine is
blocked.
The alert will be repeated with update of the
remaining range at each increment of 31 miles
(50 km) travelled.
Each time the ignition is switched on, the alert
will be accompanied by an audible signal.
It is imperative to top up as soon as possible
before the tank empties completely. Otherwise
you will not be able to restart the vehicle.
Breakdown related to a lack of AdBlue
®
0 km range reached: the AdBlue® tank is empty.
The regulatory device prevents the engine from
starting.
Unless the AdBlue
® is topped up in the
special additive tank, the vehicle will remain
immobilised.
To be able to restart the engine, you must top up with at least 4 litres of
AdBlue®. You can also call a PEUGEOT
dealer or a qualified workshop for the top-up
required.
For more information on AdBlue®
(BlueHDi engines) and, in particular
topping up, refer to the corresponding section.
In the event of a fault with the SCR
emissions control system
Detection
The self-diagnostic warning lamp comes on.
Every time the ignition is switched on, the
emissions fault is confirmed by an audible signal
and a message.
If it is a temporary fault, the alert disappears
as soon as the exhaust emissions return to the
levels required by the standard.
However, if the warning lamp is still on
after 30 miles (50 km) of driving, the fault
is confirmed.
An engine start prevention system will be
activated automatically after 250 miles (400
km) travelled following this confirmation.
See a PEUGEOT dealer or a qualified
workshop as soon as possible.
Page 27 of 196
25
Access
2- Anti-tilt monitoring
The system checks for any change in the attitude
of the vehicle.
Activation
► Switch off the ignition and exit the vehicle.► Press this button of the remote control.
The protections are active after a few seconds.
Triggering of the alarm
This is signalled by the siren sounding and
flashing of the direction indicators for thirty
seconds.
The alarm then returns to monitoring mode but the triggering event is stored
and is indicated by illumination of the electronic
immobiliser warning lamp for about 10 seconds
when the ignition is switched on.
The alarm is also triggered after interruption of
the electrical supply and when it is reconnected.
Deactivation using the
remote control
► Press this button.
The standby mode is deactivated when the
vehicle is unlocked.
Deactivating the anti-tilt
monitoring
(Depending on engine)► Press this button to deactivate the protection (e.g. when towing the vehicle
with the alarm on).
The protection remains active until the central
opening of the doors.
Failure of the remote control
► Unlock the doors using the key in the lock; the alarm goes off.► Turn the ignition on; the identification of the key code will turn off the alarm.
Locking the doors using the key in the
lock does not activate the alarm.
To deactivate the siren quickly
following a false alarm:
► switch on the ignition, recognition of the key code stops the alarm,
► press the unlocking button (cab and key) on the remote control.
To avoid setting the alarm, when washing the
vehicle for example, lock the vehicle using
the key.
Unlocking the vehicle using the remote
control deactivates the siren automatically.
Electric windows
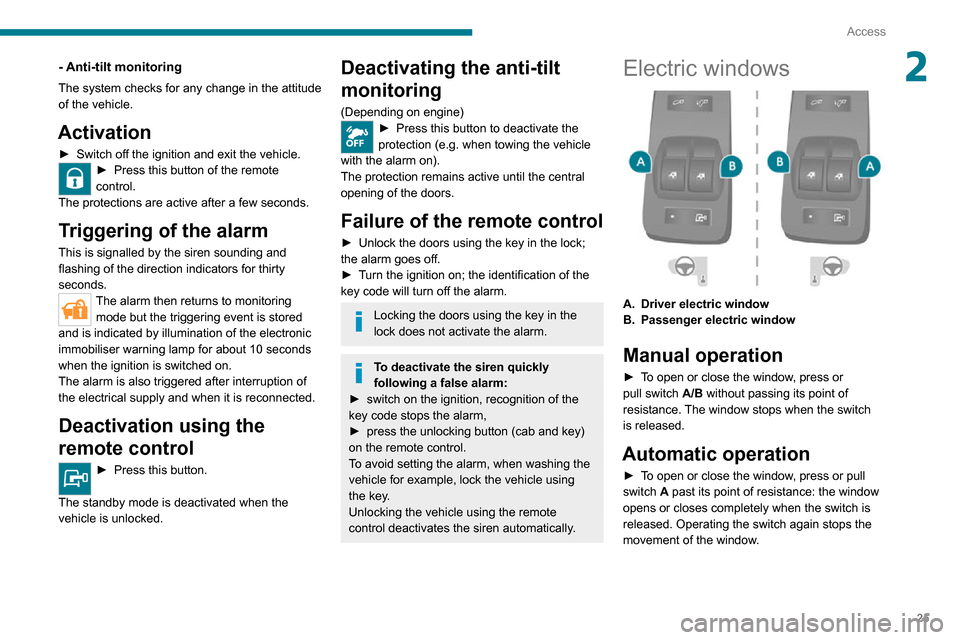
A. Driver electric window
B. Passenger electric window
Manual operation
► To open or close the window, press or pull switch A/B without passing its point of
resistance. The window stops when the switch
is released.
Automatic operation
► To open or close the window, press or pull switch A past its point of resistance: the window
opens or closes completely when the switch is
released. Operating the switch again stops the
movement of the window.
Page 38 of 196
36
Ease of use and comfort
Delayed starting of the
heating system
The start time can be programmed between 1
minute and 24 hours in advance.
You can memorise up to three different start
times, but only programme a single delayed
start.
To perform a daily start at a fixed time, reprogramme the memorised time each
day.
► Press button 3; the screen comes on.
The - -:- - symbol or the previous memorised
time and the corresponding preset number (1, 2
or 3) are displayed for 10 seconds.
To recall the other preset times, press button 3 several times before the end of
the 10 seconds.
Within 10 seconds, press one of the buttons 1 to
select the desired start time.
The memorisation is confirmed by the
disappearance of the start time, the display of
the preset number (1, 2 or 3) and the lighting of
the screen.
By default, preset times are already
memorised in the system (1 = 06:00, 2 =
16:00, 3 = 22:00). Any change cancels and
replaces the previous preset time.
If the battery is disconnected, the default
preset times will be restored.
Setting the comfort
temperature
► Turn control 1 to select a position between
blue (cold) and red (hot) so as to adjust the
temperature to your requirements.
The OFF control on the "Mono-zone" central control panel switches the
function off.
However, a back-up system will automatically
ventilate the rear circuit, even if the control is
in position 0, to avoid the formation of mist.
Air flow
► Set control 2 to the desired position to
increase or decrease the air flow.
Additional programmable heating
The additional programmable heating gradually
brings the engine to a good temperature to
facilitate its starting.
An built-in clock allows the time of its triggering
to be programmed. The passenger compartment
will warm up faster.
The warming-up of the passenger
compartment, de-icing and demisting are
facilitated. The control panel for the programmable
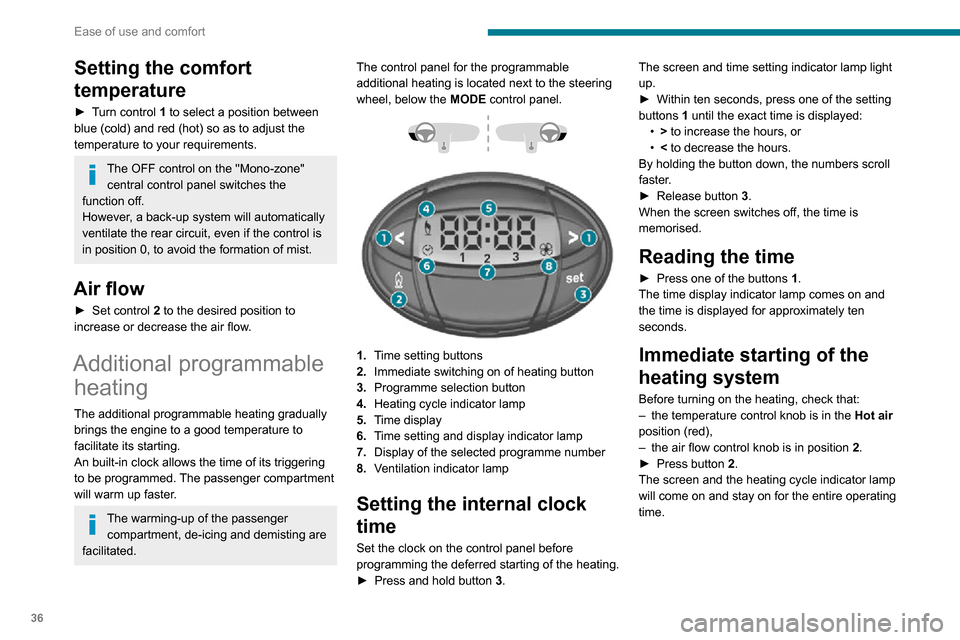
additional heating is located next to the steering
wheel, below the
MODE control panel.
1.Time setting buttons
2. Immediate switching on of heating button
3. Programme selection button
4. Heating cycle indicator lamp
5. Time display
6. Time setting and display indicator lamp
7. Display of the selected programme number
8. Ventilation indicator lamp
Setting the internal clock
time
Set the clock on the control panel before
programming the deferred starting of the heating.
► Press and hold button 3. The screen and time setting indicator lamp light
up.
► Within ten seconds, press one of the setting buttons 1 until the exact time is displayed:• > to increase the hours, or• < to decrease the hours.By holding the button down, the numbers scroll
faster.
► Release
button 3.
When the screen switches off, the time is
memorised.
Reading the time
► Press one of the buttons 1.
The time display indicator lamp comes on and
the time is displayed for approximately ten
seconds.
Immediate starting of the
heating system
Before turning on the heating, check that:– the temperature control knob is in the Hot air
position (red),
– the air flow control knob is in position 2.► Press button 2.
The screen and the heating cycle indicator lamp
will come on and stay on for the entire operating
time.
Page 39 of 196
37
Ease of use and comfort
3Delayed starting of the
heating system
The start time can be programmed between 1
minute and 24 hours in advance.
You can memorise up to three different start
times, but only programme a single delayed
start.
To perform a daily start at a fixed time, reprogramme the memorised time each
day.
► Press button 3; the screen comes on.
The - -:- - symbol or the previous memorised
time and the corresponding preset number (1, 2
or 3) are displayed for 10 seconds.
To recall the other preset times, press button 3 several times before the end of
the 10 seconds.
Within 10 seconds, press one of the buttons 1 to
select the desired start time.
The memorisation is confirmed by the
disappearance of the start time, the display of
the preset number (1, 2 or 3) and the lighting of
the screen.
By default, preset times are already
memorised in the system (1 = 06:00, 2 =
16:00, 3 = 22:00). Any change cancels and
replaces the previous preset time.
If the battery is disconnected, the default
preset times will be restored.
Cancelling the programming
► To delete the programmed start time, briefly press button 3.
The lighting of the screen and the preset number
(1, 2 or 3) go off.
Recalling one of the preset
start times
► Press button 3 as many times as necessary until the number corresponding to the desired
preset start time (1, 2 or 3) appears.
After ten seconds, the time disappears but
remains memorised while the corresponding
number (1, 2 or 3) and the screen remain on.
Setting the operating
duration
The operating duration can be set between 10
and 60 minutes.
► Press and hold button 3.► Press simultaneously one of the buttons 1.
The time and the time setting indicator lamp light
up.
► Press and hold button 3 again.► Press simultaneously one of the buttons 1
again.
The programmed operating duration is displayed
and the heating or ventilation cycle indicator
lamp flashes.
► Set the duration by pressing one of the buttons 1.
The memorisation is confirmed by the
disappearance of the duration on the screen or
by pressing button 3 again.
Switching the heating off
In the event of a delayed start, the heating
switches off automatically at the end of the
programmed duration.
► In the event of an immediate start, press button 2 again to switch it off manually.
The heating cycle indicator lamp and the screen
switch off.
Have the additional heating checked at
least once a year at the beginning of
winter. Maintenance and repairs should only
be carried out by a PEUGEOT dealer or a
qualified workshop.
Use only genuine replacement parts.
To avoid the risks of poisoning or asphyxia, the additional heating must not
be used, even for short periods, in a closed
environment such as a garage or workshop
which are not equipped with an exhaust gas
extraction system.
The additional heating switches off when the
battery voltage is low, so as to allow engine
starting.
The additional heating is fed by the vehicle's
fuel tank. Ensure that the low fuel warning
lamp is not on.