start stop button PEUGEOT BOXER 2021 Owners Manual
[x] Cancel search | Manufacturer: PEUGEOT, Model Year: 2021, Model line: BOXER, Model: PEUGEOT BOXER 2021Pages: 212, PDF Size: 6.37 MB
Page 10 of 212
8
Instruments
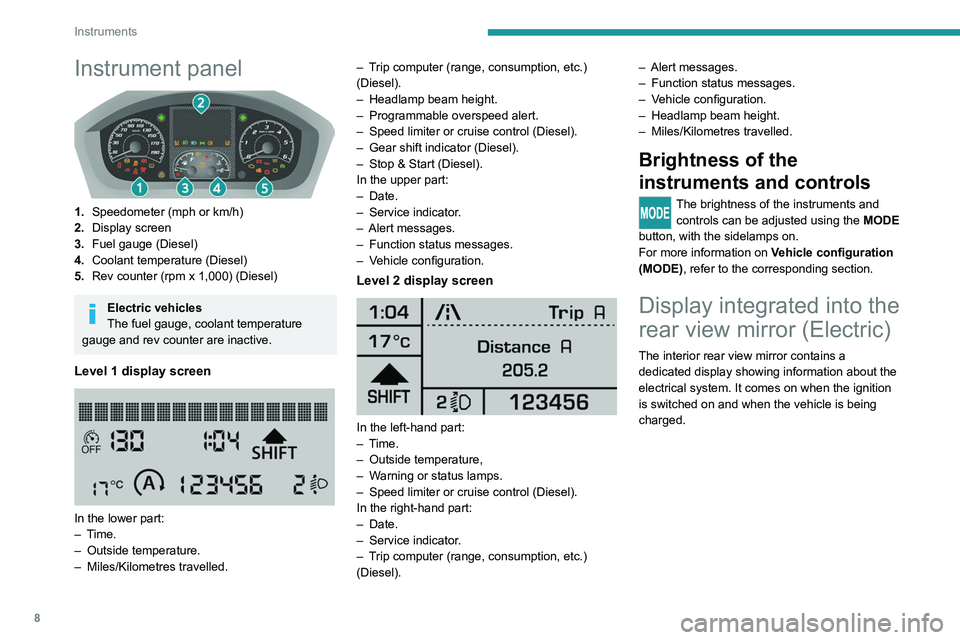
Instrument panel
1.Speedometer (mph or km/h)
2. Display screen
3. Fuel gauge (Diesel)
4. Coolant temperature (Diesel)
5. Rev counter (rpm x 1,000) (Diesel)
Electric vehicles
The fuel gauge, coolant temperature
gauge and rev counter are inactive.
Level 1 display screen
In the lower part:
– Time.
–
Outside temperature.
–
Miles/Kilometres travelled. –
T
rip computer (range, consumption, etc.)
(Diesel).
–
Headlamp beam height.
–
Programmable overspeed alert.
–
Speed limiter or cruise control (Diesel).
–
Gear shift indicator (Diesel).
–
Stop & Start (Diesel).
In the upper part:
–
Date.
–
Service indicator
.
–
Alert messages.
–
Function status messages.
–
V
ehicle configuration.
Level 2 display screen
In the left-hand part:
–
Time.
–
Outside temperature,
–
W
arning or status lamps.
–
Speed limiter or cruise control (Diesel).
In the right-hand part:
–
Date.
–
Service indicator
.
–
T
rip computer (range, consumption, etc.)
(Diesel). –
Alert messages.
–
Function status messages.
–
V
ehicle configuration.
–
Headlamp beam height.
–
Miles/Kilometres travelled.
Brightness of the
instruments and controls
The brightness of the instruments and
controls can be adjusted using the MODE
button, with the sidelamps on.
For more information on Vehicle configuration
(MODE), refer to the corresponding section.
Display integrated into the
rear view mirror (Electric)
The interior rear view mirror contains a
dedicated display showing information about the
electrical system. It comes on when the ignition
is switched on and when the vehicle is being
charged.
Page 11 of 212
9
Instruments
1
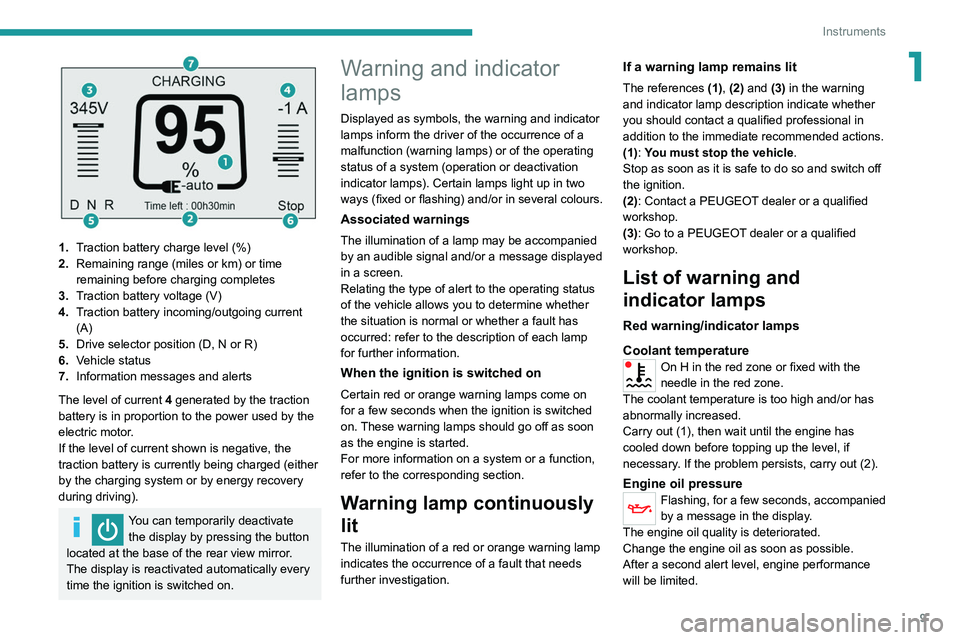
1.Traction battery charge level (%)
2. Remaining range (miles or km) or time
remaining before charging completes
3. Traction battery voltage (V)
4. Traction battery incoming/outgoing current
(A)
5. Drive selector position (D, N or R)
6. Vehicle status
7. Information messages and alerts
The level of current 4 generated by the traction
battery is in proportion to the power used by the
electric motor.
If the level of current shown is negative, the
traction battery is currently being charged (either
by the charging system or by energy recovery
during driving).
You can temporarily deactivate the display by pressing the button
located at the base of the rear view mirror.
The display is reactivated automatically every
time the ignition is switched on.
Warning and indicator
lamps
Displayed as symbols, the warning and indicator
lamps inform the driver of the occurrence of a
malfunction (warning lamps) or of the operating
status of a system (operation or deactivation
indicator lamps). Certain lamps light up in two
ways (fixed or flashing) and/or in several colours.
Associated warnings
The illumination of a lamp may be accompanied
by an audible signal and/or a message displayed
in a screen.
Relating the type of alert to the operating status
of the vehicle allows you to determine whether
the situation is normal or whether a fault has
occurred: refer to the description of each lamp
for further information.
When the ignition is switched on
Certain red or orange warning lamps come on
for a few seconds when the ignition is switched
on. These warning lamps should go off as soon
as the engine is started.
For more information on a system or a function,
refer to the corresponding section.
Warning lamp continuously
lit
The illumination of a red or orange warning lamp
indicates the occurrence of a fault that needs
further investigation.
If a warning lamp remains lit
The references (1), (2) and (3) in the warning
and indicator lamp description indicate whether
you should contact a qualified professional in
addition to the immediate recommended actions.
(1): You must stop the vehicle .
Stop as soon as it is safe to do so and switch off
the ignition.
(2): Contact a PEUGEOT dealer or a qualified
workshop.
(3): Go to a PEUGEOT dealer or a qualified
workshop.
List of warning and
indicator lamps
Red warning/indicator lamps
Coolant temperature
On H in the red zone or fixed with the
needle in the red zone.
The coolant temperature is too high and/or has
abnormally increased.
Carry out (1), then wait until the engine has
cooled down before topping up the level, if
necessary. If the problem persists, carry out (2).
Engine oil pressureFlashing, for a few seconds, accompanied
by a message in the display.
The engine oil quality is deteriorated.
Change the engine oil as soon as possible.
After a second alert level, engine performance
will be limited.
Page 14 of 212
12
Instruments
Flashing.
The system has a fault.
Carry out (2).
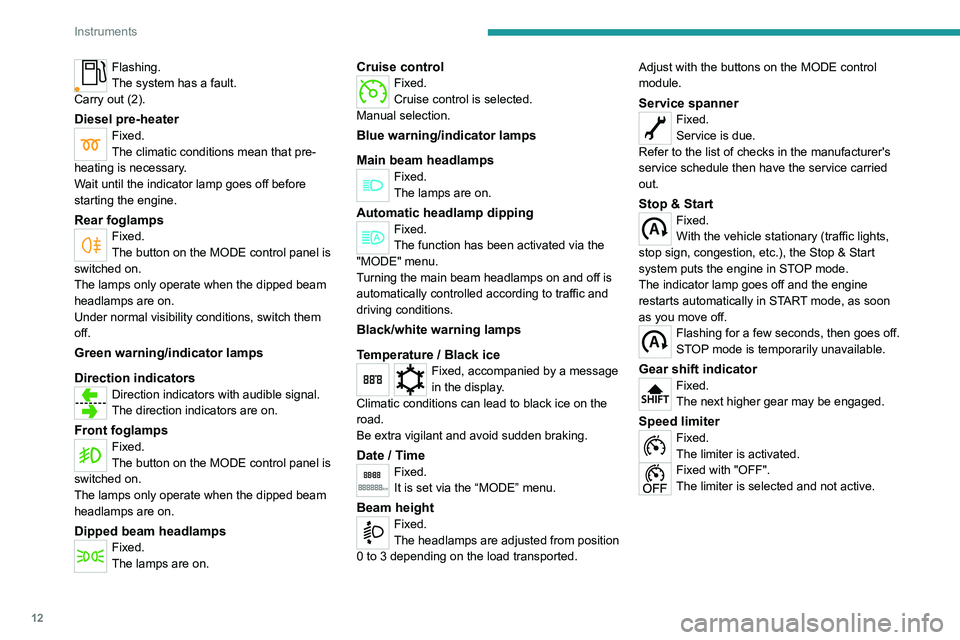
Diesel pre-heaterFixed.
The climatic conditions mean that pre-
heating is necessary.
Wait until the indicator lamp goes off before
starting the engine.
Rear foglampsFixed.
The button on the MODE control panel is
switched on.
The lamps only operate when the dipped beam
headlamps are on.
Under normal visibility conditions, switch them
off.
Green warning/indicator lamps
Direction indicators
Direction indicators with audible signal.
The direction indicators are on.
Front foglampsFixed.
The button on the MODE control panel is
switched on.
The lamps only operate when the dipped beam
headlamps are on.
Dipped beam headlampsFixed.
The lamps are on.
Cruise controlFixed.
Cruise control is selected.
Manual selection.
Blue warning/indicator lamps
Main beam headlamps
Fixed.
The lamps are on.
Automatic headlamp dippingFixed.
The function has been activated via the
"MODE" menu.
Turning the main beam headlamps on and off is
automatically controlled according to traffic and
driving conditions.
Black/white warning lamps
Temperature / Black ice
Fixed, accompanied by a message
in the display.
Climatic conditions can lead to black ice on the
road.
Be extra vigilant and avoid sudden braking.
Date / TimeFixed.
It is set via the “MODE” menu.
Beam heightFixed.
The headlamps are adjusted from position
0 to 3 depending on the load transported. Adjust with the buttons on the MODE control
module.
Service spannerFixed.
Service is due.
Refer to the list of checks in the manufacturer's
service schedule then have the service carried
out.
Stop & StartFixed.
With the vehicle stationary (traffic lights,
stop sign, congestion, etc.), the Stop & Start
system puts the engine in STOP mode.
The indicator lamp goes off and the engine
restarts automatically in START mode, as soon
as you move off.
Flashing for a few seconds, then goes off.
STOP mode is temporarily unavailable.
Gear shift indicatorFixed.
The next higher gear may be engaged.
Speed limiter
Fixed.
The limiter is activated.
Fixed with "OFF".
The limiter is selected and not active.
Page 15 of 212
13
Instruments
1Indicators
Service information
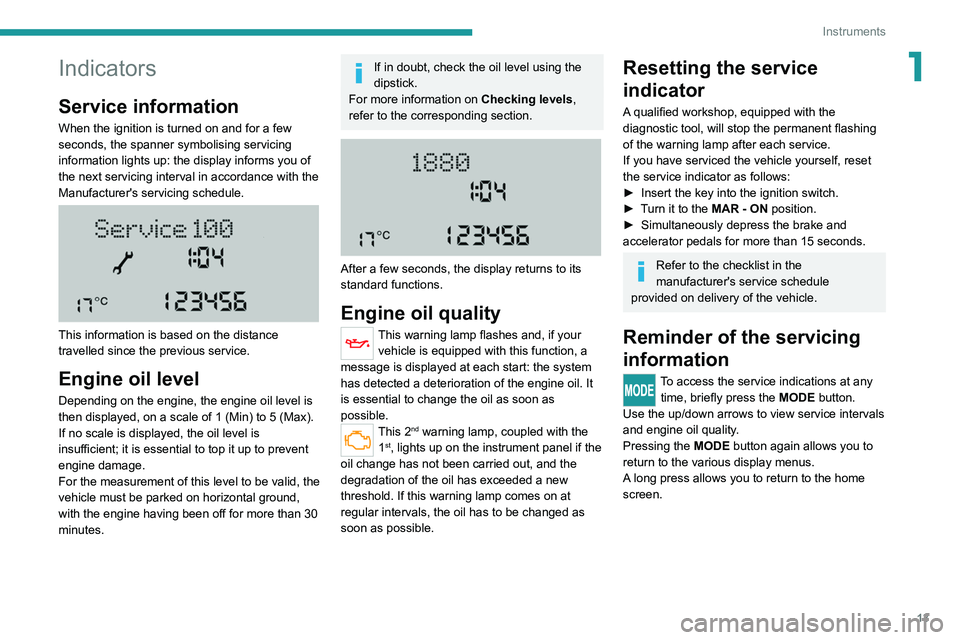
When the ignition is turned on and for a few
seconds, the spanner symbolising servicing
information lights up: the display informs you of
the next servicing interval in accordance with the
Manufacturer's servicing schedule.
This information is based on the distance
travelled since the previous service.
Engine oil level
Depending on the engine, the engine oil level is
then displayed, on a scale of 1 (Min) to 5 (Max).
If no scale is displayed, the oil level is
insufficient; it is essential to top it up to prevent
engine damage.
For the measurement of this level to be valid, the
vehicle must be parked on horizontal ground,
with the engine having been off for more than 30
minutes.
If in doubt, check the oil level using the
dipstick.
For more information on Checking levels,
refer to the corresponding section.
After a few seconds, the display returns to its
standard functions.
Engine oil quality
This warning lamp flashes and, if your vehicle is equipped with this function, a
message is displayed at each start: the system
has detected a deterioration of the engine oil. It
is essential to change the oil as soon as
possible.
This 2nd warning lamp, coupled with the
1st, lights up on the instrument panel if the
oil change has not been carried out, and the
degradation of the oil has exceeded a new
threshold. If this warning lamp comes on at
regular intervals, the oil has to be changed as
soon as possible.
Resetting the service
indicator
A qualified workshop, equipped with the
diagnostic tool, will stop the permanent flashing
of the warning lamp after each service.
If you have serviced the vehicle yourself, reset
the service indicator as follows:
►
Insert the key into the ignition switch.
►
T
urn it to the MAR - ON position.
►
Simultaneously depress the brake and
accelerator pedals for more than 15 seconds.
Refer to the checklist in the
manufacturer's service schedule
provided on delivery of the vehicle.
Reminder of the servicing
information
To access the service indications at any time, briefly press the MODE button.
Use the up/down arrows to view service intervals
and engine oil quality.
Pressing the MODE
button again allows you to
return to the various display menus.
A long press allows you to return to the home
screen.
Page 63 of 212
61
Safety
5Height adjustment
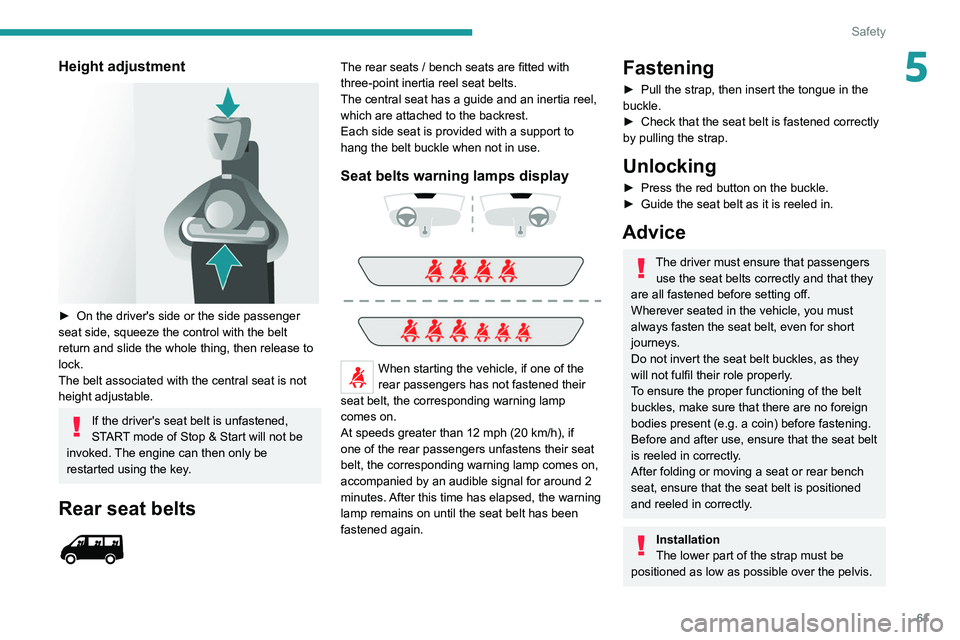
► On the driver's side or the side passenger
seat side, squeeze the control with the belt
return and slide the whole thing, then release to
lock.
The belt associated with the central seat is not
height adjustable.
If the driver's seat belt is unfastened,
START mode of Stop & Start will not be
invoked. The engine can then only be
restarted using the key.
Rear seat belts
The rear seats / bench seats are fitted with
three-point inertia reel seat belts.
The central seat has a guide and an inertia reel,
which are attached to the backrest.
Each side seat is provided with a support to
hang the belt buckle when not in use.
Seat belts warning lamps display
When starting the vehicle, if one of the
rear passengers has not fastened their
seat belt, the corresponding warning lamp
comes on.
At speeds greater than 12 mph (20
km/h), if
one of the rear passengers unfastens their seat
belt, the corresponding warning lamp comes on,
accompanied by an audible signal for around 2
minutes. After this time has elapsed, the warning
lamp remains on until the seat belt has been
fastened again.
Fastening
► Pull the strap, then insert the tongue in the
buckle.
►
Check that the seat belt is fastened correctly
by pulling the strap.
Unlocking
► Press the red button on the buckle.
► Guide the seat belt as it is reeled in.
Advice
The driver must ensure that passengers use the seat belts correctly and that they
are all fastened before setting off.
Wherever seated in the vehicle, you must
always fasten the seat belt, even for short
journeys.
Do not invert the seat belt buckles, as they
will not fulfil their role properly.
To ensure the proper functioning of the belt
buckles, make sure that there are no foreign
bodies present (e.g.
a coin) before fastening.
Before and after use, ensure that the seat belt
is reeled in correctly.
After folding or moving a seat or rear bench
seat, ensure that the seat belt is positioned
and reeled in correctly.
Installation
The lower part of the strap must be
positioned as low as possible over the pelvis.
Page 75 of 212
73
Driving
6Starting/Switching off the
motor (Electric)
Starting
► With the parking brake applied, turn the key
to the AV V position and then release it so it
returns to the MAR position.
The message "Go green" appears in the display
integrated into the rear view mirror.
►
Depress the brake pedal fully
, then press
button D (Drive) or R (Reverse) on the drive
selector.
The pedestrian horn comes on.
►
Release the parking brake.
If the electric motor does not start first time, turn
the key to the
STOP position and repeat the
procedure.
Do not depress the accelerator pedal
when switching on the ignition.
Switching off
► Press button N (Neutral) on the drive selector
and then apply the parking brake.
►
Move the key back to the
STOP position.
The parking brake must be applied each time the ignition is switched off.
If the parking brake is not applied, the
message "ENGAGE HANDBRAKE " appears
in the rear view mirror accompanied by an
audible signal lasting 10 seconds.
If the driver's door is opened with mode
D or R selected, the drive selector
automatically switches to mode N. The
message "DRIVE ACTIVE" is displayed in the
rear view mirror accompanied by an audible
signal.
Always remove the key from the ignition switch when the vehicle is parked in
order to avoid discharging the 12
V accessory
battery.
Battery standby system
If your vehicle is to be out of use for an extended
period of time, such as during winter storage for
example, it is strongly recommended to put the
battery in standby mode in order to protect it and
optimise its life.
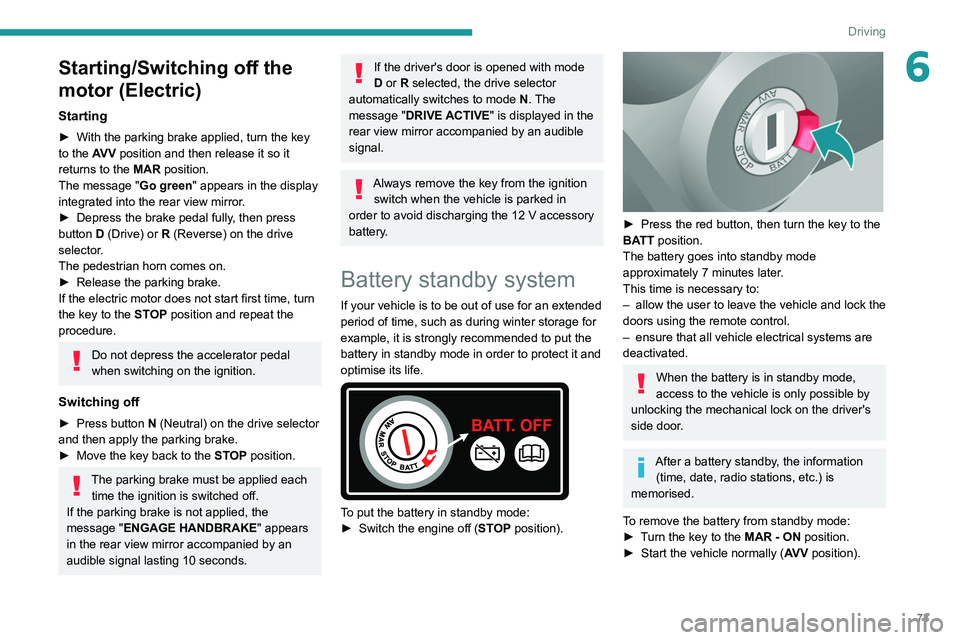
To put the battery in standby mode:
► Switch the engine off ( ST
OP position).
► Press the red button, then turn the key to the
BA TT position.
The battery goes into standby mode
approximately 7 minutes later.
This time is necessary to:
–
allow the user to leave the vehicle and lock the
doors using the remote control.
–
ensure that all vehicle electrical systems are
deactivated.
When the battery is in standby mode,
access to the vehicle is only possible by
unlocking the mechanical lock on the driver's
side door.
After a battery standby, the information (time, date, radio stations, etc.) is
memorised.
To remove the battery from standby mode:
►
T
urn the key to the MAR - ON position.
►
Start the vehicle normally ( AV
V position).
Page 78 of 212
76
Driving
Stop & Start
The Stop & Start function puts the engine temporarily into standby - STOP mode - during
phases when the vehicle is stopped (red lights,
queues, etc.). The engine restarts automatically
- START mode - as soon as the driver wishes to
move off again.
Primarily designed for urban use, the function
is intended to reduce fuel consumption and
exhaust emissions as well as the noise level
when stationary.
The function does not affect the functionalities of
the vehicle, in particular the braking.
Deactivation/Reactivation
The function is activated by default when the
ignition is switched on.
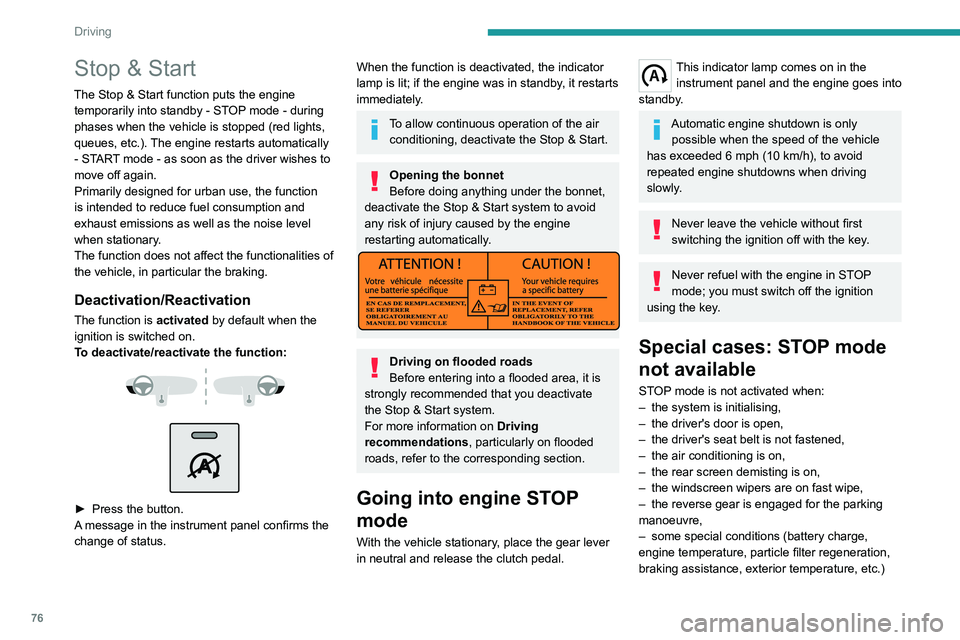
To deactivate/reactivate the function:
► Press the button.
A message in the instrument panel confirms the
change of status.
When the function is deactivated, the indicator
lamp is lit; if the engine was in standby, it restarts
immediately.
To allow continuous operation of the air conditioning, deactivate the Stop & Start.
Opening the bonnet
Before doing anything under the bonnet,
deactivate the Stop & Start system to avoid
any risk of injury caused by the engine
restarting automatically.
Driving on flooded roads
Before entering into a flooded area, it is
strongly recommended that you deactivate
the Stop & Start system.
For more information on Driving
recommendations, particularly on flooded
roads, refer to the corresponding section.
Going into engine STOP
mode
With the vehicle stationary, place the gear lever
in neutral and release the clutch pedal.
This indicator lamp comes on in the instrument panel and the engine goes into
standby.
Automatic engine shutdown is only possible when the speed of the vehicle
has exceeded 6 mph (10 km/h), to avoid
repeated engine shutdowns when driving
slowly.
Never leave the vehicle without first
switching the ignition off with the key.
Never refuel with the engine in STOP
mode; you must switch off the ignition
using the key.
Special cases: STOP mode
not available
STOP mode is not activated when:
– the system is initialising,
–
the driver's door is open,
–
the driver's seat belt is not fastened,
–
the air conditioning is on,
–
the rear screen demisting is on,
–
the windscreen wipers are on fast wipe,
–
the reverse gear is engaged for the parking
manoeuvre,
–
some special conditions (battery charge,
engine temperature, particle filter regeneration,
braking assistance, exterior temperature, etc.)
Page 80 of 212
78
Driving
Operation
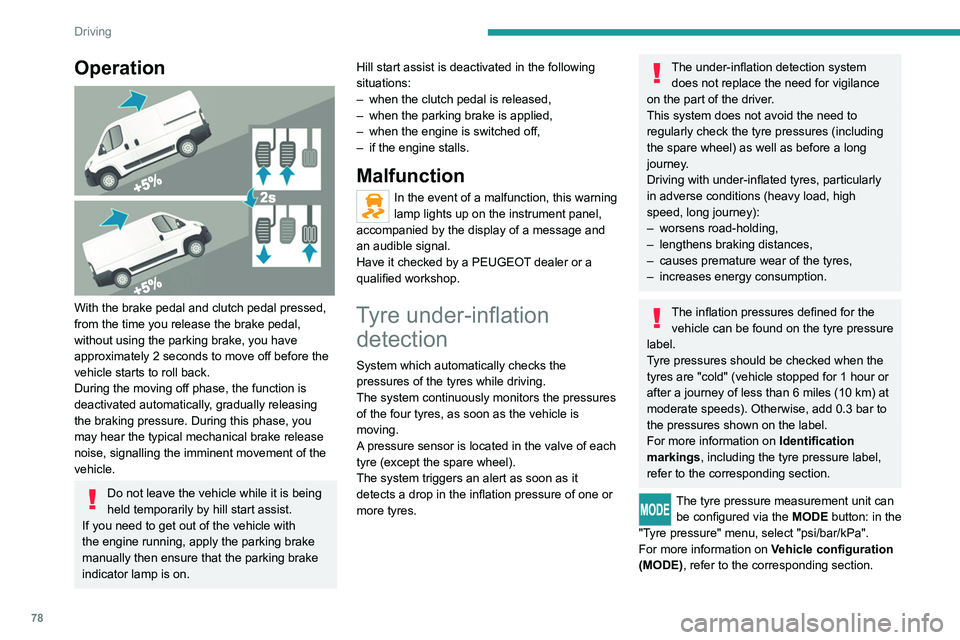
With the brake pedal and clutch pedal pressed,
from the time you release the brake pedal,
without using the parking brake, you have
approximately 2 seconds to move off before the
vehicle starts to roll back.
During the moving off phase, the function is
deactivated automatically, gradually releasing
the braking pressure. During this phase, you
may hear the typical mechanical brake release
noise, signalling the imminent movement of the
vehicle.
Do not leave the vehicle while it is being
held temporarily by hill start assist.
If you need to get out of the vehicle with
the engine running, apply the parking brake
manually then ensure that the parking brake
indicator lamp is on. Hill start assist is deactivated in the following
situations:
–
when the clutch pedal is released,
–
when the parking brake is applied,
–
when the engine is switched off,
–
if the engine stalls.
Malfunction
In the event of a malfunction, this warning
lamp lights up on the instrument panel,
accompanied by the display of a message and
an audible signal.
Have it checked by a PEUGEOT dealer or a
qualified workshop.
Tyre under-inflation detection
System which automatically checks the
pressures of the tyres while driving.
The system continuously monitors the pressures
of the four tyres, as soon as the vehicle is
moving.
A pressure sensor is located in the valve of each
tyre (except the spare wheel).
The system triggers an alert as soon as it
detects a drop in the inflation pressure of one or
more tyres.
The under-inflation detection system
does not replace the need for vigilance
on the part of the driver.
This system does not avoid the need to
regularly check the tyre pressures (including
the spare wheel) as well as before a long
journey.
Driving with under-inflated tyres, particularly
in adverse conditions (heavy load, high
speed, long journey):
–
worsens road-holding,
–
lengthens braking distances,
–
causes premature wear of the tyres,
–
increases energy consumption.
The inflation pressures defined for the vehicle can be found on the tyre pressure
label.
Tyre pressures should be checked when the
tyres are "cold" (vehicle stopped for 1 hour or
after a journey of less than 6 miles (10 km) at
moderate speeds). Otherwise, add 0.3 bar to
the pressures shown on the label.
For more information on Identification
markings, including the tyre pressure label,
refer to the corresponding section.
The tyre pressure measurement unit can be configured via the MODE button: in the
"Tyre pressure" menu, select "psi/bar/kPa".
For more information on Vehicle configuration
(MODE), refer to the corresponding section.
Page 89 of 212
87
Driving
6a qualified workshop for any replacement and
calibration of the camera.
Operation
The system starts automatically when moving
off.
A check of the operating conditions takes place: these two indicator
lamps come on in the instrument panel.
When these conditions are met, these two
indicator lamps go off. The system is activated.
If the operating conditions are not met, the
system is activated but is no longer effective.
This is signalled by the fixed illumination of these
two warning lamps in the instrument panel.
Operating conditions
Once engaged, the system is active only when
these operating conditions are met:
–
The vehicle is moving forwards.
–
No malfunction of the vehicle is detected.
–
The speed of the vehicle is equal to or greater
than approximately 37 mph (60 km/h).
–
The longitudinal marking of the traffic lanes is
clearly visible.
–
The visibility conditions are clear
.
–
The trajectory is in a straight line (or in the
case of bends, they are wide).
–
The field of vision is sufficiently clear (the
safety distance with the vehicle ahead is
respected). –
In the event of a lane departure, the direction
indicator corresponding to the direction (right or
left) of the departure has not been operated.
–
The trajectory of the vehicle is consistent with
the road layout.
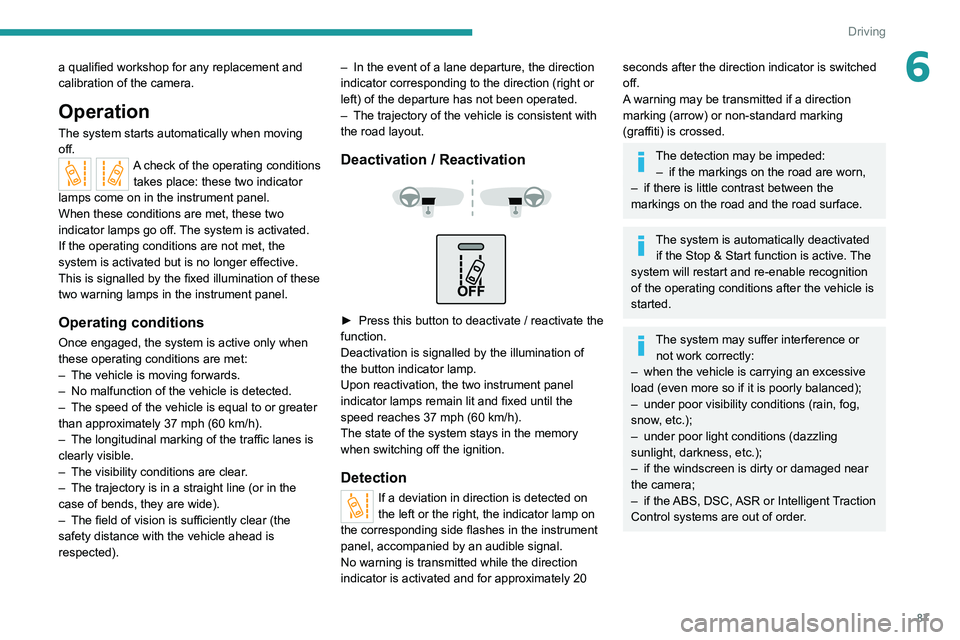
Deactivation / Reactivation
► Press this button to deactivate / reactivate the
function.
Deactivation is signalled by the illumination of
the button indicator lamp.
Upon reactivation, the two instrument panel
indicator lamps remain lit and fixed until the
speed reaches 37 mph (60 km/h).
The state of the system stays in the memory
when switching off the ignition.
Detection
If a deviation in direction is detected on
the left or the right, the indicator lamp on
the corresponding side flashes in the instrument
panel, accompanied by an audible signal.
No warning is transmitted while the direction
indicator is activated and for approximately 20
seconds after the direction indicator is switched
off.
A warning may be transmitted if a direction
marking (arrow) or non-standard marking
(graffiti) is crossed.
The detection may be impeded: – if the markings on the road are worn,
–
if there is little contrast between the
markings on the road and the road surface.
The system is automatically deactivated if the Stop & Start function is active. The
system will restart and re-enable recognition
of the operating conditions after the vehicle is
started.
The system may suffer interference or not work correctly:
–
when the vehicle is carrying an excessive
load (even more so if it is poorly balanced);
–
under poor visibility conditions (rain, fog,
snow
, etc.);
–
under poor light conditions (dazzling
sunlight, darkness, etc.);
–
if the windscreen is dirty or damaged near
the camera;
–
if the
ABS, DSC, ASR or Intelligent Traction
Control systems are out of order.
Page 98 of 212
96
Practical information
Fuel
The capacity of the tank is about 90 litres.
Fuel tanks of different capacities may be fitted,
60 and 120 litres, depending on the engine.
Low fuel level
When the low fuel tank level E (Empty) is
reached, this warning lamp comes on.
At this moment, you have approximately 10 or
12 litres left in the reserve, depending on the
capacity of your tank and the engine.
You must refuel as soon as possible to avoid
running out of fuel.
Refuelling
The fuel tank must be filled with the engine off.
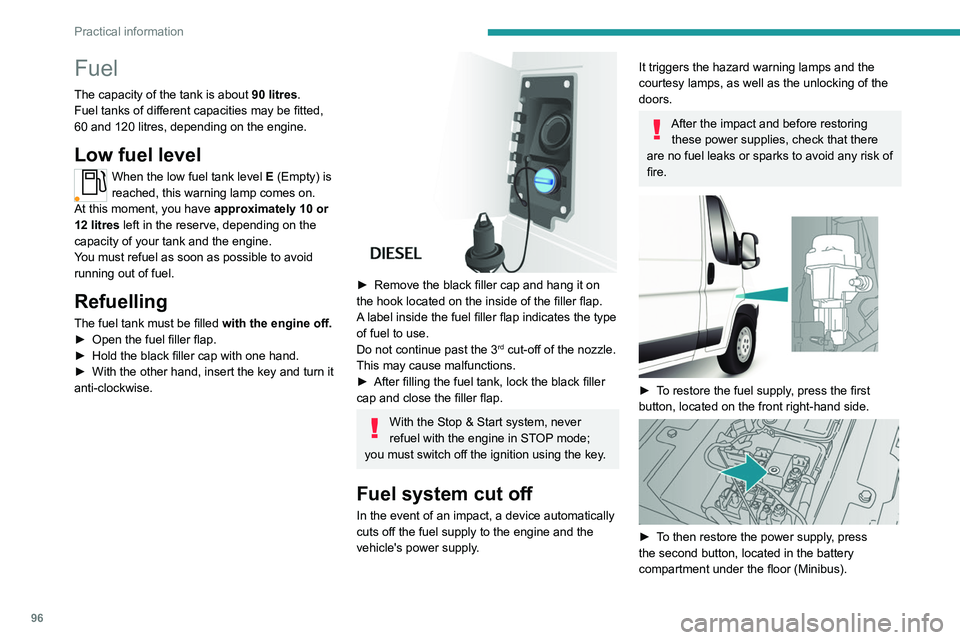
► Open the fuel filler flap.
►
Hold the black filler cap with one hand.
►
With the other hand, insert the key and turn it
anti-clockwise.
► Remove the black filler cap and hang it on
the hook located on the inside of the filler flap.
A
label inside the fuel filler flap indicates the type
of fuel to use.
Do not continue past the 3
rd cut-off of the nozzle.
This may cause malfunctions.
►
After filling the fuel tank, lock the black filler
cap and close the filler flap.
With the Stop & Start system, never
refuel with the engine in STOP mode;
you must switch off the ignition using the key.
Fuel system cut off
In the event of an impact, a device automatically
cuts off the fuel supply to the engine and the
vehicle's power supply.
It triggers the hazard warning lamps and the
courtesy lamps, as well as the unlocking of the
doors.
After the impact and before restoring these power supplies, check that there
are no fuel leaks or sparks to avoid any risk of
fire.
► To restore the fuel supply, press the first
button, located on the front right-hand side.
► To then restore the power supply, press
the second button, located in the battery
compartment under the floor (Minibus).