Peugeot Partner 2011 - RHD (UK, Australia) Manual PDF
Manufacturer: PEUGEOT, Model Year: 2011, Model line: Partner, Model: Peugeot Partner 2011Pages: 200, PDF Size: 7.41 MB
Page 71 of 200
69
EASE OF USE and COMFOR
T
33
Practical information
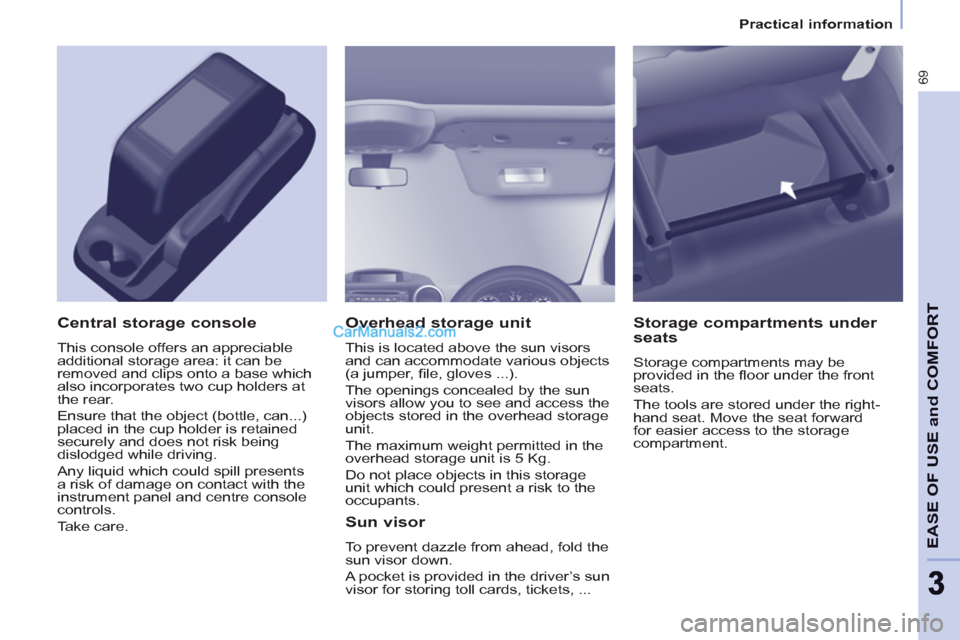
Overhead storage unit
This is located above the sun visors
and can accommodate various objects
(a jumper, fi le, gloves ...).
The openings concealed by the sun
visors allow you to see and access the
objects stored in the overhead storage
unit.
The maximum weight permitted in the
overhead storage unit is 5 Kg.
Do not place objects in this storage
unit which could present a risk to the
occupants.
Central storage console
This console offers an appreciable
additional storage area: it can be
removed and clips onto a base which
also incorporates two cup holders at
the rear.
Ensure that the object (bottle, can...)
placed in the cup holder is retained
securely and does not risk being
dislodged while driving.
Any liquid which could spill presents
a risk of damage on contact with the
instrument panel and centre console
controls.
Take care.
Sun visor
To prevent dazzle from ahead, fold the
sun visor down.
A pocket is provided in the driver’s sun
visor for storing toll cards, tickets, ...
Storage compartments under
seats
Storage compartments may be
provided in the fl oor under the front
seats.
The tools are stored under the right-
hand seat. Move the seat forward
for easier access to the storage
compartment.
Page 72 of 200
70
Practical information
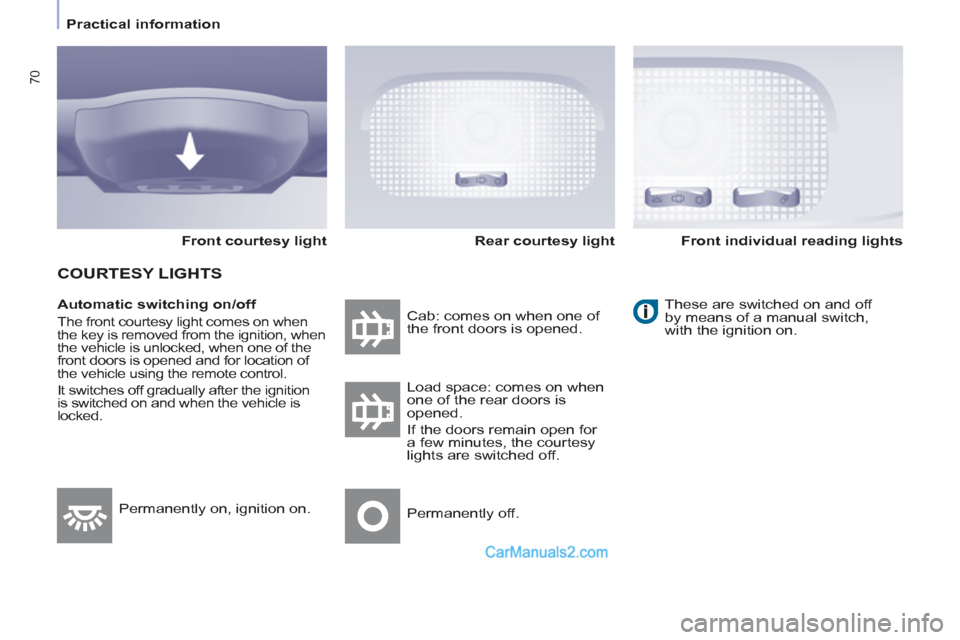
Automatic switching on/off
The front courtesy light comes on when
the key is removed from the ignition, when
the vehicle is unlocked, when one of the
front doors is opened and for location of
the vehicle using the remote control.
It switches off gradually after the ignition
is switched on and when the vehicle is
locked. Cab: comes on when one of
the front doors is opened. These are switched on and off
by means of a manual switch,
with the ignition on.
Load space: comes on when
one of the rear doors is
opened.
If the doors remain open for
a few minutes, the courtesy
lights are switched off.
Permanently off. Permanently on, ignition on.
Front courtesy light
COURTESY LIGHTS
Rear courtesy light
Front individual reading lights
Page 73 of 200
71
EASE OF USE and COMFOR
T
33
Practical information
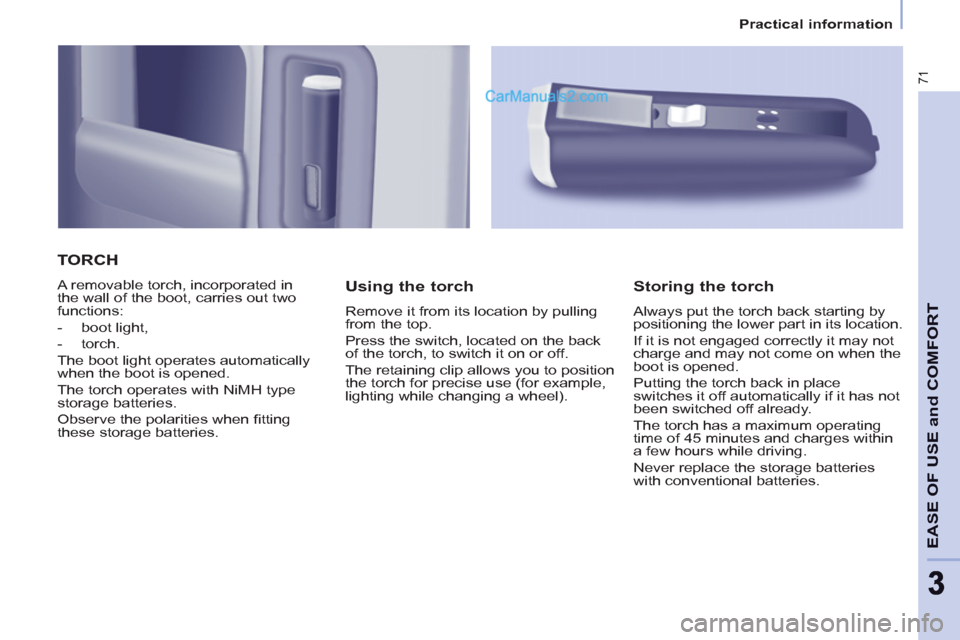
TORCH
A removable torch, incorporated in
the wall of the boot, carries out two
functions:
- boot light,
- torch.
The boot light operates automatically
when the boot is opened.
The torch operates with NiMH type
storage batteries.
Observe the polarities when fi tting
these storage batteries.
Using the torch
Remove it from its location by pulling
from the top.
Press the switch, located on the back
of the torch, to switch it on or off.
The retaining clip allows you to position
the torch for precise use (for example,
lighting while changing a wheel).
Storing the torch
Always put the torch back starting by
positioning the lower part in its location.
If it is not engaged correctly it may not
charge and may not come on when the
boot is opened.
Putting the torch back in place
switches it off automatically if it has not
been switched off already.
The torch has a maximum operating
time of 45 minutes and charges within
a few hours while driving.
Never replace the storage batteries
with conventional batteries.
Page 74 of 200
72
Practical information
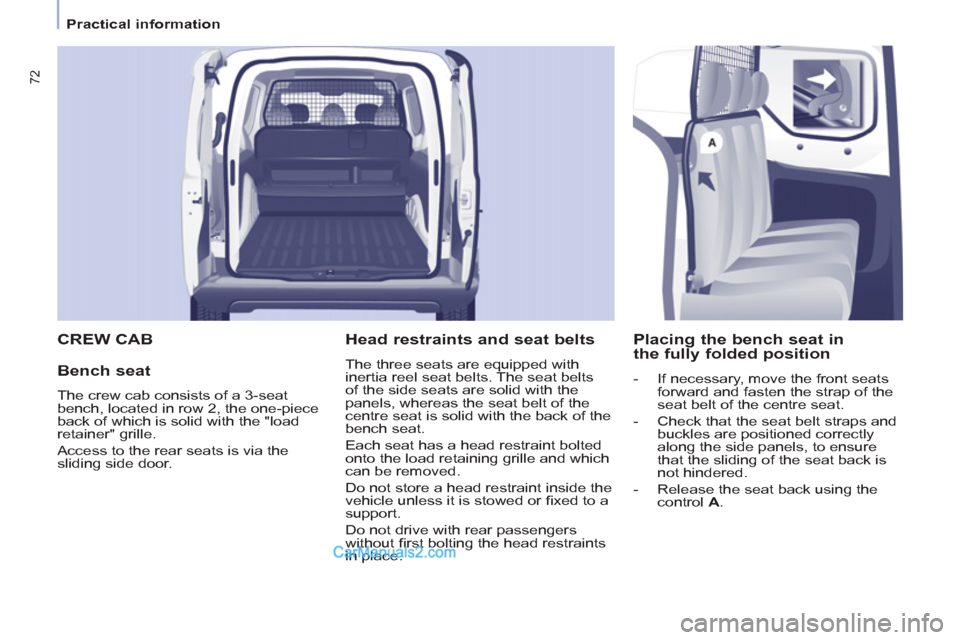
CREW CAB
Bench seat
The crew cab consists of a 3-seat
bench, located in row 2, the one-piece
back of which is solid with the "load
retainer" grille.
Access to the rear seats is via the
sliding side door.
Head restraints and seat belts
The three seats are equipped with
inertia reel seat belts. The seat belts
of the side seats are solid with the
panels, whereas the seat belt of the
centre seat is solid with the back of the
bench seat.
Each seat has a head restraint bolted
onto the load retaining grille and which
can be removed.
Do not store a head restraint inside the
vehicle unless it is stowed or fi xed to a
support.
Do not drive with rear passengers
without fi rst bolting the head restraints
in place.
Placing the bench seat in
the fully folded position
- If necessary, move the front seats
forward and fasten the strap of the
seat belt of the centre seat.
- Check that the seat belt straps and
buckles are positioned correctly
along the side panels, to ensure
that the sliding of the seat back is
not hindered.
- Release the seat back using the
control A
.
Page 75 of 200
73
EASE OF USE and COMFOR
T
33
Practical information
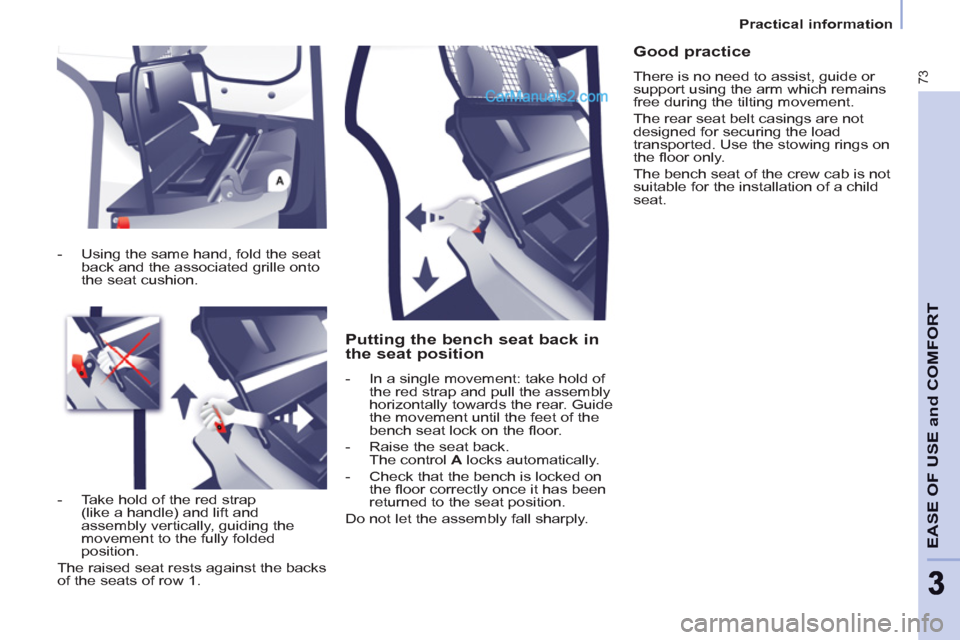
Putting the bench seat back in
the seat position
- In a single movement: take hold of
the red strap and pull the assembly
horizontally towards the rear. Guide
the movement until the feet of the
bench seat lock on the fl oor.
- Raise the seat back.
The control A
locks automatically.
- Check that the bench is locked on
the fl oor correctly once it has been
returned to the seat position.
Do not let the assembly fall sharply.
Good practice
There is no need to assist, guide or
support using the arm which remains
free during the tilting movement.
The rear seat belt casings are not
designed for securing the load
transported. Use the stowing rings on
the fl oor only.
The bench seat of the crew cab is not
suitable for the installation of a child
seat.
- Using the same hand, fold the seat
back and the associated grille onto
the seat cushion.
- Take hold of the red strap
(like a handle) and lift and
assembly vertically, guiding the
movement to the fully folded
position.
The raised seat rests against the backs
of the seats of row 1.
Page 76 of 200
74
Practical information
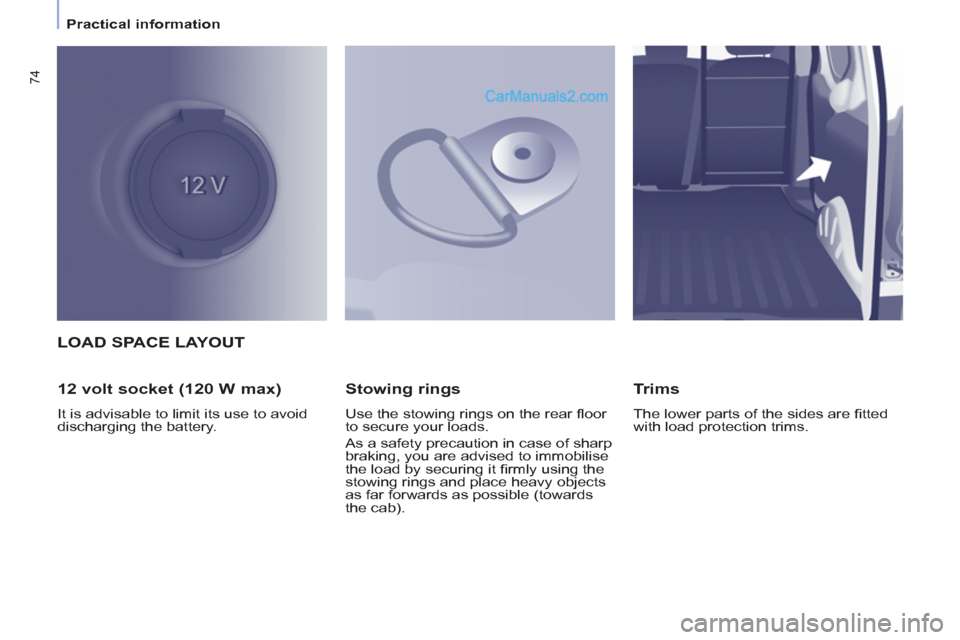
LOAD SPACE LAYOUT
12 volt socket (120 W max)
It is advisable to limit its use to avoid
discharging the battery.
Stowing rings
Use the stowing rings on the rear fl oor
to secure your loads.
As a safety precaution in case of sharp
braking, you are advised to immobilise
the load by securing it fi rmly using the
stowing rings and place heavy objects
as far forwards as possible (towards
the cab).
Trims
The lower parts of the sides are fi tted
with load protection trims.
Page 77 of 200
75
EASE OF USE and COMFOR
T
33
Practical information
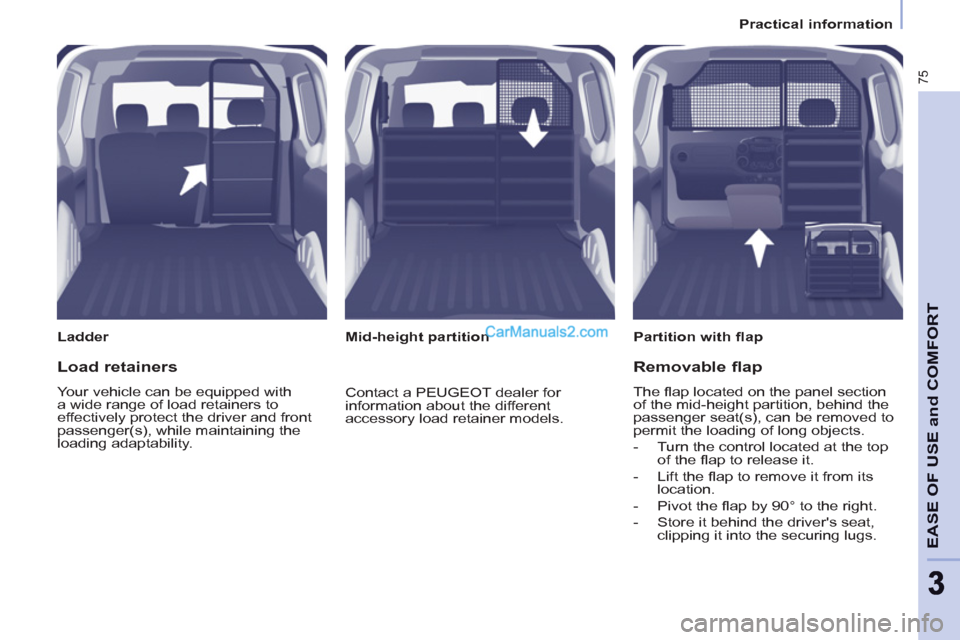
Ladder
Partition with fl ap
Mid-height partition
Load retainers
Your vehicle can be equipped with
a wide range of load retainers to
effectively protect the driver and front
passenger(s), while maintaining the
loading adaptability.
Removable flap
The fl ap located on the panel section
of the mid-height partition, behind the
passenger seat(s), can be removed to
permit the loading of long objects.
- Turn the control located at the top
of the fl ap to release it.
- Lift the fl ap to remove it from its
location.
- Pivot the fl ap by 90° to the right.
- Store it behind the driver's seat,
clipping it into the securing lugs.
Contact a PEUGEOT dealer for
information about the different
accessory load retainer models.
Page 78 of 200
76
Practical information
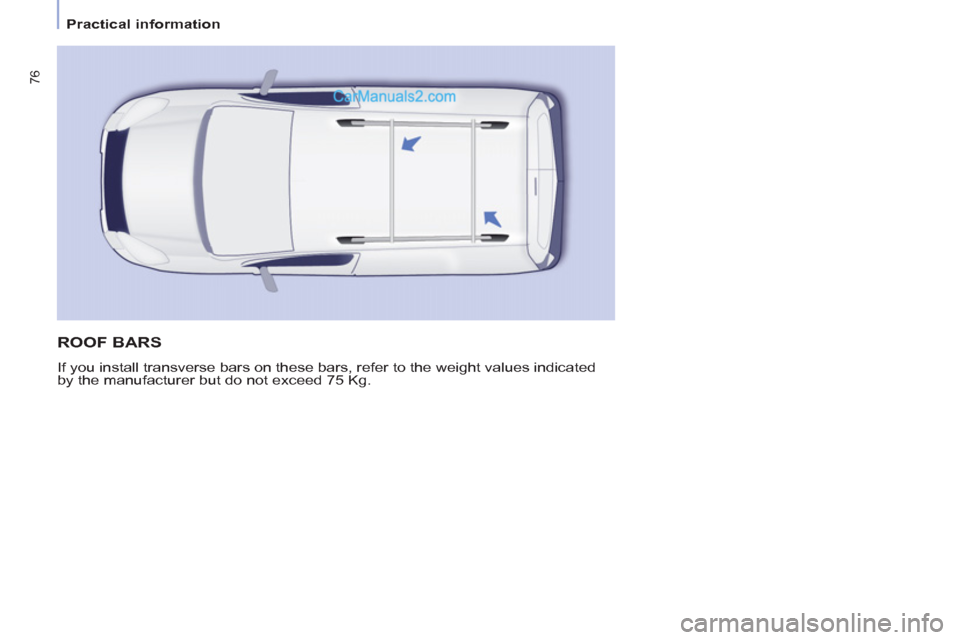
ROOF BARS
If you install transverse bars on these bars, refer to the weight values indicated
by the manufacturer but do not exceed 75 Kg.
Page 79 of 200
77
EASE OF USE and COMFOR
T
33
Mirrors and windows
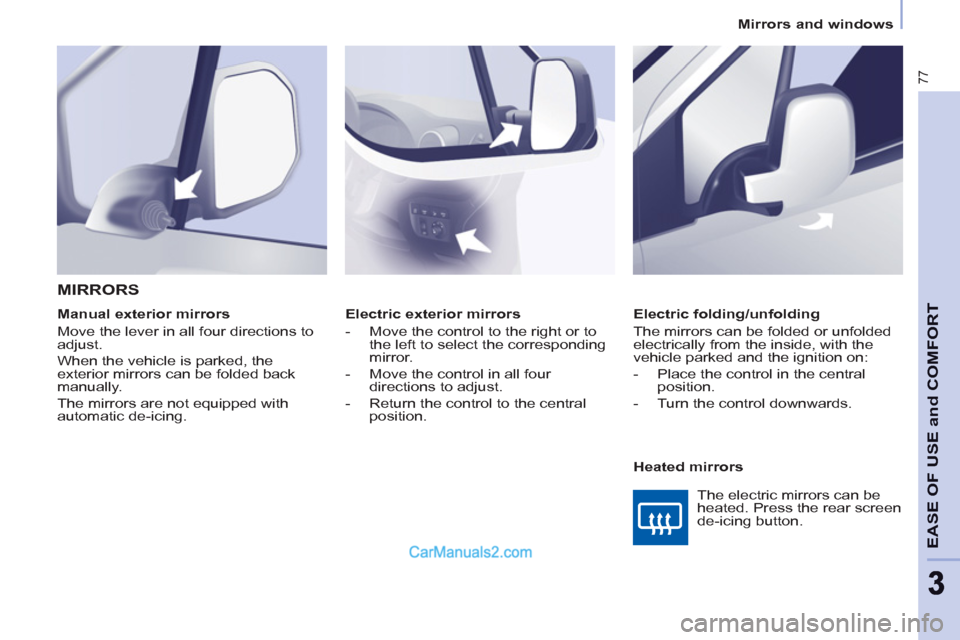
Electric exterior mirrors
- Move the control to the right or to
the left to select the corresponding
mirror.
- Move the control in all four
directions to adjust.
- Return the control to the central
position.
Electric folding/unfolding
The mirrors can be folded or unfolded
electrically from the inside, with the
vehicle parked and the ignition on:
- Place the control in the central
position.
- Turn the control downwards.
MIRRORS
Heated mirrors
Manual exterior mirrors
Move the lever in all four directions to
adjust.
When the vehicle is parked, the
exterior mirrors can be folded back
manually.
The mirrors are not equipped with
automatic de-icing.
The electric mirrors can be
heated. Press the rear screen
de-icing button.
Page 80 of 200
78
Mirrors and windows
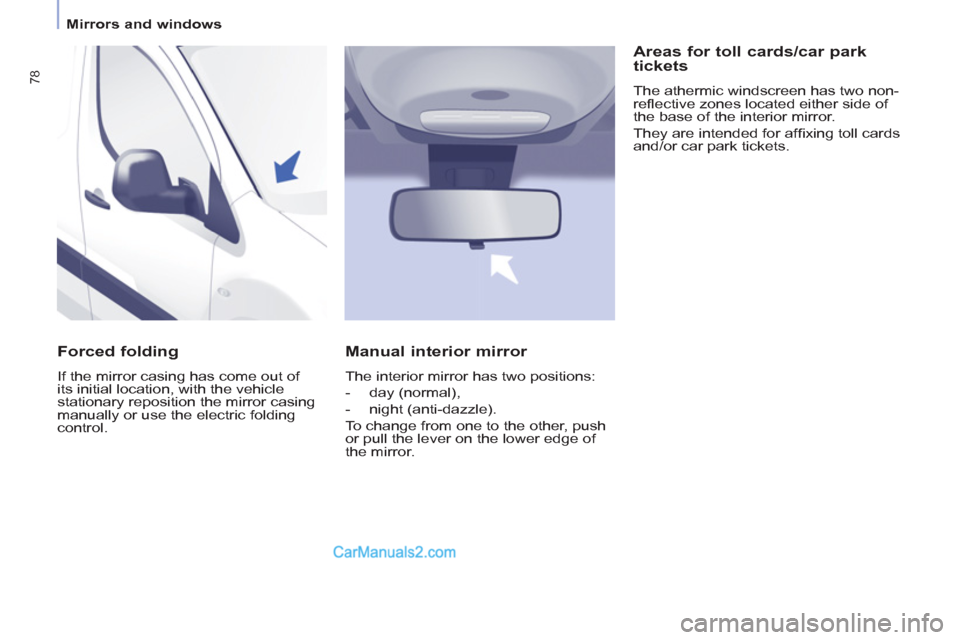
Forced folding
If the mirror casing has come out of
its initial location, with the vehicle
stationary reposition the mirror casing
manually or use the electric folding
control.
Manual interior mirror
The interior mirror has two positions:
- day (normal),
- night (anti-dazzle).
To change from one to the other, push
or pull the lever on the lower edge of
the mirror.
Areas for toll cards/car park
tickets
The athermic windscreen has two non-
refl ective zones located either side of
the base of the interior mirror.
They are intended for affi xing toll cards
and/or car park tickets.