emergency PEUGEOT PARTNER 2022 Owners Manual
[x] Cancel search | Manufacturer: PEUGEOT, Model Year: 2022, Model line: PARTNER, Model: PEUGEOT PARTNER 2022Pages: 324, PDF Size: 9.42 MB
Page 4 of 324
2
Contents
■
OverviewOverview 4
Labels 6
■
Eco-driving
1InstrumentsInstrument panels 10
Digital instrument panel 11
Warning and indicator lamps 13
Indicators 20
Trip computer 27
Touch screen BLUETOOTH audio system 28
Touch screen 29
Setting the date and time 31
2AccessElectronic key with remote control function and
built-in key, 32
Back-up procedures 38
Central locking / unlocking 41
Doors 43
General recommendations for the sliding
side doors
43
Rear roof flap 44
Alarm 45
Electric windows 47
Tilting rear door windows 49
3Ease of use and comfortGeneral recommendations for the seats 50
Front seats 50
PEUGEOT
i-Cockpit 50
Steering wheel adjustment 53
Mirrors 53
2-seat front bench seat 54
Rear bench seat (row 2) 56
Rear seats (row 2) 57
Rear seats (row 3) 57
Interior fittings 60
Two-position luggage cover shelf (removable) 65
Luggage cover (7-seat) 66
Warning triangle 67
Multi-Flex bench seat 68
Crew cab 70
Heating and Ventilation 73
Heating 74
Manual air conditioning 74
Dual-zone automatic air conditioning 75
Front demisting - de-icing 77
Heated windscreen 78
Demisting/de-icing the rear screen and/or
the door mirrors
78
Rear heating and air conditioning 79
Additional heating/ventilation system 79
Temperature conditioning (Electric) 81
4Lighting and visibilityLighting control stalk 83
Direction indicators 84
Automatic illumination of headlamps 84
Daytime running lamps / Sidelamps 85
Guide-me-home and welcome lighting 85
Automatic lighting systems - General
recommendations
86
Automatic headlamp dipping 86
Headlamp beam height adjustment 88
Wiper control stalk 88
Changing a wiper blade 90
Automatic wipers 90
5SafetyGeneral safety recommendations 92
Emergency or assistance 92
Hazard warning lamps 94
Horn 95
Pedestrian horn (Electric) 95
Electronic stability control (ESC) 95
Advanced Grip Control 97
Hill Assist Descent Control 98
Seat belts 99
Airbags 103
Child seats 106
Deactivating the front passenger airbag 108
ISOFIX child seats 11 2
i-Size child seats 11 5
Manual child lock 11 6
Electric child lock 11 6
6DrivingDriving recommendations 11 7
Starting/switching off the engine 11 9
Manual parking brake 123
Electric parking brake 123
Hill start assist 126
5-speed manual gearbox 126
6-speed manual gearbox 127
Automatic gearbox 127
Drive selector (Electric) 132
Driving modes 133
Gear shift indicator 134
Stop & Start (Petrol or Diesel) 134
Tyre under-inflation detection 136
Driving and manoeuvring aids - General
recommendations
138
Road signs recognition 139
Speed limiter 142
Cruise control - Specific recommendations 144
Programmable cruise control 145
Adaptive cruise control 146
Page 5 of 324
3
Contents
Memorising speeds 150
Active Safety Brake with Collision Risk Alert and
Intelligent emergency braking assistance
150
Active lane departure warning system 153
Blind spot monitoring 156
Distraction detection 158
Parking sensors 159
Reversing Camera 161
Surround Rear Vision 162
Visiopark 1 165
Park Assist 167
7Practical informationCompatibility of fuels 172
Refuelling 172
Misfuel prevention (Diesel) 173
Charging system (Electric) 174
Charging the traction battery (Electric) 181
Energy economy mode 185
Snow chains 186
Very cold climate screen 186
Towing device 187
Overload indicator 188
Roof bars / Roof rack 189
Bonnet 190
Engine compartment 191
Checking levels 191
Checks 194
AdBlue® (BlueHDi) 195
Free-wheeling 197
Advice on care and maintenance 198
8In the event of a breakdownRunning out of fuel (Diesel) 200
Tool kit 200
Temporary puncture repair kit 202
Spare wheel 204
Changing a bulb 207
Fuses 212
12
V battery
/ Accessory battery 212
Towing 216
9Technical dataDimensions 219
Engine technical data and towed loads 225
Petrol engine 226
Diesel engine 227
Electric motor 233
Identification markings 234
10Touch screen BLUETOOTH audio systemFirst steps 235
Steering mounted controls 235
Menus 236
Radio 237
DAB (Digital Audio Broadcasting) radio 238
Media 239
Telephone 240
Settings 242
Frequently asked questions 242
11PEUGEOT Connect RadioFirst steps 245
Steering mounted controls 246
Menus 247
Applications 248
Radio 248
DAB (Digital Audio Broadcasting) radio 250
Media 250
Telephone 251
Settings 254
Frequently asked questions 256
12PEUGEOT Connect NavFirst steps 258
Steering mounted controls 259
Menus 259
Voice commands 261
Navigation 264
Connected navigation 267
Applications 269
Radio 272
DAB (Digital Audio Broadcasting) radio 273
Media 273
Telephone 275
Settings 277
Frequently asked questions 279
13Event data recorders
■
Alphabetical index
http://q-r.to/bagGl9
Access to additional videos
Page 6 of 324
4
Overview
Presentation
Presentation
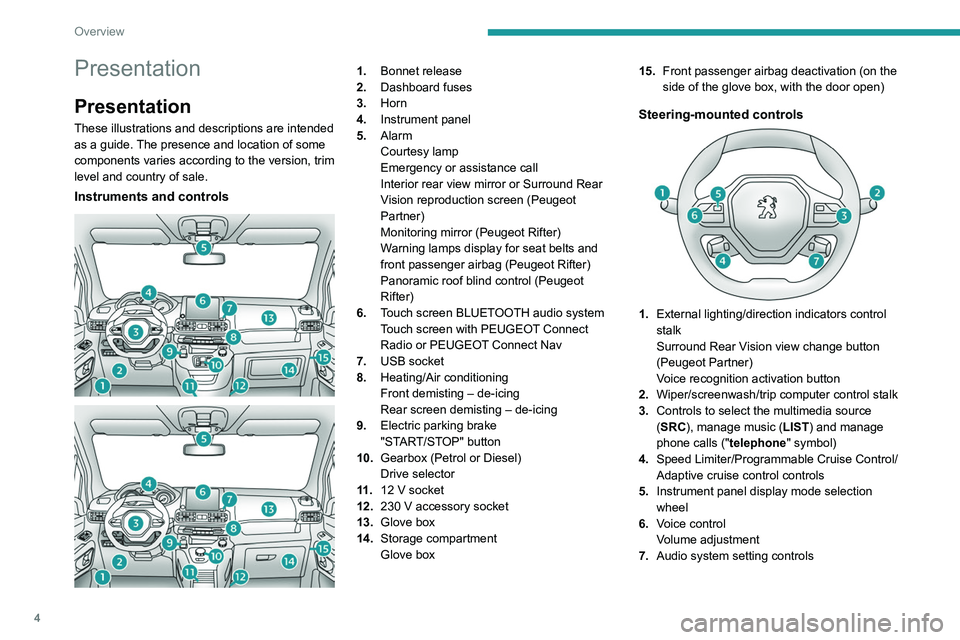
These illustrations and descriptions are intended
as a guide. The presence and location of some
components varies according to the version, trim
level and country of sale.
Instruments and controls
1. Bonnet release
2. Dashboard fuses
3. Horn
4. Instrument panel
5. Alarm
Courtesy lamp
Emergency or assistance call
Interior rear view mirror or Surround Rear
Vision reproduction screen (Peugeot
Partner)
Monitoring mirror (Peugeot Rifter)
Warning lamps display for seat belts and
front passenger airbag (Peugeot Rifter)
Panoramic roof blind control (Peugeot
Rifter)
6. Touch screen BLUETOOTH audio system
Touch screen with PEUGEOT Connect
Radio or PEUGEOT Connect Nav
7. USB socket
8. Heating/Air conditioning
Front demisting – de-icing
Rear screen demisting – de-icing
9. Electric parking brake
"START/STOP" button
10. Gearbox (Petrol or Diesel)
Drive selector
11 . 12
V socket
12. 230
V accessory socket
13. Glove box
14. Storage compartment
Glove box 15.
Front passenger airbag deactivation (on the
side of the glove box, with the door open)
Steering-mounted controls
1.External lighting/direction indicators control
stalk
Surround Rear Vision view change button
(Peugeot Partner)
Voice recognition activation button
2. Wiper/screenwash/trip computer control stalk
3. Controls to select the multimedia source
(SRC), manage music (LIST) and manage
phone calls (" telephone" symbol)
4. Speed Limiter/Programmable Cruise Control/
Adaptive cruise control controls
5. Instrument panel display mode selection
wheel
6. Voice control
Volume adjustment
7. Audio system setting controls
Page 20 of 324
18
Instruments
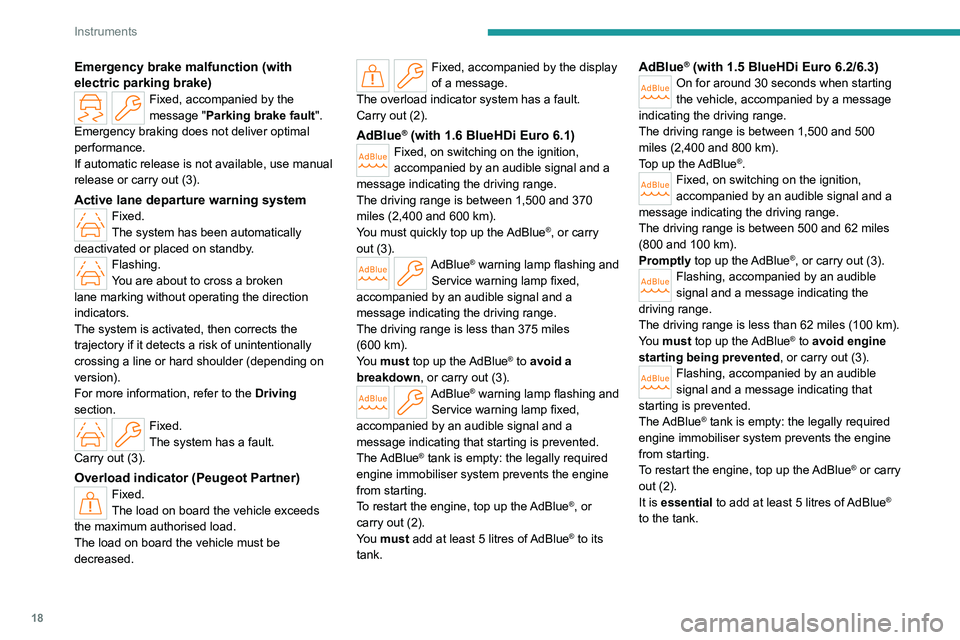
Emergency brake malfunction (with
electric parking brake)
Fixed, accompanied by the
message "Parking brake fault".
Emergency braking does not deliver optimal
performance.
If automatic release is not available, use manual
release or carry out (3).
Active lane departure warning systemFixed.
The system has been automatically
deactivated or placed on standby.
Flashing.
You are about to cross a broken
lane marking without operating the direction
indicators.
The system is activated, then corrects the
trajectory if it detects a risk of unintentionally
crossing a line or hard shoulder (depending on
version).
For more information, refer to the Driving
section.
Fixed.
The system has a fault.
Carry out (3).
Overload indicator (Peugeot Partner)Fixed.
The load on board the vehicle exceeds
the maximum authorised load.
The load
on board the vehicle must be
decreased.
Fixed, accompanied by the display
of a message.
The overload indicator system has a fault.
Carry out (2).
AdBlue® (with 1.6 BlueHDi Euro 6.1)Fixed, on switching on the ignition,
accompanied by an audible signal and a
message indicating the driving range.
The driving range is between 1,500 and 370
miles (2,400 and 600
km).
You must quickly top up the AdBlue
®, or carry
out (3).
AdBlue® warning lamp flashing and
Service warning lamp fixed,
accompanied by an audible signal and a
message indicating the driving range.
The driving range is less than 375 miles
(600
km).
You must top up the AdBlue
® to avoid a
breakdown, or carry out (3).
AdBlue® warning lamp flashing and
Service warning lamp fixed,
accompanied by an audible signal and a
message indicating that starting is prevented.
The AdBlue
® tank is empty: the legally required
engine immobiliser system prevents the engine
from starting.
To restart the engine, top up the AdBlue
®, or
carry out
(2).
You must add at least 5 litres of
AdBlue® to its
tank.
AdBlue® (with 1.5 BlueHDi Euro 6.2/6.3)On for around 30 seconds when starting
the vehicle, accompanied by a message
indicating the driving range.
The driving range is between 1,500 and 500
miles (2,400 and 800
km).
Top up the AdBlue
®.Fixed, on switching on the ignition,
accompanied by an audible signal and a
message indicating the driving range.
The driving range is between 500 and 62 miles
(800 and 100
km).
Promptly top up the AdBlue
®, or carry out (3).Flashing, accompanied by an audible
signal and a message indicating the
driving range.
The driving range is less than 62 miles (100
km).
You must top up the AdBlue
® to avoid engine
starting being prevented , or carry out
(3).
Flashing, accompanied by an audible
signal and a message indicating that
starting is prevented.
The AdBlue
® tank is empty: the legally required
engine immobiliser system prevents the engine
from starting.
To restart the engine, top up the AdBlue
® or carry
out (2).
It is essential to add at least 5 litres of AdBlue
®
to the tank.
Page 35 of 324
33
Access
2
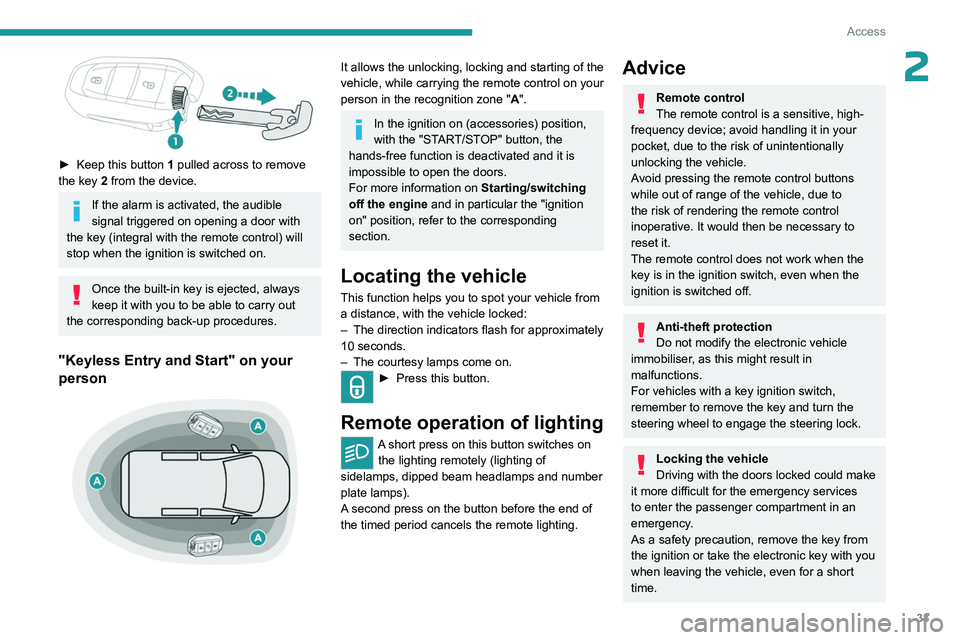
► Keep this button 1 pulled across to remove
the key 2 from the device.
If the alarm is activated, the audible
signal triggered on opening a door with
the key (integral with the remote control) will
stop when the ignition is switched on.
Once the built-in key is ejected, always
keep it with you to be able to carry out
the corresponding back-up procedures.
"Keyless Entry and Start" on your
person
It allows the unlocking, locking and starting of the
vehicle, while carrying the remote control on your
person in the recognition zone " A".
In the ignition on (accessories) position,
with the "START/STOP" button, the
hands-free function is deactivated and it is
impossible to open the doors.
For more information on Starting/switching
off the engine and in particular the "ignition
on" position, refer to the corresponding
section.
Locating the vehicle
This function helps you to spot your vehicle from
a distance, with the vehicle locked:
–
The direction indicators flash for approximately
10 seconds.
–
The courtesy lamps come on.
► Press this button.
Remote operation of lighting
A short press on this button switches on
the lighting remotely (lighting of
sidelamps, dipped beam headlamps and number
plate lamps).
A second press on the button before the end of
the timed period cancels the remote lighting.
Advice
Remote control
The remote control is a sensitive, high-
frequency device; avoid handling it in your
pocket, due to the risk of unintentionally
unlocking the vehicle.
Avoid pressing the remote control buttons
while out of range of the vehicle, due to
the risk of rendering the remote control
inoperative. It would then be necessary to
reset it.
The remote control does not work
when the
key is in the ignition switch, even when the
ignition is switched off.
Anti-theft protection
Do not modify the electronic vehicle
immobiliser, as this might result in
malfunctions.
For vehicles with a key ignition switch,
remember to remove the key and turn the
steering wheel to engage the steering lock.
Locking the vehicle
Driving with the doors locked could make
it more difficult for the emergency services
to enter the passenger compartment in an
emergency.
As a safety precaution, remove the key from
the ignition or take the electronic key with you
when leaving the vehicle, even for a short
time.
Page 39 of 324
37
Access
2► Pull the side-hinged door handle or raise the
tailgate.
With an opening rear screen in the
tailgate
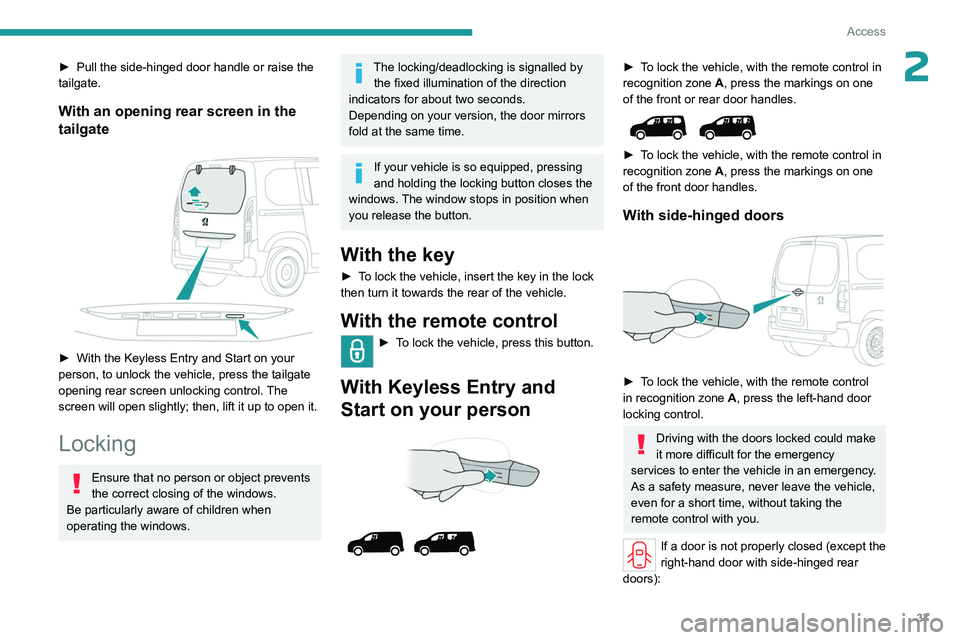
► With the Keyless Entry and Start on your
person, to unlock the vehicle, press the tailgate
opening rear screen unlocking control.
The
screen will open slightly; then, lift it up to open it.
Locking
Ensure that no person or object prevents
the correct closing of the windows.
Be particularly aware of children when
operating the windows.
The locking/deadlocking is signalled by the fixed illumination of the direction
indicators for about two seconds.
Depending on your version, the door mirrors
fold at the same time.
If your vehicle is so equipped, pressing
and holding the locking button closes the
windows. The window stops in position when
you release the button.
With the key
► To lock the vehicle, insert the key in the lock
then turn it towards the rear of the vehicle.
With the remote control
► To lock the vehicle, press this button.
With Keyless Entry and
Start on your person
► To lock the vehicle, with the remote control in
recognition zone A, press the markings on one
of the front or rear door handles.
► To lock the vehicle, with the remote control in
recognition zone A, press the markings on one
of the front door handles.
With side-hinged doors
► To lock the vehicle, with the remote control
in recognition zone A, press the left-hand door
locking control.
Driving with the doors locked could make
it more difficult for the emergency
services to enter the vehicle in an emergency.
As a safety measure, never leave the vehicle,
even for a short time, without taking the
remote control with you.
If a door is not properly closed (except the
right-hand door with side-hinged rear
doors):
Page 43 of 324
41
Access
2Risk of explosion or leaking of
inflammable liquid or gas!
Do not use in/store in/place in an environment
where the temperature is extremely high or
where the pressure is extremely low due to
very high altitude.
Do not try to burn, crush or cut a used battery.
Reinitialising the remote
control
Following replacement of the battery or in
the event of a fault, it may be necessary to
reinitialise the remote control.
Without Keyless Entry and Start
► Switch the ignition off.
► T urn the key to position 2 (Ignition on) .
►
Immediately press the closed padlock button
for a few seconds. ►
Switch off the ignition and remove the key
from the ignition switch.
The remote control is now fully operational
again.
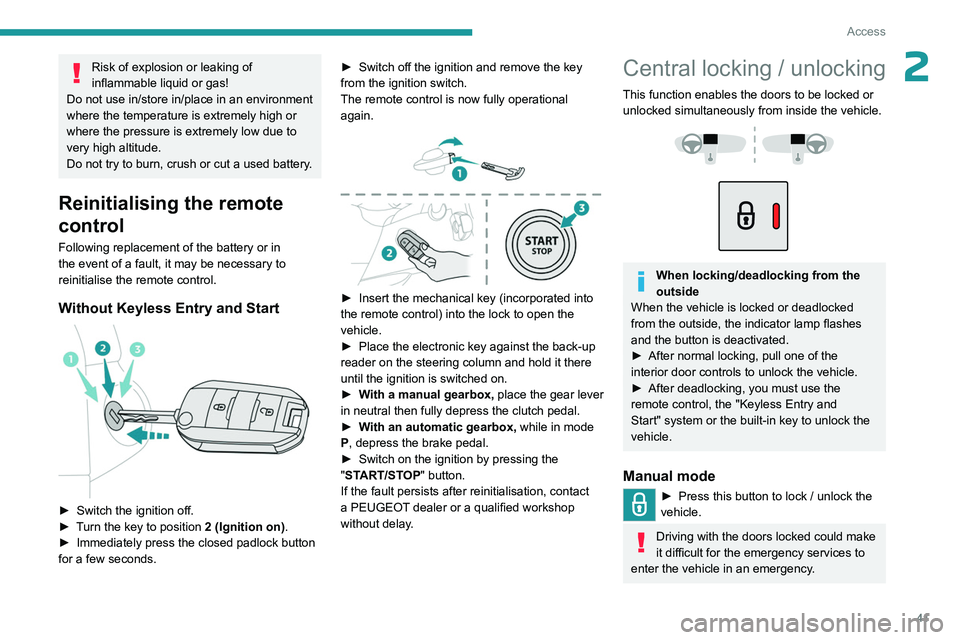
► Insert the mechanical key (incorporated into
the remote control) into the lock to open the
vehicle.
►
Place the electronic key against the back-up
reader on the steering column and hold it there
until the ignition is switched on.
►
W
ith a manual gearbox, place the gear lever
in neutral then fully depress the clutch pedal.
►
W
ith an automatic gearbox, while in mode
P, depress the brake pedal.
►
Switch on the ignition by pressing the
"
START/STOP" button.
If the fault persists after reinitialisation, contact
a PEUGEOT dealer or a qualified workshop
without delay.
Central locking / unlocking
This function enables the doors to be locked or unlocked simultaneously from inside the vehicle.
When locking/deadlocking from the
outside
When the vehicle is locked or deadlocked
from the outside, the indicator lamp flashes
and the button is deactivated.
►
After normal locking, pull one of the
interior door controls to unlock the vehicle.
►
After deadlocking, you must use the
remote control, the "Keyless Entry and
Start" system or the built-in key to unlock the
vehicle.
Manual mode
► Press this button to lock / unlock the
vehicle.
Driving with the doors locked could make
it difficult for the emergency services to
enter the vehicle in an emergency.
Page 44 of 324
42
Access
If one of the doors is open, the central
locking from the inside does not function.
This is signalled by a mechanical noise from
the locks.
If the boot is open, only the locking of the
other doors is carried out. The indicator lamp
in the button remains off.
When locking from inside, the door
mirrors do not fold.
The indicator lamp also goes off when unlocking one or more accesses.
Automatic mode
This is the automatic central locking of the
vehicle when driving, also called anti-intrusion
security.
For more information on Anti-intrusion
security, refer to the corresponding section.
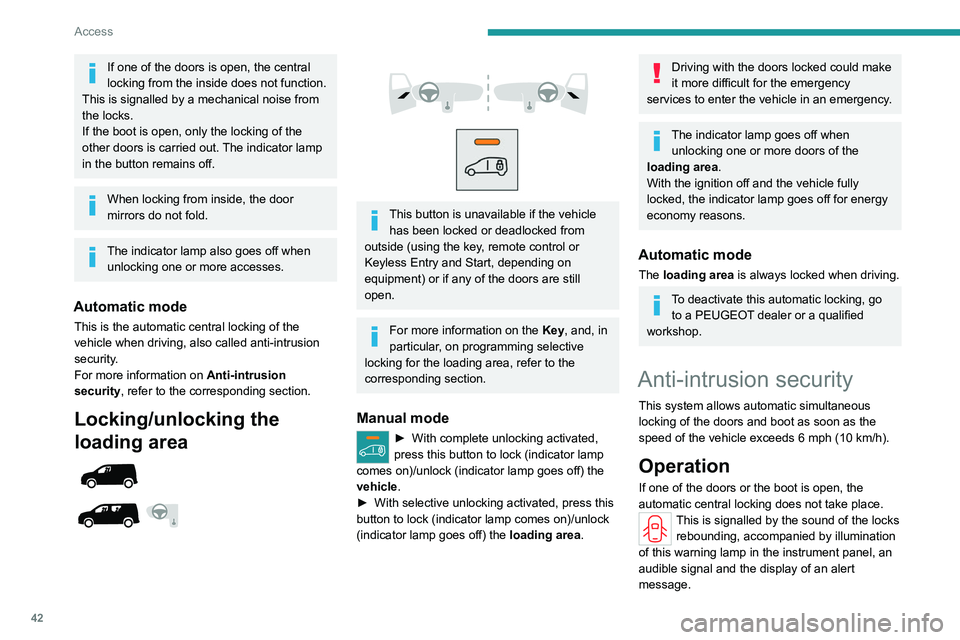
Locking/unlocking the
loading area
This button is unavailable if the vehicle has been locked or deadlocked from
outside (using the key, remote control or
Keyless Entry and Start, depending on
equipment) or if any of the doors are still
open.
For more information on the Key, and, in
particular, on programming selective
locking for the loading area, refer to the
corresponding section.
Manual mode
► With complete unlocking activated,
press this button to lock (indicator lamp
comes on)/unlock (indicator lamp goes off) the
vehicle
.
►
With selective unlocking activated, press this
button to lock (indicator lamp comes on)/unlock
(indicator lamp goes off) the loading area
.
Driving with the doors locked could make
it more difficult for the emergency
services to enter the vehicle in an emergency.
The indicator lamp goes off when unlocking one or more doors of the
loading area.
With the ignition off and the vehicle fully
locked, the indicator lamp goes off for energy
economy reasons.
Automatic mode
The loading area is always locked when driving.
To deactivate this automatic locking, go to a PEUGEOT dealer or a qualified
workshop.
Anti-intrusion security
This system allows automatic simultaneous
locking of the doors and boot as soon as the
speed of the vehicle exceeds 6 mph (10 km/h).
Operation
If one of the doors or the boot is open, the
automatic central locking does not take place.
This is signalled by the sound of the locks rebounding, accompanied by illumination
of this warning lamp in the instrument panel, an
audible signal and the display of an alert
message.
Page 45 of 324
43
Access
2Activation/Deactivation
You can activate or deactivate this function
permanently.
►
With the ignition on, press the central locking
button until an audible signal is triggered and
a corresponding message of confirmation is
displayed.
The state of the system stays in the memory
when the ignition is switched off.
Driving with the doors locked may render
access by the emergency services to the
interior difficult in an emergency.
Carrying long or voluminous objects
If you want to drive with the boot open,
you should press the central locking button
to lock the doors. Otherwise, every time the
speed of the vehicle exceeds 6 mph (10
km/h), the locks will rebound and the alerts
mentioned above will appear.
Pressing the central locking button unlocks
the vehicle.
Above 6 mph (10 km/h), this unlocking is
temporary.
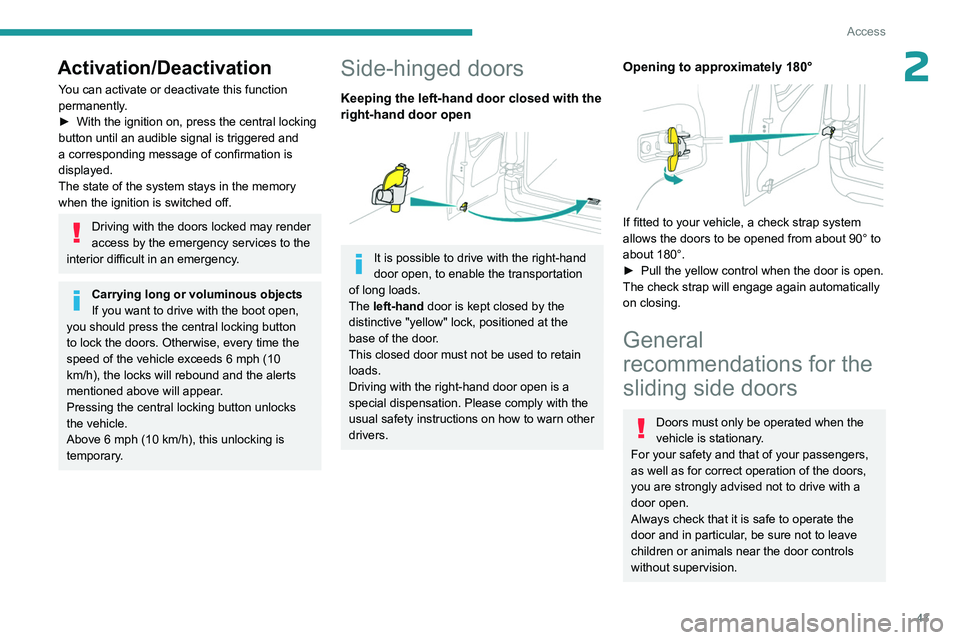
Side-hinged doors
Keeping the left-hand door closed with the
right-hand door open
It is possible to drive with the right-hand
door open, to enable the transportation
of long loads.
The left-hand door is kept closed by the
distinctive "yellow" lock, positioned at the
base of the door.
This closed door must not be used to retain
loads.
Driving with the right-hand door open is a
special dispensation. Please comply with the
usual safety instructions on how to warn other
drivers.
Opening to approximately 180°
If fitted to your vehicle, a check strap system
allows the doors to be opened from about 90° to
about 180°.
►
Pull the yellow control when the door is open.
The check strap will engage again automatically
on closing.
General
recommendations for the
sliding side doors
Doors must only be operated when the
vehicle is stationary.
For your safety and that of your passengers,
as well as for correct operation of the doors,
you are strongly advised not to drive with a
door open.
Always check that it is safe to operate the
door and in particular, be sure not to leave
children or animals near the door controls
without supervision.
Page 94 of 324
92
Safety
General safety
recommendations
Do not remove the labels attached in
different places on your vehicle. They
include safety warnings as well as
identification information for the vehicle.
For all work on your vehicle, use a
qualified workshop that has the technical
information, skills and equipment required, all
of which a PEUGEOT dealer is able to
provide.
Depending on country regulations,
certain safety equipment may be
mandatory: high visibility safety vests,
warning triangles, breathalysers, spare bulbs,
spare fuses, fire extinguisher, first aid kit, mud
flaps at the rear of the vehicle, etc.
Installing electrical accessories:
– The fitting of electrical equipment or
accessories not approved by PEUGEOT
may
cause excessive current consumption and
faults and failures with the electrical system
of your vehicle. Contact a PEUGEOT dealer
for information on the range of approved
accessories.
– As a safety measure, access to the
diagnostic socket, used for the vehicle's
electronic systems, is reserved strictly for
PEUGEOT
dealers or qualified workshops,
equipped with the special tools required (risk
of malfunctions of the vehicle's electronic
systems that could cause breakdowns or
serious accidents). The Manufacturer cannot
be held responsible if this advice is not
followed.
–
Any modification or adaptation not intended
or authorised by PEUGEOT
or carried out
without meeting the technical requirements
defined by the Manufacturer will result in the
suspension of the commercial warranty.
Installation of accessory radio
communication transmitters
Before installing a radio communication
transmitter with an external aerial, you must
without fail contact a PEUGEOT dealer for
the specification of transmitters which can
be fitted (frequency, maximum power, aerial
position, specific installation requirements),
in line with the Vehicle Electromagnetic
Compatibility Directive (2004/104/EC).
Declarations of conformity for radio
equipment
The relevant certificates are available on the
http://public.servicebox.peugeot.com/APddb/
website.
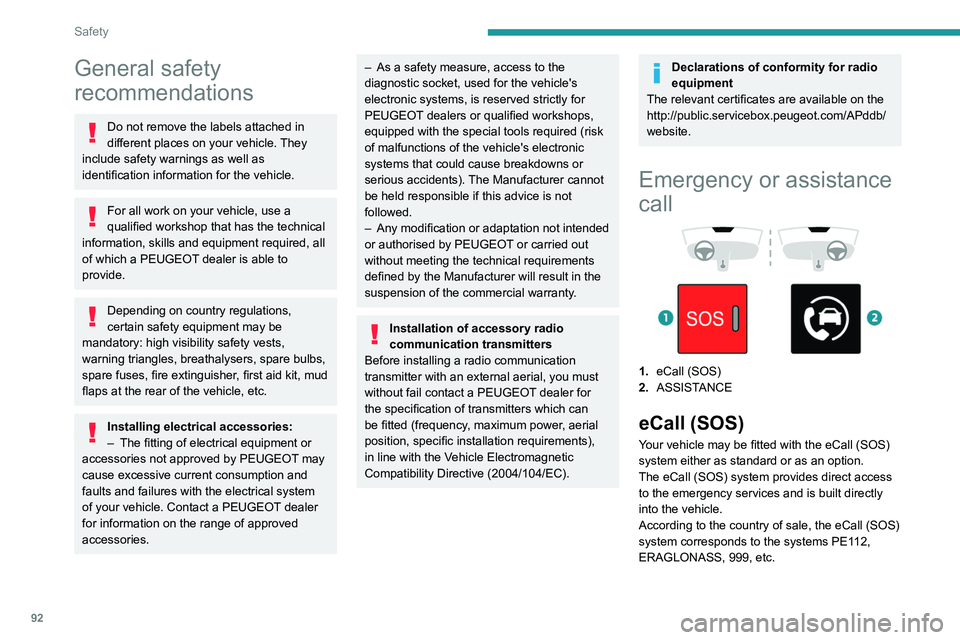
Emergency or assistance
call
1. eCall (SOS)
2. ASSISTANCE
eCall (SOS)
Your vehicle may be fitted with the eCall (SOS)
system either as standard or as an option.
The eCall (SOS) system provides direct access
to the emergency services and is built directly
into the vehicle.
According to the country of sale, the eCall
(SOS)
system
corresponds to the systems PE112,
ERAGLONASS, 999, etc.