PONTIAC G6 2007 Owners Manual
G6 2007
PONTIAC
PONTIAC
https://www.carmanualsonline.info/img/50/40824/w960_40824-0.png
PONTIAC G6 2007 Owners Manual
Trending: fuel type, headlamp, wiper blades, parking brake, oil additives, hood release, windshield wipers
Page 361 of 486
To disconnect the jumper cables from both
vehicles, do the following:
1. Disconnect the black negative (−) cable from
the vehicle that had the dead battery.
2. Disconnect the black negative (−) cable from
the vehicle with the good battery.
3. Disconnect the red positive (+) cable from the
vehicle with the good battery.
4. Disconnect the red positive (+) cable from the
other vehicle.
Bulb Replacement
For the proper type of replacement bulbs, see
Replacement Bulbs on page 368.
For any bulb changing procedure not listed in this
section, contact your dealer.
Halogen Bulbs
{CAUTION:
Halogen bulbs have pressurized gas
inside and can burst if you drop or
scratch the bulb. You or others could be
injured. Be sure to read and follow the
instructions on the bulb package.
361
Page 362 of 486
Headlamps, Front Turn Signal,
Sidemarker, and Parking Lamps
A. Front Sidemarker
B. Front Turn Signal/Parking Lamp
C. Low-Beam Headlamp
D. High-Beam HeadlampTo replace one of these bulbs, do the following:
1. Remove the two screws that secure the
headlamp assembly.
2. Loosen the front fascia by removing the
plastic push pins along the top of the tie bar
by prying under the fasteners with a tool.
362
Page 363 of 486
3. Pull back the front fascia then pull the
headlamp assembly forward, out of the
vehicle. You need to pry the headlamp
assembly away from the fender. This frees
the ball stud from its retainer in the fender
bracket.
You might want someone to assist you with
the removal of the headlamp assembly to avoid
possible damage to the vehicle.
4. Remove the bulb access cover by turning it
counterclockwise.
5. Turn the bulb socket counterclockwise and
pull out the bulb assembly.
6. Disconnect the bulb socket from the wiring
harness for headlamps.
For the front turn signal/parking or sidemarker
bulbs, unclip the bulb from the socket.
7. Install a new bulb.
8. Reverse Steps 1 through 4 to reinstall the
bulb assembly and headlamp assembly.Center High-Mounted
Stoplamp (CHMSL) (Sedan)
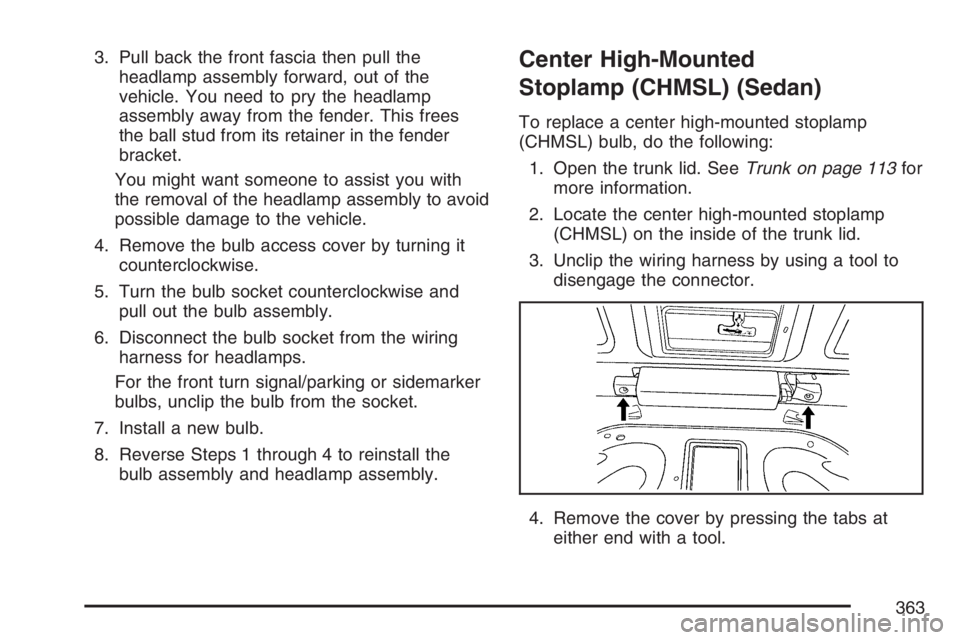
To replace a center high-mounted stoplamp
(CHMSL) bulb, do the following:
1. Open the trunk lid. SeeTrunk on page 113for
more information.
2. Locate the center high-mounted stoplamp
(CHMSL) on the inside of the trunk lid.
3. Unclip the wiring harness by using a tool to
disengage the connector.
4. Remove the cover by pressing the tabs at
either end with a tool.
363
Page 364 of 486
5. Remove the bulb by turning it
counterclockwise.
6. Install a new bulb.
7. Reverse Steps 3 through 5 to reinstall the
bulb assembly.
Center High-Mounted
Stoplamp (CHMSL)
(Retractable Hardtop and Coupe)
If your vehicle has this component and it needs
replacement, it is recommended that it be replaced
as a unit by your dealer.
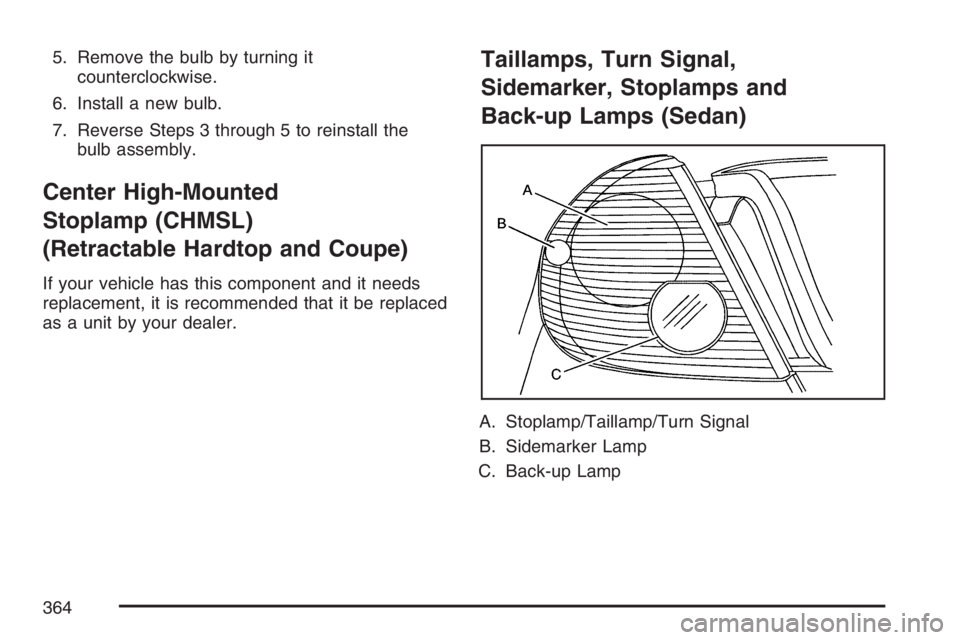
Taillamps, Turn Signal,
Sidemarker, Stoplamps and
Back-up Lamps (Sedan)
A. Stoplamp/Taillamp/Turn Signal
B. Sidemarker Lamp
C. Back-up Lamp
364
Page 365 of 486
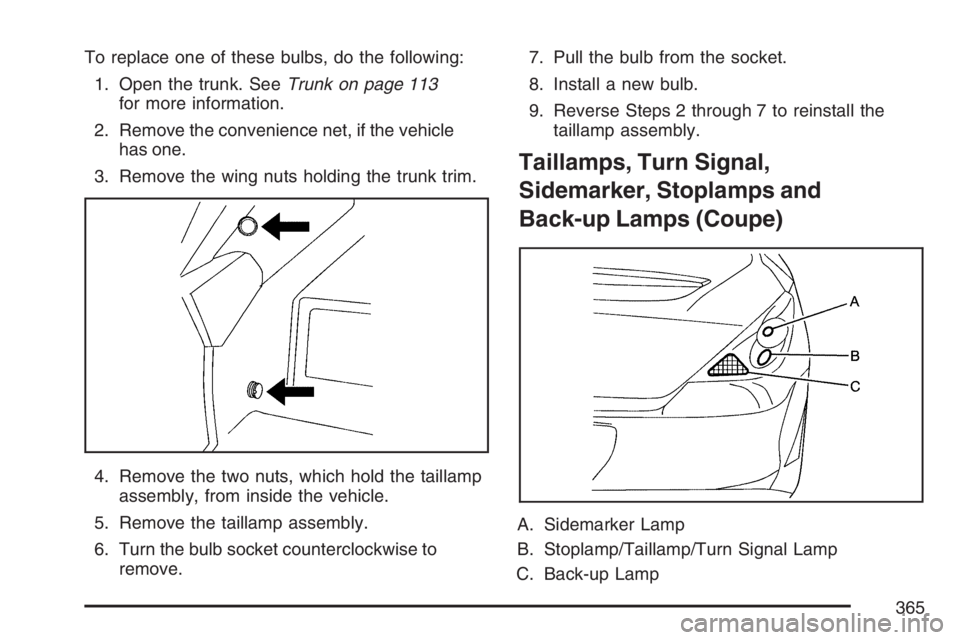
To replace one of these bulbs, do the following:
1. Open the trunk. SeeTrunk on page 113
for more information.
2. Remove the convenience net, if the vehicle
has one.
3. Remove the wing nuts holding the trunk trim.
4. Remove the two nuts, which hold the taillamp
assembly, from inside the vehicle.
5. Remove the taillamp assembly.
6. Turn the bulb socket counterclockwise to
remove.7. Pull the bulb from the socket.
8. Install a new bulb.
9. Reverse Steps 2 through 7 to reinstall the
taillamp assembly.
Taillamps, Turn Signal,
Sidemarker, Stoplamps and
Back-up Lamps (Coupe)
A. Sidemarker Lamp
B. Stoplamp/Taillamp/Turn Signal Lamp
C. Back-up Lamp
365
Page 366 of 486
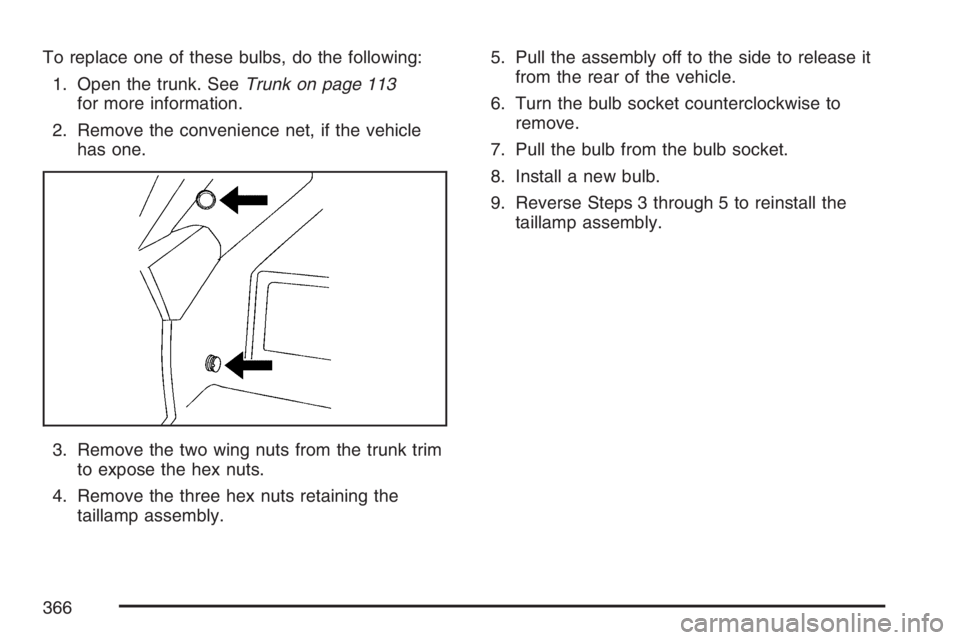
To replace one of these bulbs, do the following:
1. Open the trunk. SeeTrunk on page 113
for more information.
2. Remove the convenience net, if the vehicle
has one.
3. Remove the two wing nuts from the trunk trim
to expose the hex nuts.
4. Remove the three hex nuts retaining the
taillamp assembly.5. Pull the assembly off to the side to release it
from the rear of the vehicle.
6. Turn the bulb socket counterclockwise to
remove.
7. Pull the bulb from the bulb socket.
8. Install a new bulb.
9. Reverse Steps 3 through 5 to reinstall the
taillamp assembly.
366
Page 367 of 486
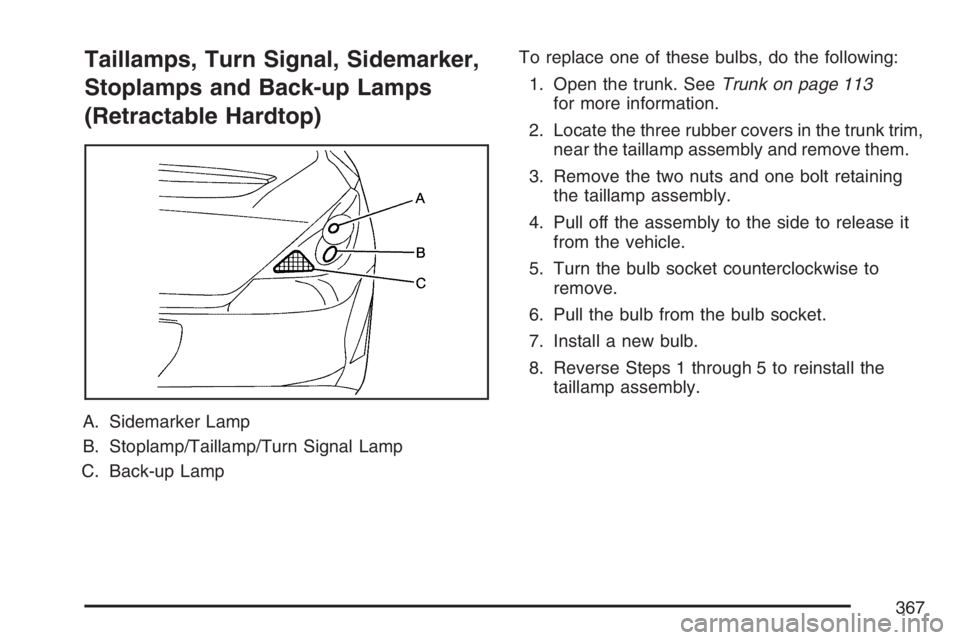
Taillamps, Turn Signal, Sidemarker,
Stoplamps and Back-up Lamps
(Retractable Hardtop)
A. Sidemarker Lamp
B. Stoplamp/Taillamp/Turn Signal Lamp
C. Back-up LampTo replace one of these bulbs, do the following:
1. Open the trunk. SeeTrunk on page 113
for more information.
2. Locate the three rubber covers in the trunk trim,
near the taillamp assembly and remove them.
3. Remove the two nuts and one bolt retaining
the taillamp assembly.
4. Pull off the assembly to the side to release it
from the vehicle.
5. Turn the bulb socket counterclockwise to
remove.
6. Pull the bulb from the bulb socket.
7. Install a new bulb.
8. Reverse Steps 1 through 5 to reinstall the
taillamp assembly.
367
Page 368 of 486
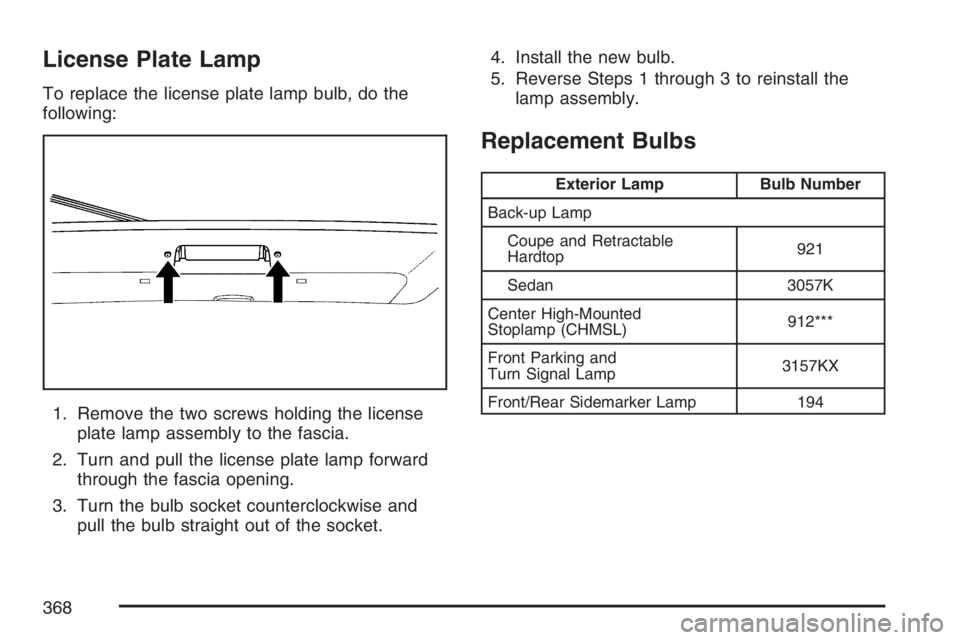
License Plate Lamp
To replace the license plate lamp bulb, do the
following:
1. Remove the two screws holding the license
plate lamp assembly to the fascia.
2. Turn and pull the license plate lamp forward
through the fascia opening.
3. Turn the bulb socket counterclockwise and
pull the bulb straight out of the socket.4. Install the new bulb.
5. Reverse Steps 1 through 3 to reinstall the
lamp assembly.
Replacement Bulbs
Exterior Lamp Bulb Number
Back-up Lamp
Coupe and Retractable
Hardtop921
Sedan 3057K
Center High-Mounted
Stoplamp (CHMSL)912***
Front Parking and
Turn Signal Lamp3157KX
Front/Rear Sidemarker Lamp 194
368
Page 369 of 486
Exterior Lamp Bulb Number
License Plate Lamp 168
Headlamps
High-Beam H9
Low-Beam H11
Stoplamp, Taillamp and
Turn Signal Lamp3057K*
Sidemarker, Stoplamp, Taillamp
and Turn Signal Lamp3157K**
*Coupe and Sedan only
**Retractable Hardtop only
***Sedan Only
For replacement bulbs not listed here, contact
your dealer.
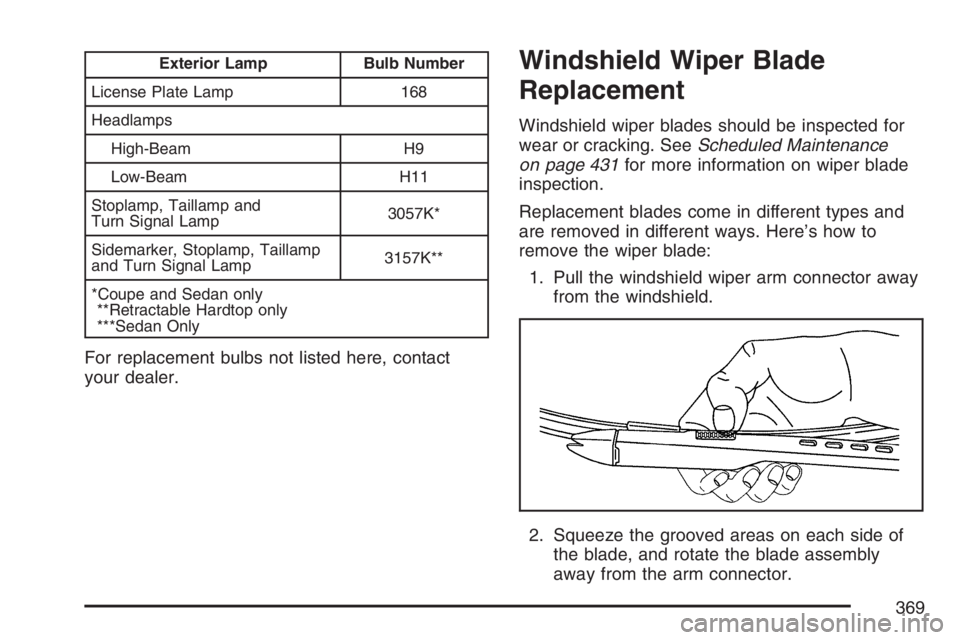
Windshield Wiper Blade
Replacement
Windshield wiper blades should be inspected for
wear or cracking. SeeScheduled Maintenance
on page 431for more information on wiper blade
inspection.
Replacement blades come in different types and
are removed in different ways. Here’s how to
remove the wiper blade:
1. Pull the windshield wiper arm connector away
from the windshield.
2. Squeeze the grooved areas on each side of
the blade, and rotate the blade assembly
away from the arm connector.
369
Page 370 of 486
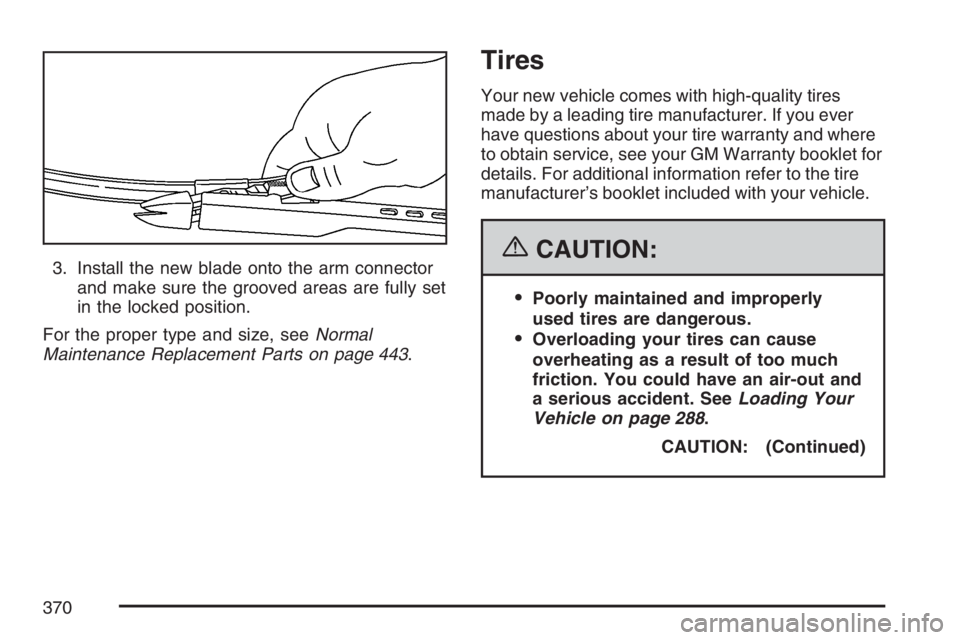
3. Install the new blade onto the arm connector
and make sure the grooved areas are fully set
in the locked position.
For the proper type and size, seeNormal
Maintenance Replacement Parts on page 443.
Tires
Your new vehicle comes with high-quality tires
made by a leading tire manufacturer. If you ever
have questions about your tire warranty and where
to obtain service, see your GM Warranty booklet for
details. For additional information refer to the tire
manufacturer’s booklet included with your vehicle.
{CAUTION:
Poorly maintained and improperly
used tires are dangerous.
Overloading your tires can cause
overheating as a result of too much
friction. You could have an air-out and
a serious accident. SeeLoading Your
Vehicle on page 288.
CAUTION: (Continued)
370
Trending: instrument cluster, towing capacity, maintenance schedule, steering, windshield wipers, oil filter, battery location
