ESP Ram 2500 2020 Service Manual
[x] Cancel search | Manufacturer: RAM, Model Year: 2020, Model line: 2500, Model: Ram 2500 2020Pages: 553, PDF Size: 21.99 MB
Page 289 of 553
STARTING AND OPERATING287
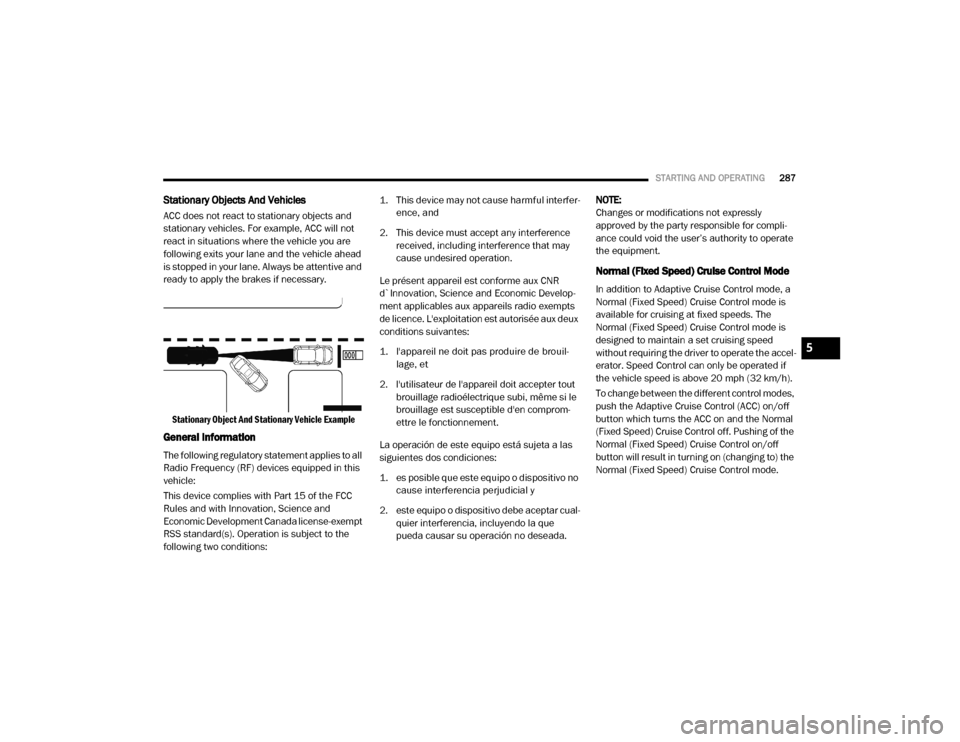
Stationary Objects And Vehicles
ACC does not react to stationary objects and
stationary vehicles. For example, ACC will not
react in situations where the vehicle you are
following exits your lane and the vehicle ahead
is stopped in your lane. Always be attentive and
ready to apply the brakes if necessary.
Stationary Object And Stationary Vehicle Example
General Information
The following regulatory statement applies to all
Radio Frequency (RF) devices equipped in this
vehicle:
This device complies with Part 15 of the FCC
Rules and with Innovation, Science and
Economic Development Canada license-exempt
RSS standard(s). Operation is subject to the
following two conditions:
1. This device may not cause harmful interfer
-
ence, and
2. This device must accept any interference received, including interference that may
cause undesired operation.
Le présent appareil est conforme aux CNR
d`Innovation, Science and Economic Develop -
ment applicables aux appareils radio exempts
de licence. L'exploitation est autorisée aux deux
conditions suivantes:
1. l'appareil ne doit pas produire de brouil -
lage, et
2. l'utilisateur de l'appareil doit accepter tout brouillage radioélectrique subi, même si le
brouillage est susceptible d'en comprom -
ettre le fonctionnement.
La operación de este equipo está sujeta a las
siguientes dos condiciones:
1. es posible que este equipo o dispositivo no cause interferencia perjudicial y
2. este equipo o dispositivo debe aceptar cual -
quier interferencia, incluyendo la que
pueda causar su operación no deseada. NOTE:
Changes or modifications not expressly
approved by the party responsible for compli
-
ance could void the user’s authority to operate
the equipment.
Normal (Fixed Speed) Cruise Control Mode
In addition to Adaptive Cruise Control mode, a
Normal (Fixed Speed) Cruise Control mode is
available for cruising at fixed speeds. The
Normal (Fixed Speed) Cruise Control mode is
designed to maintain a set cruising speed
without requiring the driver to operate the accel -
erator. Speed Control can only be operated if
the vehicle speed is above 20 mph (32 km/h).
To change between the different control modes,
push the Adaptive Cruise Control (ACC) on/off
button which turns the ACC on and the Normal
(Fixed Speed) Cruise Control off. Pushing of the
Normal (Fixed Speed) Cruise Control on/off
button will result in turning on (changing to) the
Normal (Fixed Speed) Cruise Control mode.
5
20_DJD2_OM_EN_USC_t.book Page 287
Page 295 of 553
STARTING AND OPERATING293
(Continued)
(Continued)
When you move the gear selector into
REVERSE with ParkSense turned off, the
instrument cluster display will show "Off" on
the vehicle graphic arcs for as long as the
vehicle is in REVERSE.
ParkSense, when on, will reduce the volume
of the radio when it is sounding a tone.
Clean the ParkSense sensors regularly,
taking care not to scratch or damage them.
The sensors must not be covered with ice,
snow, slush, mud, dirt or debris. Failure to do
so can result in the system not working prop
-
erly. The ParkSense system might not detect
an obstacle behind the fascia/bumper, or it
could provide a false indication that an
obstacle is behind the fascia/bumper.
Ensure the ParkSense system is off if objects
such as bicycle carriers, trailer hitches, etc.,
are placed within 18 inches (45 cm) of the
rear fascia/bumper while driving the vehicle.
Failure to do so can result in the system
misinterpreting a close obstacle as a sensor
problem, causing the "Rear ParkSense
Unavailable Service Required" message to
appear in the instrument cluster display.
On vehicles equipped with a tailgate, Park -
Sense should be disabled when the tailgate
is in the lowered or open position and the
vehicle is in REVERSE. A lowered tailgate
could provide a false indication that an
obstacle is behind the vehicle.
WARNING!
Drivers must be careful when backing up
even when using ParkSense. Always check
carefully behind your vehicle, look behind
you, and be sure to check for pedestrians,
animals, other vehicles, obstructions, and
blind spots before backing up. You are
responsible for safety and must continue to
pay attention to your surroundings. Failure
to do so can result in serious injury or
death.
Before using ParkSense, it is strongly
recommended that the ball mount and
hitch ball assembly is disconnected from
the vehicle when the vehicle is not used for
towing. Failure to do so can result in injury
or damage to vehicles or obstacles
because the hitch ball will be much closer
to the obstacle than the rear fascia when
the loudspeaker sounds the continuous
tone. Also, the sensors could detect the ball
mount and hitch ball assembly, depending
on its size and shape, giving a false indica -
tion that an obstacle is behind the vehicle.
CAUTION!
ParkSense is only a parking aid and it is
unable to recognize every obstacle,
including small obstacles. Parking curbs
might be temporarily detected or not
detected at all. Obstacles located above or
below the sensors will not be detected
when they are in close proximity.
WARNING! (Continued)
5
20_DJD2_OM_EN_USC_t.book Page 293
Page 301 of 553
STARTING AND OPERATING299
LANESENSE — IF EQUIPPED
LaneSense Operation
The LaneSense system is operational at speeds
above 37 mph (60 km/h) and below 112 mph
(180 km/h). It uses a forward looking camera to
detect lane markings and measure vehicle posi -
tion within the lane boundaries.
When both lane markings are detected and the
driver unintentionally drifts out of the lane while
no turn signal has been applied OR the driver
departs the lane on the opposite side of the
applied turn signal (if the left turn signal is applied and the vehicle departs to the right), the
LaneSense system provides a haptic warning in
the form of torque applied to the steering wheel
to prompt the driver to remain within the lane
boundaries. The LaneSense system will also
provide a visual warning through the instrument
cluster display to prompt the driver to remain
within the lane boundaries.
The driver may manually override the haptic
warning by applying torque into the steering
wheel at any time.
When only a single lane marking is detected
and the driver unintentionally drifts across that
lane marking (no turn signal applied), the Lane
-
Sense system provides a visual warning
through the instrument cluster display to
prompt the driver to remain within the lane.
When only a single lane marking is detected, a
haptic (torque) warning will not be provided.
NOTE:
When operating conditions have been met, the
LaneSense system will monitor if the driver’s
hands are on the steering wheel and provides
an audible and visual warning to the driver
when the driver’s hands are not detected on the
steering wheel. The system will cancel if the
driver does not return their hands to the wheel.
WARNING!
Drivers must be careful when backing up
even when using ParkSense. Always check
carefully behind your vehicle, look behind
you, and be sure to check for pedestrians,
animals, other vehicles, obstructions, and
blind spots before backing up. You are
responsible for safety and must continue to
pay attention to your surroundings. Failure
to do so can result in serious injury or
death.
Before using ParkSense, it is strongly
recommended that the ball mount and
hitch ball assembly is disconnected from
the vehicle when the vehicle is not used for
towing. Failure to do so can result in injury
or damage to vehicles or obstacles
because the hitch ball will be much closer
to the obstacle than the rear fascia when
the loudspeaker sounds the continuous
tone. Also, the sensors could detect the ball
mount and hitch ball assembly, depending
on its size and shape, giving a false indica -
tion that an obstacle is behind the vehicle.
CAUTION!
ParkSense is only a parking aid and it is
unable to recognize every obstacle,
including small obstacles. Parking curbs
might be temporarily detected or not
detected at all. Obstacles located above or
below the sensors will not be detected
when they are in close proximity.
The vehicle must be driven slowly when
using ParkSense in order to be able to stop
in time when an obstacle is detected. It is
recommended that the driver looks over
his/her shoulder when using ParkSense.
5
20_DJD2_OM_EN_USC_t.book Page 299
Page 305 of 553
STARTING AND OPERATING303
image will continue to be displayed until the
display timer exceeds 10 seconds.
NOTE:
If the vehicle speed remains below 8 mph
(13 km/h), the Rear View Camera image will
be displayed continuously until deactivated
via the touchscreen button "X", the transmis -
sion is shifted into PARK, or the ignition is
placed in the OFF position.
The touchscreen button "X" to disable display
of the camera image is made available ONLY
when the vehicle is not in REVERSE.
Cargo Camera Icons — If Equipped Backup Camera Touchscreen Button
Cargo Camera Touchscreen Button
AUX Camera Touchscreen Button
If equipped with a Cargo Camera, a touchscreen
button to indicate the current active Camera
image being displayed is made available when -
ever the Rear View Camera image is displayed. If equipped with a Cargo Camera, a touchscreen
button to switch the display to Cargo Camera
image is made available whenever the Rear
View Camera image is displayed.
A touchscreen button "X" to disable display of
the camera image is made available when the
vehicle is not in REVERSE gear.
When enabled, active guidelines are overlaid on
the backup camera image to illustrate the width
of the vehicle and its projected backup path
based on the steering wheel position. The active
guidelines will show separate zones that will
help indicate the distance to the rear of the
vehicle.
NOTE:
For further information about how to access
and change the programmable features of the
ParkView Rear Backup Camera, refer to “Ucon
-
nect Settings” in “Multimedia.”
A dashed center line overlay indicates the
center of the vehicle to assist with parking or
aligning to a hitch/receiver. The following table
shows the approximate distances for each
zone:
Zones Distance To The Rear
Of The Vehicle
Red 0 - 1 ft (0 - 30 cm)
Yellow 1 ft - 6.5 ft
(30 cm - 2m)
Green 6.5 ft or greater
(2 m or greater)
WARNING!
Drivers must be careful when backing up
even when using the ParkView Rear Back Up
Camera. Always check carefully behind your
vehicle, and be sure to check for pedestrians,
animals, other vehicles, obstructions, or blind
spots before backing up. You are responsible
for the safety of your surroundings and must
continue to pay attention while backing up.
Failure to do so can result in serious injury or
death.5
20_DJD2_OM_EN_USC_t.book Page 303
Page 308 of 553
306STARTING AND OPERATING
Modes Of Operation
Standard Backup Camera view can be manually
activated by selecting “Backup Camera”
through the Controls menu within the Uconnect
screen.
Refer to “Parkview Rear Back Up Camera” in
this section for more information on activation
conditions.
Top View
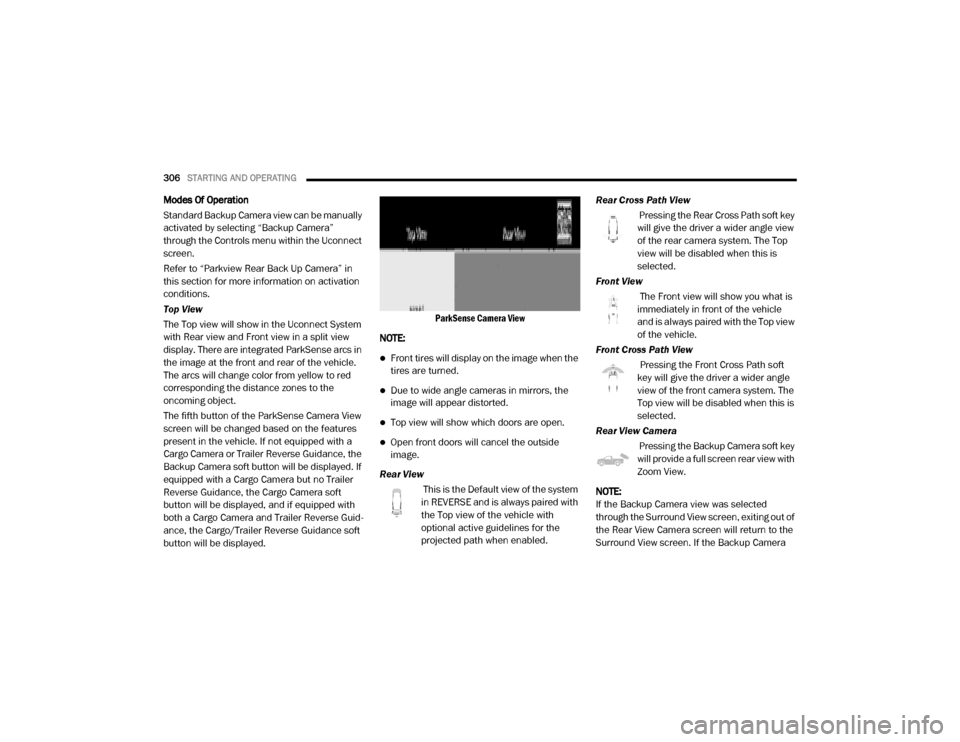
The Top view will show in the Uconnect System
with Rear view and Front view in a split view
display. There are integrated ParkSense arcs in
the image at the front and rear of the vehicle.
The arcs will change color from yellow to red
corresponding the distance zones to the
oncoming object.
The fifth button of the ParkSense Camera View
screen will be changed based on the features
present in the vehicle. If not equipped with a
Cargo Camera or Trailer Reverse Guidance, the
Backup Camera soft button will be displayed. If
equipped with a Cargo Camera but no Trailer
Reverse Guidance, the Cargo Camera soft
button will be displayed, and if equipped with
both a Cargo Camera and Trailer Reverse Guid -
ance, the Cargo/Trailer Reverse Guidance soft
button will be displayed.
ParkSense Camera View
NOTE:
Front tires will display on the image when the
tires are turned.
Due to wide angle cameras in mirrors, the
image will appear distorted.
Top view will show which doors are open.
Open front doors will cancel the outside
image.
Rear View This is the Default view of the system
in REVERSE and is always paired with
the Top view of the vehicle with
optional active guidelines for the
projected path when enabled. Rear Cross Path View
Pressing the Rear Cross Path soft key
will give the driver a wider angle view
of the rear camera system. The Top
view will be disabled when this is
selected.
Front View The Front view will show you what is
immediately in front of the vehicle
and is always paired with the Top view
of the vehicle.
Front Cross Path View Pressing the Front Cross Path soft
key will give the driver a wider angle
view of the front camera system. The
Top view will be disabled when this is
selected.
Rear View Camera Pressing the Backup Camera soft key
will provide a full screen rear view with
Zoom View.
NOTE:
If the Backup Camera view was selected
through the Surround View screen, exiting out of
the Rear View Camera screen will return to the
Surround View screen. If the Backup Camera
20_DJD2_OM_EN_USC_t.book Page 306
Page 310 of 553
308STARTING AND OPERATING
Deactivation
The system is deactivated in the following
conditions if it was activated automatically:
When the vehicle is shifted out of REVERSE
(with camera delay turned on), the camera
image will continue to be displayed for up to
10 seconds after shifting out of REVERSE
unless the vehicle speed exceeds 8 mph
(13 km/h), the vehicle is shifted into PARK or
the ignition is placed in the OFF position.
There is a touch screen button “X” to disable
the display of the camera image.
When the vehicle is shifted out of REVERSE
(with camera delay turned off), the surround
view camera mode is exited and the last
known screen appears again.
The system is deactivated in the following
conditions if it was activated manually from the
Uconnect controls menu via the Surround View
button, Backup Camera button, Cargo Camera
button or Forward Facing Camera button:
The "X" button on the display is pressed
Vehicle is shifted into PARK
Ignition is placed in the OFF position
Vehicle speed is over 8 mph (13 km/h) for
10 seconds
NOTE:
If the Surround View Camera, Cargo Camera,
Backup Camera, or Forward Facing Camera is
activated manually, and the vehicle is shifted
into REVERSE, deactivation methods for auto -
matic activation are assumed.
The camera delay system is turned off manually
through the Uconnect settings menu. Refer to
“Uconnect Settings” in “Multimedia” for further
information.
NOTE:
If snow, ice, mud, or any foreign substance
builds up on the camera lenses, clean the
lenses, rinse with water, and dry with a soft
cloth. Do not cover the lenses.
If a malfunction with the system has
occurred, see an authorized dealer. Cargo Camera With Dynamic Centerline — If
Equipped
The Dynamic Centerline feature provides an
overlay on the Cargo Camera display screen
that aligns to the center of the pickup box to aid
in hooking up a fifth wheel camper or goose
-
neck trailer. The centerline auto aligns to the
center of the pickup box, and can also be manu -
ally adjusted. The centerline will adjust in
response to steering angle inputs, and will not
obstruct the gooseneck receiver or an
approaching trailer gooseneck in the camera
feed.
Activation
The Dynamic Centerline feature can be acti -
vated through the Uconnect settings by
pressing the Cargo Camera soft button,
followed by the “Dynamic Centerline” soft
button on the touchscreen.
If the Dynamic Centerline feature is turned on,
the overlay will display anytime the Cargo
Camera image is displayed.
20_DJD2_OM_EN_USC_t.book Page 308
Page 312 of 553
310STARTING AND OPERATING
NOTE:
If the vehicle is in 4LO, the Forward Facing
Camera image will be displayed until the “X”
button is pressed or the ignition is placed in the
OFF position. If the vehicle goes out of 4LO, then
the regular deactivation conditions listed above
are applied.
Trailer Reverse Guidance — If Equipped
The Trailer Reverse Guidance feature assists
the driver in backing up a trailer by providing
adjustable camera views of the trailer and
surrounding area. The cameras are mounted on
the side mirrors and the images will be
displayed side-by-side on the touchscreen. Left
and right camera images are swapped and
mirrored on the touchscreen to show the equiv -
alent area behind the vehicle as though the
driver is using the side mirrors.
Activation
The Trailer Reverse Guidance feature can be
activated by pressing the Trailer Reverse Guid -
ance button on the Backup/Cargo Camera
Display. Deactivation
When the vehicle is shifted out of REVERSE
(with camera delay turned on), the camera
image will continue to be displayed for up to 10
seconds after shifting out of REVERSE unless
the vehicle speed exceeds 8 mph (13 km/h),
the vehicle is shifted into PARK or the ignition is
placed in the OFF position. There is a touch
-
screen button “X” to disable the display of the
camera image.
If Trailer Reverse Guidance is selected through
manually activated Surround View, Backup
Camera, or Cargo Camera, the below deactiva -
tion conditions are applied:
The “X” button on the display is pressed
The vehicle is shifted into PARK
The ignition is placed in the OFF position
The vehicle speed is over 8 mph (13 km/h)
for 10 seconds
WARNING!
Drivers must be careful when backing up
even when using the Surround View Camera.
Always check carefully behind your vehicle,
and be sure to check for pedestrians,
animals, other vehicles, obstructions, or blind
spots before backing up. You are responsible
for the safety of your surroundings and must
continue to pay attention while backing up.
Failure to do so can result in serious injury or
death.
CAUTION!
To avoid vehicle damage, Surround View
should only be used as a parking aid. The
Surround View camera is unable to view
every obstacle or object in your drive path.
To avoid vehicle damage, the vehicle must
be driven slowly when using Surround View
to be able to stop in time when an obstacle
is seen. It is recommended that the driver
look frequently over his/her shoulder when
using Surround View.
20_DJD2_OM_EN_USC_t.book Page 310
Page 319 of 553
STARTING AND OPERATING317
3. Stop filling the DEF tank immediately when
any of the following happen: DEF stops
flowing from the fill bottle into the DEF tank,
DEF splashes out the filler neck, or a DEF
pump nozzle automatically shuts off.
4. Reinstall cap onto DEF tank.
Filling The Def Tank In Cold Climates
Since DEF will begin to freeze at 12°F (-11°C),
your vehicle is equipped with an automatic DEF
heating system. This allows the DEF injection system to operate properly at temperatures
below 12°F (-11°C). If your vehicle is not in
operation for an extended period of time with
temperatures below 12°F (-11°C), the DEF in
the tank may freeze. If the tank is overfilled and
freezes, it could be damaged. Therefore, do not
overfill the DEF tank.
Extra care should be taken when filling with
portable containers to avoid overfilling. Note the
level of the DEF gauge in your instrument cluster.
You may safely add a maximum of 2 Gallons
(7.5 Liters) of DEF from portable containers
when your DEF gauge is reading ½ full.
VEHICLE LOADING
Gross Vehicle Weight Rating (GVWR)
The GVWR is the total permissible weight of your
vehicle including driver, passengers, vehicle,
options and cargo. The label also specifies
maximum capacities of front and rear axle
systems (GAWR). Total load must be limited so
GVWR and front and rear GAWR are not
exceeded.
Payload
The payload of a vehicle is defined as the allow
-
able load weight a truck can carry, including the
weight of the driver, all passengers, options and
cargo.
Gross Axle Weight Rating (GAWR)
The GAWR is the maximum permissible load on
the front and rear axles. The load must be
distributed in the cargo area so that the GAWR
of each axle is not exceeded.
Each axle GAWR is determined by the compo -
nents in the system with the lowest load
carrying capacity (axle, springs, tires or wheels).
Heavier axles or suspension components some -
times specified by purchasers for increased
durability does not necessarily increase the
vehicle's GVWR.
Tire Size
The tire size on the Vehicle Certification Label
represents the actual tire size on your vehicle.
Replacement tires must be equal to the load
capacity of this tire size.
Never add anything other than DEF to the
tank – especially any form of hydrocarbon
such as diesel fuel, fuel system additives,
gasoline, or any other petroleum-based
product. Even a very small amount of these,
less than 100 parts per million or less than
1 oz. per 78 Gallons (295 Liters) will
contaminate the entire DEF system and will
require replacement. If owners use a
container, funnel or nozzle when refilling
the tank, it should either be new or one that
is has only been used for adding DEF.
Mopar provides an attachable nozzle with
its DEF for this purpose.
CAUTION! (Continued)
5
20_DJD2_OM_EN_USC_t.book Page 317
Page 341 of 553
IN CASE OF EMERGENCY339
NOTE:
Your vehicle may be transmitting data as
authorized by the subscriber.
The SOS and ASSIST buttons will only func -
tion if you are connected to an operable LTE
(voice/data) or 4G (data) network. Other
Uconnect services will only be operable if
your SiriusXM Guardian™ service is active
and you are connected to an operable LTE
(voice/data) or 4G (data) network. ASSIST Call
The ASSIST Button is used to automatically
connect you to any one of the following support
centers:
Roadside Assistance – If you get a flat tire, or
need a tow, just push the ASSIST button and
you’ll be connected to someone who can
help. Roadside Assistance will know what
vehicle you’re driving and its location. Addi
-
tional fees may apply for roadside assis -
tance.
SiriusXM Guardian™ Customer Care –
In-vehicle support for SiriusXM Guardian™.
Vehicle Customer Care – Total support for all
other vehicle issues.
SOS Call
1. Push the SOS Call button on the overhead console.
NOTE:
In case the SOS Call button is pushed in error,
there will be a 10 second delay before the SOS
Call system initiates a call to a SOS operator. To
cancel the SOS Call connection, push the SOS
call button on the overhead console or press the cancellation button on the Device Screen.
Termination of the SOS Call will turn off the
green LED light on the overhead console.
2. The LED light located between the ASSIST
and SOS buttons on the overhead console
will turn green once a connection to a SOS
operator has been made.
3. Once a connection between the vehicle and a SOS operator is made, the SOS Call
system may transmit the following
important vehicle information to a SOS
operator: Indication that the occupant placed a SOS Call.
The vehicle brand.
The last known GPS coordinates of the vehicle.
4. You should be able to speak with the SOS operator through the vehicle audio system
to determine if additional help is needed.
WARNING!
ALWAYS obey traffic laws and pay attention to
the road. ALWAYS drive safely with your hands
on the steering wheel. You have full
responsibility and assume all risks related to
the use of the features and applications in
this vehicle. Only use the features and
applications when it is safe to do so. Failure
to do so may result in an accident involving
serious injury or death.
6
20_DJD2_OM_EN_USC_t.book Page 339
Page 342 of 553
340IN CASE OF EMERGENCY
(Continued)
NOTE:
Your vehicle may be transmitting data as
authorized by the subscriber.
Once a connection is made between the
vehicle’s SOS Call system and the SOS oper-
ator, the SOS operator may be able to open a
voice connection with the vehicle to deter -
mine if additional help is needed. Once the
SOS operator opens a voice connection with
the vehicle’s SOS Call system, the operator
should be able to speak with you or other
vehicle occupants and hear sounds occurring
in the vehicle. The vehicle’s SOS Call system
will attempt to remain connected with the SOS operator until the SOS operator termi
-
nates the connection.
5. The SOS operator may attempt to contact appropriate emergency responders and
provide them with important vehicle infor -
mation and GPS coordinates.
WARNING!
ALWAYS obey traffic laws and pay attention to
the road. ALWAYS drive safely with your hands
on the steering wheel. You have full
responsibility and assume all risks related to
the use of the features and applications in
this vehicle. Only use the features and
applications when it is safe to do so. Failure
to do so may result in an accident involving
serious injury or death.
WARNING!
If anyone in the vehicle could be in danger
(e.g., fire or smoke is visible, dangerous
road conditions or location), do not wait for
voice contact from an Emergency Services
Agent. All occupants should exit the vehicle
immediately and move to a safe location.
Never place anything on or near the
vehicle’s operable network and GPS
antennas. You could prevent operable
network and GPS signal reception, which
can prevent your vehicle from placing an
emergency call. An operable network and
GPS signal reception is required for the SOS
Call system to function properly.
The SOS Call system is embedded into the
vehicle’s electrical system. Do not add
aftermarket electrical equipment to the
vehicle’s electrical system. This may
prevent your vehicle from sending a signal
to initiate an emergency call. To avoid inter -
ference that can cause the SOS Call system
to fail, never add aftermarket equipment
(e.g., two-way mobile radio, CB radio, data
recorder, etc.) to your vehicle’s electrical
system or modify the antennas on your
vehicle. IF YOUR VEHICLE LOSES BATTERY
POWER FOR ANY REASON (INCLUDING
DURING OR AFTER AN ACCIDENT), THE
UCONNECT FEATURES, APPS AND
SERVICES, AMONG OTHERS, WILL NOT
OPERATE.
Modifications to any part of the SOS Call
system could cause the air bag system to
fail when you need it. You could be injured
if the air bag system is not there to help
protect you.
WARNING! (Continued)
20_DJD2_OM_EN_USC_t.book Page 340