steering Ram 3500 2020 User Guide
[x] Cancel search | Manufacturer: RAM, Model Year: 2020, Model line: 3500, Model: Ram 3500 2020Pages: 568
Page 76 of 568
74GETTING TO KNOW YOUR VEHICLE
HOOD
TO OPEN THE HOOD
To open the hood, two latches must be
released.
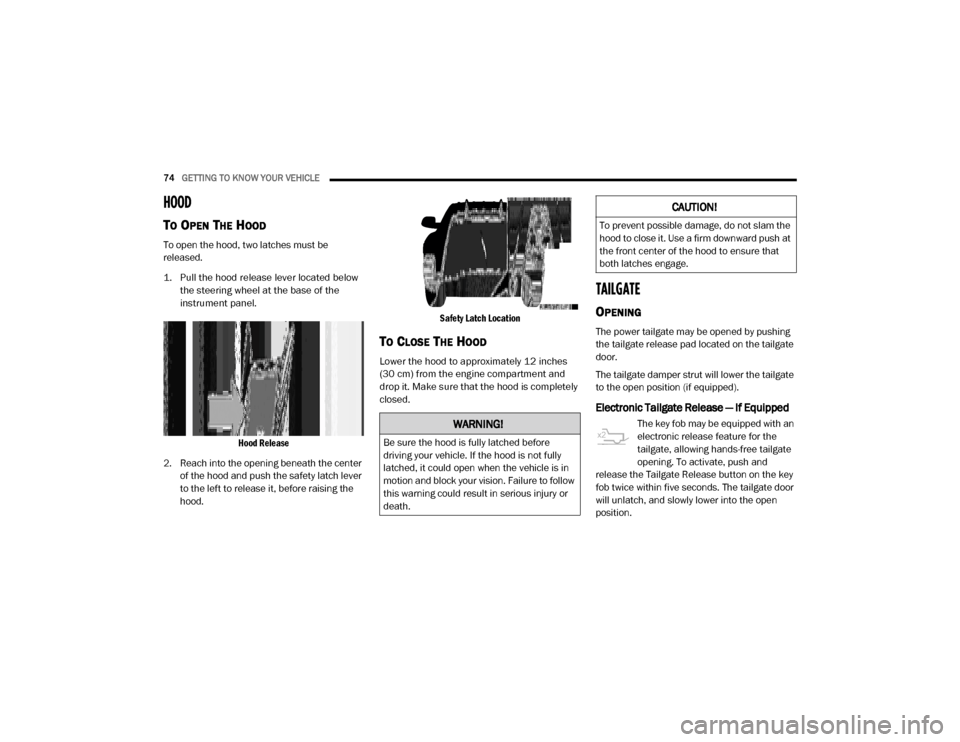
1. Pull the hood release lever located below
the steering wheel at the base of the
instrument panel.
Hood Release
2. Reach into the opening beneath the center of the hood and push the safety latch lever
to the left to release it, before raising the
hood.
Safety Latch Location
TO CLOSE THE HOOD
Lower the hood to approximately 12 inches
(30 cm) from the engine compartment and
drop it. Make sure that the hood is completely
closed.
TAILGATE
OPENING
The power tailgate may be opened by pushing
the tailgate release pad located on the tailgate
door.
The tailgate damper strut will lower the tailgate
to the open position (if equipped).
Electronic Tailgate Release — If Equipped
The key fob may be equipped with an
electronic release feature for the
tailgate, allowing hands-free tailgate
opening. To activate, push and
release the Tailgate Release button on the key
fob twice within five seconds. The tailgate door
will unlatch, and slowly lower into the open
position.WARNING!
Be sure the hood is fully latched before
driving your vehicle. If the hood is not fully
latched, it could open when the vehicle is in
motion and block your vision. Failure to follow
this warning could result in serious injury or
death.
CAUTION!
To prevent possible damage, do not slam the
hood to close it. Use a firm downward push at
the front center of the hood to ensure that
both latches engage.
20_DJD2_OM_EN_USC_t.book Page 74
Page 90 of 568

88GETTING TO KNOW YOUR VEHICLE
POWER INVERTER — IF EQUIPPED
If equipped, a 115 Volt (400 Watts maximum)
inverter may be located inside the center
console toward the right hand side, just under
the Wireless Charging Pad (if equipped). This
inverter can power cellular phones, electronics
and other low power devices requiring power up
to 400 Watts. Certain high-end video game
consoles exceed this power limit, as will most
power tools.
Center Console Power Inverter Outlet
There is also a second 115 Volt (400 Watts
maximum) power inverter located on the rear of
the center console. This inverter can power
cellular phones, electronics and other low
power devices requiring power up to 400 Watts. Certain high-end video game consoles exceed
this power limit, as will most power tools.
All power inverters are designed with built-in
overload protection. If the power rating of
400 Watts is exceeded, the power inverter
shuts down. Once the electrical device has
been removed from the outlet the inverter
should reset.
Rear Center Console Power Inverter Outlet
NOTE:
400 Watts is the maximum for the inverter, not
each outlet. If three outlets are in use, 400 Watts
is shared amongst the devices plugged in.
If your vehicle is equipped with a Ram Box, a
115 Volt (400 Watts Maximum) inverter will be
located inside the Ram Box. The inverter can be
turned on by the Instrument Panel Power Inverter switch located to the left of the steering
wheel. This inverter can power cellular phones,
electronics and other low power devices
requiring power up to 400 Watts. Certain
high-end video game consoles exceed this
power limit, as will most power tools.
Ram Box Power Inverter
Instrument Panel Power Inverter Switch
20_DJD2_OM_EN_USC_t.book Page 88
Page 93 of 568

GETTING TO KNOW YOUR VEHICLE91
There are stampings in the sheet metal on the
inner side bulkheads of the box in front of and
behind both wheel housings. Place wooden
boards across the box from side to side to
create separate load compartments in the
pickup box.
There are four tie-down cleats bolted to the
lower sides of the pickup box that can sustain
loads up to 1000 lbs (450 kg) total.
CARGO CAMERA — IF EQUIPPED
Your vehicle may be equipped with the Cargo
Camera that allows you to see an image of the
inside of the pickup box. The image will be
displayed in the Uconnect screen.
The Cargo Camera is located in the bottom
center area of the Center High-Mounted
Stoplamp (CHMSL).
A touchscreen button to indicate the current
active camera image being displayed is made
available whenever the Cargo Camera image is
displayed.
A touchscreen button to switch the display to
rear view camera image is made available
whenever the Cargo Camera image is displayed. A touchscreen button "X" to disable display of
the camera image is made available when the
vehicle is not in REVERSE gear.
A display timer is initiated when the Cargo
Camera image is displayed. The image will
continue to be displayed until the display timer
exceeds 10 seconds and the vehicle speed is
above 8 mph (13 km/h) or the touchscreen
button "X" to disable display of the Cargo
Camera image is pressed.
Cargo Camera With Dynamic Centerline
(Available With Surround View Camera Only) — If
Equipped
The Dynamic Centerline feature provides an
overlay on the Cargo Camera display screen
that aligns to the center of the pickup box to aid
in hooking up a fifth wheel camper or
gooseneck trailer. The centerline auto aligns to
the center of the pickup box, and can also be
manually adjusted. The centerline will adjust in
response to steering angle inputs, and will not
obstruct the gooseneck receiver or an
approaching trailer gooseneck in the camera
feed.
Activation
The Dynamic Centerline feature can be
activated through the Uconnect settings by
pressing the Cargo Camera soft button,
followed by the “Adjust Centerline” soft button
on the touchscreen.
If the Dynamic Centerline feature is turned on,
the overlay will display anytime the Cargo
Camera image is displayed.
Adjusting Centerline
Follow the steps below to manually adjust the
centerline:
1. Press the “Adjust Centerline” soft button
located in the bottom right corner of the
Cargo Camera display.
2. Use the arrows on the bottom left corner of the Cargo Camera display to adjust the
centerline horizontally or vertically.
3. Once the desired position is achieved, press the “Accept” button to set the centerline to
the newly specified position.
2
20_DJD2_OM_EN_USC_t.book Page 91
Page 115 of 568
GETTING TO KNOW YOUR INSTRUMENT PANEL113
The fuel pump symbol points
to the side of the vehicle where
the fuel filler door is located.
Refer to “Refueling The Vehicle — Gas
Engine” in “Starting And Operating” for
further information.
5. Diesel Exhaust Fluid (DEF) Gauge
The DEF Gauge displays the actual level
of Diesel Exhaust Fluid in the DEF tank.
Diesel Exhaust Fluid (DEF) is required to
maintain normal vehicle operation and
emissions compliance. If something is
wrong with the gauge, a DEF Warning
Message or Malfunction Indicator Light
(MIL) will be displayed. More information
is available in the instrument cluster
display section under the heading of
Diesel Exhaust Fluid (DEF) Warning
Messages. NOTE:
The DEF tank on these vehicles is designed
with a large amount of full reserve. So the level
sensor will indicate a full reading even before
the tank is completely full. To put it another
way, there’s additional storage capacity in the
tank above the Full mark that’s not repre
-
sented in the gauge. You may not see any
movement in the reading – even after driving
up to 200 miles (322 kilometers) in some
cases.
The gauge may take up to five seconds to
update after adding a gallon or more of
Diesel Exhaust Fluid (DEF) to the DEF tank. If
you have a fault related to the DEF system,
the gauge may not update to the new level.
See an authorized dealer for service.
The DEF gauge may also not immediately
update after a refill if the temperature of the
DEF fluid is below 39°F (4°C). The DEF tank
heater will warm up the DEF fluid and allow
the gauge to update after a period of run
time. Under very cold conditions, it is possible
that the gauge may not reflect the new fill
level for several drives.
INSTRUMENT CLUSTER DISPLAY
Your vehicle will be equipped with an
instrument cluster display, which offers useful
information to the driver. With the ignition in the
OFF mode, opening/closing of a door will
activate the display for viewing, and display the
total miles, or kilometers, in the odometer. Your
instrument cluster display is designed to display
important information about your vehicle’s
systems and features. Using a driver interactive
display located on the instrument panel, your
instrument cluster display can show you how
systems are working and give you warnings
when they are not. The steering wheel mounted
controls allow you to scroll through the main
menus and submenus. You can access the
specific information you want and make
selections and adjustments.
3
20_DJD2_OM_EN_USC_t.book Page 113
Page 116 of 568

114GETTING TO KNOW YOUR INSTRUMENT PANEL
INSTRUMENT CLUSTER DISPLAY
C
ONTROLS
The instrument cluster display features a driver
interactive display that is located in the
instrument cluster.
Base Instrument Cluster Display Premium Instrument Cluster Display
The instrument cluster display menu items may
consist of the following:
Speedometer
Vehicle Info
Driver Assist — If Equipped
Fuel Economy
Trip Info
Trailer Tow — If Equipped
Audio
Messages
Screen Set Up
Commercial Settings — If Equipped
The system allows the driver to select
information by pushing the following instrument
cluster display control buttons located on the
left side of the steering wheel:
Instrument Cluster Display Control Buttons
1 – Instrument Cluster Display Controls
2 – Instrument Cluster Display Screen
1 – Instrument Cluster Display Controls
2 – Instrument Cluster Display Screen
20_DJD2_OM_EN_USC_t.book Page 114
Page 117 of 568
GETTING TO KNOW YOUR INSTRUMENT PANEL115
Up Arrow Button
Push and release the up arrow
button to scroll upward through the
main menu items, submenu
screen, and vehicle settings.
Down Arrow Button
Push and release the down arrow
button to scroll downward through
the main menu items, submenu
screen, and vehicle settings.
Right Arrow Button
Push and release the right arrow
button to access/select the infor -
mation screens or submenu
screens of a main menu item. Push
and hold the right arrow button for two
seconds to reset displayed/selected features
that can be reset.
Left Arrow Button
Push and release the left arrow
button to access/select the infor -
mation screens, submenu screens
of a main menu item, or to return to
the main menu.
OIL LIFE RESET
Your vehicle is equipped with an engine oil
change indicator system. The “Oil Change
Required” message will display in the
instrument cluster display after a single chime
has sounded, to indicate the next scheduled oil
change interval. The engine oil change indicator
system is duty cycle based, which means the
engine oil change interval may fluctuate,
dependent upon your personal driving style.
NOTE:
Use the steering wheel instrument cluster
display controls for the following procedure.
Oil Life Reset Procedure
1. Without pushing the brake pedal, push the ENGINE START/STOP button and place the
ignition to the ON/RUN position (do not
start the engine).
2. Push and release the down arrow button to
scroll downward through the main menu to
“Vehicle Info.”
3. Push and release the right arrow button to
access the ”Vehicle Info” screen, then scroll
up or down to select “Oil Life.” 4. Push and hold the
right arrow button to
select “Reset”.
5. Push and release the down arrow button to
select “Yes,” then push and release the
right arrow button to reset the Oil Life to
100%.
6. Push and release the up arrow button to exit
the instrument cluster display screen.
Secondary Method Of Resetting Engine Oil Life
1. Without pressing the brake pedal, push the ENGINE START/STOP button and place the
ignition to the ON/RUN position (do not
start the engine).
2. Fully press the accelerator pedal, slowly, three times within ten seconds.
3. Without pushing the brake pedal, push the ENGINE START/STOP button once to return
the ignition to the OFF/LOCK position.
NOTE:
If the indicator message illuminates when you
start the vehicle, the oil change indicator
system did not reset. If necessary, repeat this
procedure.
3
20_DJD2_OM_EN_USC_t.book Page 115
Page 118 of 568

116GETTING TO KNOW YOUR INSTRUMENT PANEL
DISPLAY MENU ITEMS
Push and release the up or down arrow button
until the desired selectable menu icon is
highlighted in the instrument cluster display.
Refer to “Instrument Cluster Display” in this
chapter for further information.
Speedometer
Push and release the up or down arrow button
until the speedometer menu item is highlighted
in the instrument cluster display. Push and
release the right arrow button to cycle the
display between mph and km/h.
Vehicle Info
Push and release the up or down arrow button
until the Vehicle Info menu item is highlighted in
the instrument cluster display. Push and
release the right arrow button to enter the
submenus items of Vehicle Info. Follow the
directional prompts to access or reset any of the
following Vehicle Info submenu items:
Tire Pressure
Coolant Temperature
Transmission Temperature — If Equipped
Oil Temperature
Oil Pressure
Exhaust Brake — If Equipped
Turbo Boost — If Equipped
Oil Life
Fuel Filter Life — If Equipped
Battery Voltage
Gauge Summary
Engine Hours
Driver Assist — If Equipped
The Driver Assist menu displays the status of
the Adaptive Cruise Control (ACC) and
LaneSense systems.
Push and release the up or down arrow button
until the Driver Assist menu is displayed in the
instrument cluster display.
Adaptive Cruise Control (ACC) Feature
The instrument cluster display displays the
current ACC system settings. The information
displayed depends on ACC system status. Push the Adaptive Cruise Control (ACC) on/off
button (located on the steering wheel) until one
of the following displays in the instrument
cluster display:
Adaptive Cruise Control Off
When ACC is deactivated, the display will read
“Adaptive Cruise Control Off.”
Adaptive Cruise Control Ready
When ACC is activated but the vehicle speed
setting has not been selected, the display will
read “Adaptive Cruise Control Ready.”
Push the SET + or the SET- button (located on
the steering wheel) and the following will display
in the instrument cluster display:
ACC SET
When ACC is set, the set speed will display in
the instrument cluster.
The ACC screen may display once again if any
ACC activity occurs, which may include any of
the following:
Distance Setting Change
System Cancel
Driver Override
20_DJD2_OM_EN_USC_t.book Page 116
Page 137 of 568
GETTING TO KNOW YOUR INSTRUMENT PANEL135
The ESC system will make buzzing or clicking
sounds when it is active. This is normal; the
sounds will stop when ESC becomes inactive.
This light will come on when the vehicle is in
an ESC event.
Electronic Stability Control (ESC) OFF
Warning Light — If Equipped
This warning light indicates the
Electronic Stability Control (ESC) is
off.
Each time the ignition is turned to ON/RUN or
ACC/ON/RUN, the ESC system will be on, even
if it was turned off previously.
LaneSense Warning Light — If Equipped
The LaneSense system provides the
driver with visual and steering torque
warnings when the vehicle starts to
drift out of its lane unintentionally
without the use of a turn signal.
When the LaneSense system senses a lane
drift situation, the LaneSense indicator
changes from solid green to solid yellow.
When the LaneSense system senses the lane
has been approached and is in a lane depar -
ture situation, the LaneSense indicator
changes from solid white/green to flashing
yellow.
Refer to “LaneSense – If Equipped” in
“Starting And Operating” for further informa -
tion.
Service LaneSense Warning Light — If
Equipped
This warning light will illuminate when
the LaneSense system is not
operating and requires service.
Please see an authorized dealer.
Low Washer Fluid Warning Light
This warning light will illuminate when
the windshield washer fluid is low.
Refer to “Engine Compartment” in
“Servicing And Maintenance” for further
information.
Low Fuel Warning Light
When the fuel level reaches
approximately 3.2 gal (12 L) this light
will turn on, and remain on until fuel is
added.
A single warning chime will sound with Low Fuel
Warning.
Low Coolant Level Warning Light
This telltale will turn on to indicate the
vehicle coolant level is low.
Refer to “Fluids And Lubricants” in
“Technical Specifications” for further
information.
Loose Fuel Filler Cap Warning Light — If
Equipped
This warning light will illuminate when
the fuel filler cap is loose. Properly
close the filler cap to disengage the
light. If the light does not turn off,
please see an authorized dealer.
3
20_DJD2_OM_EN_USC_t.book Page 135
Page 138 of 568
136GETTING TO KNOW YOUR INSTRUMENT PANEL
Trailer Merge Assist Indicator Light — If
Equipped
This indicator light will illuminate to
indicate when Trailer Merge Assist
has been activated.
Refer to “Blind Spot Monitoring (BSM)” in
“Safety” for further information.
Tire Pressure Monitoring System (TPMS)
Warning Light
The warning light switches on and a
message is displayed to indicate that
the tire pressure is lower than the
recommended value and/or that slow
pressure loss is occurring. In these cases,
optimal tire duration and fuel consumption may
not be guaranteed.
Should one or more tires be in the condition
mentioned above, the display will show the
indications corresponding to each tire. Each tire, including the spare (if provided),
should be checked monthly when cold and
inflated to the inflation pressure recommended
by the vehicle manufacturer on the vehicle
placard or tire inflation pressure label. If your
vehicle has tires of a different size than the size
indicated on the vehicle placard or tire inflation
pressure label, you should determine the
proper tire inflation pressure for those tires.
As an added safety feature, your vehicle has
been equipped with a Tire Pressure Monitoring
System (TPMS) that illuminates a low tire
pressure telltale when one or more of your tires
is significantly under-inflated. Accordingly, when
the low tire pressure telltale illuminates, you
should stop and check your tires as soon as
possible, and inflate them to the proper
pressure. Driving on a significantly
under-inflated tire causes the tire to overheat
and can lead to tire failure. Under-inflation also
reduces fuel efficiency and tire tread life, and
may affect the vehicle’s handling and stopping
ability.
Please note that the TPMS is not a substitute for
proper tire maintenance, and it is the driver’s
responsibility to maintain correct tire pressure, even if under-inflation has not reached the level
to trigger illumination of the TPMS low tire
pressure telltale.
Your vehicle has also been equipped with a
TPMS malfunction indicator to indicate when
the system is not operating properly. The TPMS
malfunction indicator is combined with the low
tire pressure telltale. When the system detects
a malfunction, the telltale will flash for
approximately one minute and then remain
continuously illuminated. This sequence will
continue upon subsequent vehicle start-ups as
long as the malfunction exists. When the
malfunction indicator is illuminated, the system
may not be able to detect or signal low tire
pressure as intended. TPMS malfunctions may
occur for a variety of reasons, including the
installation of replacement or alternate tires or
wheels on the vehicle that prevent the TPMS
from functioning properly. Always check the
TPMS malfunction telltale after replacing one or
more tires or wheels on your vehicle to ensure
that the replacement or alternate tires and
wheels allow the TPMS to continue to function
properly.
CAUTION!
Do not continue driving with one or more flat
tires as handling may be compromised. Stop the
vehicle, avoiding sharp braking and steering. If a
tire puncture occurs, repair immediately using
the dedicated tire repair kit and contact an
authorized dealer as soon as possible.
20_DJD2_OM_EN_USC_t.book Page 136
Page 146 of 568
144 (Continued)
SAFETY
SAFETY FEATURES
ANTI-LOCK BRAKE SYSTEM (ABS)
The Anti-Lock Brake System (ABS) provides
increased vehicle stability and brake
performance under most braking conditions.
The system automatically prevents wheel lock,
and enhances vehicle control during braking.
The ABS performs a self-check cycle to ensure
that the ABS is working properly each time the
vehicle is started and driven. During this
self-check, you may hear a slight clicking sound
as well as some related motor noises.
ABS is activated during braking when the
system detects one or more wheels begin to
lock. Road conditions such as ice, snow, gravel,
bumps, railroad tracks, loose debris, or panic
stops may increase the likelihood of ABS
activation(s).You also may experience the following when
ABS activates:
The ABS motor noise (it may continue to run
for a short time after the stop)
The clicking sound of solenoid valves
Brake pedal pulsations
A slight drop of the brake pedal at the end of
the stop
These are all normal characteristics of ABS.
WARNING!
The ABS contains sophisticated electronic
equipment that may be susceptible to inter -
ference caused by improperly installed or
high output radio transmitting equipment.
This interference can cause possible loss of
anti-lock braking capability. Installation of
such equipment should be performed by
qualified professionals.
Pumping of the Anti-Lock Brakes will
diminish their effectiveness and may lead
to a collision. Pumping makes the stopping
distance longer. Just press firmly on your
brake pedal when you need to slow down or
stop.
The ABS cannot prevent the natural laws of
physics from acting on the vehicle, nor can
it increase braking or steering efficiency
beyond that afforded by the condition of the
vehicle brakes and tires or the traction
afforded.
The ABS cannot prevent collisions,
including those resulting from excessive
speed in turns, following another vehicle
too closely, or hydroplaning.
The capabilities of an ABS equipped vehicle
must never be exploited in a reckless or
dangerous manner that could jeopardize
the user’s safety or the safety of others.
WARNING! (Continued)
20_DJD2_OM_EN_USC_t.book Page 144