RENAULT TWINGO 2012 2.G Repair Manual
Manufacturer: RENAULT, Model Year: 2012, Model line: TWINGO, Model: RENAULT TWINGO 2012 2.GPages: 220, PDF Size: 6.73 MB
Page 61 of 220
steering wheeladjustment ....................................................... (current page)
1.55
ENG_UD24726_4
Volant de direction (X44 - Renault)
ENG_NU_952-4_X44_Renault_1
Steering wheel
sTEERING WhEEL
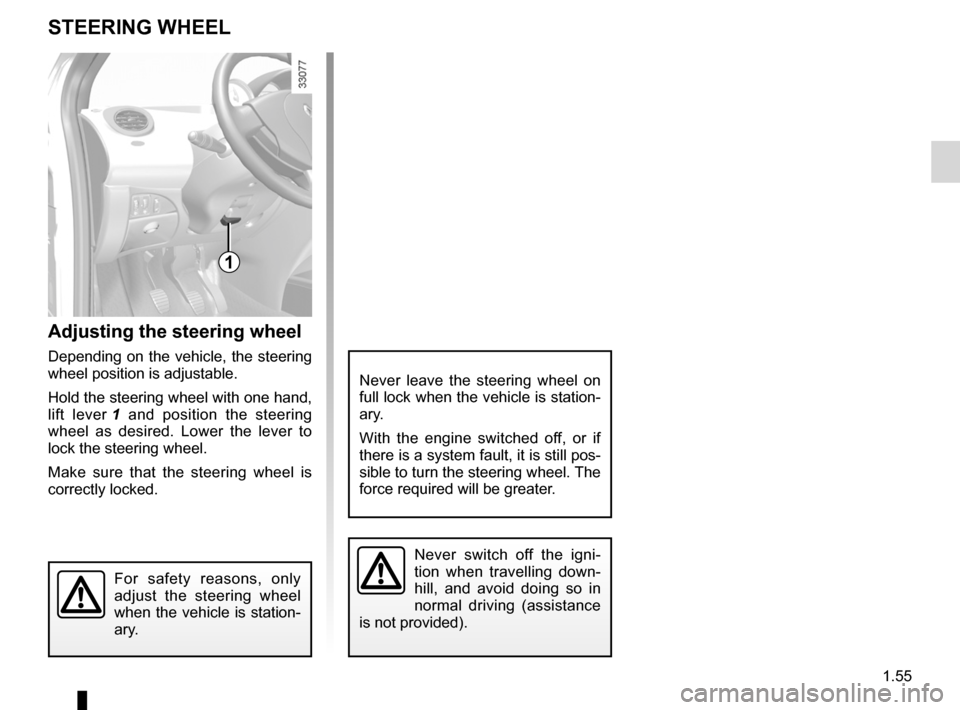
Adjusting the steering wheel
Depending on the vehicle, the steering
wheel position is adjustable.
Hold the steering wheel with one hand,
lift lever 1 and position the steering
wheel as desired. Lower the lever to
lock the steering wheel.
Make sure that the steering wheel is
correctly locked.
For safety reasons, only
adjust the steering wheel
when the vehicle is station-
ary.
Never leave the steering wheel on
full lock when the vehicle is station-
ary.
With the engine switched off, or if
there is a system fault, it is still pos-
sible to turn the steering wheel. The
force required will be greater.
Never switch off the igni -
tion when travelling down -
hill, and avoid doing so in
normal driving (assistance
is not provided).
1
Page 62 of 220
clock ..................................................... (up to the end of the DU)
external temperature ............................ (up to the end of the DU)
clock ...................................................................... (current page)
indicators: exterior temperature indicator .......................... (current page)
1.56
ENG_UD11028_3
Heure / Température extérieure (X44 - Renault)
ENG_NU_952-4_X44_Renault_1
Jaune NoirNoir texte
Clock and exterior temperature
CLOCK AND EXTERIOR TEMpERATURE
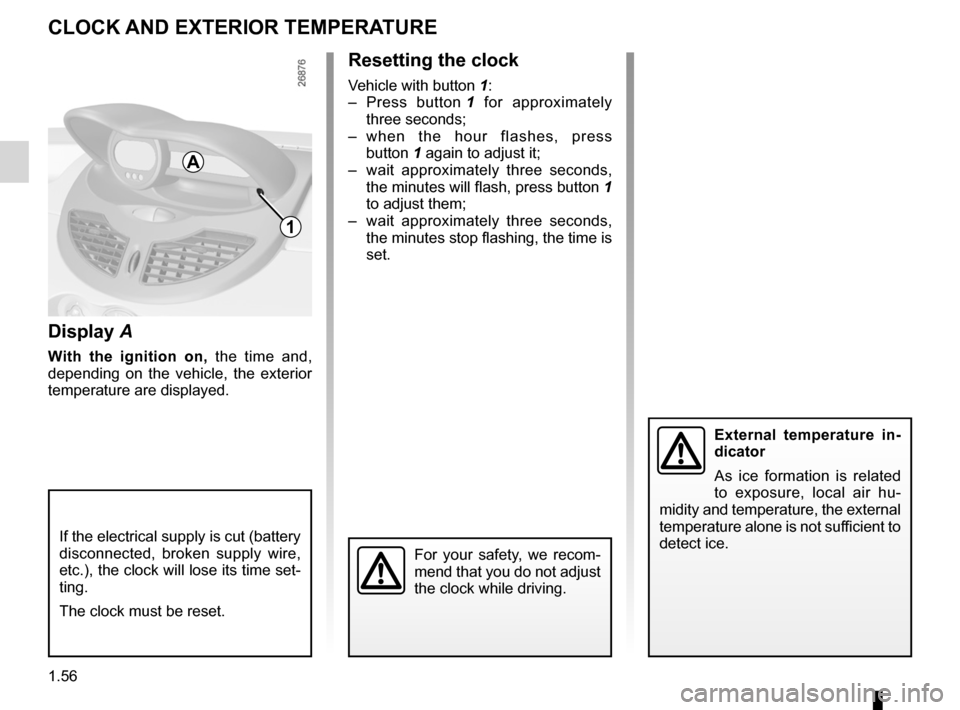
Display A
With the ignition on, the time and,
depending on the vehicle, the exterior
temperature are displayed.
External temperature in -
dicator
As ice formation is related
to exposure, local air hu -
midity and temperature, the external
temperature alone is not sufficient to
detect ice.
If the electrical supply is cut (battery
disconnected, broken supply wire,
etc.), the clock will lose its time set-
ting.
The clock must be reset.
Resetting the clock
Vehicle with button 1:
– Press button 1 for approximately
three seconds;
– when the hour flashes, press
button 1 again to adjust it;
– wait approximately three seconds,
the minutes will flash, press button 1
to adjust them;
– wait approximately three seconds,
the minutes stop flashing, the time is
set.
1
A
For your safety, we recom -
mend that you do not adjust
the clock while driving.
Page 63 of 220
JauneNoirNoir texte
1.57
ENG_UD11028_3
Heure / Température extérieure (X44 - Renault)
ENG_NU_952-4_X44_Renault_1
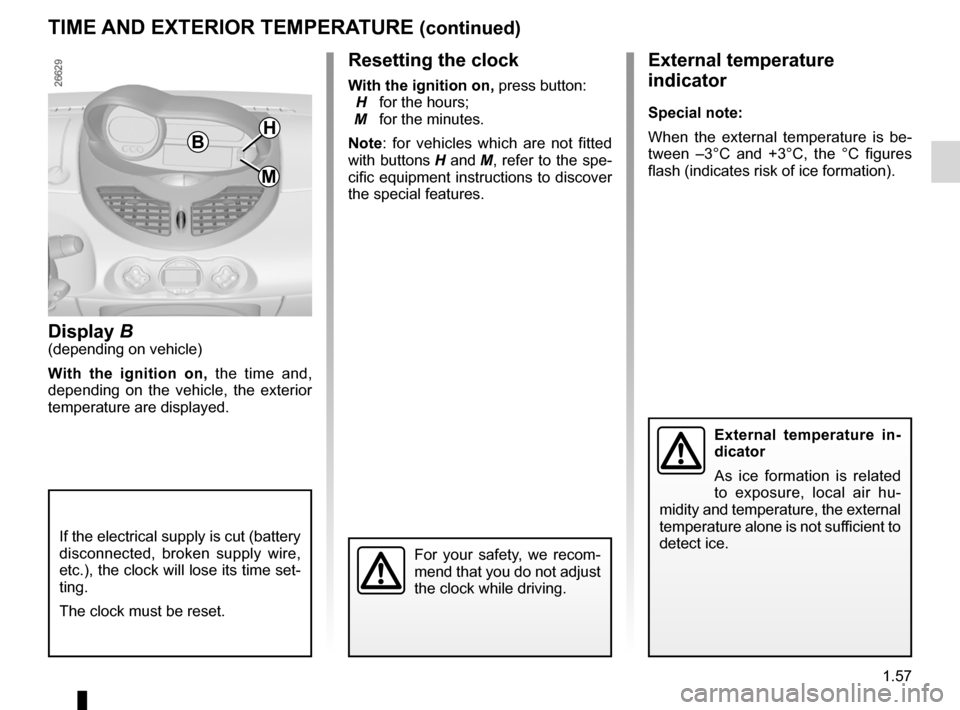
Resetting the clock
With the ignition on, press button:
H for the hours;
M for the minutes.
Note : for vehicles which are not fitted
with buttons H and M, refer to the spe-
cific equipment instructions to discover
the special features.
TIME AND EXTERIOR TEMpERATURE (continued)
Display B(depending on vehicle)
With the ignition on, the time and,
depending on the vehicle, the exterior
temperature are displayed.
External temperature
indicator
special note:
When the external temperature is be -
tween –3°C and +3°C, the °C figures
flash (indicates risk of ice formation).
If the electrical supply is cut (battery
disconnected, broken supply wire,
etc.), the clock will lose its time set-
ting.
The clock must be reset.
External temperature in -
dicator
As ice formation is related
to exposure, local air hu -
midity and temperature, the external
temperature alone is not sufficient to
detect ice.
h
M
B
For your safety, we recom -
mend that you do not adjust
the clock while driving.
Page 64 of 220
lighting:exterior ............................................ (up to the end of the DU)
signals and lights .................................. (up to the end of the DU)
lights: side lights ......................................................... (current page)
1.58
ENG_UD26567_5
Éclairages et signalisations extérieures (X44 - Renault)
ENG_NU_952-4_X44_Renault_1
Jaune NoirNoir texte
Exterior lighting and signals
EXTERIOR LIGhTING AND sIGNALs (1/3)
uswitching on the side
lights
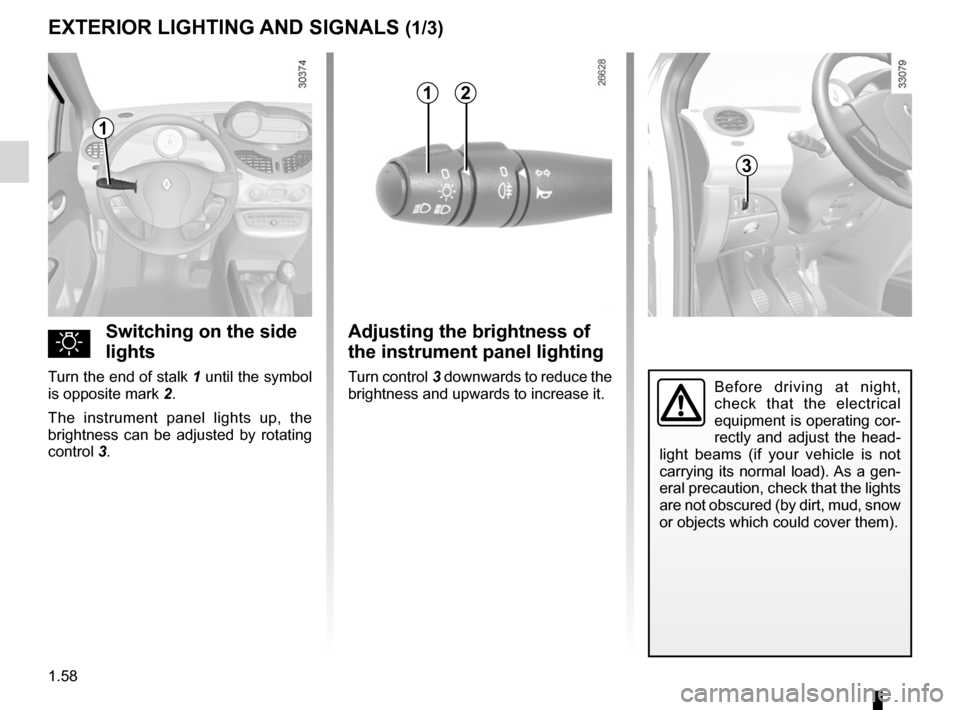
Turn the end of stalk 1 until the symbol
is opposite mark 2.
The instrument panel lights up, the
brightness can be adjusted by rotating
control 3.
Adjusting the brightness of
the instrument panel lighting
Turn control 3 downwards to reduce the
brightness and upwards to increase it.Before driving at night,
check that the electrical
equipment is operating cor-
rectly and adjust the head -
light beams (if your vehicle is not
carrying its normal load). As a gen-
eral precaution, check that the lights
are not obscured (by dirt, mud, snow
or objects which could cover them).
12
1
3
Page 65 of 220
lights:main beam headlights ...................................... (current page)
lights-on warning buzzer ........................................ (current page)
lights: dipped beam headlights ................................... (current page)
JauneNoirNoir texte
1.59
ENG_UD26567_5
Éclairages et signalisations extérieures (X44 - Renault)
ENG_NU_952-4_X44_Renault_1
kDipped beam
headlights
Manual operation
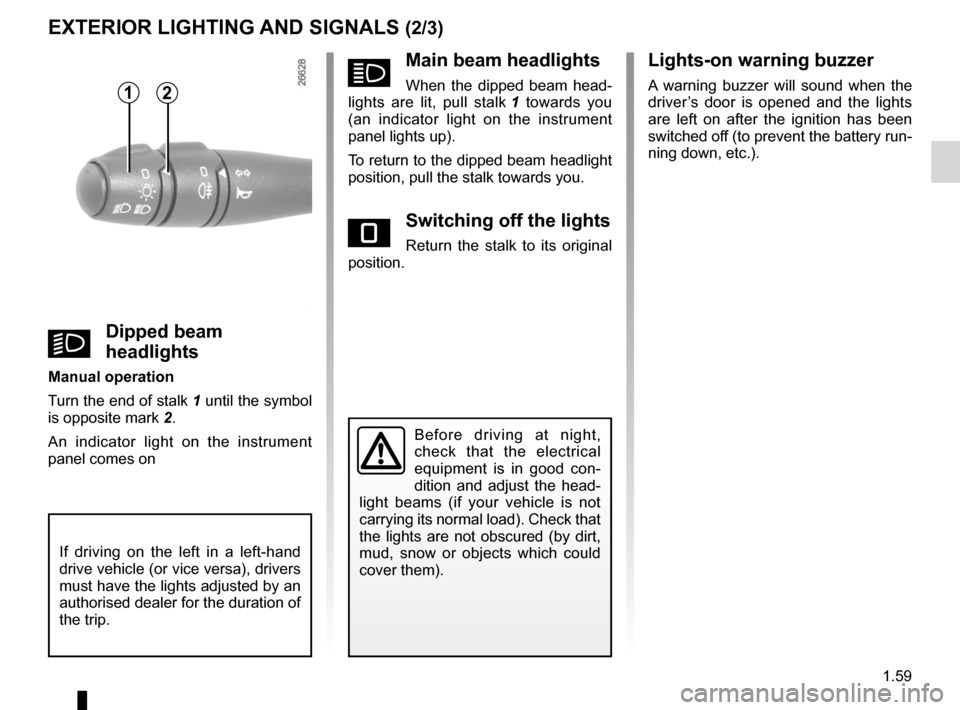
Turn the end of stalk 1 until the symbol
is opposite mark 2.
An indicator light on the instrument
panel comes on
EXTERIOR LIGhTING AND sIGNALs (2/3)
áMain beam headlights
When the dipped beam head-
lights are lit, pull stalk 1 towards you
(an indicator light on the instrument
panel lights up).
To return to the dipped beam headlight
position, pull the stalk towards you.
eswitching off the lights
Return the stalk to its original
position.
Lights-on warning buzzer
A warning buzzer will sound when the
driver’s door is opened and the lights
are left on after the ignition has been
switched off (to prevent the battery run-
ning down, etc.).
Before driving at night,
check that the electrical
equipment is in good con -
dition and adjust the head -
light beams (if your vehicle is not
carrying its normal load). Check that
the lights are not obscured (by dirt,
mud, snow or objects which could
cover them).
12
If driving on the left in a left-hand
drive vehicle (or vice versa), drivers
must have the lights adjusted by an
authorised dealer for the duration of
the trip.
Page 66 of 220
lights:fog lights .......................................................... (current page)
1.60
ENG_UD26567_5
Éclairages et signalisations extérieures (X44 - Renault)
ENG_NU_952-4_X44_Renault_1
EXTERIOR LIGhTING AND sIGNALs (3/3)
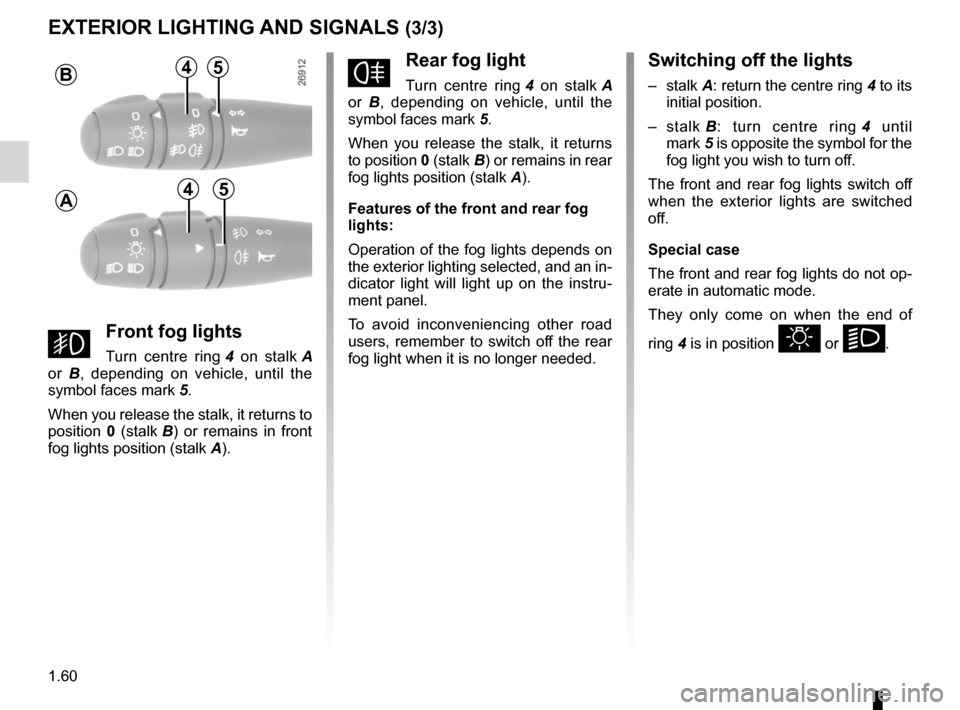
gFront fog lights
Turn centre ring 4 on stalk A
or B , depending on vehicle, until the
symbol faces mark 5.
When you release the stalk, it returns to
position 0 (stalk B ) or remains in front
fog lights position (stalk A).
fRear fog light
Turn centre ring 4 on stalk A
or B , depending on vehicle, until the
symbol faces mark 5.
When you release the stalk, it returns
to position 0 (stalk B) or remains in rear
fog lights position (stalk A).
Features of the front and rear fog
lights:
Operation of the fog lights depends on
the exterior lighting selected, and an in-
dicator light will light up on the instru -
ment panel.
To avoid inconveniencing other road
users, remember to switch off the rear
fog light when it is no longer needed.
switching off the lights
– stalk A: return the centre ring 4 to its
initial position.
– stalk B : turn centre ring 4 until
mark 5 is opposite the symbol for the
fog light you wish to turn off.
The front and rear fog lights switch off
when the exterior lights are switched
off.
special case
The front and rear fog lights do not op-
erate in automatic mode.
They only come on when the end of
ring 4 is in position
u or k.
B
A
4
4
5
5
Page 67 of 220
headlight beam adjustment ................................... (current page)
electric beam height adjustment ............................ (current page)
1.61
ENG_UD26566_4
Réglages électriques de la hauteur des faisceaux (X44 - Renault)\
ENG_NU_952-4_X44_Renault_1
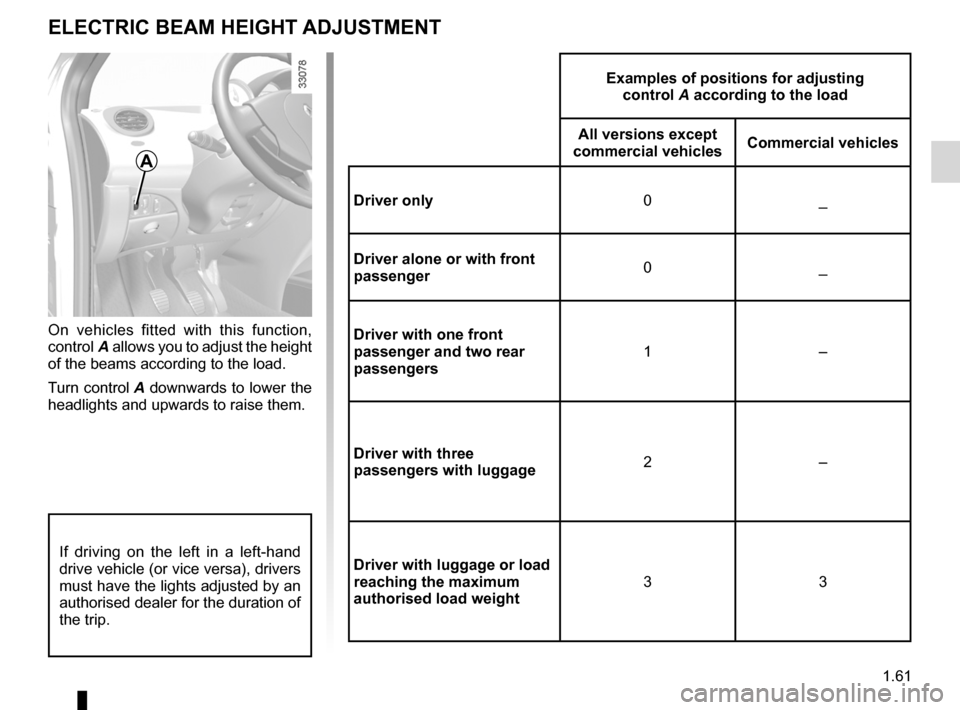
Examples of positions for adjusting
control A according to the load
All versions except
commercial vehicles Commercial vehicles
Driver only 0_
Driver alone or with front
passenger 0
_
Driver with one front
passenger and two rear
passengers 1
–
Driver with three
passengers with luggage 2
–
Driver with luggage or load
reaching the maximum
authorised load weight 3
3
Headlight beam adjustment
ELECTRIC BEAM hEIGhT ADJUsTMENT
On vehicles fitted with this function,
control A allows you to adjust the height
of the beams according to the load.
Turn control A downwards to lower the
headlights and upwards to raise them.
A
If driving on the left in a left-hand
drive vehicle (or vice versa), drivers
must have the lights adjusted by an
authorised dealer for the duration of
the trip.
Page 68 of 220
screen wash/wipe ................................. (up to the end of the DU)
windscreen washer ............................... (up to the end of the DU)
1.62
ENG_UD24729_6
Essuie-vitre / Lave-vitre avant (X44 - Renault)
ENG_NU_952-4_X44_Renault_1
Jaune NoirNoir texte
Screen washer/wiper
WINDsCREEN WAsh/WIpE (1/2)
nWindscreen wiper
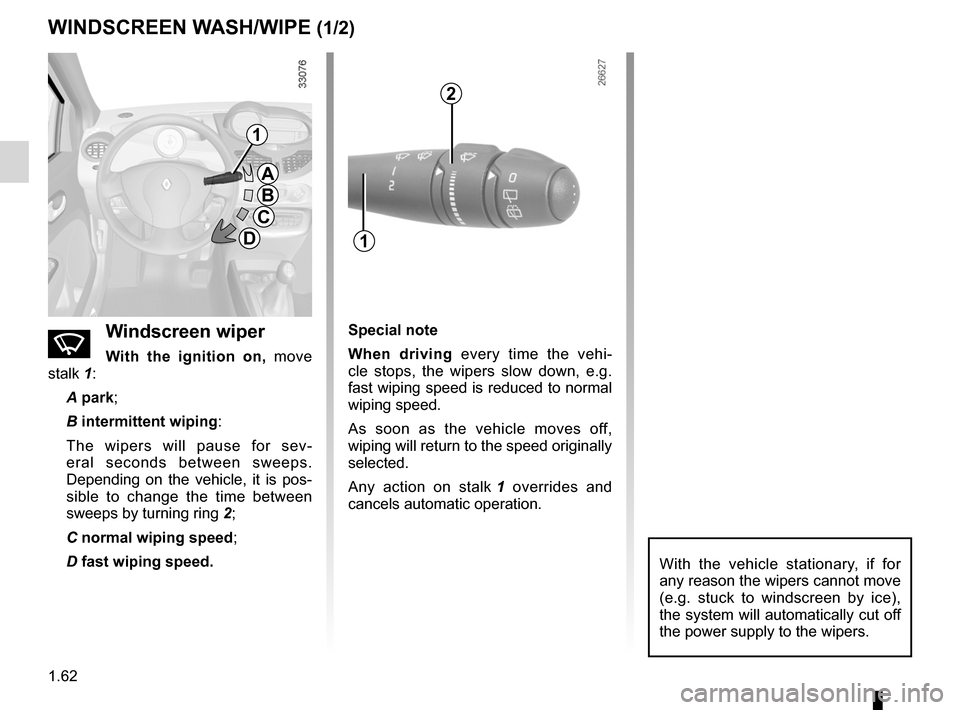
With the ignition on, move
stalk 1:
A park;
B intermittent wiping :
The wipers will pause for sev -
eral seconds between sweeps.
Depending on the vehicle, it is pos-
sible to change the time between
sweeps by turning ring 2;
C normal wiping speed ;
D fast wiping speed.
special note
When driving every time the vehi -
cle stops, the wipers slow down, e.g.
fast wiping speed is reduced to normal
wiping speed.
As soon as the vehicle moves off,
wiping will return to the speed originally
selected.
Any action on stalk 1 overrides and
cancels automatic operation.
With the vehicle stationary, if for
any reason the wipers cannot move
(e.g. stuck to windscreen by ice),
the system will automatically cut off
the power supply to the wipers.
2
1
1
A
B
C
D
Page 69 of 220
JauneNoirNoir texte
1.63
ENG_UD24729_6
Essuie-vitre / Lave-vitre avant (X44 - Renault)
ENG_NU_952-4_X44_Renault_1
WINDsCREEN WAsh/WIpE (2/2)
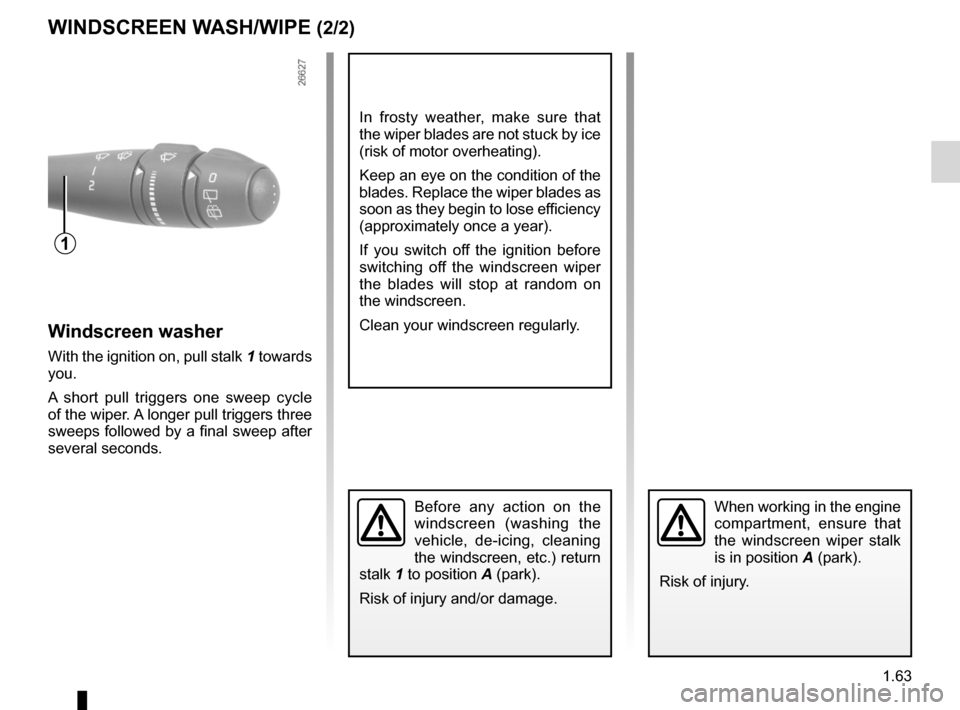
Windscreen washer
With the ignition on, pull stalk 1 towards
you.
A short pull triggers one sweep cycle
of the wiper. A longer pull triggers three
sweeps followed by a final sweep after
several seconds.
In frosty weather, make sure that
the wiper blades are not stuck by ice
(risk of motor overheating).
Keep an eye on the condition of the
blades. Replace the wiper blades as
soon as they begin to lose efficiency
(approximately once a year).
If you switch off the ignition before
switching off the windscreen wiper
the blades will stop at random on
the windscreen.
Clean your windscreen regularly.
1
Before any action on the
windscreen (washing the
vehicle, de-icing, cleaning
the windscreen, etc.) return
stalk 1 to position A (park).
Risk of injury and/or damage.When working in the engine
compartment, ensure that
the windscreen wiper stalk
is in position A (park).
Risk of injury.
Page 70 of 220
rear screen de-icing/demisting .............................. (current page)
windscreen washer ................................................ (current page)
wipers .................................................................... (current page)
1.64
ENG_UD24376_5
Essuie-vitre / Lave-vitre arrière / Dégivrage (X44 - Renault)
ENG_NU_952-4_X44_Renault_1
REAR sCREEN WAsh/WIpE
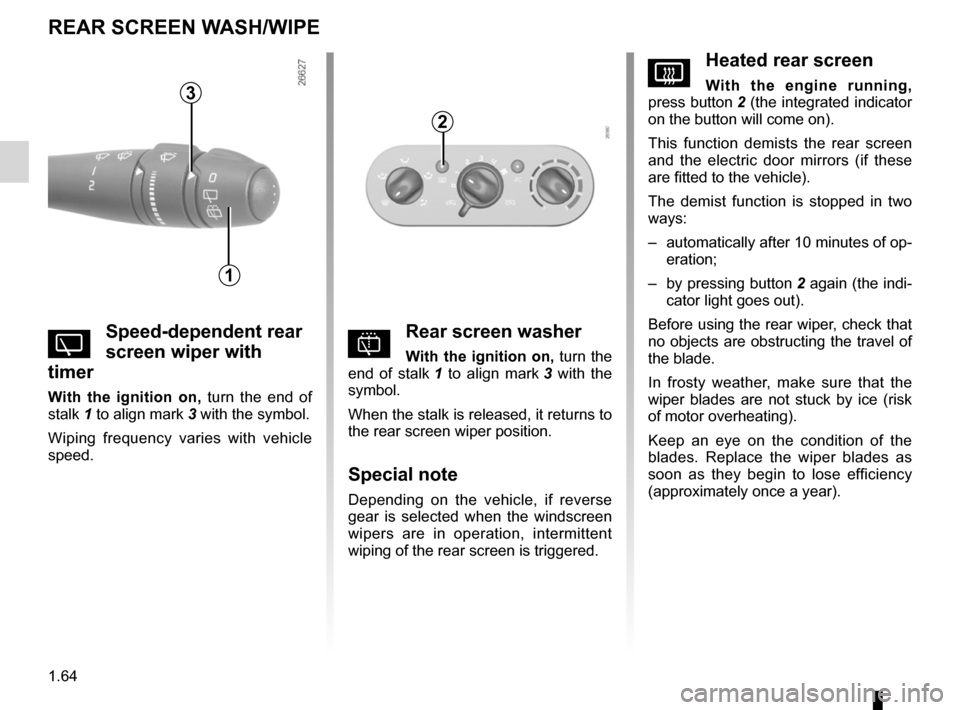
Vheated rear screen
With the engine running,
press button 2 (the integrated indicator
on the button will come on).
This function demists the rear screen
and the electric door mirrors (if these
are fitted to the vehicle).
The demist function is stopped in two
ways:
– automatically after 10 minutes of op-
eration;
– by pressing button 2 again (the indi -
cator light goes out).
Before using the rear wiper, check that
no objects are obstructing the travel of
the blade.
In frosty weather, make sure that the
wiper blades are not stuck by ice (risk
of motor overheating).
Keep an eye on the condition of the
blades. Replace the wiper blades as
soon as they begin to lose efficiency
(approximately once a year).
Yspeed-dependent rear
screen wiper with
timer
With the ignition on, turn the end of
stalk 1 to align mark 3 with the symbol.
Wiping frequency varies with vehicle
speed.
pRear screen washer
With the ignition on, turn the
end of stalk 1 to align mark 3 with the
symbol.
When the stalk is released, it returns to
the rear screen wiper position.
special note
Depending on the vehicle, if reverse
gear is selected when the windscreen
wipers are in operation, intermittent
wiping of the rear screen is triggered.
33
1
2