Seat Alhambra 2011 Owner's Manual
Manufacturer: SEAT, Model Year: 2011, Model line: Alhambra, Model: Seat Alhambra 2011Pages: 385, PDF Size: 7.92 MB
Page 151 of 385
149
Seats and storage compartments WARNING
Improper use of the cup holders can cause injury.
● Never place hot drinks in the drink holders. During sudden braking or
drivin g m
anoeuvres, the hot drink could be spilled and lead to scalding.
● Ensure that bottles and other object is dropped in the driver footwell,
as it
could get under the pedals and obstruct their working.
● Never place heavy containers, food or other heavy objects in the cup
holder
. In the event of an accident, these heavy objects could be thrown
around the passenger compartment and cause serious injuries. WARNING
Closed bottles inside the vehicle could explode or crack due to the heat
or the co l
d.
● Never leave a closed bottle in the vehicle if the inside temperature is
too high or too lo
w. CAUTION
Do not leave open cans in the cup holders when the vehicle is in motion.
They c ou
ld spill during braking, for example, and cause damage to the vehi-
cle and the electrical system. Note
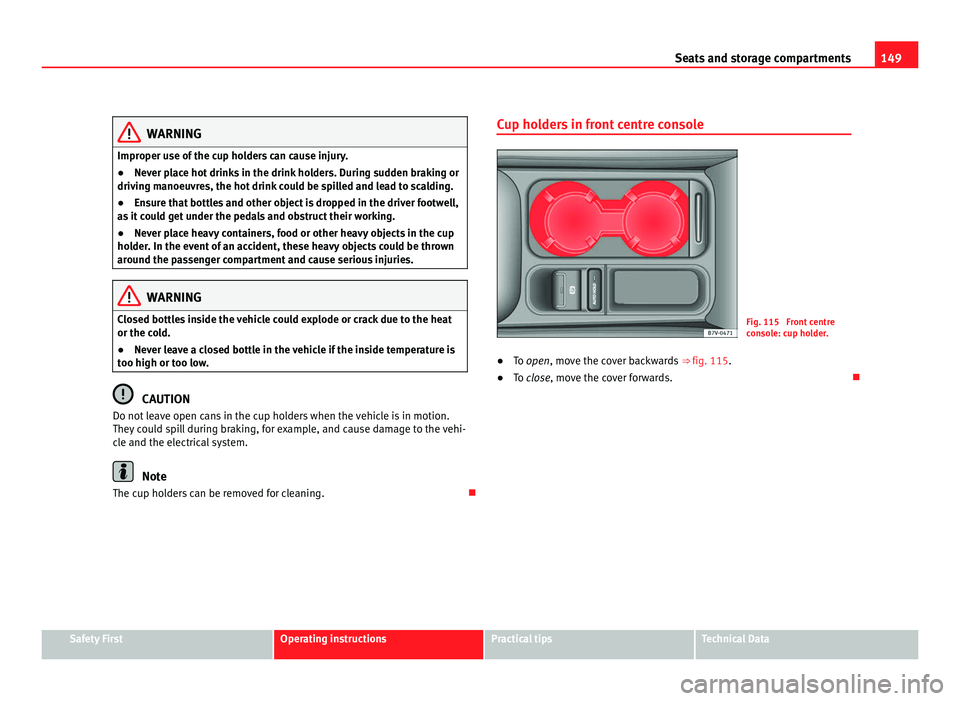
The cup holders can be removed for cleaning. Cup holders in front centre console
Fig. 115 Front centre
con
so
le: cup holder.
● To open, move the c
over backwards ⇒ fig. 115.
● To close, move the cover forwards. Safety First Operating instructions Practical tips Technical Data
Page 152 of 385
150
Seats and storage compartments
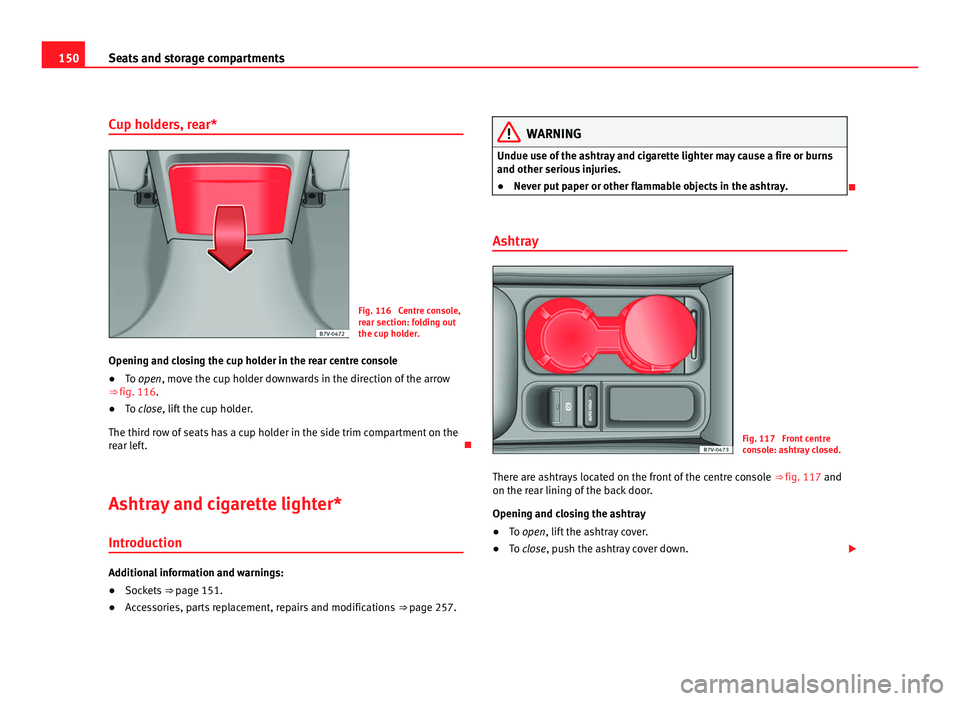
Cup holders, rear* Fig. 116 Centre console,
re
ar section: f
olding out
the cup holder.
Opening and closing the cup holder in the rear centre console
● To open, move the c
up holder downwards in the direction of the arrow
⇒ fig. 116.
● To close, lift the cup holder.
The third r
ow of seats has a cup holder in the side trim compartment on the
rear left.
Ashtray and cigarette lighter*
Introduction Additional information and warnings:
●
Sockets ⇒ page 151.
● A
ccessories, parts replacement, repairs and modifications ⇒ page 257. WARNING
Undue use of the ashtray and cigarette lighter may cause a fire or burns
and other serious injurie
s.
● Never put paper or other flammable objects in the ashtray.
Ashtray Fig. 117 Front centre
con
so
le: ashtray closed.
There are ashtrays located on the front of the centre console ⇒ fig. 117 and
on the rear linin
g of the back door.
Opening and closing the ashtray
● To open, lift the ashtray cover.
● To
close, push the ashtray cover down.
Page 153 of 385
151
Seats and storage compartments
Emptying the ashtray
● Remove the ashtray from the cup holder or lining of the door by pulling
it up w
ards.
● After emptying the ashtray, insert it from above into the cup holder or
door lining.
Cig
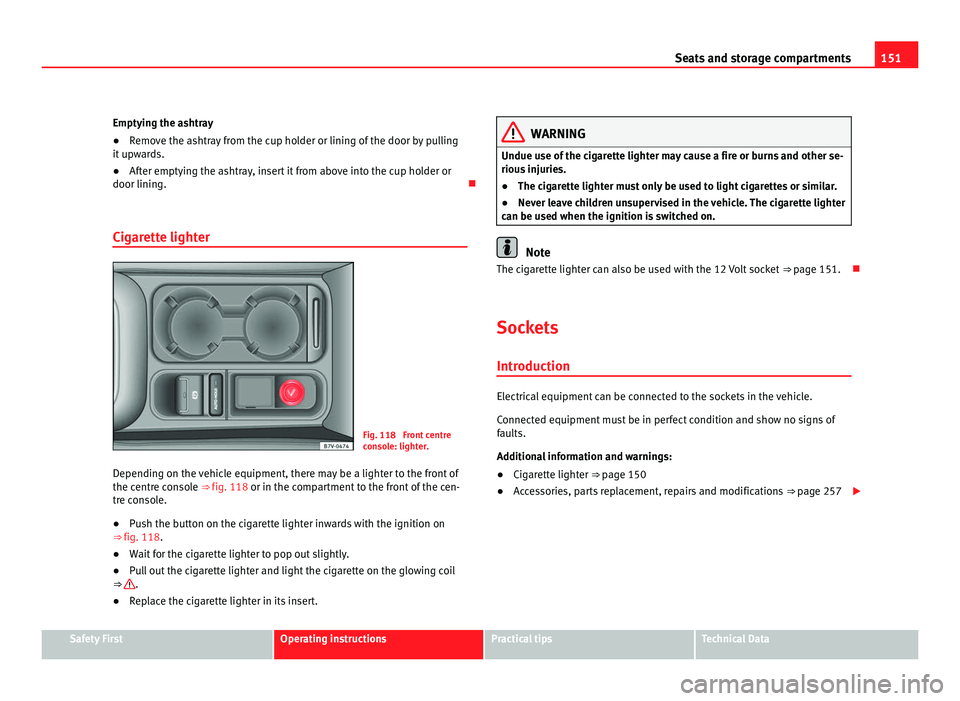
arette lighter Fig. 118 Front centre
con
so
le: lighter.
Depending on the vehicle equipment, there may be a lighter to the front of
the centre c
onsole ⇒ fig. 118 or in the compartment to the front of the cen-
tre console.
● Push the button on the cigarette lighter inwards with the ignition on
⇒ fig. 118.
● Wait for the cigarette lighter to pop out slightly.
● Pull out the cigarette lighter and light the cigarette on the glowing coil
⇒ .
● Replace the cigarette lighter in its insert. WARNING
Undue use of the cigarette lighter may cause a fire or burns and other se-
rious injurie
s.
● The cigarette lighter must only be used to light cigarettes or similar.
● Never leave children unsupervised in the vehicle. The cigarette lighter
can be used when the ignition i
s switched on. Note
The cigarette lighter can also be used with the 12 Volt socket ⇒ pag
e 151.
Sockets Intr oduction Electrical equipment can be connected to the sockets in the vehicle.
Connect
ed equipment
must be in perfect condition and show no signs of
faults.
Additional information and warnings:
● Cigarette lighter
⇒ page 150
● A
ccessories, parts replacement, repairs and modifications ⇒ page 257
Safety First Operating instructions Practical tips Technical Data
Page 154 of 385
152
Seats and storage compartments WARNING
Improper use of the sockets or electrical devices could lead to a fire and
cau se seriou
s injuries.
● Never leave children unsupervised in the vehicle. The sockets and
equipment connect
ed to them can be used when the ignition is switched
on.
● Should a connected electrical device overheat, switch it off and un-
plug it immedi
ately. CAUTION
● To avoid damage to the vehicle's electrical system, never connect equip-
ment th
at generates electrical current, such as solar panels or battery charg-
ers, to the 12 Volt sockets in order to charge the vehicle's battery.
● Only use accessories with approved electromagnetic compatibility ac-
cordin
g to current regulations.
● To avoid damage due to voltage variations, switch off all appliances con-
nected to the 12
V sockets before switching the ignition on or off and before
starting the engine.
● Never connect an appliance to the 12 Volt socket that consumes more
than the pow
er indicated in watts. Exceeding the maximum power absorp-
tion could damage the vehicle's electrical system. For the sake of the environment
Do not leave the engine running when the vehicle is at a standstill. Note
● Using electrical appliances with the engine stopped and the ignition
sw it
ched on will drain the battery.
● Unshielded equipment can cause interference on the radio equipment
and the vehic
le's electrical system.
● Interference can occur on the radio's AM waveband if electrical applian-
ces
are used near the rear window aerial.
Page 155 of 385
153
Seats and storage compartments
Vehicle sockets Depending on your vehicle's version, you may have a 12-
volt
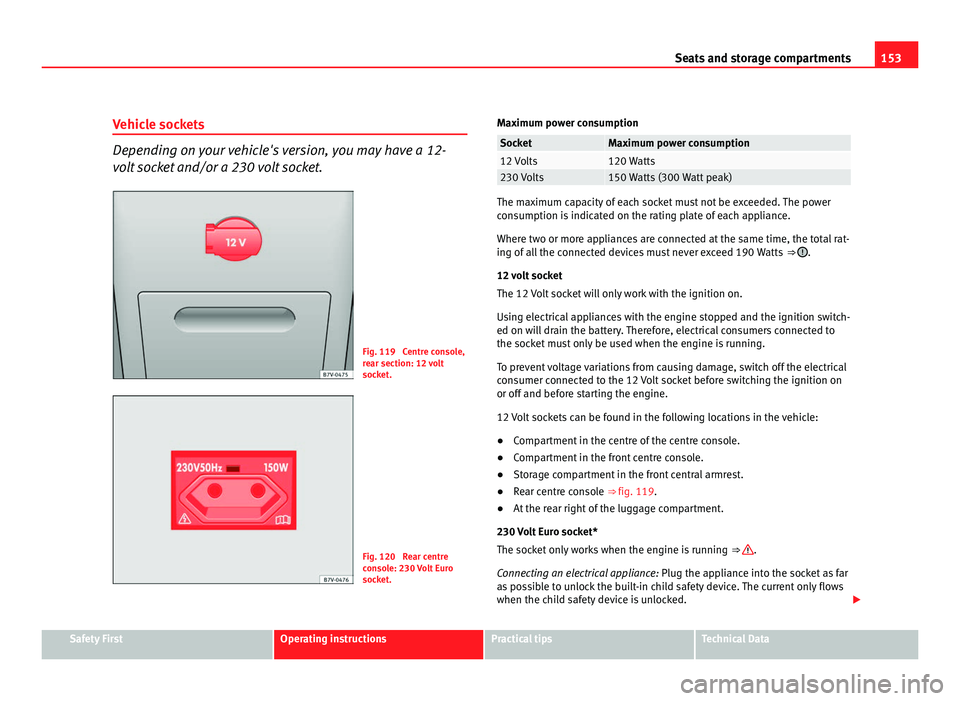
socket and/or a 230 volt socket. Fig. 119 Centre console,
re
ar section: 12
volt
socket. Fig. 120 Rear centre
con
so
le: 230 Volt Euro
socket. Maximum power consumption Socket Maximum power consumption
12 Volts 120 Watts
230 Volts 150 Watts (300 Watt peak)
The maximum capacity of each socket must not be exceeded. The power
con
s
umption is indicated on the rating plate of each appliance.
Where two or more appliances are connected at the same time, the total rat-
ing of all the connected devices must never exceed 190 Watts ⇒ .
12 v o
lt socket
The 12 Volt socket will only work with the ignition on.
Using electrical appliances with the engine stopped and the ignition switch-
ed on will drain the battery. Therefore, electrical consumers connected to
the socket must only be used when the engine is running.
To prevent voltage variations from causing damage, switch off the electrical
consumer connected to the 12 Volt socket before switching the ignition on
or off and before starting the engine.
12 Volt sockets can be found in the following locations in the vehicle:
● Compartment in the centre of the centre console.
● Compartment in the front centre console.
● Storage compartment in the front central armrest.
● Rear centre console ⇒ fig. 119.
● At the rear right of the luggage compartment.
230 Vo
lt Euro socket*
The socket only works when the engine is running ⇒ .
Conn e
cting an electrical appliance: Plug the appliance into the socket as far
as possible to unlock the built-in child safety device. The current only flows
when the child safety device is unlocked. Safety First Operating instructions Practical tips Technical Data
Page 156 of 385
154
Seats and storage compartments LED on the socket
⇒ fig. 120Steady green light: The child safety device is unlocked. The
sock
et
can now be used. Flashing red light: There is some kind of fault (e.g. discon-
nection due to e
x
cess current or tempera-
ture). Heat protection
The 230 V
o
lt Euro power connector converter switches off automatically
when a certain temperature is exceeded. This disconnect prevents overheat-
ing in the event of an increase in power consumption of the connected ap-
pliance and where the atmospheric temperature is too high. The converter
will switch on again automatically after it has cooled down. Appliances that
are switched on and connected to the socket will start up again. Therefore,
switch off all electrical appliances connected to the socket when the current
converter switches off due to overheating. WARNING
High voltage in the electrical installation!
● Liquids must not be spilt over the socket.
● Do not plug adapters or extension cords into the 230 Volt Euro power
connect or
. Otherwise, the built-in child safety device will switch off and
the connector will become live.
● Do not plug current conductors such as a knitting needle into the 230
Volt
Euro power connector. CAUTION
● Always follow the operating instructions for the appliances to be con-
nect ed!
● Nev
er exceed the maximum power rating as this could damage the vehi-
cle's
general electrical system. ●
12 volt socket:
– Only
use accessories with approved electromagnetic compatibility ac-
cordin
g to current regulations.
– Never power the socket.
● 230 Volt Euro socket:
– Do not hang appliances or plugs that are too heavy (e.g. a transform-
er) from the sock
et.
– Do not connect lamps which contain a neon tube.
– Only plug appliances with a voltage that matches the socket voltage
into the sock
et.
– In the event of consumers with a high start-up current, surge protec-
tion prevents
them from switching on. In this case, unplug the consumer
and try plugging it back in after around 10 seconds. Note
● Some app li
ances may not work properly in the 230 Volt Euro power con-
nector due to a lack of power (Watts).
● The 230 Watt Euro power connector can be modified for 115 Watt appli-
ances
and vice versa. Consult a specialist shop for advice on accessories to
adapt the connector. SEAT recommends visiting a Technical Service.
Page 157 of 385
155
Heating, Ventilation and Air conditioning
Heating, Ventilation and Air conditioning Climate Control
Introduction Viewing Climatronic information
The fact
or
y-fitted radio or navigation system screen briefly displays informa-
tion relating to Climatronic.
The units of temperature measurement is displayed on the factory-installed
radio or navigation system and, depending on the vehicle equipment, can
be set using the Configuration menu on the instrument panel.
Additional information and warnings:
● SEAT information system ⇒ page 62
● W
indscreen wash system ⇒ page 105
● Aux
iliary heating ⇒ page 163
● C
aring for and cleaning the vehicle exterior ⇒ page 242WARNING
Reduced visibility through the windows increases the risk of serious acci-
dents.
● Ens
ure that all windows are free of ice and snow and that they are not
fogg
ed up preventing a clear view of everything outside.
● The maximum heat output required to defrost windows quickly is only
avail
able when the engine has reached its normal running temperature.
Only drive when you have good visibility. WARNING (Continued)
● Always ensure that you use the climate control and heated rear win-
do w t
o maintain good visibility.
● Never leave the air recirculation on for a long period of time. If the
coolin
g mode is switched off and air recirculation mode switched on, the
windows can mist over very quickly, considerably limiting visibility.
● Switch air recirculation mode off when it is not required. WARNING
Stuffy or used air will increase fatigue and reduce driver concentration
pos s
ibly resulting in a serious accident.
● Never leave the fresh air fan turned off or use the air recirculation for
long periods
of time; the air inside the passenger compartment will not
be refreshed. CAUTION
● Switch the climate control system off if you think it may be broken. This
w i
ll avoid additional damage. Have the climate control system checked by a
Technical Service.
● Repairs to the climate control system require specialist knowledge and
speci
al tools. SEAT recommends visiting a Technical Service.
● Do not smoke when air recirculation is switched on in vehicles with a cli-
mate c
ontrol system. The smoke taken in could lie on the cooling system va-
poriser and on the activated charcoal cartridge of the dust and pollen filter,
leading to a permanently unpleasant smell. Safety First Operating instructions Practical tips Technical Data
Page 158 of 385
156
Heating, Ventilation and Air conditioning Note
● When the coo lin g system is turned off, air coming from the outside will
not be dried. To avoid fogging up the windows, SEAT recommends leaving
the cooler (compressor) on. To do this, press the AC button. The button in-
dicat or shou
ld light up.
● If the humidity and temperature outside the vehicle are high, condens
a-
tion can drip off the evaporator in the cooling system and form a pool un-
derneath the vehicle, this is completely normal and there is no need to sus-
pect a leak.
● Keep the air vents in front of the windscreen free of snow, ice and leaves
to ens
ure heating and cooling are not impaired and to prevent the windows
from misting over.
Page 159 of 385
157
Heating, Ventilation and Air conditioning
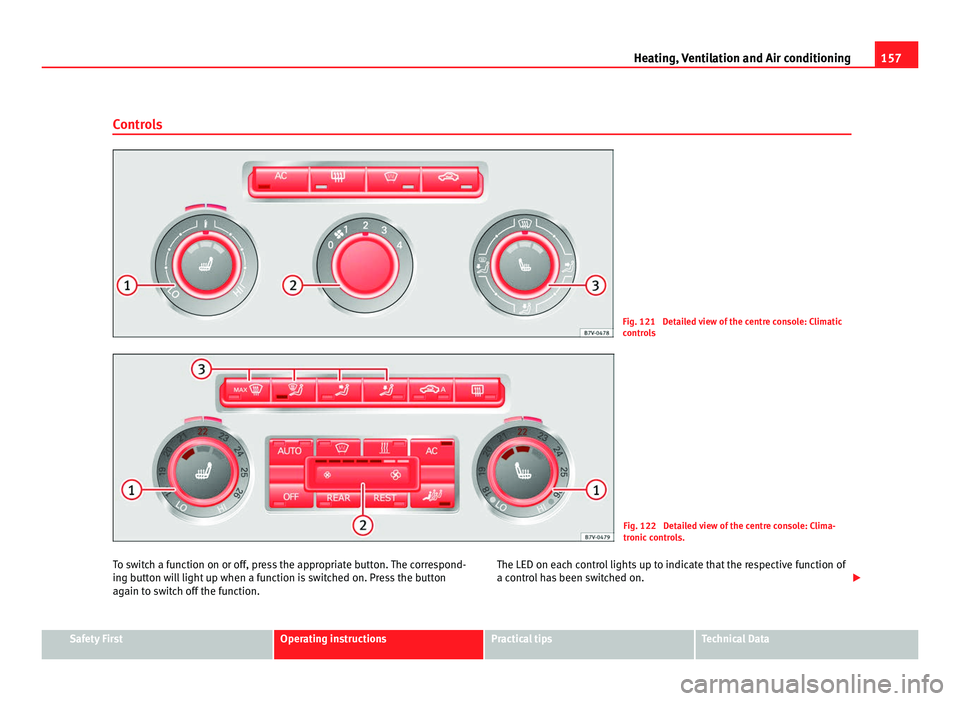
Controls Fig. 121 Detailed view of the centre console: Climatic
contr
o
ls Fig. 122 Detailed view of the centre console: Clima-
tronic
c
ontrols.
To switch a function on or off, press the appropriate button. The correspond-
ing butt
on will light up when a function is switched on. Press the button
again to switch off the function. The LED on each control lights up to indicate that the respective function of
a contro
l has been switched on. Safety First Operating instructions Practical tips Technical Data
Page 160 of 385
158
Heating, Ventilation and Air conditioning
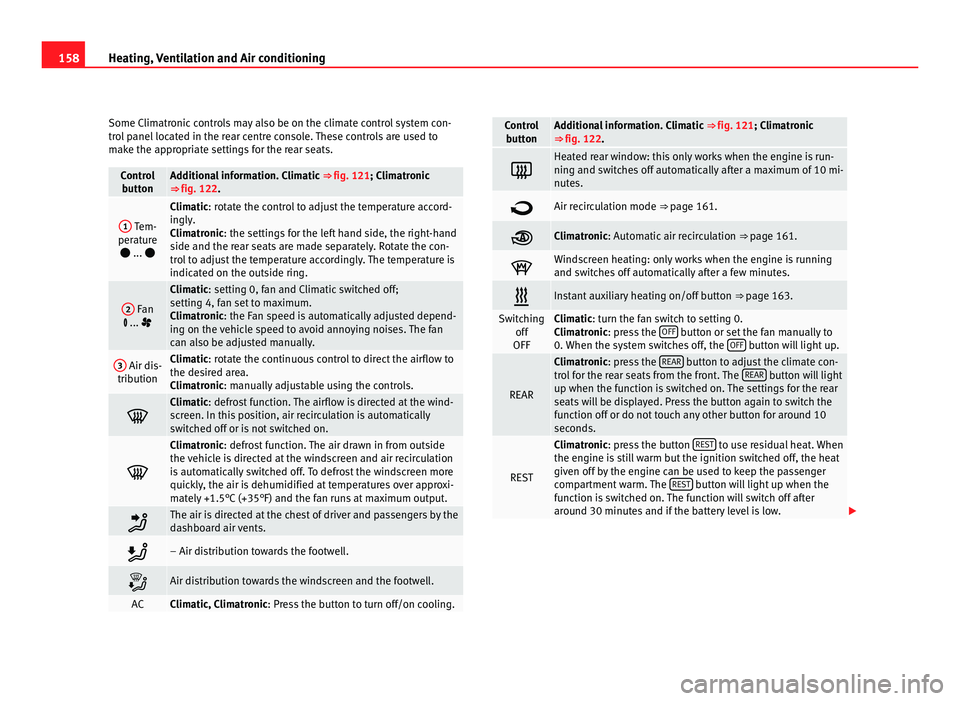
Some Climatronic controls may also be on the climate control system con-
tro l
panel located in the rear centre console. These controls are used to
make the appropriate settings for the rear seats. Control
butt on Additional information. Climatic
⇒ fig. 121; Climatr
onic
⇒ fig. 122. 1
Tem-
perat ur
e
... Climatic: rotate the control to adjust the temperature accord-
in
gly
.
Climatronic: the settings for the left hand side, the right-hand
side and the rear seats are made separately. Rotate the con-
trol to adjust the temperature accordingly. The temperature is
indicated on the outside ring. 2
Fan
... Climatic: setting 0, f
an and C
limatic switched off;
setting 4, fan set to maximum.
Climatronic: the Fan speed is automatically adjusted depend-
ing on the vehicle speed to avoid annoying noises. The fan
can also be adjusted manually. 3
Air dis-
tribution Climatic: rotate the continuous control to direct the airflow to
the de
s
ired area.
Climatronic: manually adjustable using the controls. Climatic: defro
s
t function. The airflow is directed at the wind-
screen. In this position, air recirculation is automatically
switched off or is not switched on. Climatronic: defro
s
t function. The air drawn in from outside
the vehicle is directed at the windscreen and air recirculation
is automatically switched off. To defrost the windscreen more
quickly, the air is dehumidified at temperatures over approxi-
mately +1.5°C (+35°F) and the fan runs at maximum output. The air is directed at the chest of driver and passengers by the
da
shbo
ard air vents. – Air distribution towards the footwell.
Air distribution towards the windscreen and the footwell.
AC Climatic, Climatronic: Pre
s
s the button to turn off/on cooling. Control
butt on Additional information. Climatic
⇒ fig. 121; Climatr
onic
⇒ fig. 122. Heated rear window: this only works when the engine is run-
ning and sw
it
ches off automatically after a maximum of 10 mi-
nutes. Air recirculation mode ⇒ pag
e 161. Climatronic: Autom
atic
air recirculation ⇒ page 161. Windscreen heating: only works when the engine is running
and swit
c
hes off automatically after a few minutes. Instant auxiliary heating on/off button
⇒ page 163. Switching
off
OFF Climatic: turn the fan switch to setting 0.
C
lim
atronic: press the OFF button or set the fan manually to
0. When the sy s
tem switches off, the OFF button will light up.
REAR Climatronic: pre
s
s the REAR button to adjust the climate con-
tro l
for the rear seats from the front. The REAR button will light
up when the fu nction i
s switched on. The settings for the rear
seats will be displayed. Press the button again to switch the
function off or do not touch any other button for around 10
seconds. REST Climatronic: pre
s
s the button REST to use residual heat. When
the engine i s
still warm but the ignition switched off, the heat
given off by the engine can be used to keep the passenger
compartment warm. The REST button will light up when the
fu nction i
s switched on. The function will switch off after
around 30 minutes and if the battery level is low.