technical specifications Seat Alhambra 2013 Manual Online
[x] Cancel search | Manufacturer: SEAT, Model Year: 2013, Model line: Alhambra, Model: Seat Alhambra 2013Pages: 387, PDF Size: 6.13 MB
Page 165 of 387
163
Air conditioning
Switching off: Press the button until the lamp on the button switches off.
Switching the recirculation mode on and off manually on the
Climatronic
Switching on: Press the button until the lamp on the button lights up.
Switching off: Press the button until the lamp on the button switches
off.
Automatic air recirculation mode
Fresh air enters the vehicle interior in position . If the system detects a
high concentration of hazardous substances in the ambient air, air recircu-
lation mode is switched on automatically. When the level of impurities
drops to within a normal range, recirculation mode is switched off.
The system is unable to detect unpleasant smells.
With the following outside temperatures and conditions the air recirculation
does not switch on automatically:
● The cooling system is switched on (the AC
button is lit up) and the out-
side temperature is below +3 °C (+38 °F).
● The cooling system and the windscreen wipers are switched off and the
outside temperature is below +10 °C (+50 °F).
● The cooling system is switched off and the outside temperature is below
+15 °C (+59 °F). The windscreen wiper is switched on.
Switching the automatic air recirculation mode on and off
Switching on: Press the button until the right lamp on the button lights
up.
Switching off: Press the button until all the lamps on the button are
switched off. Switching the automatic air recirculation mode off temporarily
●
Press the button once to temporarily switch to manual air recircula-
tion mode in the event of unpleasant smells from outside. The left indicator
lamp turns on.
● After more than two seconds, press the button again to restart auto-
matic air recirculation. The right indicator lamp turns on.
WARNING
Stuffy or used air will increase fatigue and reduce driver concentration
possibly resulting in a serious accident.
● Never use recirculation mode for long periods as it does not refresh
the air inside the vehicle.
● If the cooling system is switched off and air recirculation mode
switched on, the windows can mist over very quickly, considerably limit-
ing visibility.
● Switch air recirculation mode off when it is not required.
CAUTION
Do not smoke when air recirculation is switched on in vehicles with an air
conditioner. The smoke taken in could lie on the cooling system vaporiser
and on the activated charcoal cartridge of the dust and pollen filter, leading
to a permanently unpleasant smell.
Note
Climatronic: Air recirculation mode switches on to prevent exhaust gas from
entering the vehicle interior when it is in reverse and while the automatic
windscreen wash and wipe is working.
Safety FirstOperating instructionsPractical tipsTechnical Specifications
Page 167 of 387
165
Air conditioning
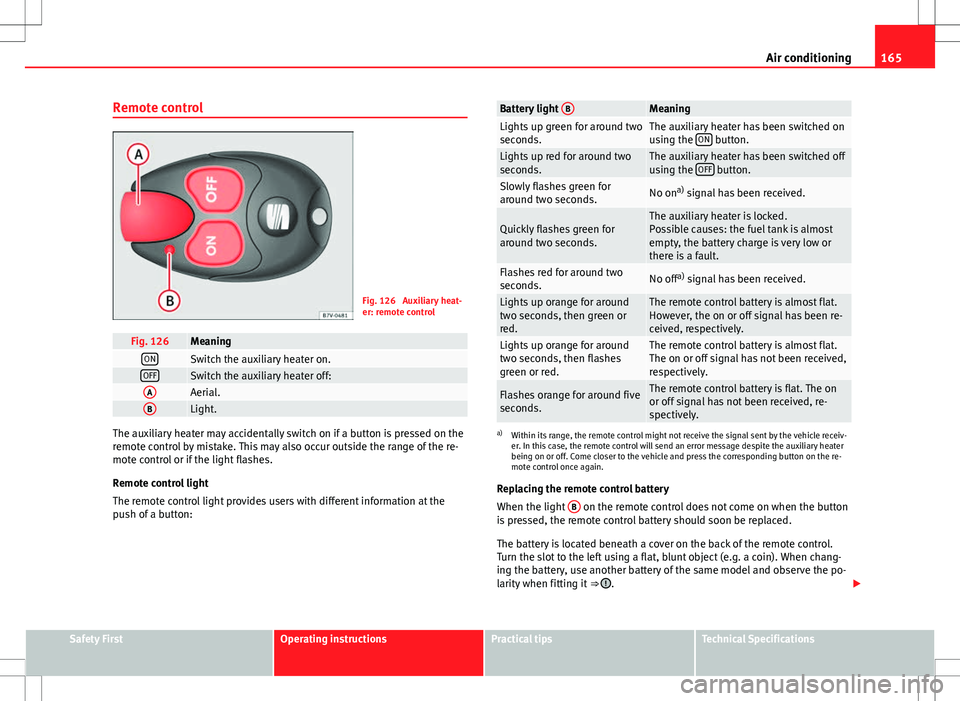
Remote control
Fig. 126 Auxiliary heat-
er: remote control
Fig. 126MeaningONSwitch the auxiliary heater on.OFFSwitch the auxiliary heater off:AAerial.BLight.
The auxiliary heater may accidentally switch on if a button is pressed on the
remote control by mistake. This may also occur outside the range of the re-
mote control or if the light flashes.
Remote control light
The remote control light provides users with different information at the
push of a button:
Battery light BMeaningLights up green for around two
seconds.The auxiliary heater has been switched on
using the ON button.Lights up red for around two
seconds.The auxiliary heater has been switched off
using the OFF button.Slowly flashes green for
around two seconds.No ona)
signal has been received.
Quickly flashes green for
around two seconds.The auxiliary heater is locked.
Possible causes: the fuel tank is almost
empty, the battery charge is very low or
there is a fault.
Flashes red for around two
seconds.No off a)
signal has been received.
Lights up orange for around
two seconds, then green or
red.The remote control battery is almost flat.
However, the on or off signal has been re-
ceived, respectively.
Lights up orange for around
two seconds, then flashes
green or red.The remote control battery is almost flat.
The on or off signal has not been received,
respectively.
Flashes orange for around five
seconds.The remote control battery is flat. The on
or off signal has not been received, re-
spectively.
a) Within its range, the remote control might not receive the signal sent by the vehicle receiv-
er. In this case, the remote control will send an error message despite the auxiliary heater
being on or off. Come closer to the vehicle and press the corresponding button on the re-
mote control once again.
Replacing the remote control battery
When the light B
on the remote control does not come on when the button
is pressed, the remote control battery should soon be replaced.
The battery is located beneath a cover on the back of the remote control.
Turn the slot to the left using a flat, blunt object (e.g. a coin). When chang-
ing the battery, use another battery of the same model and observe the po-
larity when fitting it ⇒
.
Safety FirstOperating instructionsPractical tipsTechnical Specifications
Page 169 of 387
167
Air conditioning
Checking programming
If the timer has been switched on after switching the ignition off, the instant
on button
will remain lit for around ten seconds.
WARNING
Never program the independent heating system to be activated and oper-
ated in closed, unventilated areas. The auxiliary heater fumes contain
carbon dioxide, an odourless and colourless toxic gas. Carbon monoxide
can cause people to lose consciousness. It can also cause death.
Operating instructions
The auxiliary heater exhaust system located below the vehicle must be kept
clear of snow, mud and other objects. The exhaust gases must not be ob-
structed in any way. The exhaust gases generated by the auxiliary heater are
removed via an exhaust pipe fitted underneath the vehicle.
On heating the vehicle interior, depending on the outside temperature the
warm air is first directed at the windscreen and then to the rest of the vehi-
cle interior through the air vents. If the air vents are turned towards the win-
dows, for example, the form of air distribution may be affected.
Depending on the outside temperature, the temperature at which the auxili-
ary heater warms the vehicle interior may be somewhat higher if the heating
or air conditioner temperature control is set to maximum before switching
the heating on.
Depending on the engine, vehicles with auxiliary heater may be fitted with a
second battery in the luggage compartment that is responsible for powering
the auxiliary heater. Cases in which the auxiliary heater will not switch on
●
The auxiliary heater requires about as much power as the dipped beam
headlights. If the battery charge is low, the auxiliary heater will switch off
automatically or will not even switch on. This avoids problems when starting
the engine.
● The heater will switch just once each time. The timer will also have to be
switched back on every time it is required.
Note
● Noise will be heard while the auxiliary heater is running.
● When the air humidity is high and the outside temperature low, the
heating system may evaporate condensation from the auxiliary heater. In
this case, steam may be released from underneath the vehicle. This is com-
pletely normal and there is no need to suspect a fault!
● If the auxiliary heater runs several times over a prolonged period, the ve-
hicle battery may run flat. To re-charge the battery, drive the vehicle for a
long distance. In general: drive for as much time as the auxiliary heating
was working.
Safety FirstOperating instructionsPractical tipsTechnical Specifications
Page 171 of 387
169
Driving
flashesPossible causeSolution
(red)Fault in the steering column
electronic lock. Do not drive on!
Seek professional advice.
(yellow)
Steering column deviation.Gently turn the steering wheel to
and fro.
Steering wheel not unlocked
or locked.
Remove the key from the igni-
tion and then switch the ignition
back on. Check the messages
displayed on the instrument
panel at the same time.
Do not drive on, if the steering
column remains locked after the
ignition has been switched on.
You should obtain professional
assistance.
Several warning and control lamps should light up for a few seconds when
the ignition is switched on, signalling that the function is being verified.
They will switch off after a few seconds.
WARNING
If the warning lamps and messages are ignored, the vehicle may stall in
traffic, or may cause accidents and severe injuries.
● Never ignore the warning lamps or text messages.
● Stop the vehicle safely as soon as possible.
CAUTION
Failure to heed the control lamps and text messages when they appear may
result in faults in the vehicle. Information on the steering
Steering column electronic lock
If the driver door is opened before the ignition is switched off, the steering
column electronic lock is activated via the ignition key or the sensor built
into the door handle.
Mechanical steering lock
To prevent theft, we recommend you lock the steering before leaving the ve-
hicle.
Please engage steering lockUnlocking the steeringParking the vehicle
⇒ page 184.Turn the steering wheel slightly to
release the steering lock.
Remove the key from the ignition.Insert the key in the ignition lock.Turn the steering wheel slightly until
you hear the steering lock.Hold the steering wheel in this posi-
tion and switch on the ignition.
Electromechanical power steering
With the power steering system, the assisted steering function automatical-
ly adjusts according to the vehicle speed, the steering torque and the wheel
turning angle. The power steering only works when the engine is running.
You should remember that you will need considerably more power than nor-
mal to steer the vehicle if the power steering is not working correctly or not
at all.
Counter steering assistance system
The counter steering assistance system helps the driver in critical situa-
tions. Additional steering power helps the driver when counter steering.
Safety FirstOperating instructionsPractical tipsTechnical Specifications
Page 173 of 387
171
Driving
Stopping and starting the engine Introduction
Immobiliser display
When an invalid key is used or in the event of a system fault, or Immo-
biliser on is displayed on the instrument panel. The engine cannot be star- ted.
Pushing or towing
For technical reasons, the vehicle must not be push- or tow-started. Jump
starting is preferable.
Additional information and warnings:
● Vehicle key set ⇒ page 71
● Changing gear ⇒ page 175
● Braking, stopping and parking ⇒ page 184
● Steering ⇒ page 168
● Start assist systems ⇒ page 195
● Refuelling ⇒ page 267
● Fuel ⇒ page 270
● Emergency locking and unlocking ⇒ page 317
● Jump starting ⇒ page 340
● Tow starting and towing away ⇒ page 343
WARNING
Turning off the engine while driving will make stopping the vehicle diffi-
cult; this could even result in the loss of control causing an accident with
serious consequences.
● The assisted braking and steering systems, the airbag system, seat
belts and certain safety equipment are only active while the engine is
running.
● The engine should only be switched off when the vehicle is at a
standstill.
WARNING
While the engine is running or starting it could help reduce the risk of se-
rious injury.
● Never start or leave the engine running in poorly ventilated or closed
spaces. Exhaust gas contains carbon monoxide, a toxic, colourless and
odourless gas. Carbon monoxide can cause people to lose conscious-
ness. It can also cause death.
● Never leave the vehicle unattended if the engine is running. The vehi-
cle could move off suddenly or something unexpected could happen re-
sulting in damage and serious injury.
● Never use start boosters. Cold start sprays could explode or increase
the engine speed unexpectedly.
Safety FirstOperating instructionsPractical tipsTechnical Specifications
Page 175 of 387
173
Driving
Key not authorised for the vehicle
If a key which is not authorised for this vehicle is inserted in the ignition
lock, it can be removed as follows:
● Automatic gearbox: the key cannot be removed from the ignition lock.
Press and release the selector lever locking button. Key can be removed
from the vehicle.
● Manual gearbox: Remove the key from the ignition.
WARNING
Unsuitable or careless use of the vehicle key could result in serious in-
jury.
● Always take all the keys with you whenever you leave the vehicle. The
engine could accidentally be started and electrical equipment such as
the windows could accidentally be operated resulting in serious injury.
● Never leave children or disabled people alone in the car. They could
be trapped in the car in an emergency and will not be able to get them-
selves to safety. For example, depending on the time of the year, temper-
atures inside a locked and closed vehicle can be extremely high or ex-
tremely low resulting in serious injuries and illness or even death, partic-
ularly for young children.
● Never remove the key from the ignition if the vehicle is in motion. The
steering may lock and it will not be possible to turn the steering wheel.
Note
● If the key is left in the ignition lock with the engine off for long periods,
the vehicle battery will run flat.
● For automatic gearbox vehicles the key can only be removed from the ig-
nition lock if the gear selector lever is in position P. In this case, press and
release the selector lever locking button. Starting the engine
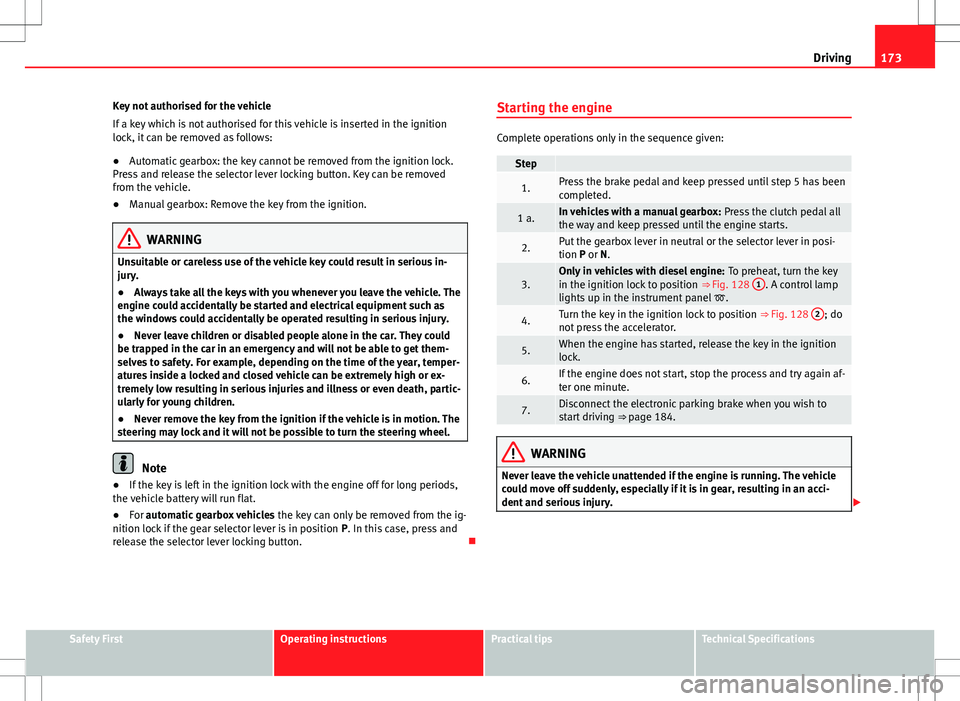
Complete operations only in the sequence given:
Step
1.Press the brake pedal and keep pressed until step 5 has been
completed.
1 a.In vehicles with a manual gearbox:
Press the clutch pedal all
the way and keep pressed until the engine starts.
2.Put the gearbox lever in neutral or the selector lever in posi-
tion P or N.
3.Only in vehicles with diesel engine: To preheat, turn the key
in the ignition lock to position ⇒ Fig. 128 1. A control lamp
lights up in the instrument panel .
4.Turn the key in the ignition lock to position ⇒ Fig. 128 2; do
not press the accelerator.
5.When the engine has started, release the key in the ignition
lock.
6.If the engine does not start, stop the process and try again af-
ter one minute.
7.Disconnect the electronic parking brake when you wish to
start driving ⇒ page 184.
WARNING
Never leave the vehicle unattended if the engine is running. The vehicle
could move off suddenly, especially if it is in gear, resulting in an acci-
dent and serious injury.
Safety FirstOperating instructionsPractical tipsTechnical Specifications
Page 177 of 387
175
Driving
Note
● In vehicles with automatic gearbox, the key can only be removed when
the selector lever is in position P.
● After stopping the engine, the engine compartment fan may continue
running for a few minutes, even when the ignition has been switched off or
the key removed. The radiator fan is automatically switched off.
Electronic immobiliser
The gear lock prevents the engine from being started with an unauthorised
key and the vehicle being moved.
The vehicle key has a built-in chip. It automatically deactivates the electron-
ic immobiliser when the key is inserted into the ignition lock.
For this reason, the vehicle can only be used with a genuine SEAT key with
the correct code. Coded keys can be obtained from your Technical Services
⇒ page 71.
If an unauthorised key is used, the message SAFE or Immobiliser active is
displayed on the instrument panel. The vehicle cannot be started in this
case
Note
The correct operation of the vehicle is only guaranteed when original SEAT
keys are used. Changing gear
Introduction
When reverse gear is engaged and the ignition is switched on the following
takes place:
● Reverse lights light up.
● When reversing, the air conditioner automatically changes to air recircu-
lation mode.
● The rear window heater switches on when the windscreen wiper is acti-
vated.
● Also, the parking sensor system, the optical parking sensor and the
camera for the reverse assist system are connected.
Additional information and warnings:
● Instruments ⇒ page 57
● Braking, stopping and parking ⇒ page 184
● Parking sensor system ⇒ page 199
● Park Assist system ⇒ page 203
● Reverse assist system (Rear Assist) ⇒ page 208
● Air conditioning ⇒ page 156
● Electronic power control and exhaust gases purification system
⇒ page 231
● Emergency locking and unlocking ⇒ page 317
WARNING
Rapid acceleration can cause loss of traction and skidding, especially on
slippery ground. This could cause loss of control of the vehicle resulting
in an accident and considerable damage.
● Only use the kick-down function or rapid acceleration if visibility,
weather, road and traffic conditions so permit.
Safety FirstOperating instructionsPractical tipsTechnical Specifications
Page 179 of 387
177
Driving
Pedals
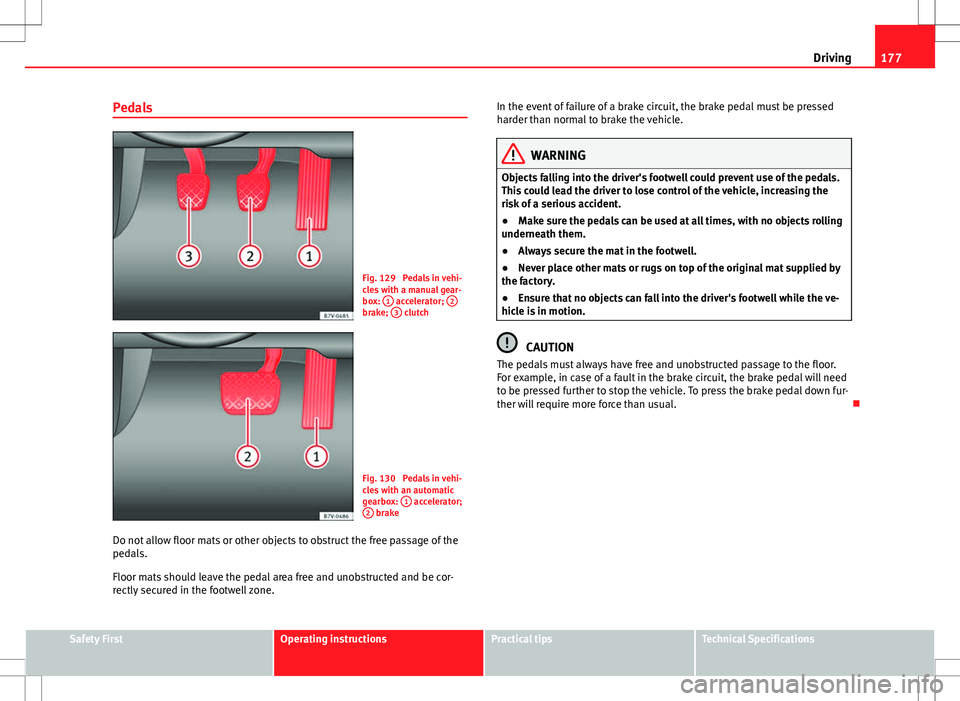
Fig. 129 Pedals in vehi-
cles with a manual gear-
box: 1
accelerator; 2brake; 3 clutch
Fig. 130 Pedals in vehi-
cles with an automatic
gearbox: 1
accelerator;
2 brake
Do not allow floor mats or other objects to obstruct the free passage of the
pedals.
Floor mats should leave the pedal area free and unobstructed and be cor-
rectly secured in the footwell zone. In the event of failure of a brake circuit, the brake pedal must be pressed
harder than normal to brake the vehicle.
WARNING
Objects falling into the driver's footwell could prevent use of the pedals.
This could lead the driver to lose control of the vehicle, increasing the
risk of a serious accident.
● Make sure the pedals can be used at all times, with no objects rolling
underneath them.
● Always secure the mat in the footwell.
● Never place other mats or rugs on top of the original mat supplied by
the factory.
● Ensure that no objects can fall into the driver's footwell while the ve-
hicle is in motion.
CAUTION
The pedals must always have free and unobstructed passage to the floor.
For example, in case of a fault in the brake circuit, the brake pedal will need
to be pressed further to stop the vehicle. To press the brake pedal down fur-
ther will require more force than usual.
Safety FirstOperating instructionsPractical tipsTechnical Specifications
Page 181 of 387
179
Driving
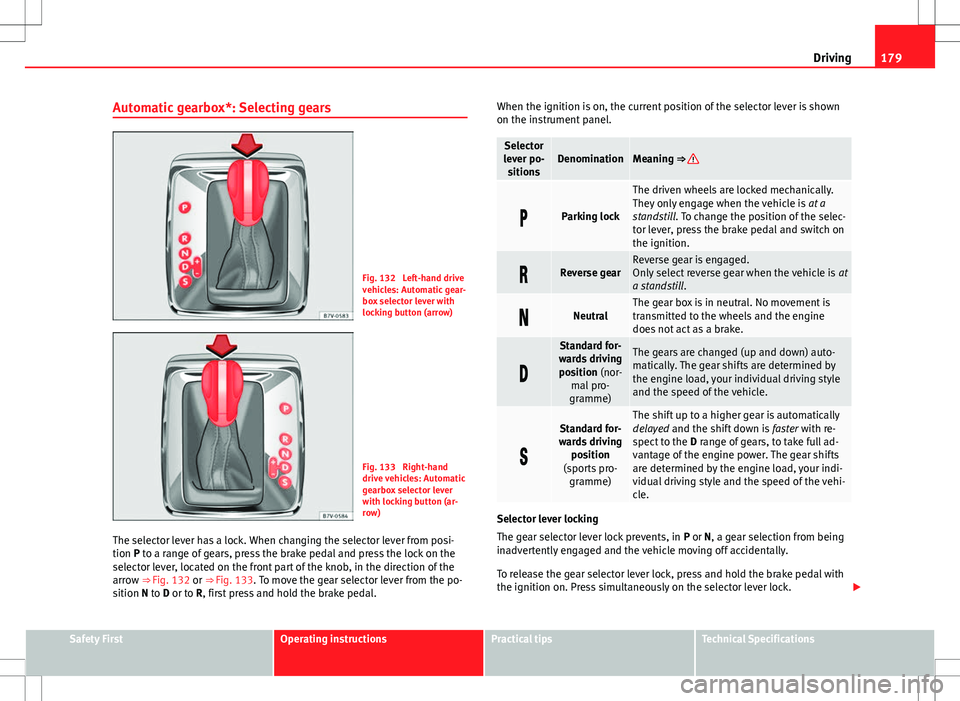
Automatic gearbox*: Selecting gears
Fig. 132 Left-hand drive
vehicles: Automatic gear-
box selector lever with
locking button (arrow)
Fig. 133 Right-hand
drive vehicles: Automatic
gearbox selector lever
with locking button (ar-
row)
The selector lever has a lock. When changing the selector lever from posi-
tion P to a range of gears, press the brake pedal and press the lock on the
selector lever, located on the front part of the knob, in the direction of the
arrow ⇒ Fig. 132 or ⇒ Fig. 133. To move the gear selector lever from the po-
sition N to D or to R, first press and hold the brake pedal. When the ignition is on, the current position of the selector lever is shown
on the instrument panel.
Selector
lever po- sitionsDenominationMeaning ⇒
Parking lock
The driven wheels are locked mechanically.
They only engage when the vehicle is at a
standstill. To change the position of the selec-
tor lever, press the brake pedal and switch on
the ignition.
Reverse gearReverse gear is engaged.
Only select reverse gear when the vehicle is at
a standstill .
NeutralThe gear box is in neutral. No movement is
transmitted to the wheels and the engine
does not act as a brake.
Standard for-
wards driving position (nor- mal pro-
gramme)The gears are changed (up and down) auto-
matically. The gear shifts are determined by
the engine load, your individual driving style
and the speed of the vehicle.
Standard for-
wards driving position
(sports pro- gramme)The shift up to a higher gear is automatically
delayed and the shift down is faster with re-
spect to the D range of gears, to take full ad-
vantage of the engine power. The gear shifts
are determined by the engine load, your indi-
vidual driving style and the speed of the vehi-
cle.
Selector lever locking
The gear selector lever lock prevents, in P or N, a gear selection from being
inadvertently engaged and the vehicle moving off accidentally.
To release the gear selector lever lock, press and hold the brake pedal with
the ignition on. Press simultaneously on the selector lever lock.
Safety FirstOperating instructionsPractical tipsTechnical Specifications
Page 183 of 387
181
Driving
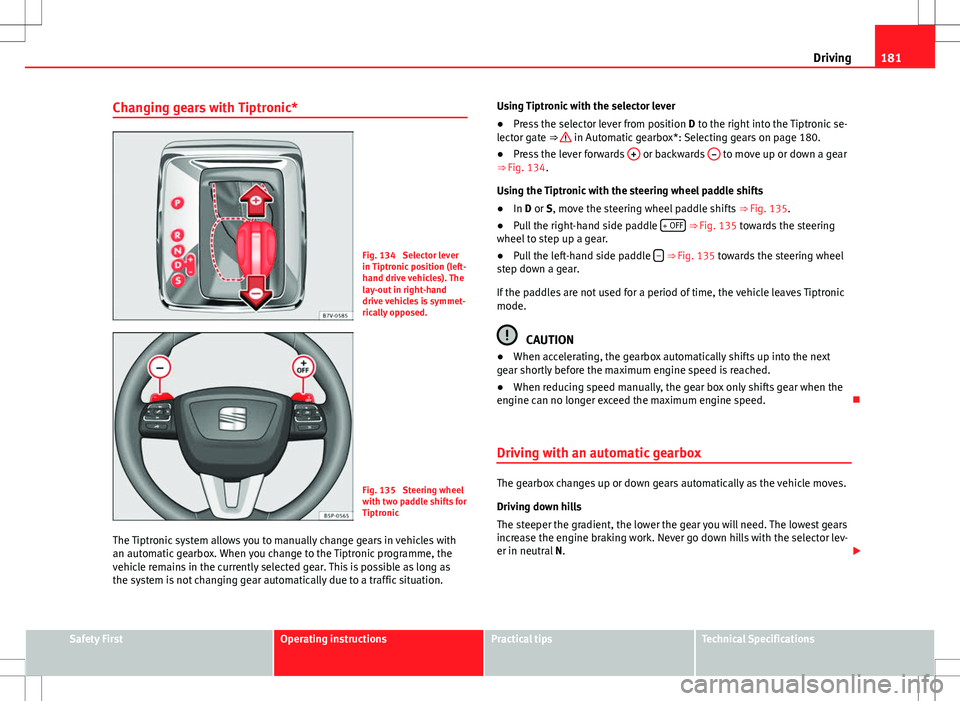
Changing gears with Tiptronic*
Fig. 134 Selector lever
in Tiptronic position (left-
hand drive vehicles). The
lay-out in right-hand
drive vehicles is symmet-
rically opposed.
Fig. 135 Steering wheel
with two paddle shifts for
Tiptronic
The Tiptronic system allows you to manually change gears in vehicles with
an automatic gearbox. When you change to the Tiptronic programme, the
vehicle remains in the currently selected gear. This is possible as long as
the system is not changing gear automatically due to a traffic situation. Using Tiptronic with the selector lever
●
Press the selector lever from position D to the right into the Tiptronic se-
lector gate ⇒
in Automatic gearbox*: Selecting gears on page 180.
● Press the lever forwards + or backwards – to move up or down a gear
⇒ Fig. 134.
Using the Tiptronic with the steering wheel paddle shifts
● In D or S, move the steering wheel paddle shifts ⇒ Fig. 135.
● Pull the right-hand side paddle + OFF
⇒ Fig. 135 towards the steering
wheel to step up a gear.
● Pull the left-hand side paddle –
⇒ Fig. 135 towards the steering wheel
step down a gear.
If the paddles are not used for a period of time, the vehicle leaves Tiptronic
mode.
CAUTION
● When accelerating, the gearbox automatically shifts up into the next
gear shortly before the maximum engine speed is reached.
● When reducing speed manually, the gear box only shifts gear when the
engine can no longer exceed the maximum engine speed.
Driving with an automatic gearbox
The gearbox changes up or down gears automatically as the vehicle moves.
Driving down hills
The steeper the gradient, the lower the gear you will need. The lowest gears
increase the engine braking work. Never go down hills with the selector lev-
er in neutral N.
Safety FirstOperating instructionsPractical tipsTechnical Specifications