technical specifications Seat Alhambra 2013 Owner's Manual
[x] Cancel search | Manufacturer: SEAT, Model Year: 2013, Model line: Alhambra, Model: Seat Alhambra 2013Pages: 387, PDF Size: 6.13 MB
Page 205 of 387
203
Driving
Park Assist system* Introduction
The Park Assist system helps the driver to find a suitable place to park, to
insert the vehicle into parallel and perpendicular parking places and to
leave parallel parking places.
The Park Assist system is limited to the system abilities and requires that
the driver is especially attentive ⇒
.
The parking sensor system is a component of the Park Assist system that
helps to park the vehicle.
For vehicles with the optical parking system, the radio navigation systems
screen displays the detected zones in front of and behind the vehicle, indi-
cating - within the limits of the system - the position of obstacles compared
to the vehicle.
The park assist system cannot be switched on if the factory-fitted towing
bracket is electrically connected to a trailer.
Additional information and warnings:
● Braking, stopping and parking ⇒ page 184
● Parking sensor system ⇒ page 199
● Caring for and cleaning the vehicle exterior ⇒ page 245
● Accessories, parts replacement, repairs and modifications ⇒ page 260
WARNING
Despite the assistance provided by the park assist system, do not run
any risks when parking. The system is not a replacement for driver
awareness.
● Unintentional movements of the vehicle could cause serious injury.
● Adjust your speed and driving style to visibility, road, traffic and
weather conditions.
● The surface of certain objects and items of clothing and external
sound sources may have a negative affect on the park assist signals or on
the system sensors or may not reflect its signals.
● The sensors have blind spots in which obstacles and people are not
registered.
● Always observe the area around the vehicle, as the sensors do not al-
ways detect small children, animals or objects.
CAUTION
● The park assist system aims exclusively at other parked vehicles, with-
out taking curbs or other circumstances into account. Make sure you do not
damage the tyres and wheel rims when parking. Where necessary, stop ma-
noeuvring to avoid damaging the vehicle.
● The sensors may not always be able to detect objects such as trailer
draw bars, thin rails, fences, posts and trees, etc. This could result in dam-
age to your car.
● Although the parking sensor system detects and warns of the presence
of an obstacle, the obstacle could disappear from the angle of measure-
ment of the sensors if it is too high or low and the system would no longer
indicate it. Therefore, it will not warn you of these objects. Ignoring the
warnings of the parking sensor system could cause considerable damage to
the vehicle. This is also valid when using the park assist (e.g. to park be-
hind a truck or motorcycle). Therefore, always keep a close watch on the
area in front of and behind the vehicle while parking, and intervene prompt-
ly if necessary.
Safety FirstOperating instructionsPractical tipsTechnical Specifications
Page 207 of 387
205
Driving
Parking
● Parking parallel to the road: Drive next to the gap at a speed of no more
than 40 km/h (25 mph) and at a distance of between 0.5 m and 2 m.
● Parking perpendicular to the road: Drive next to the gap at a speed of no
more than 20 km/h (12 mph) and at a distance of between 0.5 m and 2 m.
● The best parking results will be achieved if you position the vehicle as
parallel as possible to the line of parked cars or the kerb.
● When a suitable parking place is displayed on the instrument panel,
stop and select reverse gear.
● Follow the instructions given on the instrument panel display
● Then, release the steering wheel when the warning signal sounds ⇒
:
The system will move the steering wheel! Observe the surrounding area.
● Observe the surrounding area and accelerate carefully at a maximum of
up to 7 km/h (4 mph).
● The park assist system is only responsible for moving the steering wheel
during the manoeuvre. The driver applies the accelerator, the clutch, the
gears and the brake.
● Follow the instructions given by the park assist system until the ma-
noeuvre is completed.
● The park assist system steers the vehicle forwards and backwards until
it is in a straight position in the parking space.
● The manoeuvre is complete when the corresponding indication is given
on the instrument panel display.
Stopping the parking manoeuvre
The park assist system stops the manoeuvre in the event of one of the fol-
lowing:
● Press button
.
● Driving faster than 7 km/h (4 mph).
● The driver moves the steering wheel.
● The parking manoeuvre has not been completed after six minutes since
the park assist system was activated. ●
A sliding door is opened. To restart the manoeuvre, close the sliding
door and press the button
again.
● There is a system malfunction (system temporarily unavailable).
● The ASR system is switched off or the ASR or ESC is working.
WARNING
The steering wheel turns quickly by itself when parking using the park
assist system. Placing your hand between the steering wheel spokes
could lead to injuries.
Note
● The park assist system has its limitations. For example, it is not possible
to park on tight bends using the park assist system.
● Even if the park assist system recognises that there is not enough space
for parking the vehicle, the instrument panel display will still show this
place. In this case, the parking manoeuvre should not be requested.
● Changing gears between forward and reverse gears before indicated
(that is, before the signal from the parking sensor system) the parking re-
sults may not be ideal.
● For parallel parking (parallel to the road), a sound will tell the driver
when they must change from forward gears to reverse; the signal from the
parking sensor system does not indicate changes of direction.
● The park assist can also be activated afterwards, if you pass close to a
parallel parking space at a maximum of 40 km an hour (25 mph) or close to
be perpendicular parking space at about 20 km an hour (12 mph) then
press the button
.
● The progress bar on the screen of the instrument panel shows a display
of the relative distance to be covered.
● When the Park Assist system is turning the steering wheel of the stop-
ped vehicle the symbol is also displayed. Press on the brake pedal so
that the steering can turn with the vehicle at a standstill and thus reduce
the number of manoeuvres.
Safety FirstOperating instructionsPractical tipsTechnical Specifications
Page 209 of 387
207
Driving
● Press the foot brake ⇒
!
Following the intervention of the brakes, the Park Assist will stop.
WARNING
Despite the assistance provided by the park assist system, do not run
any risks when parking. The system is not a replacement for driver
awareness.
● Always be ready to brake.
● Automatic brake intervention will end after 1.5 seconds approximate-
ly. Following automatic intervention of the brakes, stop the vehicle your-
self.
Safety FirstOperating instructionsPractical tipsTechnical Specifications
Page 211 of 387
209
Driving
User instructions
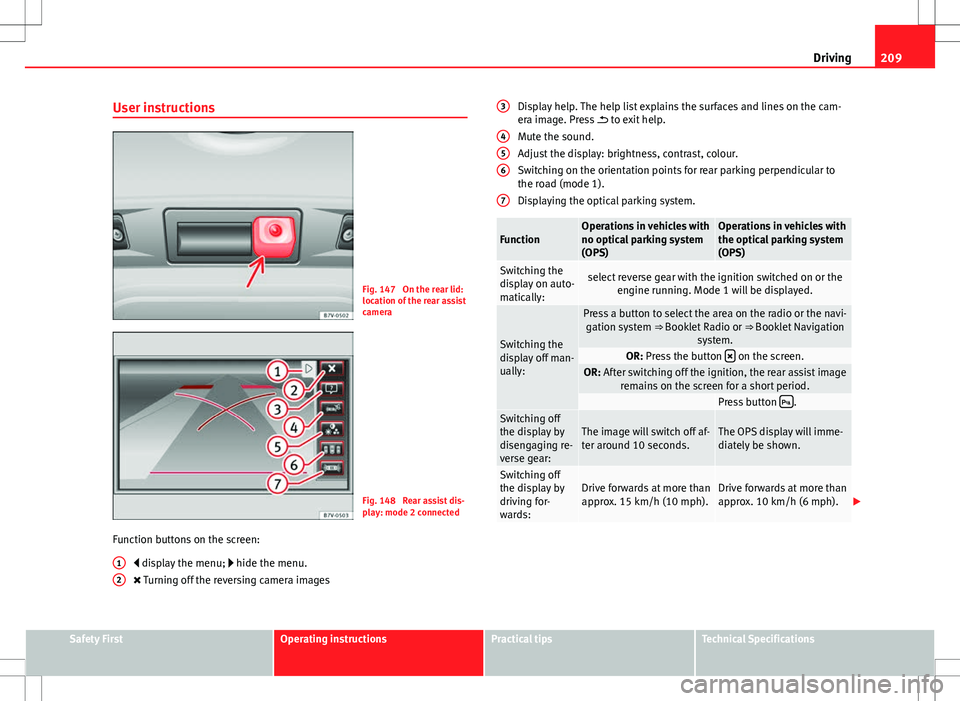
Fig. 147 On the rear lid:
location of the rear assist
camera
Fig. 148 Rear assist dis-
play: mode 2 connected
Function buttons on the screen: display the menu; hide the menu.
Turning off the reversing camera images
1
2
Display help. The help list explains the surfaces and lines on the cam-
era image. Press
to exit help.
Mute the sound.
Adjust the display: brightness, contrast, colour.
Switching on the orientation points for rear parking perpendicular to
the road (mode 1).
Displaying the optical parking system.
FunctionOperations in vehicles with
no optical parking system
(OPS)Operations in vehicles with
the optical parking system
(OPS)
Switching the
display on auto-
matically:select reverse gear with the ignition switched on or the engine running. Mode 1 will be displayed.
Switching the
display off man-
ually:
Press a button to select the area on the radio or the navi-gation system ⇒ Booklet Radio or ⇒ Booklet Navigation
system.
OR: Press the button on the screen.OR: After switching off the ignition, the rear assist image
remains on the screen for a short period.
Press button .Switching off
the display by
disengaging re-
verse gear:The image will switch off af-
ter around 10 seconds.The OPS display will imme-
diately be shown.
Switching off
the display by
driving for-
wards:Drive forwards at more than
approx. 15 km/h (10 mph).Drive forwards at more than
approx. 10 km/h (6 mph).
3
456
7
Safety FirstOperating instructionsPractical tipsTechnical Specifications
Page 213 of 387
211
Driving
Summary of the orientation points
Meaning of orientation lines displayed on the screen ⇒ Fig. 149. All of the
lengths of the orientation lines use a vehicle located on a horizontal surface
as reference.
Red Safety distance: road area located up to around 40 cm behind the
vehicle.
Green: prolongation of the rear of the vehicle (somewhat enlarged). The
area displayed green ends around two metres behind the vehicle, on
the road.
Yellow: prolongation of the rear of the vehicle as the steering wheel
turns. The area displayed yellow ends around three metres behind the
vehicle, on the road.
Parking
● Stop the vehicle in front of a space and select reverse gear.
● Reverse slowly and turn the steering wheel so that the yellow orientation
lines guide you towards the space 3
.
● Align the vehicle straight in the parking place using the help of the
green orientation lines.
1
2
3
Parking parallel to the road (mode 2)
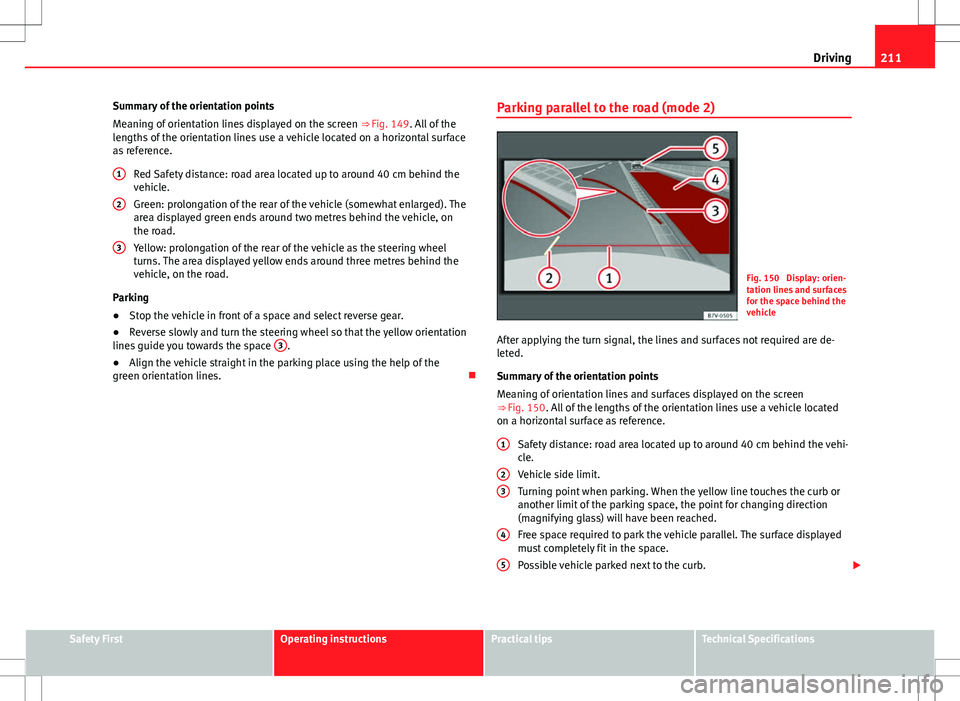
Fig. 150 Display: orien-
tation lines and surfaces
for the space behind the
vehicle
After applying the turn signal, the lines and surfaces not required are de-
leted.
Summary of the orientation points
Meaning of orientation lines and surfaces displayed on the screen
⇒ Fig. 150. All of the lengths of the orientation lines use a vehicle located
on a horizontal surface as reference.
Safety distance: road area located up to around 40 cm behind the vehi-
cle.
Vehicle side limit.
Turning point when parking. When the yellow line touches the curb or
another limit of the parking space, the point for changing direction
(magnifying glass) will have been reached.
Free space required to park the vehicle parallel. The surface displayed
must completely fit in the space.
Possible vehicle parked next to the curb.
1
23
4
5
Safety FirstOperating instructionsPractical tipsTechnical Specifications
Page 215 of 387
213
Driving
Cruise control system*
Introduction
The cruise control system (CCS) is able to maintain the set speed when driv-
ing forwards from approx. 20 km/h (12 mph).
The CCS only slows down by reducing the accelerator but not by braking.
⇒
.
Additional information and warnings:
● Changing gear ⇒ page 175
● Accessories, parts replacement, repairs and modifications ⇒ page 260
WARNING
Use of the cruise control could cause accidents and severe injuries if it is
not possible to drive at a constant speed maintaining the safety distance.
● Do not use the CCS in heavy traffic, if the distance from the vehicle in
front is insufficient, on steep roads, with several bends or in slippery cir-
cumstances (snow, ice, rain or loose gravel), or on flooded roads.
● Never use the CCS when driving off-road or on unpaved roads.
● Always adapt your speed and the distance to the vehicles ahead in
line with visibility, weather conditions, the condition of the road and the
traffic situation.
● To avoid unexpected operation of the cruise control system, turn it off
every time you finish using it.
● It is dangerous to use a set speed which is too high for the prevailing
road, traffic or weather conditions.
● When travelling down hills, the CCS cannot maintain a constant
speed. The vehicle tends to accelerate under its own weight. Select a
lower gear or use the foot brake to slow the vehicle.
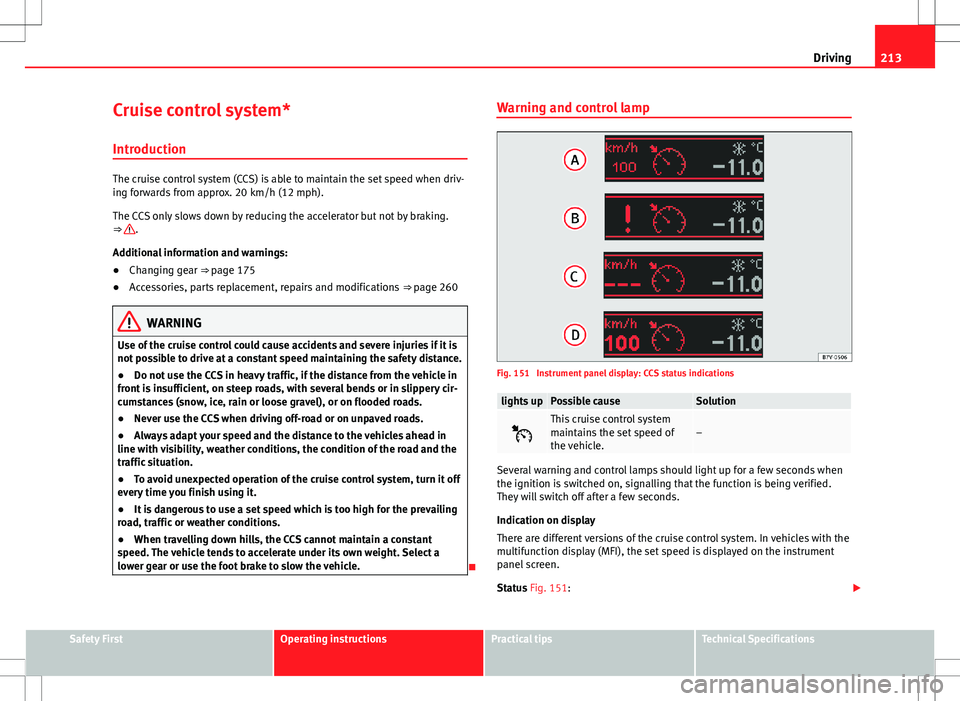
Warning and control lamp
Fig. 151 Instrument panel display: CCS status indications
lights upPossible causeSolution
This cruise control system
maintains the set speed of
the vehicle.–
Several warning and control lamps should light up for a few seconds when
the ignition is switched on, signalling that the function is being verified.
They will switch off after a few seconds.
Indication on display
There are different versions of the cruise control system. In vehicles with the
multifunction display (MFI), the set speed is displayed on the instrument
panel screen.
Status Fig. 151:
Safety FirstOperating instructionsPractical tipsTechnical Specifications
Page 217 of 387
215
Driving
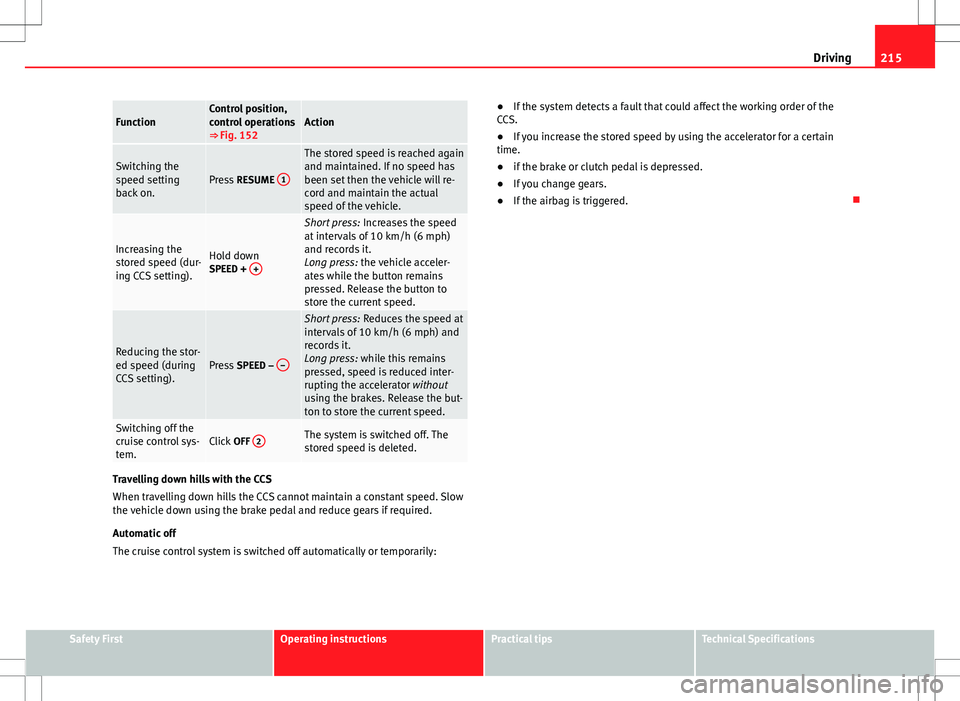
FunctionControl position,
control operations
⇒ Fig. 152Action
Switching the
speed setting
back on.Press RESUME 1
The stored speed is reached again
and maintained. If no speed has
been set then the vehicle will re-
cord and maintain the actual
speed of the vehicle.
Increasing the
stored speed (dur-
ing CCS setting).Hold down
SPEED + +
Short press:
Increases the speed
at intervals of 10 km/h (6 mph)
and records it.
Long press: the vehicle acceler-
ates while the button remains
pressed. Release the button to
store the current speed.
Reducing the stor-
ed speed (during
CCS setting).Press SPEED – –
Short press:
Reduces the speed at
intervals of 10 km/h (6 mph) and
records it.
Long press: while this remains
pressed, speed is reduced inter-
rupting the accelerator without
using the brakes. Release the but-
ton to store the current speed.
Switching off the
cruise control sys-
tem.Click OFF 2The system is switched off. The
stored speed is deleted.
Travelling down hills with the CCS
When travelling down hills the CCS cannot maintain a constant speed. Slow
the vehicle down using the brake pedal and reduce gears if required.
Automatic off
The cruise control system is switched off automatically or temporarily: ●
If the system detects a fault that could affect the working order of the
CCS.
● If you increase the stored speed by using the accelerator for a certain
time.
● if the brake or clutch pedal is depressed.
● If you change gears.
● If the airbag is triggered.
Safety FirstOperating instructionsPractical tipsTechnical Specifications
Page 219 of 387
217
Driving
Control lamps
Blinks or
lights upPossible causeSolution
(yellow)Lane assist system connec-
ted but inactive.
The system cannot clearly de-
tect the lane. See and
page 218, The lane assist sys-
tem is inactive (control lamp lit
in yellow).
(green)Lane assist system connec-
ted and active.–
Several warning and control lamps should light up for a few seconds when
the ignition is switched on, signalling that the function is being verified.
They will switch off after a few seconds.
WARNING
If the warning lamps and messages are ignored, the vehicle may stall in
traffic, or may cause accidents and severe injuries.
● Never ignore the warning lamps or text messages.
● Stop the vehicle safely as soon as possible.
CAUTION
Failure to heed the control lamps and text messages when they appear may
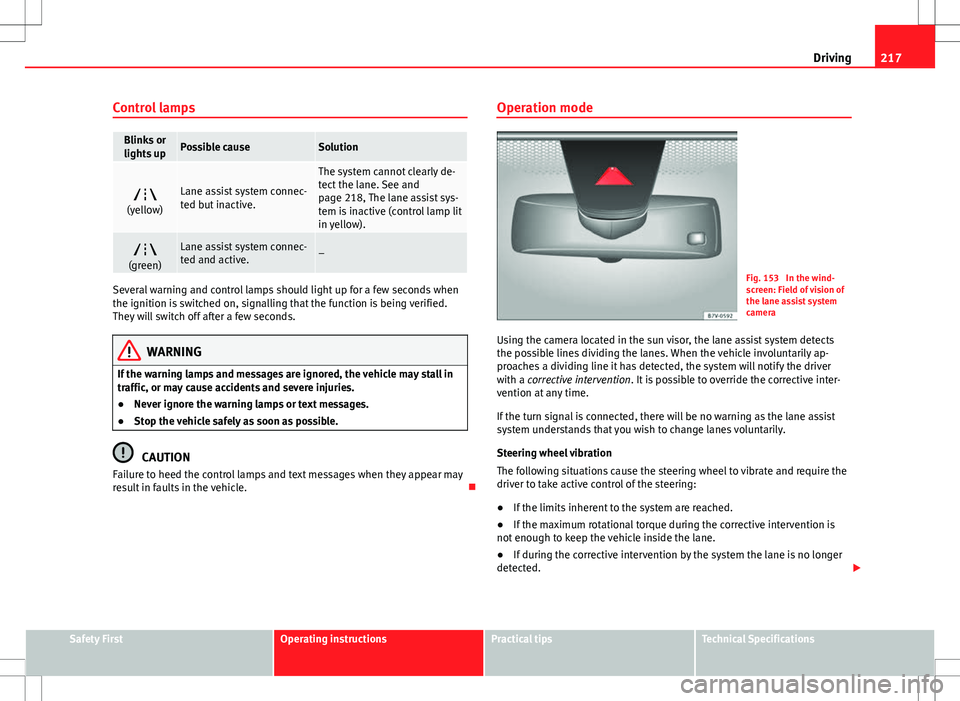
result in faults in the vehicle. Operation mode
Fig. 153 In the wind-
screen: Field of vision of
the lane assist system
camera
Using the camera located in the sun visor, the lane assist system detects
the possible lines dividing the lanes. When the vehicle involuntarily ap-
proaches a dividing line it has detected, the system will notify the driver
with a corrective intervention. It is possible to override the corrective inter-
vention at any time.
If the turn signal is connected, there will be no warning as the lane assist
system understands that you wish to change lanes voluntarily.
Steering wheel vibration
The following situations cause the steering wheel to vibrate and require the
driver to take active control of the steering:
● If the limits inherent to the system are reached.
● If the maximum rotational torque during the corrective intervention is
not enough to keep the vehicle inside the lane.
● If during the corrective intervention by the system the lane is no longer
detected.
Safety FirstOperating instructionsPractical tipsTechnical Specifications
Page 221 of 387
219
Driving
Sign Assist* Introduction
Sign Assist can help the driver with information on speed limits or if over-
taking is prohibited at that moment. The traffic signs and additional infor-
mation detected by the system is represented in the instrument panel dis-
play and in the visual presentation of the navigation system map.
Applicable countries:
Sign Assist is supported in the following countries:
Andorra, Belgium, Denmark, Germany, Finland, France, Ireland, Italy, Liech-
tenstein, Luxembourg, Monaco, Netherlands, Norway, Austria, Poland, Por-
tugal, San Marino, Sweden, Switzerland, Spain, Czech Republic, United
Kingdom, Vatican City.
Additional information and warnings:
● SEAT information system ⇒ page 62
● Navigation system ⇒ Booklet Navigation system
WARNING
The traffic signs and instructions shown by Sign Assist may differ from
the current traffic situation.
● The signs and Highway Code rules always take precedence over the
instructions and display of Sign Assist.
● Adjust your speed and driving style to visibility, road, traffic and
weather conditions.
● The system cannot always detect or correctly show all the traffic
signs.
WARNING
The traffic sign detection is not a replacement for driver awareness.
● Adverse conditions of visibility, darkness, snow, rain and fog can
cause the system not to show the traffic signs or to show them errone-
ously.
CAUTION
● If old mapping data is used in the navigation system, this may cause the
traffic signs to be shown incorrectly.
● In the route points mode (navigation by route points) of the navigation
system, Sign Assist is only partly available.
Safety FirstOperating instructionsPractical tipsTechnical Specifications
Page 223 of 387
221
Driving
during travel, the traffic sign valid at this moment will move to the first posi-
tion along the additional sign “if the road is wet”.
The permanent display on the instrument panel screen is shown as you
pass the real traffic signs. The signs for entering and leaving towns activate
the display of the usual speed limits for that country on roads in populated
areas and national highways, even if the speed is not limited by an actual
traffic sign.
The end of a prohibition or limitation is not displayed. If you exceed the
speed limits shown, a warning will not appear. The system does not detect
areas with little traffic. The current legal provisions apply.
Connection and disconnection
● Connect or disconnect the assist system in the Settings menu in the
SEAT information system ⇒ page 62.
● OR: Press the button for the driver assist systems on the main beam lev-
er.
Trailer
Connect or disconnect the secondary display for speed limits and overtak-
ing bans that apply to trailers (trailer mode) in the Settings menu in the
SEAT information system ⇒ page 62.
Safety FirstOperating instructionsPractical tipsTechnical Specifications