ESP Seat Alhambra 2015 User Guide
[x] Cancel search | Manufacturer: SEAT, Model Year: 2015, Model line: Alhambra, Model: Seat Alhambra 2015Pages: 305, PDF Size: 5.46 MB
Page 22 of 305
Safety
Airbag activation The airbags deploy extremely rapidly, within
thousandths of a second, to provide addi-
tional protection in the event of an accident.
A fine dust may develop when the airbag de-
ploys. This is normal and it is not an indica-
tion of fire in the vehicle.
The airbag system is only ready to function
when the ignition is on.
In special accidents instances, several air-
bags may activate at the same time.
In the event of minor head-on and side colli-
sions, rear-end collisions, overturning or roll-
over of the vehicle, airbags
do not activate.
Activation factors
The conditions that lead to the airbag system
activating in each situation cannot be gener-
alised. Some factors play an important role,
such as the properties of the object the vehi-
cle hits (hard/soft), angle of impact, vehicle
speed, etc.
Deceleration trajectory is key for airbag acti-
vation.
The control unit analyses the collision trajec-
tory and activates the respective restraint
system.
If the deceleration rate is below the prede-
fined reference value in the control unit the
airbags will not be triggered, even though the accident may cause extensive damage to
the car.
The following airbags are triggered in
serious head-on collisions
● Driver airbag.
● Front passenger front airbag
● Knee airbag for the driver.
The following airbags are triggered in
serious side-on collisions
● Front side airbag on the side of the acci-
dent.
● Rear side airbag on the side of the acci-
dent.
● Curtain (head) airbag on the side of the ac-
cident.
In an accident with airbag activation:
● the interior lights switch on (if the interior
light switch is in the courtesy light position);
● the hazard warning lights switch on;
● all doors are unlocked;
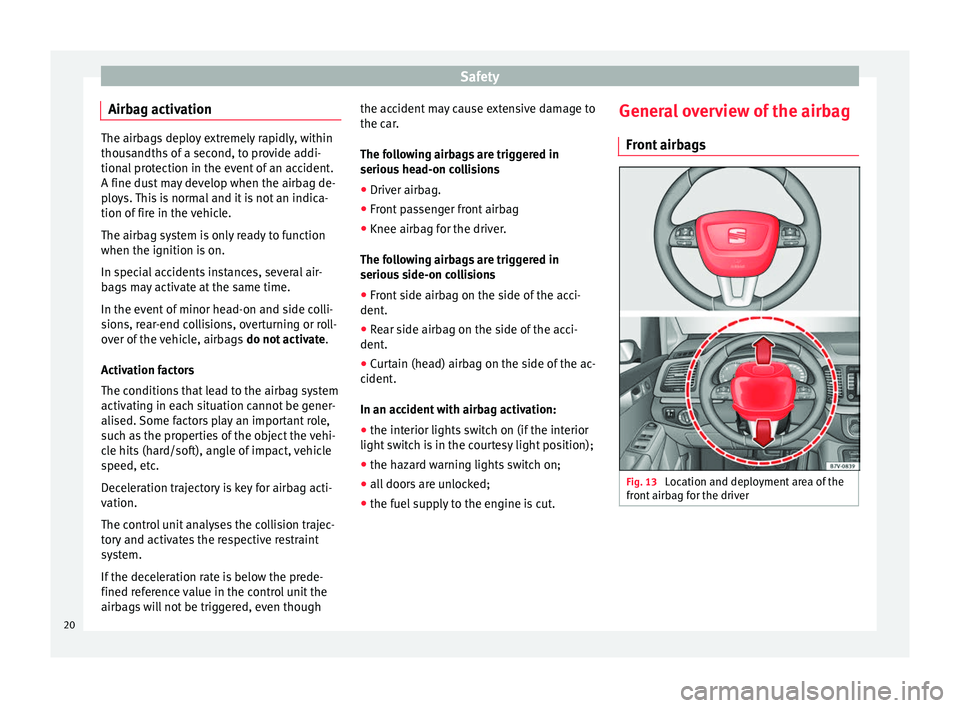
● the fuel supply to the engine is cut. General overview of the airbag
Front airbags Fig. 13
Location and deployment area of the
front airbag for the driver 20
Page 27 of 305
Airbag system
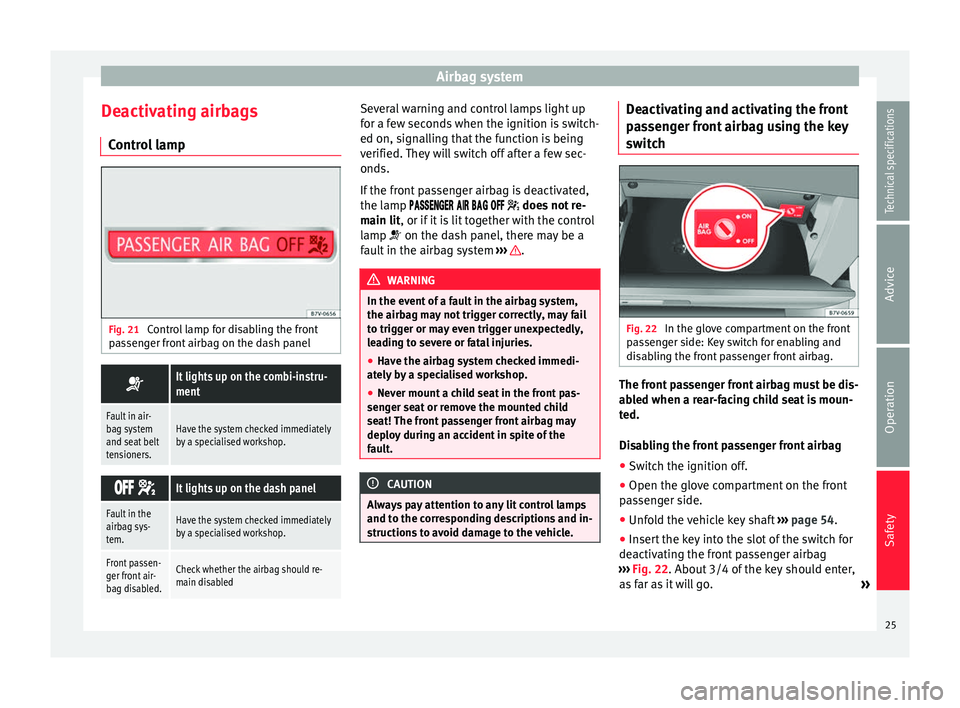
Deactivating airbags Control lamp Fig. 21
Control lamp for disabling the front
passenger front airbag on the dash panel It lights up on the combi-instru-
ment
Fault in air-
bag system
and seat belt
tensioners.Have the system checked immediately
by a specialised workshop.
It lights up on the dash panel
Fault in the
airbag sys-
tem.Have the system checked immediately
by a specialised workshop.
Front passen-
ger front air-
bag disabled.Check whether the airbag should re-
main disabled Several warning and control lamps light up
for a few seconds when the ignition is switch-
ed on, signalling that the function is being
verified. They will switch off after a few sec-
onds.
If the front passenger airbag is deactivated,
the lamp
does not re-
main lit, or if it is lit together with the control
lamp on the dash panel, there may be a
f
ault in the airbag system ››› .
WARNING
In the event of a fault in the airbag system,
the airbag may not trigger correctly, may fail
to trigger or may even trigger unexpectedly,
leading to severe or fatal injuries.
● Have the airbag system checked immedi-
ately by a specialised workshop.
● Never mount a child seat in the front pas-
senger seat or remove the mounted child
seat! The front passenger front airbag may
deploy during an accident in spite of the
fault. CAUTION
Always pay attention to any lit control lamps
and to the corresponding descriptions and in-
structions to avoid damage to the vehicle. Deactivating and activating the front
passenger front airbag using the key
switch
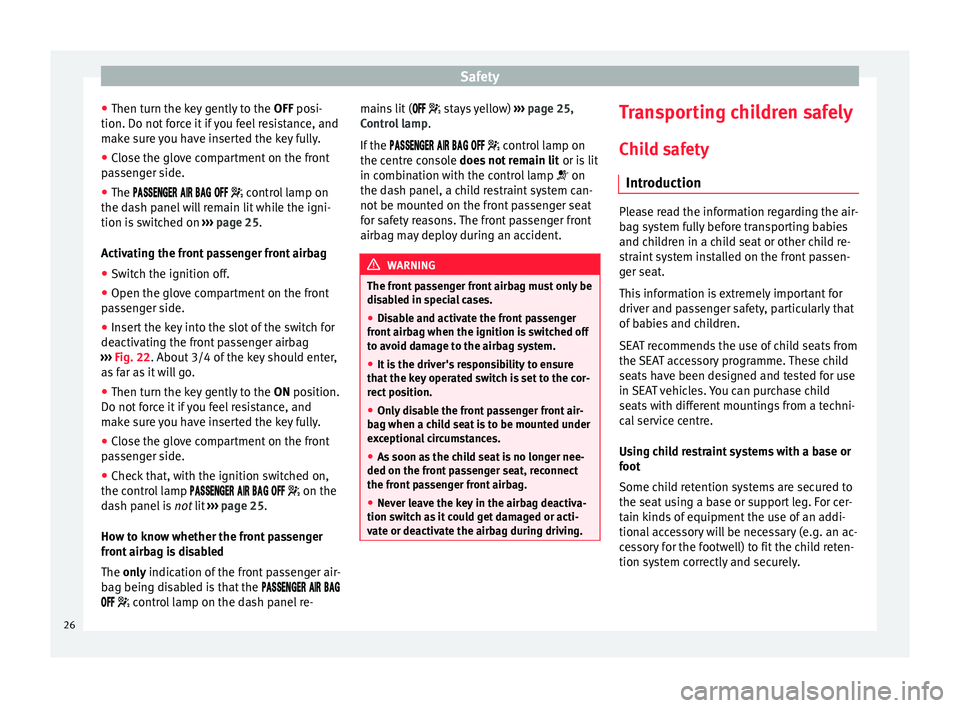
Fig. 22
In the glove compartment on the front
passenger side: Key switch for enabling and
disabling the front passenger front airbag. The front passenger front airbag must be dis-
abled when a rear-facing child seat is moun-
ted.
Disabling the front passenger front airbag
● Switch the ignition off.
● Open the glove compartment on the front
passenger side.
● Unfold the vehicle key shaft ››› page 54.
● Insert the key into the slot of the switch for
deactivating the front passenger airbag
››› Fig. 22 . About 3/4 of the key should enter,
a s
far as it will go. »
25
Technical specifications
Advice
Operation
Safety
Page 28 of 305
Safety
● Then turn the key gently to the OFF posi-
tion. Do not f
orce it if you feel resistance, and
make sure you have inserted the key fully.
● Close the glove compartment on the front
passenger side.
● The
control lamp on
the dash panel will remain lit while the igni-
tion is switched on ››› page 25.
Activating the front passenger front airbag ● Switch the ignition off.
● Open the glove compartment on the front
passenger side.
● Insert the key into the slot of the switch for
deactivating the front passenger airbag
››› Fig. 22
. About 3/4 of the key should enter,
as far as it will go.
● Then turn the key gently to the ON
position.
Do not force it if you feel resistance, and
make sure you have inserted the key fully.
● Close the glove compartment on the front
passenger side.
● Check that, with the ignition switched on,
the control lamp on the
dash panel is not
lit ››› page 25.
How to know whether the front passenger
front airbag is disabled
The only indication of the front passenger air-
b
ag being disabled is that the
control lamp on the dash panel re- mains lit (
stays yellow) ››› page 25,
Control lamp .
If the
control lamp on
the centre console does not remain lit or is lit
in combination with the control lamp on
the da
sh panel, a child restraint system can-
not be mounted on the front passenger seat
for safety reasons. The front passenger front
airbag may deploy during an accident. WARNING
The front passenger front airbag must only be
disabled in special cases.
● Disable and activate the front passenger
front airbag when the ignition is switched off
to avoid damage to the airbag system.
● It is the driver's responsibility to ensure
that the key operated switch is set to the cor-
rect position.
● Only disable the front passenger front air-
bag when a child seat is to be mounted under
exceptional circumstances.
● As soon as the child seat is no longer nee-
ded on the front passenger seat, reconnect
the front passenger front airbag.
● Never leave the key in the airbag deactiva-
tion switch as it could get damaged or acti-
vate or deactivate the airbag during driving. Transporting children safely
Child safety Introduction Please read the information regarding the air-
bag system fully before transporting babies
and children in a child seat or other child re-
straint system installed on the front passen-
ger seat.
This information is extremely important for
driver and passenger safety, particularly that
of babies and children.
SEAT recommends the use of child seats from
the SEAT accessory programme. These child
seats have been designed and tested for use
in SEAT vehicles. You can purchase child
seats with different mountings from a techni-
cal service centre.
Using child restraint systems with a base or
foot
Some child retention systems are secured to
the seat using a base or support leg. For cer-
tain kinds of equipment the use of an addi-
tional accessory will be necessary (e.g. an ac-
cessory for the footwell) to fit the child reten-
tion system correctly and securely.
26
Page 30 of 305
Safety
the safety information included in the follow-
ing chapters:
● Child seats and passenger side airbag
››› page 29, Use of the child seat on the
front passenger seat .
● Safety distance with respect to the passen-
ger airbag ››› in Introduction on page 18.
● Objects between the passenger and the
passenger side airbag ››› in Front airbags
on page 21 .
Gener a
l information on transporting
children in the vehicle Legal regulations and provisions will always
take priority over the descriptions of this in-
struction manual. There are different regula-
tions and provisions for the use of child seats
and their mountings (
›››
table on page 28).
In some countries, for example, the use of
child seats on certain seats in the vehicle
may be forbidden.
The physical principles and the forces acting
on the vehicle in the event of a collision or
other type of accidents also apply to children
››› page 14 . However, unlike adults and
y ou
ngsters, children do not have fully devel-
oped muscle and bone structures. In the
event of an accident, children are subject to a
greater risk than adults of sustaining severe
injuries. Given that children's bodies are not yet fully
developed, child restraint systems must be
used that are especially adapted to their
height, weight and constitution. There are
laws in force in many countries that indicate
the use of approved seat systems for trans-
porting babies and children.
Only used authorised, approved child seats
that are suitable for the vehicle. Always con-
sult with a technical service centre or a speci-
alised workshop should you have any
doubts.
Specific child seat regulations for each
country (selection)
RegulationFurther information
ECE-R 44
a)technical service centre
a)
ECE-R: Economic Comission for Europe Regulation.
Categorisation of child seats according to
ECE-R 44
Weight
catego- ryWeight ofthe childInstallation of the child seat
Group 0up to 10 kgRear-facing. On rear seats,
optionally using the ISOFIX system.
Group 0+up to 13 kg
Group 19 to 18 kgForward-facing. On rear
seats, optionally using the ISOFIX system.
Weight
catego- ryWeight ofthe childInstallation of the child seat
Group 215 to 25 kg
Forward-facing. On the outerrear seats or in the centreseat of the second row of
seats and on all seats in the third row. Optionally with ISOFIX system.
Group 322 to 36 kgForward-facing. Not all children fit in the seat of their weight
group. Nor do all seats adapt to the vehicle.
Therefore, always check whether the child fits
properly in the child seat and whether the
seat can be installed safely in the vehicle.
The rear seats are suitable for child seats
with the
ISOFIX system spec
ially designed
for this type of vehicle in accordance with
regulation ECE-R 44.
Child seats approved under the ECE-R 44 reg-
ulation are fitted with the corresponding ap-
proval symbol. The sign is an upper-case E in
a circle with the identification number below
it. WARNING
In general, the rear seat is always the safest
place for correctly belted in children in the
event of an accident.
● A suitable child seat that is correctly instal-
led and used on one of the rear seats offer 28
Page 31 of 305
Transporting children safely
the most protection possible for babies and
small children in most accidents. Note
Other accessories may be required to fit the
child retention system with a base or foot se- curity and safely. Contact a technical service
centre or specialised workshop.
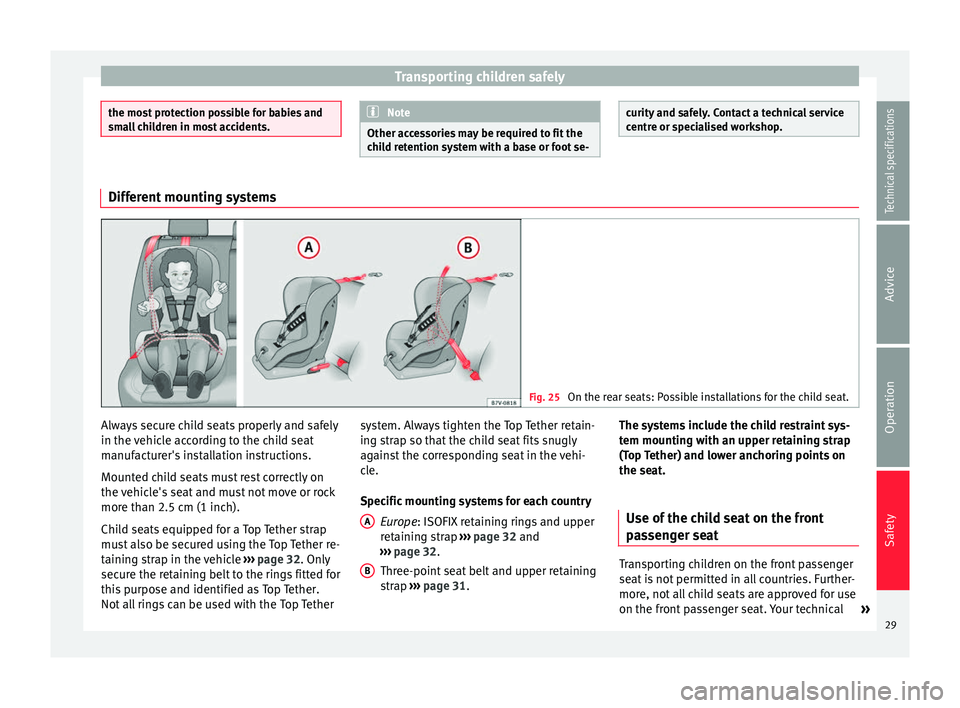
Different mounting systems
Fig. 25
On the rear seats: Possible installations for the child seat. Always secure child seats properly and safely
in the vehicle according to the child seat
manufacturer's installation instructions.
Mounted child seats must rest correctly on
the vehicle's seat and must not move or rock
more than 2.5 cm (1 inch).
Child seats equipped for a Top Tether strap
must also be secured using the Top Tether re-
taining strap in the vehicle
››› page 32. Only
secure the retaining belt to the rings fitted for
this purpose and identified as Top Tether.
Not all rings can be used with the Top Tether system. Always tighten the Top Tether retain-
ing strap so that the child seat fits snugly
against the corresponding seat in the vehi-
cle.
Specific mounting systems for each country
Europe : ISOFIX retaining rings and upper
r et
aining strap ››› page 32 and
››› page 32.
Three-point
seat belt and upper retaining
strap ››› page 31
.
A B The systems include the child restraint sys-
tem mounting with an upper retaining strap
(Top Tether) and lower anchoring points on
the seat.
Use of the child seat on the front
passenger seat Transporting children on the front passenger
seat is not permitted in all countries. Further-
more, not all child seats are approved for use
on the front passenger seat. Your technical
»
29
Technical specifications
Advice
Operation
Safety
Page 32 of 305
Safety
service centre has an updated list of all ap-
proved child seats. Only used child seats that
are approved for each vehicle.
The front airbag on the front passenger side
is highly dangerous for a child. The front pas-
senger seat is life-threatening to a child if he
or she is transported in a rear-facing child
seat.
If a rear-facing child seat is secured to the
front passenger seat, an inflating front airbag
can strike it with such great force that severe
or fatal injuries may result ››› . Therefore,
rear-facing child seats must never be placed
on the fr ont
passenger seat when the front
passenger front airbag is enabled.
Only use a rear-facing child seat on the front
passenger seat if the front passenger front
airbag is disabled. When it is disabled, the
yellow PASSENGER AIR BAG control lamp
on the dash panel will be lit ››› page 20. If
you cannot disable the front passenger front
airbag and it remains activated, it is forbid-
den to transport children on the front pas-
senger seat ››› .
Things to note if using a child seat on the
front passenger seat:
● The front passenger front airbag must be
disabled when using a rear-facing child
seat ››› page 25 .
● The se at
backrest of the front passenger
seat must be upright. ●
The front passenger seat must be moved as
far back as possible.
● The seat backrest of the front passenger
seat must be upright.
● The seat belt height adjustment must be as
high as possible.
Suitable child seats
The child seat must be authorised by the
manufacturer especially for use on a front
passenger seat with a front or side airbag.
If the front passenger seat is equipped with
retaining rings, the child seat can be secured
us
ing an approved retaining system provided
it is approved for this type of vehicle in ac-
cordance with current regulations of the
country in question.
Universal seats for children of groups 0, 0+,
1, 2 or 3 according to the standard ECE-R 44
can be mounted on the front passenger seat
and the rear seats. WARNING
If a child seat is mounted on the front passen-
ger seat, the risk of the child sustaining se-
vere or fatal injuries in the event of an acci-
dent increases. Rear-facing child seats must
never be mounted on the front passenger
seat when the front passenger front airbag is
enabled. This is life-threatening to the child
should the front airbag deploy, as the child seat would be struck by the inflated airbag
and thrown against the seat backrest.
WARNING
If, in exceptional circumstances, a child must
be transported in a rear-facing child seat on
the front passenger seat, strictly observe the
following:
● Always disable the front passenger front
airbag and leave it disabled.
● The child seat must be approved by the
manufacturer for use on a front passenger
seat with front and side airbag.
● Follow the installation instructions of the
child seat manufacturer and observe the
warnings.
● Move the front passenger seat as far back
as possible and adjust it to its highest posi-
tion to keep as far away as possible from the
front airbag.
● Move the seat backrest to the upright posi-
tion.
● The seat belt height adjustment must be as
high as possible.
● Children must always be protected with an
approved child restraint system suited to
their height and weight. Use of the child seat on the rear seat
If a child seat is mounted on the rear seat,
adapt the position of the front passenger
30
Page 36 of 305
Safety
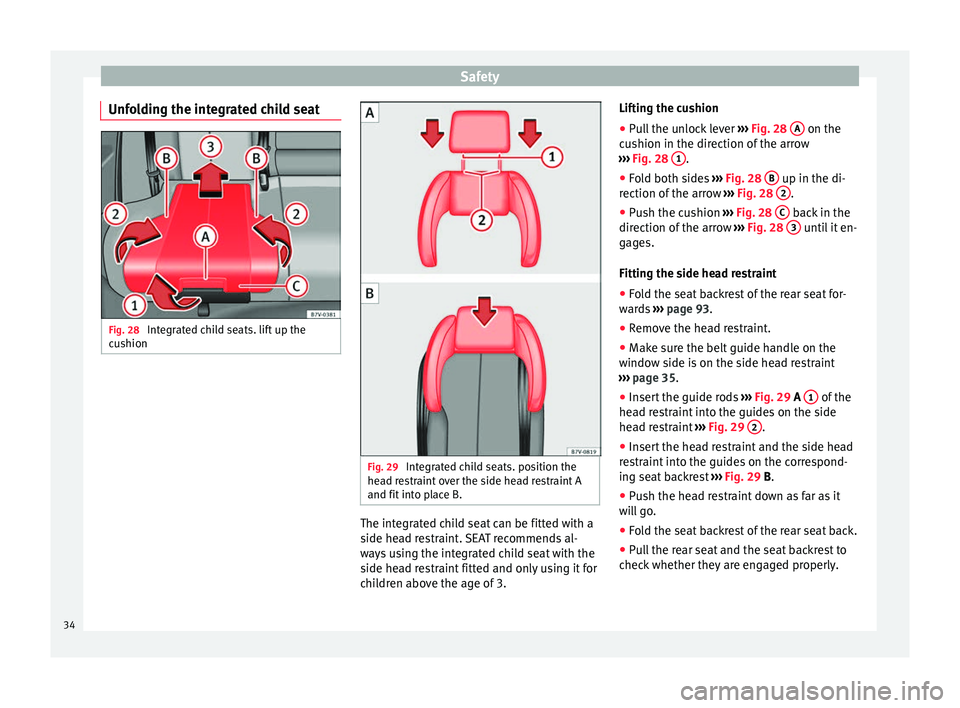
Unfolding the integrated child seat Fig. 28
Integrated child seats. lift up the
cushion Fig. 29
Integrated child seats. position the
head restraint over the side head restraint A
and fit into place B. The integrated child seat can be fitted with a
side head restraint. SEAT recommends al-
ways using the integrated child seat with the
side head restraint fitted and only using it for
children above the age of 3.Lifting the cushion
● Pull the unlock lever ››› Fig. 28 A on the
cushion in the direction of the arrow
››› Fig. 28 1 .
● Fold both sides ››› Fig. 28 B up in the di-
rection of the arrow ››› Fig. 28 2 .
● Push the cushion ››› Fig. 28 C back in the
direction of the arrow ››› Fig. 28 3 until it en-
gages.
Fitting the side head restraint
● Fold the seat backrest of the rear seat for-
wards ››› page 93 .
● Remo
ve the head restraint.
● Make sure the belt guide handle on the
window side is on the side head restraint
››› page 35.
● Inser
t the guide rods ››› Fig. 29 A 1 of the
head restraint into the guides on the side
head restraint ››› Fig. 29 2 .
● Insert the head restraint and the side head
restraint into the guides on the correspond-
ing seat backrest ››› Fig. 29
B
.
● Push the head restraint down as far as it
will go.
● Fold the seat backrest of the rear seat back.
● Pull the rear seat and the seat backrest to
check whether they are engaged properly.
34
Page 42 of 305
Operation
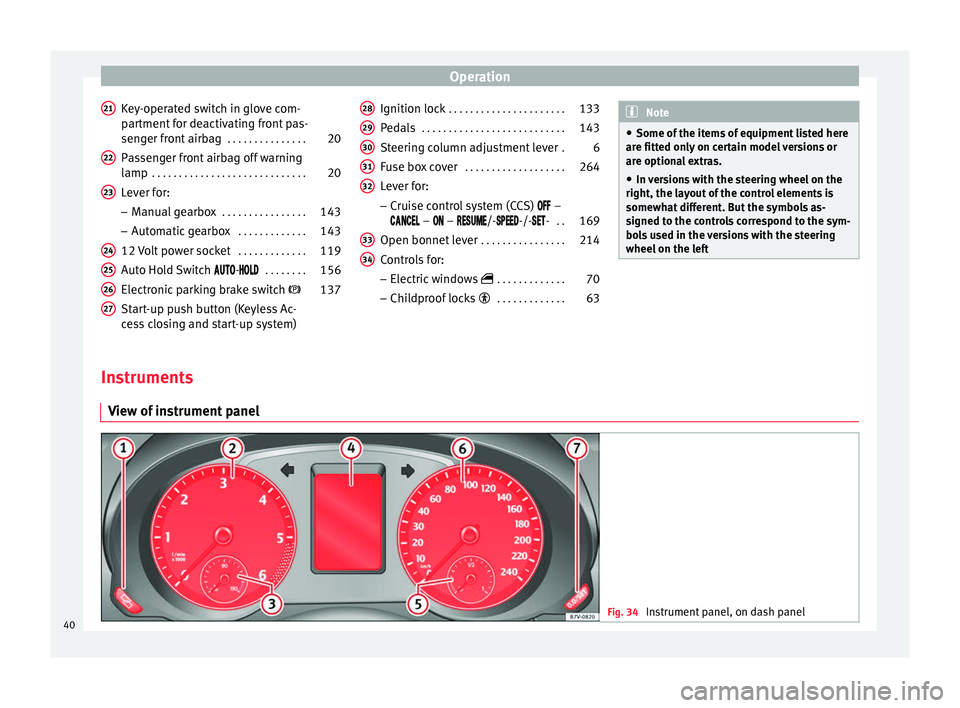
Key-operated switch in glove com-
partment for deactivating front pas-
senger front airbag . . . . . . . . . . . . . . .20
Passenger front airbag off warning
lamp . . . . . . . . . . . . . . . . . . . . . . . . . . . . . 20
Lever for:
– Manual gearbox . . . . . . . . . . . . . . . . 143
– Automatic gearbox . . . . . . . . . . . . .143
12 Volt power socket . . . . . . . . . . . . .119
Auto Hold Switch
- . . . . . . . . 156
Electronic parking brake switch 137
Start-up push button (Keyless Ac-
cess closing and start-up system)
21 22
23
24
25
26
27 Ignition lock
. . . . . . . . . . . . . . . . . . . . . . 133
Pedals . . . . . . . . . . . . . . . . . . . . . . . . . . . 143
Steering column adjustment lever .6
Fuse box cover . . . . . . . . . . . . . . . . . . . 264
Lever for:
– Cruise control system (CCS) –
– – /--/-- . . 169
Open bonnet lever . . . . . . . . . . . . . . . . 214
Controls for:
– Electric windows . . . . . . . . . . . . . 70
– Childproof locks . . . . . . . . . . . . . 63
28 29
30
31
32
33
34 Note
● Some of the items of equipment listed here
are fitted only on certain model versions or
are optional extras.
● In versions with the steering wheel on the
right, the layout of the control elements is
somewhat different. But the symbols as-
signed to the controls correspond to the sym-
bols used in the versions with the steering
wheel on the left Instruments
View of instrument panel Fig. 34
Instrument panel, on dash panel40
Page 44 of 305
Operation
( ››› page 45 ) and, in some cases, with audi-
b l
e warnings. The display may vary according
to the type of instrument panel fitted.
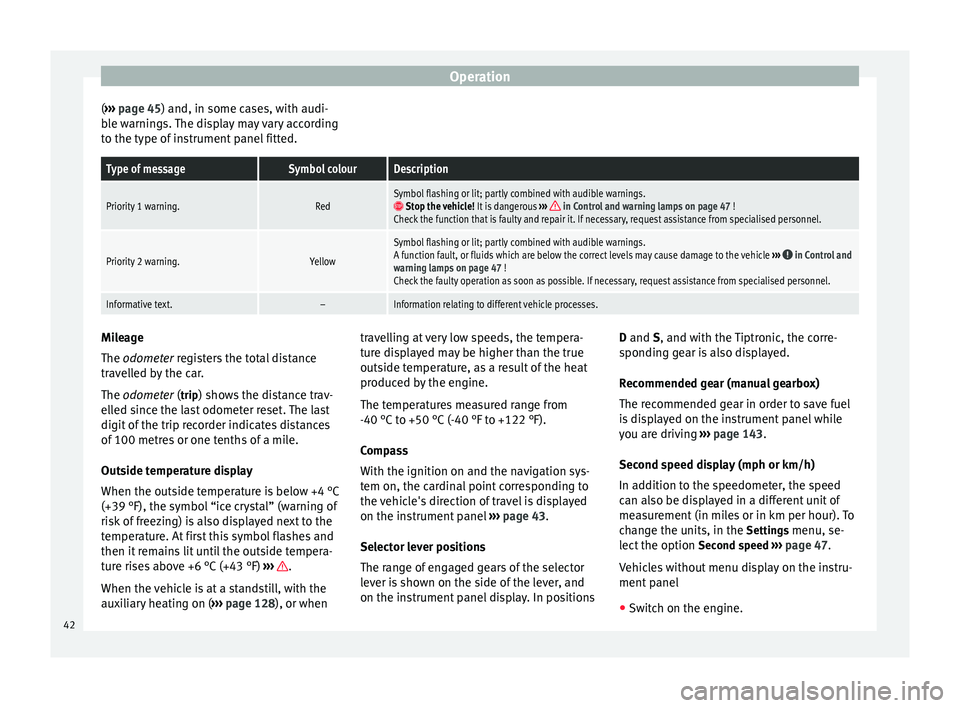
Type of messageSymbol colourDescription
Priority 1 warning.RedSymbol flashing or lit; partly combined with audible warnings. Stop the vehicle! It is dangerous ››› in Control and warning lamps on page 47 !
Check the function that is faulty and repair it. If necessary, request assistance from specialised personnel.
Priority 2 warning.Yellow
Symbol flashing or lit; partly combined with audible warnings.
A function fault, or fluids which are below the correct levels may cause damage to the vehicle ››› in Control and
warning lamps on page 47 !
Check the faulty operation as soon as possible. If necessary, request assistance from specialised personnel.
Informative text.–Information relating to different vehicle processes. Mileage
The
odometer
registers the total distance
tr
avelled by the car.
The
odometer (trip) shows the distance trav-
elled since the last odometer reset. The last
digit of the trip recorder indicates distances
of 100 metres or one tenths of a mile.
Outside temperature display
When the outside temperature is below +4 °C
(+39 °F), the symbol “ice crystal” (warning of
risk of freezing) is also displayed next to the
temperature. At first this symbol flashes and
then it remains lit until the outside tempera-
ture rises above +6 °C (+43 °F) ››› .
When the vehicle is at a standstill, with the
auxiliary heating on ( ››› page 128), or when travelling at very low speeds, the tempera-
ture displayed may be higher than the true
outside temperature, as a result of the heat
produced by the engine.
The temperatures measured range from
-40 °C to +50 °C (-40 °F to +122 °F).
Compass
With the ignition on and the navigation sys-
tem on, the cardinal point corresponding to
the vehicle's direction of travel is displayed
on the instrument panel
››› page 43.
Selector lever positions
The range of engaged gears of the selector
lever is shown on the side of the lever, and
on the instrument panel display. In positions D
and
S
, and with the Tiptronic, the corre-
sponding gear is also displayed.
Recommended gear (manual gearbox)
The recommended gear in order to save fuel
is displayed on the instrument panel while
you are driving ››› page 143
.
Second speed display (mph or km/h)
In addition to the speedometer, the speed
can also be displayed in a different unit of
measurement (in miles or in km per hour). To
change the units, in the Settings menu, se-
lect the option Second speed ››› page 47.
Vehicles without menu display on the instru-
ment panel
● Switch on the engine.
42
Page 45 of 305
Cockpit
● Press button three times. The odometer
display flashes on the instrument panel dis-
play.
● Press button 0.0 / SET once. “mph”
or “km/h” is displayed briefly instead of the
odometer.
● This activates the second speed display. To
switch it off, repeat the procedure.
This option cannot be deactivated in models
destined for countries in which the second
speed must always be visible.
Start-Stop operating display.
Updated information relating to the status is
displayed on the instrument panel
››› page 156 . WARNING
Observe the safety warnings ››› in Control
and warning lamps on page 47. WARNING
Even though outside temperatures are above
freezing, some roads and bridges may be icy.
● At outside temperatures above +4°C
(+39°F), even when the “ice crystal symbol”
is not visible, there may still be patches of ice
on the road.
● Never rely on the outside temperature indi-
cator! Note
● Different versions of the instrument panel
are available and therefore the versions and
instructions on the display may vary. In the
case of displays without warning or informa-
tion texts, faults are indicated exclusively by
the warning lamps.
● When several warnings are active at the
same time, the symbols are shown succes-
sively for a few seconds and will stay on until
the fault is rectified. Compass*
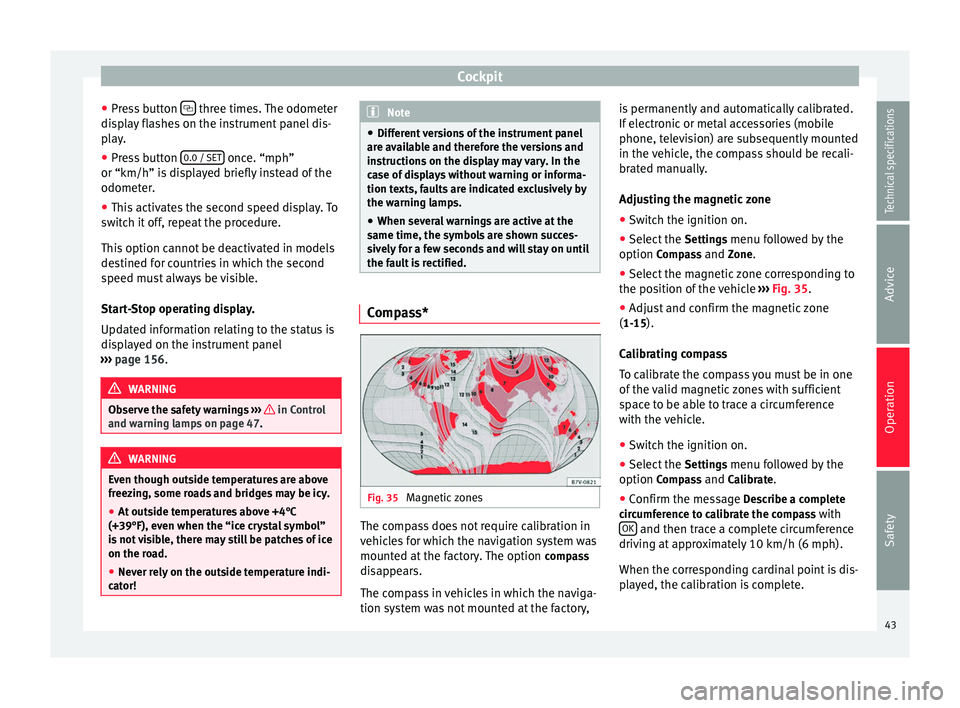
Fig. 35
Magnetic zones The compass does not require calibration in
vehicles for which the navigation system was
mounted at the factory. The option
compass
disappears.
The compass in vehicles in which the naviga-
tion system was not mounted at the factory, is permanently and automatically calibrated.
If electronic or metal accessories (mobile
phone, television) are subsequently mounted
in the vehicle, the compass should be recali-
brated manually.
Adjusting the magnetic zone
● Switch the ignition on.
● Select the Settings menu followed by the
option Compass and Zone.
● Sel ect
the magnetic zone corresponding to
the position of the vehicle ››› Fig. 35.
● Adjus
t and confirm the magnetic zone
(1-15).
Calibrating compass
To calibrate the compass you must be in one
of the valid magnetic zones with sufficient
space to be able to trace a circumference
with the vehicle.
● Switch the ignition on.
● Select the Settings menu followed by the
option Compass and Calibrate.
● Confirm the message Describe a complete
circumference to calibrate the compass with OK and then trace a complete circumference
driving at approximately 10 km/h (6 mph).
When the corresponding cardinal point is dis-
played, the calibration is complete.
43
Technical specifications
Advice
Operation
Safety