technical data Seat Altea 2010 Service Manual
[x] Cancel search | Manufacturer: SEAT, Model Year: 2010, Model line: Altea, Model: Seat Altea 2010Pages: 310, PDF Size: 7.46 MB
Page 85 of 310
Cockpit83
Safety First
Operating instructions
Practical tips
Technical Data
•The wheel on one axle is changed.
Tyre pressure adjustment
Following the modification to tyre pressure or after changing one or more
wheels, the button ⇒page 82, fig. 50 must be kept pressed while the igni-
tion is on until an acoustic signal is heard and the warning lamp goes out.
If the wheels are under excessive load (for example, driving with a trailer or
heavy load), the tire pressure must be increased to the recommended value
for a full load (see the sticker on the inside of the fuel flap). If the tyre monitor
system button is pressed down, the new tyre pressures are confirmed.
The tyre pressure monitor indicator
lights up
If the tyre pressure of one or more wheels is much lower than the value set by
the driver, then the tyre control warning lamp lights up ⇒.
The tyre pressure monitor indicator flashes
If the tyre pressure indicator flashes, this indicates a fault. Go to the nearest
specialist workshop.
WARNING
•When the tyre pressure indicator lights, reduce speed immediately and
avoid any sudden manoeuvre or braking. Stop when possible, and check
the tyre pressure and status.•The driver is responsible for correct tyre pressure. For this reason, tyre
pressure must be regularly checked.•Under certain circumstances (for example, in a sports situation, in
winter conditions or on a dirt track) the tyre monitor indicator may light or
function incorrectly.Note
If the battery is disconnected, the yellow indicator
lights up after turning
the ignition on. This should turn off after a brief journey.
Brake system* / handbrake
The warning lamp lights up if the handbrake is applied, if the
brake fluid level falls too low or if there is a fault in the brake
system.
This warning lamp
lights up if
•If the handbrake is on.
If you drive faster than 6 km/h with the handbrake on, the following message
will appear on the dash panel display
14): HANDBRAKE ON. Also, an audible
warning is given.
•If the brake fluid level is too low ⇒page 239.
The dash panel displays the following message
14): STOP BRAKE FLUID
INSTRUCTION MANUAL .
•If there is a fault in the brake system.
The dash panel displays the following message
14): BRAKE SYSTEM FAULT
INSTRUCTIONS MANUAL .
This warning lamp can light up together with the anti-lock brake system
warning lamp.
WARNING
•Before opening the bonnet, read and observe the warnings on
⇒ page 226.•If the brake warning lamp does not go out, or if it lights up when
driving, the brake fluid level ⇒page 239, “Brake fluid” in the reservoir is
too low. Risk of accident. Stop the vehicle and do not drive on. Obtain tech-
nical assistance.
14)Depending on the version of the model.
altea_EN Seite 83 Mittwoch, 26. August 2009 6:00 18
Page 87 of 310
Cockpit85
Safety First
Operating instructions
Practical tips
Technical Data
The warning lamp should light up for a few seconds when the ignition is
switched on. It should go out once the engine is started.
If the battery is disconnected, the indicator remains lit, even with the engine
running. The warning light only goes off after a distance of approx. 50 m.
There is a fault in the electromechanical steering system if the lamp does not
go out or lights up whilst the vehicle is in motion. The indicator may appear
in two different colours to indicate faults. If it lights yellow, this indicates a
minor fault. If it lights red, seek workshop assistance immediately, if no
assistance is available stop driving. Stop the vehicle and seek technical
assistance. The power steering does not work if the battery is flat or if the
engine is off (for example, for towing). You should take into account that you
will need considerably more power than normal to steer the vehicle if the
steering assistance is reduced or has failed completely.
For those vehicles fitted with ESP* the function “Recommended steering
manoeuvre” is included. See
⇒page 195.
Emission control system*
This warning lamp monitors the exhaust system.
Warning lamp
flashes:
When there is misfiring that can damage the catalytic converter. Reduce
speed and drive carefully to the nearest qualified workshop to have the
engine checked.
The dash panel displays the following message
17): EXHAUST GAS SEE
WORKSHOP . Warning lamp
is lit:
If a fault has developed during driving which has reduced the quality of the
exhaust gas (e.g. lambda probe fault). Reduce speed and drive carefully to
the nearest qualified workshop to have the engine checked.
The following information text displayed in the dash panel display : EXHAUST
GAS SEE WORKSHOP .
Electronic stabilisation programme (ESP)*
This warning lamp monitors the electronic stabilisation
programme.
This programme includes the ABS, EDL and TCS. This also includes the brake
assist system (BAS), automatic cleaning of the brake discs and the trailer
stability programme (TSP).
The warning lamp
has the following functions:
•It will light for about 2 seconds when the ignition is switched on while a
test of the function is carried out.•It flashes when the ESP is activated when driving.•It will light up continuously if there is a malfunction in the ESP.•It will also come on if a fault should occur in the ABS because the ESP
operates in conjunction with the ABS.
If the ESP warning lamp
lights up and stays on after the engine is started,
this may mean that the control system has temporarily switched off the ESP.
In this case the ESP can be reactivated by switching the ignition off and then
on again. If the warning lamp goes out, this means the system is fully func-
tional.
If the ESP button is activated, the TCS function deactivates and the warning
lamp flashes.
17)Depending on the version of the model.
altea_EN Seite 85 Mittwoch, 26. August 2009 6:00 18
Page 89 of 310
Steering wheel controls87
Safety First
Operating instructions
Practical tips
Technical Data
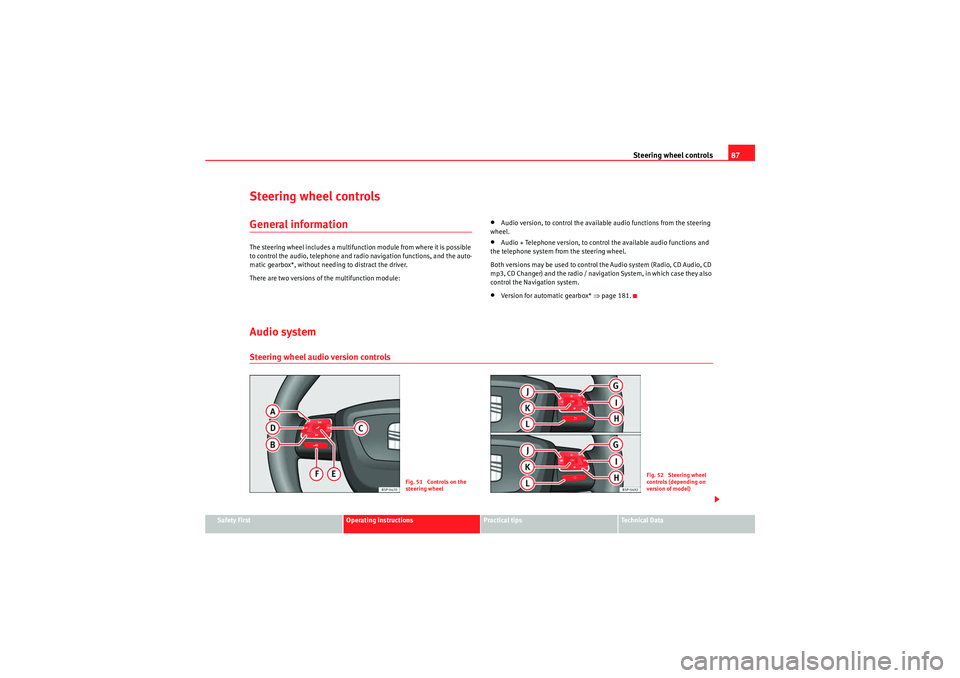
Steering wheel controlsGeneral informationThe steering wheel includes a multifunction module from where it is possible
to control the audio, telephone and radio navigation functions, and the auto-
matic gearbox*, without needing to distract the driver.
There are two versions of the multifunction module:
•Audio version, to control the available audio functions from the steering
wheel.•Audio + Telephone version, to control the available audio functions and
the telephone system from the steering wheel.
Both versions may be used to control the Audio system (Radio, CD Audio, CD
mp3, CD Changer) and the radio / navigation System, in which case they also
control the Navigation system.•Version for automatic gearbox* ⇒page 181.
Audio systemSteering wheel audio version controls
Fig. 51 Controls on the
steering wheel
Fig. 52 Steering wheel
controls (depending on
version of model)
altea_EN Seite 87 Mittwoch, 26. August 2009 6:00 18
Page 91 of 310
Steering wheel controls89
Safety First
Operating instructions
Practical tips
Technical Data
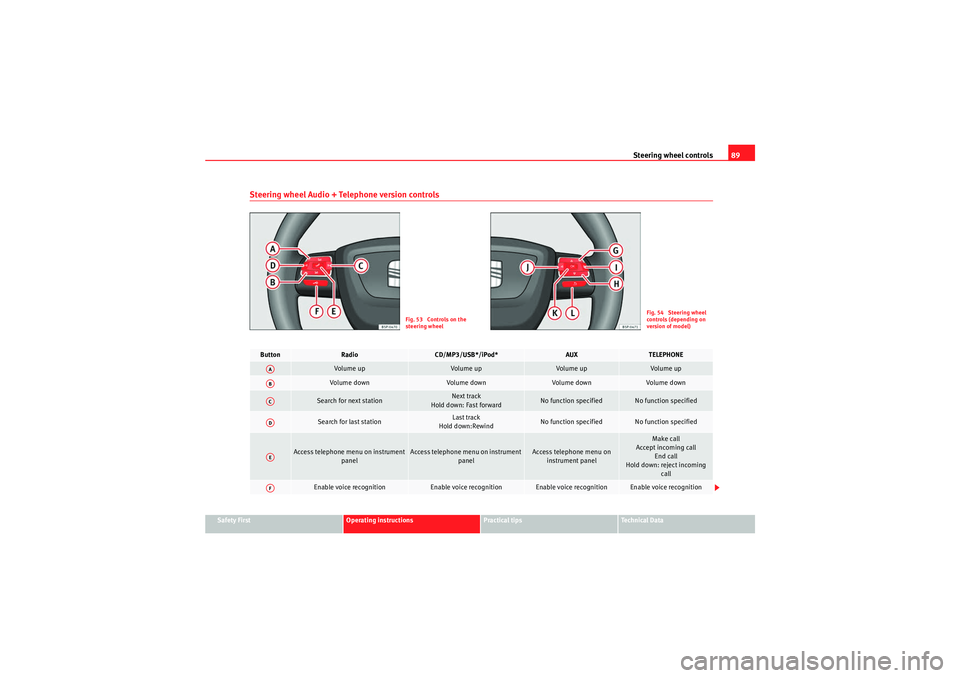
Steering wheel Audio + Telephone version controls
Fig. 53 Controls on the
steering wheel
Fig. 54 Steering wheel
controls (depending on
version of model)
Button
Radio
CD/MP3/USB*/iPod*
AUX
TELEPHONE
Volume up
Volume up
Volume up
Volume up
Vol um e d own
Volume down
Volume down
Volume down
Search for next station
Next track
Hold down: Fast forward
No function specified
No function specified
Search for last station
Last track
Hold down:Rewind
No function specified
No function specified
Access telephone menu on instrument panel
Access telephone menu on instrument panel
Access telephone menu on instrument panel
Make call
Accept incoming call End call
Hold down: reject incoming call
Enable voice recognition
Enable voice recognition
Enable voice recognition
Enable voice recognition
AAABACADAEAF
altea_EN Seite 89 Mittwoch, 26. August 2009 6:00 18
Page 93 of 310
Steering wheel controls91
Safety First
Operating instructions
Practical tips
Technical Data
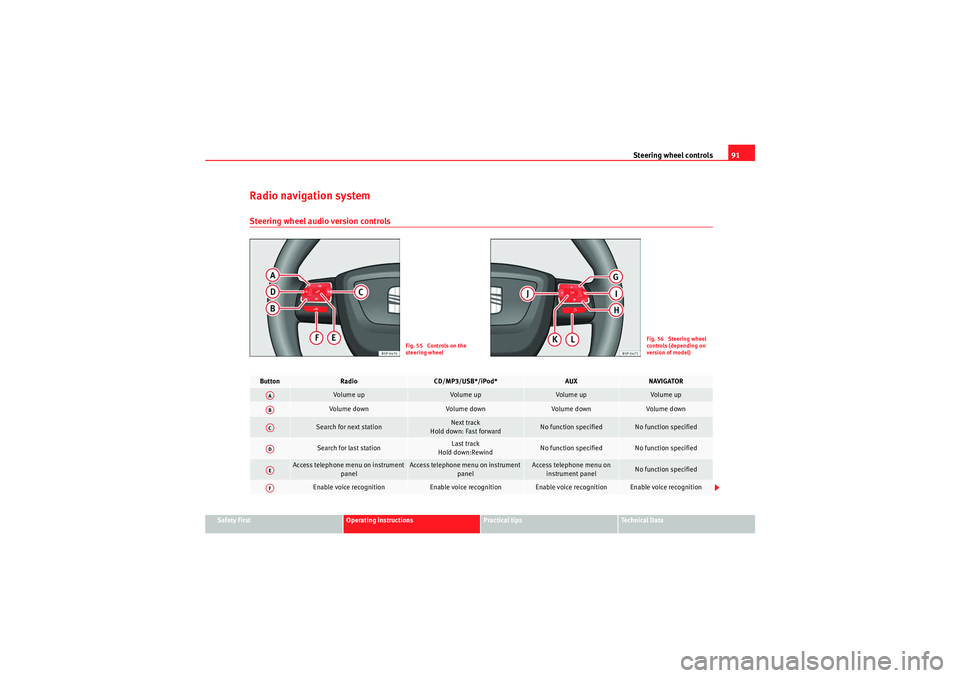
Radio navigation systemSteering wheel audio version controls
Fig. 55 Controls on the
steering wheel
Fig. 56 Steering wheel
controls (depending on
version of model)
Button
Radio
CD/MP3/USB*/iPod*
AUX
NAVIGATOR
Vol um e u p
Volume up
Volume up
Volume up
Volume down
Vol um e d own
Volume down
Volume down
Search for next station
Next track
Hold down: Fast forward
No function specified
No function specified
Search for last station
Last track
Hold down:Rewind
No function specified
No function specified
Access telephone menu on instrument panel
Access telephone menu on instrument panel
Access telephone menu on instrument panel
No function specified
Enable voice recognition
Enable voice recognition
Enable voice recognition
Enable voice recognition
AAABACADAEAF
altea_EN Seite 91 Mittwoch, 26. August 2009 6:00 18
Page 95 of 310
Steering wheel controls93
Safety First
Operating instructions
Practical tips
Technical Data
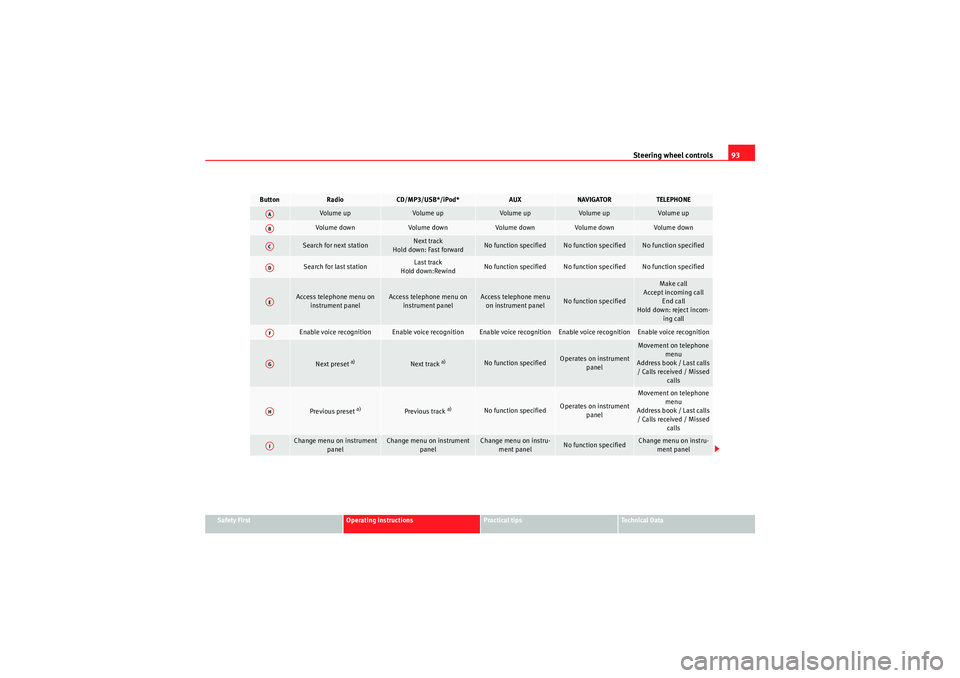
Button
Radio
CD/MP3/USB*/iPod*
AUX
NAVIGATOR
TELEPHONE
Volume up
Volume up
Volume up
Volume up
Volume up
Volume down
Volume down
Volume down
Volume down
Volume down
Search for next station
Next track
Hold down: Fast forward
No function specified
No function specified
No function specified
Search for last station
Last track
Hold down:Rewind
No function specified
No function specified
No function specified
Access telephone menu on instrument panel
Access telephone menu on instrument panel
Access telephone menu on instrument panel
No function specified
Make call
Accept incoming call End call
Hold down: reject incom- ing call
Enable voice recognition
Enable voice recognition
Enable voice recognition
Enable voice recognition
Enable voice recognition
Next preset
a)
Next track
a)
No function specified
Operates on instrument panel
Movement on telephone menu
Address book / Last calls / Calls received / Missed calls
Previous preset
a)
Previous track
a)
No function specified
Operates on instrument panel
Movement on telephone
menu
Address book / Last calls / Calls received / Missed calls
Change menu on instrument panel
Change menu on instrument panel
Change menu on instru-ment panel
No function specified
Change menu on instru-ment panel
AAABACADAEAFAGAHAI
altea_EN Seite 93 Mittwoch, 26. August 2009 6:00 18
Page 97 of 310
Unlocking and locking95
Safety First
Operating instructions
Practical tips
Technical Data
Unlocking and lockingCe n t ra l l o cki n gBasic functions
The central locking system enables you to lock and unlock all
doors with just pushing on the key button.Description
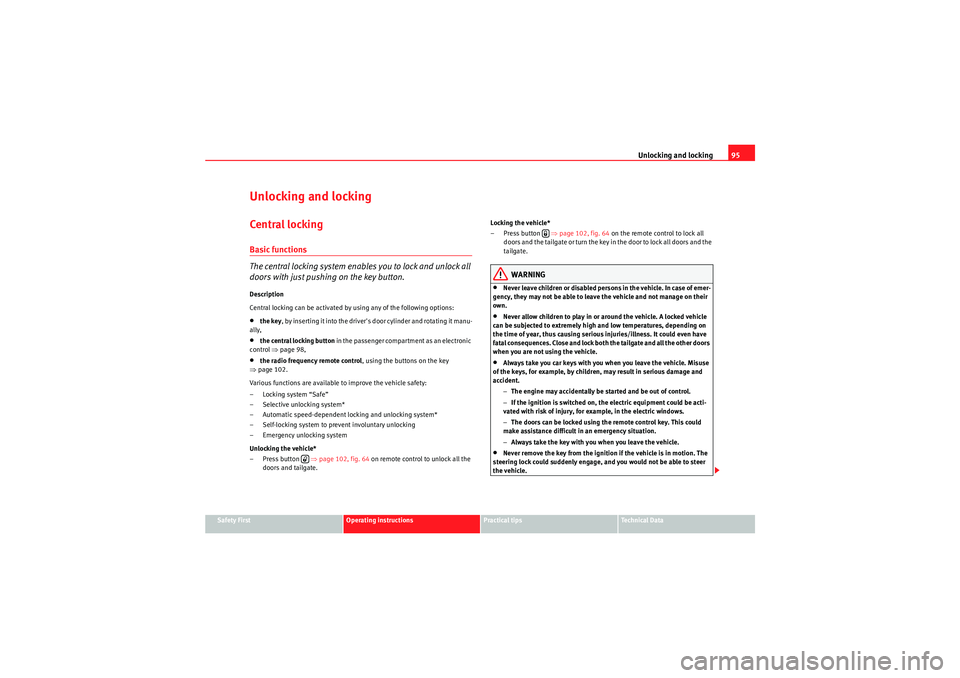
Central locking can be activated by using any of the following options:•the key, by inserting it into the driver's door cylinder and rotating it manu-
ally,•the central locking button in the passenger compartment as an electronic
control ⇒page 98,•the radio frequency remote control , using the buttons on the key
⇒ page 102.
Various functions are available to improve the vehicle safety:
– Locking system “Safe”
– Selective unlocking system*
– Automatic speed-dependent locking and unlocking system*
– Self-locking system to prevent involuntary unlocking
– Emergency unlocking system
Unlocking the vehicle*
– Press button ⇒page 102, fig. 64 on remote control to unlock all the
doors and tailgate. Locking the vehicle*
–Press button ⇒
page 102, fig. 64 on the remote control to lock all
doors and the tailgate or turn the key in the door to lock all doors and the
tailgate.
WARNING
•Never leave children or disabled persons in the vehicle. In case of emer-
gency, they may not be able to leave the vehicle and not manage on their
own.•Never allow children to play in or around the vehicle. A locked vehicle
can be subjected to extremely high and low temperatures, depending on
the time of year, thus causing serious injuries/illness. It could even have
fatal consequences. Close and lock both the tailgate and all the other doors
when you are not using the vehicle.•Always take you car keys with you when you leave the vehicle. Misuse
of the keys, for example, by children, may result in serious damage and
accident.
−The engine may accidentally be started and be out of control.
− If the ignition is switched on, the electric equipment could be acti-
vated with risk of injury, for example, in the electric windows.
− The doors can be locked using the remote control key. This could
make assistance difficult in an emergency situation.
− Always take the key with you when you leave the vehicle.•Never remove the key from the ignition if the vehicle is in motion. The
steering lock could suddenly engage, and you would not be able to steer
the vehicle.
altea_EN Seite 95 Mittwoch, 26. August 2009 6:00 18
Page 99 of 310
Unlocking and locking97
Safety First
Operating instructions
Practical tips
Technical Data
Unlocking all doors and the boot
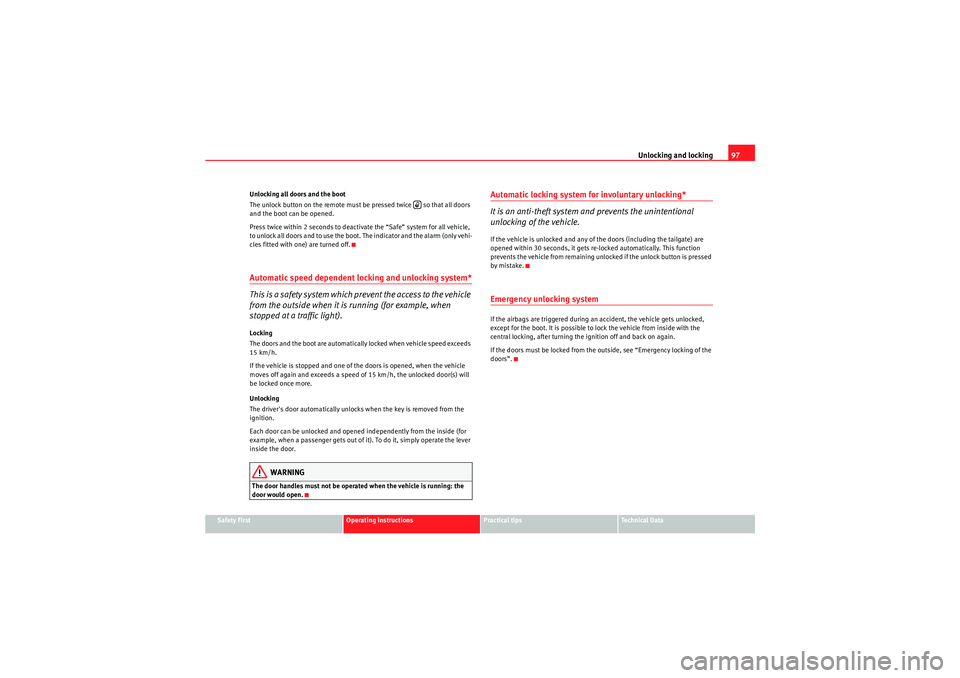
The unlock button on the remote must be pressed twice so that all doors
and the boot can be opened.
Press twice within 2 seconds to deactivate the “Safe” system for all vehicle,
to unlock all doors and to use the boot. The indicator and the alarm (only vehi-
cles fitted with one) are turned off.
Automatic speed dependent locking and unlocking system*
This is a safety system which prevent the access to the vehicle
from the outside when it is running (for example, when
stopped at a traffic light).Locking
The doors and the boot are automatically locked when vehicle speed exceeds
15 km/h.
If the vehicle is stopped and one of the doors is opened, when the vehicle
moves off again and exceeds a speed of 15 km/h, the unlocked door(s) will
be locked once more.
Unlocking
The driver's door automatically unlocks when the key is removed from the
ignition.
Each door can be unlocked and opened independently from the inside (for
example, when a passenger gets out of it). To do it, simply operate the lever
inside the door.
WARNING
The door handles must not be operated when the vehicle is running: the
door would open.
Automatic locking system for involuntary unlocking*
It is an anti-theft system and prevents the unintentional
unlocking of the vehicle.If the vehicle is unlocked and any of the doors (including the tailgate) are
opened within 30 seconds, it gets re-locked automatically. This function
prevents the vehicle from remaining unlocked if the unlock button is pressed
by mistake.Emergency unlocking systemIf the airbags are triggered during an accident, the vehicle gets unlocked,
except for the boot. It is possible to lock the vehicle from inside with the
central locking, after turning the ignition off and back on again.
If the doors must be locked from the outside, see “Emergency locking of the
doors”.
altea_EN Seite 97 Mittwoch, 26. August 2009 6:00 18
Page 101 of 310
Unlocking and locking99
Safety First
Operating instructions
Practical tips
Technical Data
Deactivating selective unlocking
With the driver's door open, turn the key to lock for approx. 3 s.
The indicator lamps flash to confirm activation or deactivation.
Activation of automatic locking
Press the lock button on the central locking button for 3 seconds.
Deactivation of automatic locking
Press the unlock button on the central locking button for 3 seconds.
The lock button lamp flashes to confirm activation or deactivation.
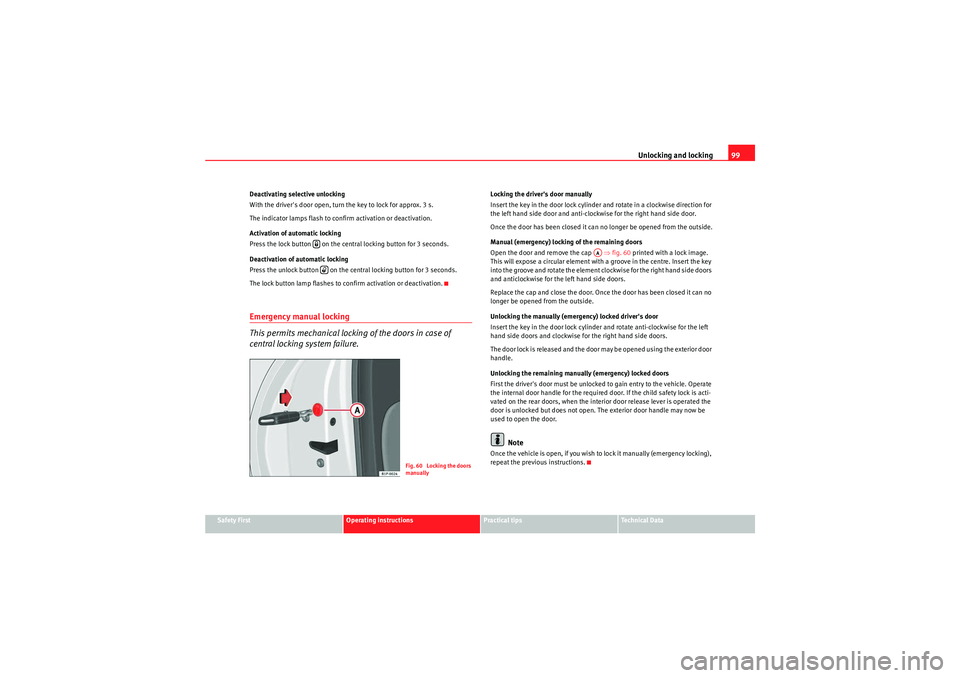
Emergency manual locking
This permits mechanical locking of the doors in case of
central locking system failure.
Locking the driver's door manually
Insert the key in the door lock cylinder and rotate in a clockwise direction for
the left hand side door and anti-clockwise for the right hand side door.
Once the door has been closed it can no longer be opened from the outside.
Manual (emergency) locking of the remaining doors
Open the door and remove the cap
⇒fig. 60 printed with a lock image.
This will expose a circular element with a groove in the centre. Insert the key
into the groove and rotate the element clockwise for the right hand side doors
and anticlockwise for the left hand side doors.
Replace the cap and close the door. Once the door has been closed it can no
longer be opened from the outside.
Unlocking the manually (emergency) locked driver's door
Insert the key in the door lock cylinder and rotate anti-clockwise for the left
hand side doors and clockwise for the right hand side doors.
The door lock is released and the door may be opened using the exterior door
handle.
Unlocking the remaining manually (emergency) locked doors
First the driver's door must be unlocked to gain entry to the vehicle. Operate
the internal door handle for the required door. If the child safety lock is acti-
vated on the rear doors, when the interior door release lever is operated the
door is unlocked but does not open. The exterior door handle may now be
used to open the door.
Note
Once the vehicle is open, if you wish to lock it manually (emergency locking),
repeat the previous instructions.
Fig. 60 Locking the doors
manually
AA
altea_EN Seite 99 Mittwoch, 26. August 2009 6:00 18
Page 103 of 310
Unlocking and locking101
Safety First
Operating instructions
Practical tips
Technical Data
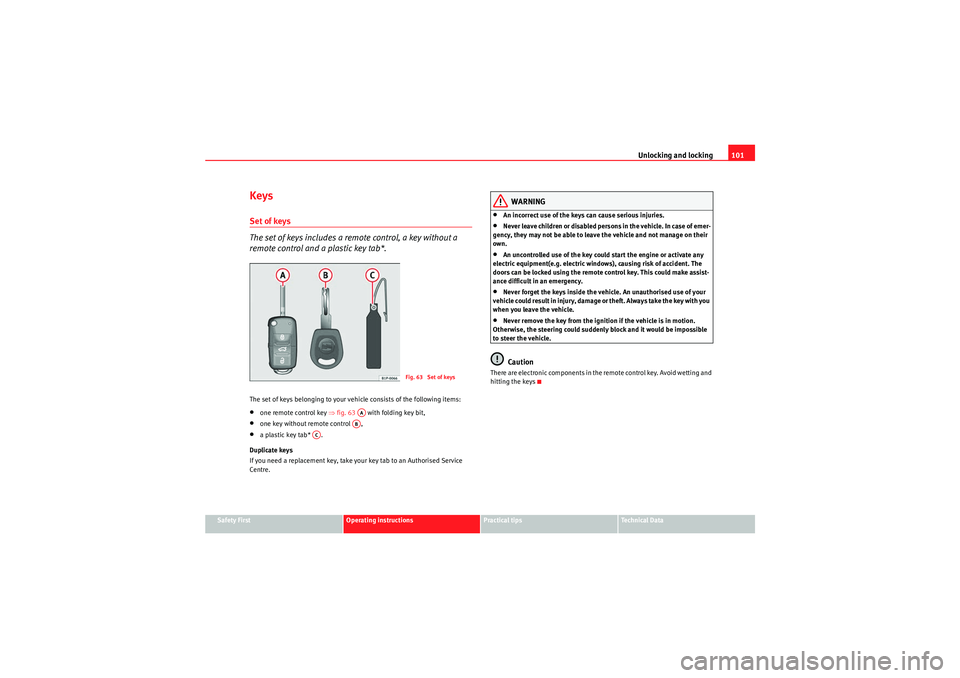
KeysSet of keys
The set of keys includes a remote control, a key without a
remote control and a plastic key tab*.The set of keys belonging to your vehicle consists of the following items:•one remote control key ⇒fig. 63 with folding key bit,•one key without remote control ,•a plastic key tab* .
Duplicate keys
If you need a replacement key, take your key tab to an Authorised Service
Centre.
WARNING
•An incorrect use of the keys can cause serious injuries.•Never leave children or disabled persons in the vehicle. In case of emer-
gency, they may not be able to leave the vehicle and not manage on their
own.•An uncontrolled use of the key could start the engine or activate any
electric equipment(e.g. electric windows), causing risk of accident. The
doors can be locked using the remote control key. This could make assist-
ance difficult in an emergency.•Never forget the keys inside the vehicle. An unauthorised use of your
vehicle could result in injury, damage or theft. Always take the key with you
when you leave the vehicle.•Never remove the key from the ignition if the vehicle is in motion.
Otherwise, the steering could suddenly block and it would be impossible
to steer the vehicle.Caution
There are electronic components in the remote control key. Avoid wetting and
hitting the keys
Fig. 63 Set of keys
AAAB
AC
altea_EN Seite 101 Mittwoch, 26. August 2009 6:00 18