buttons Seat Toledo 2008 RADIO-NAVIGATION
[x] Cancel search | Manufacturer: SEAT, Model Year: 2008, Model line: Toledo, Model: Seat Toledo 2008Pages: 96, PDF Size: 3.72 MB
Page 17 of 96
RADIO function selection button
16
– Press the function button and in the pop-up window that opens press ⇒page 15, fig. 8 to view a list of all
currently receivable stations on the FM frequency band. The list
“jumps” straight to the position of the station you are currently
listening to ⇒ page 15, fig. 9 “Radio 2”.
– Alternatively, you can open the FM station list by turning the setting knob ⇒page 3, fig. 1 if in the RADIO main menu the
station buttons are currently not displayed ⇒page 19,
“Switching the station button display on and off”.
Selecting stations from the FM station list
– When you have opened the FM station list, turn the setting knob ⇒page 3, fig. 1 to mark the desired station.
– To call up the marked station, press the setting knob.
– Alternatively, you can search the list by dragging the scroll marker up or down ⇒ page 10, “Moving the scroll marker on the
screen”.
– You can call up a station by pressing its name on the screen.
– Press the button at the bottom right of the unit ⇒page 3,
fig. 1 to close the FM station list.The FM station list view closes automati cally after one minute of inactivity.
By pressing the ⇒page 15, fig. 9 button, you can store the currently
marked station in the station list to one of the “station buttons”. For details
of how to use the “station buttons”, please see ⇒page 19, “Storing radio
stations to “station buttons””. The unit regularly executes a search to check what stations can be received
and updates the FM station list accordingly. The FM station list can only be
updated when it is closed.
No station list is availabl
e for the AM frequency band.
Note
In vehicles with a window aerial, the reception could be impaired if foil or
metal-coated stickers are attached to the windows.
Band
FM/List
A10
A10
A8
Store
media_system_ingles.book Seite 16 Donnerstag, 5. Februar 2009 3:31 15
Page 18 of 96
RADIO function selection button17
Scan function
When the scan function is running, all stations with a strong
reception are played in sequence for 5 seconds each.
Open the RADIO main menu and select a frequency band
⇒ page 14.
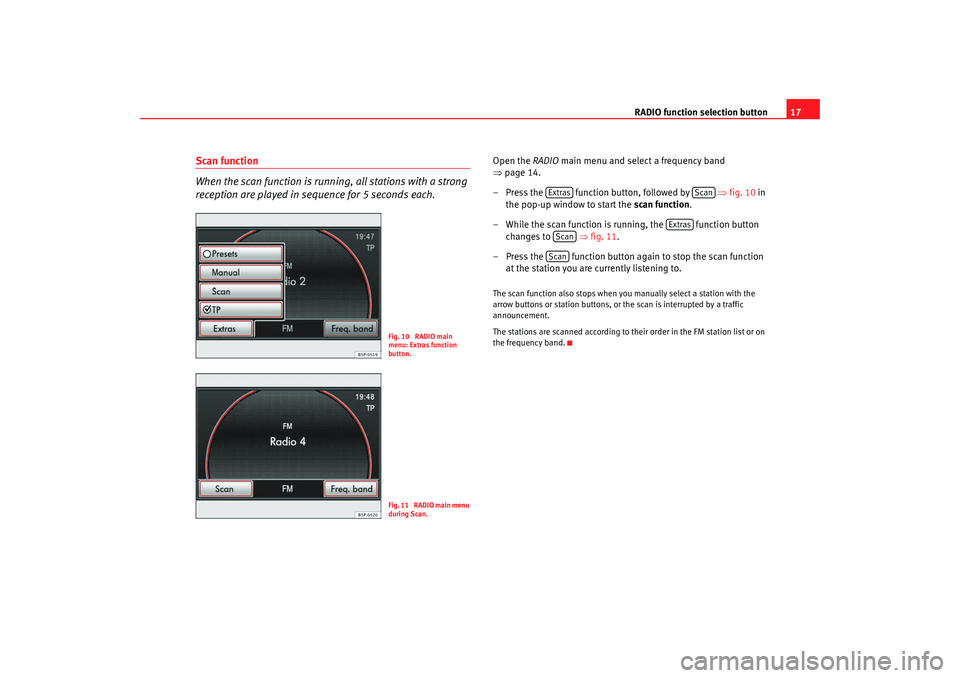
– Press the function button, followed by ⇒fig. 10 in
the pop-up window to start the scan function.
– While the scan function is running, the function button changes to ⇒fig. 11 .
– Press the function button again to stop the scan function at the station you are currently listening to.The scan function also stops when y ou manually select a station with the
arrow buttons or station buttons, or the scan is interrupted by a traffic
announcement.
The stations are scanned according to their order in the FM station list or on
the frequency band.
Fig. 10 RADIO main
menu: Extras function
button.Fig. 11 RADIO main menu
during Scan.
Extras
Scan
Extras
ScanScan
media_system_ingles.book Seite 17 Donnerstag, 5. Februar 2009 3:31 15
Page 19 of 96
RADIO function selection button
18Tuning to radio stations manually
You can also tune to a radio station by manually selecting its
frequency.Open the RADIO main menu ⇒page 14.
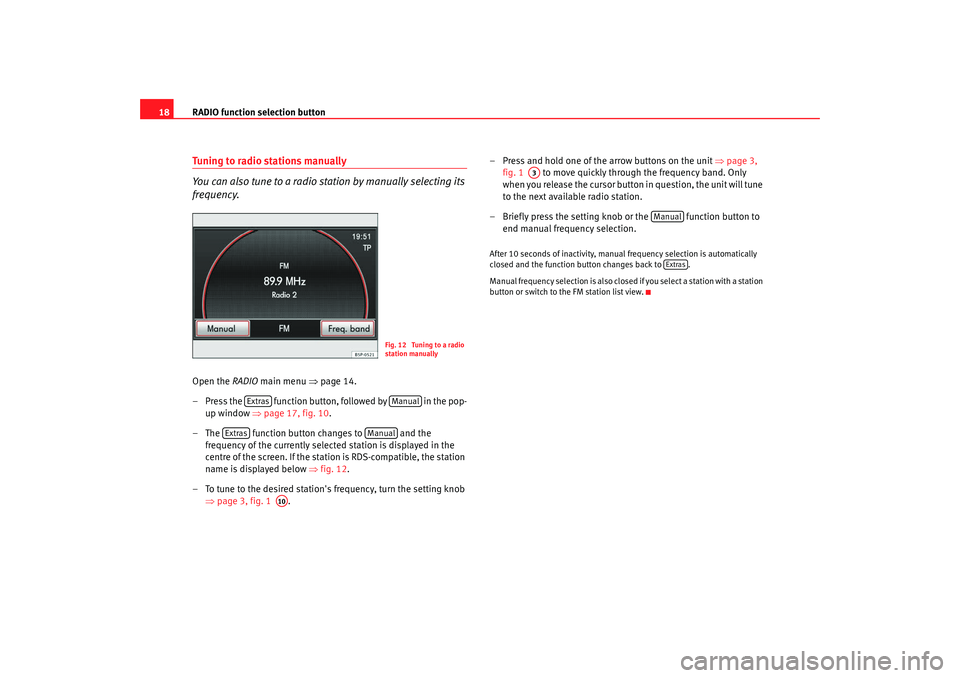
– Press the function button, followed by in the pop- up window ⇒page 17, fig. 10 .
– The function button changes to and the frequency of the currently selected station is displayed in the
centre of the screen. If the stat ion is RDS-compatible, the station
name is displayed below ⇒fig. 12 .
– To tune to the desired station's frequency, turn the setting knob ⇒page 3, fig. 1 . – Press and hold one of the arrow buttons on the unit
⇒page 3,
fig. 1 to move quickly through the frequency band. Only
when you release the cursor button in question, the unit will tune
to the next available radio station.
– Briefly press the setting knob or the function button to end manual frequency selection.
After 10 seconds of inactivity, manual frequency selection is automatically
closed and the function button changes back to .
Manual frequency selection is also closed if you select a station with a station
button or switch to the FM station list view.
Fig. 12 Tuning to a radio
station manually
Extras
Manual
Extras
Manual
A10
A3
Manual
Extras
media_system_ingles.book Seite 18 Donnerstag, 5. Februar 2009 3:31 15
Page 20 of 96
RADIO function selection button19
Storing radio stations to “station buttons”
In the RADIO main menu, you can call up a view of the “station
buttons”, which are used to store radio stations.
Open the RADIO main menu ⇒ page 14.
Switching the station button display on and off
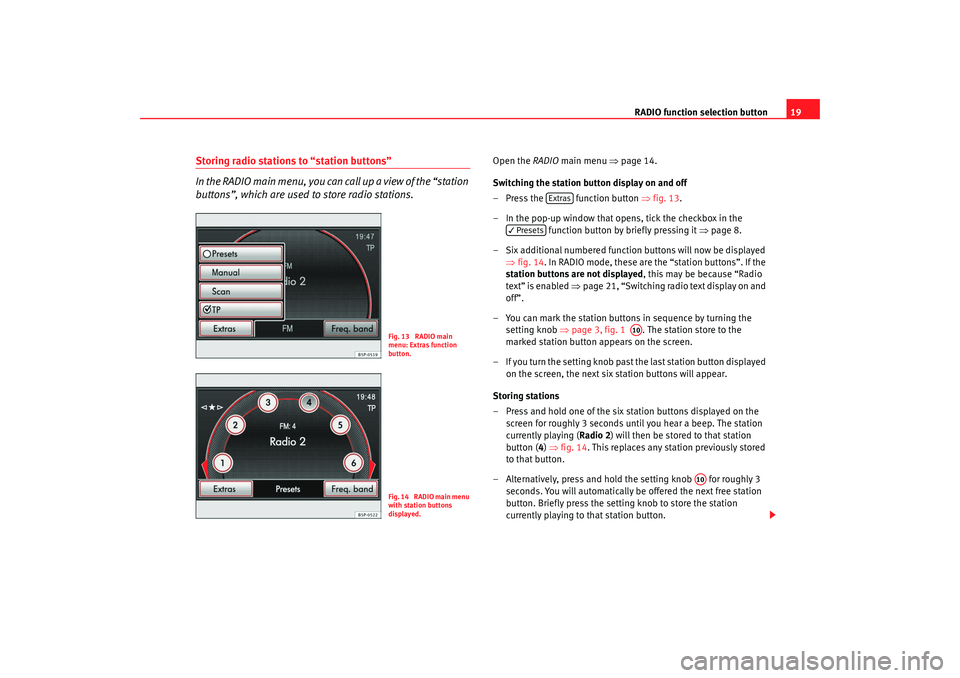
– Press the function button ⇒fig. 13 .
– In the pop-up window that opens, tick the checkbox in the function button by briefly pressing it ⇒page 8.
– Six additional numbered function buttons will now be displayed ⇒fig. 14 . In RADIO mode, these are the “station buttons”. If the
station buttons are not displayed , this may be because “Radio
text” is enabled ⇒page 21, “Switching radio text display on and
off”.
– You can mark the station buttons in sequence by turning the setting knob ⇒page 3, fig. 1 . The station store to the
marked station button appears on the screen.
– If you turn the setting knob past the last station button displayed
on the screen, the next six station buttons will appear.
Storing stations
– Press and hold one of the six st ation buttons displayed on the
screen for roughly 3 seconds until you hear a beep. The station
currently playing ( Radio 2) will then be stored to that station
button ( 4) ⇒ fig. 14 . This replaces any station previously stored
to that button.
– Alternatively, press and hold the setting knob for roughly 3 seconds. You will automatically be offered the next free station
button. Briefly press the setti ng knob to store the station
currently playing to that station button.
Fig. 13 RADIO main
menu: Extras function
button.Fig. 14 RADIO main menu
with station buttons
displayed.
Extras
Presets
A10
A10
media_system_ingles.book Seite 19 Donnerstag, 5. Februar 2009 3:31 15
Page 21 of 96
RADIO function selection button
20You can also mark a certain station button by turning the setting knob. Then
press and hold the setting knob for roughly 3 seconds until you hear a beep.
The station currently playing will then be stored to the marked station button.
You can also select a station from the station list view and store it to a station
button by first pressing the function button ⇒page 15, fig. 9 .
There are 24 station buttons available for storing stations from both
frequency bands.
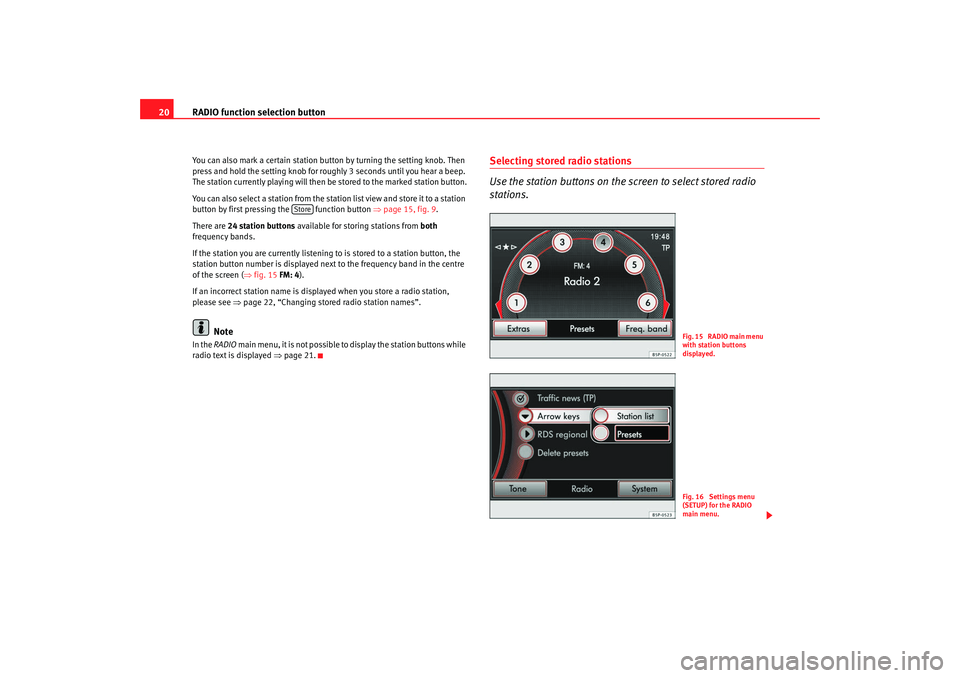
If the station you are currently listening to is stored to a station button, the
station button number is displayed next to the frequency band in the centre
of the screen ( ⇒fig. 15 FM: 4).
If an incorrect station name is displayed when you store a radio station,
please see ⇒page 22, “Changing stored radio station names”.
Note
In the RADIO main menu, it is not possible to display the station buttons while
radio text is displayed ⇒page 21.
Selecting stored radio stations
Use the station buttons on the screen to select stored radio
stations.
Store
F i g . 1 5 R A D I O m a i n m e n u
with station buttons
displayed.Fig. 16 Settings menu
(SETUP) for the RADIO
main menu.
media_system_ingles.book Seite 20 Donnerstag, 5. Februar 2009 3:31 15
Page 22 of 96
RADIO function selection button21
Open the RADIO main menu ⇒ page 14 and disable radio text if
necessary ⇒page 21.
Selecting stations
– Switch on station button display as described ⇒page 19.
– You can mark the station button s in sequence by turning the
setting knob ⇒page 3, fig. 1 . The station store to the
marked station button appears on the screen.
– Briefly press the setting knob to select the station displayed on
the screen.
– You can directly select a station that is stored to a station button by briefly pressing the respective station button.
Selecting stored stations with the arrow buttons (SETUP)
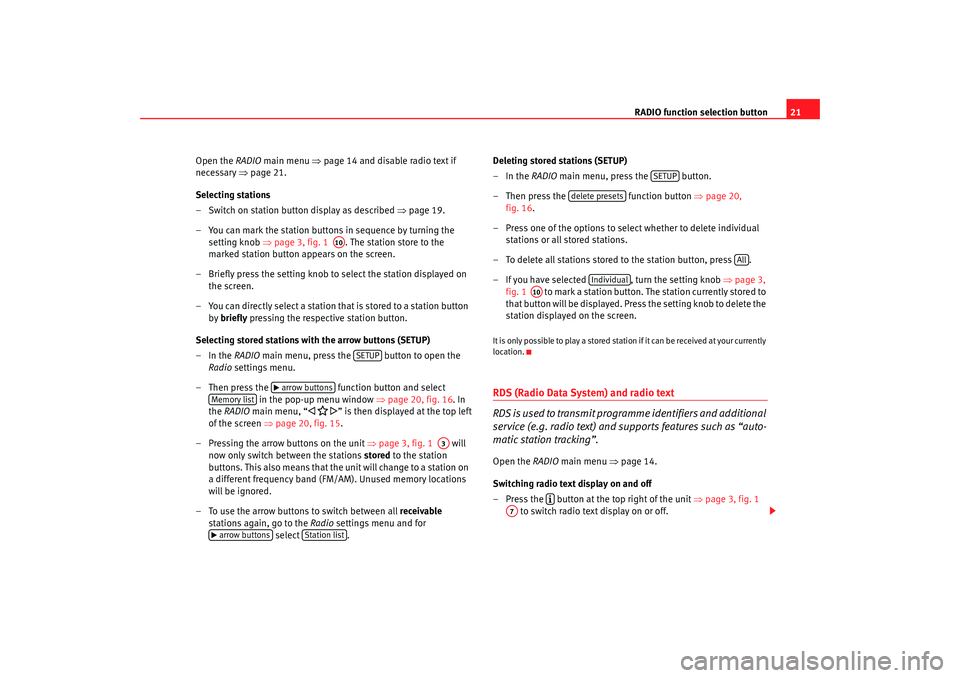
–In the RADIO main menu, press the button to open the
Radio settings menu.
– Then press the function button and select
in the pop-up menu window ⇒page 20, fig. 16 . In
the RADIO main menu, “
” is then displayed at the top left
of the screen ⇒page 20, fig. 15 .
– Pressing the arrow buttons on the unit ⇒page 3, fig. 1 will
now only switch between the stations stored to the station
buttons. This also means that the unit will change to a station on
a different frequency band (FM/AM). Unused memory locations
will be ignored.
– To use the arrow buttons to switch between all receivable
stations again, go to the Radio settings menu and for
select . Deleting stored stations (SETUP)
–In the
RADIO main menu, press the button.
– Then press the function button ⇒page 20,
fig. 16 .
– Press one of the options to select whether to delete individual stations or all stored stations.
– To delete all stations stored to the station button, press .
– If you have selected , turn the setting knob ⇒page 3,
fig. 1 to mark a station button. The station currently stored to
that button will be displayed. Press the setting knob to delete the
station displayed on the screen.
It is only possible to play a stored station if it can be received at your currently
location.RDS (Radio Data System) and radio text
R DS i s u s ed t o t ra n s m i t p ro g ra mme identifiers and additional
service (e.g. radio text) and supports features such as “auto-
matic station tracking”.Open the RADIO main menu ⇒ page 14.
Switching radio text display on and off
– Press the button at the top right of the unit ⇒ page 3, fig. 1
to switch radio text display on or off.
A10
SETUP
arrow buttons
Memory list
A3
arrow buttons
Station list
SETUP
delete presets
All
Individual
A10
A7
media_system_ingles.book Seite 21 Donnerstag, 5. Februar 2009 3:31 15
Page 23 of 96
RADIO function selection button
22
– If the currently selected station supports radio text, the text will be displayed below the station name. Note that no station
buttons will appear while radio text is displayed.
– You can switch off radio text display by pressing the button again.
Adjusting station tracking settings (SETUP)
–In the RADIO main menu, press the button to open the Radio settings menu.
– The press the function button and press an
option to select or in the pop-up window by
pressing ⇒page 22, “Station tracking and RDS regional”.RDS and radio text
The station names of RDS-compatible radio stations are displayed on the
screen provided the reception is strong enough.
Some RDS-compatible stations also transmit additional text known as radio
text. Radio text can also be displayed on the screen.
Not all radio stations support RDS and radio text.
The individual radio station is responsible for the information displayed.
Changing stored radio station names
If an RDS-compatible radio station broadcasts additional information (radio
text) while the station is being stored, the name of the radio station may
subsequently be incorrectly displayed.
In this case, you can change the displayed station name manually.
Select the stored station and wait until the correct name appears on the
screen. If you then briefly press the setting knob, the text currently displayed
on the screen will be stored as the station name. Station tracking and RDS regional
FM radio stations broadcast under the same name on several different
regional frequencies. Some of these “
broadcasting stations” temporarily or
always broadcast different content a ccording to region under the name
name.
As the default setting, the automatic station tracking always switches auto-
matically to the radio station's frequency that offers the best reception, as the
vehicle travels from one area to the next (setting: ).
This can, however, result in a region al radio programme being interrupted as
the unit switches to another frequency with a better reception, on which the
same radio station is broadcast from a different regional broadcasting
station.
If you change the setting to when travelling through the broadcasting
range of a radio station, the radio-navi gation system will attempt for as long
as possible to tune only to alternat ive frequencies for the selected regional
broadcasting station.
SETUP
RDS RegionalFixed
Automatic
RDS regional
Automatic
Fixed
media_system_ingles.book Seite 22 Donnerstag, 5. Februar 2009 3:31 15
Page 25 of 96
RADIO function selection button
24Traffic announcements will interrupt the active audio mode. The radio will
switch to the traffic news station for the duration of the traffic announcement.
The media mode will be paused for the duration of the traffic announcement.
If no TP station can be received at any time, e.g. because radio reception is
generally poor, then No TP is displayed instead of TP. Keep in mind that in
covered garages, tunnels, areas with tall buildings or mountains, the radio
signal may encounter interference, perhaps even being lost completely.
On the AM frequency band, traffic news monitoring with the traffic news func-
tion is not possible. No TP is displayed permanently.
EON (Enhanced Other Network)
If the selected radio station does not broadcast its own traffic news, but does
support EON (Enhanced Other Network), the unit will temporarily switch over
to play traffic announcements from a corresponding traffic news station as
they are broadcast. This happens only when the traffic news function is
switched on and the corresponding traffic news station can be received.
If this is the case, pressing the button will not make the unit switch to a
traffic news station. The traffic news function remains active and TP is
displayed.
Search function and traffic news monitoring
If traffic news monitoring is switched on in FM mode, you will only be offered
traffic news stations when carrying out a station search with the arrow
buttons ⇒ page 15 or using the scan function ⇒page 17.
While the unit is in FM mode and the traffic news function is switched on, if
you select via the station buttons or manually tune to a radio station that does
not support the traffic news function, the text NO TP will flash on the display
for three seconds. NO TP is then displayed permanently. The unit will remain
tuned to the selected station. Only when you switch to media mode will the
unit automatically retune in the background to the next receivable traffic
news station and TP will appear again on the display.
In FM mode , the text NO TP will flash for three seconds when the reception of
the selected traffic news station is completely lost. NO TP is then displayed permanently. If you start the automatic station search with the arrow buttons
⇒
page 15, the unit searches for the next traffic news station it can receive.
In media mode the unit will automatically retune in the background to the
next receivable traffic news station when the selected traffic news station can
no longer be received.
Incoming traffic announcement
A pop-up window opens ⇒page 23, fig. 18 while a traffic announcement is
being played.
If you wish to stop the traffic announcement, press the function
button in the pop-up window. The traffic station function remains active and
plays the next traffic bulletin receiv ed. Press the function button to
fully deactivate the TP function.
The unit switches to a predefined volume for the duration of the traffic
announcement. You can adjust the predefined volume in the sound settings
main menu ⇒ page 12. During a traffic announcement, you can alter the
predefined volume with the volume control ⇒page 3, fig. 1 .
TP
Cancel
TP off
A1
media_system_ingles.book Seite 24 Donnerstag, 5. Februar 2009 3:31 15
Page 30 of 96
MEDIA function selection button29
completely filled. The elapsed playing time is displayed at the bottom left and
the remaining playing time at the bottom right of the screen in
minutes/seconds. The remaining playi ng time cannot be displayed for files
with variable bit rate (VBR).
Unit buttons (hard keys) for controlling the media sources
Press the function selec tion button opens the MEDIA main menu.
The arrow buttons on the unit ⇒page 3, fig. 1 or always refer to the
audio source you are currently listening to, whatever menu you are in at the
time.
– press briefly in the MEDIA main menu to open the Media selection
menu and press again to switch to the next available media source
⇒ page 34.
- press briefly to go to the beginni ng of the current track and press again
to go to the beginning of the previous track. Press and hold for fast reverse.
- briefly press to go to the beginning of the next track. Press and hold for
fast forward.
– press briefly to display or hide additional information on the audio file
currently playing (e.g. its loc ation on the data medium).
– press briefly to switch to the MEDIA main menu view.
Setting knob – turn to open the track list and display the track currently
playing ⇒page 36.
– press briefly to open the Media settings menu.
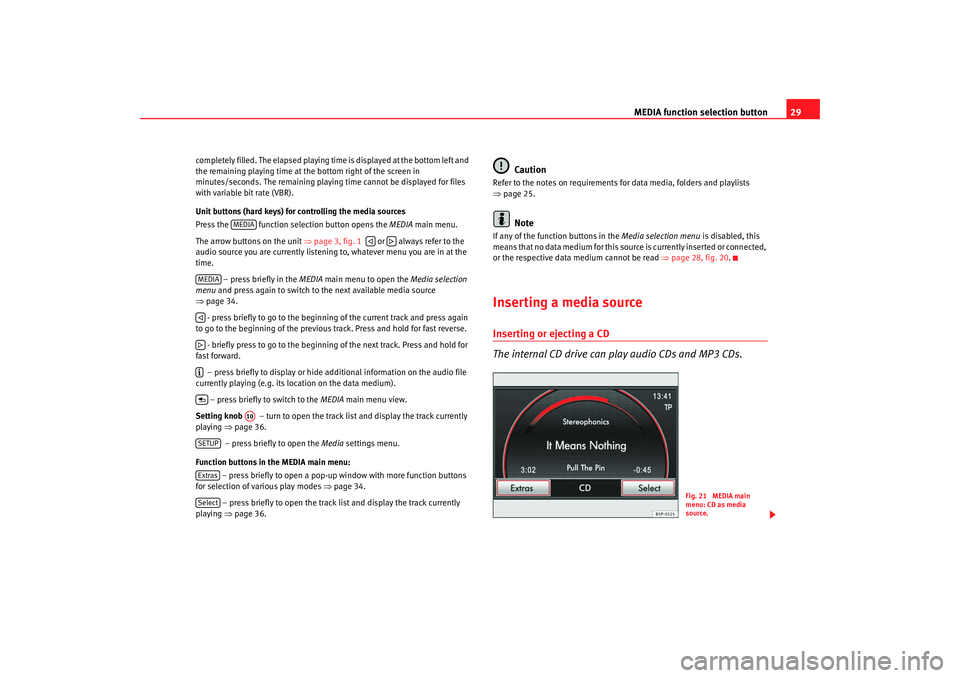
Function buttons in the MEDIA main menu: – press briefly to open a pop-up window with more function buttons
for selection of various play modes ⇒page 34.
– press briefly to open the track list and display the track currently
playing ⇒page 36.
Caution
Refer to the notes on requirements for data media, folders and playlists
⇒page 25.
Note
If any of the function buttons in the Media selection menu is disabled, this
means that no data medium for this sour ce is currently inserted or connected,
or the respective data medium cannot be read ⇒page 28, fig. 20 .Inserting a media sourceInserting or ejecting a CD
The internal CD drive can play audio CDs and MP3 CDs.
MEDIA
MEDIA
A10
SETUPExtrasSelect
Fig. 21 MEDIA main
menu: CD as media
source.
media_system_ingles.book Seite 29 Donnerstag, 5. Februar 2009 3:31 15
Page 37 of 96
MEDIA function selection button
36Changing track manually
You can browse through the tracks of a current media source
or select a specific track from the track list.
Load a media source ⇒page 29 or start playback from a loaded
media source ⇒page 34.
Changing track
– To change to the previous or next track of the media source currently playing, briefly press the appropriate arrow button on
the unit or ⇒page 3, fig. 1 .
Fast forward/reverse
– To search the current track, press and hold one of the arrow buttons or ⇒.
– Release the arrow button when the desired sequence in the track has been found.
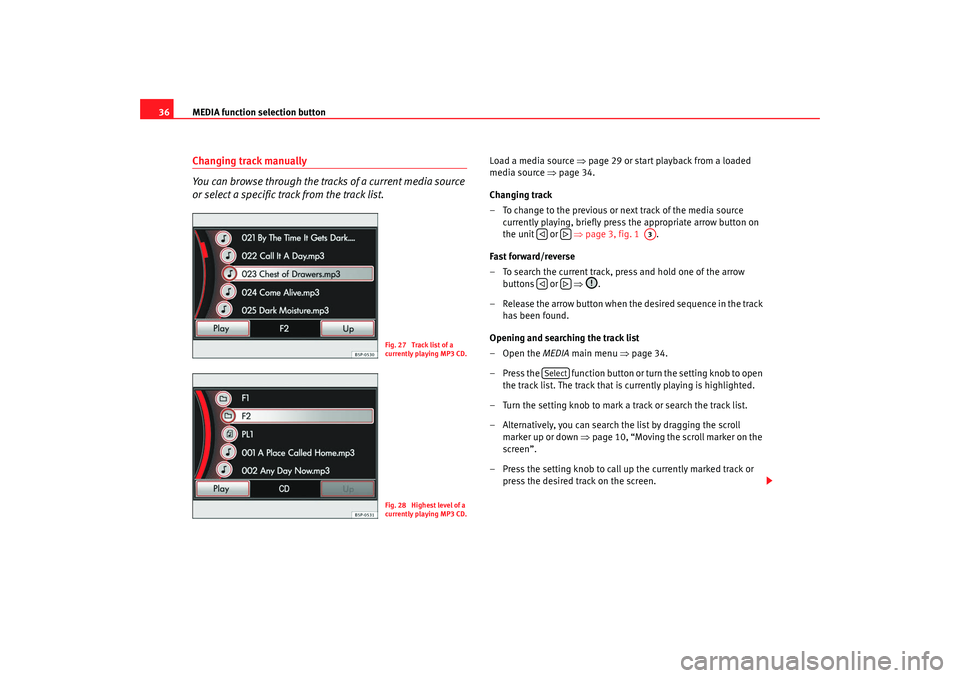
Opening and searching the track list
–Open the MEDIA main menu ⇒page 34.
– Press the function button or turn the setting knob to open the track list. The track that is currently playing is highlighted.
– Turn the setting knob to mark a track or search the track list.
– Alternatively, you can search the list by dragging the scroll marker up or down ⇒ page 10, “Moving the scroll marker on the
screen”.
– Press the setting knob to call up the currently marked track or press the desired track on the screen.
Fig. 27 Track list of a
currently playing MP3 CD.Fig. 28 Highest level of a
currently playing MP3 CD.
A3
Select
media_system_ingles.book Seite 36 Donnerstag, 5. Februar 2009 3:31 15