window Seat Toledo 2008 RADIO-NAVIGATION
[x] Cancel search | Manufacturer: SEAT, Model Year: 2008, Model line: Toledo, Model: Seat Toledo 2008Pages: 96, PDF Size: 3.72 MB
Page 2 of 96
Contents1
ContentsGeneral information
. . . . . . . . . . . . . . . .
Quick Reference Guide
. . . . . . . . . . . .
Equipment diagram
. . . . . . . . . . . . . . . . . . . . . . .
Operation whilst the vehicle is in motion
. . .
Switching on or off
. . . . . . . . . . . . . . . . . . . . . . . .
General usage notes
. . . . . . . . . . . . . . . . . . . . . .
About this operating manual
. . . . . . . . . . . . . .
Resetting the unit to the factory settings
. . .
Sound and volume settings
. . . . . . . . . . . . . . .
RADIO function selection buttonRadio mode
. . . . . . . . . . . . . . . . . . . . . . . . . . . . . .
Traffic news monitoring TP (Traffic
Programme)
. . . . . . . . . . . . . . . . . . . . . . . . . . . . . .
MEDIA function selection buttonNotes and requirements
. . . . . . . . . . . . . . . . . .
MEDIA main menu
. . . . . . . . . . . . . . . . . . . . . . . .
Inserting a media source
. . . . . . . . . . . . . . . . . .
Opening and operating media sources
. . . . .
MEDIA-IN multi-media interface (MDI)
. . . . . .
Important information for operating CD
players
. . . . . . . . . . . . . . . . . . . . . . . . . . . . . . . . . . .
NAV (navigation system) function
selection button
. . . . . . . . . . . . . . . . . . . .
Introduction
. . . . . . . . . . . . . . . . . . . . . . . . . . . . . .
Navigation data media: CD and memory
cards
. . . . . . . . . . . . . . . . . . . . . . . . . . . . . . . . . . . .
Navigation main menu
. . . . . . . . . . . . . . . . . . . .
Input windows
. . . . . . . . . . . . . . . . . . . . . . . . . . . .
Destination entry
. . . . . . . . . . . . . . . . . . . . . . . . .
Destination memory
. . . . . . . . . . . . . . . . . . . . . .
Route guidance
. . . . . . . . . . . . . . . . . . . . . . . . . . .
TRAF function selection button
. .
Displaying TMC traffic reports
. . . . . . . . . . . . .
System settings
. . . . . . . . . . . . . . . . . . . . .
Overview
. . . . . . . . . . . . . . . . . . . . . . . . . . . . . . . . .
Anti-theft coding
. . . . . . . . . . . . . . . . . . . .
Entering the PIN
. . . . . . . . . . . . . . . . . . . . . . . . . .
Index
. . . . . . . . . . . . . . . . . . . . . . . . . . . . . . . . . .
2
3
3
6
6
7
10
11
12
14
14
23
25
25
28
29
34
41
45 47
47
49
52
54
58
65
73
84
84
86
86
88
88
89
media_system_ingles.book Seite 1
Donnerstag, 5. Februar 2009 3:31 15
Page 6 of 96
Quick Reference Guide5
Caution
•
Inserting a new CD while an inserted CD is being ejected can destroy the
CD drive in the unit. You must wait until the CD is ejected before trying to
insert a new CD.
•
Do not press buttons or keys forcefully, otherwise an imperfection may
occur. Light pressure is sufficient to operate the unit. The rotary/push knobs
have breaking points to reduce the risk of injury in the event of an accident.
•
Do not use pointed or sharp objects on the touch screen. Lightly pressing
with your finger is enough. The screen indication that it cannot be activated
by pressing with your finger is not available.
•
Please not that a defective navigation data medium can serious impair
the speed and functions of the navigation system ⇒ page 49.
•
Refer to the notes on requirements for data media, folders and playlists
⇒ page 25.Note
•
The unit can play audio files fr om various different data media
⇒ page 25.
•
The navigation system takes a few seconds to process complicated oper-
ations. During this time, the unit may appear not to respond to further opera-
tion of the controls. When this occur s, do not continue to operate the
controls, as the unit “remembers” any commands and will “work through”
them in the order they were given when the current processes have been
completed.
•
Interference noise may be heard when using a mobile telephone in the
vehicle.
•
In vehicles with a window aerial, the reception could be impaired if foil or
metal-coated stickers are attached to the windows.
•
In some vehicles with a parking distance warning system*, the volume of
the audio source currently playing is automatically reduced when the vehicle is put into reverse gear so that the driver can hear the acoustic signals given
by the parking distance warning system.
•
In vehicles with an optical parking system*, a visualisation of the detec-
tion range of the parking distance warning system is also shown on the
screen.
•
If changes have already been made to the basic settings, you may find
that some aspects of the unit's operation differ from the descriptions given in
this manual ⇒page 11, “Resetting the unit to the factory settings”.
media_system_ingles.book Seite 5 Donnerstag, 5. Februar 2009 3:31 15
Page 8 of 96
Quick Reference Guide7
General usage notesTouchscreen, buttons and function buttons
The screen is a touch screen. Areas of the screen with a
coloured border are currently “active” and can be operated
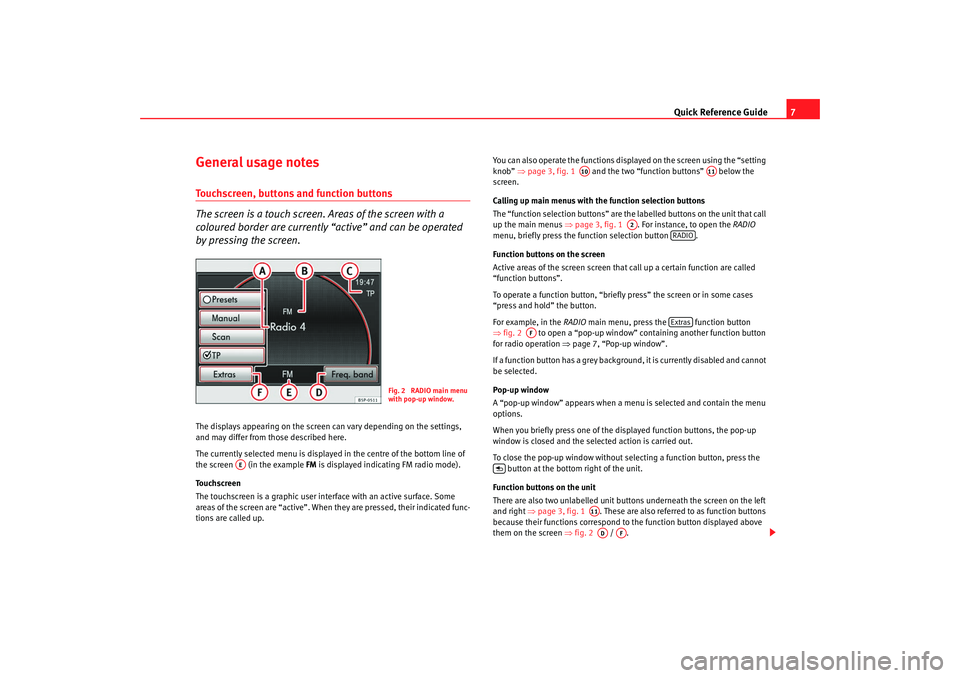
by pressing the screen.The displays appearing on the screen can vary depending on the settings,
and may differ from those described here.
The currently selected menu is displayed in the centre of the bottom line of
the screen (in the example FM is displayed indicating FM radio mode).
Touchscreen
The touchscreen is a graphic user inte rface with an active surface. Some
areas of the screen are “active”. When they are pressed, their indicated func-
tions are called up. You can also operate the functions displayed on the screen using the “setting
knob”
⇒page 3, fig. 1 and the two “function buttons” below the
screen.
Calling up main menus with th e function selection buttons
The “function selection buttons” are the labelled buttons on the unit that call
up the main menus ⇒page 3, fig. 1 . For instance, to open the RADIO
menu, briefly press the fu nction selection button .
Function buttons on the screen
Active areas of the screen screen that call up a certain function are called
“function buttons”.
To operate a function button, “briefly press” the screen or in some cases
“press and hold” the button.
For example, in the RADIO main menu, press the function button
⇒ fig. 2 to open a “pop-up window” containing another function button
for radio operation ⇒page 7, “Pop-up window”.
If a function button has a grey background, it is currently disabled and cannot
be selected.
Pop-up window
A “pop-up window” appears when a menu is selected and contain the menu
options.
When you briefly press one of the displayed function buttons, the pop-up
window is closed and the selected action is carried out.
To close the pop-up window without selecting a function button, press the button at the bottom right of the unit.
Function buttons on the unit
There are also two unlabelled unit buttons underneath the screen on the left
and right ⇒page 3, fig. 1 . These are also referred to as function buttons
because their functions correspond to the function button displayed above
them on the screen ⇒fig. 2 /.
Fig. 2 RADIO main menu
with pop-up window.
AE
A10
A11
A2
RADIOExtras
AF
A11AD
AF
media_system_ingles.book Seite 7 Donnerstag, 5. Februar 2009 3:31 15
Page 9 of 96
Quick Reference Guide
8Whenever the directions of this manual tell you to press one of these two
function buttons, you can choose whether to use the buttons on your screen
or the unlabelled buttons underneath them.
Starting functions or enabling functions with “checkboxes”
Some functions are immediately started and stopped by pressing a button,
for example the scan function ⇒page 17, “Scan function”.
Other additional functions and displays can be permanently enabled or disa-
bled. These function buttons appear with a “checkbox”.
A tick in the checkbox
indicates that the function is enabled, and an empty
checkbox
indicates that it is disabled ⇒page 7, fig. 2 .
For instance, traffic news monitoring or station button display in Radio
mode ⇒page 9, fig. 3 can be enabled or disabled ⇒page 7,
fig. 2 .
Any functions enabled by checkbox can only be disabled by opening the pop-
up window again and pressing the respective checkbox.
Additional screen displays
If no function buttons are displayed on the screen in the navigation map view,
briefly press the bottom-left or bottom-right area of the screen to display the
available function buttons.
In some vehicles, changes to the climate control settings are briefly displayed
on the screen in a pop-up window.
Brief displays may appear on the screen with some factory-fitted driver assist-
ance systems3). These displays disappear automatically when they are not
longer required.
3)Optional equipment!
A11
TP
Presets
AA
media_system_ingles.book Seite 8 Donnerstag, 5. Februar 2009 3:31 15
Page 14 of 96
Quick Reference Guide13
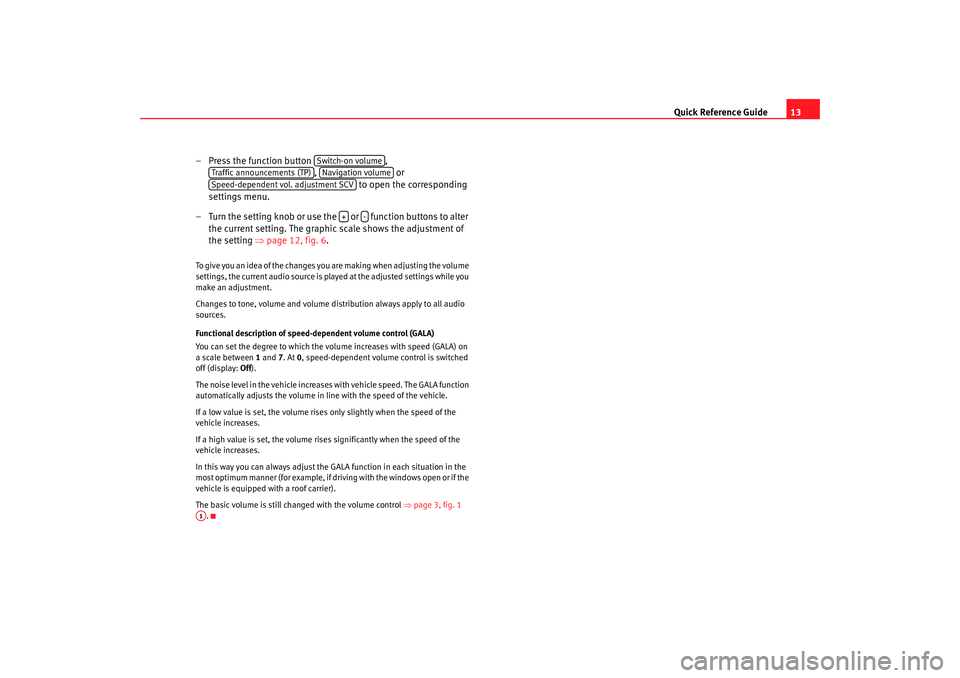
– Press the function button ,
, or
to open the corresponding
settings menu.
– Turn the setting knob or use the or function buttons to alter
the current setting. The graphic scale shows the adjustment of
the setting ⇒page 12, fig. 6 .
To give you an idea of the changes you are making when adjusting the volume
settings, the current audio source is played at the adjusted settings while you
make an adjustment.
Changes to tone, volume and volume distribution always apply to all audio
sources.
Functional description of speed- dependent volume control (GALA)
You can set the degree to which the volume increases with speed (GALA) on
a scale between 1 and 7. At 0, speed-dependent volume control is switched
off (display: Off).
The noise level in the vehicle increases with vehicle speed. The GALA function
automatically adjusts the volume in line with the speed of the vehicle.
If a low value is set, the volume rises only slightly when the speed of the
vehicle increases.
If a high value is set, the volume rises significantly when the speed of the
vehicle increases.
In this way you can always adjust the GALA function in each situation in the
most optimum manner (for example, if dr iving with the windows open or if the
vehicle is equipped with a roof carrier).
The basic volume is still changed with the volume control ⇒page 3, fig. 1
.
Switch-on volume
Traffic announcements (TP)
Navigation volume
Speed-dependent vol. adjustment SCV
+
-
A1
media_system_ingles.book Seite 13 Donnerstag, 5. Februar 2009 3:31 15
Page 17 of 96
RADIO function selection button
16
– Press the function button and in the pop-up window that opens press ⇒page 15, fig. 8 to view a list of all
currently receivable stations on the FM frequency band. The list
“jumps” straight to the position of the station you are currently
listening to ⇒ page 15, fig. 9 “Radio 2”.
– Alternatively, you can open the FM station list by turning the setting knob ⇒page 3, fig. 1 if in the RADIO main menu the
station buttons are currently not displayed ⇒page 19,
“Switching the station button display on and off”.
Selecting stations from the FM station list
– When you have opened the FM station list, turn the setting knob ⇒page 3, fig. 1 to mark the desired station.
– To call up the marked station, press the setting knob.
– Alternatively, you can search the list by dragging the scroll marker up or down ⇒ page 10, “Moving the scroll marker on the
screen”.
– You can call up a station by pressing its name on the screen.
– Press the button at the bottom right of the unit ⇒page 3,
fig. 1 to close the FM station list.The FM station list view closes automati cally after one minute of inactivity.
By pressing the ⇒page 15, fig. 9 button, you can store the currently
marked station in the station list to one of the “station buttons”. For details
of how to use the “station buttons”, please see ⇒page 19, “Storing radio
stations to “station buttons””. The unit regularly executes a search to check what stations can be received
and updates the FM station list accordingly. The FM station list can only be
updated when it is closed.
No station list is availabl
e for the AM frequency band.
Note
In vehicles with a window aerial, the reception could be impaired if foil or
metal-coated stickers are attached to the windows.
Band
FM/List
A10
A10
A8
Store
media_system_ingles.book Seite 16 Donnerstag, 5. Februar 2009 3:31 15
Page 18 of 96
RADIO function selection button17
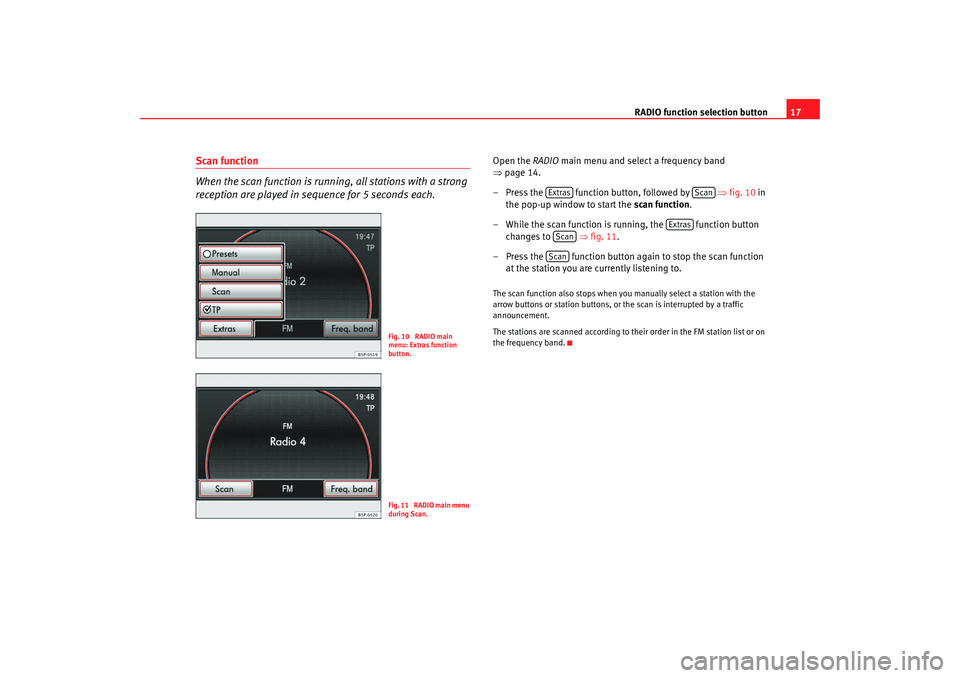
Scan function
When the scan function is running, all stations with a strong
reception are played in sequence for 5 seconds each.
Open the RADIO main menu and select a frequency band
⇒ page 14.
– Press the function button, followed by ⇒fig. 10 in
the pop-up window to start the scan function.
– While the scan function is running, the function button changes to ⇒fig. 11 .
– Press the function button again to stop the scan function at the station you are currently listening to.The scan function also stops when y ou manually select a station with the
arrow buttons or station buttons, or the scan is interrupted by a traffic
announcement.
The stations are scanned according to their order in the FM station list or on
the frequency band.
Fig. 10 RADIO main
menu: Extras function
button.Fig. 11 RADIO main menu
during Scan.
Extras
Scan
Extras
ScanScan
media_system_ingles.book Seite 17 Donnerstag, 5. Februar 2009 3:31 15
Page 19 of 96
RADIO function selection button
18Tuning to radio stations manually
You can also tune to a radio station by manually selecting its
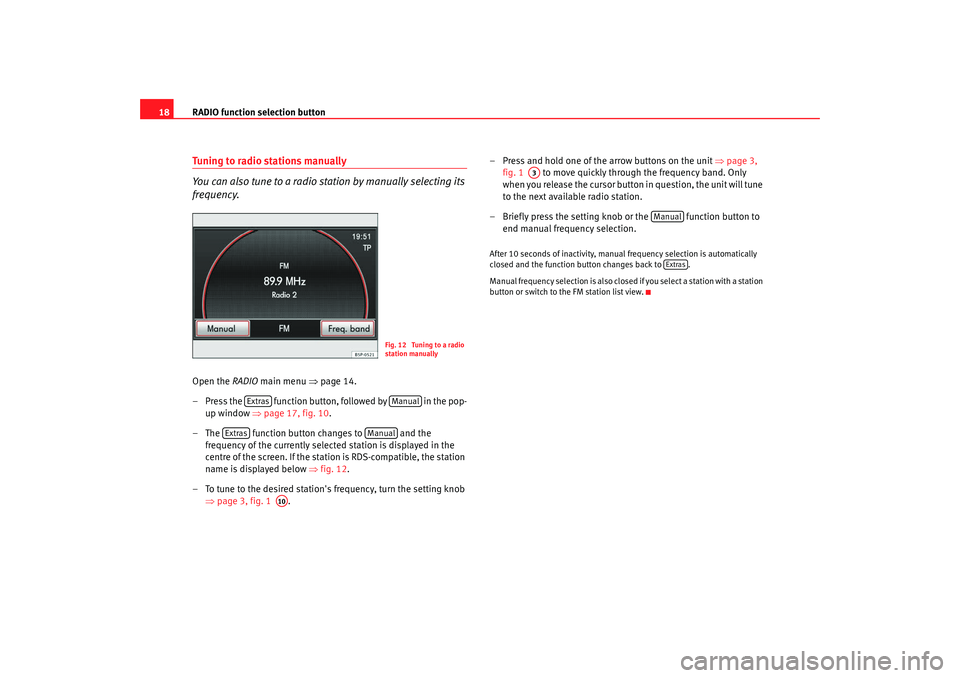
frequency.Open the RADIO main menu ⇒page 14.
– Press the function button, followed by in the pop- up window ⇒page 17, fig. 10 .
– The function button changes to and the frequency of the currently selected station is displayed in the
centre of the screen. If the stat ion is RDS-compatible, the station
name is displayed below ⇒fig. 12 .
– To tune to the desired station's frequency, turn the setting knob ⇒page 3, fig. 1 . – Press and hold one of the arrow buttons on the unit
⇒page 3,
fig. 1 to move quickly through the frequency band. Only
when you release the cursor button in question, the unit will tune
to the next available radio station.
– Briefly press the setting knob or the function button to end manual frequency selection.
After 10 seconds of inactivity, manual frequency selection is automatically
closed and the function button changes back to .
Manual frequency selection is also closed if you select a station with a station
button or switch to the FM station list view.
Fig. 12 Tuning to a radio
station manually
Extras
Manual
Extras
Manual
A10
A3
Manual
Extras
media_system_ingles.book Seite 18 Donnerstag, 5. Februar 2009 3:31 15
Page 20 of 96
RADIO function selection button19
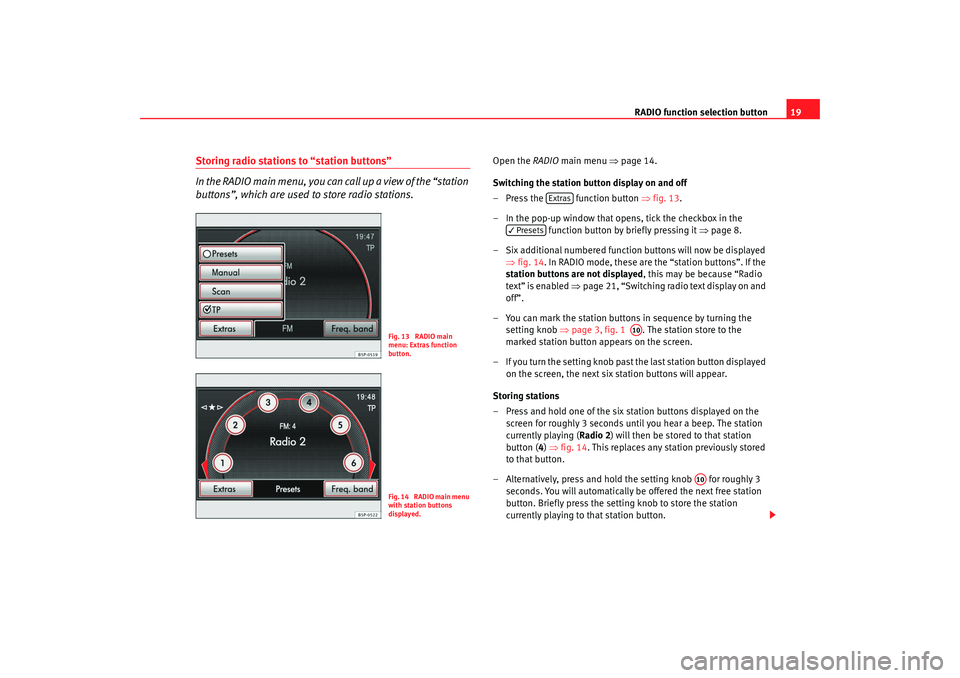
Storing radio stations to “station buttons”
In the RADIO main menu, you can call up a view of the “station
buttons”, which are used to store radio stations.
Open the RADIO main menu ⇒ page 14.
Switching the station button display on and off
– Press the function button ⇒fig. 13 .
– In the pop-up window that opens, tick the checkbox in the function button by briefly pressing it ⇒page 8.
– Six additional numbered function buttons will now be displayed ⇒fig. 14 . In RADIO mode, these are the “station buttons”. If the
station buttons are not displayed , this may be because “Radio
text” is enabled ⇒page 21, “Switching radio text display on and
off”.
– You can mark the station buttons in sequence by turning the setting knob ⇒page 3, fig. 1 . The station store to the
marked station button appears on the screen.
– If you turn the setting knob past the last station button displayed
on the screen, the next six station buttons will appear.
Storing stations
– Press and hold one of the six st ation buttons displayed on the
screen for roughly 3 seconds until you hear a beep. The station
currently playing ( Radio 2) will then be stored to that station
button ( 4) ⇒ fig. 14 . This replaces any station previously stored
to that button.
– Alternatively, press and hold the setting knob for roughly 3 seconds. You will automatically be offered the next free station
button. Briefly press the setti ng knob to store the station
currently playing to that station button.
Fig. 13 RADIO main
menu: Extras function
button.Fig. 14 RADIO main menu
with station buttons
displayed.
Extras
Presets
A10
A10
media_system_ingles.book Seite 19 Donnerstag, 5. Februar 2009 3:31 15
Page 22 of 96
RADIO function selection button21
Open the RADIO main menu ⇒ page 14 and disable radio text if
necessary ⇒page 21.
Selecting stations
– Switch on station button display as described ⇒page 19.
– You can mark the station button s in sequence by turning the
setting knob ⇒page 3, fig. 1 . The station store to the
marked station button appears on the screen.
– Briefly press the setting knob to select the station displayed on
the screen.
– You can directly select a station that is stored to a station button by briefly pressing the respective station button.
Selecting stored stations with the arrow buttons (SETUP)
–In the RADIO main menu, press the button to open the
Radio settings menu.
– Then press the function button and select
in the pop-up menu window ⇒page 20, fig. 16 . In
the RADIO main menu, “
” is then displayed at the top left
of the screen ⇒page 20, fig. 15 .
– Pressing the arrow buttons on the unit ⇒page 3, fig. 1 will
now only switch between the stations stored to the station
buttons. This also means that the unit will change to a station on
a different frequency band (FM/AM). Unused memory locations
will be ignored.
– To use the arrow buttons to switch between all receivable
stations again, go to the Radio settings menu and for
select . Deleting stored stations (SETUP)
–In the
RADIO main menu, press the button.
– Then press the function button ⇒page 20,
fig. 16 .
– Press one of the options to select whether to delete individual stations or all stored stations.
– To delete all stations stored to the station button, press .
– If you have selected , turn the setting knob ⇒page 3,
fig. 1 to mark a station button. The station currently stored to
that button will be displayed. Press the setting knob to delete the
station displayed on the screen.
It is only possible to play a stored station if it can be received at your currently
location.RDS (Radio Data System) and radio text
R DS i s u s ed t o t ra n s m i t p ro g ra mme identifiers and additional
service (e.g. radio text) and supports features such as “auto-
matic station tracking”.Open the RADIO main menu ⇒ page 14.
Switching radio text display on and off
– Press the button at the top right of the unit ⇒ page 3, fig. 1
to switch radio text display on or off.
A10
SETUP
arrow buttons
Memory list
A3
arrow buttons
Station list
SETUP
delete presets
All
Individual
A10
A7
media_system_ingles.book Seite 21 Donnerstag, 5. Februar 2009 3:31 15