battery SKODA FABIA 2014 3.G / NJ User Guide
[x] Cancel search | Manufacturer: SKODA, Model Year: 2014, Model line: FABIA, Model: SKODA FABIA 2014 3.G / NJPages: 216, PDF Size: 30.7 MB
Page 53 of 216
›The interior light switched by the door contact goes off.
› The SafeLock system is switched on.
› The warning light in the driver door begins flashing.
› The anti-theft alarm system is activated.
If the doors or the boot lid remain open after the vehicle doors have been
locked, the turn signal lights do not flash until they have been closed.WARNING■ Never leave the key in the vehicle when you exit the vehicle. Unauthor-
ized persons, such as children, for example, could lock the car, turn on the
ignition or start the engine - danger of injury and accidents!■
When leaving the vehicle, never leave people who are not completely in-
dependent, such as children, unattended in the vehicle. The children might,
for example, release the handbrake or take the vehicle out of gear. The ve-
hicle could then start to move – risk of accident! These individuals would
possibly not be able to leave the vehicle on their own or to help them-
selves. At very high or very low temperatures can be fatal!
CAUTION
■ Each key contains electronic components; therefore it must be protected
against moisture and severe shocks.■
Keep the groove of the keys absolutely clean. Impurities (textile fibres, dust,
etc.) impair the function of the locking cylinder and ignition lock.
■
The battery must be replaced if the central locking or anti-theft alarm system
does react to the remote control at less than approx. 3 metres away
» page 179 .
■
Always check that the vehicle is locked before leaving it.
■
If the driver's door has been opened, the vehicle cannot be locked.
Note
In the event of an accident in which the airbags are deployed, the locked doors
are automatically unlocked in order to enable rescuers to gain access to the
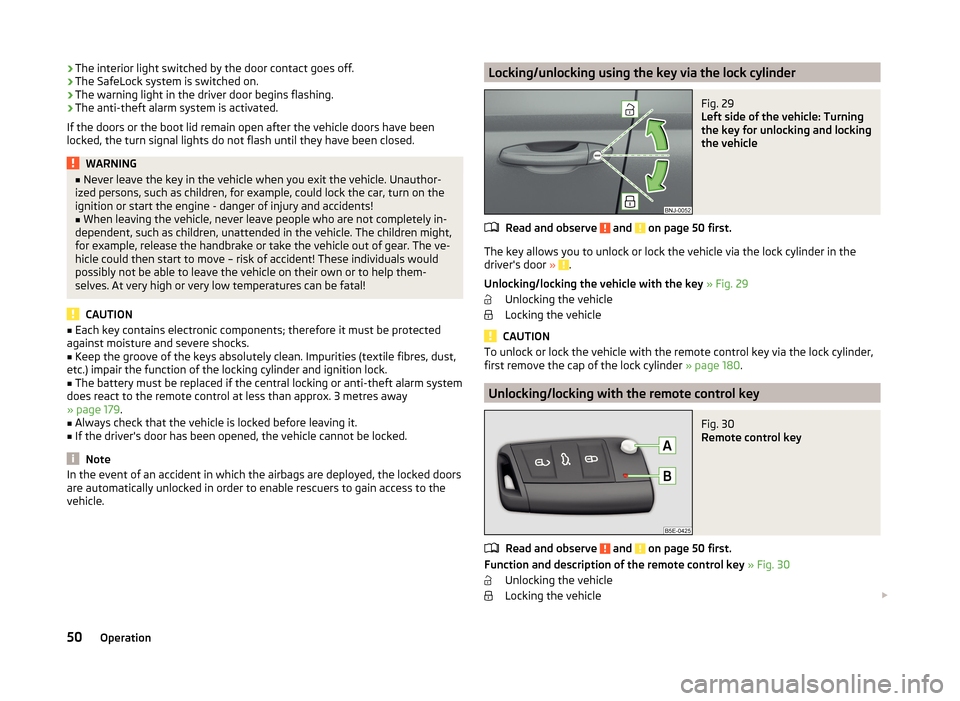
vehicle.Locking/unlocking using the key via the lock cylinderFig. 29
Left side of the vehicle: Turning
the key for unlocking and locking
the vehicle
Read and observe and on page 50 first.
The key allows you to unlock or lock the vehicle via the lock cylinder in the
driver's door » .
Unlocking/locking the vehicle with the key » Fig. 29
Unlocking the vehicle
Locking the vehicle
CAUTION
To unlock or lock the vehicle with the remote control key via the lock cylinder,
first remove the cap of the lock cylinder » page 180.
Unlocking/locking with the remote control key
Fig. 30
Remote control key
Read and observe and on page 50 first.
Function and description of the remote control key » Fig. 30
Unlocking the vehicle
Locking the vehicle
50Operation
Page 57 of 216
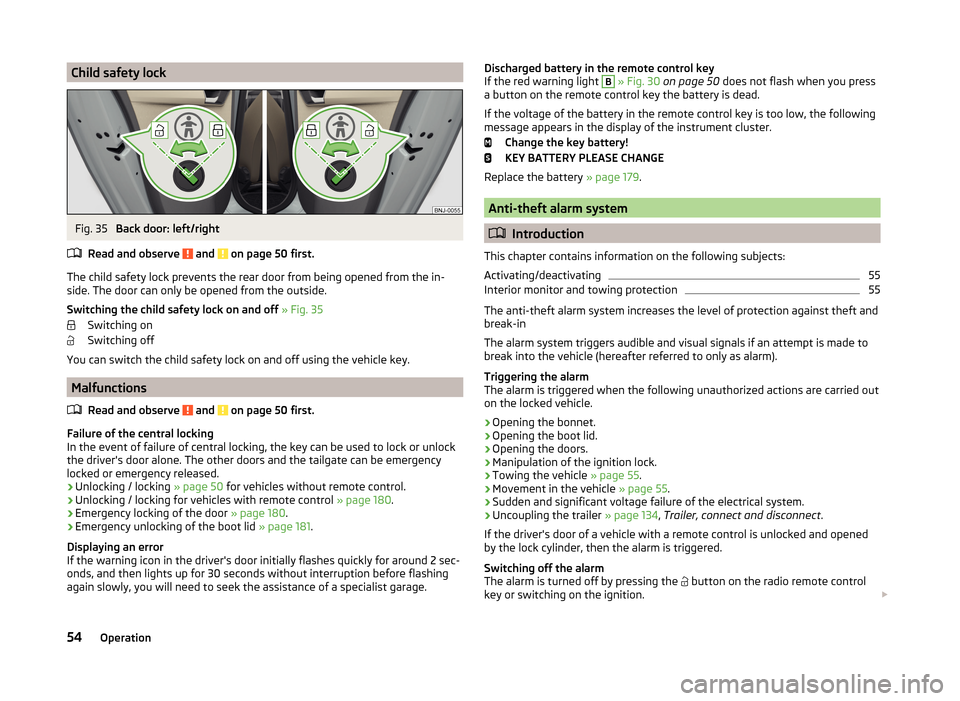
Child safety lockFig. 35
Back door: left/right
Read and observe
and on page 50 first.
The child safety lock prevents the rear door from being opened from the in- side. The door can only be opened from the outside.
Switching the child safety lock on and off » Fig. 35
Switching on
Switching off
You can switch the child safety lock on and off using the vehicle key.
Malfunctions
Read and observe
and on page 50 first.
Failure of the central locking
In the event of failure of central locking, the key can be used to lock or unlock
the driver's door alone. The other doors and the tailgate can be emergency
locked or emergency released.
› Unlocking / locking
» page 50 for vehicles without remote control.
› Unlocking / locking for vehicles with remote control
» page 180.
› Emergency locking of the door
» page 180.
› Emergency unlocking of the boot lid
» page 181.
Displaying an error
If the warning icon in the driver's door initially flashes quickly for around 2 sec-
onds, and then lights up for 30 seconds without interruption before flashing
again slowly, you will need to seek the assistance of a specialist garage.
Discharged battery in the remote control key
If the red warning light B » Fig. 30 on page 50 does not flash when you press
a button on the remote control key the battery is dead.
If the voltage of the battery in the remote control key is too low, the following
message appears in the display of the instrument cluster.
Change the key battery!
KEY BATTERY PLEASE CHANGE
Replace the battery » page 179.
Anti-theft alarm system
Introduction
This chapter contains information on the following subjects:
Activating/deactivating
55
Interior monitor and towing protection
55
The anti-theft alarm system increases the level of protection against theft and
break-in
The alarm system triggers audible and visual signals if an attempt is made to
break into the vehicle (hereafter referred to only as alarm).
Triggering the alarm
The alarm is triggered when the following unauthorized actions are carried out
on the locked vehicle.
› Opening the bonnet.
› Opening the boot lid.
› Opening the doors.
› Manipulation of the ignition lock.
› Towing the vehicle
» page 55.
› Movement in the vehicle
» page 55.
› Sudden and significant voltage failure of the electrical system.
› Uncoupling the trailer
» page 134, Trailer, connect and disconnect .
If the driver's door of a vehicle with a remote control is unlocked and opened by the lock cylinder, then the alarm is triggered.
Switching off the alarm
The alarm is turned off by pressing the button on the radio remote control
key or switching on the ignition.
54Operation
Page 60 of 216
WARNINGPower windows in the driver's door and the rear doors are equipped with a
force limiter (only applies to the Variant 2 ) » page 58 . If there is an obsta-
cle, the closing process is stopped and the window goes down by several
centimetres. The windows should nevertheless be closed carefully – risk of
injury.
CAUTION
■ Keep the windows clean to ensure the correct functionality of the electric
windows.■
In the event that the windows are frozen, first of all eliminate the ice
» page 143 , Windows and external mirrors and only then operate the electrical
power windows. Otherwise, the window sealing and the electrical power win-
dow mechanism could be damaged.
■
In the winter, ice on the window may cause greater resistance as the win-
dow is closed. The window will stop and open again by several centimetres. It
is necessary to deactivate the force limiter to close the window » page 58.
■
Always make sure that the windows are closed when you leave the locked
vehicle.
■
Always close the windows before disconnecting the battery » page 58,
Force limitation .
■
The window lift mechanism is equipped with protection against overheater.
Repeated opening and closing of the window can cause this mechanism to
overheat. If this happens, it will not be possible to operate the window for a
short time. You will be able to operate the window again as soon as the over-
heater protection has cooled down.
For the sake of the environment
At high speeds you should keep the windows closed to prevent unnecessarily high fuel consumption.
Note
When driving always use the existing heater, air conditioning and ventilation
system for ventilating the interior of the vehicle. With the windows open, dust
and other dirt can get into the vehicle. In addition, wind noises can occur at
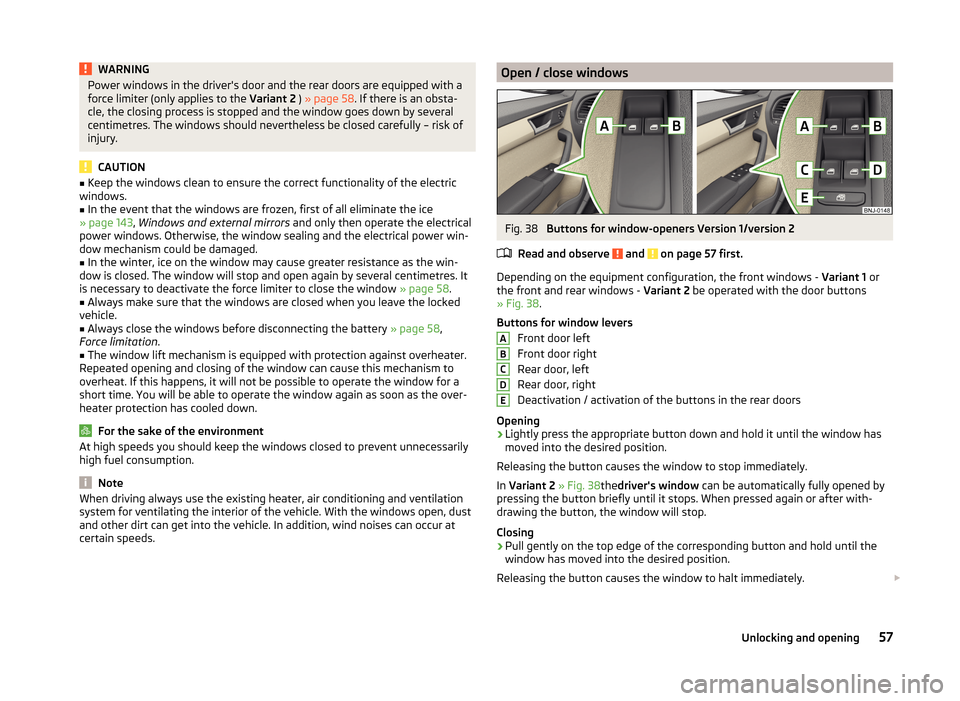
certain speeds.Open / close windowsFig. 38
Buttons for window-openers Version 1/version 2
Read and observe
and on page 57 first.
Depending on the equipment configuration, the front windows - Variant 1 or
the front and rear windows - Variant 2 be operated with the door buttons
» Fig. 38 .
Buttons for window levers Front door left
Front door right
Rear door, left
Rear door, right
Deactivation / activation of the buttons in the rear doors
Opening
›
Lightly press the appropriate button down and hold it until the window has
moved into the desired position.
Releasing the button causes the window to stop immediately.
In Variant 2 » Fig. 38thedriver's window can be automatically fully opened by
pressing the button briefly until it stops. When pressed again or after with-
drawing the button, the window will stop.
Closing
›
Pull gently on the top edge of the corresponding button and hold until the
window has moved into the desired position.
Releasing the button causes the window to halt immediately.
ABCDE57Unlocking and opening
Page 61 of 216
In Variant 2 » Fig. 38the driver's window can be automatically closed com-
pletely by drawing the button to the stop. When drawn again or after pressing
the button, the window will stop.
Disable / enable the buttons in the rear doors›
Press the button
E
» Fig. 38 .
When the buttons are disabled in the rear doors, the indicator light
in the
button
E
lights up.
WARNINGIf the rear seats are accommodating people who are not completely inde-
pendent, e.g. children, it is recommended that for safety reasons the but-
tons in the rear doors are disabled with the button E
» Fig. 38 .
Opening the windows in the front passenger door and in the rear
doors
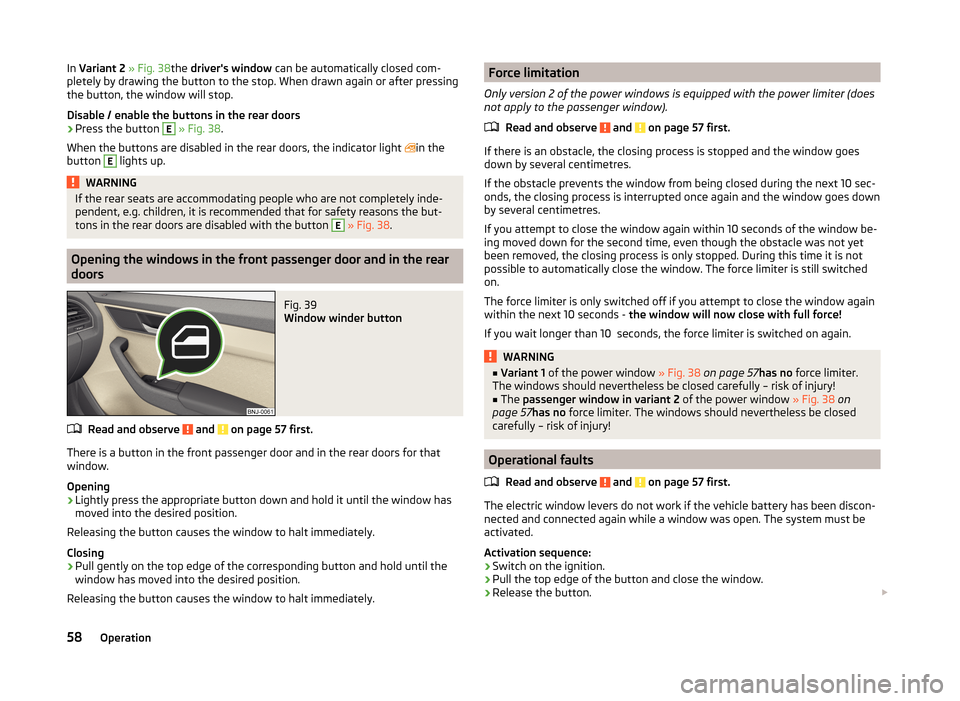
Fig. 39
Window winder button
Read and observe and on page 57 first.
There is a button in the front passenger door and in the rear doors for that
window.
Opening
›
Lightly press the appropriate button down and hold it until the window has
moved into the desired position.
Releasing the button causes the window to halt immediately.
Closing
›
Pull gently on the top edge of the corresponding button and hold until the
window has moved into the desired position.
Releasing the button causes the window to halt immediately.
Force limitation
Only version 2 of the power windows is equipped with the power limiter (does
not apply to the passenger window).
Read and observe
and on page 57 first.
If there is an obstacle, the closing process is stopped and the window goes
down by several centimetres.
If the obstacle prevents the window from being closed during the next 10 sec-
onds, the closing process is interrupted once again and the window goes down
by several centimetres.
If you attempt to close the window again within 10 seconds of the window be-
ing moved down for the second time, even though the obstacle was not yet
been removed, the closing process is only stopped. During this time it is not
possible to automatically close the window. The force limiter is still switched
on.
The force limiter is only switched off if you attempt to close the window again
within the next 10 seconds - the window will now close with full force!
If you wait longer than 10 seconds, the force limiter is switched on again.
WARNING■ Variant 1 of the power window » Fig. 38 on page 57 has no force limiter.
The windows should nevertheless be closed carefully – risk of injury!■
The passenger window in variant 2 of the power window » Fig. 38 on
page 57 has no force limiter. The windows should nevertheless be closed
carefully – risk of injury!
Operational faults
Read and observe
and on page 57 first.
The electric window levers do not work if the vehicle battery has been discon-nected and connected again while a window was open. The system must be
activated.
Activation sequence:
›
Switch on the ignition.
›
Pull the top edge of the button and close the window.
›
Release the button.
58Operation
Page 67 of 216
LEAVING HOME (hereinafter referred to only as function) switches the light au-
tomatically for a short time when approaching the vehicle.
The daytime running lights are switched on automatically if the following
conditions are met.
The light switch is in position
» Fig. 43 on page 62 .
The visibility in the vehicle environment is reduced.
The ignition is switched off.
The parking aid is activated.
The function is switched on (the driver's door is opened / the car is un-
locked with the remote control).
The function switches on the following light. › Parking lights
› Low beam
› Licence plate light
Poorer visibility is detected by a sensor mounted in the holder of the inside
mirror or in the control panel .
Enabling / disabling and setting function
The functions and setting of the lighting duration can be activated or deactiva-
ted in the Infotainment system » Operating instructions for Infotainment ,
chapter Vehicle settings (button CAR) .
COMING HOME
The light turns on automatically when you open the driver's door on (within 60
seconds of turning off the ignition).
The light turns off 10 seconds after closing all the doors and the boot lid or af-
ter the pre-set time has expired.
If a door or the boot lid remains open, the light goes out after 60 seconds.
LEAVING HOME
The light turns on automatically after the vehicle is unlocked with the remote
control.
The light turns off after 10 seconds or after a pre-set time or after the vehicle
is locked.CAUTION■ Do not attach any stickers or similar objects in front of the light sensor on
the windscreen. This can impair its function or reliability.■
If this function is activated constantly, the battery will be heavily discharged
particularly in short-haul travel.
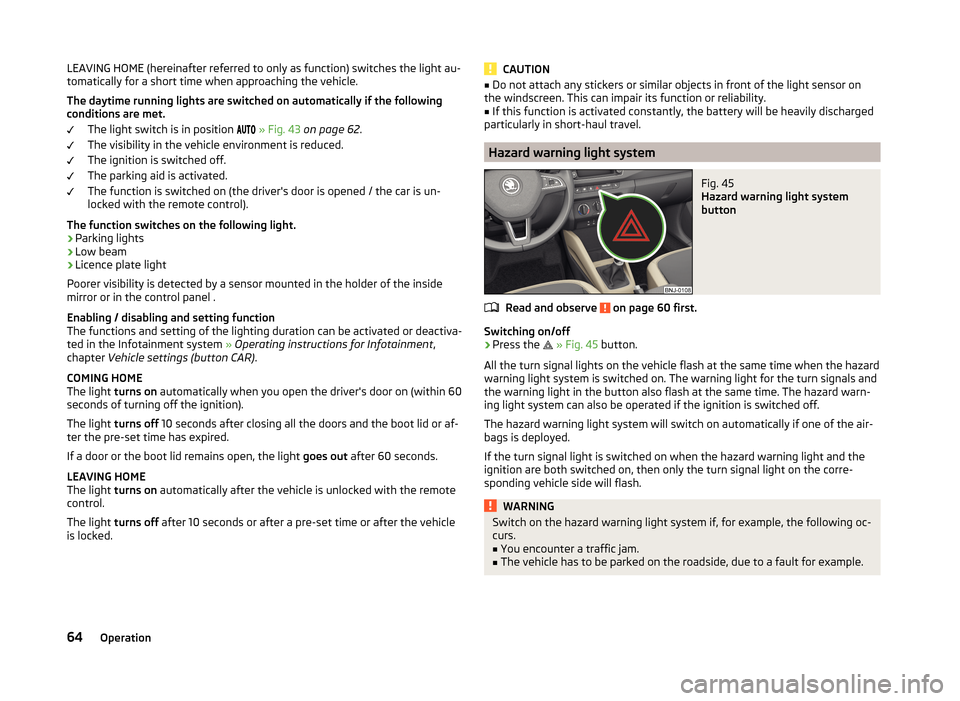
Hazard warning light system
Fig. 45
Hazard warning light system
button
Read and observe on page 60 first.
Switching on/off
›
Press the
» Fig. 45 button.
All the turn signal lights on the vehicle flash at the same time when the hazard
warning light system is switched on. The warning light for the turn signals and
the warning light in the button also flash at the same time. The hazard warn-
ing light system can also be operated if the ignition is switched off.
The hazard warning light system will switch on automatically if one of the air-
bags is deployed.
If the turn signal light is switched on when the hazard warning light and the
ignition are both switched on, then only the turn signal light on the corre-
sponding vehicle side will flash.
WARNINGSwitch on the hazard warning light system if, for example, the following oc-
curs.■
You encounter a traffic jam.
■
The vehicle has to be parked on the roadside, due to a fault for example.
64Operation
Page 68 of 216
Parking lightsRead and observe
on page 60 first.
The parking light is designed for temporary lighting of the parked vehicle.
Switching on
the parking light
›
Switch off the ignition.
›
Place the control lever into position
A
or
B
as far as it can go » Fig. 42 on
page 62 - the parking light on the right/left-hand side of the vehicle is
switched on.
If the right or left turn signal light has been switched on and the ignition is
switched off, the parking light is not automatically switched on.
Switching on the parking lights on both sides
›
Turn the light switch
A
to position
» Fig. 41 on page 60 and lock the vehi-
cle.
After pulling out the ignition key and opening the driver's door, an audible
warning sounds. After a few seconds or after closing the driver's door, the au-
dible alarm is turned off, but the parking lights will remain switched on.
CAUTION
Turning on the parking light means the battery is heavily loaded, especially
over short distances.
Driving abroad
Read and observe
on page 60 first.
The low beam is set asymmetrically. It illuminates the side of the road on
which the vehicle is being driven to a greater extent.
When driving in countries with opposing traffic system (traffic on the left/
right), asymmetric headlight adjustment can dazzle oncoming traffic. To pre-
vent oncoming traffic from being dazzled, the headlights must be adjusted by
a specialist garage.
Note
For more information on adjusting the headlights, consult a specialist garage.Interior lights
Introduction
This chapter contains information on the following subjects:
Front interior light
65
Rear interior light
66
Note
The light turns off automatically 10 minutes after switching off the ignition or
opening a door unless otherwise specified
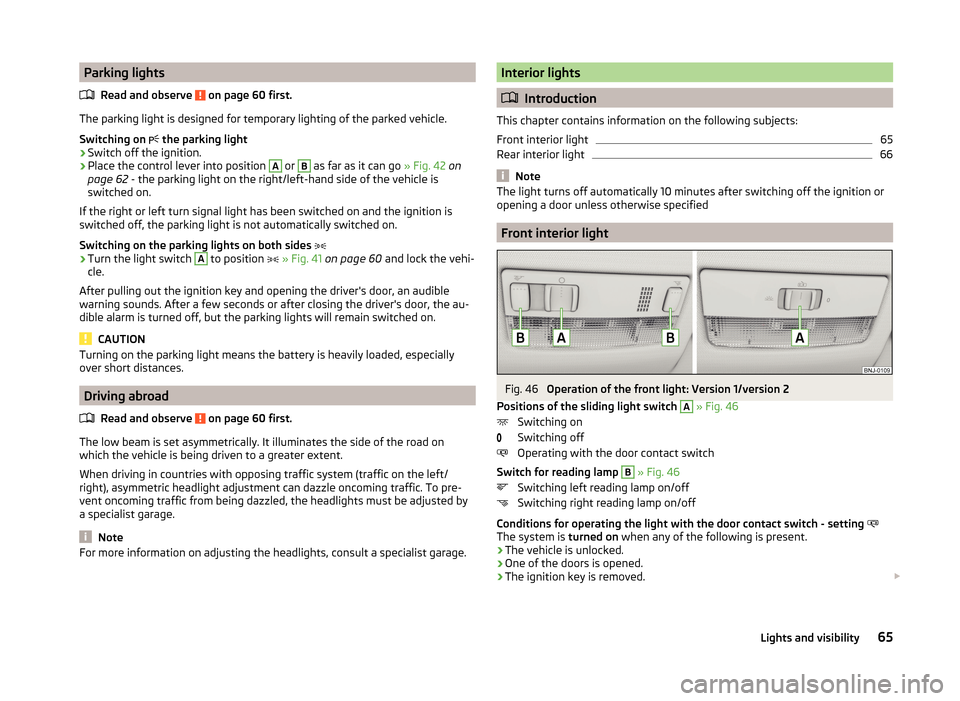
Front interior light
Fig. 46
Operation of the front light: Version 1/version 2
Positions of the sliding light switch
A
» Fig. 46
Switching on
Switching off
Operating with the door contact switch
Switch for reading lamp
B
» Fig. 46
Switching left reading lamp on/off
Switching right reading lamp on/off
Conditions for operating the light with the door contact switch - setting
The system is turned on when any of the following is present.
› The vehicle is unlocked.
› One of the doors is opened.
› The ignition key is removed.
65Lights and visibility
Page 82 of 216
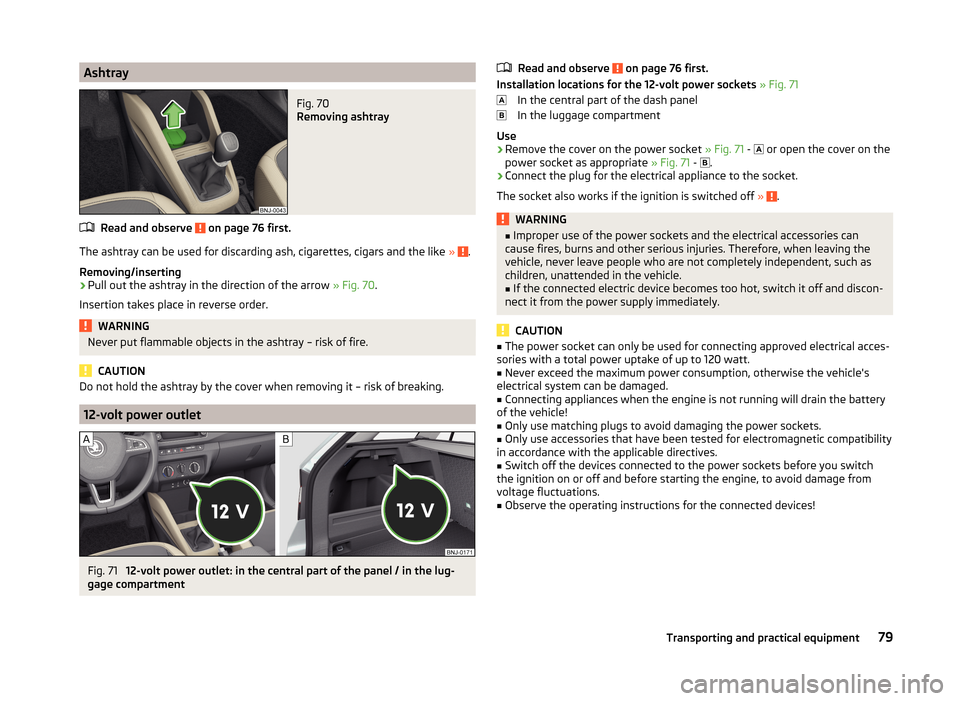
AshtrayFig. 70
Removing ashtray
Read and observe on page 76 first.
The ashtray can be used for discarding ash, cigarettes, cigars and the like » .
Removing/inserting
›
Pull out the ashtray in the direction of the arrow » Fig. 70.
Insertion takes place in reverse order.
WARNINGNever put flammable objects in the ashtray – risk of fire.
CAUTION
Do not hold the ashtray by the cover when removing it – risk of breaking.
12-volt power outlet
Fig. 71
12-volt power outlet: in the central part of the panel / in the lug-
gage compartment
Read and observe on page 76 first.
Installation locations for the 12-volt power sockets » Fig. 71
In the central part of the dash panel
In the luggage compartment
Use
›
Remove the cover on the power socket » Fig. 71 -
or open the cover on the
power socket as appropriate » Fig. 71 -
.
›
Connect the plug for the electrical appliance to the socket.
The socket also works if the ignition is switched off »
.
WARNING■
Improper use of the power sockets and the electrical accessories can
cause fires, burns and other serious injuries. Therefore, when leaving the
vehicle, never leave people who are not completely independent, such as
children, unattended in the vehicle.■
If the connected electric device becomes too hot, switch it off and discon-
nect it from the power supply immediately.
CAUTION
■ The power socket can only be used for connecting approved electrical acces-
sories with a total power uptake of up to 120 watt.■
Never exceed the maximum power consumption, otherwise the vehicle's
electrical system can be damaged.
■
Connecting appliances when the engine is not running will drain the battery
of the vehicle!
■
Only use matching plugs to avoid damaging the power sockets.
■
Only use accessories that have been tested for electromagnetic compatibility
in accordance with the applicable directives.
■
Switch off the devices connected to the power sockets before you switch
the ignition on or off and before starting the engine, to avoid damage from
voltage fluctuations.
■
Observe the operating instructions for the connected devices!
79Transporting and practical equipment
Page 106 of 216
Driving
Starting-off and driving
Starting and stopping the engine using the key
Introduction
This chapter contains information on the following subjects:
Electronic immobilizer
103
Lock / unlock steering lock
103
Turn ignition on / off and start the engine
104
Stopping the engine
104
With the key in the ignition, the ignition can be switched on and off and the
engine can be started / stopped.
WARNING■ While driving with the engine stopped, the ignition must always be
switched on » page 104, Turn ignition on / off and start the engine .
■ With the ignition off, the steering may lock » page 103 - danger of an
accident!■
Do not withdraw the ignition key from the ignition lock until the vehicle
has come to a stop » page 109, Parking . Otherwise the steering wheel
could lock – risk of accident.
■
Never leave the key in the vehicle when you exit the vehicle. Unauthor-
ized persons, children for example, could lock the car, turn on the ignition
or start the engine - risk of injury and accidents!
■
Never leave the vehicle unattended with the engine running - risk of acci-
dent, damage or theft!
■
Never switch off the engine before the vehicle has come to a halt – risk of
accident.
WARNING■ Never (e.g. in garages) run the engine in a closed place - risk of poisoning
and death!■
Do not leave any items (e.g. cleaning cloths or tools) in the engine com-
partment. There is a fire hazard and the risk of engine damage.
■
Never cover the engine with additional insulation material (e.g. with a
blanket) – risk of fire.
CAUTION■ Only start the engine when the engine and the vehicle are stationary - risk of
starter and engine damage!■
Do not push-start the engine – there is a risk of damaging the engine and
the catalytic converter. The battery from another vehicle can be used as a
jump-start aid » page 176.
Note
Do not warm up the engine while the vehicle is stationary. If possible, start
your journey as soon as the engine has started. Through this, the engine rea-
ches its operating temperature faster.
Electronic immobilizer
Read and observe
and on page 103 first.
The electronic immobilizer makes a possible attempted theft or unauthorizeduse of your vehicle more difficult.
An electronic chip is integrated in the head of the key. The immobilizer is deac-
tivated with the aid of this chip when the key is inserted in the ignition lock.
The electronic immobilizer is automatically activated when the ignition key is
withdrawn from the lock.
The engine will not start if an unauthorized ignition key is used.
The following message is shown in the information cluster display. Immobilizer active.
IMMOBILIZER ACTIVE
Lock / unlock steering lock
Read and observe
and on page 103 first.
The steering lock (steering lock) deters any attempted theft of your vehicle.
Locking
›
Withdraw the ignition key.
›
Turn the steering wheel to the left or right until the steering lock clicks into
place.
Unlocking
›
Insert the key into the ignition lock.
›
Switch on the ignition » page 104.
103Starting-off and driving
Page 107 of 216
The vehicle is unlocked.
If the ignition switch cannot be turned on, turn the steering wheel back and
forth slightly to unlock the steering lock.
Turn ignition on / off and start the engine
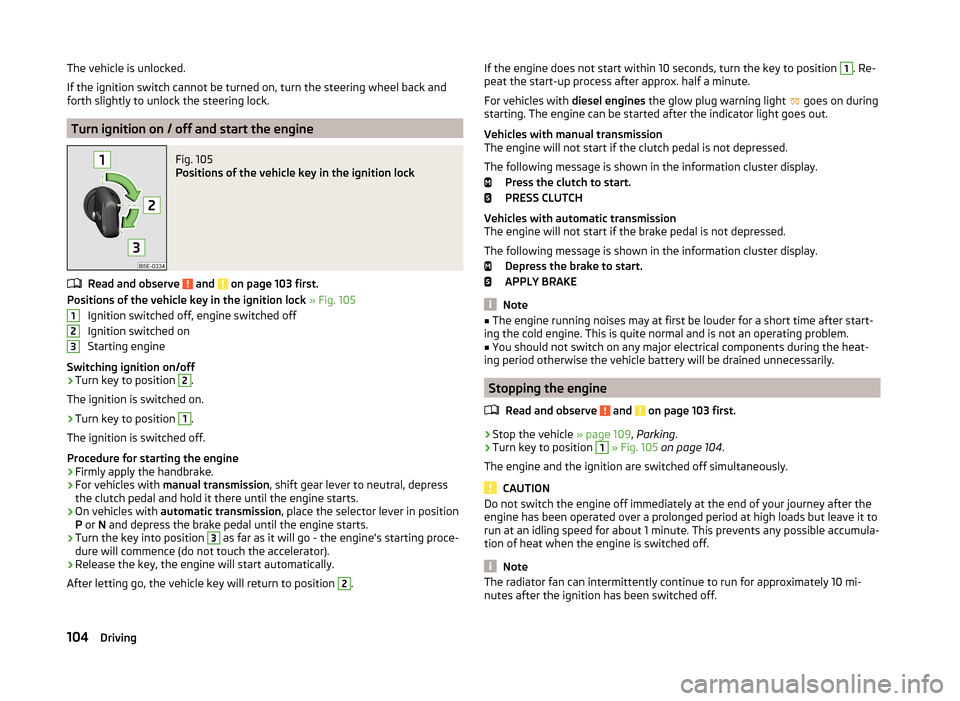
Fig. 105
Positions of the vehicle key in the ignition lock
Read and observe and on page 103 first.
Positions of the vehicle key in the ignition lock » Fig. 105
Ignition switched off, engine switched off
Ignition switched on
Starting engine
Switching ignition on/off
›
Turn key to position
2
.
The ignition is switched on.
›
Turn key to position
1
.
The ignition is switched off.
Procedure for starting the engine
›
Firmly apply the handbrake.
›
For vehicles with manual transmission , shift gear lever to neutral, depress
the clutch pedal and hold it there until the engine starts.
›
On vehicles with automatic transmission , place the selector lever in position
P or N and depress the brake pedal until the engine starts.
›
Turn the key into position
3
as far as it will go - the engine's starting proce-
dure will commence (do not touch the accelerator).
›
Release the key, the engine will start automatically.
After letting go, the vehicle key will return to position
2
.
123If the engine does not start within 10 seconds, turn the key to position 1. Re-
peat the start-up process after approx. half a minute.
For vehicles with diesel engines the glow plug warning light
goes on during
starting. The engine can be started after the indicator light goes out.
Vehicles with manual transmission
The engine will not start if the clutch pedal is not depressed.
The following message is shown in the information cluster display. Press the clutch to start.
PRESS CLUTCH
Vehicles with automatic transmission
The engine will not start if the brake pedal is not depressed.
The following message is shown in the information cluster display. Depress the brake to start.
APPLY BRAKE
Note
■ The engine running noises may at first be louder for a short time after start-
ing the cold engine. This is quite normal and is not an operating problem.■
You should not switch on any major electrical components during the heat-
ing period otherwise the vehicle battery will be drained unnecessarily.
Stopping the engine
Read and observe
and on page 103 first.
›
Stop the vehicle » page 109, Parking .
›
Turn key to position
1
» Fig. 105 on page 104 .
The engine and the ignition are switched off simultaneously.
CAUTION
Do not switch the engine off immediately at the end of your journey after the
engine has been operated over a prolonged period at high loads but leave it to
run at an idling speed for about 1 minute. This prevents any possible accumula-
tion of heat when the engine is switched off.
Note
The radiator fan can intermittently continue to run for approximately 10 mi-
nutes after the ignition has been switched off.104Driving
Page 108 of 216
Start or stop the engine by pressing button
Introduction
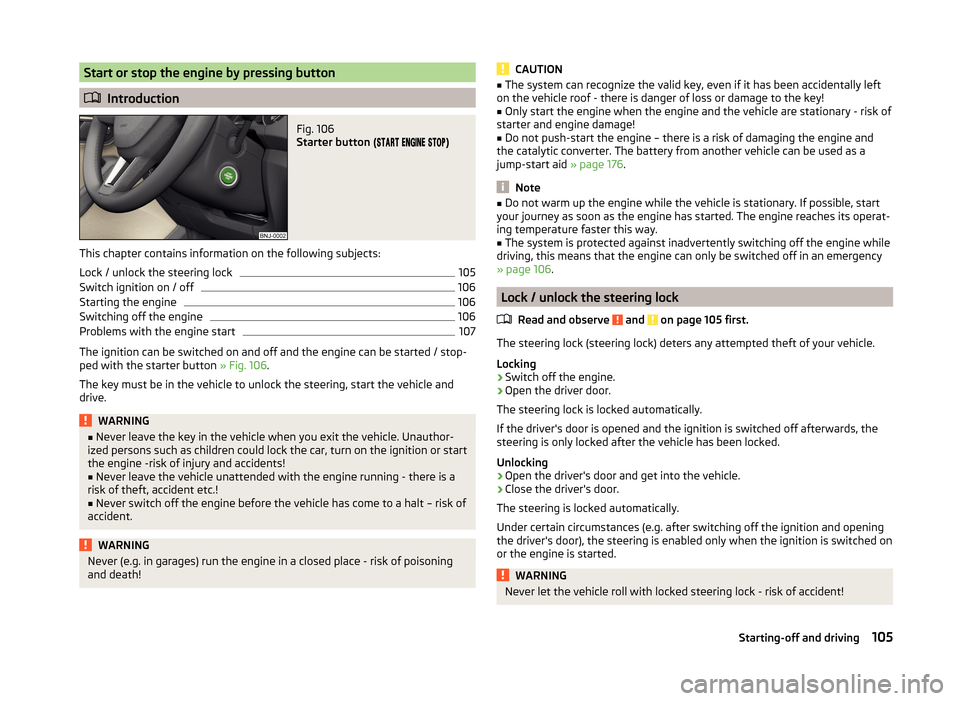
Fig. 106
Starter button (
)
This chapter contains information on the following subjects:
Lock / unlock the steering lock
105
Switch ignition on / off
106
Starting the engine
106
Switching off the engine
106
Problems with the engine start
107
The ignition can be switched on and off and the engine can be started / stop-
ped with the starter button » Fig. 106.
The key must be in the vehicle to unlock the steering, start the vehicle and
drive.
WARNING■ Never leave the key in the vehicle when you exit the vehicle. Unauthor-
ized persons such as children could lock the car, turn on the ignition or start
the engine -risk of injury and accidents!■
Never leave the vehicle unattended with the engine running - there is a
risk of theft, accident etc.!
■
Never switch off the engine before the vehicle has come to a halt – risk of
accident.
WARNINGNever (e.g. in garages) run the engine in a closed place - risk of poisoning
and death!CAUTION■ The system can recognize the valid key, even if it has been accidentally left
on the vehicle roof - there is danger of loss or damage to the key!■
Only start the engine when the engine and the vehicle are stationary - risk of
starter and engine damage!
■
Do not push-start the engine – there is a risk of damaging the engine and
the catalytic converter. The battery from another vehicle can be used as a
jump-start aid » page 176.
Note
■
Do not warm up the engine while the vehicle is stationary. If possible, start
your journey as soon as the engine has started. The engine reaches its operat-
ing temperature faster this way.■
The system is protected against inadvertently switching off the engine while
driving, this means that the engine can only be switched off in an emergency
» page 106 .
Lock / unlock the steering lock
Read and observe
and on page 105 first.
The steering lock (steering lock) deters any attempted theft of your vehicle.
Locking
›
Switch off the engine.
›
Open the driver door.
The steering lock is locked automatically.
If the driver's door is opened and the ignition is switched off afterwards, the
steering is only locked after the vehicle has been locked.
Unlocking
›
Open the driver's door and get into the vehicle.
›
Close the driver's door.
The steering is locked automatically.
Under certain circumstances (e.g. after switching off the ignition and opening
the driver's door), the steering is enabled only when the ignition is switched on
or the engine is started.
WARNINGNever let the vehicle roll with locked steering lock - risk of accident!105Starting-off and driving