wheel SKODA SUPERB 2007 1.G / (B5/3U) Owner's Manual
[x] Cancel search | Manufacturer: SKODA, Model Year: 2007, Model line: SUPERB, Model: SKODA SUPERB 2007 1.G / (B5/3U)Pages: 259, PDF Size: 14.71 MB
Page 4 of 259
Contents3
Contents
Layout of this Owner's Manual
(explanations)
. . . . . . . . . . . . . . . . . . . . . . . . . .
Using the system. . . . . . . . . . . . . . . . . . . . . .
Cockpit. . . . . . . . . . . . . . . . . . . . . . . . . . . . . . . . . . . . . . . .
General view . . . . . . . . . . . . . . . . . . . . . . . . . . . . . . . . .
Instruments and Indicator/Warning Lights. . .
General view of the instrument cluster . . . . . . . . .
Engine revolutions counter . . . . . . . . . . . . . . . . . . . .
Coolant temperature gauge . . . . . . . . . . . . . . . . . . .
Fuel gauge . . . . . . . . . . . . . . . . . . . . . . . . . . . . . . . . . . .
Digital clock . . . . . . . . . . . . . . . . . . . . . . . . . . . . . . . . . .
Speedometer with counter for distance driven . .
Service Interval Display . . . . . . . . . . . . . . . . . . . . . . .
Multi-functional indicato r (onboard computer) .
Information display* . . . . . . . . . . . . . . . . . . . . . . . . . .
Auto Check Control . . . . . . . . . . . . . . . . . . . . . . . . . . .
Warning lights . . . . . . . . . . . . . . . . . . . . . . . . . . . . . . . .
Unlocking and locking . . . . . . . . . . . . . . . . . . . . . . . .
Key . . . . . . . . . . . . . . . . . . . . . . . . . . . . . . . . . . . . . . . . . .
Changing the key battery . . . . . . . . . . . . . . . . . . . . . .
Electronic immobiliser . . . . . . . . . . . . . . . . . . . . .
Child safety lock . . . . . . . . . . . . . . . . . . . . . . . . . . . . . .
Central locking system . . . . . . . . . . . . . . . . . . . . . . . .
Remote control . . . . . . . . . . . . . . . . . . . . . . . . . . . . . . .
Anti-theft alarm system* . . . . . . . . . . . . . . . . . . . . . .
Power windows . . . . . . . . . . . . . . . . . . . . . . . . . . . . . .
Electric sliding/tilting roof* . . . . . . . . . . . . . . . . . . . .
Lights and Visibility . . . . . . . . . . . . . . . . . . . . . . . . . . .
Lights . . . . . . . . . . . . . . . . . . . . . . . . . . . . . . . . . . . . . . . .
Interior lighting . . . . . . . . . . . . . . . . . . . . . . . . . . . . . . . Visibility . . . . . . . . . . . . . . . . . . . . . . . . . . . . . . . . . . . . .
Windshield wiper and wash system . . . . . . . . . . . .
Rear-view mirror . . . . . . . . . . . . . . . . . . . . . . . . . . . . .
Seats and Stowage. . . . . . . . . . . . . . . . . . . . . . . . . . . .
Front seats . . . . . . . . . . . . . . . . . . . . . . . . . . . . . . . . . . .
Adjusting front seats manually . . . . . . . . . . . . . . . . .
Adjusting front seats electrically* . . . . . . . . . . . . . .
Front passenger seat with a folding central back
rest* . . . . . . . . . . . . . . . . . . . . . . . . . . . . . . . . . . . . . . . . .
Footrest at the rear* . . . . . . . . . . . . . . . . . . . . . . . . . .
Seat heaters* . . . . . . . . . . . . . . . . . . . . . . . . . . . . . . . . .
Pedals . . . . . . . . . . . . . . . . . . . . . . . . . . . . . . . . . . . . . . .
luggage compartment . . . . . . . . . . . . . . . . . . . . . . . .
The cool box behind the armrest of the rear seats*
CargoFlex folding box* . . . . . . . . . . . . . . . . . . . . . . . .
The roof luggage rack system . . . . . . . . . . . . . . . . . .
Cup holder . . . . . . . . . . . . . . . . . . . . . . . . . . . . . . . . . . .
Ashtrays . . . . . . . . . . . . . . . . . . . . . . . . . . . . . . . . . . . . .
Cigarette lighters and power sockets . . . . . . . . . . .
Storage facilities . . . . . . . . . . . . . . . . . . . . . . . . . . . . . .
Heating and air conditioning system. . . . . . . . .
Air conditioning system . . . . . . . . . . . . . . . . . . . . . . .
Climatronic* (automatic air conditioning) . . . . . .
Starting-off and Driving. . . . . . . . . . . . . . . . . . . . . . .
Setting steering wheel position . . . . . . . . . . . . . . . .
Ignition lock . . . . . . . . . . . . . . . . . . . . . . . . . . . . . . . . . .
Starting the engine . . . . . . . . . . . . . . . . . . . . . . . . . . .
Switching the engine off . . . . . . . . . . . . . . . . . . . . . . .
Shifting (manual gearbox) . . . . . . . . . . . . . . . . . . . . .
Handbrake . . . . . . . . . . . . . . . . . . . . . . . . . . . . . . . . . . .
Parking aid* . . . . . . . . . . . . . . . . . . . . . . . . . . . . . . . . . .
Front and rear parking aid* . . . . . . . . . . . . . . . . . . . .
Cruise control system (CCS)* . . . . . . . . . . . . . . . . . .
Automatic gearbox* . . . . . . . . . . . . . . . . . . . . . . . . . .
5-speed automatic gearbox . . . . . . . . . . . . . . . . . . .
Communicating and Navigating . . . . . . . . . . . . .
Multifunction steering wheel* . . . . . . . . . . . . . . . . .
CD changer* . . . . . . . . . . . . . . . . . . . . . . . . . . . . . . . . .
Mobile phone, two-way radio system and
navigation system . . . . . . . . . . . . . . . . . . . . . . . . . . . .
Safety . . . . . . . . . . . . . . . . . . . . . . . . . . . . . . . . . . . . . .
Passive Safety . . . . . . . . . . . . . . . . . . . . . . . . . . . . . . . . .
Basic information . . . . . . . . . . . . . . . . . . . . . . . . . . . .
Correct seated position . . . . . . . . . . . . . . . . . . . . . . .
Seat belts. . . . . . . . . . . . . . . . . . . . . . . . . . . . . . . . . . . . . .
Why seat belts? . . . . . . . . . . . . . . . . . . . . . . . . . . . . . .
The physical principle of a frontal collision . . . . .
Important safety information regarding the use of
seat belts . . . . . . . . . . . . . . . . . . . . . . . . . . . . . . . . . . . .
How are seat belts correctly fastened? . . . . . . . . .
Belt tensioners . . . . . . . . . . . . . . . . . . . . . . . . . . . . . . .
Airbag system. . . . . . . . . . . . . . . . . . . . . . . . . . . . . . . . .
Description of the airbag system . . . . . . . . . . . . . . .
Front airbag . . . . . . . . . . . . . . . . . . . . . . . . . . . . . . . . . .
Side airbag . . . . . . . . . . . . . . . . . . . . . . . . . . . . . . . . . . .
Head airbags* . . . . . . . . . . . . . . . . . . . . . . . . . . . . . . . .
Deactivating an airbag . . . . . . . . . . . . . . . . . . . . . . . .
Transporting children safely . . . . . . . . . . . . . . . . . .
What you should know about transporting
children! . . . . . . . . . . . . . . . . . . . . . . . . . . . . . . . . . . . . .
Child seat . . . . . . . . . . . . . . . . . . . . . . . . . . . . . . . . . . . .
Attaching child safety seat . . . . . . . . . . . . . . . . . . . . .
6
7
9
9
11
11
12
12
12
13
13
14
15
18
20
22
31
31
32
32
33
33
37
39
40
43
46
46
50 52
53
56
59
59
59
60
64
65
66
66
67
73
75
77
78
79
81
82
89
89
93
99
99
100
101
102
103
103
104
105
106 109
109
115
115
118
121
125
125
125
127
130
130
131
131
132
134
136
136
138
140
142
144
146
146
149
152
NKO B5 20.book Page 3 Friday, March 2, 2007 1:46 PM
Page 5 of 259
Contents
4
Driving Tips. . . . . . . . . . . . . . . . . . . . . . . . . . . . . .
Intelligent Technology . . . . . . . . . . . . . . . . . . . . . . . .
Electronic stability programme (ESP)* . . . . . . . . . .
Brakes . . . . . . . . . . . . . . . . . . . . . . . . . . . . . . . . . . . . . . .
Brake booster . . . . . . . . . . . . . . . . . . . . . . . . . . . . . . . .
Antilock brake system (ABS) . . . . . . . . . . . . . . . . . . .
Brake Assist* . . . . . . . . . . . . . . . . . . . . . . . . . . . . . . . . .
Power steering . . . . . . . . . . . . . . . . . . . . . . . . . . . . . . .
Diesel particle filter* (diesel engine) . . . . . . . . . . . .
Driving and the Environment. . . . . . . . . . . . . . . . .
The first 1 500 kilometres and then afterwards . .
Catalytic converter . . . . . . . . . . . . . . . . . . . . . . . . . . . .
Driving in an economical and environmentally
conscious manner . . . . . . . . . . . . . . . . . . . . . . . . . . . .
Environmental compatibility . . . . . . . . . . . . . . . . . . .
Motoring abroad . . . . . . . . . . . . . . . . . . . . . . . . . . . . .
Avoiding damage to your vehicle . . . . . . . . . . . . . .
To w i n g a t r a i l e r. . . . . . . . . . . . . . . . . . . . . . . . . . . . . . . .
Towing a trailer . . . . . . . . . . . . . . . . . . . . . . . . . . . . . . .
Detachable towing device* . . . . . . . . . . . . . . . . . . . .
General Maintenance. . . . . . . . . . . . . . .
Taking care of your ve hicle and cleaning the
vehicle. . . . . . . . . . . . . . . . . . . . . . . . . . . . . . . . . . . . . . . . .
General . . . . . . . . . . . . . . . . . . . . . . . . . . . . . . . . . . . . . .
Care of the exterior of vehicle . . . . . . . . . . . . . . . . . .
Care of the interior of vehicle . . . . . . . . . . . . . . . . . .
Fuel. . . . . . . . . . . . . . . . . . . . . . . . . . . . . . . . . . . . . . . . . . . .
Petrol . . . . . . . . . . . . . . . . . . . . . . . . . . . . . . . . . . . . . . . .
Diesel . . . . . . . . . . . . . . . . . . . . . . . . . . . . . . . . . . . . . . .
Refuelling . . . . . . . . . . . . . . . . . . . . . . . . . . . . . . . . . . . .
Inspecting and Replenishing. . . . . . . . . . . . . . . . . .
Engine compartment . . . . . . . . . . . . . . . . . . . . . . . . .
Overview of the engine compartment . . . . . . . . . .
Engine oil . . . . . . . . . . . . . . . . . . . . . . . . . . . . . . . . . . . .
Cooling system . . . . . . . . . . . . . . . . . . . . . . . . . . . . . . . Brake fluid . . . . . . . . . . . . . . . . . . . . . . . . . . . . . . . . . . .
Battery . . . . . . . . . . . . . . . . . . . . . . . . . . . . . . . . . . . . . . .
Windshield washer system . . . . . . . . . . . . . . . . . . . .
Wheels and Tyres. . . . . . . . . . . . . . . . . . . . . . . . . . . . . .
Wheels . . . . . . . . . . . . . . . . . . . . . . . . . . . . . . . . . . . . . .
Accessories, changes and replacement of partsAccessories and replacement parts . . . . . . . . . . . . .
Technical changes . . . . . . . . . . . . . . . . . . . . . . . . . . . .
Breakdown assistance. . . . . . . . . . . . . .
Breakdown assistance . . . . . . . . . . . . . . . . . . . . . . . .
First-aid box* . . . . . . . . . . . . . . . . . . . . . . . . . . . . . . . . .
Warning triangle . . . . . . . . . . . . . . . . . . . . . . . . . . . . . .
Fire extinguisher* . . . . . . . . . . . . . . . . . . . . . . . . . . . . .
Vehicle tool kit . . . . . . . . . . . . . . . . . . . . . . . . . . . . . . . .
Spare wheel . . . . . . . . . . . . . . . . . . . . . . . . . . . . . . . . . .
Changing a wheel . . . . . . . . . . . . . . . . . . . . . . . . . . . . .
Jump-starting . . . . . . . . . . . . . . . . . . . . . . . . . . . . . . . .
Tow-starting and towing vehicle . . . . . . . . . . . . . . .
Fuses and light bulbs. . . . . . . . . . . . . . . . . . . . . . . . . .
Electric fuses . . . . . . . . . . . . . . . . . . . . . . . . . . . . . . . . .
Bulbs . . . . . . . . . . . . . . . . . . . . . . . . . . . . . . . . . . . . . . . .
Technical Data. . . . . . . . . . . . . . . . . . . . . . . . . .
Te c h n i c a l D a t a. . . . . . . . . . . . . . . . . . . . . . . . . . . . . . . . .
General comments . . . . . . . . . . . . . . . . . . . . . . . . . . .
Used abbreviations . . . . . . . . . . . . . . . . . . . . . . . . . . .
Performances . . . . . . . . . . . . . . . . . . . . . . . . . . . . . . . .
Weight . . . . . . . . . . . . . . . . . . . . . . . . . . . . . . . . . . . . . . .
Identification details . . . . . . . . . . . . . . . . . . . . . . . . . .
Fuel consumption according to the regulations
(99/100/EU) . . . . . . . . . . . . . . . . . . . . . . . . . . . . . . . . . .
Dimensions . . . . . . . . . . . . . . . . . . . . . . . . . . . . . . . . . .
2.0 ltr./85 kW - EU 4 . . . . . . . . . . . . . . . . . . . . . . . . . . .
1.8 ltr./110 kW - EU 4/EU 2 . . . . . . . . . . . . . . . . . . . . .
2.8 ltr./142 kW - EU 4 . . . . . . . . . . . . . . . . . . . . . . . . . . 2.8 ltr./140 kW - EU 2 . . . . . . . . . . . . . . . . . . . . . . . . . .
1,9 l/77 kW TDI PD - EU 4 . . . . . . . . . . . . . . . . . . . . . .
1,9 l/85 kW TDI PD - EU 4 . . . . . . . . . . . . . . . . . . . . . .
1,9 l/96 kW TDI PD - EU 3 . . . . . . . . . . . . . . . . . . . . . .
2.0 ltr./103 kW TDI DPF - EU 4 . . . . . . . . . . . . . . . . . .
2.5 ltr./120 kW TDI PD - EU 4 . . . . . . . . . . . . . . . . . . .
Index . . . . . . . . . . . . . . . . . . . . . . . . . . . . . . . . . . . . . . . .
155
155
155
158
158
159
159
160
160
162
162
163
163
167
167
168
169
169
171
173
173
173
173
178
181
181
181
182
184
184
186
186
189 191
193
197
199
199
205
205
205
207
207
207
207
207
208
209
209
215
217
220
220
222
227
227
227
227
227
227
227
228
228
230
232
234236
238
240
242
244
246
249
NKO B5 20.book Page 4 Friday, March 2, 2007 1:46 PM
Page 10 of 259
Cockpit9
Using the systemSafetyDriving TipsGeneral MaintenanceBreakdown assistanceTechnical Data
Cockpit
General view
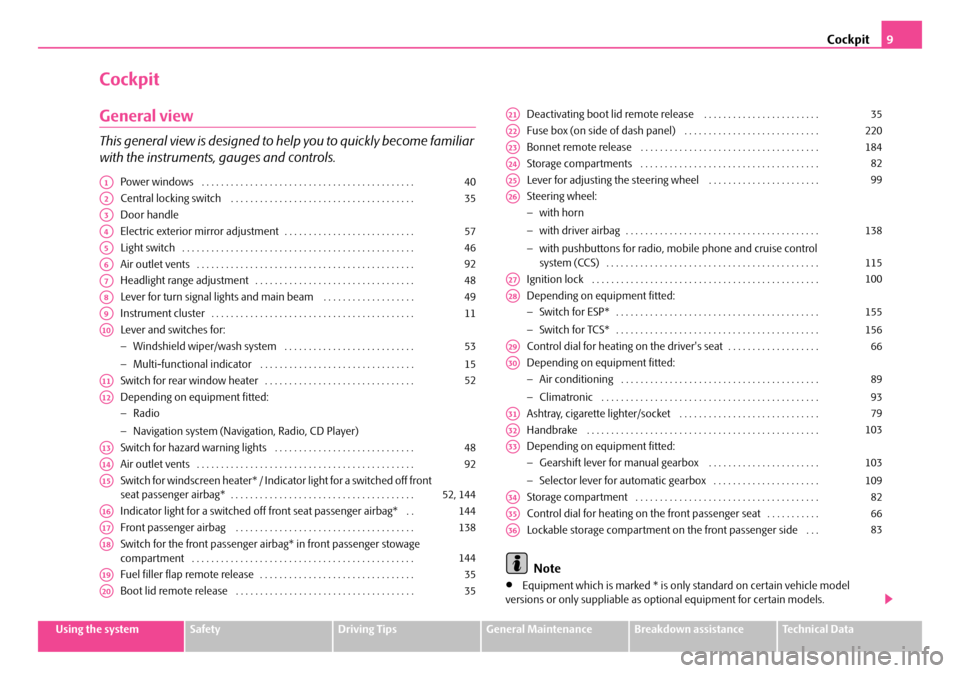
This general view is designed to help you to quickly become familiar
with the instruments, gauges and controls.
Power windows . . . . . . . . . . . . . . . . . . . . . . . . . . . . . . . . . . . . . . . . . . . .
Central locking switch . . . . . . . . . . . . . . . . . . . . . . . . . . . . . . . . . . . . . .
Door handle
Electric exterior mirror adjustment . . . . . . . . . . . . . . . . . . . . . . . . . . .
Light switch . . . . . . . . . . . . . . . . . . . . . . . . . . . . . . . . . . . . . . . . . . . . . . . .
Air outlet vents . . . . . . . . . . . . . . . . . . . . . . . . . . . . . . . . . . . . . . . . . . . . .
Headlight range adjustment . . . . . . . . . . . . . . . . . . . . . . . . . . . . . . . . .
Lever for turn signal lights and main beam . . . . . . . . . . . . . . . . . . .
Instrument cluster . . . . . . . . . . . . . . . . . . . . . . . . . . . . . . . . . . . . . . . . . .
Lever and switches for:
−Windshield wiper/wash system . . . . . . . . . . . . . . . . . . . . . . . . . . .
− Multi-functional indicator . . . . . . . . . . . . . . . . . . . . . . . . . . . . . . . .
Switch for rear window heater . . . . . . . . . . . . . . . . . . . . . . . . . . . . . . .
Depending on equipment fitted:
− Radio
− Navigation system (Navigation, Radio, CD Player)
Switch for hazard warning lights . . . . . . . . . . . . . . . . . . . . . . . . . . . . .
Air outlet vents . . . . . . . . . . . . . . . . . . . . . . . . . . . . . . . . . . . . . . . . . . . . .
Switch for windscreen heater* / Indic ator light for a switched off front
seat passenger airbag* . . . . . . . . . . . . . . . . . . . . . . . . . . . . . . . . . . . . . .
Indicator light for a switched off front seat passenger airbag* . .
Front passenger airbag . . . . . . . . . . . . . . . . . . . . . . . . . . . . . . . . . . . . .
Switch for the front passenger ai rbag* in front passenger stowage
compartment . . . . . . . . . . . . . . . . . . . . . . . . . . . . . . . . . . . . . . . . . . . . . .
Fuel filler flap remote release . . . . . . . . . . . . . . . . . . . . . . . . . . . . . . . .
Boot lid remote release . . . . . . . . . . . . . . . . . . . . . . . . . . . . . . . . . . . . . Deactivating boot lid remote release . . . . . . . . . . . . . . . . . . . . . . . .
Fuse box (on side of dash panel) . . . . . . . . . . . . . . . . . . . . . . . . . . . .
Bonnet remote release . . . . . . . . . . . . . . . . . . . . . . . . . . . . . . . . . . . . .
Storage compartments . . . . . . . . . . . . . . . . . . . . . . . . . . . . . . . . . . . . .
Lever for adjusting the steering wheel . . . . . . . . . . . . . . . . . . . . . . .
Steering wheel:
−
with horn
− with driver airbag . . . . . . . . . . . . . . . . . . . . . . . . . . . . . . . . . . . . . . . .
− with pushbuttons for radio, mobile phone and cruise control
system (CCS) . . . . . . . . . . . . . . . . . . . . . . . . . . . . . . . . . . . . . . . . . . . .
Ignition lock . . . . . . . . . . . . . . . . . . . . . . . . . . . . . . . . . . . . . . . . . . . . . . .
Depending on equipment fitted:
− Switch for ESP* . . . . . . . . . . . . . . . . . . . . . . . . . . . . . . . . . . . . . . . . . .
− Switch for TCS* . . . . . . . . . . . . . . . . . . . . . . . . . . . . . . . . . . . . . . . . . .
Control dial for heating on the driver's seat . . . . . . . . . . . . . . . . . . .
Depending on equipment fitted:
− Air conditioning . . . . . . . . . . . . . . . . . . . . . . . . . . . . . . . . . . . . . . . . .
− Climatronic . . . . . . . . . . . . . . . . . . . . . . . . . . . . . . . . . . . . . . . . . . . . .
Ashtray, cigarette lighter/socket . . . . . . . . . . . . . . . . . . . . . . . . . . . . .
Handbrake . . . . . . . . . . . . . . . . . . . . . . . . . . . . . . . . . . . . . . . . . . . . . . . .
Depending on equipment fitted:
− Gearshift lever for manual gearbox . . . . . . . . . . . . . . . . . . . . . . .
− Selector lever for automatic gearbox . . . . . . . . . . . . . . . . . . . . . .
Storage compartment . . . . . . . . . . . . . . . . . . . . . . . . . . . . . . . . . . . . . .
Control dial for heating on the front passenger seat . . . . . . . . . . .
Lockable storage compartment on the front passenger side . . .
Note
•Equipment which is marked * is only standard on certain vehicle model
versions or only suppliable as op tional equipment for certain models.
A140
A235
A3
A457
A546
A692
A748
A849
A911
A10
53
15
A1152
A12
A1348
A1492
A1552, 144
A16144
A17138
A18144
A1935
A2035
A2135
A22220
A23184
A2482
A2599
A26
138
115
A27100
A28
155
156
A2966
A30
89
93
A3179
A32103
A33
103
109
A3482
A3566
A3683
NKO B5 20.book Page 9 Friday, March 2, 2007 1:46 PM
Page 27 of 259
Instruments and Indicator/Warning Lights
26
Glow plug system (diesel engine)
The indicator light lights up for a cold engine when switching on the ignition
(pre-heat position) 2 ⇒ page 100. Start the engine just as soon as the indicator light
goes out.
The glow plug indicator light will come on for about 1 second if the engine is at a
normal operating temperature or if the outside temperature is above +5°C. This
means that you can start the engine right away.
There is a fault in the glow plug system if the indicator light
does not come on
at all or lights up continuously. Contact a specialist garage as soon as possible to
obtain assistance.
There is a system fault in the engine control system if the warning light
has
started to flash while driving. The engi ne management system selects an emer-
gency programme which enables you to drive to the nearest specialist garage by
adopting a gentle style of driving.
The following text will be displayed in the information display*:
ENGINE WORKSHOP! (ENG INE FAULT - WORKSHOP!)
Coolant temperature, Coolant quantity
The warning light comes on for a few seconds 1) when the ignition is switched on.
The coolant temperature is too high or the coolant level too low if the warning light
does not go out after the engine is started or flashes while driving.
3 peeps sound as an additional warning signal.
In this case stop and switch the engine off and check the coolant level; top up the
coolant as necessary. Please also re fer to the additional instructions ⇒page 190,
“Replenishing the coolant”.
Do not continue your journey if for some reason it is not possible under the
conditions prevailing to top up with coolant. Keep the engine switched off and obtain professional assistance from a specialist garage, otherwise it could lead to
severe engine damage.
If the coolant is within the specified range, the increased temperature may be
caused by an operating problem at the coolant fan. Check the fuse for the coolant
fan, replace it if necessary
⇒page 220, “Replacing fuses”.
Do not continue driving if the warning light does not go off although the fluid is at
the correct level and also the fuse of the fan is in proper order. Contact a specialist
garage to obtain assistance.
Please also refer to the additional instructions ⇒page 190, “Replenishing the
coolant”.
The following text will be displayed in the information display*:
STOP CHECK COOLANT SERVICE MANUAL (STOP! CHECK COOLANT!
OWNER'S MANUAL)
WARNING
•If you must stop for technical reasons, then park the vehicle at a safe
distance from the traffic and switch off the engine and switch on the hazard
warning light system ⇒page 48.
•Take care when opening the coolant expa nsion bottle. If the engine is hot,
the cooling system is pressurized - risk of scalding! It is best to allow the
engine to cool down before removing the cap.
•Do not touch the coolant fan! The coolant fan may switch on automati-
cally even if the ignition is off.
Thickness of the brake pads
If the warning light comes on, contact a specialist garage immediately and have
the brake pads on all of the wheels inspected.
A peep sounds as an additional warning signal.
The following text will be displayed in the information display*: CHECK BRAKE PADS
1)The warning light on vehicles fitted with information display does not come on after
switching the ignition on, but only if the coolant temperature is too high or the coolant level
is too low.
NKO B5 20.book Page 26 Friday, March 2, 2007 1:46 PM
Page 30 of 259
Instruments and Indicator/Warning Lights29
Using the systemSafetyDriving TipsGeneral MaintenanceBreakdown assistanceTechnical Data
The fact that the TCS system operates together with the ABS means that the TCS
warning light will also come on if the
ABS system is not operating properly.
Further information about the TCS ⇒page 156, “Traction control system (TCS)*”.
Antilock brake system (ABS)
The warning light shows the functionality of the ABS and the Electronic Differ-
ential Lock (EDL).
The warning light comes on for a few seconds after the ignition has been switched
on or when starting the engine. The warning light goes out after an automatic check
sequence has been completed.
A fault in the ABS
The system is not functioning properly if the warning light
does not go out within
a few seconds after switching on the ignition , does not light up at all or lights up
while driving. The vehicle will only be br aked by the normal brake system. Visit a
specialist garage as quickly as possible and adjust your style of driving in the mean-
time since you will not know how great the damage is.
Three additional warning tones will sound if there is a major fault in the ABS.
Further information about ABS ⇒page 159, “Antilock brake system (ABS)”.
A fault in the entire brake system
If the ABS warning light
comes on together with the brake system warning light (handbrake must be released), there is a fault not only in the ABS but also in
another part of the brake system ⇒.
The following text will be displayed in the information display*: STOP BRAKE FAULT SERVICE MANUAL (STOP! BRAKE FAULT OWNER'S
MANUAL)
Electronic Differential Lock (EDL)
The EDL is a part of the ABS. A fault in the EDL is indicated by the ABS warning light
in the instrument cluster. Have the ve hicle inspected without delay by a Škoda
Service Partner. Further information on the EDL ⇒page 157, “Electronic Differen-
tial Lock (EDL)”.
WARNING
•If the brake system warning light comes on together with the ABS
warning light stop the vehicle immediately and check the brake fluid
level in the reservoir ⇒page 191, “Brake fluid”. If the brake fluid level has
dropped below the MIN marking, do not drive any further - risk of accident!
Contact a Škoda dealer to obta in professional assistance.
•Pay attention to the following instructions ⇒ page 185, “Working in the
engine compartment” before checking the brake fluid level and opening the
bonnet.
•If the brake fluid is at the correct level, the ABS control function has
failed. The rear wheels may then block very rapidly when braking. In certain
circumstances, this can result in the rear end of the car breaking away - risk
of skidding! Drive carefully to the nearest specialist garage and have the
fault rectified.
Electronic immobiliser
Data is compared between the ignition ke y and the control unit when switching on
the ignition. The indicator light will light up for a few seconds when ignition key
authorisation is confirmed.
The warning light will start flashing conti nuously if a non-authorised ignition key
(for example the wrong ignition key) has been used. The engine cannot be started
⇒ page 32.
It is only possible to start the engine of your car with a Genuine Škoda key with the
matching code.
Brake system
The warning light flashes or comes on if the brake fluid level is too low, if there
is a fault in the ABS or if the handbrake is applied.
If the warning light
flashes (handbrake is not applied), stop and check the brake
fluid level ⇒ .
NKO B5 20.book Page 29 Friday, March 2, 2007 1:46 PM
Page 50 of 259
Lights and Visibility49
Using the systemSafetyDriving TipsGeneral MaintenanceBreakdown assistanceTechnical Data
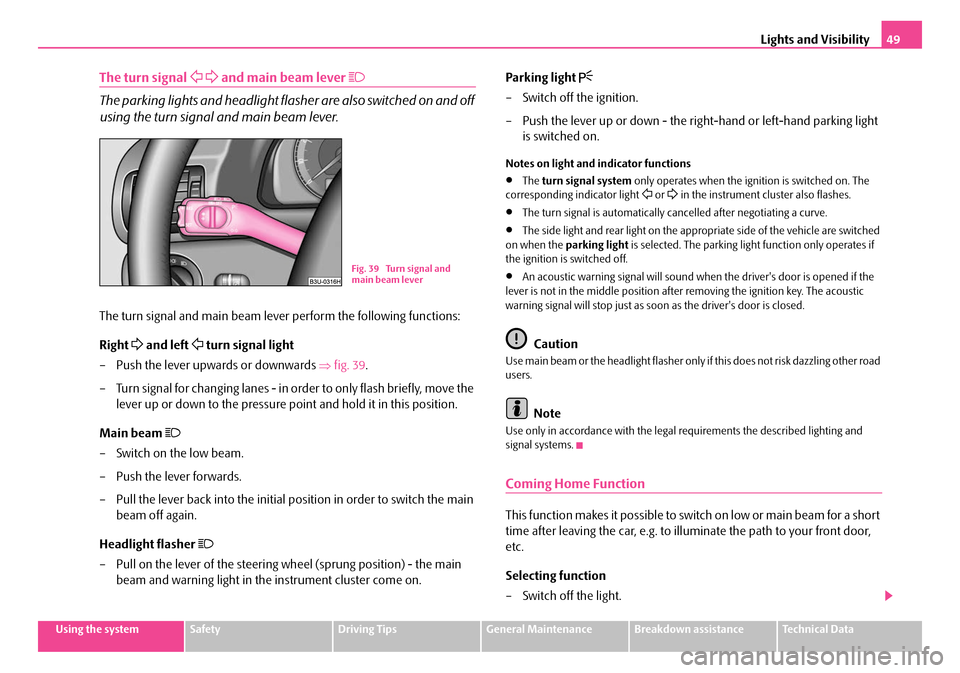
The turn signal and main beam lever
The parking lights and headlight flas her are also switched on and off
using the turn signal and main beam lever.
The turn signal and main beam lever perform the following functions:
Right
and left turn signal light
– Push the lever upwards or downwards ⇒fig. 39 .
– Turn signal for changing lanes - in or der to only flash briefly, move the
lever up or down to the pressure po int and hold it in this position.
Main beam
– Switch on the low beam.
– Push the lever forwards.
– Pull the lever back into the initial position in order to switch the main beam off again.
Headlight flasher
– Pull on the lever of the steering wheel (sprung position) - the main beam and warning light in the instrument cluster come on. Parking light
– Switch off the ignition.
– Push the lever up or down - the right-hand or left-hand parking light
is switched on.
Notes on light and indicator functions
•The turn signal system only operates when the ignition is switched on. The
corresponding indicator light or in the instrument cluster also flashes.
•The turn signal is automatically cancelled after negotiating a curve.
•The side light and rear light on the appropriate side of the vehicle are switched
on when the parking light is selected. The parking light function only operates if
the ignition is switched off.
•An acoustic warning signal will sound when the driver's door is opened if the
lever is not in the middle position after removing the ignition key. The acoustic
warning signal will stop just as soon as the driver's door is closed.
Caution
Use main beam or the headlight flasher only if this does not risk dazzling other road
users.
Note
Use only in accordance with the legal requirements the described lighting and
signal systems.
Coming Home Function
This function makes it possible to switch on low or main beam for a short
time after leaving the car, e.g. to illuminate the path to your front door,
etc.
Selecting function
– Switch off the light.
Fig. 39 Turn signal and
main beam lever
NKO B5 20.book Page 49 Friday, March 2, 2007 1:46 PM
Page 55 of 259
Lights and Visibility
54
Finger-operated wiping
– Position the lever down into position if you wish to wipe the wind-screen only for a single wipe - spring-tensioned position.
Intermittent wiping
– Position the lever up into position .
– Set with the switch the desired break between the individual wiper strokes
Slow wipe
– Position the lever up into position .
Fast wipe
– Position the lever up into position .
Automatic wipe/wash for windscreen
– Pull the lever towards the steering wheel into position and the widescreen wiper and wash system will operate - in the sprung posi-
tion.
– Release the lever. The washer system stops and the wipers continue
operating for a further 4 seconds or so.
Switching windscreen wipers off
– Move the lever back into its home position .
Rain sensor*
– Move the lever into position .
– You can set the sensitivity of the sensor individually with switch .
– If you have switched the ignition o ff and on again, you must then once
again activate the sensor by moving the lever into home position ,
and then back into position .
The windscreen wipers and the windscreen washer system only operate if the igni-
tion is switched on.
The windscreen washer nozzles are heated* when the ignition is switched on.
The rain sensor* automatically regulates the break between the individual wiper
strokes depending on the intensity of the rain.
Top up with wash liquid ⇒page 197.
WARNING
•Properly maintained windscreen wiper blades are essential for clear visi-
bility and safe driving ⇒page 55.
•Do not use the windscreen washer system at low temperatures, without
heating the windscreen beforehand. Otherwise the window cleaner could
freeze on the windscreen and re strict the view to the front.
•The rain sensor only operates as a support. The driver is not released
from the responsibility to set the function of the windscreen wipers manu-
ally depending on the visibility conditions.
Caution
In frosty weather, please first of all check whether the windscreen wiper blades are
not frozen to the windscreen before switching them on. Switching on windscreen
wipers when the blades are frozen to the windscreen may result in damage both to
the blades and the motor of the windscreen wipers!
A4
A1
AA
A2
A3
A5
A0
A1
AA
A0
A1
NKO B5 20.book Page 54 Friday, March 2, 2007 1:46 PM
Page 60 of 259
Seats and Stowage59
Using the systemSafetyDriving TipsGeneral MaintenanceBreakdown assistanceTechnical Data
Seats and Stowage
Front seats
Basic information
The front seats have a wide range of differ ent settings and can thus be matched to
the physical characteristics of the driver and front passenger. Correct adjustment of
the seats is particularly important for
•safely and quickly reaching the controls,
•a relaxed, fatigue-free body position,
•achieving the maximum protection offere d by the seat belts and the airbag
system.
The chapters which follow describe the procedure which you should adopt for
adjusting the seats.
WARNING
•Never transport more occupants than the maximum seating in the
vehicle.
•Each occupant must correctly fasten the seat belt belonging to the seat.
Children must be fastened ⇒page 146, “Transporting children safely” with
a suitable restraint system.
•The front seats and the head restraints must always be adjusted to match
the body size of the seat occupant as well as the seat belts must always be
correctly fastened in order to provide an optimal protection for you and your
occupants.
•Always keep your feet in the footwell when the car is being driven - never
place your feet on the instrument panel, out of the window or on the
surfaces of the seats. This is particularly important for the front seat
passenger. You will be exposed to increa sed risk of injury if it becomes
necessary to apply the brake or in the ev ent of an accident. If an airbag is
deployed, you may suffer fatal injuries when adopting an incorrect seated
position!
•It is important for the driver and front passenger to maintain a distance
of at least 25 cm from the steering wheel or dash panel. Not maintaining this
minimum distance will mean that the airb ag system will not be able to prop-
erly protect you - hazard! The front seats and the head restraints must
always also be correctly adjusted to match the body size of the occupant.
•Ensure that there are no objects in the footwell as any objects may get
behind the pedals during a driving or braking manoeuvre. You would then
no longer be able to operate the clutch, to brake or accelerate.
Adjusting front seats manually
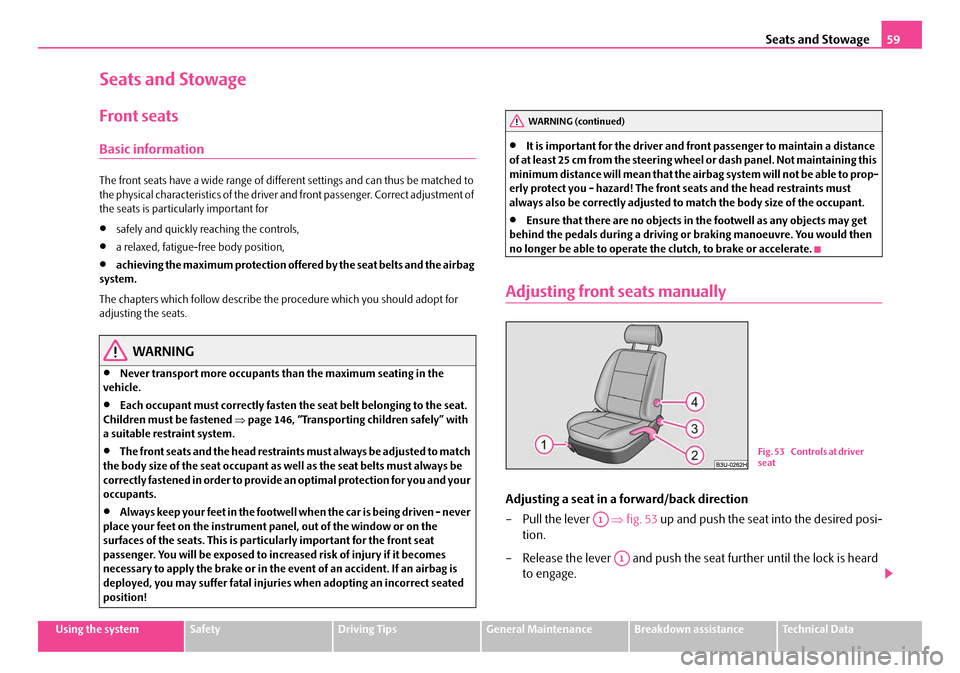
Adjusting a seat in a forward/back direction
–Pull the lever ⇒fig. 53 up and push the seat into the desired posi-
tion.
– Release the lever and push the seat further until the lock is heard to engage.
WARNING (continued)
Fig. 53 Controls at driver
seat
A1
A1
NKO B5 20.book Page 59 Friday, March 2, 2007 1:46 PM
Page 61 of 259
Seats and Stowage
60
Adjusting height of seat
– Lift the seat if required by pulling or pumping lever ⇒page 59,
fig. 53 upwards.
– Lower the seat if required by pushing or pumping lever down- wards.
Adjust the angle of the seat backrest
– Relieve any pressure on the backrest (do not lean on it) and turn the handwheel to adjust the angle of the backrest.
Adjusting Lumbar support
– Turn the handwheel until you have set the most comfortable curvature of the seat upholstery in the area of your spine.
The driver's seat should be adjusted in such a way that the pedals can be pressed
to the floor with slightly bent legs.
The backrest on the driver's seat should be adjusted in such a way that the upper
point of the steering wheel can be easi ly reached with slightly bent arms.
WARNING
•Only adjust the driver seat when the ve hicle is stationary - risk of injury!
•Take care when adjusting the seat! Adjusting the seat without care can
lead to bruises or injuries.
•The backrests must not be angled too far back when driving otherwise
this will affect proper operation of th e seat belts and of the airbag system -
risk of injury!
Adjusting front seats electrically*
Adjusting seats
Adjusting seat
– Adopt the correct seated position ⇒page 59.
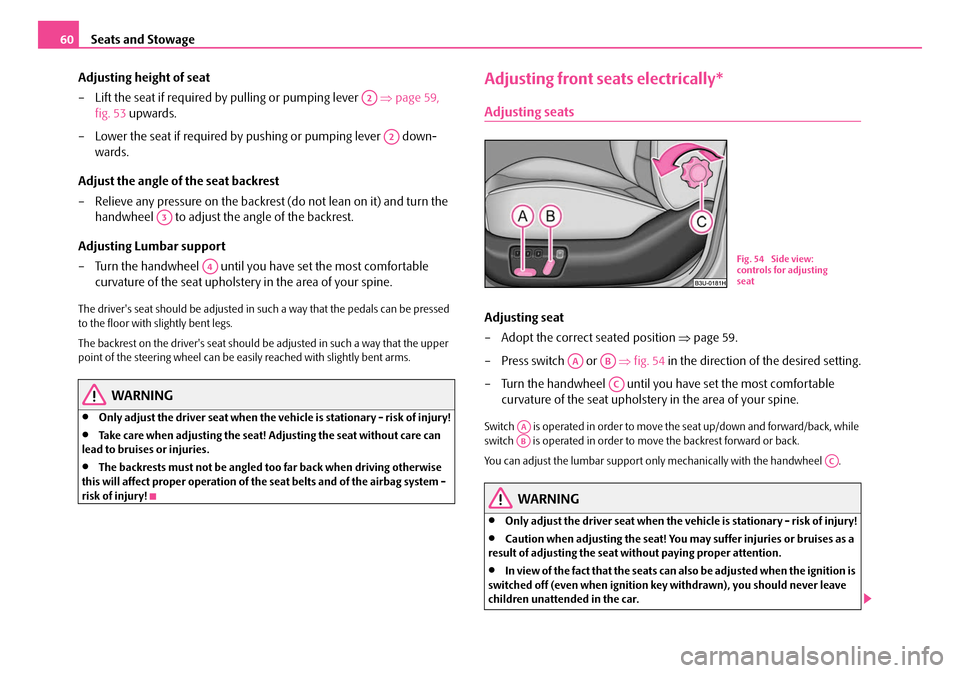
– Press switch or ⇒fig. 54 in the direction of the desired setting.
– Turn the handwheel until you have set the most comfortable curvature of the seat upholstery in the area of your spine.
Switch is operated in order to move the seat up/down and forward/back, while
switch is operated in order to move the backrest forward or back.
You can adjust the lumbar support only mechanically with the handwheel .
WARNING
•Only adjust the driver seat when the vehicle is stationary - risk of injury!
•Caution when adjusting the seat! You ma y suffer injuries or bruises as a
result of adjusting the seat without paying proper attention.
•In view of the fact that the seats can also be adjusted when the ignition is
switched off (even when ignition key withdrawn), you should never leave
children unattended in the car.
A2
A2
A3
A4
B1Z-0042HB1Z-0042H
Fig. 54 Side view:
controls for adjusting
seat
AAAB
AC
AAAB
AC
NKO B5 20.book Page 60 Friday, March 2, 2007 1:46 PM
Page 83 of 259
Seats and Stowage
82
Operating and further information regarding the use of the cigarette lighter
⇒ page 81.
Power socket in the luggage compartment
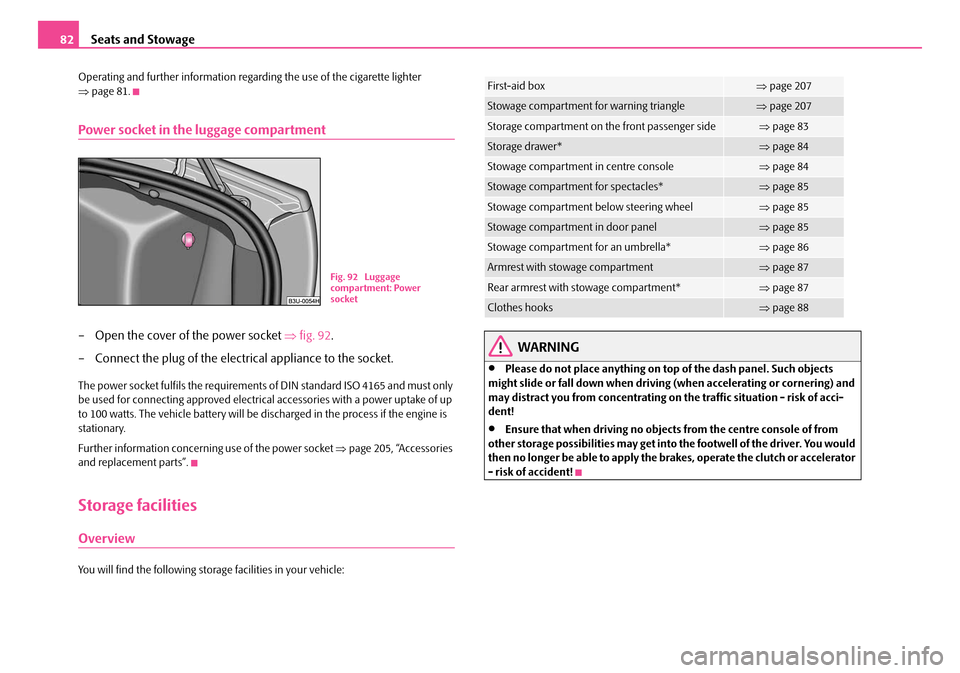
– Open the cover of the power socket ⇒fig. 92 .
– Connect the plug of the electr ical appliance to the socket.
The power socket fulfils the requirements of DIN standard ISO 4165 and must only
be used for connecting approved electrical accessories with a power uptake of up
to 100 watts. The vehicle battery will be discharged in the process if the engine is
stationary.
Further information concerning use of the power socket ⇒page 205, “Accessories
and replacement parts”.
Storage facilities
Overview
You will find the following storag e facilities in your vehicle:
WARNING
•Please do not place anything on top of the dash panel. Such objects
might slide or fall down when driving (when accelerating or cornering) and
may distract you from concentrating on the traffic situation - risk of acci-
dent!
•Ensure that when driving no objects from the centre console of from
other storage possibilities may get into the footwell of the driver. You would
then no longer be able to apply the br akes, operate the clutch or accelerator
- risk of accident!
Fig. 92 Luggage
compartment: Power
socket
First-aid box⇒ page 207
Stowage compartment for warning triangle⇒page 207
Storage compartment on the front passenger side⇒page 83
Storage drawer*⇒page 84
Stowage compartment in centre console⇒page 84
Stowage compartment for spectacles*⇒page 85
Stowage compartment below steering wheel⇒page 85
Stowage compartment in door panel⇒page 85
Stowage compartment for an umbrella*⇒page 86
Armrest with stowage compartment⇒page 87
Rear armrest with stowage compartment*⇒page 87
Clothes hooks⇒page 88
NKO B5 20.book Page 82 Friday, March 2, 2007 1:46 PM