display SKODA YETI 2014 1.G / 5L Amundsen Infotainment Navigation System Manual
[x] Cancel search | Manufacturer: SKODA, Model Year: 2014, Model line: YETI, Model: SKODA YETI 2014 1.G / 5LPages: 88, PDF Size: 8.18 MB
Page 19 of 88
CAUTION■For some languages, there is no voice control available. This device indicates
this fact through a text message that is displayed after setting the device lan-
guage screen » page 20.■
For some countries it is required to spell the city or street name in the menu
Navigation . The device indicates this through a text message on the screen.
Note
■
During voice control, no navigation announcements and traffic announce-
ments are played.■
Some voice commands must be spelled out when pronouncing depending on
the selected language of communication, such as the Source Selection “ SD”
card .
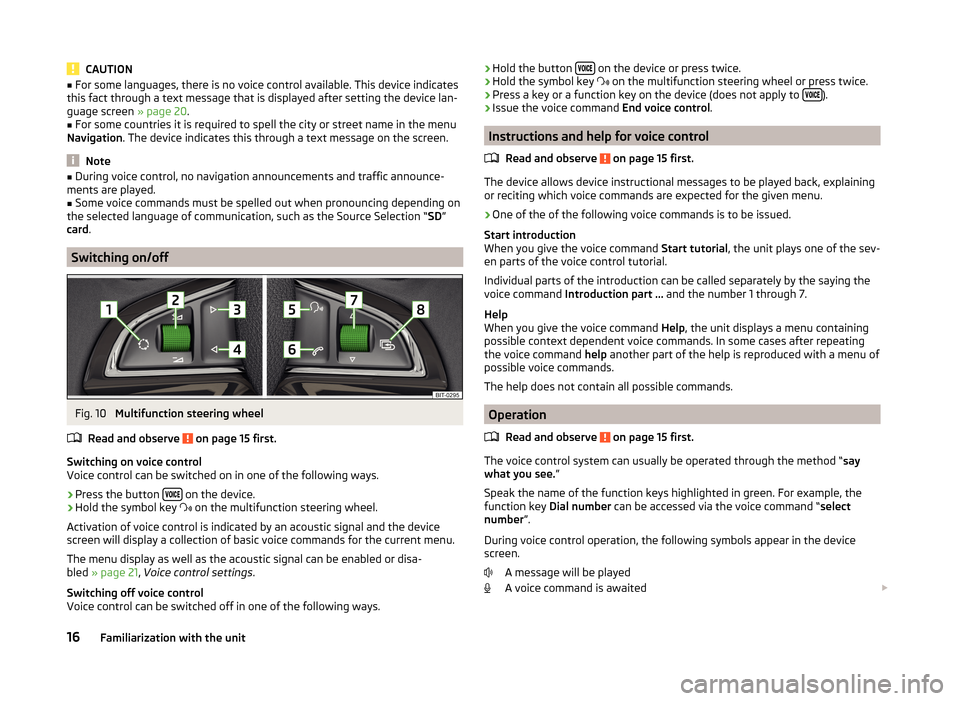
Switching on/off
Fig. 10
Multifunction steering wheel
Read and observe
on page 15 first.
Switching on voice control
Voice control can be switched on in one of the following ways.
›
Press the button on the device.
›
Hold the symbol key
on the multifunction steering wheel.
Activation of voice control is indicated by an acoustic signal and the device
screen will display a collection of basic voice commands for the current menu.
The menu display as well as the acoustic signal can be enabled or disa-
bled » page 21 , Voice control settings .
Switching off voice control
Voice control can be switched off in one of the following ways.
› Hold the button
on the device or press twice.›Hold the symbol key
on the multifunction steering wheel or press twice.›
Press a key or a function key on the device (does not apply to ).
›
Issue the voice command
End voice control.
Instructions and help for voice control
Read and observe
on page 15 first.
The device allows device instructional messages to be played back, explainingor reciting which voice commands are expected for the given menu.
›
One of the of the following voice commands is to be issued.
Start introduction
When you give the voice command Start tutorial, the unit plays one of the sev-
en parts of the voice control tutorial.
Individual parts of the introduction can be called separately by the saying the
voice command Introduction part ... and the number 1 through 7.
Help
When you give the voice command Help, the unit displays a menu containing
possible context dependent voice commands. In some cases after repeating
the voice command help another part of the help is reproduced with a menu of
possible voice commands.
The help does not contain all possible commands.
Operation
Read and observe
on page 15 first.
The voice control system can usually be operated through the method “ say
what you see. ”
Speak the name of the function keys highlighted in green. For example, the
function key Dial number can be accessed via the voice command “ select
number ”.
During voice control operation, the following symbols appear in the device
screen.
A message will be played
A voice command is awaited
16Familiarization with the unit
Page 21 of 88
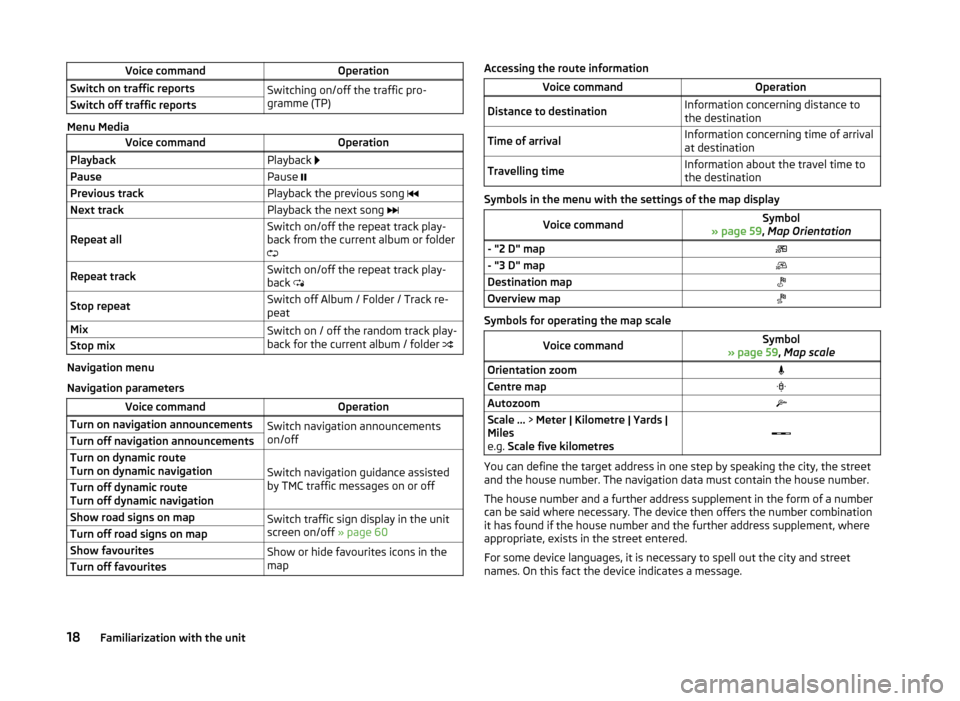
Voice commandOperationSwitch on traffic reportsSwitching on/off the traffic pro-
gramme (TP)Switch off traffic reports
Menu Media
Voice commandOperationPlaybackPlayback PausePause Previous trackPlayback the previous song Next trackPlayback the next song Repeat allSwitch on/off the repeat track play-
back from the current album or folder
Repeat trackSwitch on/off the repeat track play-
back Stop repeatSwitch off Album / Folder / Track re-
peatMixSwitch on / off the random track play-
back for the current album / folder Stop mix
Navigation menu
Navigation parameters
Voice commandOperationTurn on navigation announcementsSwitch navigation announcements
on/offTurn off navigation announcementsTurn on dynamic route
Turn on dynamic navigation
Switch navigation guidance assisted
by TMC traffic messages on or off
Turn off dynamic route
Turn off dynamic navigationShow road signs on mapSwitch traffic sign display in the unit
screen on/off » page 60Turn off road signs on mapShow favouritesShow or hide favourites icons in the
mapTurn off favouritesAccessing the route informationVoice commandOperationDistance to destinationInformation concerning distance to
the destinationTime of arrivalInformation concerning time of arrival
at destinationTravelling timeInformation about the travel time to
the destination
Symbols in the menu with the settings of the map display
Voice commandSymbol
» page 59 , Map Orientation- "2 D" map- "3 D" mapDestination mapOverview map
Symbols for operating the map scale
Voice commandSymbol
» page 59 , Map scaleOrientation zoomCentre mapAutozoomScale ... > Meter | Kilometre | Yards |
Miles
e.g. Scale five kilometres
You can define the target address in one step by speaking the city, the street
and the house number. The navigation data must contain the house number.
The house number and a further address supplement in the form of a number
can be said where necessary. The device then offers the number combination
it has found if the house number and the further address supplement, where
appropriate, exists in the street entered.
For some device languages, it is necessary to spell out the city and street
names. On this fact the device indicates a message.
18Familiarization with the unit
Page 23 of 88
Menu Setup
Introduction
This chapter contains information on the following subjects:
Main Menu
20
Screen settings
20
Setting the device language
20
Keyboard settings
21
Additional keypad language settings
21
Voice control settings
21
Data transmission of mobile devices
21
Safe removal of the audio source
21
Restore factory settings
21
Bluetooth ®
settings
21
System Information
22
First and foremost, pay attention to the safety instructions » page 7 , Impor-
tant notes .
This chapter covers the device settings.
Main Menu
The basic parameters for the unit can be set from the Main menu.
Call up the main menu
›
Press the button
→
.
■ Screen - Screen settings » page 20
■ Language - Set the unit language » page 20
■ Keypad: - Keypad display for text entry » page 21
■ More keypad languages - Enables you to enter characters other than those
available for the selected language » page 21
■ Mobile device data transfer - Setting the data transmission to connected ex-
ternal devices » page 21
■ Voice control - Voice control settings » page 21
■ Remove safely - safe removal of the connected audio source or data me-
dia » page 21
■ Factory settings - Restore to factory settings » page 21
■ Bluetooth - Settings for the Bluetooth ®
function » page 21
■
System information - Displays system information » page 22
■ Copyright - Information on licences and copyrights are only available in the
English language
Screen settings
›
Press the button
→
→ Screen .
■ Switch off screen (in 10 seconds) - Activate/deactivate the display
■ Brightness: - Adjusts the brightness of the screen
■ Brightest - brightest level
■ Brighter - brighter level
■ Medium - medium level
■ Darker - darker level
■ Darkest - darkest level
■ Confirmation tone - Switch on/off confirmation tone when touching the
screen
■ Animation when finger near screen - Switch on/off the proximity sensors
(suppression of some function keys)
■ Show clock in standby mode - Time and date displayed on the screen when
the ignition is switched on and the unit is switched off
Setting the device language
The device offers the possibility to select the device communication language
independent of the language setting in the MAXI DOT display; » Vehicle Oper-
ating Instructions , chapter MAXI DOT display .
›
Press the function key Automatic, the device language is set according to
the language setting in the instrument cluster.
For some languages, pressing the function key Female or Male selects the
voice type for acoustic messages of the device.
The messages are generated by the device. The flawless clarity (e.g. road or
city name) cannot always be guaranteed.
Note
■ The correct display of country-specific characters (e.g. ID3 tag information)
cannot always be guaranteed.■
For some languages, there is no voice control available. In this regard, an ap-
propriate warning message appears on the device screen.
20Familiarization with the unit
Page 24 of 88
Keyboard settings›
Press the button
→
→ Keypad: .
You can choose between two types of keyboard character arrange-
ment » page 11 , Alphanumeric with keyboard .
■ ABC - Keyboard characters in alphabetical order
■ QWERTZ - Keyboard characters in QWERTZ or QWERTY system
Additional keypad language settings
›
Press the button
→
→ More keypad languages .
In this menu, the keyboard character arrangement for the chosen language
can be selected, and with this the option for fast entry of the characters used
in the selected language.
It is then possible to swap between the languages in the input screen showing
a keyboard by pressing the function keys
» page 11 .
Voice control settings
›
Press the button
→
→ Voice control .
■ Dialogue style: - Setting the message style
■ Long - The device plays unabridged audible messages
■ Short - The device shortens some audible messages or substitutes them
with an acoustic signal
■ Display available commands - Switch on/off the menus containing basic
voice commands when voice control is activated
■ Voice control session start tone - Switch on/off the audible signal that is
output when voice control is activated
■ Voice control session end tone - Switch on/off the audible signal that is out-
put when voice control ends
■ Input tone in voice dialogue - Switch on/off the audible signal for voice con-
trol input
Note
For some languages, there is no voice control available. In this regard, an ap-
propriate warning message appears on the device screen.Data transmission of mobile devices›
Press the button
→
→ Mobile device data transfer .
The activated function enables transmission of vehicle data for applications in
connected devices (e.g. MirrorLink ™
Applications).
■ Activate data transfer for apps - Turning the data transfer on and off
■ Use apps to operate - Select the mode for operation using applications con-
nected to the device
■ Deactivate - The operation is prohibited
■ Confirm - An acknowledgment from the device is required
■ Allow - The operation is always allowed
Safe removal of the audio source
›
Press the button
→
→ Remove safely .
■ SD card 1 - Safe removal of the SD storage card 1
■ SD card 2 - Safe removal of the SD storage card 2
■ USB - Safe removal of the USB source
Restore factory settings
›
Press the button
→
→ Factory settings .
■ Reset all settings and data - menu to restore all settings
■ Restore factory settings - Reset all factory settings
■ Reset individual settings/data - menu for the recovery of individual settings
■ Sound - Reset default settings for sound
■ Radio - Reset default settings for radio
■ Telephone - Reset default settings for phone
■ Media - Reset default settings for media
■ Voice control - Restore the voice control
■ Navigation - Restore default settings for navigation
■ System - Reset the system default settings
■ MirrorLink ™
- Reset settings on the MirrorLink ™
- function
Bluetooth ®
settings
›
Press the button
→
→ Bluetooth .
21Device Settings
Page 25 of 88
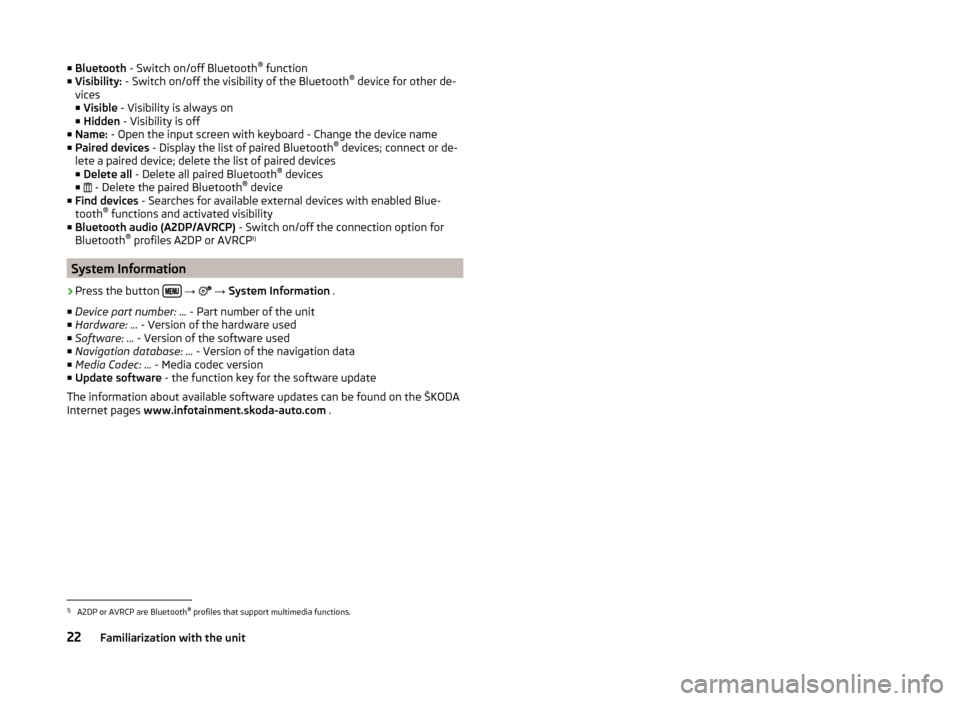
■Bluetooth - Switch on/off Bluetooth ®
function
■ Visibility: - Switch on/off the visibility of the Bluetooth ®
device for other de-
vices
■ Visible - Visibility is always on
■ Hidden - Visibility is off
■ Name: - Open the input screen with keyboard - Change the device name
■ Paired devices - Display the list of paired Bluetooth ®
devices; connect or de-
lete a paired device; delete the list of paired devices ■ Delete all - Delete all paired Bluetooth ®
devices
■ - Delete the paired Bluetooth ®
device
■ Find devices - Searches for available external devices with enabled Blue-
tooth ®
functions and activated visibility
■ Bluetooth audio (A2DP/AVRCP) - Switch on/off the connection option for
Bluetooth ®
profiles A2DP or AVRCP 1)
System Information
›
Press the button
→
→ System Information .
■ Device part number: ... - Part number of the unit
■ Hardware: ... - Version of the hardware used
■ Software: ... - Version of the software used
■ Navigation database: ... - Version of the navigation data
■ Media Codec: ... - Media codec version
■ Update software - the function key for the software update
The information about available software updates can be found on the ŠKODA
Internet pages www.infotainment.skoda-auto.com .
1)
A2DP or AVRCP are Bluetooth®
profiles that support multimedia functions.
22Familiarization with the unit
Page 26 of 88
Radio
Operation
Introduction
This chapter contains information on the following subjects:
Main menu
23
Radio DAB text and images presentation
24
Select the frequency range
24
List of available stations
24
Search and select available stations
25
Save radio station
25
Station logos
26
TP Traffic programme
26
First and foremost, pay attention to the safety instructions » page 7 , Impor-
tant notes .
The device allows analogue radio reception of FM and AM frequency ranges as
well as DAB digital radio reception.
CAUTION
■ For vehicles with window antennas do not stick foil or metal coated stickers
to the window as this can lead to interference.■
Car parks, tunnels, tall buildings or mountains can interfere with the radio
signal even causing it to fail completely.
Note
In countries where the RDS function is not supported, we recommend turning
off the AF and RDS function.Main menuFig. 12
Main menu FM and AM / DAB main menu
Read and observe
on page 23 first.
Call up the main menu
›
Press the button.
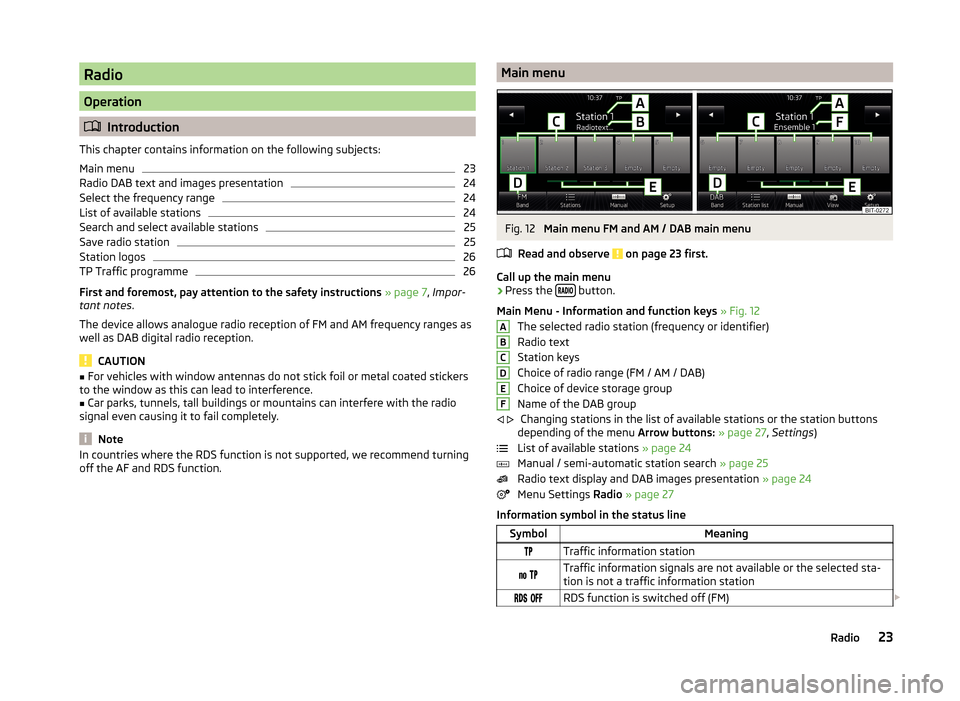
Main Menu - Information and function keys » Fig. 12
The selected radio station (frequency or identifier)
Radio text
Station keys
Choice of radio range (FM / AM / DAB)
Choice of device storage group
Name of the DAB group Changing stations in the list of available stations or the station buttons
depending of the menu Arrow buttons: » page 27 , Settings )
List of available stations » page 24
Manual / semi-automatic station search » page 25
Radio text display and DAB images presentation » page 24
Menu Settings Radio » page 27
Information symbol in the status line
SymbolMeaningTraffic information station Traffic information signals are not available or the selected sta-
tion is not a traffic information station RDS function is switched off (FM) ABCDEF
23Radio
Page 27 of 88
SymbolMeaning AF Alternative frequency is switched off (FM)Signal is not available (DAB)
If a continuous change of a displayed station name (dynamic text) occurs, then
it is possible to fix the current text by holding a finger on the device screen in
the station range
A
» Fig. 12 . The station name is displayed again completely
by holding again in the area of the station name.
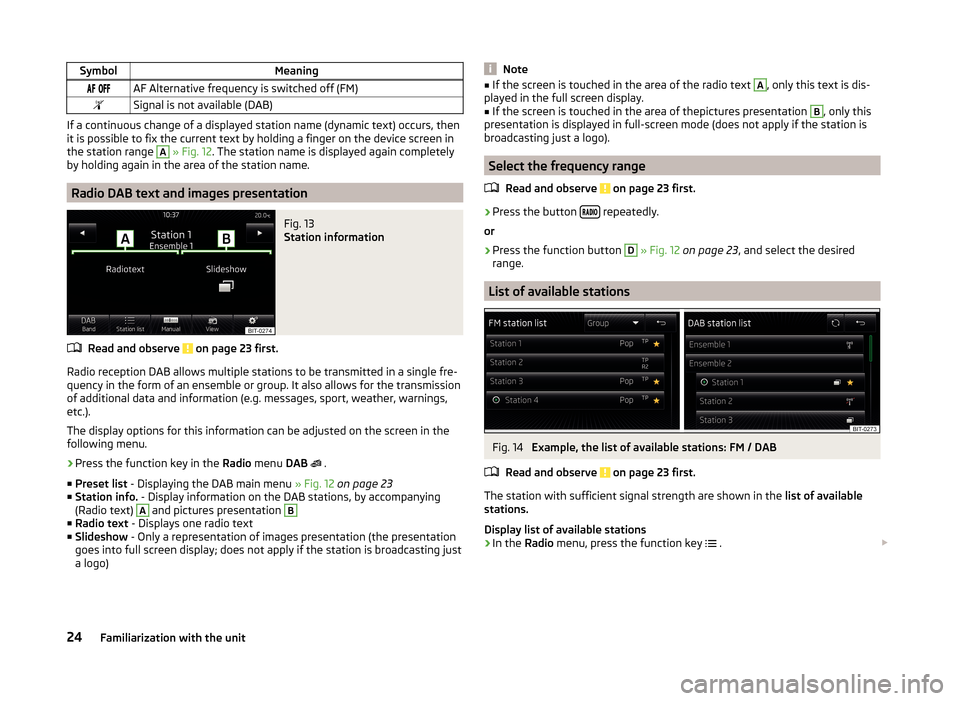
Radio DAB text and images presentation
Fig. 13
Station information
Read and observe on page 23 first.
Radio reception DAB allows multiple stations to be transmitted in a single fre- quency in the form of an ensemble or group. It also allows for the transmission
of additional data and information (e.g. messages, sport, weather, warnings,
etc.).
The display options for this information can be adjusted on the screen in the
following menu.
›
Press the function key in the Radio menu DAB
.
■ Preset list - Displaying the DAB main menu » Fig. 12 on page 23
■ Station info. - Display information on the DAB stations, by accompanying
(Radio text)
A
and pictures presentation
B
■ Radio text - Displays one radio text
■ Slideshow - Only a representation of images presentation (the presentation
goes into full screen display; does not apply if the station is broadcasting just
a logo)
Note■ If the screen is touched in the area of the radio text A, only this text is dis-
played in the full screen display.■
If the screen is touched in the area of thepictures presentation
B
, only this
presentation is displayed in full-screen mode (does not apply if the station is
broadcasting just a logo).
Select the frequency range
Read and observe
on page 23 first.
›
Press the button repeatedly.
or
›
Press the function button
D
» Fig. 12 on page 23 , and select the desired
range.
List of available stations
Fig. 14
Example, the list of available stations: FM / DAB
Read and observe
on page 23 first.
The station with sufficient signal strength are shown in the list of available
stations.
Display list of available stations
›
In the Radio menu, press the function key
.
24Familiarization with the unit
Page 29 of 88
A radio station can be stored in the device memory in one of the following
ways.
Save station from the menu Radio›
In the menu Radio hold the desired station button
C
» Fig. 12 on page 23
until you hear an acoustic signal.
If a station was already stored in the desired position it is replaced with the
currently selected station.
Save station from the station list
›
In the list of available stations » page 24 press the function key of the de-
sired station longer.
A list of the station keys
C
is shown as well as a list of the functions keys for
the storage groups
E
» Fig. 12 on page 23 .
›
Select a storage group.
›
Press the station button.
The station is stored under the selected station button.
Station logos
Read and observe
on page 23 first.
With the present buttons
C
» Fig. 12 on page 23 logos (images) can be linked
or removed to/from the radio stations.
Store station logos automatically (FM / DAB)
›
Before you store the radio station to a station button function key press in
the Radio menu the function key
→ Advanced setup .
›
Activate the menu item Auto-save station logos » page 27 , Advanced Set-
tings (FM) and » page 27 , Advanced setup (DAB) .
When you save the station to a station button, the station is assigned a logo
from the device memory if the logo is available in the memory.
Assign channel logo manually
A logo can be assigned or removed manually from the previously stored sta-
tions.
›
Press the function key
→ Station logos .
A menu with preset buttons for radio stations is displayed.
›
Press the preset button for the station, which a logo is to be assigned to.
A menu of media (CD, SD card, USB) is displayed.
› In the relevant media select the image you want to have.
By selection of the image it is assigned to the relevant station button.
Remove channel logo manually›
Press the function key
→ Station logos .
A menu with preset buttons for radio stations is displayed.
›
Press the preset button for the station, which a logo is to be removed from.
The logo is removed from the station button.
Note
■ The following image formats are supported: jpg, gif, png, bmp.■We recommend a resolution of up to 500 x 500 pixels.■
The information about radio station updates can be found on the ŠKODA In-
ternet pages www.infotainment.skoda-auto.com .
TP Traffic programme
Read and observe
on page 23 first.
The function allows the reception of traffic information.
Switching the traffic information station on and off manually
›
Press the button.
or
›
In the Radio menu, press the function key
.
›
Enable or disable the menu item
Traffic programme (TP).
Current traffic reports
During a traffic announcement, the following menu is displayed.
›
Cancel - interruption of the current traffic report. The TP function remains
activated.
›
Deactivate - Interrupt the current traffic report and turn off TP function.
Note
■
Should this radio station not transmit traffic reports or the signal is not avail-
able, then the device automatically searches in the background for another TP
station.■
During playback in menu Media or a radio station in the AM range, traffic
news is received from the previously selected FM radio station.
26Familiarization with the unit
Page 30 of 88
Settings
Introduction
This chapter contains information on the following subjects:
Settings
27
Advanced Settings (FM)
27
Advanced setup (DAB)
27
First and foremost, pay attention to the safety instructions » page 7 , Impor-
tant notes .
The basic setting of the Radio menu functions is the same for all broadcast
ranges.
The Advanced setup menu is different for FM and DAB. The AM broadcast area
does not have this menu.
Settings
›
In the Radio menu, press the function key
.
■ Sound - Sound settings » page 19, Sound settings
■ Scan - Auto-play all stations in the current frequency band, each station for
around five seconds
■ Arrow buttons: - Set the station select function in the Radio menu
■ Preset list - Change between stations stored under the preset buttons
■ Station list - Change between all receivable radio stations of the selected
frequency band
■ Traffic programme (TP) - Switches traffic programme on/off
■ Delete presets - Deletes the preset buttons
■ - Delete a particular radio station
■
Delete all - Delete all stored stations
■ Station logos - manual assignment /removal of station logos » page 26, Sta-
tion logos
■ Radio text - Switching the text display radio (FM and DAB) on and off
■ Advanced setup - another setting that is different depending on the selec-
ted broadcasting range(FM and DAB)
Advanced Settings (FM)
›
Select the FM band in the Radio menu, and press the function key
→ Ad-
vanced setup .
■
Auto-save station logos - Automatic storage of the station logos » page 26,
Station logos
■ Station logo region - Clarification of the station logo region
■ Alternative frequency (AF) - Switching on/off the search for alternative fre-
quencies of the station currently being heard, when you turn off AF off is dis-
played on the device screen
■ Radio Data System (RDS) - Switches on/off the RDS function
■ RDS Regional: - Switch on/off the automatic tracking of related regional sta-
tions
■ Fixed - Maintains the selected regional station continuously. When the sig-
nal is lost, another regional station must be set manually.
■ Automatic - Auto-selects the station with the best reception at the mo-
ment. If you lose reception the region, the unit will automatically set anoth-
er available region.
Advanced setup (DAB)
›
Select the DAB band in the Radio menu, and press the function key
→
Advanced setup .
■ Auto-save station logos - Automatic association of the logo with station de-
tected » page 26
■ DAB traffic announcements - Switch on/off DAB announcements
■ Other DAB announcements - Switch on/off other announcements (e.g.,
warnings, regional weather, sports reports, financial news)
■ DAB - DAB station tracking - Switch on/off automatic DAB station tracking in
other station groups
■ Automatic DAB - FM switching - Switch on/off auto-switching from DAB to
the FM frequency band if the DAB signal is lost
■ L-Band - Switch on/off the automatic DAB station search in L-band
DAB station tracking
If a DAB station is a member of several sender groups, when the signal is poor,
the same station is searched in a different sender group.
Auto-change DAB -FM
With bad DAB reception the device tries to find an FM transmitter.
› The station name is followed by (
) while the station is being received on
the FM band. The ( ) marker disappears when the relevant DAB station can
be received again.
› If a DAB station is also not available in the FM band due to poor reception,
the device will be switched to mute.
27Radio
Page 32 of 88
Media
Operation
Introduction
This chapter contains information on the following subjects:
Main menu
29
Playback
29
Folder / track list - Browser
30
Multimedia database
31
Settings
31
First and foremost, pay attention to the safety instructions » page 7 , Impor-
tant notes .
The device allows you to play audio files from different media and connected
devices (hereinafter referred to only as “audio sources)” » page 31.
Main menu
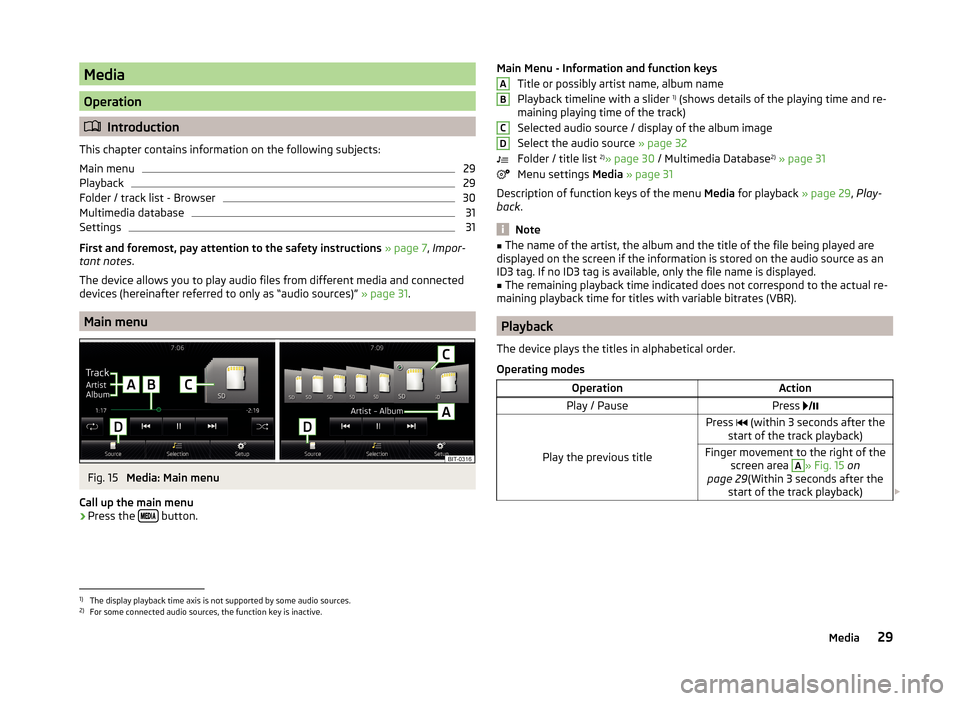
Fig. 15
Media: Main menu
Call up the main menu
›
Press the button.
Main Menu - Information and function keys
Title or possibly artist name, album name
Playback timeline with a slider 1)
(shows details of the playing time and re-
maining playing time of the track)
Selected audio source / display of the album image
Select the audio source » page 32
Folder / title list 2)
» page 30 / Multimedia Database 2)
» page 31
Menu settings Media » page 31
Description of function keys of the menu Media for playback » page 29, Play-
back .
Note
■
The name of the artist, the album and the title of the file being played are
displayed on the screen if the information is stored on the audio source as an
ID3 tag. If no ID3 tag is available, only the file name is displayed.■
The remaining playback time indicated does not correspond to the actual re-
maining playback time for titles with variable bitrates (VBR).
Playback
The device plays the titles in alphabetical order.
Operating modes
OperationActionPlay / PausePress
Play the previous title
Press (within 3 seconds after the
start of the track playback)Finger movement to the right of the screen area A
» Fig. 15 on
page 29 (Within 3 seconds after the
start of the track playback)
ABCD1)
The display playback time axis is not supported by some audio sources.
2)
For some connected audio sources, the function key is inactive.
29Media