light SMART FORTWO 2016 Workshop Manual
[x] Cancel search | Manufacturer: SMART, Model Year: 2016, Model line: FORTWO, Model: SMART FORTWO 2016Pages: 214, PDF Size: 4.93 MB
Page 101 of 214
XCompletely insert the filler neck of the
fuel pump nozzle into the tank, hook in
place and refuel.
XOnly fill the tank until the pump nozzle
switches off.
iDo not add any more fuel after the pump
stops filling for the first time. Otherwise,
fuel may leak out.
Closing the fuel filler flap
XReplace the cap on the filler neck and turn
clockwise until it engages audibly.
XClose the fuel filler flap.
iClose the fuel filler flap before locking
the vehicle.
iIf you are driving with the fuel filler cap
open, the 00B6reserve fuel warning lamp
flashes. A message appears in the multi-
function display (
Ypage 125).
In addition, the 00B9Check Engine warning
lamp may light up (
Ypage 136).
For further information on warning and
indicator lamps in the instrument cluster,
see (
Ypage 136).
Refueling99
>> Driving and parking.
Z
Page 103 of 214
To ensure that the vehicle is secured against
rolling away unintentionally:
Rthe parking brake must be applied.
Ra gear must be engaged on vehicles with
manual transmission.
Rthe selector lever must be in positionPon
vehicles with automatic transmission.
Rthe SmartKey must be removed from the
ignition lock.
Ron uphill or downhill gradients, the front
wheels must be turned towards the curb.
Switching off the engine
Important safety notes
GWARNING
The automatic transmission switches to
neutral position Nwhen you switch off the
engine. The vehicle may roll away. There is a risk of an accident.
After switching off the engine, always
switch to parking position P. Prevent the
parked vehicle from rolling away by apply-
ing the parking brake.
Vehicles with manual transmission
XSelect a gear.
XTurn the key to position 0in the ignition
lock and remove it.
The immobilizer is activated.
XApply the parking brake.
Vehicles with automatic transmission
XApply the parking brake.
XShift the transmission to position P.
XTurn the key to position0in the ignition
lock and remove it.
The immobilizer is activated.
The key can only be removed if the trans-
mission is in position P.
Parking brake
General notes
GWARNING
If you must brake the vehicle with the park-
ing brake, the braking distance is consid-
erably longer and the wheels could lock.
There is an increased danger of skidding
and accidents.
Only use the parking brake to brake the
vehicle when the service brake is faulty. Do
not apply the parking brake too firmly. If
the wheels lock, release the parking brake
until the wheels begin turning again.
GWARNING
If you leave children unsupervised in the
vehicle, they could set it in motion by, for example:
Rrelease the parking brake.
Rshift the automatic transmission out of
park position Por shift manual trans-
mission into neutral.
Rstart the engine.
In addition, they may operate vehicle
equipment and become trapped. There is a
risk of an accident and injury.
When leaving the vehicle, always take the
SmartKey with you and lock the vehicle.
Never leave children unsupervised in the
vehicle.
If you brake the vehicle with the parking
brake, the brake lamps will not light up.
Parking101
>> Driving and parking.
Z
Page 104 of 214
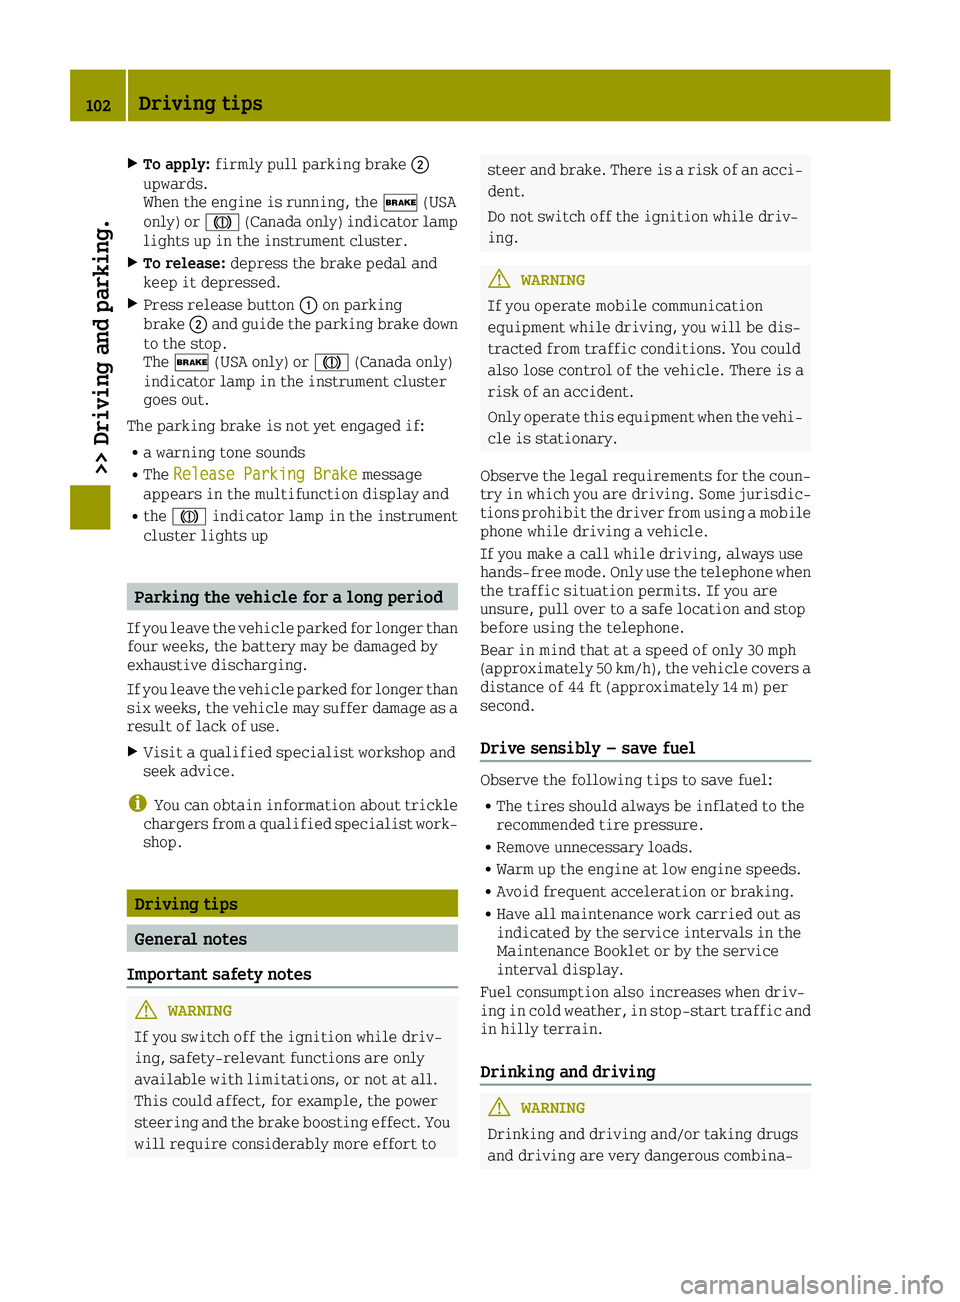
XTo apply:firmly pull parking brake 0044
upwards.
When the engine is running, the 0027(USA
only) or 004D(Canada only) indicator lamp
lights up in the instrument cluster.
XTo release: depress the brake pedal and
keep it depressed.
XPress release button 0043on parking
brake 0044and guide the parking brake down
to the stop.
The 0027 (USA only) or 004D(Canada only)
indicator lamp in the instrument cluster
goes out.
The parking brake is not yet engaged if:
Ra warning tone sounds
RThe Release Parking Brakemessage
appears in the multifunction display and
Rthe 004D indicator lamp in the instrument
cluster lights up
Parking the vehicle for a long period
If you leave the vehicle parked for longer than
four weeks, the battery may be damaged by
exhaustive discharging.
If you leave the vehicle parked for longer than
six weeks, the vehicle may suffer damage as a
result of lack of use.
XVisit a qualified specialist workshop and
seek advice.
iYou can obtain information about trickle
chargers from a qualified specialist work-
shop.
Driving tips
General notes
Important safety notes
GWARNING
If you switch off the ignition while driv-
ing, safety-relevant functions are only
available with limitations, or not at all.
This could affect, for example, the power
steering and the brake boosting effect. You will require considerably more effort to
steer and brake. There is a risk of an acci-dent.
Do not switch off the ignition while driv-
ing.
GWARNING
If you operate mobile communication
equipment while driving, you will be dis-
tracted from traffic conditions. You could
also lose control of the vehicle. There is a
risk of an accident.
Only operate this equipment when the vehi- cle is stationary.
Observe the legal requirements for the coun-
try in which you are driving. Some jurisdic-
tions prohibit the driver from using a mobile
phone while driving a vehicle.
If you make a call while driving, always use
hands-free mode. Only use the telephone when
the traffic situation permits. If you are
unsure, pull over to a safe location and stop
before using the telephone.
Bear in mind that at a speed of only 30 mph
(approximately 50 km/h), the vehicle covers a
distance of 44 ft (approximately 14 m) per
second.
Drive sensibly – save fuel
Observe the following tips to save fuel:
RThe tires should always be inflated to the
recommended tire pressure.
RRemove unnecessary loads.
RWarm up the engine at low engine speeds.
RAvoid frequent acceleration or braking.
RHave all maintenance work carried out as
indicated by the service intervals in the
Maintenance Booklet or by the service
interval display.
Fuel consumption also increases when driv-
ing in cold weather, in stop-start traffic and
in hilly terrain.
Drinking and driving
GWARNING
Drinking and driving and/or taking drugs
and driving are very dangerous combina-
102Driving tips
>> Driving and parking.
Page 105 of 214
tions. Even a small amount of alcohol or
drugs can affect your reflexes, perceptions
and judgment.
The possibility of a serious or even fatal
accident is greatly increased when you
drink or take drugs and drive.
Do not drink or take drugs and drive or
allow anyone to drive who has been drinkingor taking drugs.
Emission control
GWARNING
Combustion engines emit poisonous
exhaust gases such as carbon monoxide.
Inhaling these exhaust gases leads to poi-
soning. There is a risk of fatal injury.
Therefore never leave the engine running
in enclosed spaces without sufficient ven- tilation.
Certain engine systems are designed to keep
the level of poisonous components in exhaust
fumes within legal limits.
These systems only work at peak efficiency if
they are serviced exactly in accordance with
the manufacturer's specifications. There-
fore, only allow qualified and authorized
technicians to perform work on the engine.
The engine settings must not be changed
under any circumstances. Furthermore, all
specific service work must be performed at
regular intervals and in accordance with
smart service requirements. Details can be
found in the Maintenance Booklet.
Braking
Important safety notes
GWARNING
If you shift down on a slippery road surface
in an attempt to increase the engine's
braking effect, the drive wheels could lose
their grip. There is an increased danger of
skidding and accidents.
Do not shift down for additional engine
braking on a slippery road surface.
Downhill gradients
!On long and steep gradients, you must
reduce the load on the brakes by shifting to
a lower gear in good time. This allows you
to take advantage of the engine's braking
effect. This helps you to avoid overheating
the brakes and wearing them out exces-
sively.
When you take advantage of the engine's
braking effect, a drive wheel may not turn
for some time, e.g. on a slippery road sur-
face. This could cause damage to the drive
train, which is not covered by the smart
warranty.
Heavy and light loads
GWARNING
If you rest your foot on the brake pedal
while driving, the braking system can
overheat. This increases the stopping dis-
tance and can even cause the braking system
to fail. There is a risk of an accident.
Never use the brake pedal as a footrest.
Never depress the brake pedal and the
accelerator pedal at the same time.
!Depressing the brake pedal constantly
results in excessive and premature wear to
the brake pads.
If the brakes have been subjected to a heavy
load, do not stop the vehicle immediately.
Drive on for a short while. This allows the
airflow to cool the brakes more quickly.
Wet roads
If you have driven for a long time in heavy
rain without braking, there may be a delayed
reaction from the brakes when braking for the
first time. This may also occur after the vehi-
cle has been washed or driven through deep
water.
You then have to depress the brake pedal more
firmly. Maintain a greater distance from the
vehicle in front.
After driving on a wet road or having the
vehicle washed, brake firmly while paying
attention to the traffic conditions. This will warm up the brake discs, thereby drying them
Driving tips103
>> Driving and parking.
Z
Page 106 of 214
more quickly and protecting them against
corrosion.
Limited braking performance on salt-
treated roads
If you drive on salted roads, a layer of salt
residue may form on the brake discs and brake
pads. This can result in a significantly lon-
ger braking distance.
RBrake occasionally to remove any possible
salt residue. Make sure that you do not
endanger other road users when doing so.
RCarefully depress the brake pedal and the
beginning and end of a journey.
RMaintain a greater distance to the vehicle
ahead.
Servicing the brakes
!The brake fluid level may be too low, if:
Rif the red brake warning lamp lights up
in the instrument cluster and
Ryou hear a warning tone while the engine
is running
Observe additional warning messages in
the multifunction display.
The brake fluid level may be too low due to
brake pad wear or leaking brake lines.
Have the brake system checked immedi-
ately. Consult a qualified specialist work-
shop to arrange this.
!A function or performance test should
only be carried out on a 2-axle dynamome-
ter. If you wish to operate the vehicle on
such a dynamometer, please consult a
qualified specialist workshop in advance.
You could otherwise damage the drive train
or the brake system.
!As the ESP®system operates automati-
cally, the engine and the ignition must be
switched off (the SmartKey must be in posi-
tion 0or 1in the ignition lock) if:
Rthe parking brake is tested using a brake
dynamometer (maximum 10 seconds).
Rthe vehicle is towed with the front axle
raised.
Braking triggered automatically by ESP
®
may seriously damage the brake system. All checks and maintenance work on the brake
system must be carried out at a qualified
specialist workshop.
Have brake pads installed and brake fluid
replaced at a qualified specialist workshop.
If the brake system has only been subject to
moderate loads, you should test the function-
ality of your brakes at regular intervals.
When having brake pads/linings fitted, smart
recommends that you only use those which are
approved for smart vehicles or are of an
equivalent quality standard. Brake pads/
linings which have not been approved for
smart vehicles or which are not of an equiv-
alent quality could affect your vehicle's
operating safety.
smart recommends that you only use brake
fluid which is approved for smart vehicles or
is of an equivalent quality standard. Brake
fluid which has not been approved for smart
vehicles or which
is not of an equivalent
quality could affect your vehicle's operating
safety.
Driving on wet roads
Hydroplaning
If water has accumulated to a certain depth on the road surface, there is a danger of hydro-
planing occurring, even if:
Ryou drive at low speeds.
Rthe tires have adequate tread depth.
For this reason, in the event of heavy rain or in conditions in which hydroplaning may
occur, you must drive in the following man-
ner:
Rlower your speed.
Ravoid ruts.
Ravoid sudden steering movements
Rbrake carefully.
Driving on flooded roads
!Bear in mind that vehicles traveling in
front or in the opposite direction create
waves. This may cause the maximum per-
missible water depth to be exceeded.
Failure to observe these notes may result in damage to the engine, electrical systems
and transmission.
104Driving tips
>> Driving and parking.
Page 110 of 214
The parking aid does not take into account
obstacles located:
Rbelow the detection range, e.g. people,
animals or objects
Rabove the detection range, e.g. overhang-
ing loads, truck overhangs or loading
ramps.
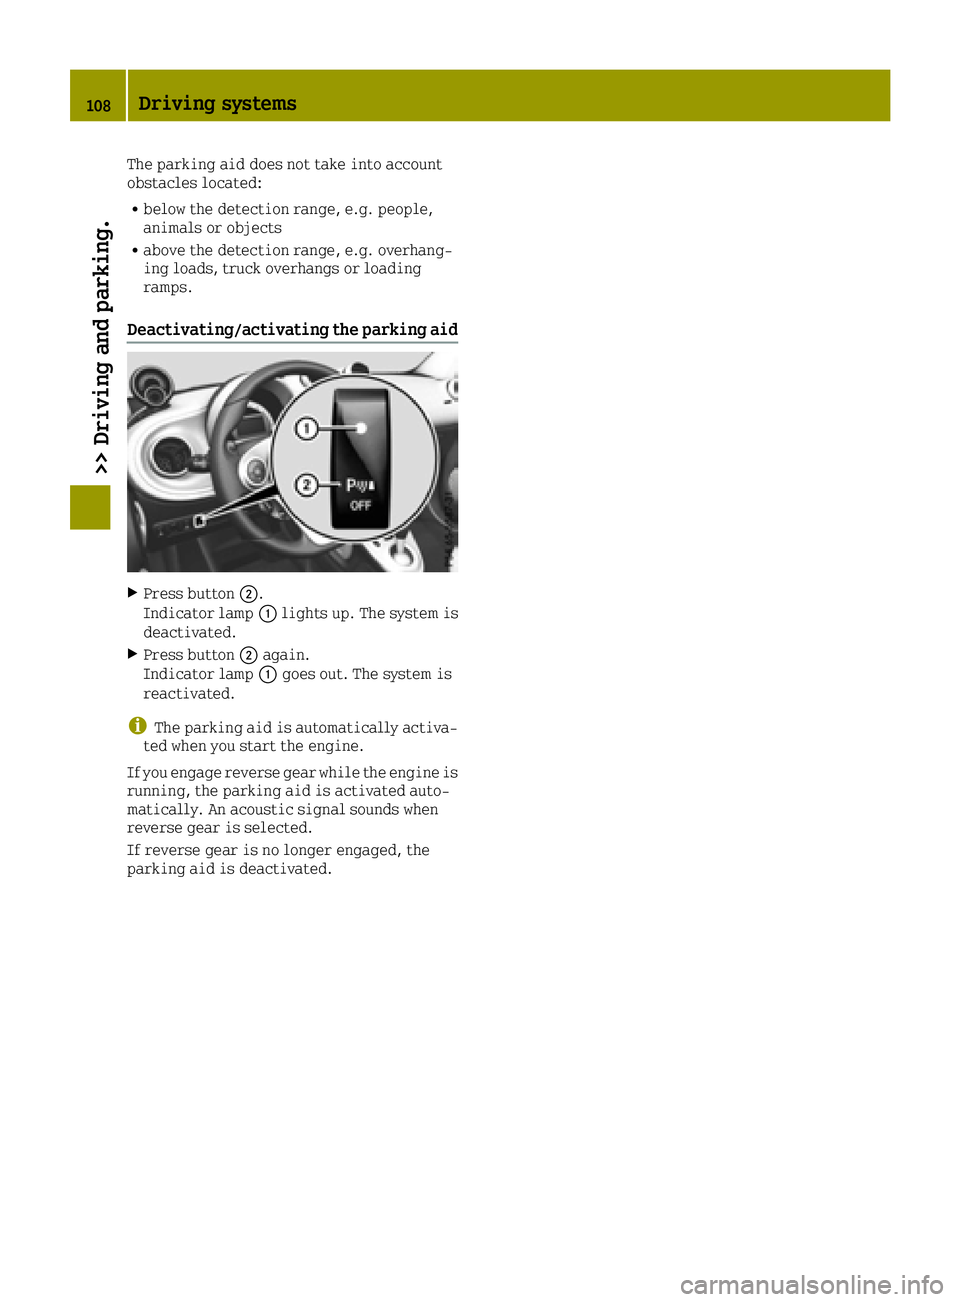
Deactivating/activating the parking aid
XPress button0044.
Indicator lamp 0043lights up. The system is
deactivated.
XPress button 0044again.
Indicator lamp 0043goes out. The system is
reactivated.
iThe parking aid is automatically activa-
ted when you start the engine.
If you engage reverse gear while the engine is
running, the parking aid is activated auto-
matically. An acoustic signal sounds when
reverse gear is selected.
If reverse gear is no longer engaged, the
parking aid is deactivated.
108Driving systems
>> Driving and parking.
Page 111 of 214
Useful information
i
This Operator's Manual describes all
models and all standard and optional
equipment of your vehicle available at the
time of publication of the Operator's Man- ual. Country-specific differences are pos-
sible. Bear in mind that your vehicle may
not feature all functions described here.
This also applies to safety-relevant sys-
tems and functions.
iRead the information on qualified spe-
cialist workshops: (Ypage 20).
Important safety notes
GWARNING
If you operate information systems and
communication equipment integrated in
the vehicle while driving, you will be dis- tracted from traffic conditions. You could
also lose control of the vehicle. There is a
risk of an accident.
Only operate the equipment when the traf-
fic situation permits. If you are not sure
that this is possible, park the vehicle pay-
ing attention to traffic conditions and
operate the equipment when the vehicle is
stationary.
You must observe the legal requirements for
the country in which you are currently driv-
ing when operating the on-board computer.
GWARNING
If the instrument cluster has failed or mal- functioned, you may not recognize function
restrictions in systems relevant to safety.
The operating safety of your vehicle may beimpaired. There is a risk of an accident.
Drive on carefully. Have the vehicle
checked at a qualified specialist workshop
immediately.
The on-board computer only shows display
messages and/or warnings from certain sys-
tems in the display. You should therefore
make sure your vehicle is operating safely at all times. Otherwise, you may cause an acci-
dent by driving a vehicle that is not operat-
ing reliably.
If the operating safety of your vehicle
impaired, park the vehicle as soon as possi-
ble paying attention to road and traffic con-
ditions. Contact a qualified specialist work-
shop.
Read and follow the notes in the overview of
warning and indicator lamps in the instru-
ment cluster (
Ypage 24).
Displays and operation
Instrument cluster lighting
Instrument cluster lighting includes illumi-
nation of the instrument cluster, the addi-
tional instruments on the dashboard, the dis-
plays and the controls.
The instrument cluster lighting is switched
automatically between day and night lighting
depending on the ambient light conditions
(
Ypage 67).
You can additionally set the brightness of the
instrument cluster lighting to different lev-
els in the on-board computer (
Ypage 115).
Speedometer
If you turn the key to position 2in the igni-
tion lock, the warning and indicator lamps in
the instrument cluster will briefly light up
for a lamp test. During the lamp test, the
illuminated speedometer needle moves in the
speedometer.
The display can show a digital speedometer.
The digital speedometer can be hidden/
displayed and its speed unit selected
(
Ypage 115).
Outside temperature display
You should pay special attention to road con-
ditions when temperatures are around freez-
ing point.
Bear in mind that the outside temperature
display indicates the temperature measured
and does not record the road temperature.
The outside temperature is displayed on the
far right in the top bar.
Displays and operation109
>> On-board computer and displays.
Z
Page 112 of 214
Changes in the outside temperature are dis-
played after a short delay.
You can set the temperature unit of the out-
door temperature display (
Ypage 116).
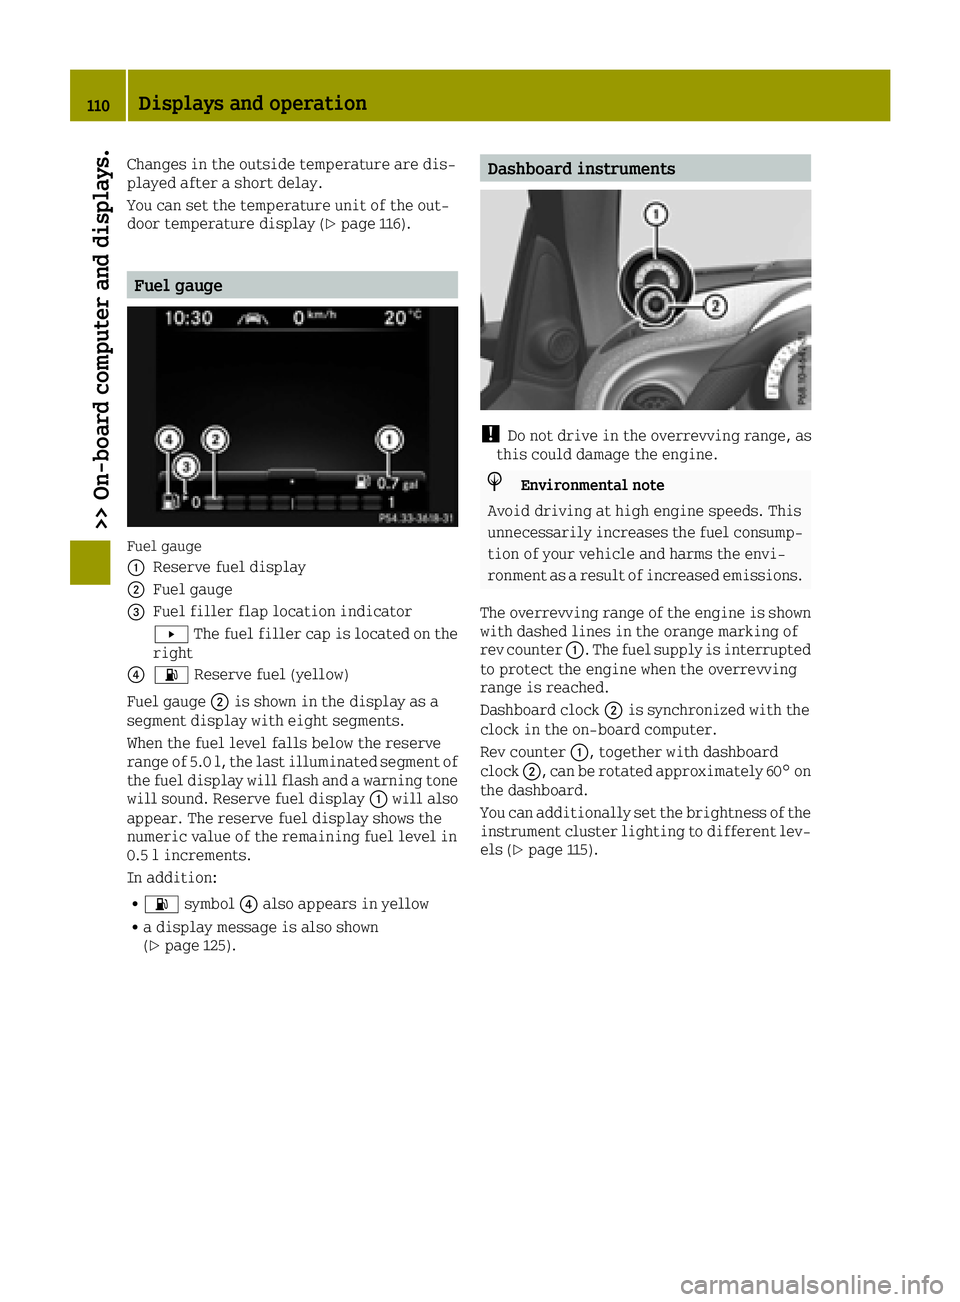
Fuel gauge
Fuel gauge
0043
Reserve fuel display
0044Fuel gauge
0087Fuel filler flap location indicator
0080The fuel filler cap is located on the
right
008500B4 Reserve fuel (yellow)
Fuel gauge 0044is shown in the display as a
segment display with eight segments.
When the fuel level falls below the reserve
range of 5.0 l, the last illuminated segment of
the fuel display will flash and a warning tone
will sound. Reserve fuel display 0043will also
appear. The reserve fuel display shows the
numeric value of the remaining fuel level in
0.5 l increments.
In addition:
R00B4 symbol 0085also appears in yellow
Ra display message is also shown
(Ypage 125).
Dashboard instruments
!Do not drive in the overrevving range, as
this could damage the engine.
HEnvironmental note
Avoid driving at high engine speeds. This
unnecessarily increases the fuel consump-
tion of your vehicle and harms the envi-
ronment as a result of increased emissions.
The overrevving range of the engine is shown with dashed lines in the orange marking of
rev counter 0043. The fuel supply is interrupted
to protect the engine when the overrevving
range is reached.
Dashboard clock 0044is synchronized with the
clock in the on-board computer.
Rev counter 0043, together with dashboard
clock 0044, can be rotated approximately 60° on
the dashboard.
You can additionally set the brightness of the
instrument cluster lighting to different lev-
els (
Ypage 115).
110Displays and operation
>> On-board computer and displays.
Page 116 of 214
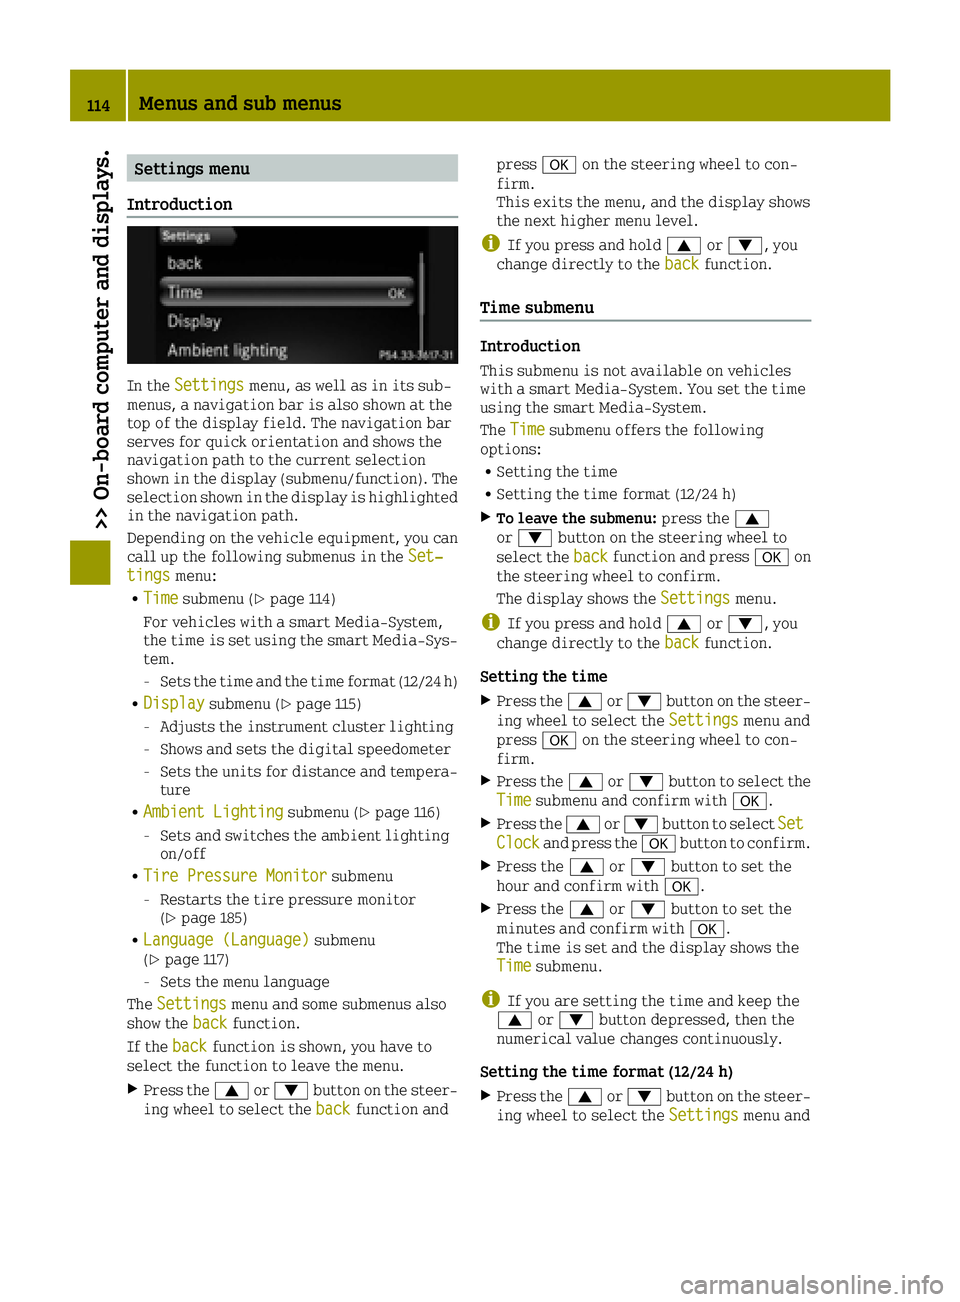
Settings menu
Introduction
In the Settingsmenu, as well as in its sub-
menus, a navigation bar is also shown at the
top of the display field. The navigation bar
serves for quick orientation and shows the
navigation path to the current selection
shown in the display (submenu/function). The
selection shown in the display is highlighted
in the navigation path.
Depending on the vehicle equipment, you can
call up the following submenus in the Set‐
tingsmenu:
RTimesubmenu (Ypage 114)
For vehicles with a smart Media-System,
the time is set using the smart Media-Sys-
tem.
-Sets the time and the time format (12/24 h)
RDisplaysubmenu (Ypage 115)
-Adjusts the instrument cluster lighting
-Shows and sets the digital speedometer
-Sets the units for distance and tempera-
ture
RAmbient Lightingsubmenu (Ypage 116)
-Sets and switches the ambient lighting
on/off
RTire Pressure Monitorsubmenu
-Restarts the tire pressure monitor
(Ypage 185)
RLanguage (Language)submenu
(Ypage 117)
-Sets the menu language
The Settings
menu and some submenus also
show the backfunction.
If the back
function is shown, you have to
select the function to leave the menu.
XPress the 0063or0064 button on the steer-
ing wheel to select the backfunction andpress
0076on the steering wheel to con-
firm.
This exits the menu, and the display shows
the next higher menu level.
iIf you press and hold 0063or0064, you
change directly to the backfunction.
Time submenu
Introduction
This submenu is not available on vehicles
with a smart Media-System. You set the time
using the smart Media-System.
TheTime
submenu offers the following
options:
RSetting the time
RSetting the time format (12/24 h)
XTo leave the submenu: press the0063
or 0064 button on the steering wheel to
select the back
function and press 0076on
the steering wheel to confirm.
The display shows the Settings
menu.
iIf you press and hold0063or0064, you
change directly to the backfunction.
Setting the time
XPress the0063or0064 button on the steer-
ing wheel to select the Settingsmenu and
press 0076on the steering wheel to con-
firm.
XPress the 0063or0064 button to select the
Timesubmenu and confirm with 0076.
XPress the0063or0064 button to select SetClockand press the0076button to confirm.
XPress the 0063or0064 button to set the
hour and confirm with 0076.
XPress the0063or0064 button to set the
minutes and confirm with 0076.
The time is set and the display shows the
Time
submenu.
iIf you are setting the time and keep the
0063 or0064 button depressed, then the
numerical value changes continuously.
Setting the time format (12/24 h)
XPress the 0063or0064 button on the steer-
ing wheel to select the Settingsmenu and
114Menus and sub menus
>> On-board computer and displays.
Page 117 of 214
press0076on the steering wheel to con-
firm.
XPress the 0063or0064 button to select the
Timesubmenu and confirm with 0076.
XPress0063or0064 to select TimeFormat(12/24 h)and confirm with 0076.
XPress0063or0064 to select the desired
time format 24Hoursor12Hours(am/pm)and confirm with 0076.
The time format is accepted and the display
shows the Time
submenu.
Display submenu
Introduction
In theDisplaysubmenu, you can call up the
following submenus:
RBrightness Display/Switchessubmenu
(Ypage 115)
-Adjusting the instrument cluster light-
ing
RDigital Speedometersubmenu, see
(Ypage 115)
-Shows and sets the digital speedometer
RUnits of Distancesubmenu (Ypage 116)
-Setting the units of distance
RUnits of Temperaturesubmenu
(Ypage 116)
-Setting the units of temperature
XTo leave the submenu: press the0063
or 0064 button on the steering wheel to
select the back
function and press 0076on
the steering wheel to confirm.
The display shows the Settings
menu.
iIf you press and hold0063or0064, you
change directly to the backfunction.
Adjusting the instrument cluster lighting
Instrument cluster lighting includes illumi-
nation of the instrument cluster, the addi-
tional instruments on the dashboard, the dis-
plays and the controls.
You can set the brightness of the instrument
cluster to different levels with the Bright‐
ness Display/Switchesfunction.
XPress the0063or0064 button on the steer-
ing wheel to select the Settingsmenu andpress
0076on the steering wheel to con-
firm.
XPress the 0063or0064 button to select the
Displaysubmenu and confirm with 0076.
XPress the0063or0064 button to select
Brightness Display/Switchesand press
the 0076 button to confirm.
XPress the 0063or0064 button to set the
brightness level. Level 1corresponds to
dimmed instrument lighting and level 5to
bright instrument lighting.
With the selection during night-time driv-
ing, the instrument cluster brightness
level is set at the same time.
XPress the 0076button to confirm the set-
ting.
The instrument lighting is set and the dis-
play shows the Display
submenu.
Digital speedometer submenu
In theDigital Speedometersubmenu you
have the following options:
Rshowing/hiding the digital speedometer
Rsetting the unit for speed in the digital
speedometer
XTo call up the submenu: press the0063
or 0064 button on the steering wheel to
select the Settings
menu and press 0076on
the steering wheel to confirm.
XPress the 0063or0064 button to select the
Displaysubmenu and confirm with 0076.
XPress the0063or0064 button to select the
Digital Speedometersubmenu and con-
firm with 0076.
XTo show/hide the digital speedometer:
press the0063or0064 button to select the
On
function.
XActivate or deactivate the Onfunction by
pressing the 0076button.
When the function is highlighted, it is
activated and the display shows the digital
speedometer (
Ypage 111).
XTo set the unit of speed: press the0063
or 0064 button to select Unitand press the
0076 button to confirm.
XPress the 0063or0064 button to select the
unit of speed km/hormphand confirm with
0076.
The display shows the Digital Speedome‐
tersubmenu.
Menus and sub menus115
>> On-board computer and displays.
Z