SSANGYONG MUSSO 1998 Workshop Repair Manual
MUSSO 1998
SSANGYONG
SSANGYONG
https://www.carmanualsonline.info/img/67/57510/w960_57510-0.png
SSANGYONG MUSSO 1998 Workshop Repair Manual
Trending: handbrake, turn signal bulb, trailer, mileage, open hood, brake light, ESP inoperative
Page 471 of 1463
OM600 ENGINE MECHANICAL 1B3-169
OIL FILTER
1 Nut ............................................................ 25 Nm
2 Oil Filter..................................................... Cover
3 O-Ring ................................................... Replace
4 Oil Filter...............Element Replace If necessary
5 Oil Filter Housing6 Bolt (M8)....................................................10Nm
7 Oil Pressure Switch
8 Gasket
9 Bolt........................................................... 25 Nm
Page 472 of 1463
1B3-170 OM600 ENGINE MECHANICAL
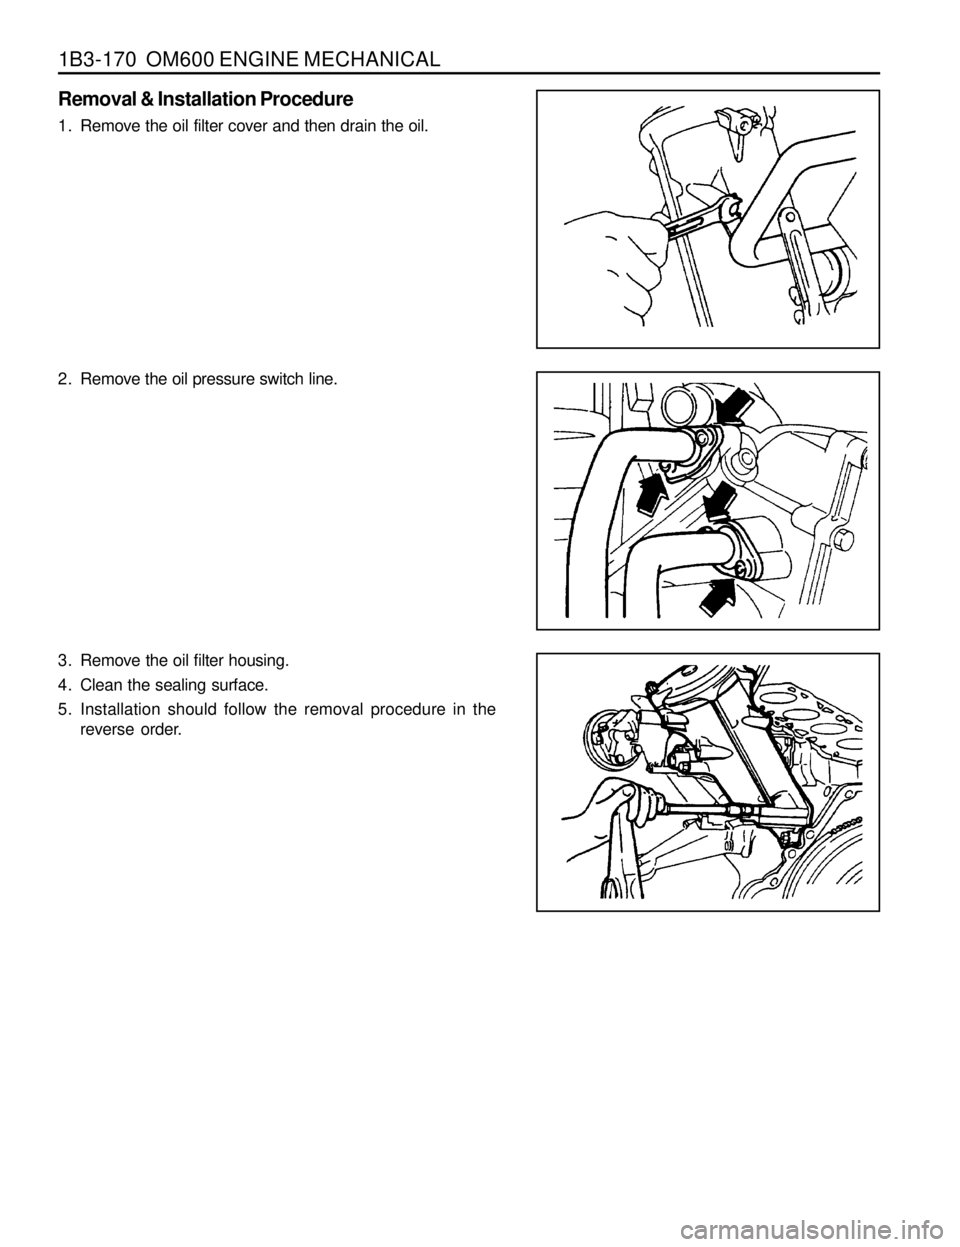
Removal & Installation Procedure
1. Remove the oil filter cover and then drain the oil.
2. Remove the oil pressure switch line.
3. Remove the oil filter housing.
4. Clean the sealing surface.
5. Installation should follow the removal procedure in the
reverse order.
Page 473 of 1463
OM600 ENGINE MECHANICAL 1B3-171
OIL PAN
1 Gasket ................................................... Replace
2 Upper Oil Pan
3 Combination Bolt...................................... 10 Nm
4 Combination Bolt...................................... 10 Nm
5 Gasket ................................................... Replace6 Lower Oil Pan
7 Combination Bolt...................................... 25 Nm
8 Drain Plug................................................. 25 Nm
9 Washer Seal.......................................... Replace
10 Oil Pan
*Remove and install as numerical sequence.
Notice
Replace the washer seal with new one.
OM662LAOM661LA
Page 474 of 1463
1B3-172 OM600 ENGINE MECHANICAL
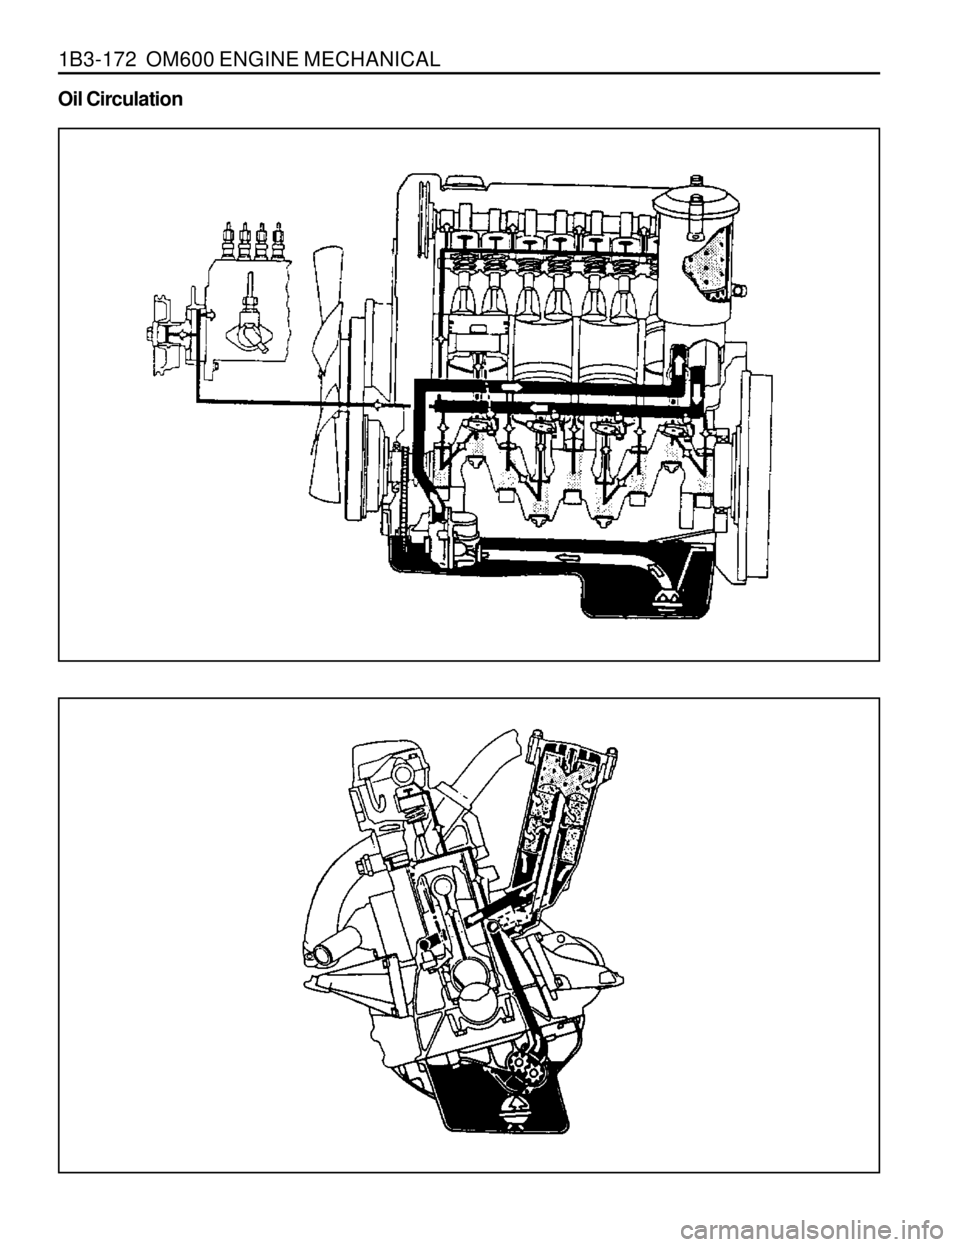
Oil Circulation
Page 475 of 1463
OM600 ENGINE MECHANICAL 1B3-173
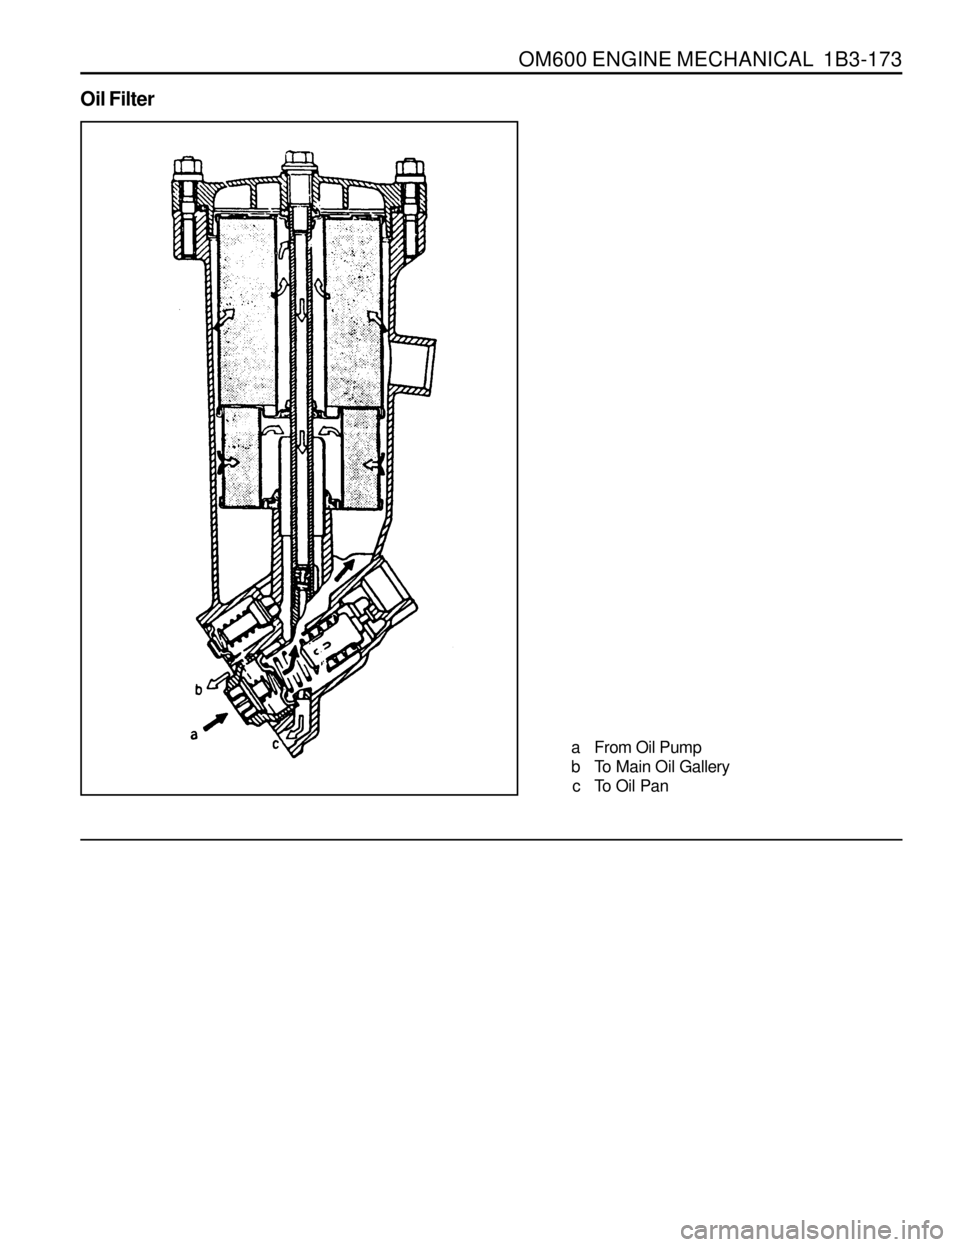
Oil Filter
a From Oil Pump
b To Main Oil Gallery
c To Oil Pan
Page 476 of 1463
1B3-174 OM600 ENGINE MECHANICAL
OIL SPRAY NOZZLE
1 Fitting Sleeve
2 Oil Spray Nozzle
Disassembly Procedure
1. Remove oil pan or crankshaft.
2. Loose the bolt and then remove the nozzle.
3 Combination Bolt..................................... 10 Nm
A Oil Duct
Page 477 of 1463
OM600 ENGINE MECHANICAL 1B3-175
OIL PUMP
1 Oil Pump
2 Piston
3 Pressure Spring
4 Guide Pin5 Screw Plug................................................ 50 Nm
6 Combination Bolt...................................... 25 Nm
7 Oil Strainer
8 Bracket
Disassembly Procedure
1. Remove the oil pan.
2. Unscrew the mounting bolt of spracket.
Page 478 of 1463
1B3-176 OM600 ENGINE MECHANICAL
Tightening Torque 10 Nm
3. Unscrew the oil strainer bracket bolt.
4. Remove the oil pump.
5. Unscrew the screw plug and remove the relief valve.
6. Installation should follow the removal procedure in the
reverse order.
Page 479 of 1463
OM600 ENGINE MECHANICAL 1B3-177
CYLINDER HEAD PRESSURE LEAKAGE TEST
Preceding Work : Removal of the cylinder head
Removal of the exhaust manifold
Removal of the valve
1 Feed Pipe
2 Bolt
3 Return Connection
4 Gasket ................................................................ Replace
5 Coolant Gallery................................................... Sealing
6 Pressure Measuring Plate..................................Completely tight to the cylinder head
7 Cylinder Head.....................................................
Immerse with pressure measuring plate into warm water of approx. 60°C and pressurize with compressed
airof 2 bar.
Notice
If air bubbles are seen, replace the cylinderhead.
Tools Required
115 589 34 63 00 Pressure Measuring Plate
601 589 00 25 00 Suspension Device
UNIT REPAIR
Page 480 of 1463
1B3-178 OM600 ENGINE MECHANICAL
Height ‘A’
(cylinder head surface - cylinder head cover surface)
Minimum height after machining
Permissible unevenness of parting surface
Permissible variation of parallelism (longitud. Direction)
Peak-to-valley height
Valve arrears ‘a’
Prechamber protrusion
Service Data
In longitudinal direction
In transverse direction
Intake valve
Exhaust valve142.9 - 143.1mm
142.5mm
0.08mm
0.0mm
Max. 0.1mm
0.0017mm
0.1 - 0.7mm
0.1 - 0.7mm
7.6 - 8.1mm
FACING CYLINDER HEAD MATING SURFACE
Preceding Work : Removal of prechamber
Cylinder head pressure leakage test
1 Valve
2 Cylinder Head
3 Prechamber
A Height of Cylinder HeadB Longitudinal Direction
C Transverse Direction
a Valve Arrears
b Prechamber Protrusion
Trending: weight, compression ratio, turn signal bulb, tailgate, rid height, technical data, wheel alignment


