SUBARU LEGACY 1999 Service Repair Manual
Manufacturer: SUBARU, Model Year: 1999, Model line: LEGACY, Model: SUBARU LEGACY 1999Pages: 1456, PDF Size: 59.93 MB
Page 331 of 1456
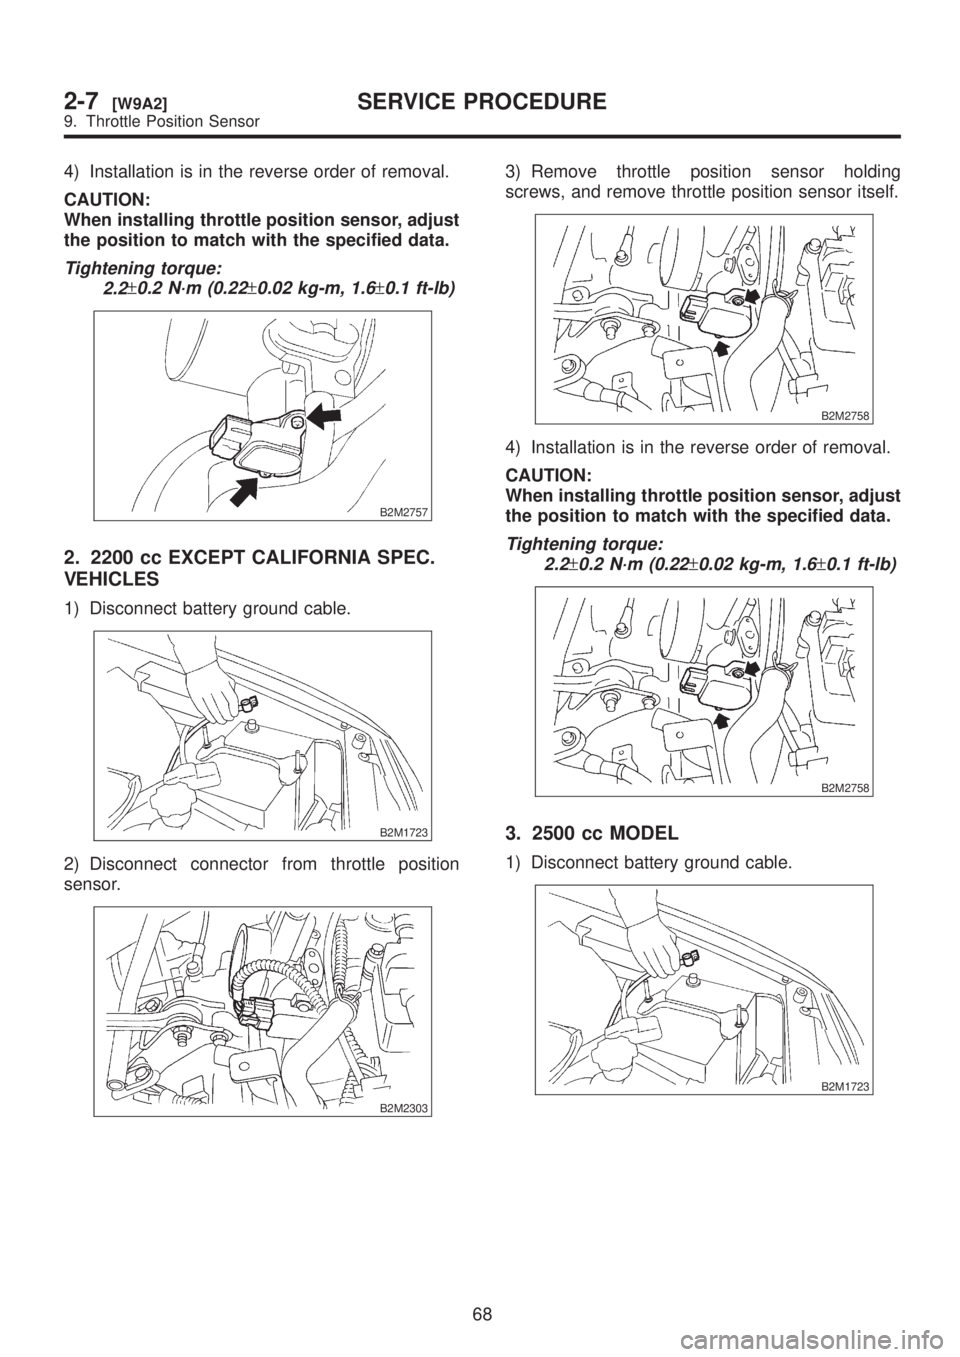
4) Installation is in the reverse order of removal.
CAUTION:
When installing throttle position sensor, adjust
the position to match with the specified data.
Tightening torque:
2.2
±0.2 N´m (0.22±0.02 kg-m, 1.6±0.1 ft-lb)
B2M2757
2. 2200 cc EXCEPT CALIFORNIA SPEC.
VEHICLES
1) Disconnect battery ground cable.
B2M1723
2) Disconnect connector from throttle position
sensor.
B2M2303
3) Remove throttle position sensor holding
screws, and remove throttle position sensor itself.
B2M2758
4) Installation is in the reverse order of removal.
CAUTION:
When installing throttle position sensor, adjust
the position to match with the specified data.
Tightening torque:
2.2
±0.2 N´m (0.22±0.02 kg-m, 1.6±0.1 ft-lb)
B2M2758
3. 2500 cc MODEL
1) Disconnect battery ground cable.
B2M1723
68
2-7[W9A2]SERVICE PROCEDURE
9. Throttle Position Sensor
Page 332 of 1456
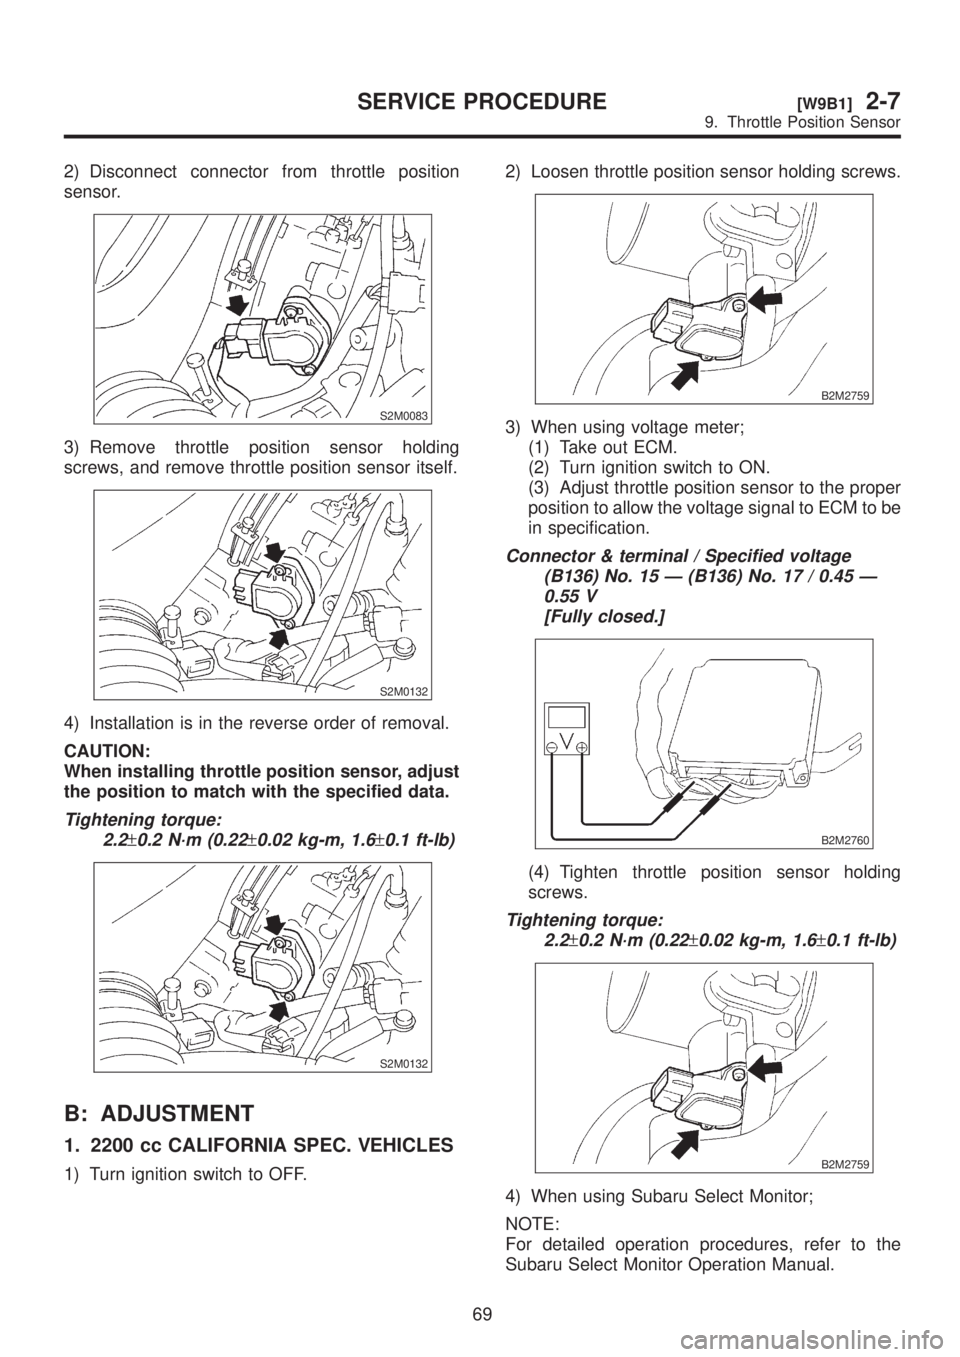
2) Disconnect connector from throttle position
sensor.
S2M0083
3) Remove throttle position sensor holding
screws, and remove throttle position sensor itself.
S2M0132
4) Installation is in the reverse order of removal.
CAUTION:
When installing throttle position sensor, adjust
the position to match with the specified data.
Tightening torque:
2.2
±0.2 N´m (0.22±0.02 kg-m, 1.6±0.1 ft-lb)
S2M0132
B: ADJUSTMENT
1. 2200 cc CALIFORNIA SPEC. VEHICLES
1) Turn ignition switch to OFF.2) Loosen throttle position sensor holding screws.
B2M2759
3) When using voltage meter;
(1) Take out ECM.
(2) Turn ignition switch to ON.
(3) Adjust throttle position sensor to the proper
position to allow the voltage signal to ECM to be
in specification.
Connector & terminal / Specified voltage
(B136) No. 15 Ð (B136) No. 17 / 0.45 Ð
0.55 V
[Fully closed.]
B2M2760
(4) Tighten throttle position sensor holding
screws.
Tightening torque:
2.2
±0.2 N´m (0.22±0.02 kg-m, 1.6±0.1 ft-lb)
B2M2759
4) When using Subaru Select Monitor;
NOTE:
For detailed operation procedures, refer to the
Subaru Select Monitor Operation Manual.
69
[W9B1]2-7SERVICE PROCEDURE
9. Throttle Position Sensor
Page 333 of 1456
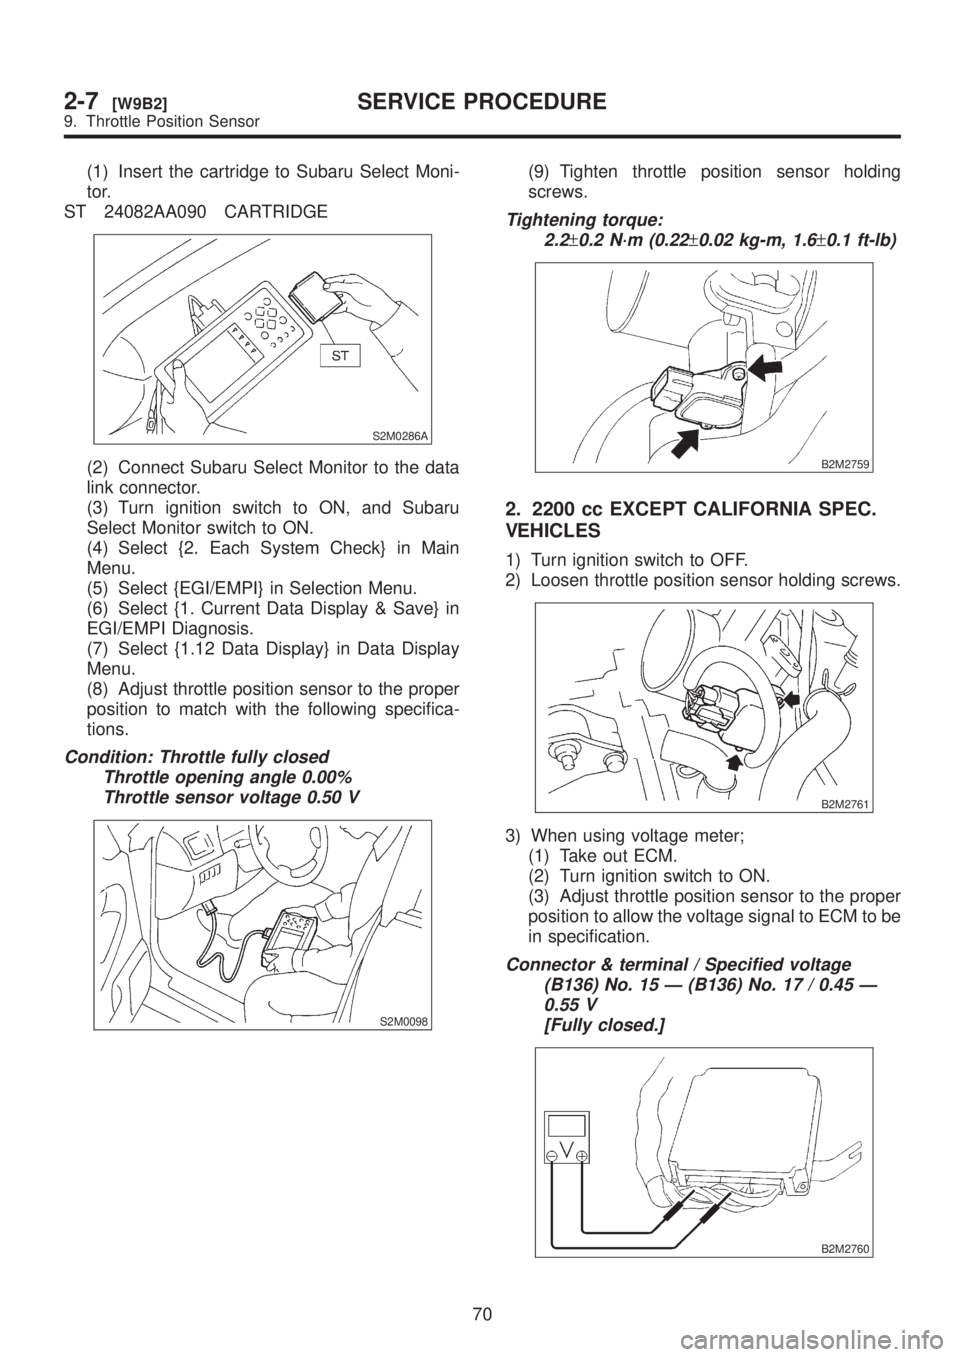
(1) Insert the cartridge to Subaru Select Moni-
tor.
ST 24082AA090 CARTRIDGE
S2M0286A
(2) Connect Subaru Select Monitor to the data
link connector.
(3) Turn ignition switch to ON, and Subaru
Select Monitor switch to ON.
(4) Select {2. Each System Check} in Main
Menu.
(5) Select {EGI/EMPI} in Selection Menu.
(6) Select {1. Current Data Display & Save} in
EGI/EMPI Diagnosis.
(7) Select {1.12 Data Display} in Data Display
Menu.
(8) Adjust throttle position sensor to the proper
position to match with the following specifica-
tions.
Condition: Throttle fully closed
Throttle opening angle 0.00%
Throttle sensor voltage 0.50 V
S2M0098
(9) Tighten throttle position sensor holding
screws.
Tightening torque:
2.2
±0.2 N´m (0.22±0.02 kg-m, 1.6±0.1 ft-lb)
B2M2759
2. 2200 cc EXCEPT CALIFORNIA SPEC.
VEHICLES
1) Turn ignition switch to OFF.
2) Loosen throttle position sensor holding screws.
B2M2761
3) When using voltage meter;
(1) Take out ECM.
(2) Turn ignition switch to ON.
(3) Adjust throttle position sensor to the proper
position to allow the voltage signal to ECM to be
in specification.
Connector & terminal / Specified voltage
(B136) No. 15 Ð (B136) No. 17 / 0.45 Ð
0.55 V
[Fully closed.]
B2M2760
70
2-7[W9B2]SERVICE PROCEDURE
9. Throttle Position Sensor
Page 334 of 1456
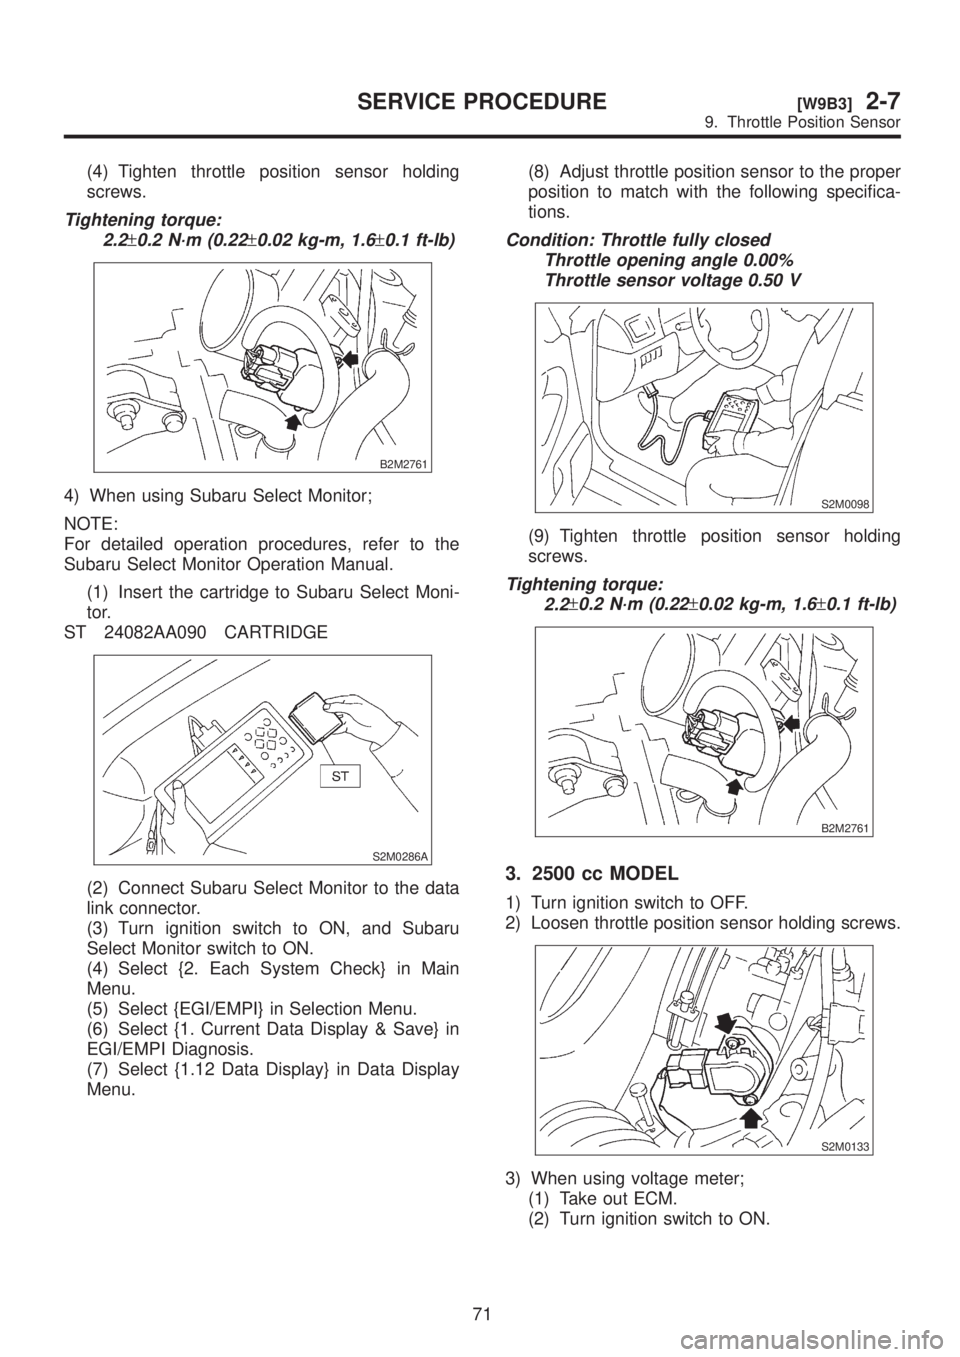
(4) Tighten throttle position sensor holding
screws.
Tightening torque:
2.2
±0.2 N´m (0.22±0.02 kg-m, 1.6±0.1 ft-lb)
B2M2761
4) When using Subaru Select Monitor;
NOTE:
For detailed operation procedures, refer to the
Subaru Select Monitor Operation Manual.
(1) Insert the cartridge to Subaru Select Moni-
tor.
ST 24082AA090 CARTRIDGE
S2M0286A
(2) Connect Subaru Select Monitor to the data
link connector.
(3) Turn ignition switch to ON, and Subaru
Select Monitor switch to ON.
(4) Select {2. Each System Check} in Main
Menu.
(5) Select {EGI/EMPI} in Selection Menu.
(6) Select {1. Current Data Display & Save} in
EGI/EMPI Diagnosis.
(7) Select {1.12 Data Display} in Data Display
Menu.(8) Adjust throttle position sensor to the proper
position to match with the following specifica-
tions.
Condition: Throttle fully closed
Throttle opening angle 0.00%
Throttle sensor voltage 0.50 V
S2M0098
(9) Tighten throttle position sensor holding
screws.
Tightening torque:
2.2
±0.2 N´m (0.22±0.02 kg-m, 1.6±0.1 ft-lb)
B2M2761
3. 2500 cc MODEL
1) Turn ignition switch to OFF.
2) Loosen throttle position sensor holding screws.
S2M0133
3) When using voltage meter;
(1) Take out ECM.
(2) Turn ignition switch to ON.
71
[W9B3]2-7SERVICE PROCEDURE
9. Throttle Position Sensor
Page 335 of 1456
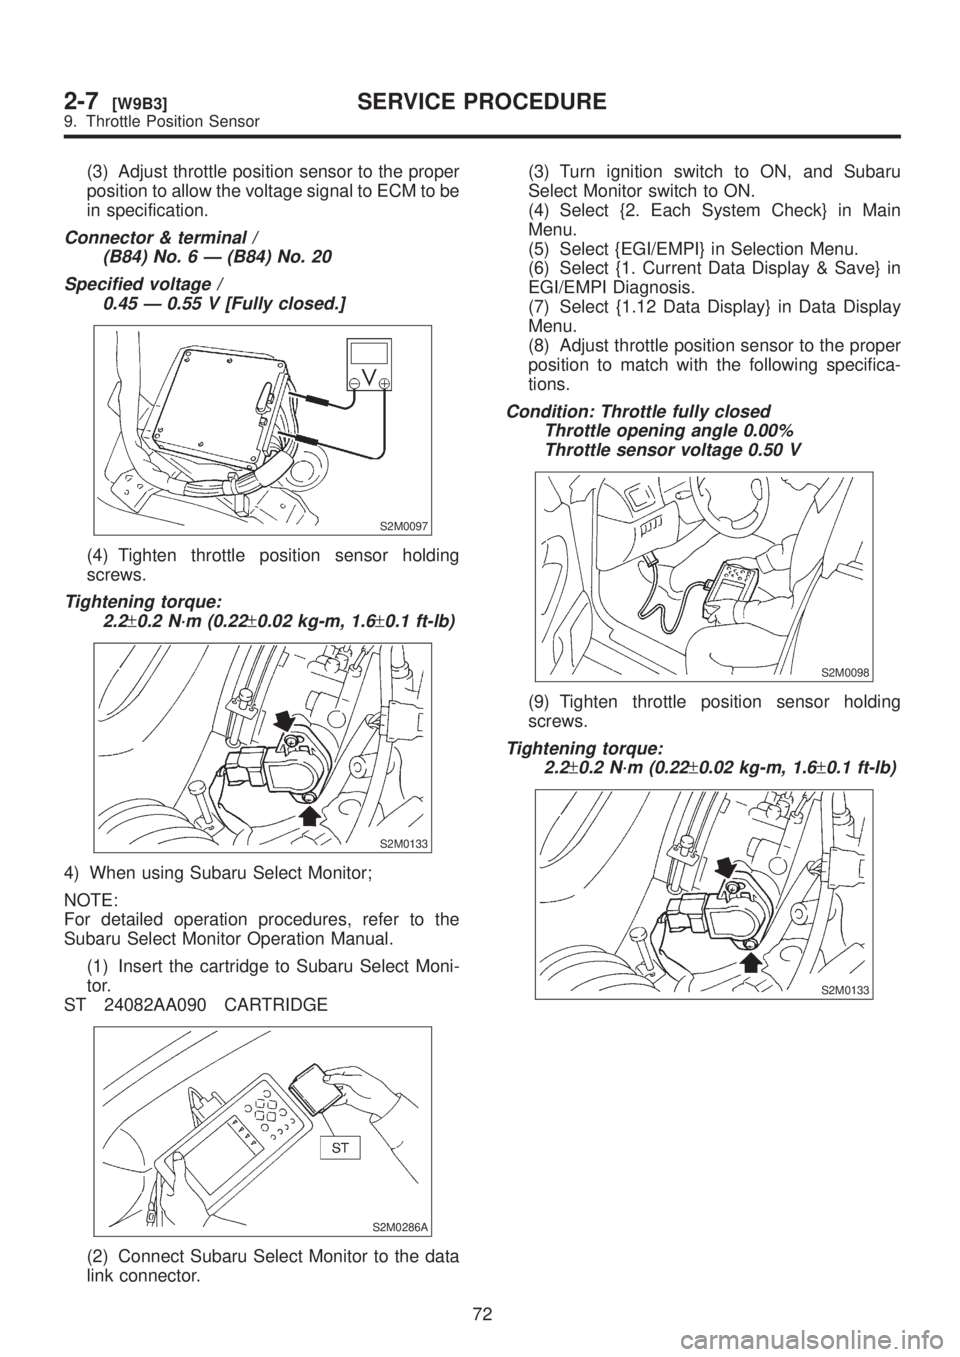
(3) Adjust throttle position sensor to the proper
position to allow the voltage signal to ECM to be
in specification.
Connector & terminal /
(B84) No. 6 Ð (B84) No. 20
Specified voltage /
0.45 Ð 0.55 V [Fully closed.]
S2M0097
(4) Tighten throttle position sensor holding
screws.
Tightening torque:
2.2
±0.2 N´m (0.22±0.02 kg-m, 1.6±0.1 ft-lb)
S2M0133
4) When using Subaru Select Monitor;
NOTE:
For detailed operation procedures, refer to the
Subaru Select Monitor Operation Manual.
(1) Insert the cartridge to Subaru Select Moni-
tor.
ST 24082AA090 CARTRIDGE
S2M0286A
(2) Connect Subaru Select Monitor to the data
link connector.(3) Turn ignition switch to ON, and Subaru
Select Monitor switch to ON.
(4) Select {2. Each System Check} in Main
Menu.
(5) Select {EGI/EMPI} in Selection Menu.
(6) Select {1. Current Data Display & Save} in
EGI/EMPI Diagnosis.
(7) Select {1.12 Data Display} in Data Display
Menu.
(8) Adjust throttle position sensor to the proper
position to match with the following specifica-
tions.
Condition: Throttle fully closed
Throttle opening angle 0.00%
Throttle sensor voltage 0.50 V
S2M0098
(9) Tighten throttle position sensor holding
screws.
Tightening torque:
2.2
±0.2 N´m (0.22±0.02 kg-m, 1.6±0.1 ft-lb)
S2M0133
72
2-7[W9B3]SERVICE PROCEDURE
9. Throttle Position Sensor
Page 336 of 1456
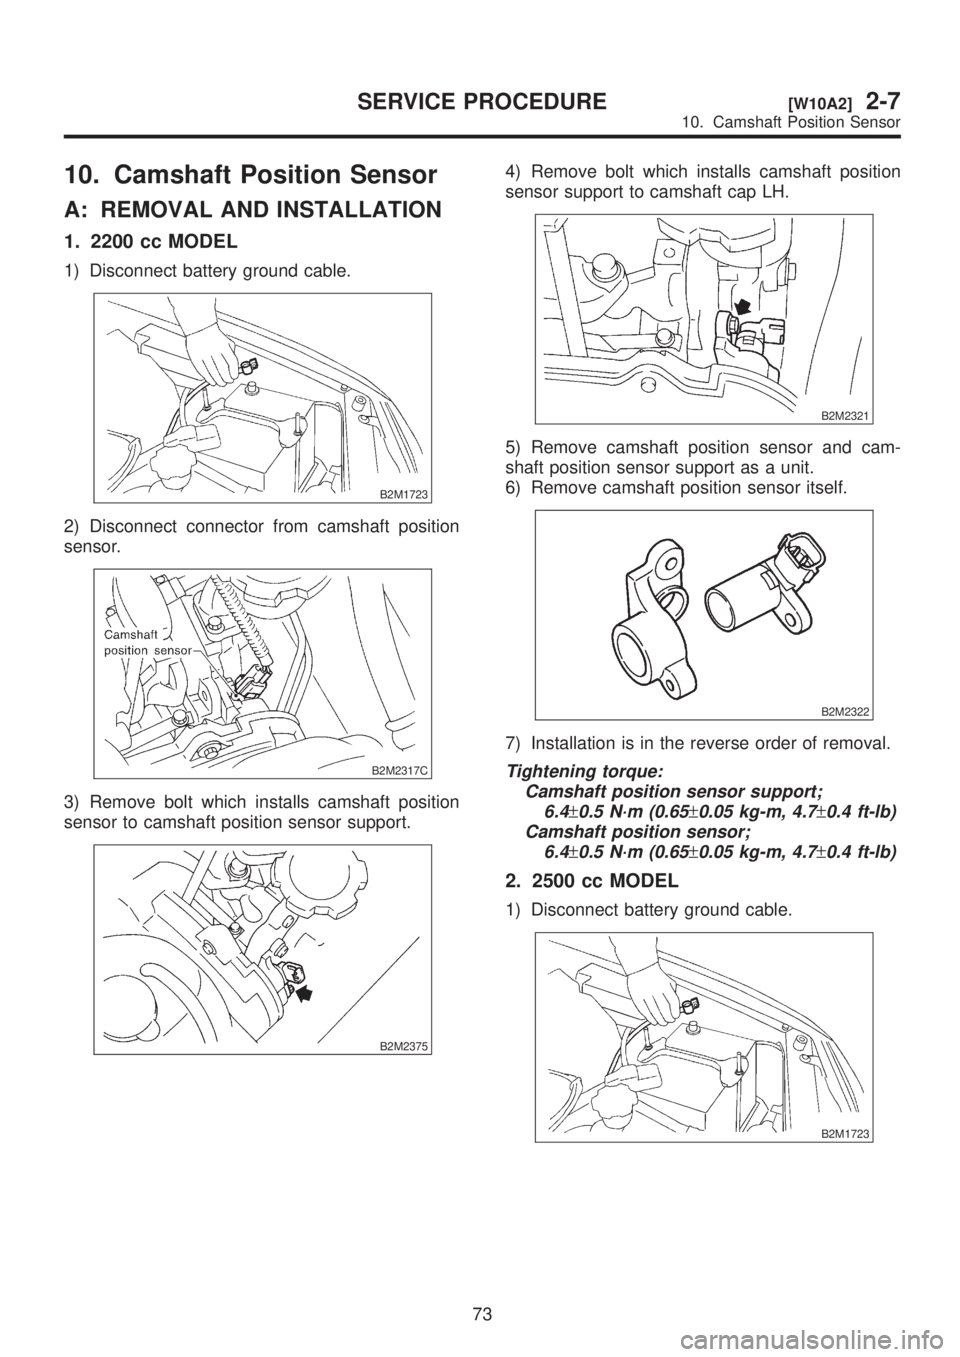
10. Camshaft Position Sensor
A: REMOVAL AND INSTALLATION
1. 2200 cc MODEL
1) Disconnect battery ground cable.
B2M1723
2) Disconnect connector from camshaft position
sensor.
B2M2317C
3) Remove bolt which installs camshaft position
sensor to camshaft position sensor support.
B2M2375
4) Remove bolt which installs camshaft position
sensor support to camshaft cap LH.
B2M2321
5) Remove camshaft position sensor and cam-
shaft position sensor support as a unit.
6) Remove camshaft position sensor itself.
B2M2322
7) Installation is in the reverse order of removal.
Tightening torque:
Camshaft position sensor support;
6.4
±0.5 N´m (0.65±0.05 kg-m, 4.7±0.4 ft-lb)
Camshaft position sensor;
6.4
±0.5 N´m (0.65±0.05 kg-m, 4.7±0.4 ft-lb)
2. 2500 cc MODEL
1) Disconnect battery ground cable.
B2M1723
73
[W10A2]2-7SERVICE PROCEDURE
10. Camshaft Position Sensor
Page 337 of 1456
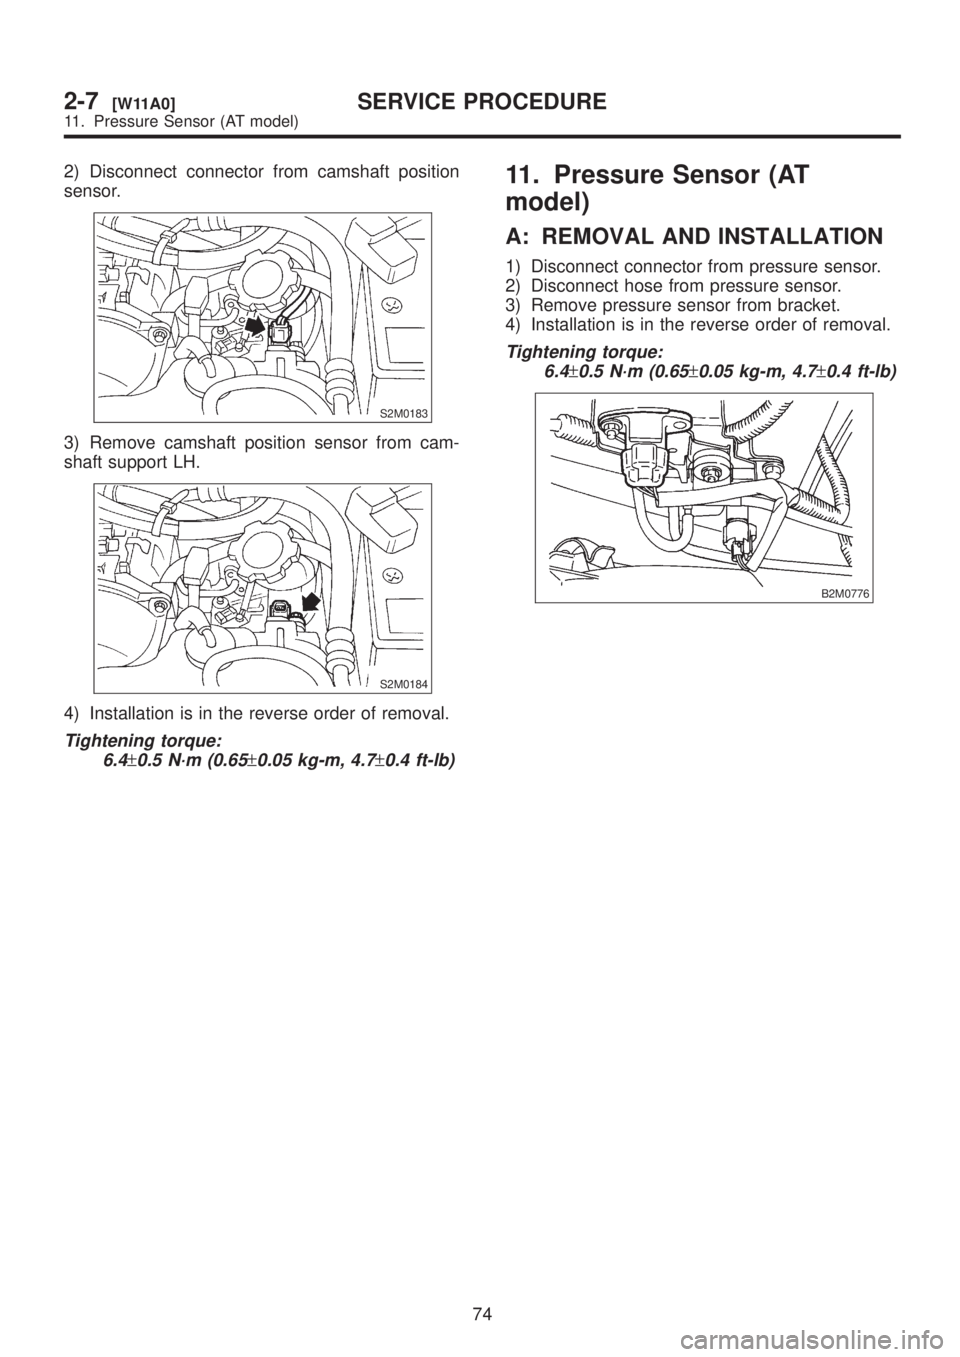
2) Disconnect connector from camshaft position
sensor.
S2M0183
3) Remove camshaft position sensor from cam-
shaft support LH.
S2M0184
4) Installation is in the reverse order of removal.
Tightening torque:
6.4
±0.5 N´m (0.65±0.05 kg-m, 4.7±0.4 ft-lb)
11. Pressure Sensor (AT
model)
A: REMOVAL AND INSTALLATION
1) Disconnect connector from pressure sensor.
2) Disconnect hose from pressure sensor.
3) Remove pressure sensor from bracket.
4) Installation is in the reverse order of removal.
Tightening torque:
6.4
±0.5 N´m (0.65±0.05 kg-m, 4.7±0.4 ft-lb)
B2M0776
74
2-7[W11A0]SERVICE PROCEDURE
11. Pressure Sensor (AT model)
Page 338 of 1456
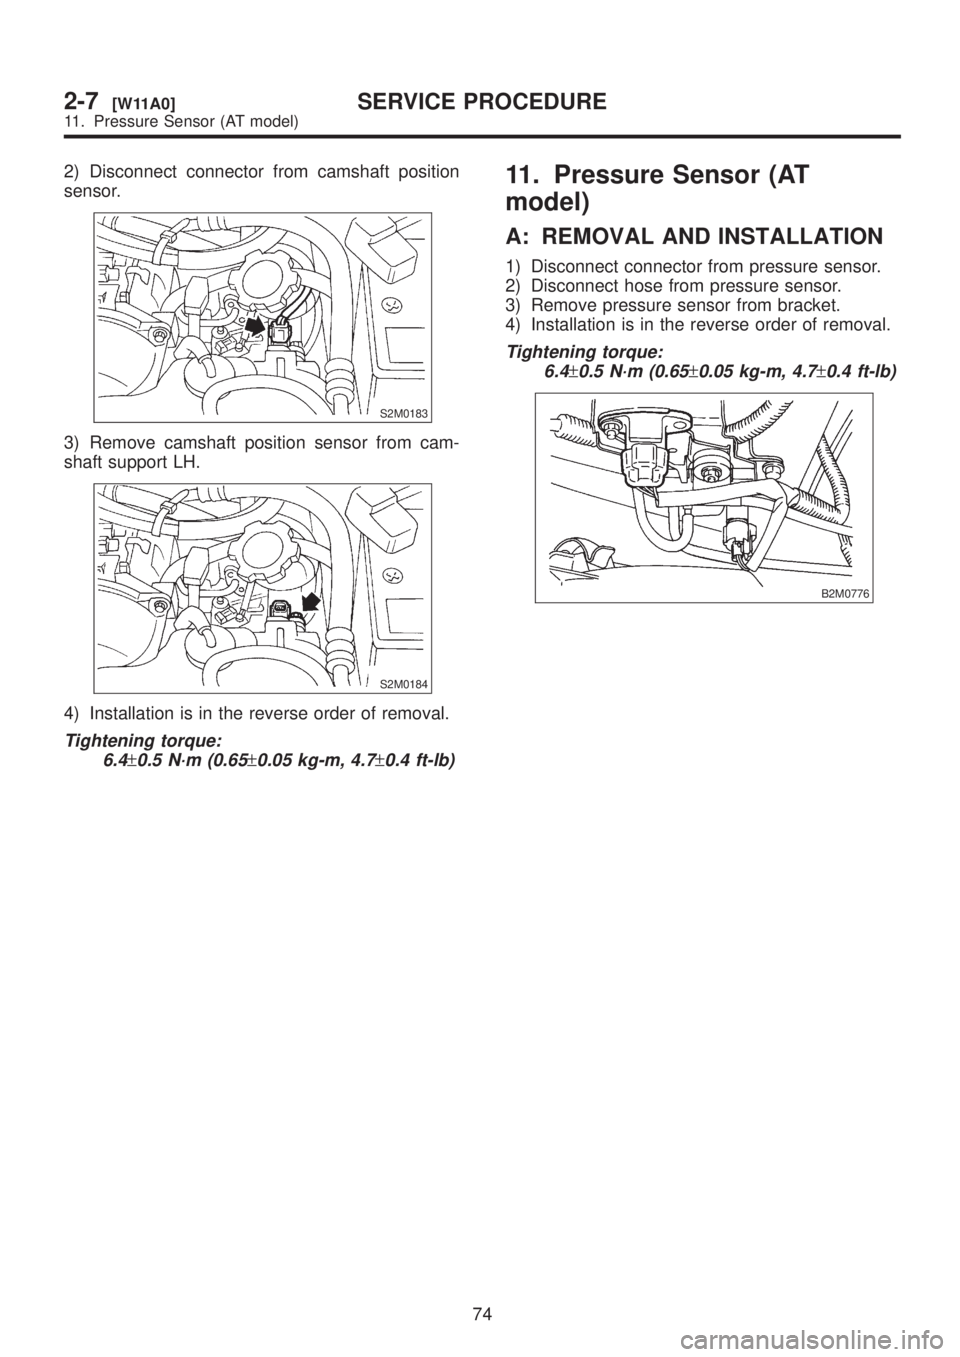
2) Disconnect connector from camshaft position
sensor.
S2M0183
3) Remove camshaft position sensor from cam-
shaft support LH.
S2M0184
4) Installation is in the reverse order of removal.
Tightening torque:
6.4
±0.5 N´m (0.65±0.05 kg-m, 4.7±0.4 ft-lb)
11. Pressure Sensor (AT
model)
A: REMOVAL AND INSTALLATION
1) Disconnect connector from pressure sensor.
2) Disconnect hose from pressure sensor.
3) Remove pressure sensor from bracket.
4) Installation is in the reverse order of removal.
Tightening torque:
6.4
±0.5 N´m (0.65±0.05 kg-m, 4.7±0.4 ft-lb)
B2M0776
74
2-7[W11A0]SERVICE PROCEDURE
11. Pressure Sensor (AT model)
Page 339 of 1456
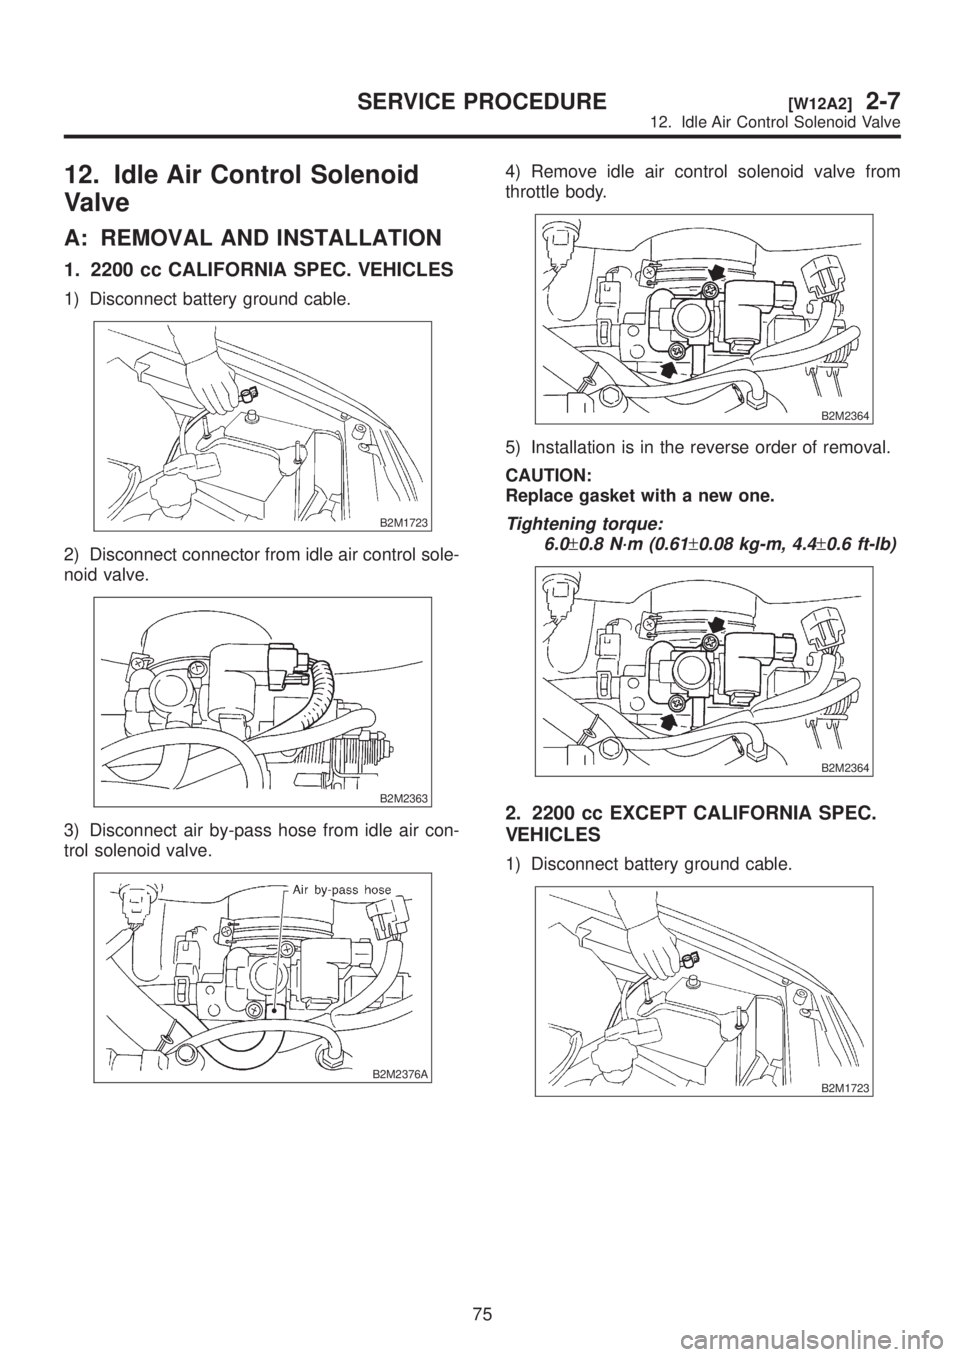
12. Idle Air Control Solenoid
Valve
A: REMOVAL AND INSTALLATION
1. 2200 cc CALIFORNIA SPEC. VEHICLES
1) Disconnect battery ground cable.
B2M1723
2) Disconnect connector from idle air control sole-
noid valve.
B2M2363
3) Disconnect air by-pass hose from idle air con-
trol solenoid valve.
B2M2376A
4) Remove idle air control solenoid valve from
throttle body.
B2M2364
5) Installation is in the reverse order of removal.
CAUTION:
Replace gasket with a new one.
Tightening torque:
6.0
±0.8 N´m (0.61±0.08 kg-m, 4.4±0.6 ft-lb)
B2M2364
2. 2200 cc EXCEPT CALIFORNIA SPEC.
VEHICLES
1) Disconnect battery ground cable.
B2M1723
75
[W12A2]2-7SERVICE PROCEDURE
12. Idle Air Control Solenoid Valve
Page 340 of 1456
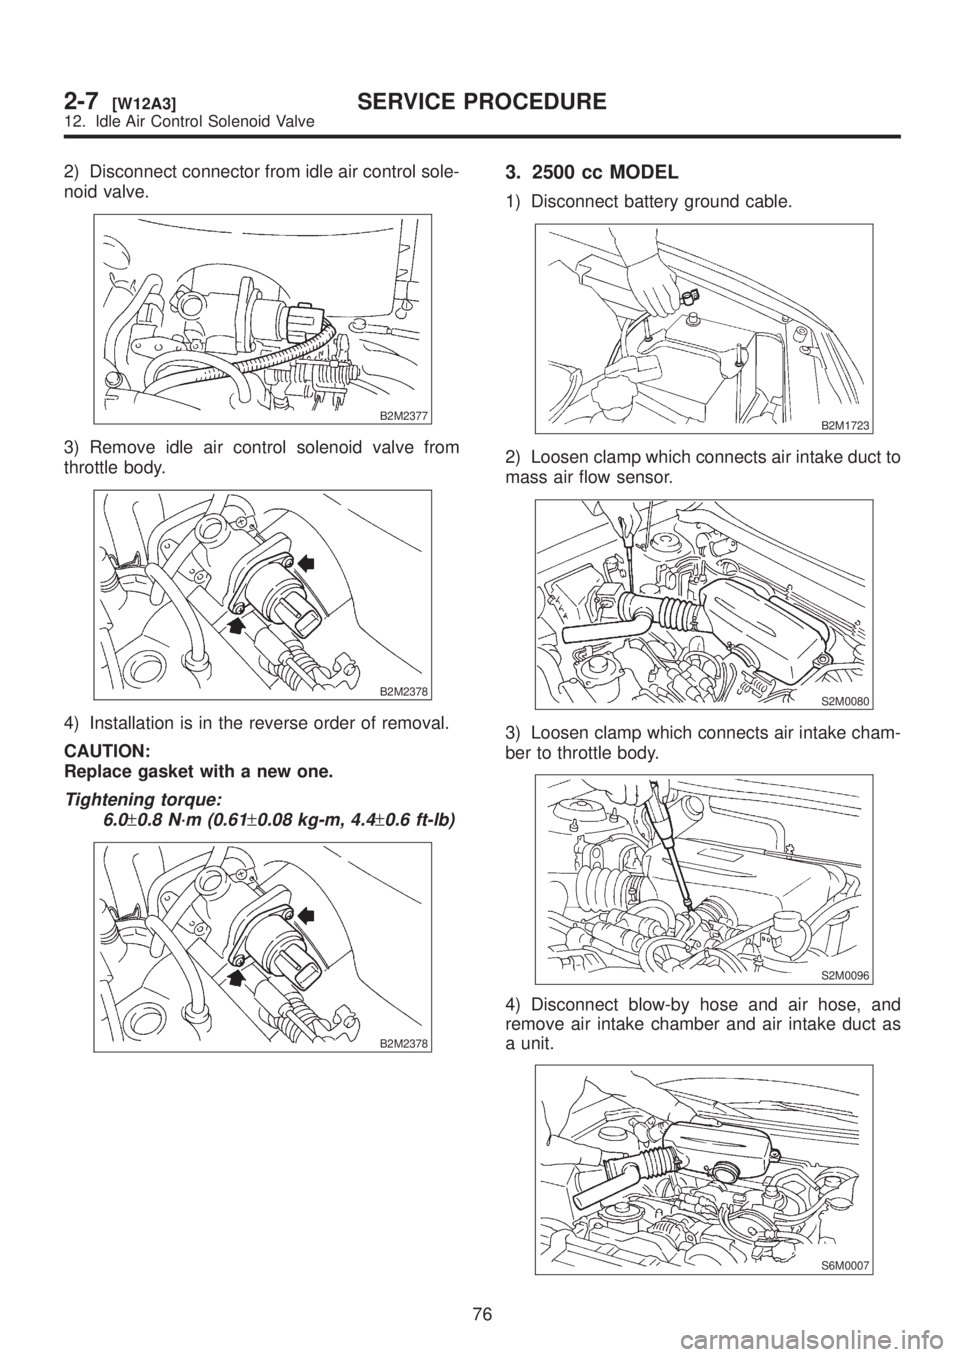
2) Disconnect connector from idle air control sole-
noid valve.
B2M2377
3) Remove idle air control solenoid valve from
throttle body.
B2M2378
4) Installation is in the reverse order of removal.
CAUTION:
Replace gasket with a new one.
Tightening torque:
6.0
±0.8 N´m (0.61±0.08 kg-m, 4.4±0.6 ft-lb)
B2M2378
3. 2500 cc MODEL
1) Disconnect battery ground cable.
B2M1723
2) Loosen clamp which connects air intake duct to
mass air flow sensor.
S2M0080
3) Loosen clamp which connects air intake cham-
ber to throttle body.
S2M0096
4) Disconnect blow-by hose and air hose, and
remove air intake chamber and air intake duct as
a unit.
S6M0007
76
2-7[W12A3]SERVICE PROCEDURE
12. Idle Air Control Solenoid Valve