SUZUKI ERTIGA 2013 1.G Owners Manual
Manufacturer: SUZUKI, Model Year: 2013, Model line: ERTIGA, Model: SUZUKI ERTIGA 2013 1.GPages: 207, PDF Size: 5.14 MB
Page 101 of 207
Downloaded from www.Manualslib.com manuals search engine 5-6
OTHER CONTROLS AND EQUIPMENT
60MK0-14E
Radio Antenna
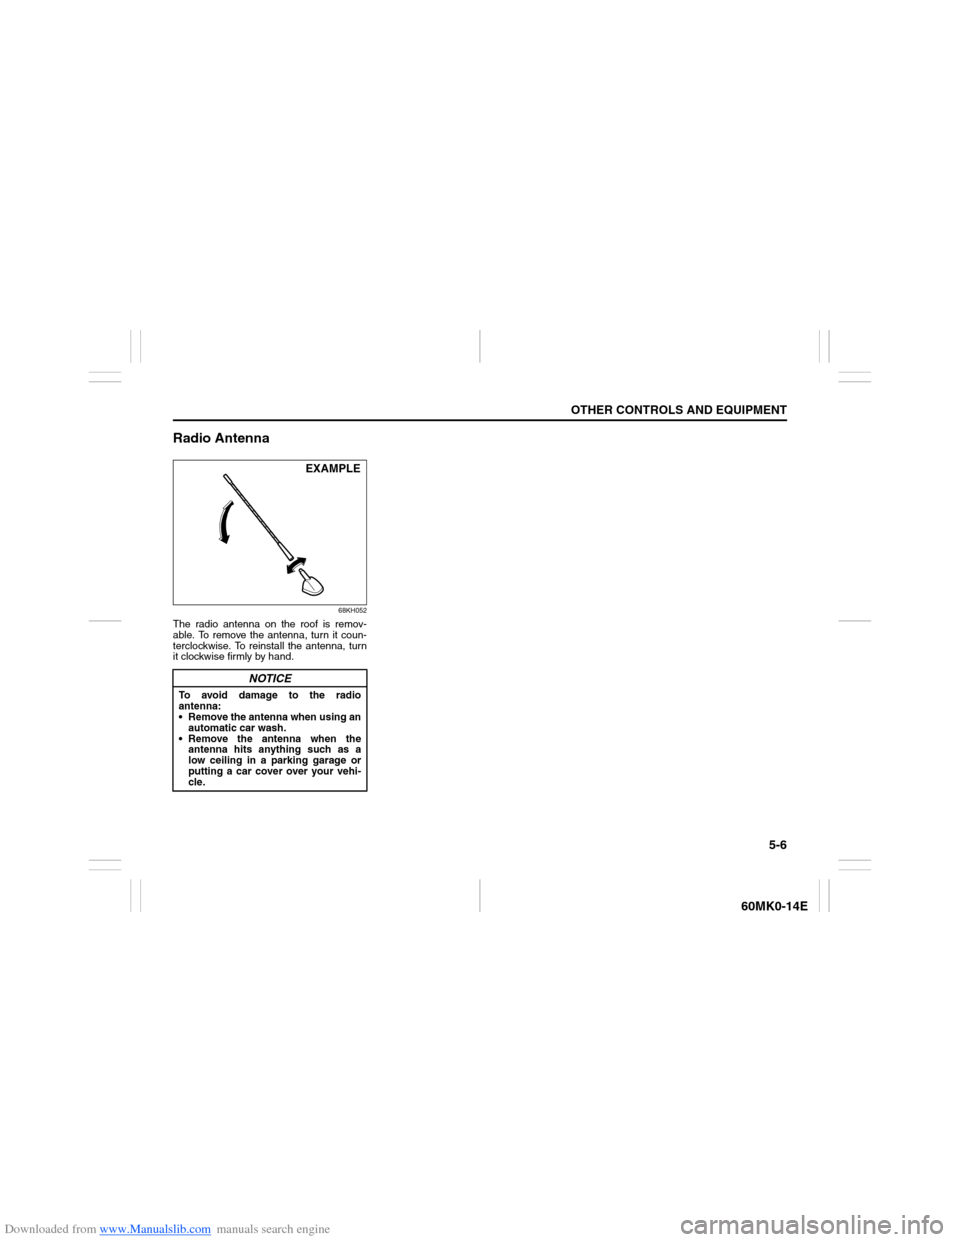
68KH052
The radio antenna on the roof is remov-
able. To remove the antenna, turn it coun-
terclockwise. To reinstall the antenna, turn
it clockwise firmly by hand.
NOTICE
To avoid damage to the radio
antenna:
Remove the antenna when using an
automatic car wash.
Remove the antenna when the
antenna hits anything such as a
low ceiling in a parking garage or
putting a car cover over your vehi-
cle.
EXAMPLE
Page 102 of 207
Downloaded from www.Manualslib.com manuals search engine 5-7OTHER CONTROLS AND EQUIPMENT
60MK0-14E
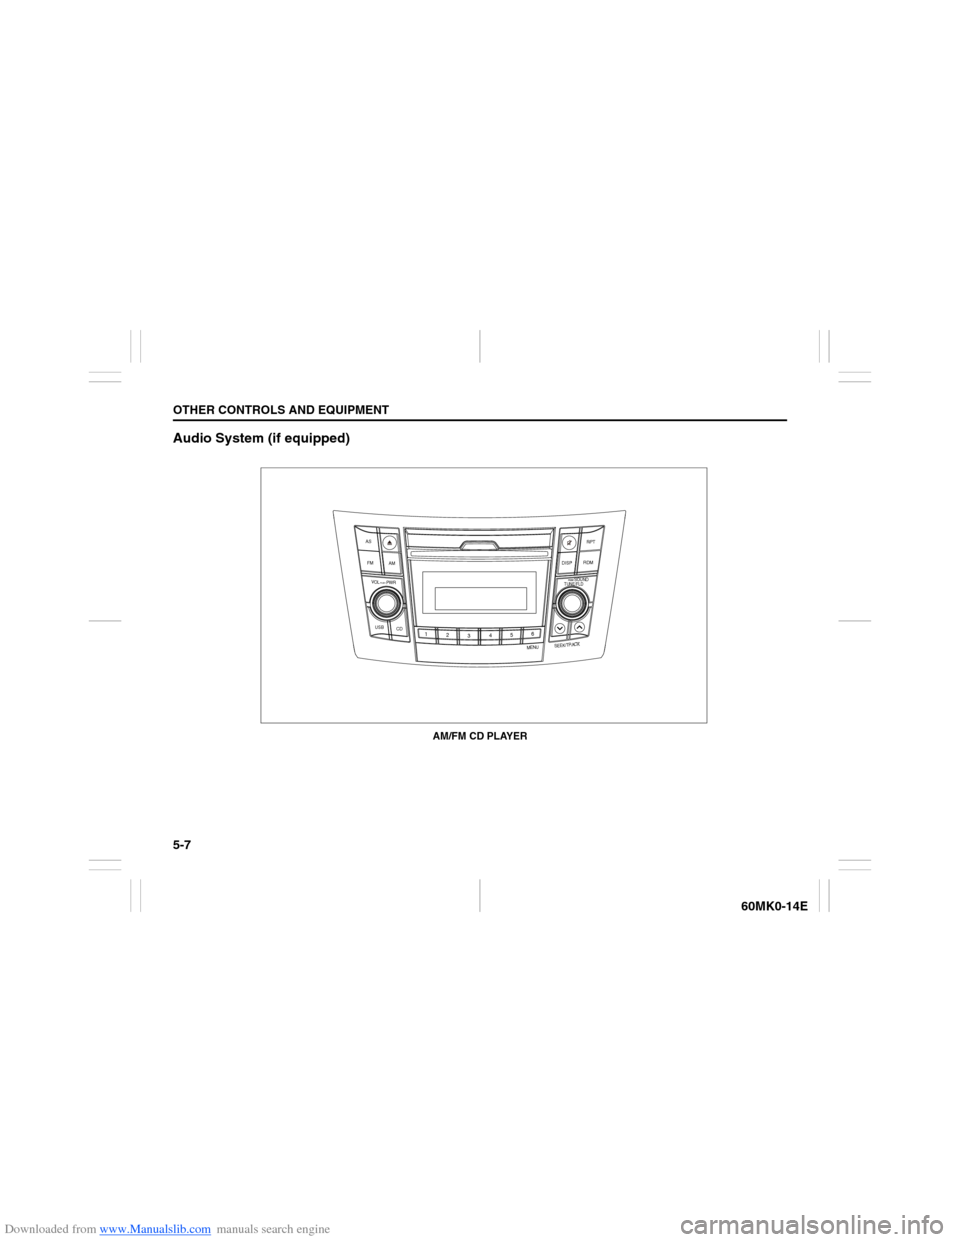
Audio System (if equipped)
USB
CD
1
2
3456
MENU
SEEK/TRACK
AS
AM FMRPT
RDM
DISP
PUSH SOUND
TUNE/FLD
VOL PUSH PWR
AM/FM CD PLAYER
Page 103 of 207
Downloaded from www.Manualslib.com manuals search engine 5-8
OTHER CONTROLS AND EQUIPMENT
60MK0-14E
Safety Information Notes on Discs
Precautions
When the inside of the vehicle is very
cold and the player is used soon after
switching on the heater, condensation
may form on the disc or the optical
parts of the player and proper playback
may not be possible. If condensation
forms on the disc, wipe it off with a soft
cloth. If condensation forms on the opti-
cal parts of the player, do not use the
player for about one hour. This will
allow the condensation to disappear
normally.
Driving on extremely bumpy roads
which cause severe vibrations may
cause sound to skip.
This unit uses a precision mechanism.
Even in the event that trouble arises,
never open the case, disassemble the
unit, or lubricate the rotating parts.
Please bring the unit to an authorized
SUZUKI dealer.Cautions on Handling
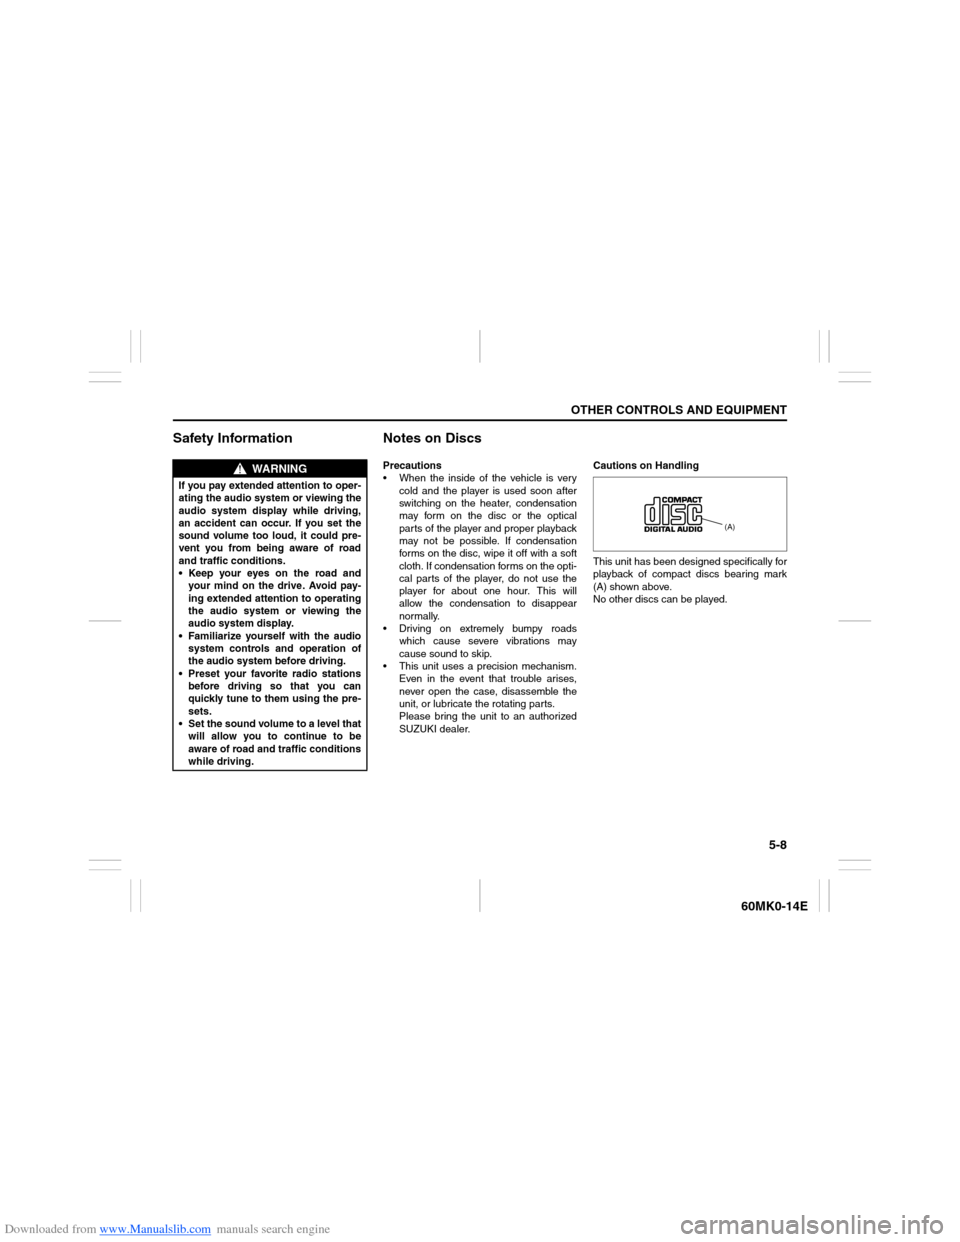
This unit has been designed specifically for
playback of compact discs bearing mark
(A) shown above.
No other discs can be played.
WARNING
If you pay extended attention to oper-
ating the audio system or viewing the
audio system display while driving,
an accident can occur. If you set the
sound volume too loud, it could pre-
vent you from being aware of road
and traffic conditions.
Keep your eyes on the road and
your mind on the drive. Avoid pay-
ing extended attention to operating
the audio system or viewing the
audio system display.
Familiarize yourself with the audio
system controls and operation of
the audio system before driving.
Preset your favorite radio stations
before driving so that you can
quickly tune to them using the pre-
sets.
Set the sound volume to a level that
will allow you to continue to be
aware of road and traffic conditions
while driving.
(A)
Page 104 of 207
Downloaded from www.Manualslib.com manuals search engine 5-9OTHER CONTROLS AND EQUIPMENT
60MK0-14E
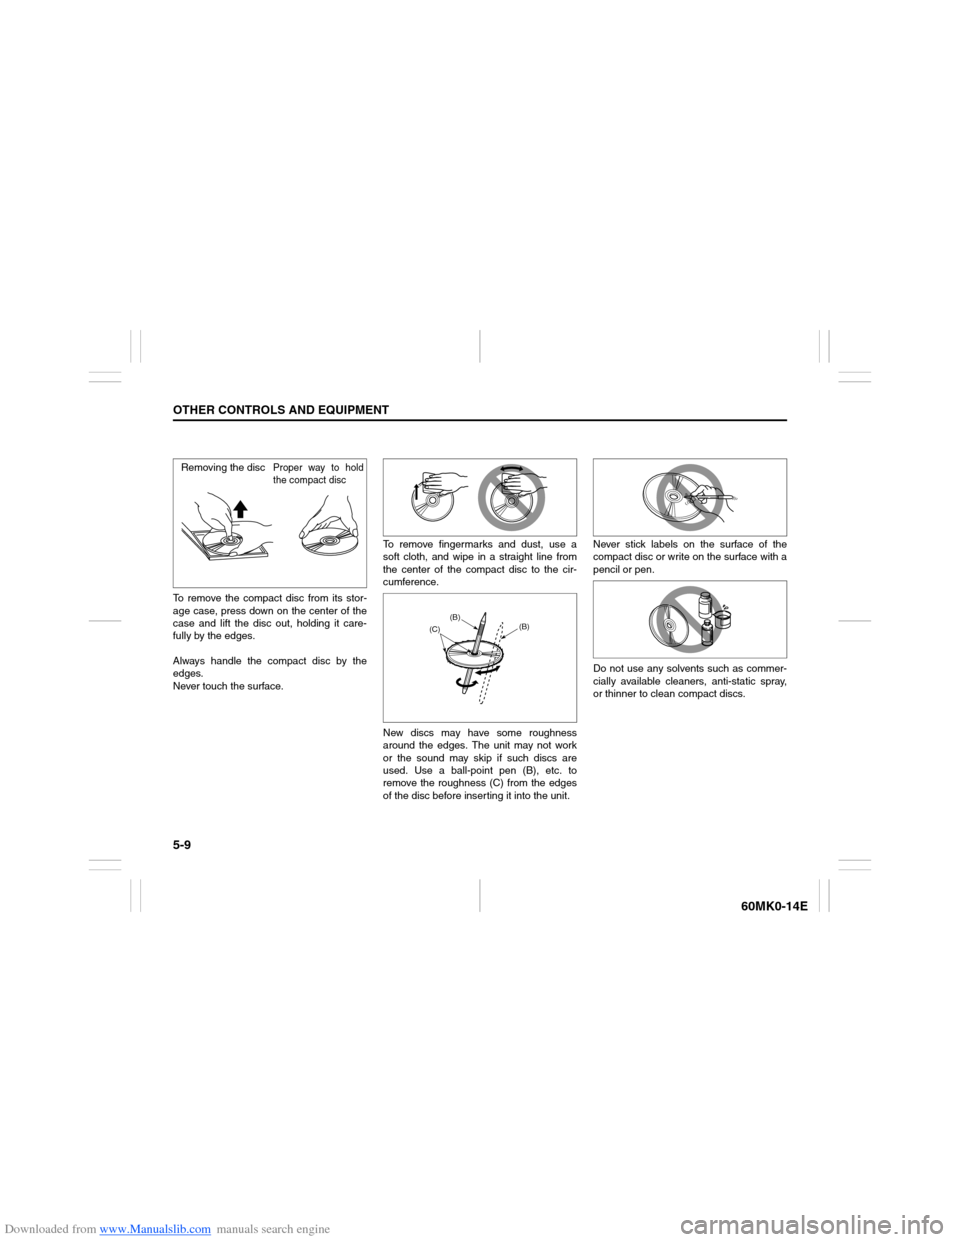
To remove the compact disc from its stor-
age case, press down on the center of the
case and lift the disc out, holding it care-
fully by the edges.
Always handle the compact disc by the
edges.
Never touch the surface.To remove fingermarks and dust, use a
soft cloth, and wipe in a straight line from
the center of the compact disc to the cir-
cumference.
New discs may have some roughness
around the edges. The unit may not work
or the sound may skip if such discs are
used. Use a ball-point pen (B), etc. to
remove the roughness (C) from the edges
of the disc before inserting it into the unit.Never stick labels on the surface of the
compact disc or write on the surface with a
pencil or pen.
Do not use any solvents such as commer-
cially available cleaners, anti-static spray,
or thinner to clean compact discs.Removing the disc
Proper way to hold
the compact disc
(B)
(B)
(C)
Page 105 of 207
Downloaded from www.Manualslib.com manuals search engine 5-10
OTHER CONTROLS AND EQUIPMENT
60MK0-14E
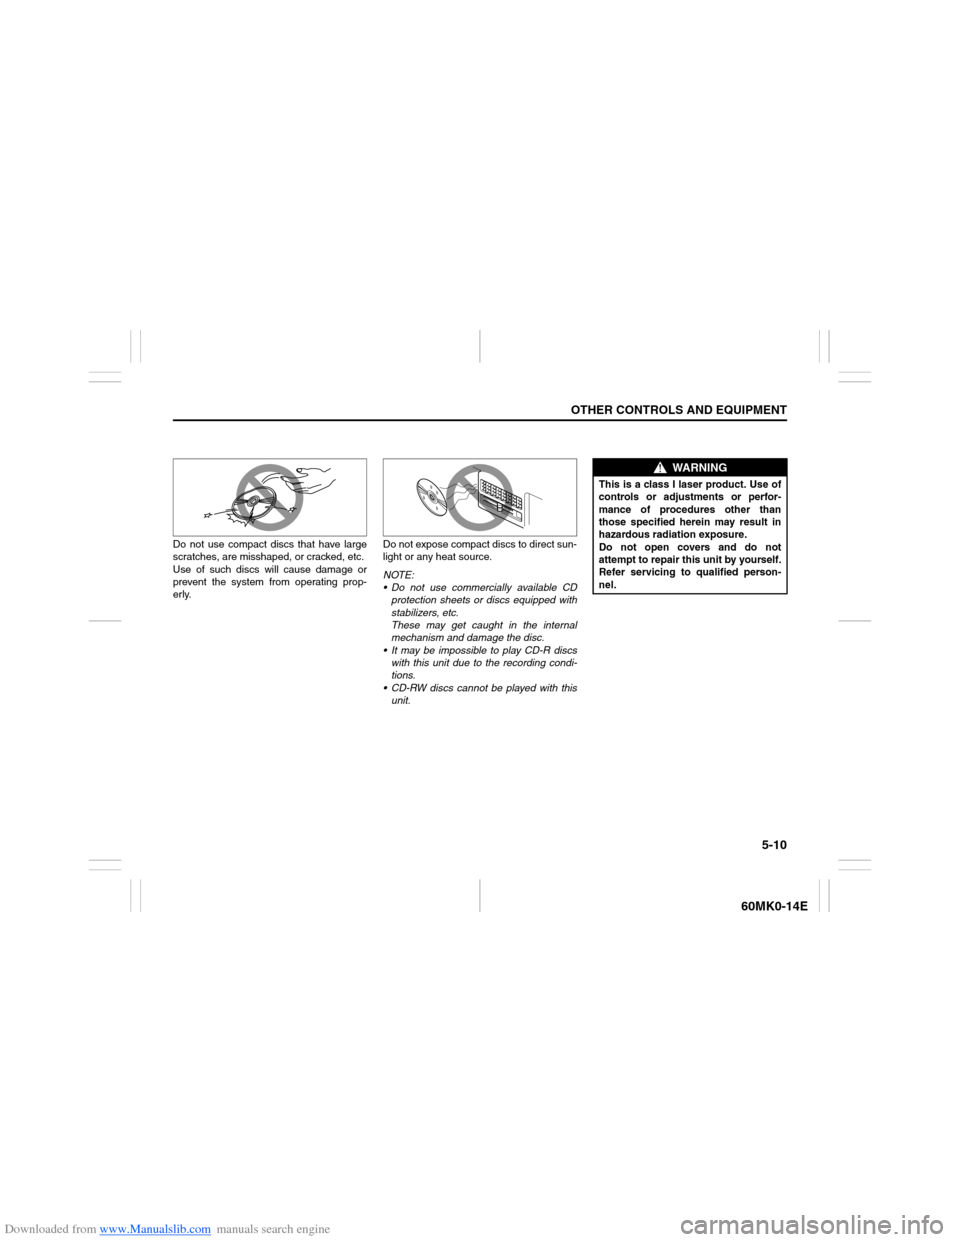
Do not use compact discs that have large
scratches, are misshaped, or cracked, etc.
Use of such discs will cause damage or
prevent the system from operating prop-
erly.Do not expose compact discs to direct sun-
light or any heat source.
NOTE:
Do not use commercially available CD
protection sheets or discs equipped with
stabilizers, etc.
These may get caught in the internal
mechanism and damage the disc.
It may be impossible to play CD-R discs
with this unit due to the recording condi-
tions.
CD-RW discs cannot be played with this
unit.
WARNING
This is a class I laser product. Use of
controls or adjustments or perfor-
mance of procedures other than
those specified herein may result in
hazardous radiation exposure.
Do not open covers and do not
attempt to repair this unit by yourself.
Refer servicing to qualified person-
nel.
Page 106 of 207
Downloaded from www.Manualslib.com manuals search engine 5-11OTHER CONTROLS AND EQUIPMENT
60MK0-14E
Basic Operations
USB
CD
1
2
3456
MENU
SEEK/TRACK
AS
AM FMRPT
RDM
DISP
PUSH SOUND
TUNE/FLD
VO L PUSH PWR
(1)(3)
(2)
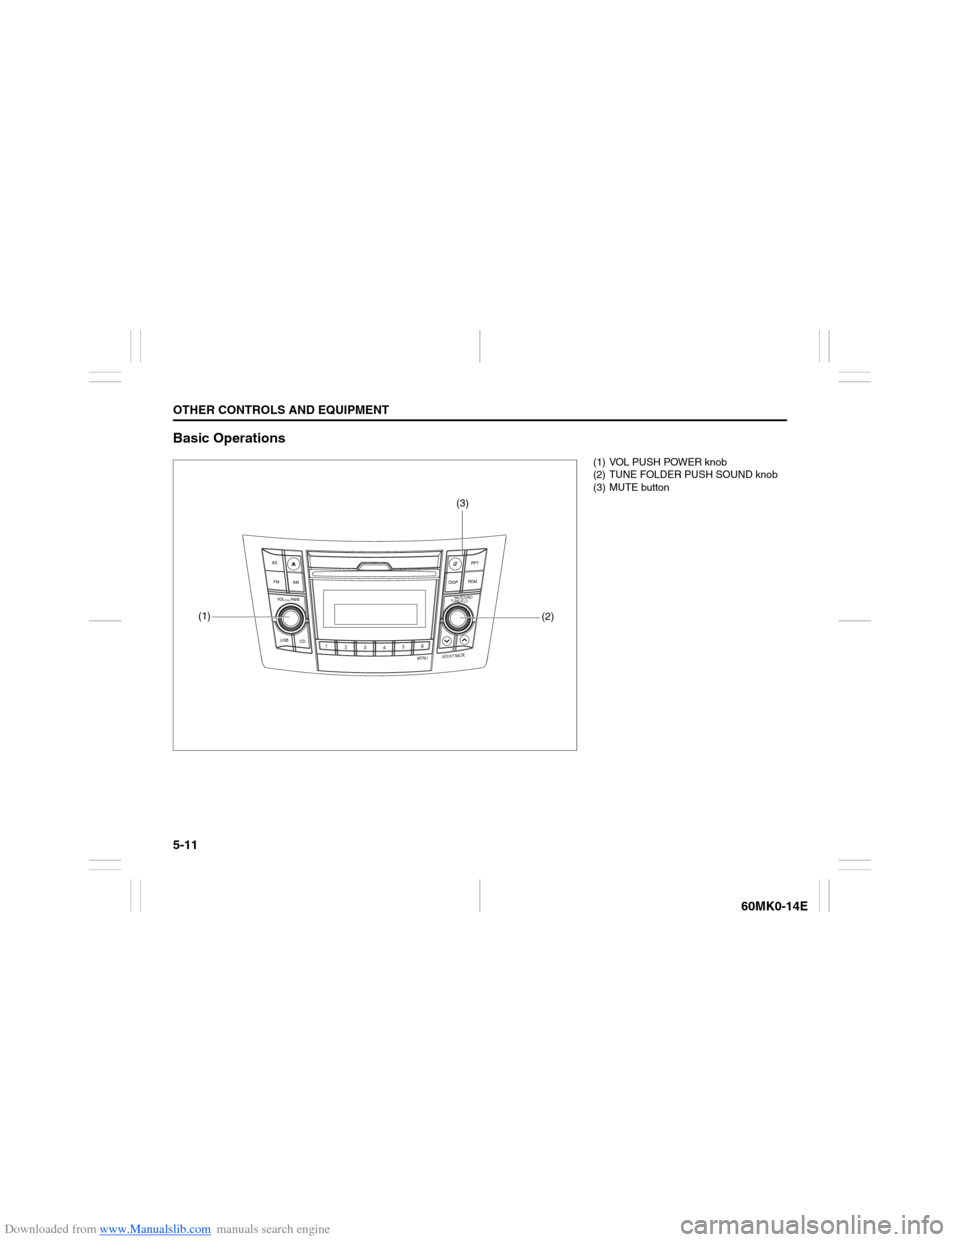
(1) VOL PUSH POWER knob
(2) TUNE FOLDER PUSH SOUND knob
(3) MUTE button
Page 107 of 207
Downloaded from www.Manualslib.com manuals search engine 5-12
OTHER CONTROLS AND EQUIPMENT
60MK0-14E
Turning power on/off
Press the VOL PUSH POWER knob (1).
The unit starts in the function mode it was
in when the power was turned off last.
Adjusting the volume
Turn the VOL PUSH POWER knob (1).
Turning it clockwise increases the volume;
turning it counterclockwise decreases the
volume.
NOTE:
While driving, adjust the volume to an
extent that sound and/or noise coming
from outside the vehicle can be heard.
Mute
Press the MUTE button (3) to mute the
sound. To cancel the mute, press the
MUTE button (3) again.Adjusting bass/treble/balance /fader
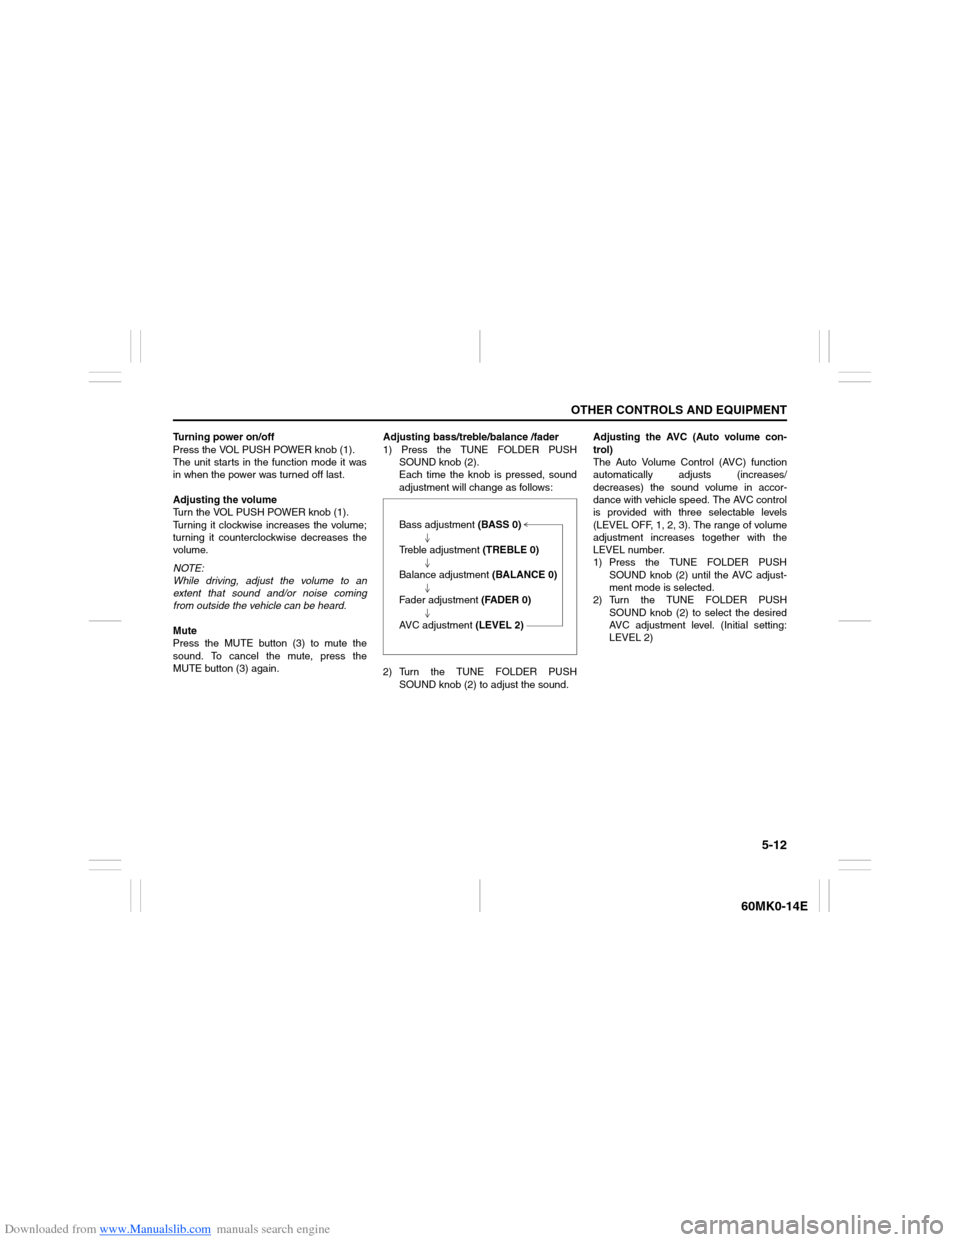
1) Press the TUNE FOLDER PUSH
SOUND knob (2).
Each time the knob is pressed, sound
adjustment will change as follows:
2) Turn the TUNE FOLDER PUSH
SOUND knob (2) to adjust the sound.Adjusting the AVC (Auto volume con-
trol)
The Auto Volume Control (AVC) function
automatically adjusts (increases/
decreases) the sound volume in accor-
dance with vehicle speed. The AVC control
is provided with three selectable levels
(LEVEL OFF, 1, 2, 3). The range of volume
adjustment increases together with the
LEVEL number.
1) Press the TUNE FOLDER PUSH
SOUND knob (2) until the AVC adjust-
ment mode is selected.
2) Turn the TUNE FOLDER PUSH
SOUND knob (2) to select the desired
AVC adjustment level. (Initial setting:
LEVEL 2) Bass adjustment (BASS 0)
Treble adjustment (TREBLE 0)
Balance adjustment (BALANCE 0)
Fader adjustment (FADER 0)
AVC adjustment (LEVEL 2)
Page 108 of 207
Downloaded from www.Manualslib.com manuals search engine 5-13OTHER CONTROLS AND EQUIPMENT
60MK0-14E
Listening to the Radio
USB
CD
1
2
3456
MENU
SEEK/TRACK
AS
AM FMRPT
RDM
DISP
PUSH SOUND
TUNE/FLD
VO L PUSH PWR
(7)
(5)
(4)(3)
(6)
(1)(2)
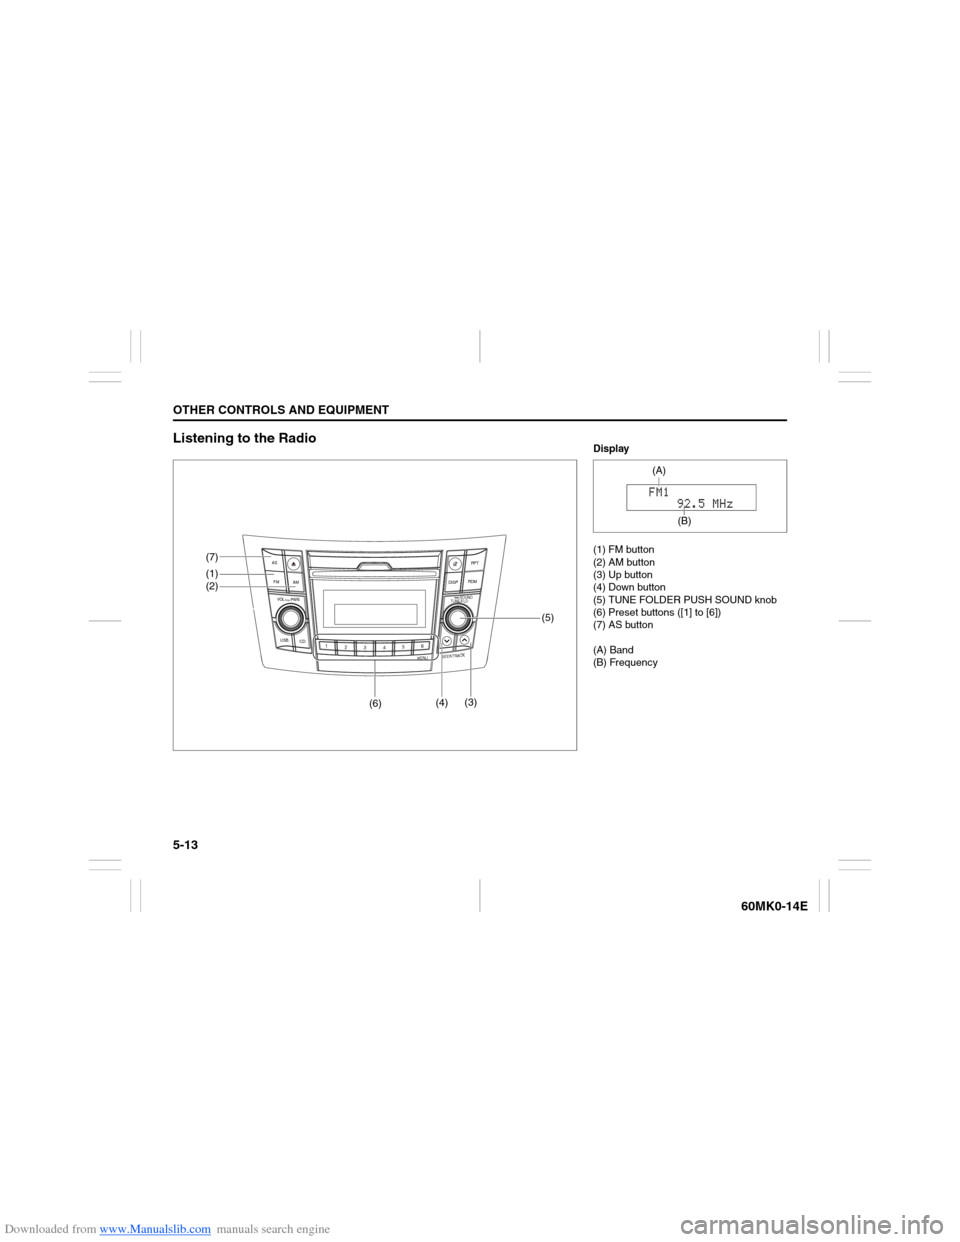
Display
(1) FM button
(2) AM button
(3) Up button
(4) Down button
(5) TUNE FOLDER PUSH SOUND knob
(6) Preset buttons ([1] to [6])
(7) AS button
(A) Band
(B) Frequency
(A)
(B)
Page 109 of 207
Downloaded from www.Manualslib.com manuals search engine 5-14
OTHER CONTROLS AND EQUIPMENT
60MK0-14E
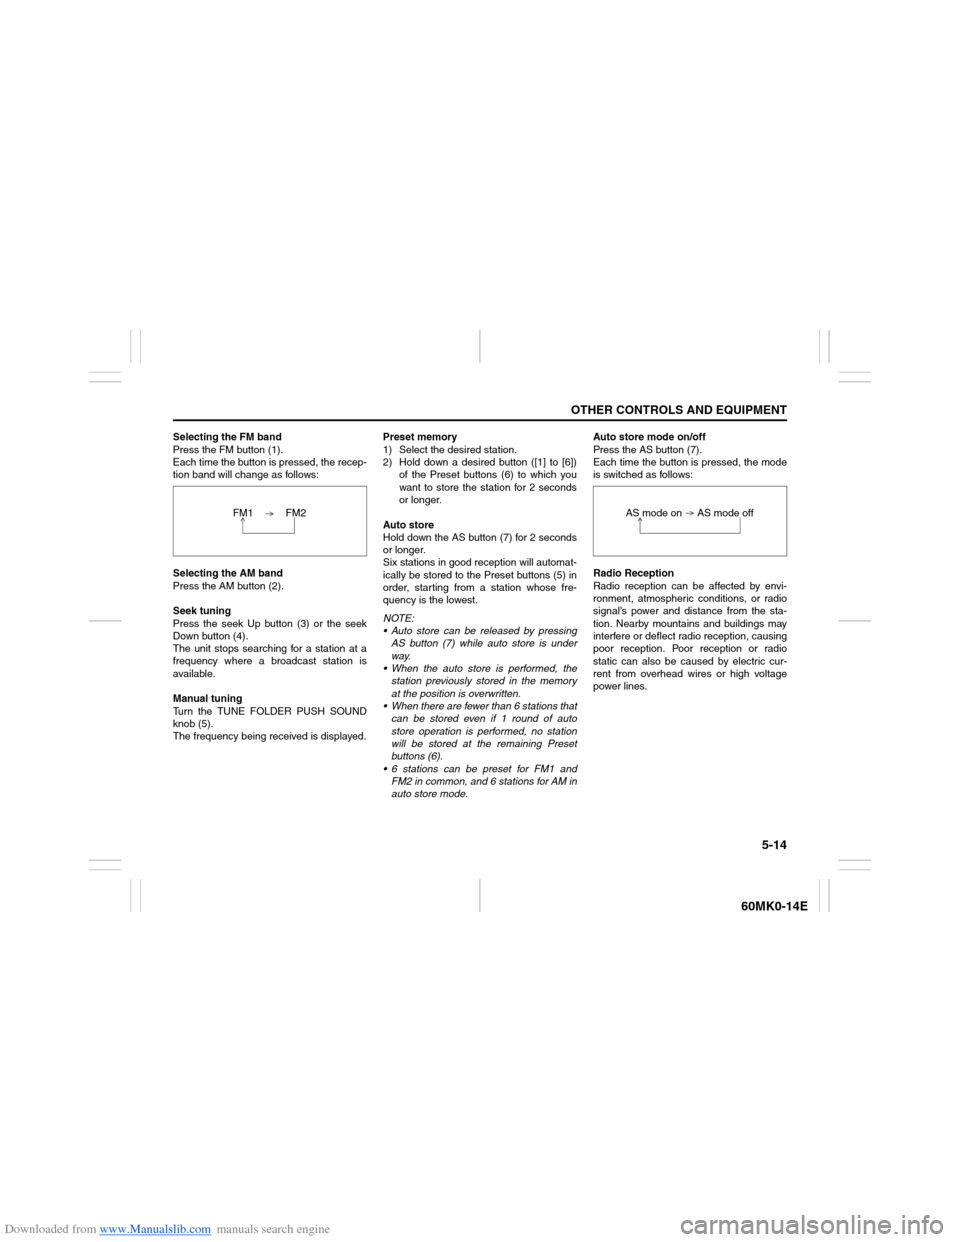
Selecting the FM band
Press the FM button (1).
Each time the button is pressed, the recep-
tion band will change as follows:
Selecting the AM band
Press the AM button (2).
Seek tuning
Press the seek Up button (3) or the seek
Down button (4).
The unit stops searching for a station at a
frequency where a broadcast station is
available.
Manual tuning
Turn the TUNE FOLDER PUSH SOUND
knob (5).
The frequency being received is displayed.Preset memory
1) Select the desired station.
2) Hold down a desired button ([1] to [6])
of the Preset buttons (6) to which you
want to store the station for 2 seconds
or longer.
Auto store
Hold down the AS button (7) for 2 seconds
or longer.
Six stations in good reception will automat-
ically be stored to the Preset buttons (5) in
order, starting from a station whose fre-
quency is the lowest.
NOTE:
Auto store can be released by pressing
AS button (7) while auto store is under
way.
When the auto store is performed, the
station previously stored in the memory
at the position is overwritten.
When there are fewer than 6 stations that
can be stored even if 1 round of auto
store operation is performed, no station
will be stored at the remaining Preset
buttons (6).
6 stations can be preset for FM1 and
FM2 in common, and 6 stations for AM in
auto store mode.Auto store mode on/off
Press the AS button (7).
Each time the button is pressed, the mode
is switched as follows:
Radio Reception
Radio reception can be affected by envi-
ronment, atmospheric conditions, or radio
signal’s power and distance from the sta-
tion. Nearby mountains and buildings may
interfere or deflect radio reception, causing
poor reception. Poor reception or radio
static can also be caused by electric cur-
rent from overhead wires or high voltage
power lines. FM1 FM2
AS mode on AS mode off
Page 110 of 207
Downloaded from www.Manualslib.com manuals search engine 5-15OTHER CONTROLS AND EQUIPMENT
60MK0-14E
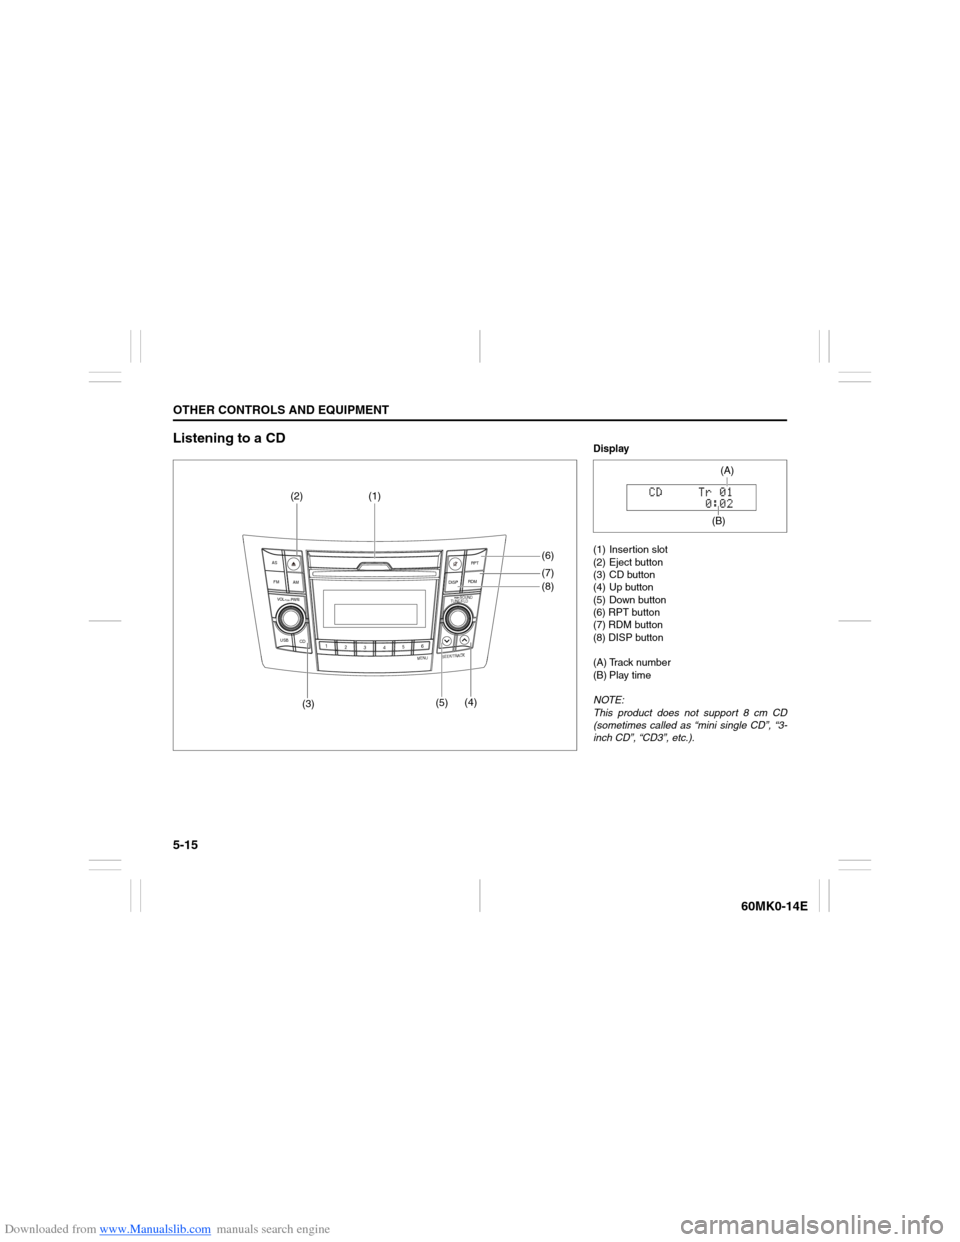
Listening to a CD
USB
CD
1
2
3456
MENU
SEEK/TRACK
AS
AM FMRPT
RDM
DISP
PUSH SOUND
TUNE/FLD
VO L PUSH PWR
(3)(5)(4)(8) (6)
(7) (2) (1)
Display
(1) Insertion slot
(2) Eject button
(3) CD button
(4) Up button
(5) Down button
(6) RPT button
(7) RDM button
(8) DISP button
(A) Track number
(B) Play time
NOTE:
This product does not support 8 cm CD
(sometimes called as “mini single CD”, “3-
inch CD”, “CD3”, etc.).
(B)(A)