SUZUKI ERTIGA 2013 1.G Owners Manual
Manufacturer: SUZUKI, Model Year: 2013, Model line: ERTIGA, Model: SUZUKI ERTIGA 2013 1.GPages: 207, PDF Size: 5.14 MB
Page 131 of 207
Downloaded from www.Manualslib.com manuals search engine 5-36
OTHER CONTROLS AND EQUIPMENT
60MK0-14E
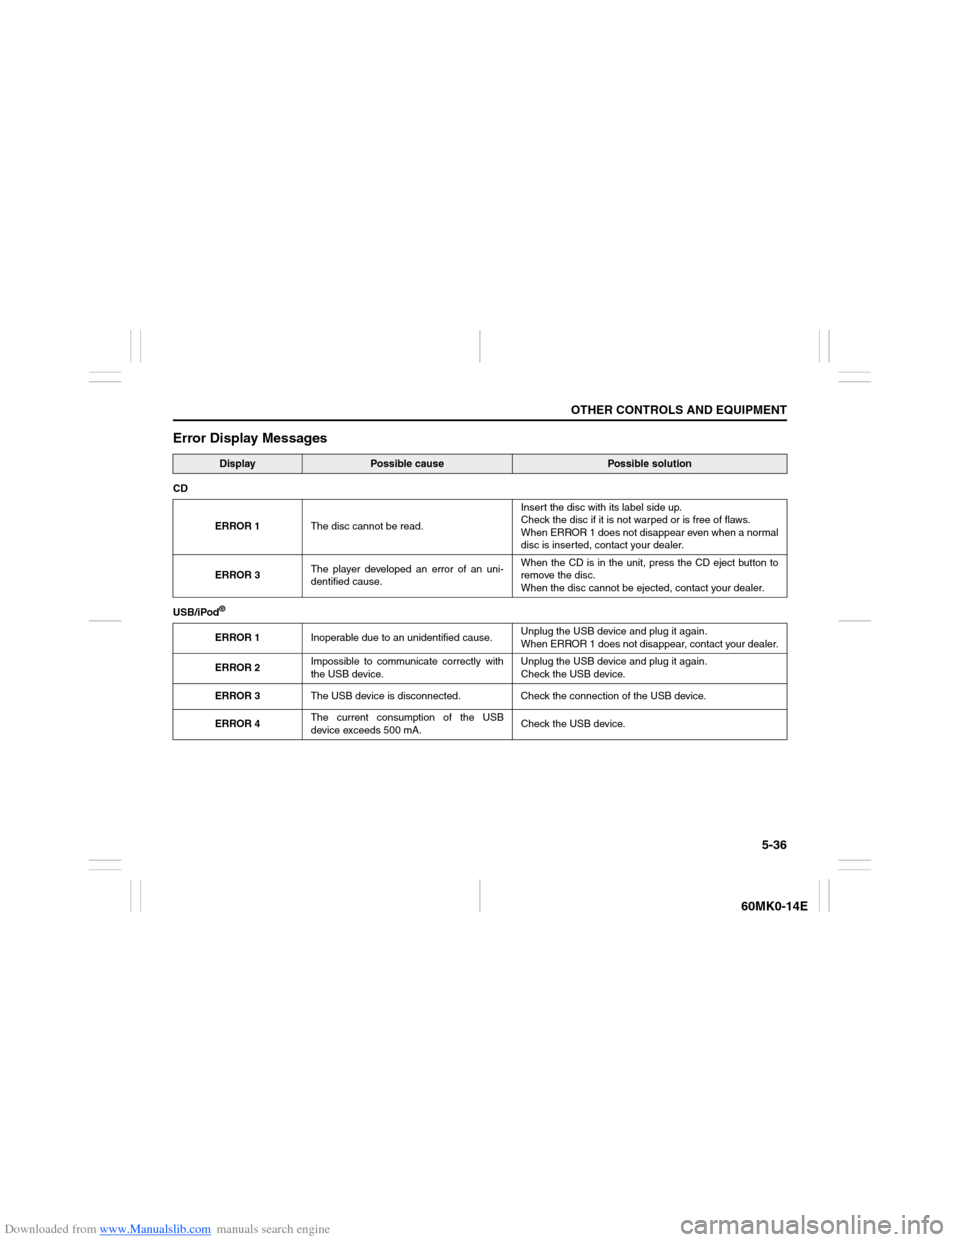
Error Display Messages
Display
Possible cause
Possible solution
CD
ERROR 1The disc cannot be read.Insert the disc with its label side up.
Check the disc if it is not warped or is free of flaws.
When ERROR 1 does not disappear even when a normal
disc is inserted, contact your dealer.
ERROR 3The player developed an error of an uni-
dentified cause.When the CD is in the unit, press the CD eject button to
remove the disc.
When the disc cannot be ejected, contact your dealer.
USB/iPod
®ERROR 1Inoperable due to an unidentified cause.Unplug the USB device and plug it again.
When ERROR 1 does not disappear, contact your dealer.
ERROR 2Impossible to communicate correctly with
the USB device.Unplug the USB device and plug it again.
Check the USB device.
ERROR 3The USB device is disconnected. Check the connection of the USB device.
ERROR 4The current consumption of the USB
device exceeds 500 mA.Check the USB device.
Page 132 of 207
Downloaded from www.Manualslib.com manuals search engine 5-37OTHER CONTROLS AND EQUIPMENT
60MK0-14E
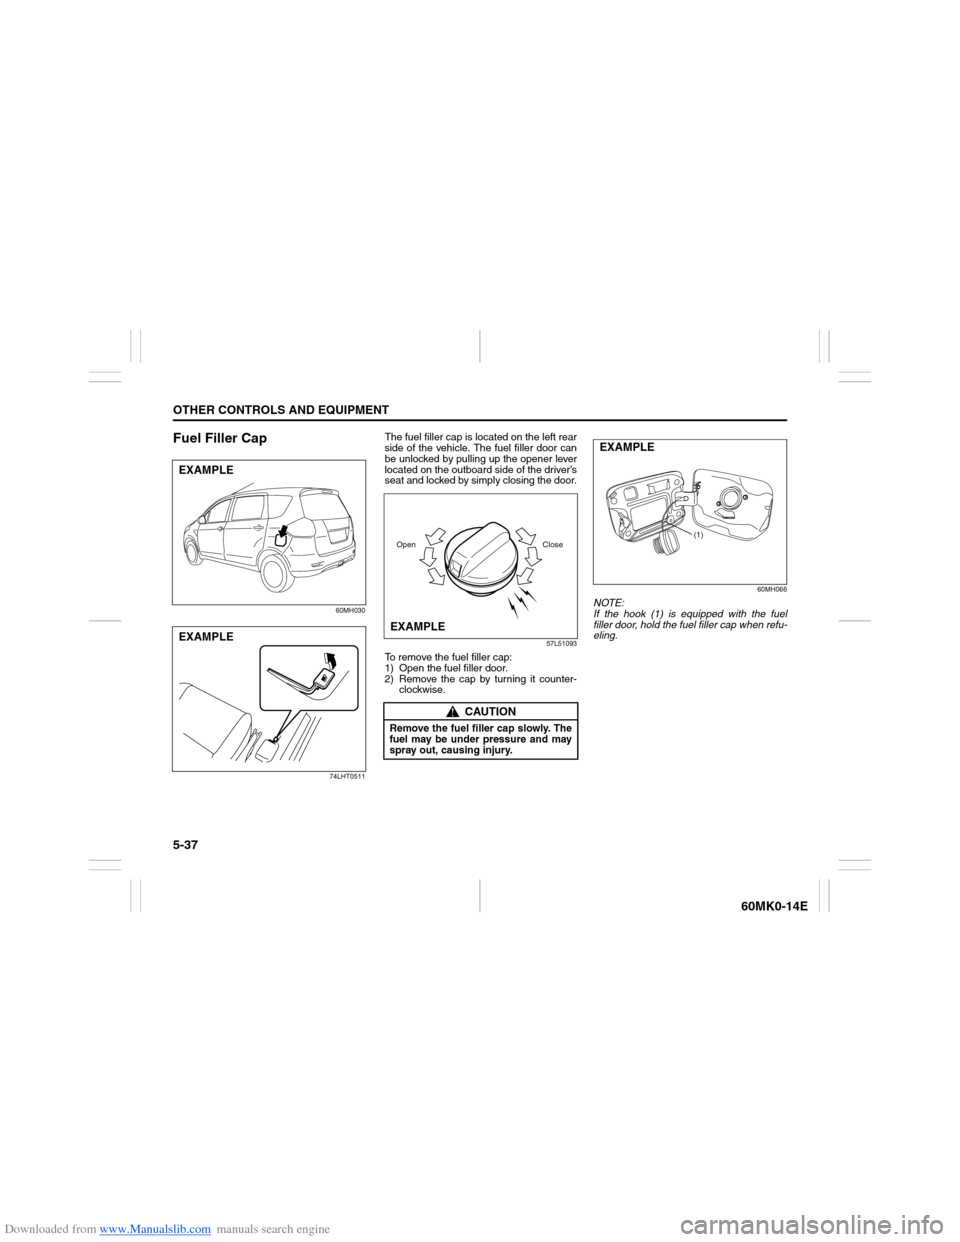
Fuel Filler Cap
60MH030
74LHT0511
The fuel filler cap is located on the left rear
side of the vehicle. The fuel filler door can
be unlocked by pulling up the opener lever
located on the outboard side of the driver’s
seat and locked by simply closing the door.
57L51093
To remove the fuel filler cap:
1) Open the fuel filler door.
2) Remove the cap by turning it counter-
clockwise.
EXAMPLEEXAMPLE
CAUTION
Remove the fuel filler cap slowly. The
fuel may be under pressure and may
spray out, causing injury.Open CloseEXAMPLE
60MH066
NOTE:
If the hook (1) is equipped with the fuel
filler door, hold the fuel filler cap when refu-
eling.
(1)
EXAMPLE
Page 133 of 207
Downloaded from www.Manualslib.com manuals search engine 5-38
OTHER CONTROLS AND EQUIPMENT
60MK0-14E
60MH031
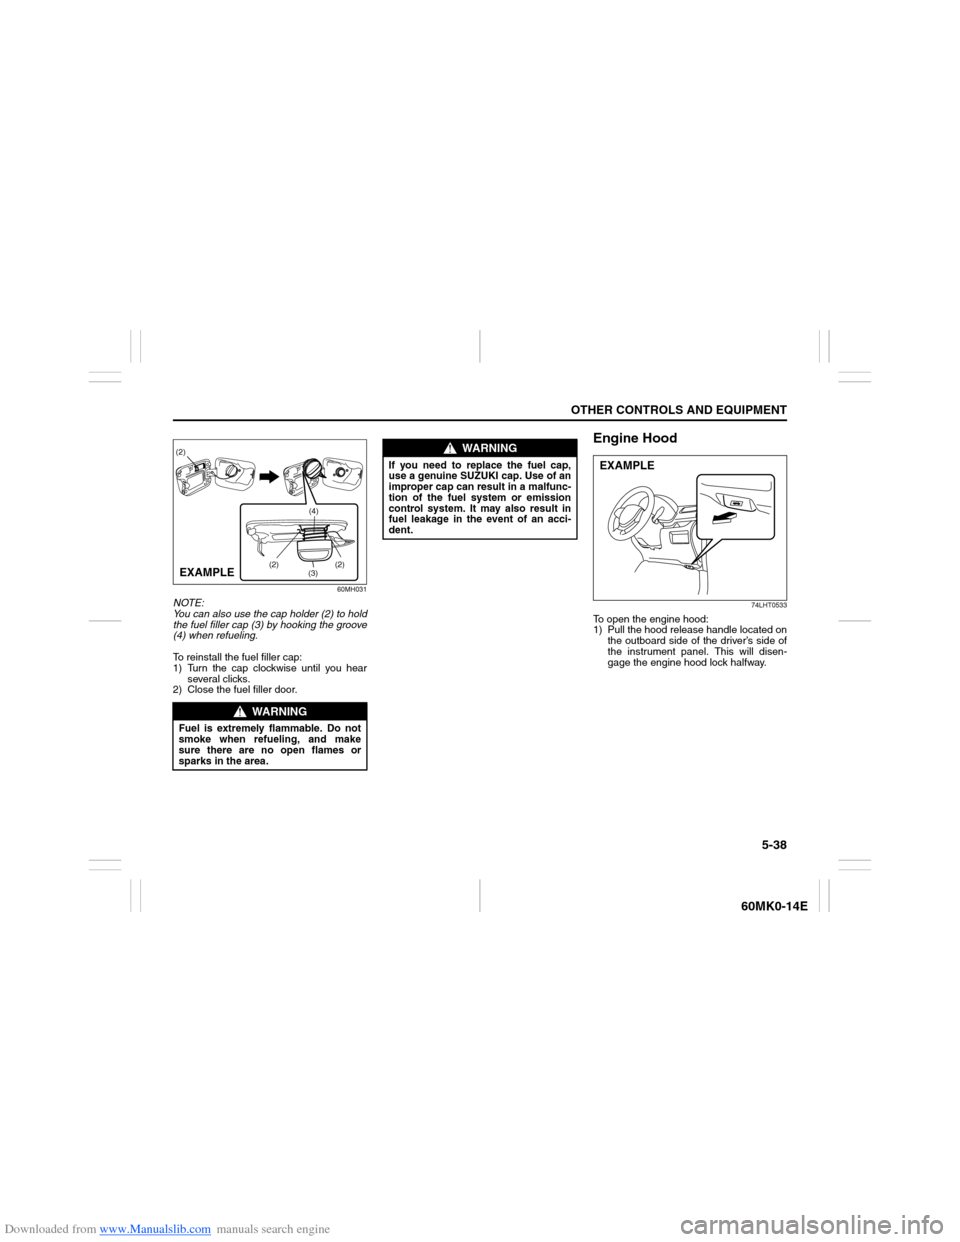
NOTE:
You can also use the cap holder (2) to hold
the fuel filler cap (3) by hooking the groove
(4) when refueling.
To reinstall the fuel filler cap:
1) Turn the cap clockwise until you hear
several clicks.
2) Close the fuel filler door.
Engine Hood
74LHT0533
To open the engine hood:
1) Pull the hood release handle located on
the outboard side of the driver’s side of
the instrument panel. This will disen-
gage the engine hood lock halfway.
WARNING
Fuel is extremely flammable. Do not
smoke when refueling, and make
sure there are no open flames or
sparks in the area.
(2)
(3)(4) (2)
(2)
EXAMPLE
WARNING
If you need to replace the fuel cap,
use a genuine SUZUKI cap. Use of an
improper cap can result in a malfunc-
tion of the fuel system or emission
control system. It may also result in
fuel leakage in the event of an acci-
dent.
EXAMPLE
Page 134 of 207
Downloaded from www.Manualslib.com manuals search engine 5-39OTHER CONTROLS AND EQUIPMENT
60MK0-14E
60MH032
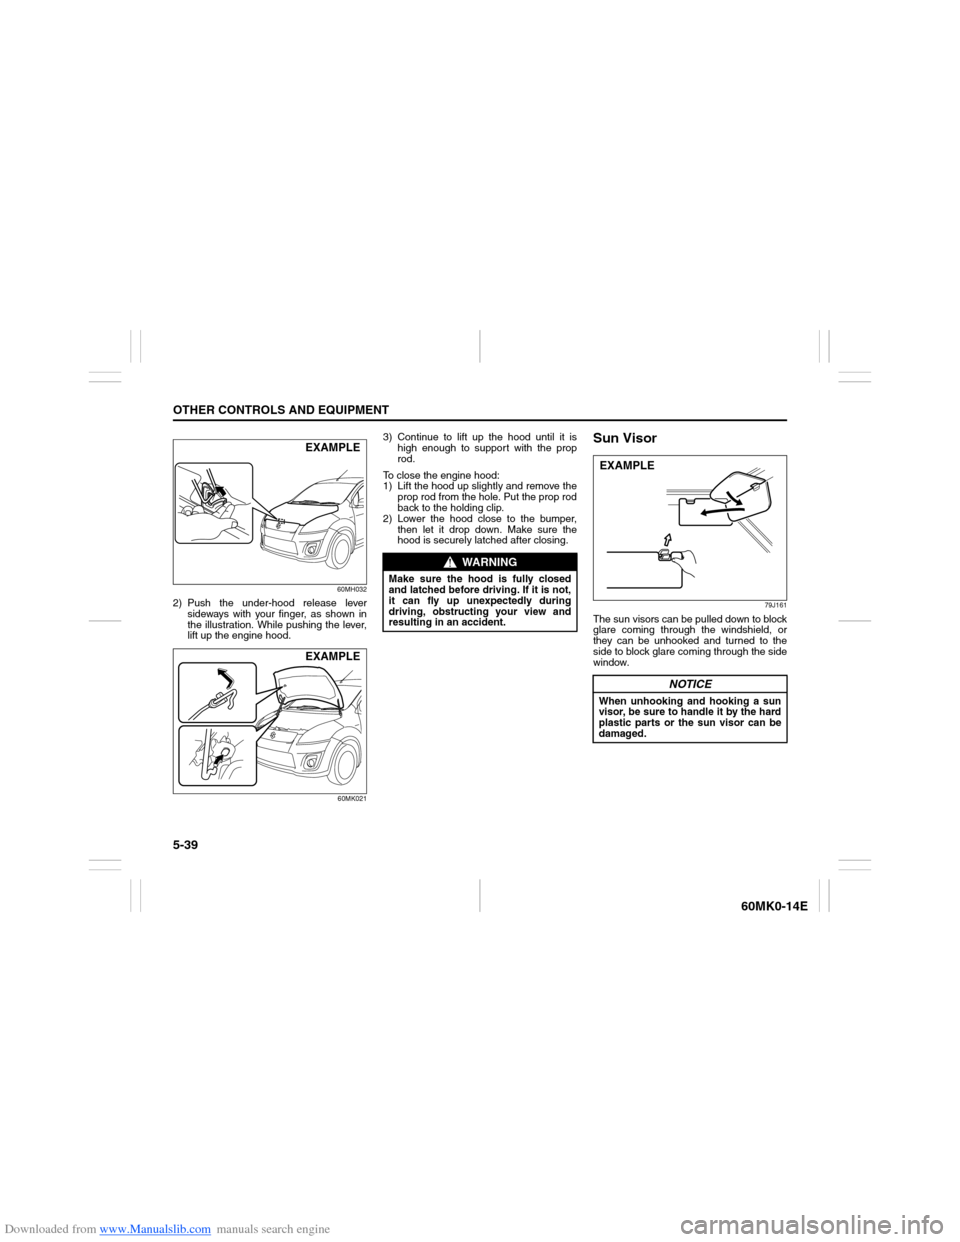
2) Push the under-hood release lever
sideways with your finger, as shown in
the illustration. While pushing the lever,
lift up the engine hood.
60MK021
3) Continue to lift up the hood until it is
high enough to support with the prop
rod.
To close the engine hood:
1) Lift the hood up slightly and remove the
prop rod from the hole. Put the prop rod
back to the holding clip.
2) Lower the hood close to the bumper,
then let it drop down. Make sure the
hood is securely latched after closing.
Sun Visor
79J161
The sun visors can be pulled down to block
glare coming through the windshield, or
they can be unhooked and turned to the
side to block glare coming through the side
window.
EXAMPLEEXAMPLE
WARNING
Make sure the hood is fully closed
and latched before driving. If it is not,
it can fly up unexpectedly during
driving, obstructing your view and
resulting in an accident.
NOTICE
When unhooking and hooking a sun
visor, be sure to handle it by the hard
plastic parts or the sun visor can be
damaged.EXAMPLE
Page 135 of 207
Downloaded from www.Manualslib.com manuals search engine 5-40
OTHER CONTROLS AND EQUIPMENT
60MK0-14E
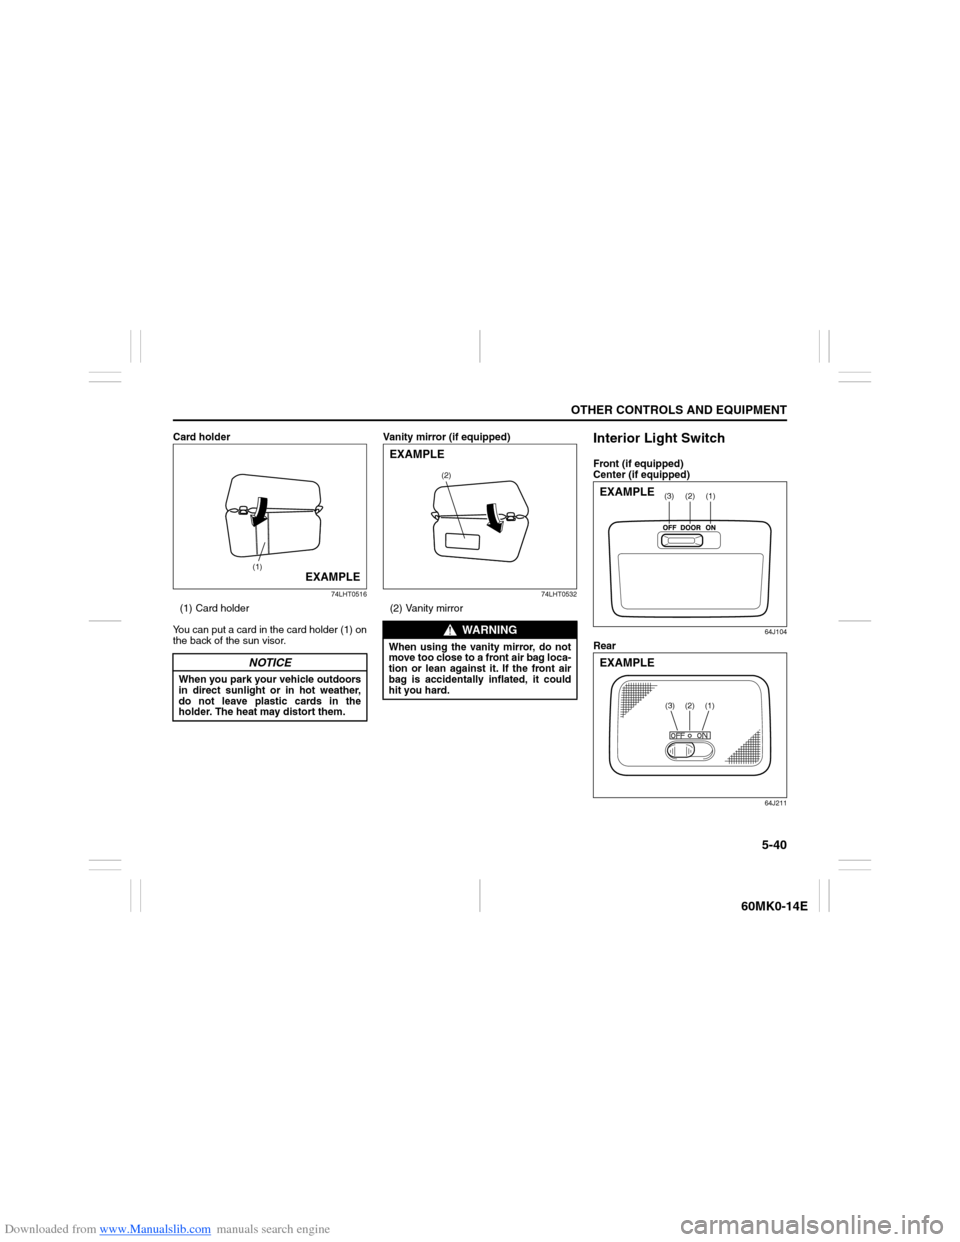
Card holder
74LHT0516
(1) Card holder
You can put a card in the card holder (1) on
the back of the sun visor.Vanity mirror (if equipped)
74LHT0532
(2) Vanity mirror
Interior Light SwitchFront (if equipped)
Center (if equipped)
64J104
Rear
64J211
NOTICE
When you park your vehicle outdoors
in direct sunlight or in hot weather,
do not leave plastic cards in the
holder. The heat may distort them.
(1)
EXAMPLE
WARNING
When using the vanity mirror, do not
move too close to a front air bag loca-
tion or lean against it. If the front air
bag is accidentally inflated, it could
hit you hard.
(2)
EXAMPLE
(1)
(2)
(3)
EXAMPLE
(3)
(2)
(1)
EXAMPLE
Page 136 of 207
Downloaded from www.Manualslib.com manuals search engine 5-41OTHER CONTROLS AND EQUIPMENT
60MK0-14E
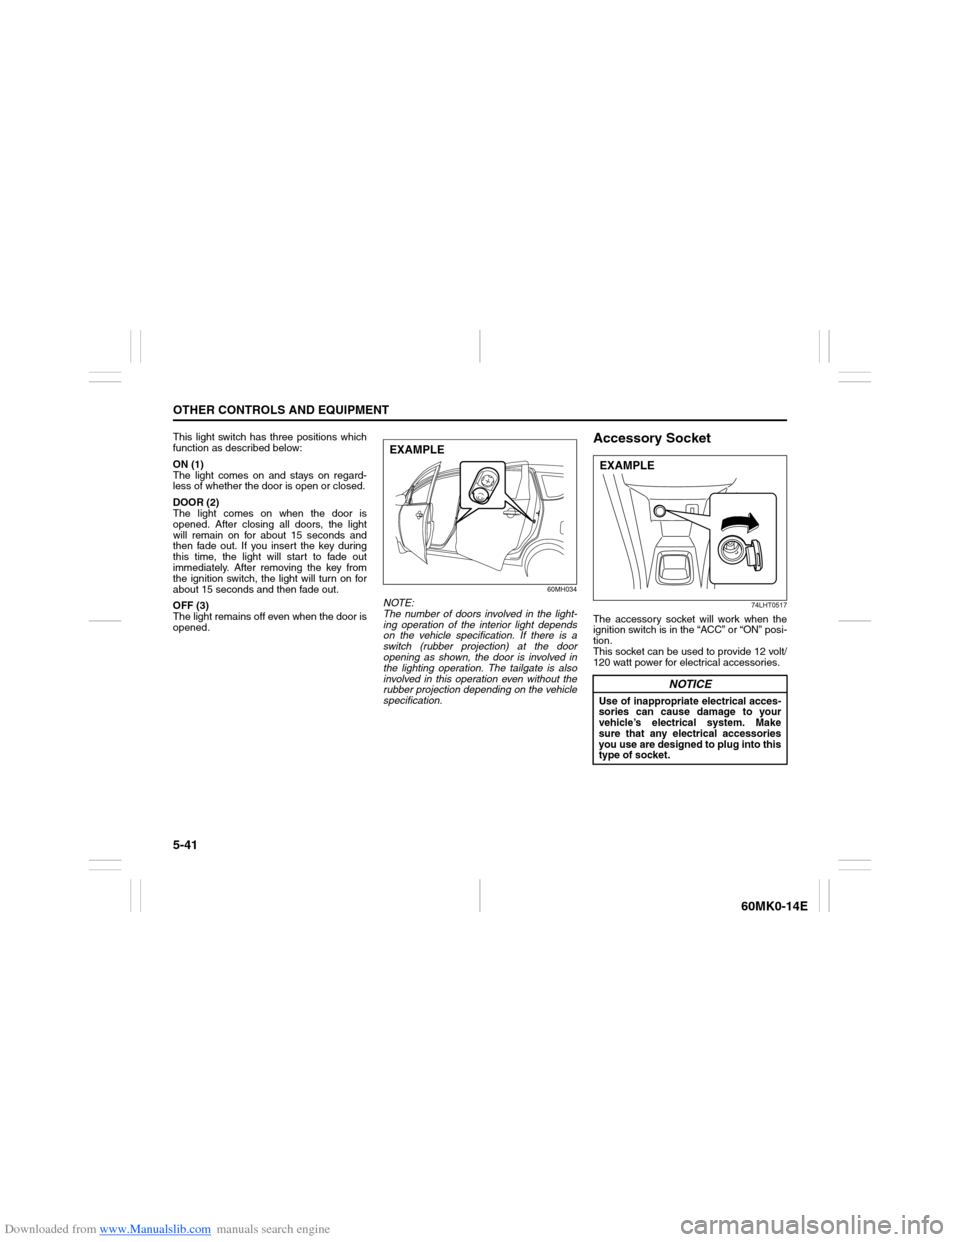
This light switch has three positions which
function as described below:
ON (1)
The light comes on and stays on regard-
less of whether the door is open or closed.
DOOR (2)
The light comes on when the door is
opened. After closing all doors, the light
will remain on for about 15 seconds and
then fade out. If you insert the key during
this time, the light will start to fade out
immediately. After removing the key from
the ignition switch, the light will turn on for
about 15 seconds and then fade out.
OFF (3)
The light remains off even when the door is
opened.
60MH034
NOTE:
The number of doors involved in the light-
ing operation of the interior light depends
on the vehicle specification. If there is a
switch (rubber projection) at the door
opening as shown, the door is involved in
the lighting operation. The tailgate is also
involved in this operation even without the
rubber projection depending on the vehicle
specification.
Accessory Socket
74LHT0517
The accessory socket will work when the
ignition switch is in the “ACC” or “ON” posi-
tion.
This socket can be used to provide 12 volt/
120 watt power for electrical accessories.
EXAMPLE
NOTICE
Use of inappropriate electrical acces-
sories can cause damage to your
vehicle’s electrical system. Make
sure that any electrical accessories
you use are designed to plug into this
type of socket.EXAMPLE
Page 137 of 207
Downloaded from www.Manualslib.com manuals search engine 5-42
OTHER CONTROLS AND EQUIPMENT
60MK0-14E
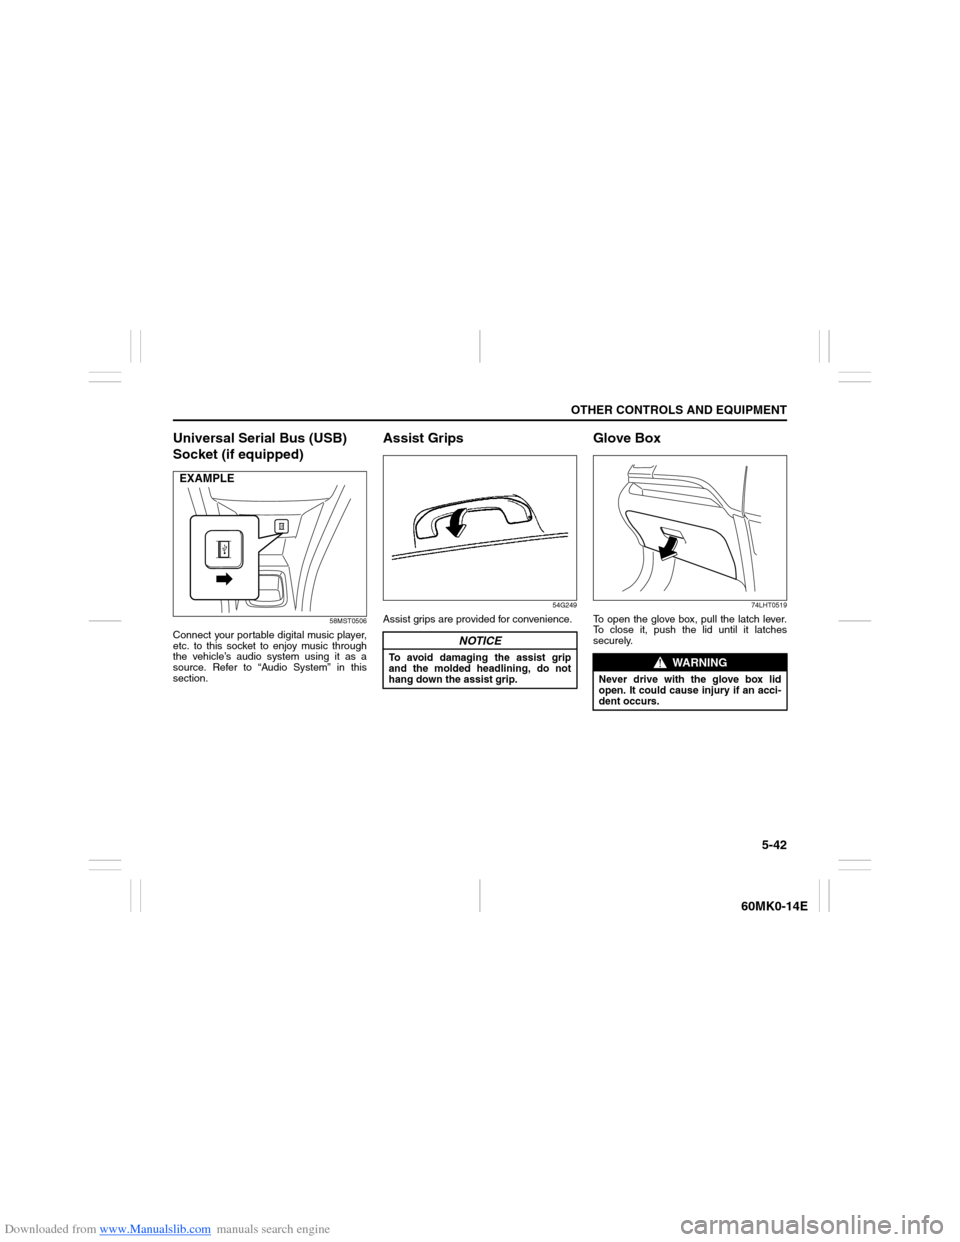
Universal Serial Bus (USB)
Socket (if equipped)
58MST0506
Connect your portable digital music player,
etc. to this socket to enjoy music through
the vehicle’s audio system using it as a
source. Refer to “Audio System” in this
section.
Assist Grips
54G249
Assist grips are provided for convenience.
Glove Box
74LHT0519
To open the glove box, pull the latch lever.
To close it, push the lid until it latches
securely.
EXAMPLE
NOTICE
To avoid damaging the assist grip
and the molded headlining, do not
hang down the assist grip.
WARNING
Never drive with the glove box lid
open. It could cause injury if an acci-
dent occurs.
Page 138 of 207
Downloaded from www.Manualslib.com manuals search engine 5-43OTHER CONTROLS AND EQUIPMENT
60MK0-14E
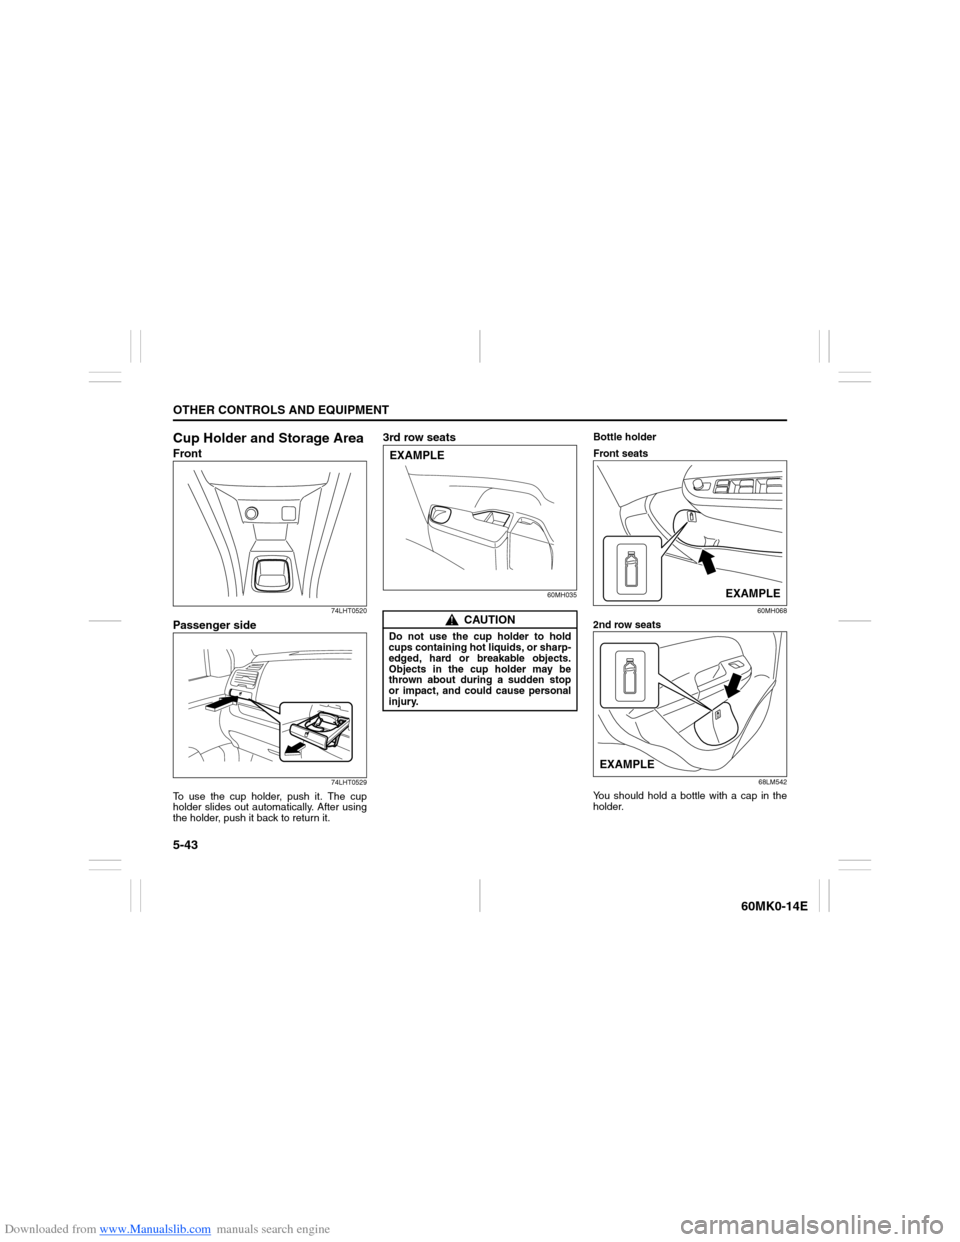
Cup Holder and Storage AreaFront
74LHT0520
Passenger side
74LHT0529
To use the cup holder, push it. The cup
holder slides out automatically. After using
the holder, push it back to return it.
3rd row seats
60MH035
Bottle holder
Front seats
60MH068
2nd row seats
68LM542
You should hold a bottle with a cap in the
holder.
CAUTION
Do not use the cup holder to hold
cups containing hot liquids, or sharp-
edged, hard or breakable objects.
Objects in the cup holder may be
thrown about during a sudden stop
or impact, and could cause personal
injury.EXAMPLE
EXAMPLE
EXAMPLE
Page 139 of 207
Downloaded from www.Manualslib.com manuals search engine 5-44
OTHER CONTROLS AND EQUIPMENT
60MK0-14E
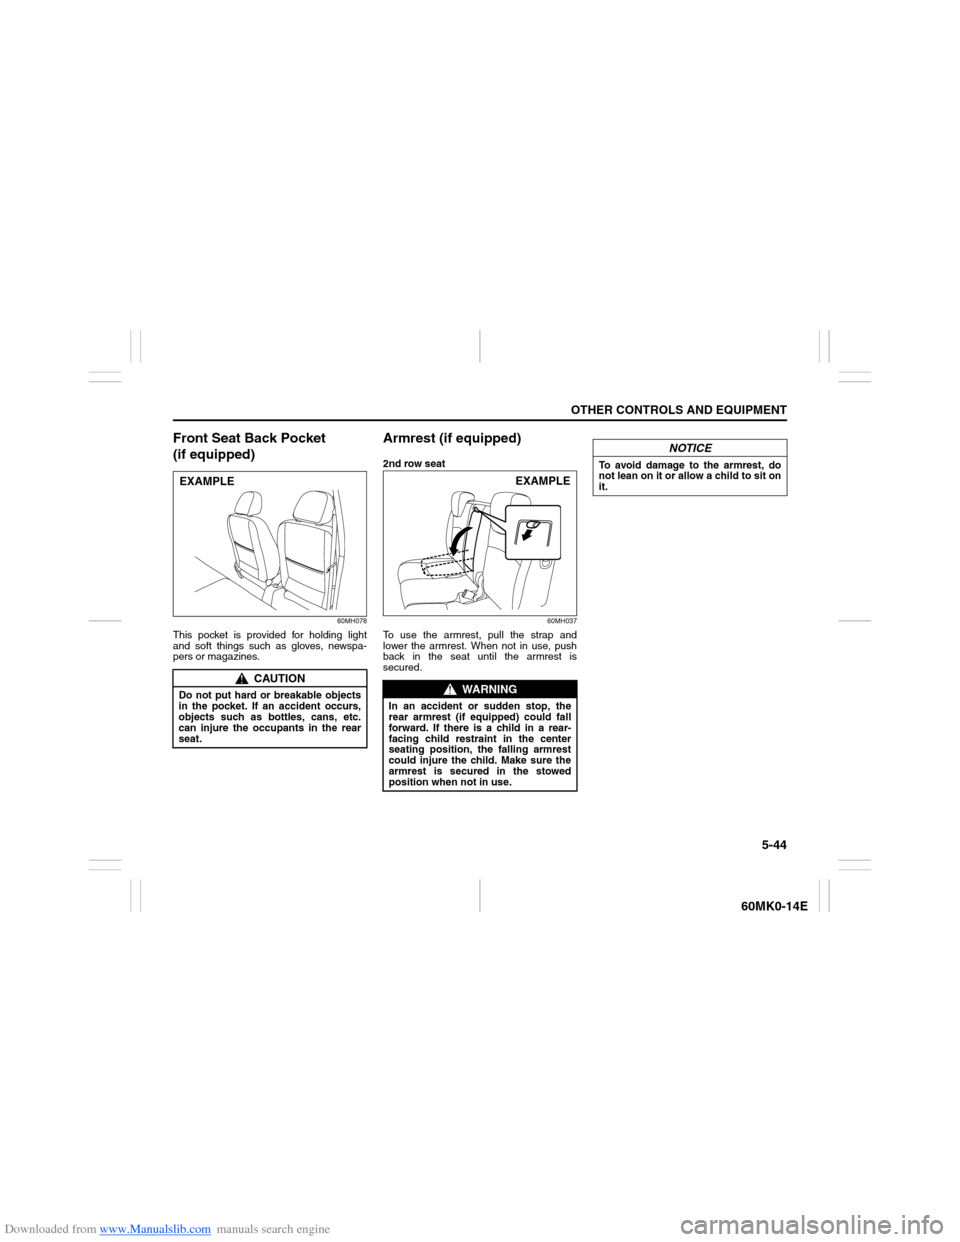
Front Seat Back Pocket
(if equipped)
60MH078
This pocket is provided for holding light
and soft things such as gloves, newspa-
pers or magazines.
Armrest (if equipped)2nd row seat
60MH037
To use the armrest, pull the strap and
lower the armrest. When not in use, push
back in the seat until the armrest is
secured.
CAUTION
Do not put hard or breakable objects
in the pocket. If an accident occurs,
objects such as bottles, cans, etc.
can injure the occupants in the rear
seat.EXAMPLE
WARNING
In an accident or sudden stop, the
rear armrest (if equipped) could fall
forward. If there is a child in a rear-
facing child restraint in the center
seating position, the falling armrest
could injure the child. Make sure the
armrest is secured in the stowed
position when not in use.
EXAMPLE
NOTICE
To avoid damage to the armrest, do
not lean on it or allow a child to sit on
it.
Page 140 of 207
Downloaded from www.Manualslib.com manuals search engine 5-45OTHER CONTROLS AND EQUIPMENT
60MK0-14E
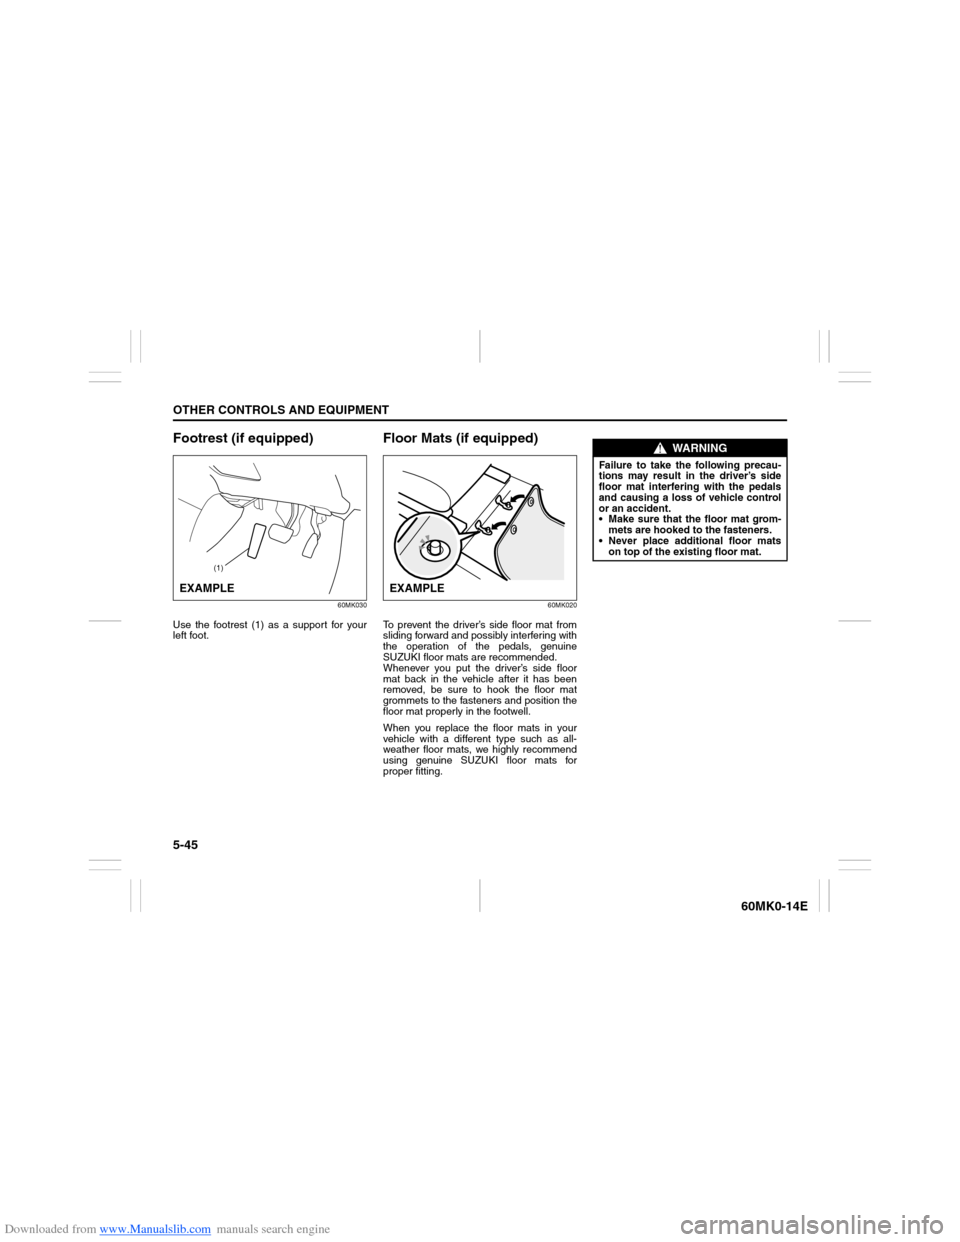
Footrest (if equipped)
60MK030
Use the footrest (1) as a support for your
left foot.
Floor Mats (if equipped)
60MK020
To prevent the driver’s side floor mat from
sliding forward and possibly interfering with
the operation of the pedals, genuine
SUZUKI floor mats are recommended.
Whenever you put the driver’s side floor
mat back in the vehicle after it has been
removed, be sure to hook the floor mat
grommets to the fasteners and position the
floor mat properly in the footwell.
When you replace the floor mats in your
vehicle with a different type such as all-
weather floor mats, we highly recommend
using genuine SUZUKI floor mats for
proper fitting.
(1)
EXAMPLE
EXAMPLE
WARNING
Failure to take the following precau-
tions may result in the driver’s side
floor mat interfering with the pedals
and causing a loss of vehicle control
or an accident.
Make sure that the floor mat grom-
mets are hooked to the fasteners.
Never place additional floor mats
on top of the existing floor mat.