SUZUKI GRAND VITARA 2022 Owners Manual
Manufacturer: SUZUKI, Model Year: 2022, Model line: GRAND VITARA, Model: SUZUKI GRAND VITARA 2022Pages: 482, PDF Size: 21 MB
Page 431 of 482
12-1
SUPPLEMENT
54P00-01E
For Australia
Built date
Built date is located on vehicle identifica-
tion plate.
“Built Date” means – the calendar month
and the year in which the body shell and
power train sub-assemblies are conjoined
and the vehicle is driven or moved from the
production line.
Temporary-use spare tire (compact spare tire)
Temporary spare tires fitted to this vehicle
must have a maximum load rating of not
less than 850 kg, or a load index of “102”
and a speed category symbol of not less
than “M” (130 km/h).
Drive with caution when the temporary-use
spare unit is fitted. Reinstall standard unit
as soon as possible.
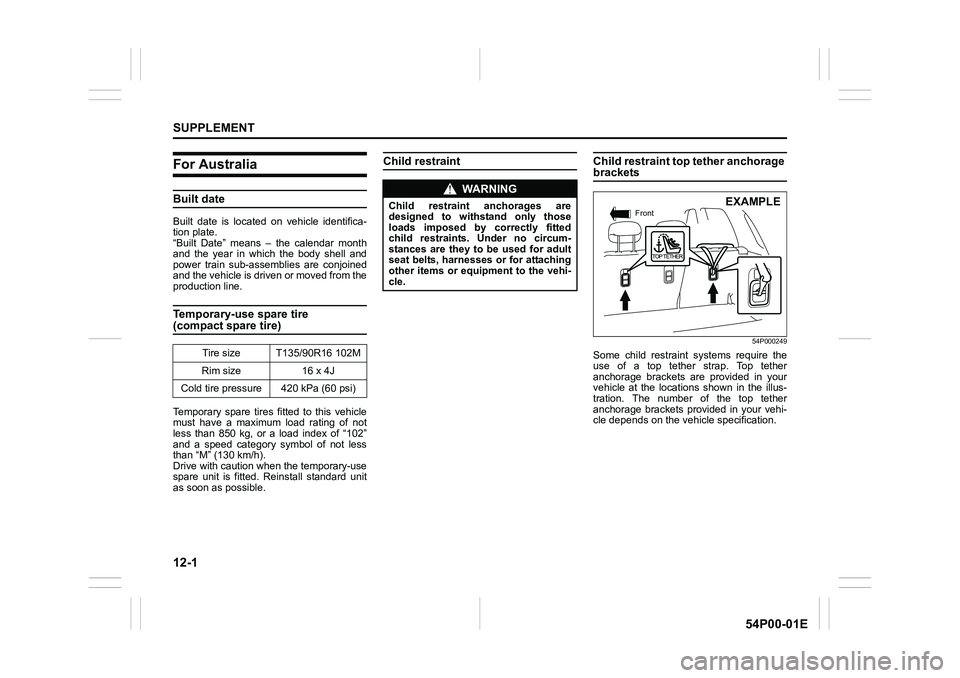
Child restraintChild restraint top tether anchorage brackets
54P000249
Some child restraint systems require the
use of a top tether strap. Top tether
anchorage brackets are provided in your
vehicle at the locations shown in the illus-
tration. The number of the top tether
anchorage brackets provided in your vehi-
cle depends on the vehicle specification. Tire size T135/90R16 102M
Rim size 16 x 4J
Cold tire pressure 420 kPa (60 psi)
WA R N I N G
Child restraint anchorages are
designed to withstand only those
loads imposed by correctly fitted
child restraints. Under no circum-
stances are they to be used for adult
seat belts, harnesses or for attaching
other items or equipment to the vehi-
cle.EXAMPLEFront
Page 432 of 482
12-2
SUPPLEMENT
54P00-01E
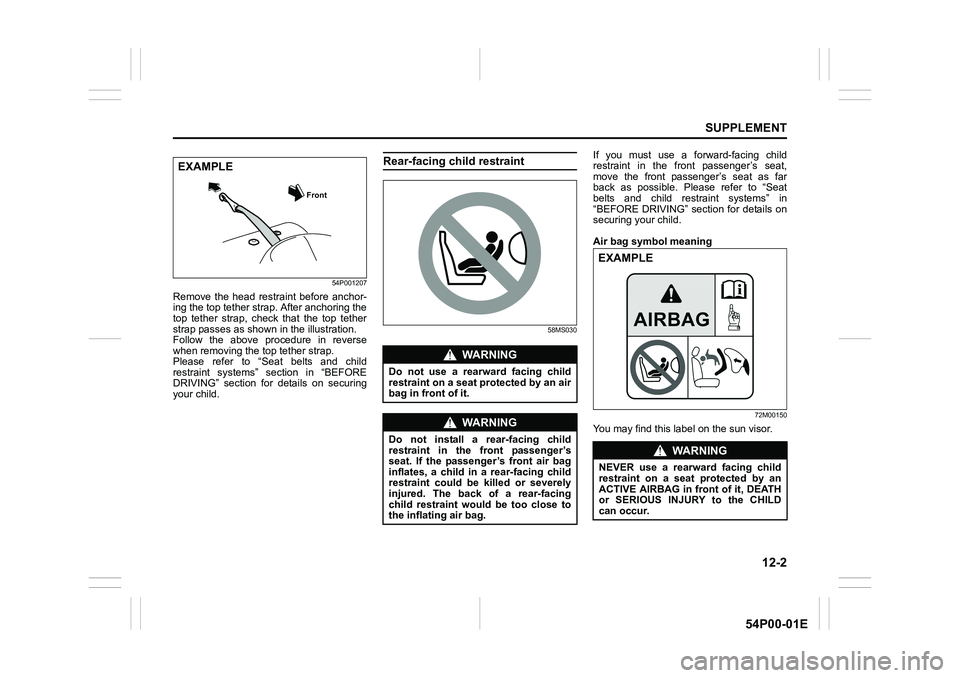
54P001207
Remove the head restraint before anchor-
ing the top tether strap. After anchoring the
top tether strap, check that the top tether
strap passes as shown in the illustration.
Follow the above procedure in reverse
when removing the top tether strap.
Please refer to “Seat belts and child
restraint systems” section in “BEFORE
DRIVING” section for details on securing
your child.
Rear-facing child restraint
58MS030
If you must use a forward-facing child
restraint in the front passenger’s seat,
move the front passenger’s seat as far
back as possible. Please refer to “Seat
belts and child restraint systems” in
“BEFORE DRIVING” section for details on
securing your child.
Air bag symbol meaning
72M00150
You may find this label on the sun visor.
Front
EXAMPLE
WA R N I N G
Do not use a rearward facing child
restraint on a seat protected by an air
bag in front of it.
WA R N I N G
Do not install a rear-facing child
restraint in the front passenger’s
seat. If the passenger’s front air bag
inflates, a child in a rear-facing child
restraint could be killed or severely
injured. The back of a rear-facing
child restraint would be too close to
the inflating air bag.
WA R N I N G
NEVER use a rearward facing child
restraint on a seat protected by an
ACTIVE AIRBAG in front of it, DEATH
or SERIOUS INJURY to the CHILD
can occur.
EXAMPLE
Page 433 of 482
12-3
SUPPLEMENT
54P00-01E
Seat belt warning
Follow this warning as well as the instruc-
tion for seat belt in this book.
In the case where a “Seat Belt Assembly”
incorporates an “Automatic Length Adjust-
ing and Locking Retractor” or an “Emer-
gency Locking Retractor”.
For Mexico
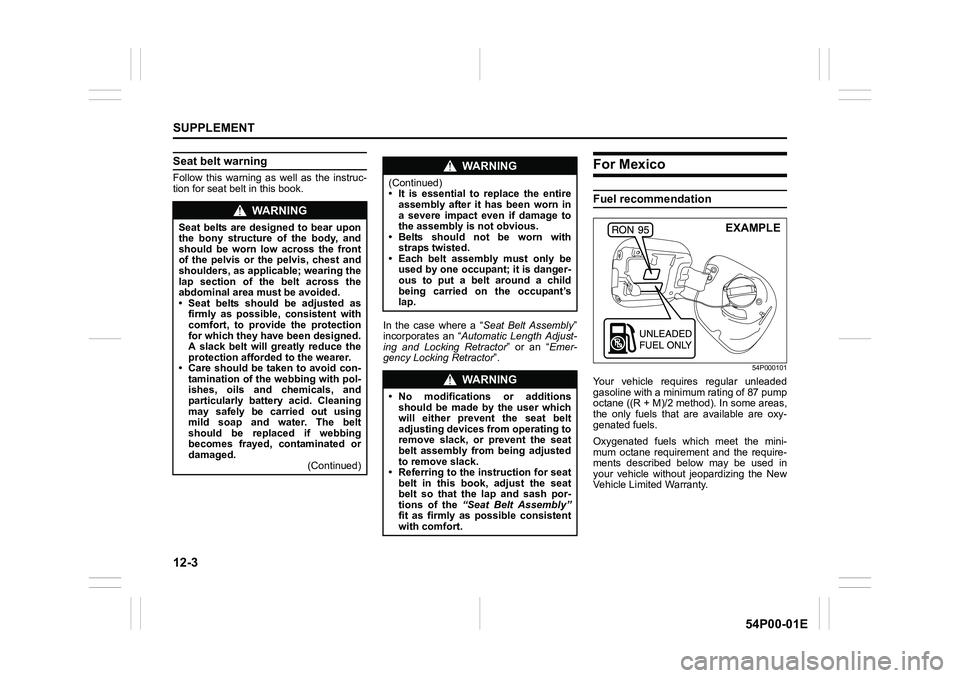
Fuel recommendation
54P000101
Your vehicle requires regular unleaded
gasoline with a minimum rating of 87 pump
octane ((R + M)/2 method). In some areas,
the only fuels that are available are oxy-
genated fuels.
Oxygenated fuels which meet the mini-
mum octane requirement and the require-
ments described below may be used in
your vehicle without jeopardizing the New
Vehicle Limited Warranty.
WA R N I N G
Seat belts are designed to bear upon
the bony structure of the body, and
should be worn low across the front
of the pelvis or the pelvis, chest and
shoulders, as applicable; wearing the
lap section of the belt across the
abdominal area must be avoided.
• Seat belts should be adjusted as
firmly as possible, consistent with
comfort, to provide the protection
for which they have been designed.
A slack belt will greatly reduce the
protection afforded to the wearer.
• Care should be taken to avoid con-
tamination of the webbing with pol-
ishes, oils and chemicals, and
particularly battery acid. Cleaning
may safely be carried out using
mild soap and water. The belt
should be replaced if webbing
becomes frayed, contaminated or
damaged.
(Continued)
WA R N I N G
(Continued)
• It is essential to replace the entire
assembly after it has been worn in
a severe impact even if damage to
the assembly is not obvious.
• Belts should not be worn with
straps twisted.
• Each belt assembly must only be
used by one occupant; it is danger-
ous to put a belt around a child
being carried on the occupant’s
lap.
WA R N I N G
• No modifications or additions
should be made by the user which
will either prevent the seat belt
adjusting devices from operating to
remove slack, or prevent the seat
belt assembly from being adjusted
to remove slack.
• Referring to the instruction for seat
belt in this book, adjust the seat
belt so that the lap and sash por-
tions of the “Seat Belt Assembly”
fit as firmly as possible consistent
with comfort.
EXAMPLE
Page 434 of 482
12-4
SUPPLEMENT
54P00-01E
NOTE:
Oxygenated fuels are fuels which contain
oxygen-carrying additives such as MTBE
or alcohol.
If “RON 95” label is attached, you must use
unleaded gasoline with a minimum rating
of 91 pump octane ((R + M)/2 method).
Gasoline containing MTBE
Unleaded gasoline containing MTBE
(methyl tertiary butyl ether) may be used in
your vehicle if the MTBE content is not
greater than 15%. This oxygenated fuel
does not contain alcohol.
Gasoline-ethanol blends
Blends of unleaded gasoline and ethanol
(grain alcohol), also known as gasohol,
may be used in your vehicle if the ethanol
content is not greater than 10%.
Gasoline-methanol blends
Fuels containing 5% or less methanol
(wood alcohol) may be suitable for use in
your vehicle if they contain cosolvents and
corrosion inhibitors. Do not use fuels con-
taining more than 5% methanol under any
circumstances. Fuel system damage or
vehicle performance problems resulting
from the use of such fuels are not the
responsibility of SUZUKI and may not be
covered under the New Vehicle Limited
Warranty.
Fuel pump labeling
In some states, pumps that dispense oxy-
genated fuels are required to be labeled
for the type and percentage of oxygenate
and whether important additives are pres-
ent. Such labels may provide enough infor-
mation for you to determine if a particular
blend of fuels meets the requirements
listed above. In other areas, pumps may
not be clearly labeled as to the content or
type of oxygenate and additives. If you are
not sure that the fuel you intend to use
meets these requirements, check with the
service station operator or the fuel sup-
plier.
NOTE:
To help clean the air, SUZUKI recom-
mends you use the oxygenated fuels.
However, if you are not satisfied with the
driveability or fuel economy of your vehicle
when you are using an oxygenated fuel,
switch back to the regular unleaded gaso-
line.
Engine oil and filter
Specified oil
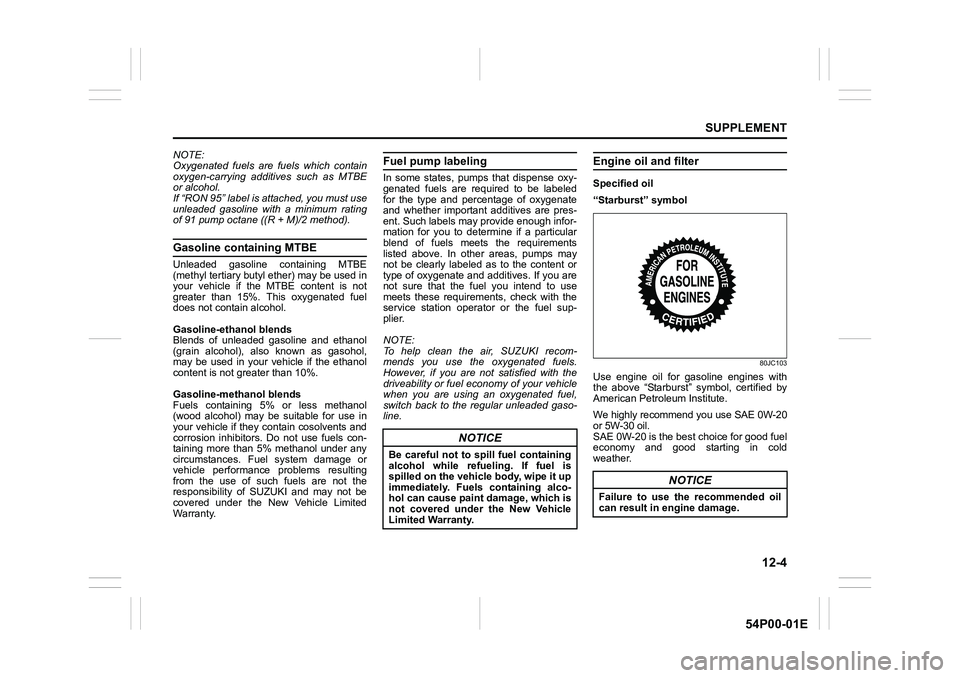
“Starburst” symbol
80JC103
Use engine oil for gasoline engines with
the above “Starburst” symbol, certified by
American Petroleum Institute.
We highly recommend you use SAE 0W-20
or 5W-30 oil.
SAE 0W-20 is the best choice for good fuel
economy and good starting in cold
weather.
NOTICE
Be careful not to spill fuel containing
alcohol while refueling. If fuel is
spilled on the vehicle body, wipe it up
immediately. Fuels containing alco-
hol can cause paint damage, which is
not covered under the New Vehicle
Limited Warranty.
NOTICE
Failure to use the recommended oil
can result in engine damage.
Page 435 of 482
12-5
SUPPLEMENT
54P00-01E
Tire rotation
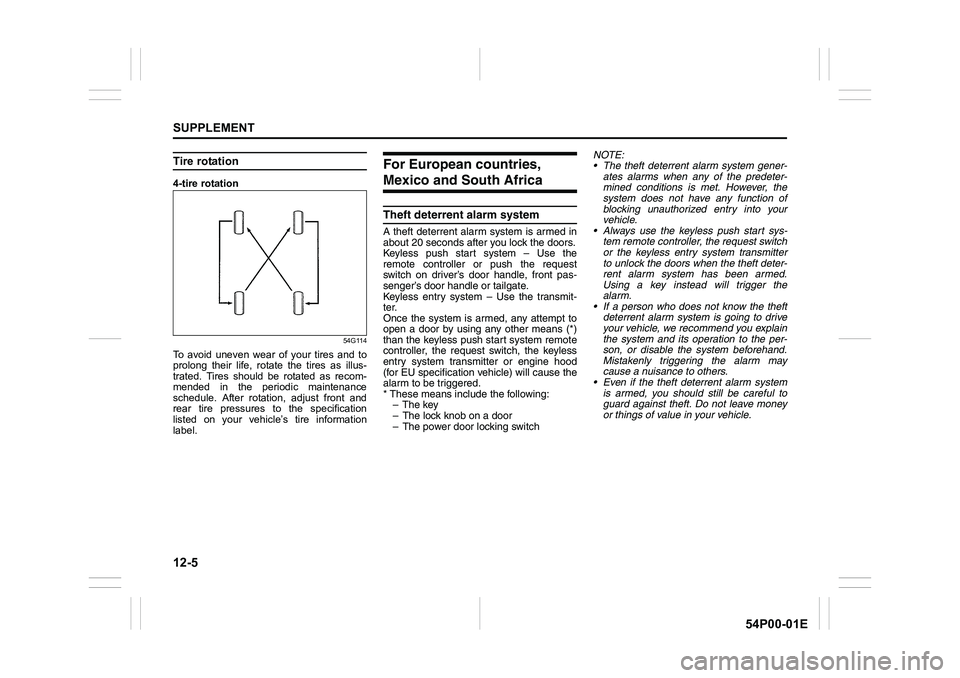
4-tire rotation
54G114
To avoid uneven wear of your tires and to
prolong their life, rotate the tires as illus-
trated. Tires should be rotated as recom-
mended in the periodic maintenance
schedule. After rotation, adjust front and
rear tire pressures to the specification
listed on your vehicle’s tire information
label.
For European countries,
Mexico and South Africa
Theft deterrent alarm system
A theft deterrent alarm system is armed in
about 20 seconds after you lock the doors.
Keyless push start system – Use the
remote controller or push the request
switch on driver’s door handle, front pas-
senger’s door handle or tailgate.
Keyless entry system – Use the transmit-
ter.
Once the system is armed, any attempt to
open a door by using any other means (*)
than the keyless push start system remote
controller, the request switch, the keyless
entry system transmitter or engine hood
(for EU specification vehicle) will cause the
alarm to be triggered.
* These means include the following:
–The key
– The lock knob on a door
– The power door locking switchNOTE:
The theft deterrent alarm system gener-
ates alarms when any of the predeter-
mined conditions is met. However, the
system does not have any function of
blocking unauthorized entry into your
vehicle.
Always use the keyless push start sys-
tem remote controller, the request switch
or the keyless entry system transmitter
to unlock the doors when the theft deter-
rent alarm system has been armed.
Using a key instead will trigger the
alarm.
If a person who does not know the theft
deterrent alarm system is going to drive
your vehicle, we recommend you explain
the system and its operation to the per-
son, or disable the system beforehand.
Mistakenly triggering the alarm may
cause a nuisance to others.
Even if the theft deterrent alarm system
is armed, you should still be careful to
guard against theft. Do not leave money
or things of value in your vehicle.
Page 436 of 482
12-6
SUPPLEMENT
54P00-01E
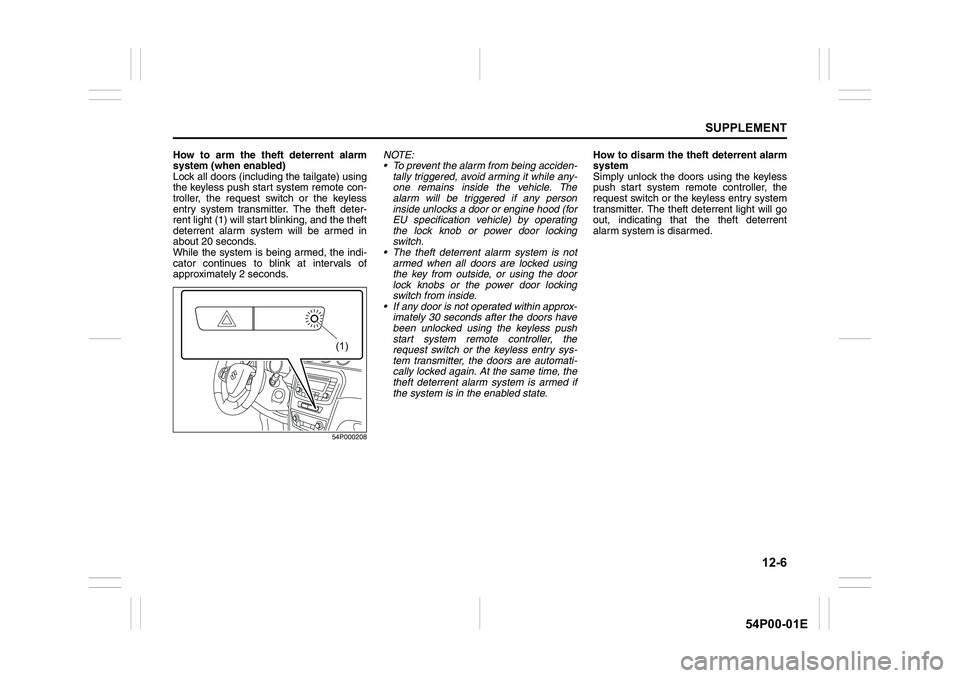
How to arm the theft deterrent alarm
system (when enabled)
Lock all doors (including the tailgate) using
the keyless push start system remote con-
troller, the request switch or the keyless
entry system transmitter. The theft deter-
rent light (1) will start blinking, and the theft
deterrent alarm system will be armed in
about 20 seconds.
While the system is being armed, the indi-
cator continues to blink at intervals of
approximately 2 seconds.
54P000208
NOTE:
To prevent the alarm from being acciden-
tally triggered, avoid arming it while any-
one remains inside the vehicle. The
alarm will be triggered if any person
inside unlocks a door or engine hood (for
EU specification vehicle) by operating
the lock knob or power door locking
switch.
The theft deterrent alarm system is not
armed when all doors are locked using
the key from outside, or using the door
lock knobs or the power door locking
switch from inside.
If any door is not operated within approx-
imately 30 seconds after the doors have
been unlocked using the keyless push
start system remote controller, the
request switch or the keyless entry sys-
tem transmitter, the doors are automati-
cally locked again. At the same time, the
theft deterrent alarm system is armed if
the system is in the enabled state.How to disarm the theft deterrent alarm
system
Simply unlock the doors using the keyless
push start system remote controller, the
request switch or the keyless entry system
transmitter. The theft deterrent light will go
out, indicating that the theft deterrent
alarm system is disarmed.
(1)
Page 437 of 482
12-7
SUPPLEMENT
54P00-01E
How to stop the alarm
Should the alarm be triggered accidentally,
unlock the doors using the keyless push
start system remote controller, the request
switch or the keyless entry system trans-
mitter, or press the engine switch to
change the ignition mode to “ON” or turn
the ignition switch to “ON” position. The
alarm will then stop.
NOTE:
Even after the alarm has stopped, if you
lock the doors using the keyless push
start system remote controller, the
request switch or the keyless entry sys-
tem transmitter, the theft deterrent alarm
system will be rearmed with a delay of
about 20 seconds.
If you disconnect the battery while the
theft deterrent alarm system is in the
armed condition or the alarm is actually
in operation, the alarm will be triggered
or re-triggered when the battery is then
reconnected, although, in the latter case,
the alarm remains stopped for the period
between disconnection and reconnec-
tion of the battery.
Even after the alarm has stopped at the
end of the predetermined operation time,
it will be triggered again if any door or
engine hood (for EU specification vehi-
cle) is opened without disarming the
theft deterrent alarm system.Checking whether the alarm has been
triggered during parking
If the alarm was triggered due to an unau-
thorized entry into the vehicle and you then
press the engine switch to change the igni-
tion mode to “ON” or turn the ignition
switch to “ON” position, the theft deterrent
light will blink rapidly for about 8 seconds
and a buzzer will beep 4 times during this
period. If this happens, check whether your
vehicle has been broken into while you
were away from it.
Enabling and disabling the theft deter-
rent alarm system
The theft deterrent alarm system can be
either enabled or disabled.
When enabled (factory setting)
When the system is enabled, it causes the
hazard warning lights to flash for about 40
seconds if any of the alarm trigger condi-
tions is met. The system also causes the
interior buzzer to beep intermittently for
about 10 seconds, which is followed by
intermittent sounding of the horn for about
30 seconds.
The theft deterrent light continues to blink
during this time.
When disabled
When the system is disabled, it stays dis-
armed even if you perform any system
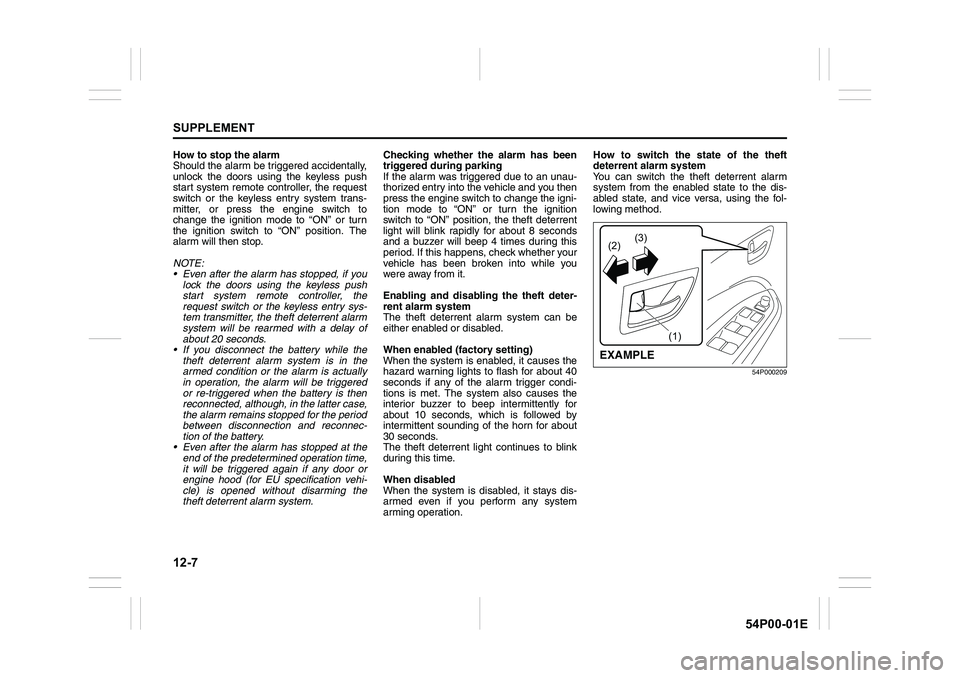
arming operation.How to switch the state of the theft
deterrent alarm system
You can switch the theft deterrent alarm
system from the enabled state to the dis-
abled state, and vice versa, using the fol-
lowing method.
54P000209
(2)(3)
(1)
EXAMPLE
Page 438 of 482
12-8
SUPPLEMENT
54P00-01E
54P000210
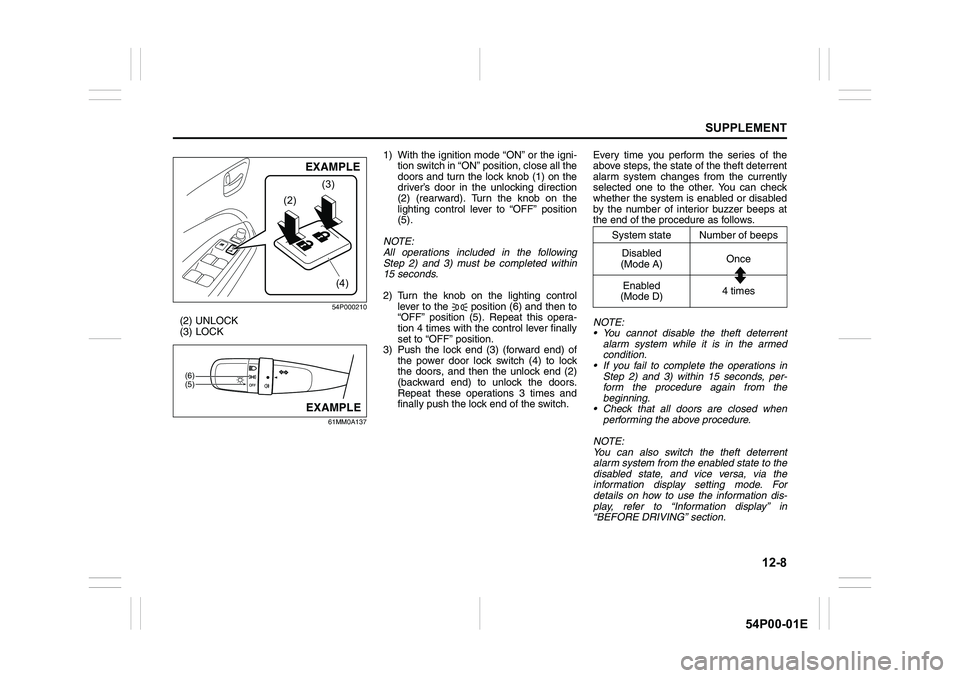
(2) UNLOCK
(3) LOCK
61MM0A137
1) With the ignition mode “ON” or the igni-
tion switch in “ON” position, close all the
doors and turn the lock knob (1) on the
driver’s door in the unlocking direction
(2) (rearward). Turn the knob on the
lighting control lever to “OFF” position
(5).
NOTE:
All operations included in the following
Step 2) and 3) must be completed within
15 seconds.
2) Turn the knob on the lighting control
lever to the position (6) and then to
“OFF” position (5). Repeat this opera-
tion 4 times with the control lever finally
set to “OFF” position.
3) Push the lock end (3) (forward end) of
the power door lock switch (4) to lock
the doors, and then the unlock end (2)
(backward end) to unlock the doors.
Repeat these operations 3 times and
finally push the lock end of the switch.Every time you perform the series of the
above steps, the state of the theft deterrent
alarm system changes from the currently
selected one to the other. You can check
whether the system is enabled or disabled
by the number of interior buzzer beeps at
the end of the procedure as follows.
NOTE:
You cannot disable the theft deterrent
alarm system while it is in the armed
condition.
If you fail to complete the operations in
Step 2) and 3) within 15 seconds, per-
form the procedure again from the
beginning.
Check that all doors are closed when
performing the above procedure.
NOTE:
You can also switch the theft deterrent
alarm system from the enabled state to the
disabled state, and vice versa, via the
information display setting mode. For
details on how to use the information dis-
play, refer to “Information display” in
“BEFORE DRIVING” section.
(2)(3)
(4)
EXAMPLE
(5) (6)
EXAMPLE
System state Number of beeps
Disabled
(Mode A)Once
Enabled
(Mode D)4 times
Page 439 of 482
12-9
SUPPLEMENT
54P00-01E
MEMO
Page 440 of 482
13-1
INDEX
13
54P00-01E
INDEX
Symbols
“ENG A-STOP OFF” light .................................................. 2-101
“ENG A-STOP” indicator light .......................................... 2-101
Numerics
4WD warning light ............................................................... 2-98
A
Accelerator pedal................................................................. 3-12
Accessory socket .................................................................. 5-8
Adding coolant..................................................................... 7-27
AIR BAG light .............................................................. 2-51, 2-93
Air cleaner ............................................................................ 7-28
Air conditioning system ...................................................... 7-59
AM/FM CD PLAYER ............................................................. 5-40
Anti-lock brake system (ABS) ................................... 3-75, 3-77
Anti-lock brake system (ABS) warning light ..................... 2-91
Anti-theft feature .................................................................. 5-83
Assist grips .......................................................................... 5-11
Audio system ....................................................................... 5-40
Automatic headlight leveling system warning light ......... 2-97
Automatic heating and air conditioning system
(climate control) ................................................................... 5-32
Automatic light operation ................................................. 2-104
Average fuel consumption.................................................. 2-67
Average speed ..................................................................... 2-67
B
Battery .................................................................................. 7-39
Battery replacement ................................................... 2-14, 7-39
Bluetooth
® audio ................................................................. 5-78
Bluetooth® hands-free......................................................... 5-70Brake assist system............................................................. 3-75
Brake fluid............................................................................. 7-33
Brake pedal ..................................................................3-12, 7-34
Brake system warning light ................................................ 2-90
Brakes ................................................................................... 7-33
Braking .................................................................................. 3-74
Brightness control ............................................................... 2-65
Built date ............................................................................... 12-1
Bulb replacement ................................................................. 7-45
C
Cargo net hooks ................................................................... 5-17
Catalytic converter ................................................................. 4-1
Central door locking system ................................................. 2-3
Changing engine oil and filter............................................. 7-23
Changing wheels.................................................................... 8-4
Charging light ....................................................................... 2-93
Chassis serial number ......................................................... 10-1
Child restraint ..............................................................2-40, 12-1
Child restraint system ......................................................... 2-40
Child restraint systems ....................................................... 2-37
Child-proof locks (rear door) ................................................ 2-5
Clock ............................................................................2-67, 5-15
Clutch pedal.................................................................3-12, 7-32
Coat hooks............................................................................ 5-11
Compact spare tire............................................................... 7-38
Coolant level check.............................................................. 7-27
Coolant replacement............................................................ 7-28
Corrosion prevention............................................................. 9-1
Cruise control ....................................................................... 3-42
Cup holder and storage area .............................................. 5-13