TESLA MODEL 3 2022 Owner´s Manual
Manufacturer: TESLA, Model Year: 2022, Model line: MODEL 3, Model: TESLA MODEL 3 2022Pages: 248, PDF Size: 7.76 MB
Page 171 of 248

Chrome and Metal Surfaces
Polish, abrasive cleaners, alcohol-based gel products (such as hand sanitizer), and hard cloths can damage the
finish on chrome and metal surfaces.
Cautions for Interior Cleaning
CAUTION: Using solvents (including alcohol),
alcohol-based gel products (such as hand
sanitizer), bleach, citrus, naphtha, or silicone-based
products or additives on interior components can
cause damage.
CAUTION: Statically-charged materials can cause
damage to the touchscreen.
WARNING: If you notice any damage on an airbag
or seat belt, contact Tesla immediately.
WARNING: Do not allow any water, cleaners, or
fabric to enter a seat belt mechanism.
WARNING: Exposure to chemical cleaners can be
hazardous and can irritate eyes and skin. Read and
observe the instructions provided by the
manufacturer of the chemical cleaner.
Polishing, Touch Up, and Body
Repair
To preserve the cosmetic appearance of the body, you
can occasionally treat the paint surfaces with an approved polish containing:
Page 172 of 248
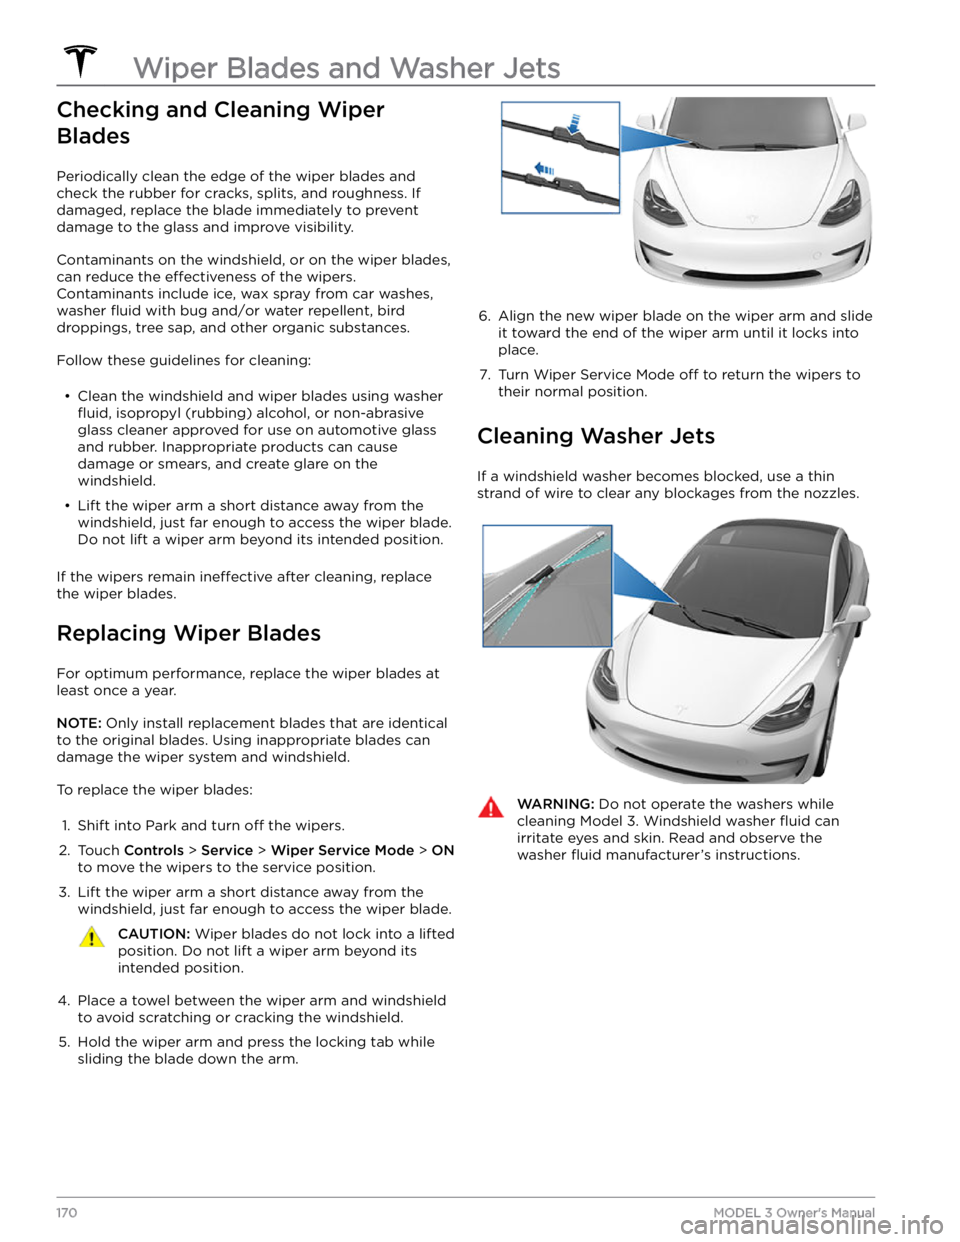
Checking and Cleaning Wiper
Blades
Periodically clean the edge of the wiper blades and
check the rubber for cracks, splits, and roughness. If
damaged, replace the blade immediately to prevent damage to the glass and improve visibility.
Contaminants on the windshield, or on the wiper blades,
can reduce the
effectiveness of the wipers.
Contaminants include ice, wax spray from car washes, washer
fluid with bug and/or water repellent, bird
droppings, tree sap, and other organic substances.
Follow these guidelines for cleaning:
Page 173 of 248
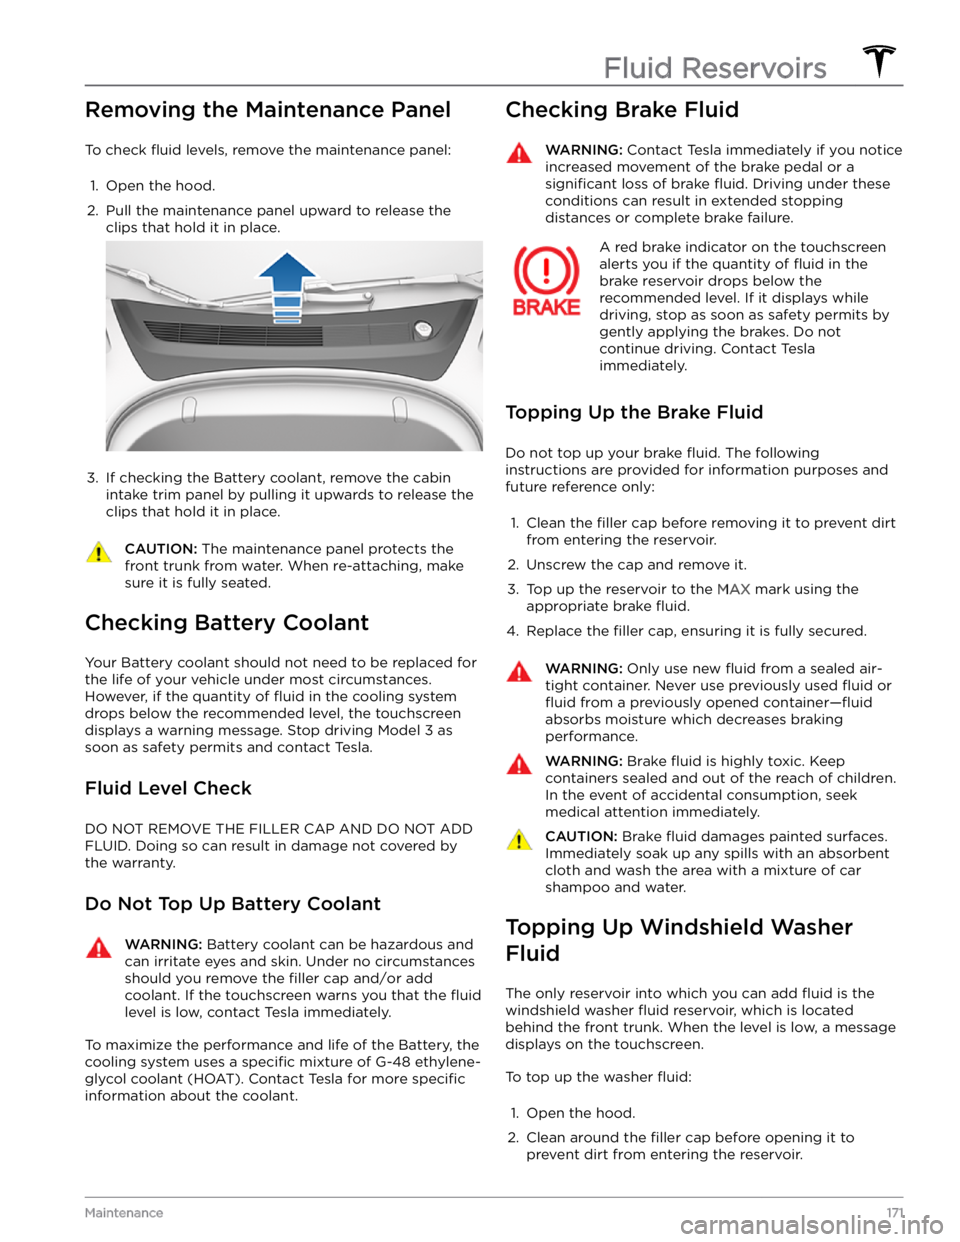
Removing the Maintenance Panel
To check fluid levels, remove the maintenance panel:
1.
Open the hood.
2.
Pull the maintenance panel upward to release the clips that hold it in place.
3.
If checking the Battery coolant, remove the cabin
intake trim panel by pulling it upwards to release the clips that hold it in place.
CAUTION: The maintenance panel protects the
front trunk from water. When re-attaching, make
sure it is fully seated.
Checking Battery Coolant
Your Battery coolant should not need to be replaced for
the life of your vehicle under most circumstances. However, if the quantity of
fluid in the cooling system
drops below the recommended level, the
touchscreen
displays a warning message. Stop driving Model 3 as
soon as safety permits and contact Tesla.
Fluid Level Check
DO NOT REMOVE THE FILLER CAP AND DO NOT ADD
FLUID. Doing so can result in damage not covered by
the warranty.
Do Not Top Up Battery Coolant
WARNING: Battery coolant can be hazardous and
can irritate eyes and skin. Under no circumstances
should you remove the filler cap and/or add
coolant. If the touchscreen warns you that the fluid
level is low, contact Tesla immediately.
To maximize the performance and life of the Battery, the
cooling system uses a
specific mixture of G-48 ethylene-
glycol coolant (HOAT). Contact Tesla for more
specific
information about the coolant.
Checking Brake FluidWARNING: Contact Tesla immediately if you notice
increased movement of the brake pedal or a
significant loss of brake fluid. Driving under these
conditions can result in extended stopping
distances or complete brake failure.
A red brake indicator on the touchscreen
alerts you if the quantity of fluid in the
brake reservoir drops below the
recommended level. If it displays while driving, stop as soon as safety permits by
gently applying the brakes. Do not
continue driving. Contact Tesla
immediately.
Topping Up the Brake Fluid
Do not top up your brake fluid. The following
instructions are provided for information purposes and future reference only:
1.
Clean the filler cap before removing it to prevent dirt
from entering the reservoir.
2.
Unscrew the cap and remove it.
3.
Top up the reservoir to the MAX mark using the
appropriate brake
fluid.
4.
Replace the filler cap, ensuring it is fully secured.
WARNING: Only use new fluid from a sealed air-
tight container. Never use previously used fluid or
fluid from a previously opened container
Page 174 of 248
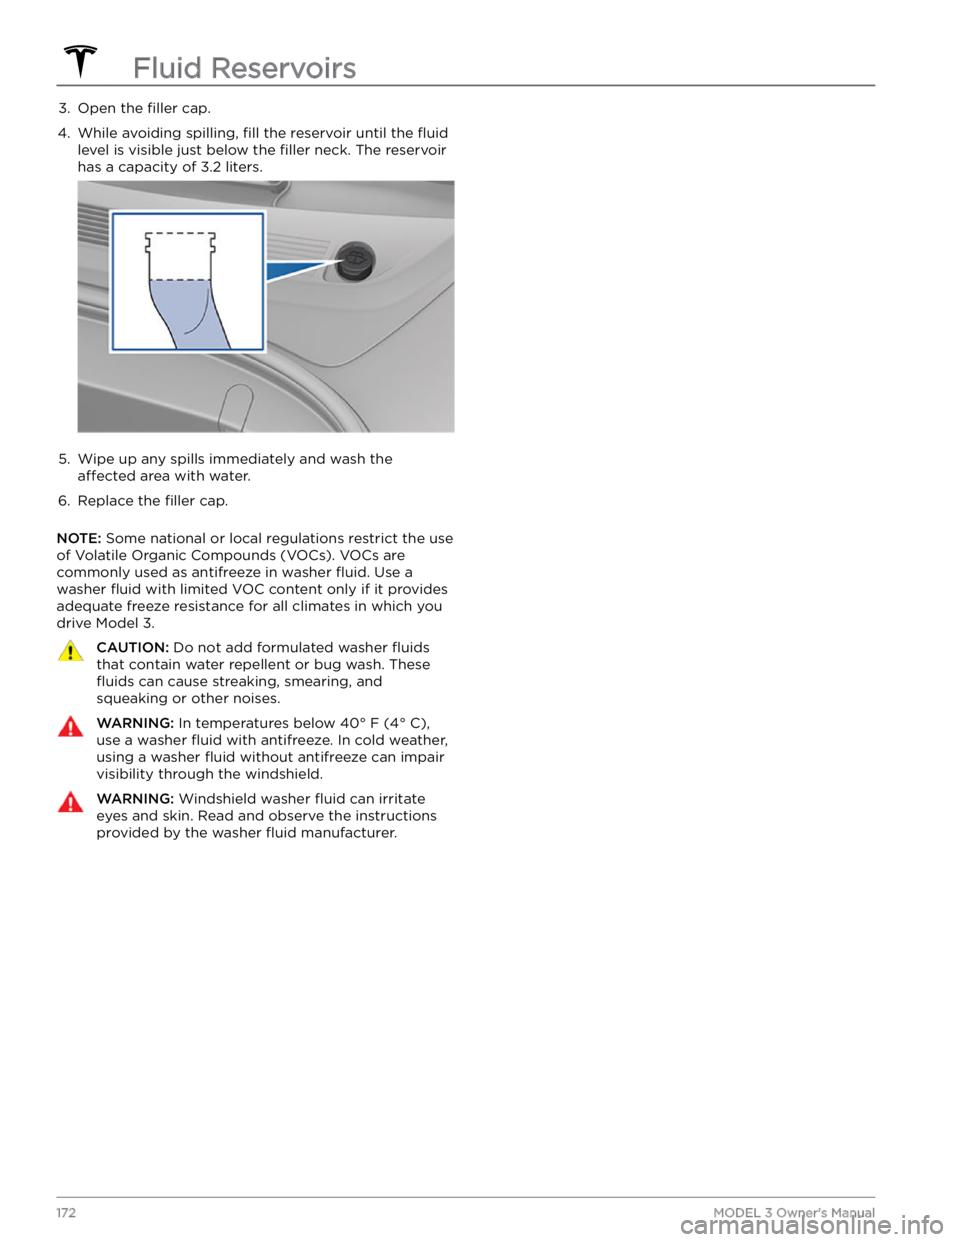
3. Open the filler cap.4.
While avoiding spilling, fill the reservoir until the fluid
level is visible just below the filler neck. The reservoir
has a capacity of 3.2 liters.
5.
Wipe up any spills immediately and wash the
affected area with water.
6.
Replace the filler cap.
NOTE: Some national or local regulations restrict the use
of Volatile Organic Compounds (VOCs). VOCs are commonly used as antifreeze in washer
fluid. Use a
washer
fluid with limited VOC content only if it provides
adequate freeze resistance for all climates in which you drive
Model 3.
CAUTION: Do not add formulated washer fluids
that contain water repellent or bug wash. These
fluids can cause streaking, smearing, and
squeaking or other noises.
WARNING: In temperatures below 40
Page 175 of 248
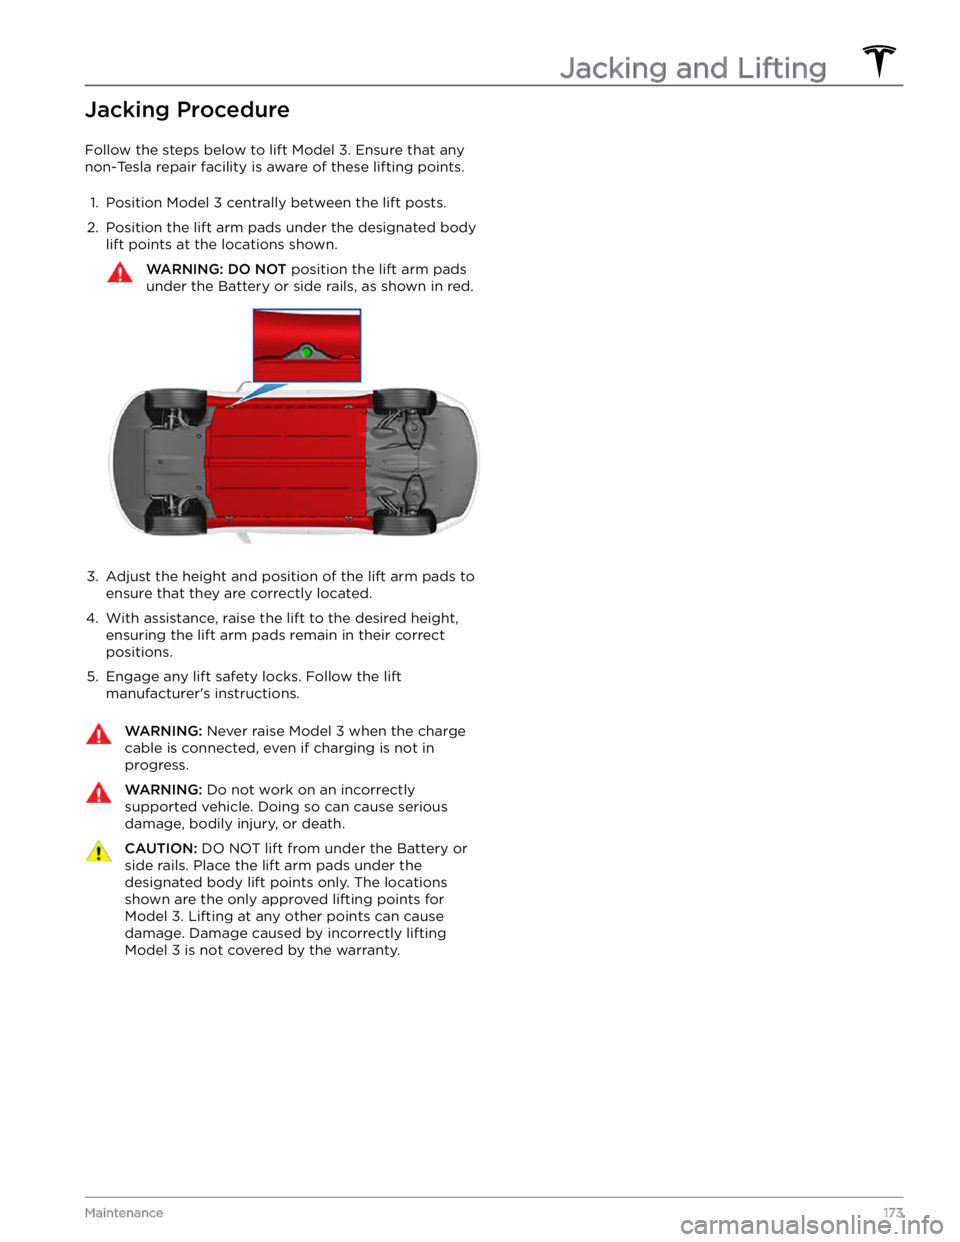
Jacking Procedure
Follow the steps below to lift Model 3. Ensure that any
non-Tesla repair facility is aware of these lifting points.
1.
Position Model 3 centrally between the lift posts.
2.
Position the lift arm pads under the designated body lift points at the locations shown.
WARNING: DO NOT position the lift arm pads
under the Battery or side rails, as shown in red.
3.
Adjust the height and position of the lift arm pads to ensure that they are correctly located.
4.
With assistance, raise the lift to the desired height, ensuring the lift arm pads remain in their correct positions.
5.
Engage any lift safety locks. Follow the lift
manufacturer
Page 176 of 248
Parts, Accessories, and
Modifications
Use only genuine Tesla parts and accessories. Tesla
performs rigorous testing on parts to ensure their
suitability, safety, and reliability. Purchase these parts
from Tesla, where they are professionally installed and
where you can receive expert advice about
modifications to Model 3. Accessories are available for
purchase from Tesla stores or online at
www.tesla.com.
NOTE: Some accessories may not be available in your
market region.
Tesla is unable to assess parts manufactured by other distributors and therefore accepts no responsibility if you use non-Tesla parts on
Model 3.
WARNING: Installing non-approved parts and
accessories, or performing non-approved
modifications, can affect the performance of
Model 3 and the safety of its occupants. Any
damage caused by using or installing non-
approved parts, or by performing non-approved
modifications, is not covered by the warranty.
WARNING: Tesla does not accept liability for
death, personal injury or damage that occurs if you
use or install non-approved accessories or make
non-approved modifications.
Accessory Wheels and Tires
If your Model 3 is fitted with Tesla accessory wheels or
tires, the Gross Axle Weight Rating (GAWR), wheel, tire, and loading information may be
different from the labels
shown on the vehicle. Refer to the relevant following
section for updated information.
NOTE: If your vehicle is not fitted with Tesla accessory
wheels or tires (it is
fitted with the factory original
wheels and tires, including Tesla genuine replacement
parts), refer to the labels attached to the center door pillar for the most accurate information for your
Model 3.
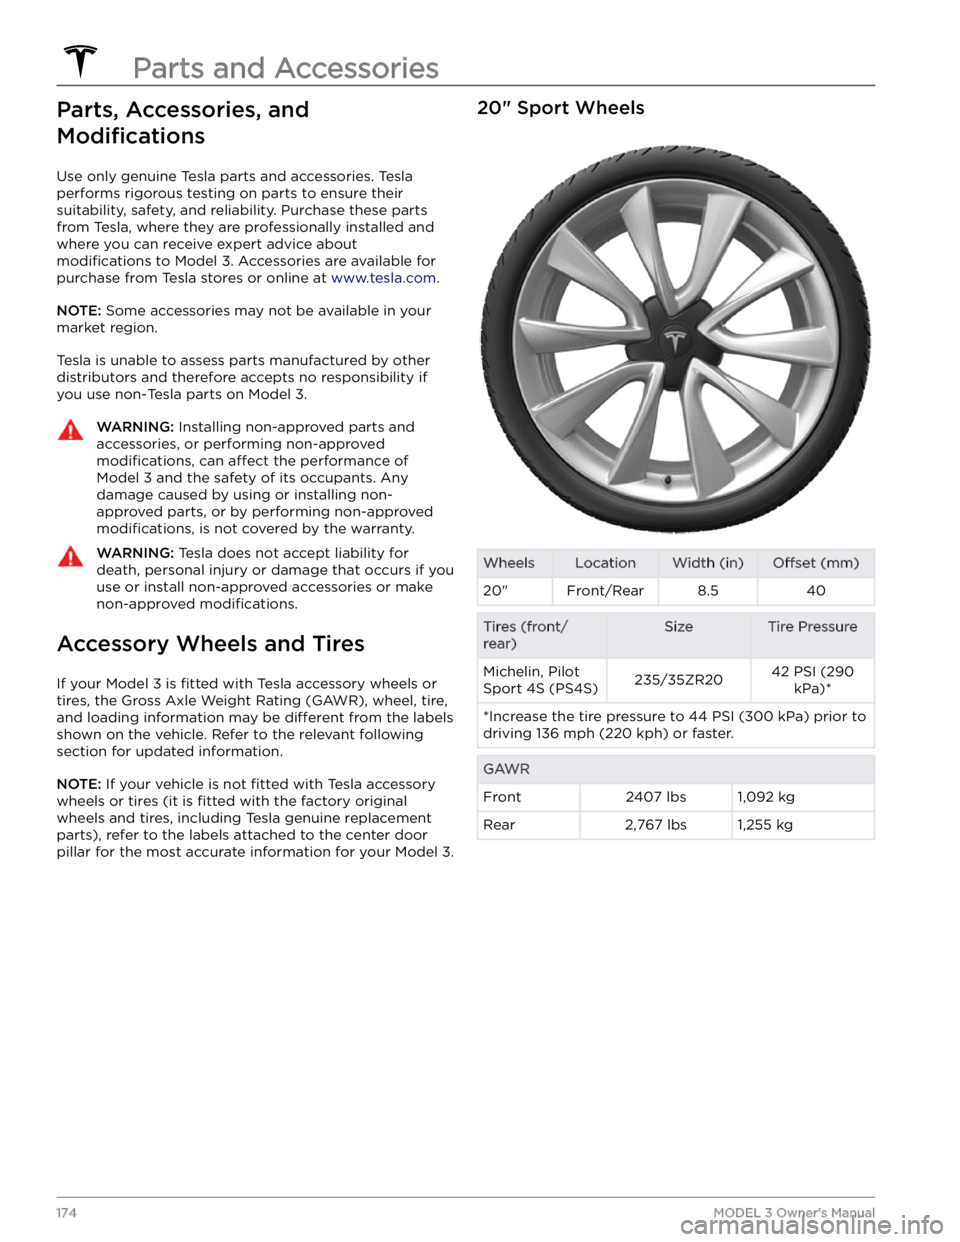
20" Sport WheelsWheelsLocationWidth (in)Offset (mm)20"Front/Rear8.540Tires (front/
rear)SizeTire PressureMichelin, Pilot
Sport 4S (PS4S)235/35ZR2042 PSI (290 kPa)**Increase the tire pressure to 44 PSI (300 kPa) prior to driving 136 mph (220 kph) or faster.GAWRFront2407 lbs1,092 kgRear2,767 lbs1,255 kg
Parts and Accessories
174MODEL 3 Owner
Page 177 of 248
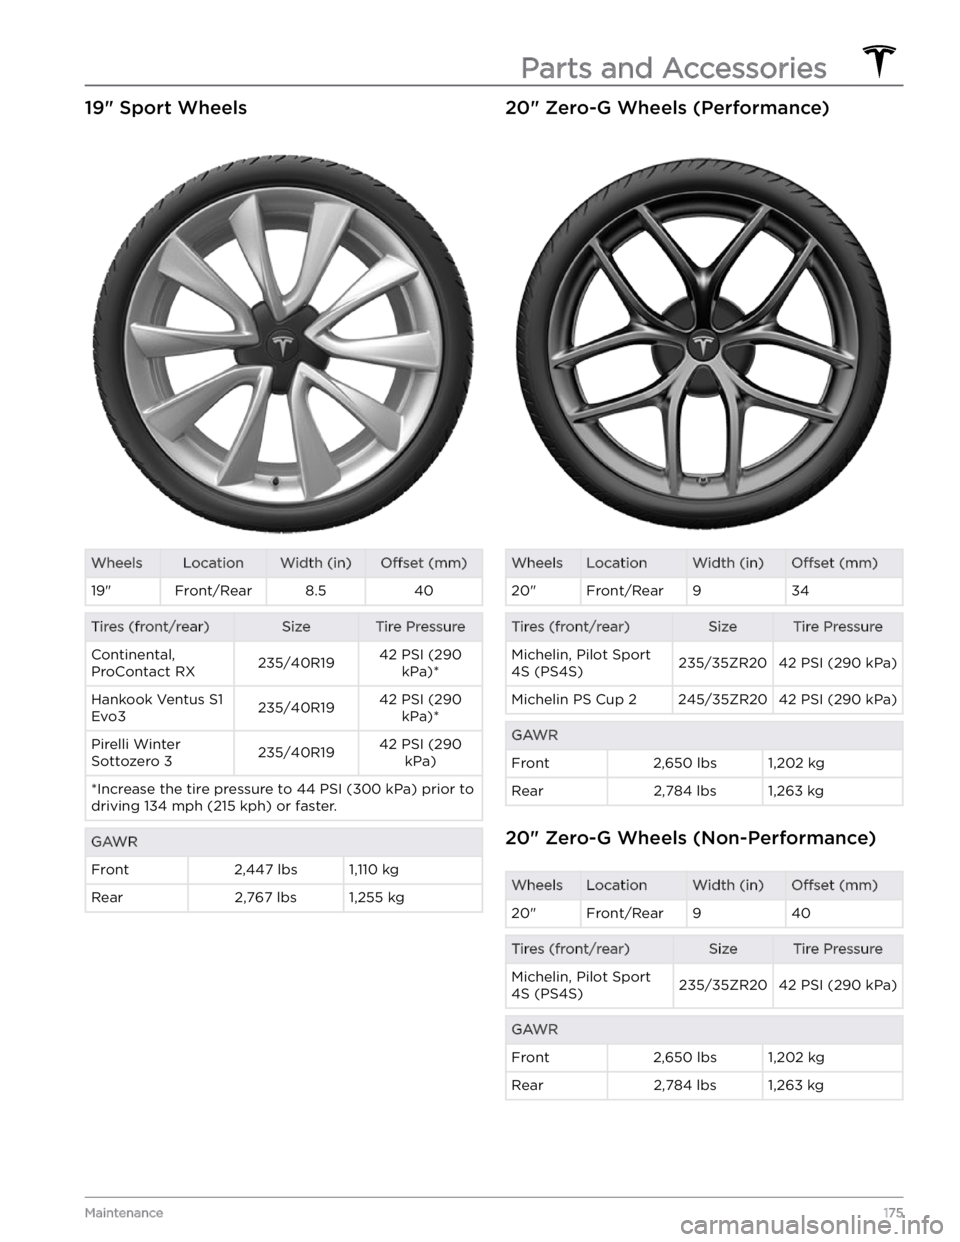
19" Sport WheelsWheelsLocationWidth (in)Offset (mm)19"Front/Rear8.540Tires (front/rear)SizeTire PressureContinental,
ProContact RX235/40R1942 PSI (290 kPa)*Hankook Ventus S1
Evo3235/40R1942 PSI (290 kPa)*Pirelli Winter
Sottozero 3235/40R1942 PSI (290 kPa)*Increase the tire pressure to 44 PSI (300 kPa) prior to driving 134 mph (215 kph) or faster.GAWRFront2,447 lbs1,110 kgRear2,767 lbs1,255 kg20" Zero-G Wheels (Performance)WheelsLocationWidth (in)Offset (mm)20"Front/Rear934Tires (front/rear)SizeTire PressureMichelin, Pilot Sport
4S (PS4S)235/35ZR2042 PSI (290 kPa)Michelin PS Cup 2245/35ZR2042 PSI (290 kPa)GAWRFront2,650 lbs1,202 kgRear2,784 lbs1,263 kg
20" Zero-G Wheels (Non-Performance)
WheelsLocationWidth (in)Offset (mm)20"Front/Rear940Tires (front/rear)SizeTire PressureMichelin, Pilot Sport
4S (PS4S)235/35ZR2042 PSI (290 kPa)GAWRFront2,650 lbs1,202 kgRear2,784 lbs1,263 kg
Parts and Accessories
175Maintenance
Page 178 of 248
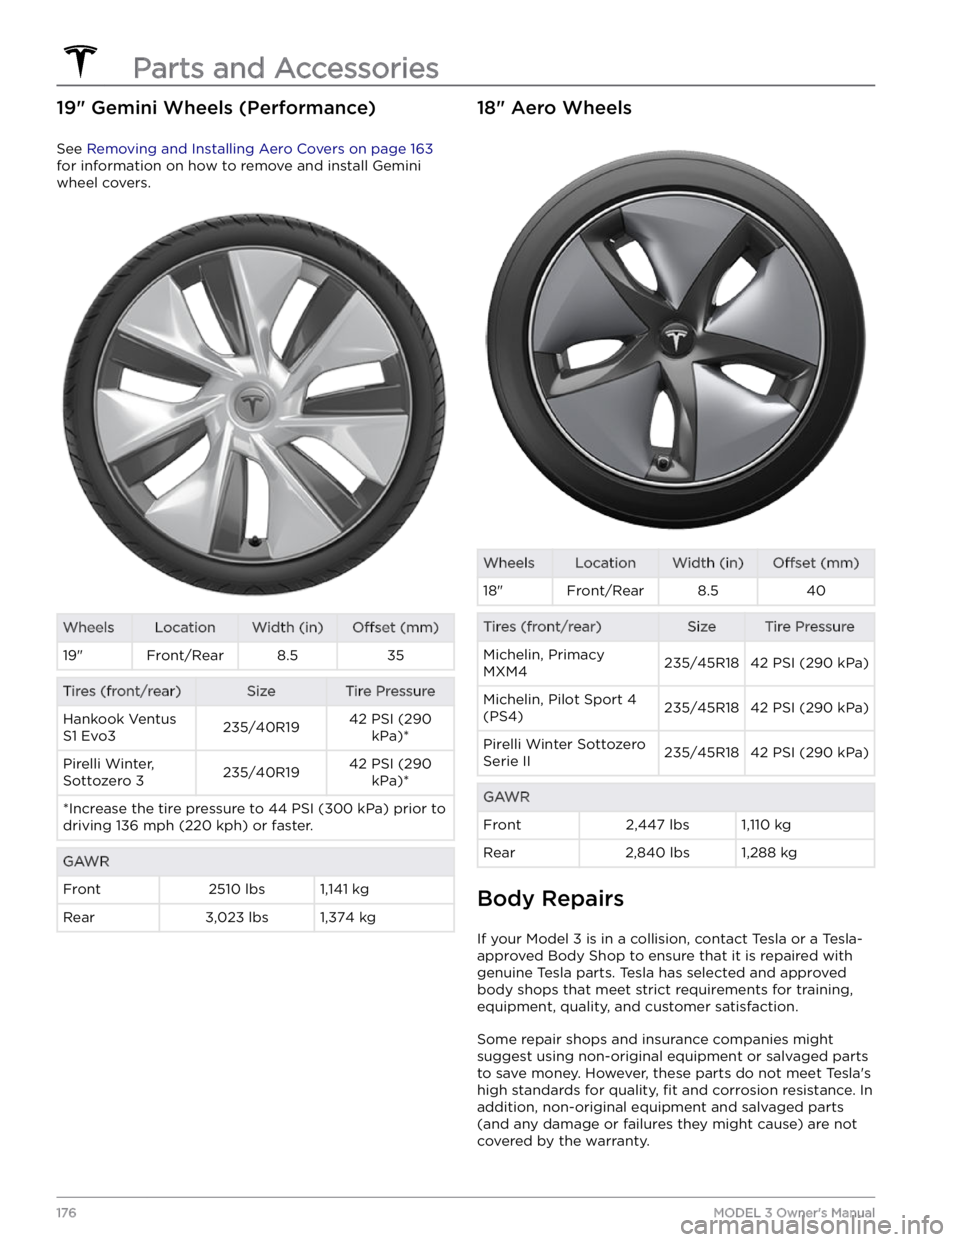
19" Gemini Wheels (Performance)
See Removing and Installing Aero Covers on page 163
for information on how to remove and install Gemini
wheel covers.
WheelsLocationWidth (in)Offset (mm)19"Front/Rear8.535Tires (front/rear)SizeTire PressureHankook Ventus
S1 Evo3235/40R1942 PSI (290 kPa)*Pirelli Winter,
Sottozero 3235/40R1942 PSI (290 kPa)**Increase the tire pressure to 44 PSI (300 kPa) prior to driving 136 mph (220 kph) or faster.GAWRFront2510 lbs1,141 kgRear3,023 lbs1,374 kg18" Aero WheelsWheelsLocationWidth (in)Offset (mm)18"Front/Rear8.540Tires (front/rear)SizeTire PressureMichelin, Primacy
MXM4235/45R1842 PSI (290 kPa)Michelin, Pilot Sport 4
(PS4)235/45R1842 PSI (290 kPa)Pirelli Winter Sottozero
Serie II235/45R1842 PSI (290 kPa)GAWRFront2,447 lbs1,110 kgRear2,840 lbs1,288 kg
Body Repairs
If your Model 3 is in a collision, contact Tesla or a Tesla-
approved Body Shop to ensure that it is repaired with genuine Tesla parts. Tesla has selected and approved
body shops that meet strict requirements for training, equipment, quality, and customer satisfaction.
Some repair shops and insurance companies might
suggest using non-original equipment or salvaged parts
to save money. However, these parts do not meet Tesla
Page 179 of 248
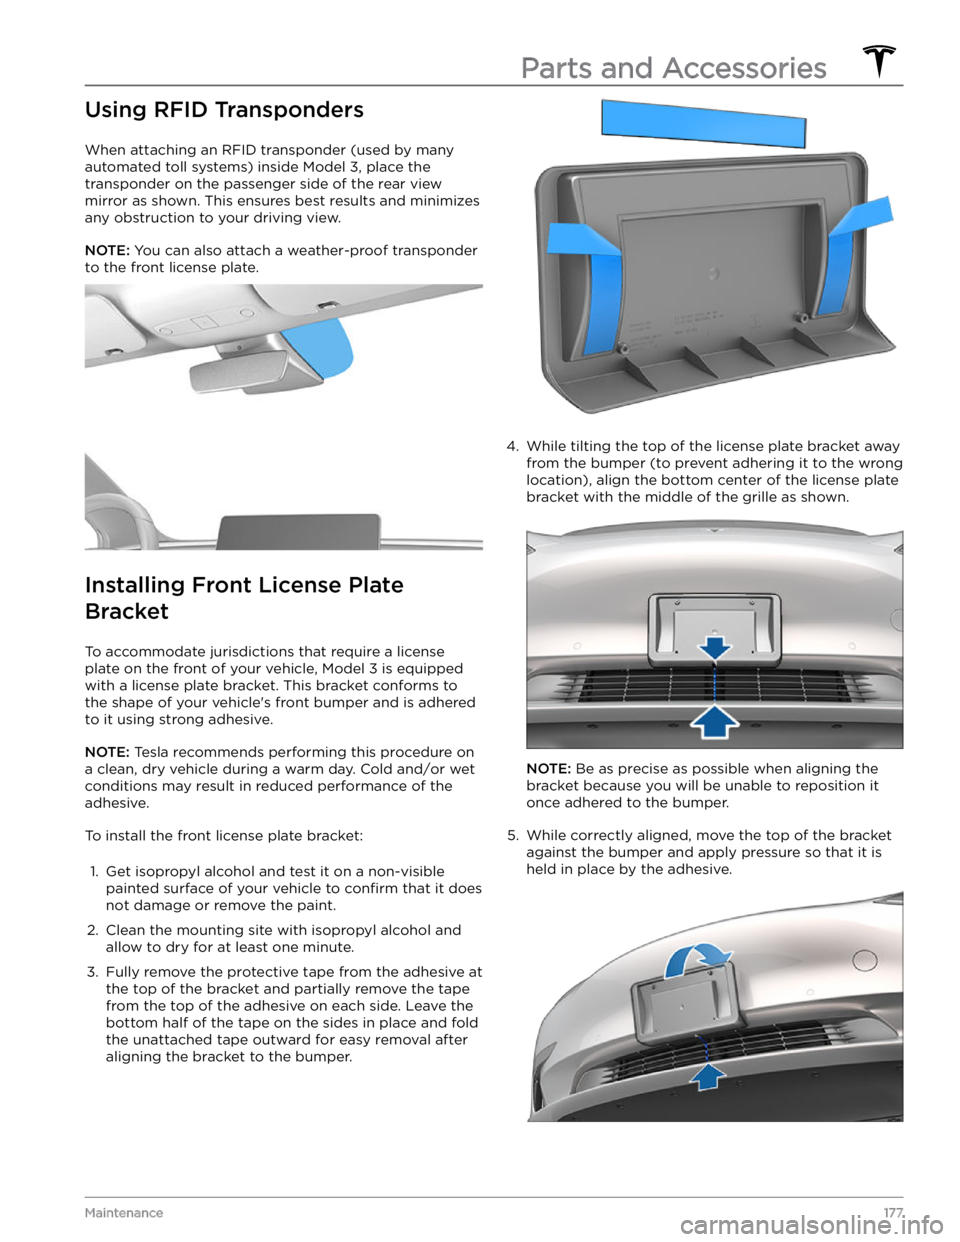
Using RFID Transponders
When attaching an RFID transponder (used by many
automated toll systems) inside
Model 3, place the
transponder
on the passenger side of the rear view
mirror as shown. This ensures best results and minimizes
any obstruction to your driving view.
NOTE: You can also attach a weather-proof transponder
to the front license plate.
Installing Front License Plate
Bracket
To accommodate jurisdictions that require a license plate on the front of your vehicle,
Model 3 is equipped
with a license plate bracket. This bracket conforms to
the shape of your vehicle
Page 180 of 248
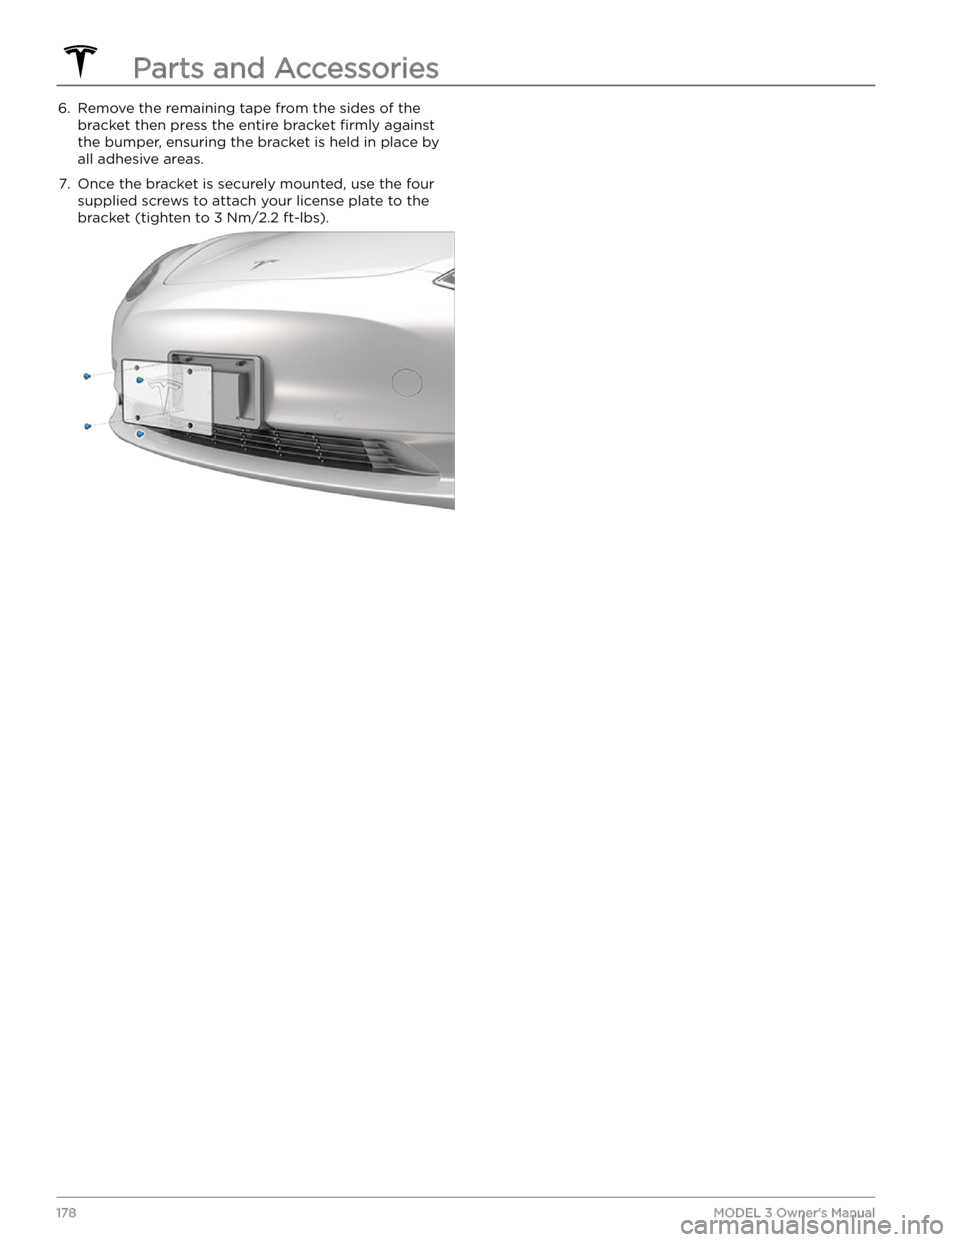
6. Remove the remaining tape from the sides of the
bracket then press the entire bracket
firmly against
the bumper, ensuring the bracket is held in place by
all adhesive areas.
7.
Once the bracket is securely mounted, use the four supplied screws to attach your license plate to the bracket (tighten to 3 Nm/2.2 ft-lbs).Parts and Accessories
178MODEL 3 Owner