display TOYOTA AVALON 2020 Accessories, Audio & Navigation (in English)
[x] Cancel search | Manufacturer: TOYOTA, Model Year: 2020, Model line: AVALON, Model: TOYOTA AVALON 2020Pages: 326, PDF Size: 7.79 MB
Page 97 of 326
97
3. MEDIA OPERATION
AUDIO/VISUAL SYSTEM
3
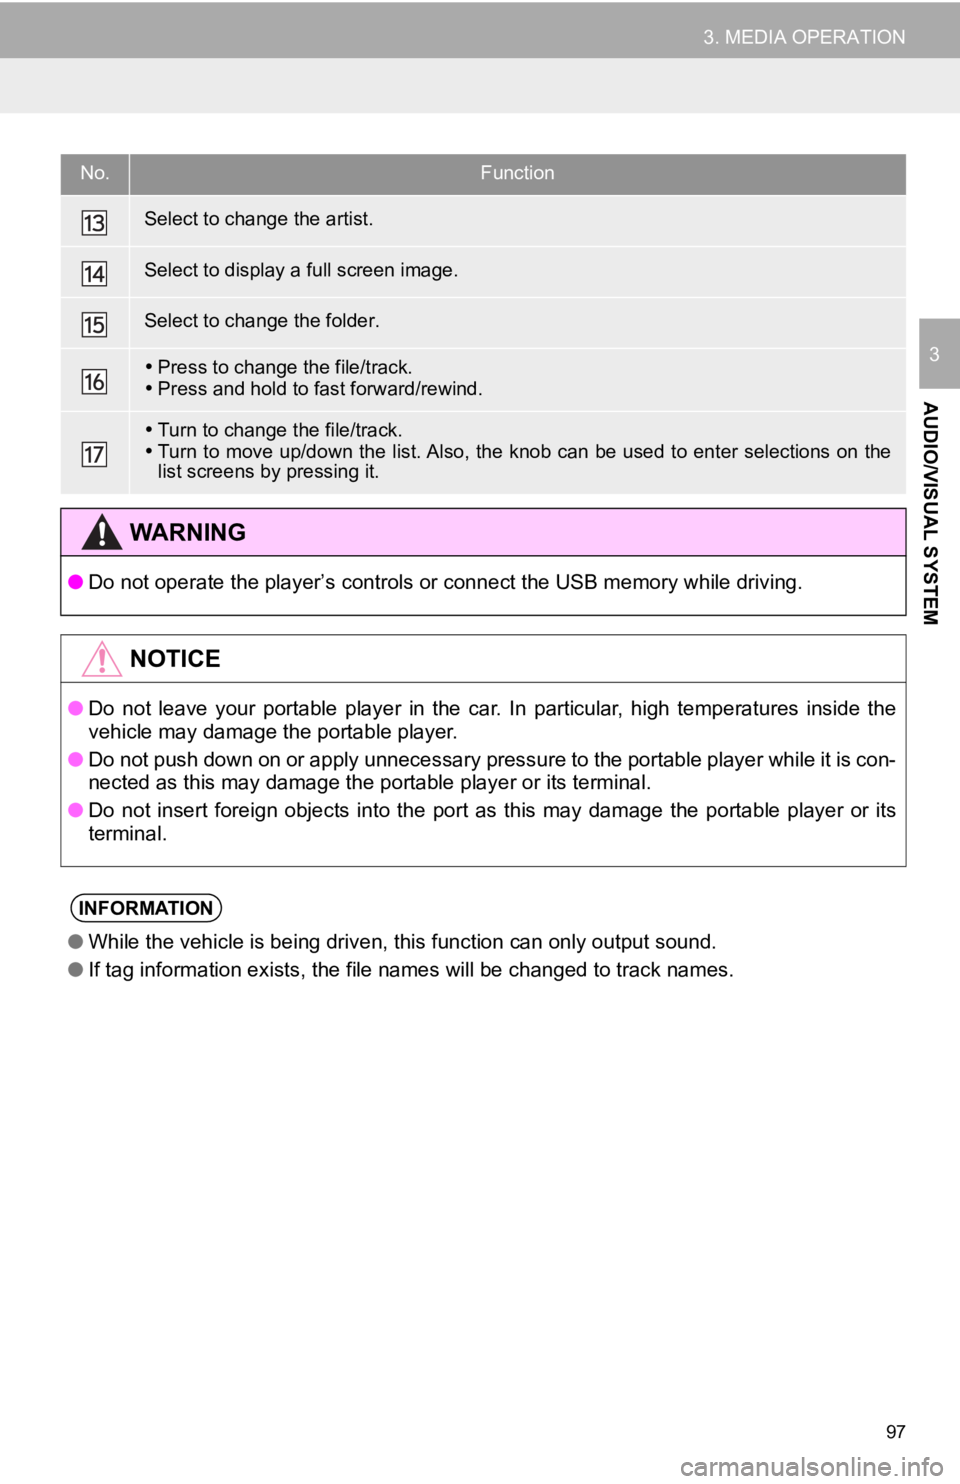
Select to change the artist.
Select to display a full screen image.
Select to change the folder.
Press to change the file/track.
Press and hold to fast forward/rewind.
Turn to change the file/track.
Turn to move up/down the list. Also, the knob can be used to en ter selections on the
list screens by pressing it.
WA R N I N G
● Do not operate the player’s contr ols or connect the USB memory while driving.
NOTICE
●Do not leave your portable player in the car. In particular, hi gh temperatures inside the
vehicle may damage the portable player.
● Do not push down on or apply unnecessary pressure to the portable player while it is con-
nected as this may damage the portable player or its terminal.
● Do not insert foreign objects into the port as this may damage the portable player or its
terminal.
INFORMATION
● While the vehicle is being driven, this function can only outpu t sound.
● If tag information exists, the file names will be changed to tr ack names.
No.Function
Page 99 of 326
99
3. MEDIA OPERATION
AUDIO/VISUAL SYSTEM
3
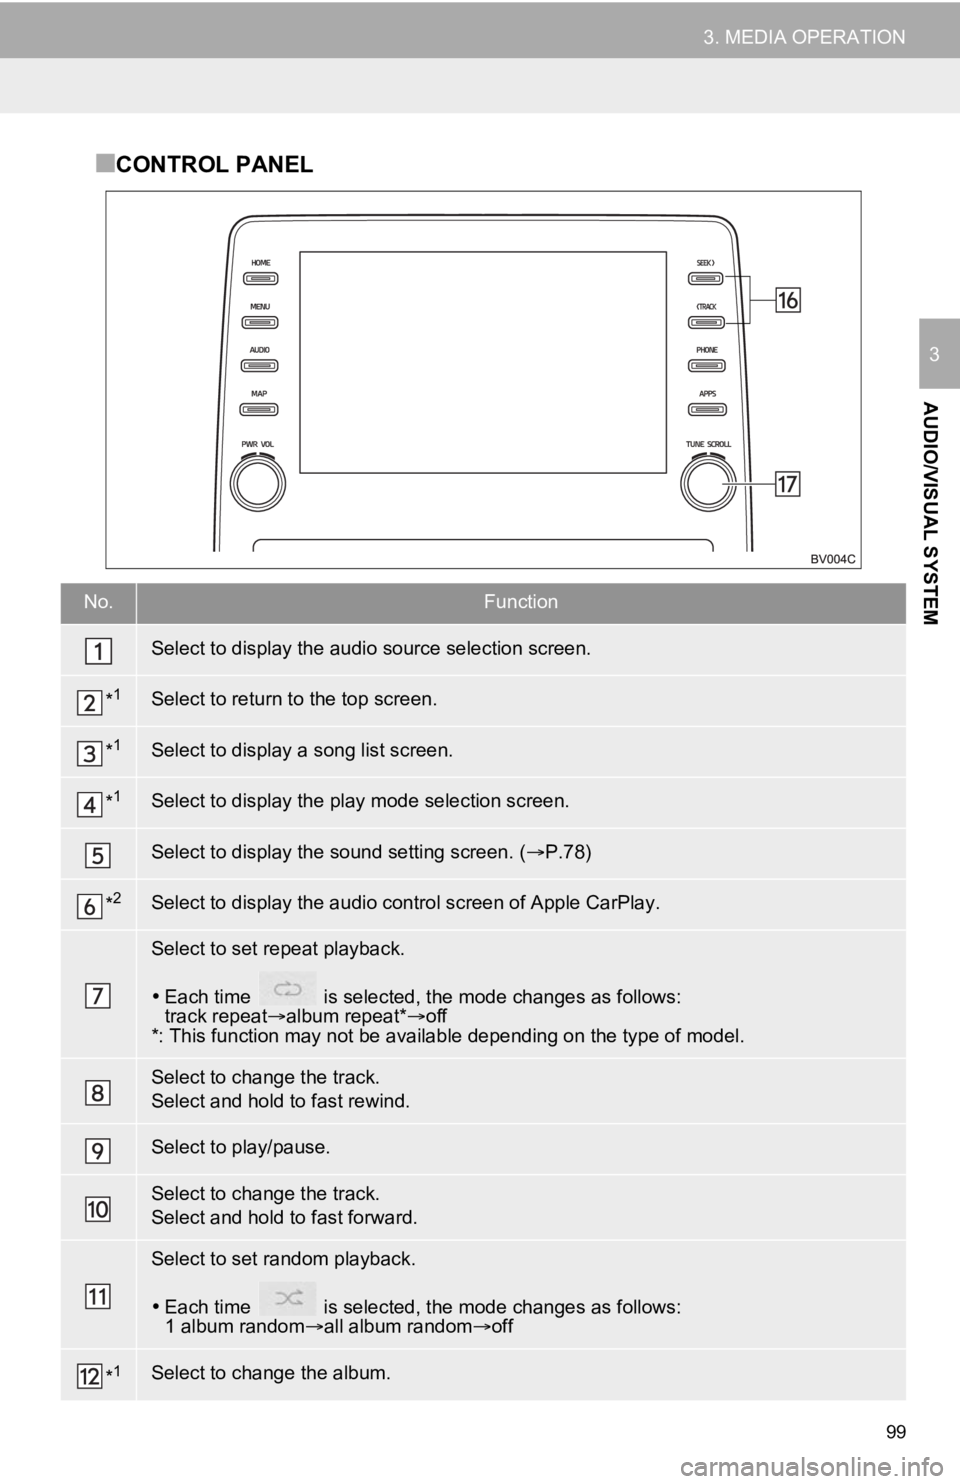
■CONTROL PANEL
No.Function
Select to display the audio source selection screen.
*1Select to return to the top screen.
*1Select to display a song list screen.
*1Select to display the pl ay mode selection screen.
Select to display the sound setting screen. ( P.78)
*2Select to display the audio control screen of Apple CarPlay.
Select to set repeat playback.
Each time is selected, the mode changes as follows:
track repeat album repeat*off
*: This function may not be available depending on the type of model.
Select to change the track.
Select and hold to fast rewind.
Select to play/pause.
Select to change the track.
Select and hold to fast forward.
Select to set random playback.
Each time is selected, the mode changes as follows:
1 album random all album random off
*1Select to change the album.
Page 100 of 326
100
3. MEDIA OPERATION
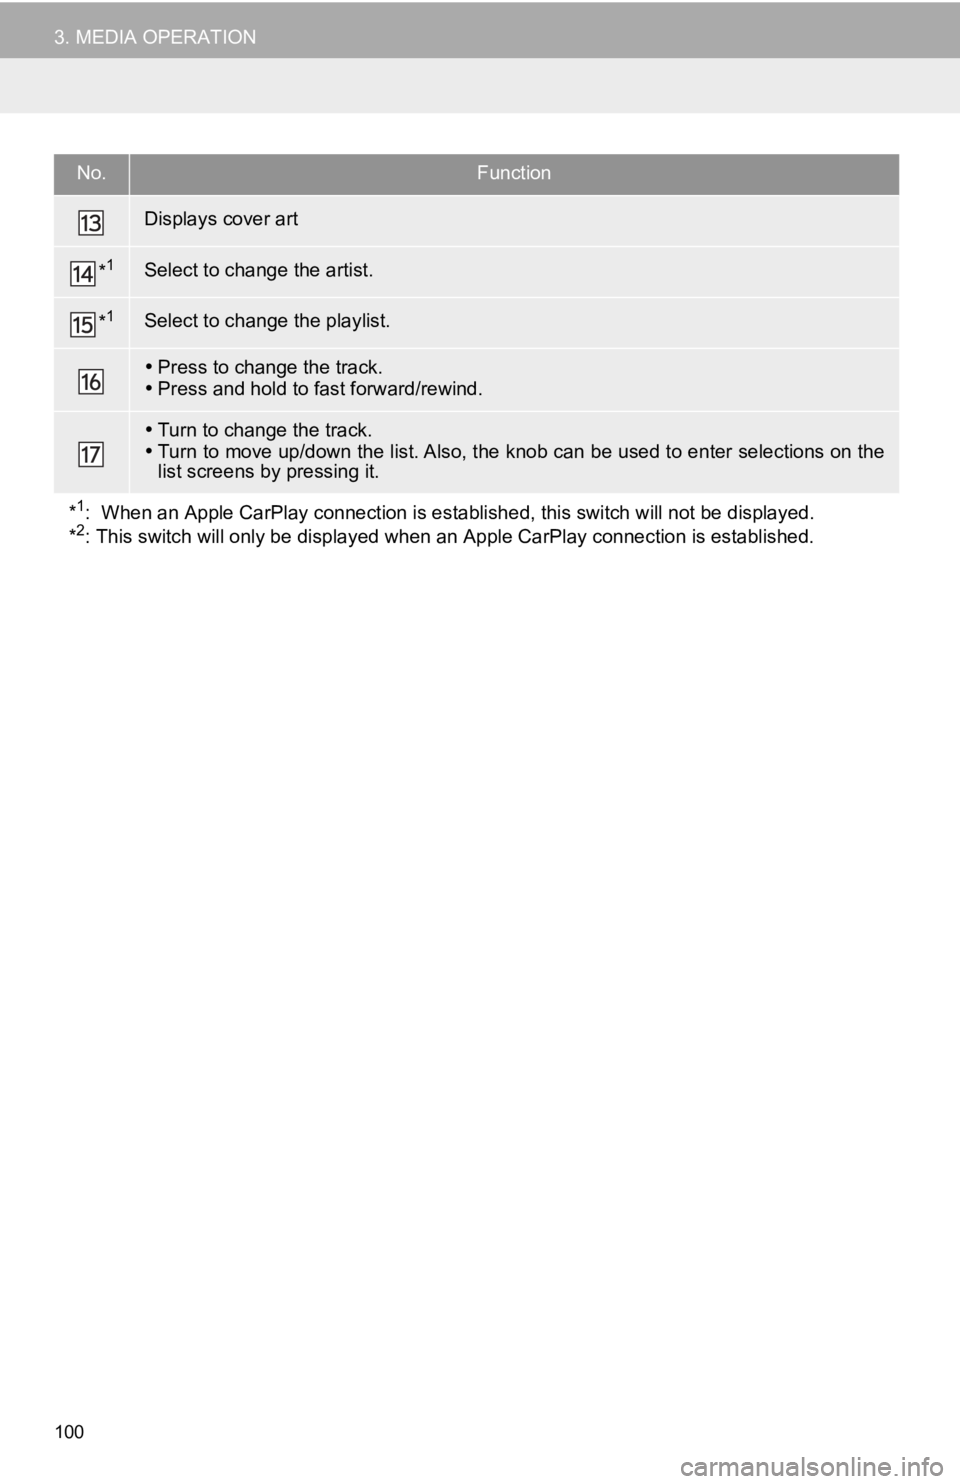
Displays cover art
*1Select to change the artist.
*1Select to change the playlist.
Press to change the track.
Press and hold to fast forward/rewind.
Turn to change the track.
Turn to move up/down the list. Also, the knob can be used to en ter selections on the
list screens by pressing it.
*
1: When an Apple CarPlay connecti on is established, this switch will not be displayed.
*2: This switch will only be displayed when an Apple CarPlay connection is established.
No.Function
Page 101 of 326
101
3. MEDIA OPERATION
AUDIO/VISUAL SYSTEM
3
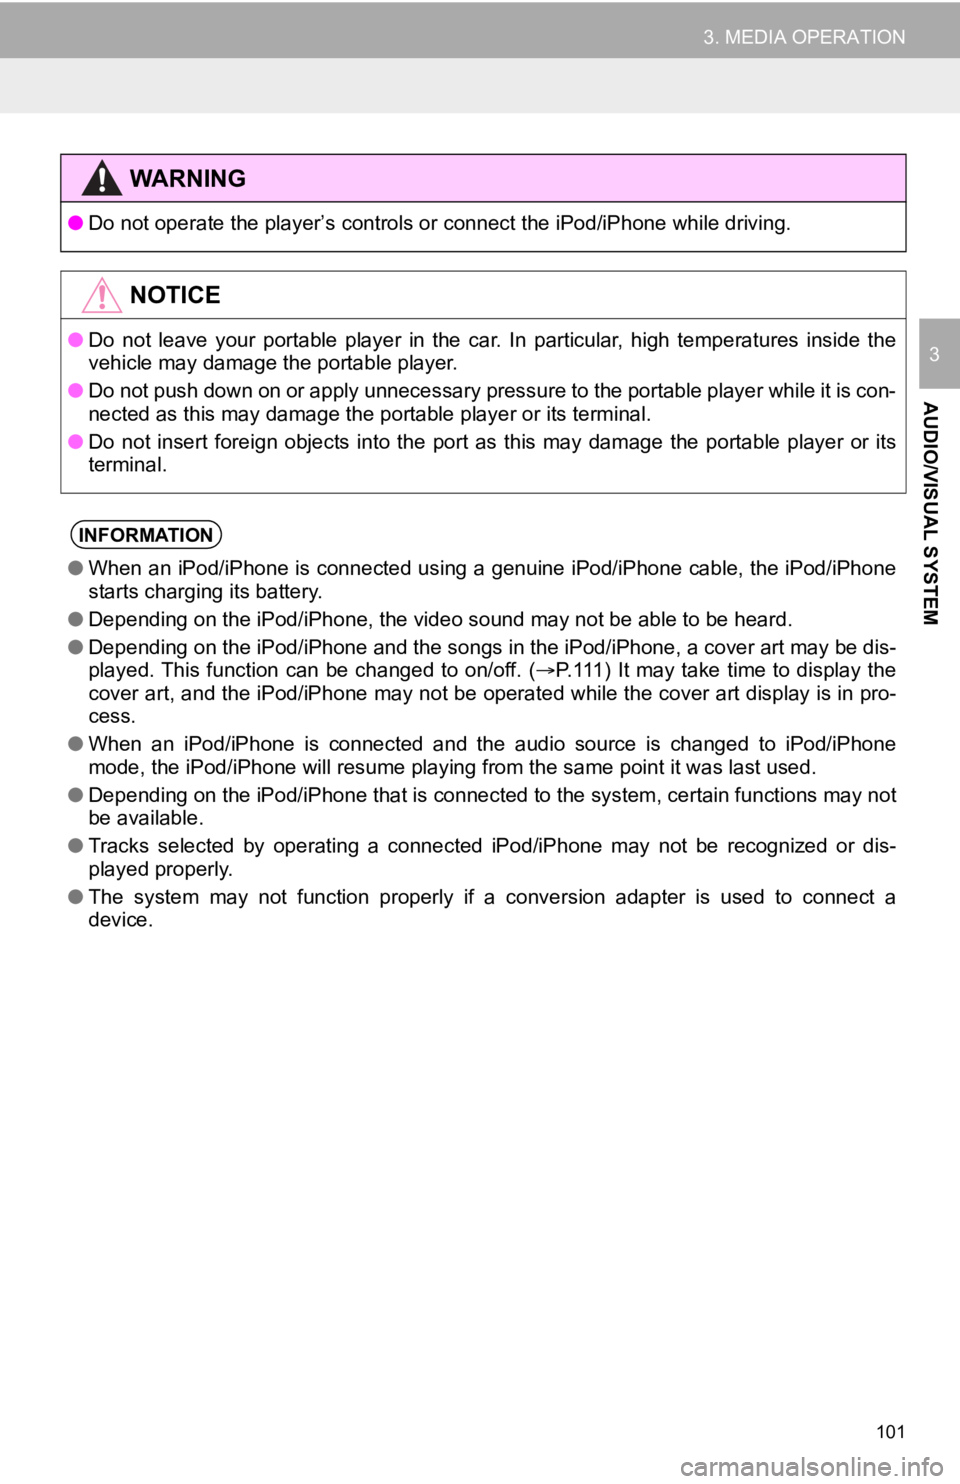
WA R N I N G
●Do not operate the player’s controls or connect the iPod/iPhone while driving.
NOTICE
●Do not leave your portable player in the car. In particular, hi gh temperatures inside the
vehicle may damage the portable player.
● Do not push down on or apply unnecessary pressure to the portable player while it is con-
nected as this may damage the portable player or its terminal.
● Do not insert foreign objects into the port as this may damage the portable player or its
terminal.
INFORMATION
● When an iPod/iPhone is connected using a genuine iPod/iPhone cable, the iPod/iPhone
starts charging its battery.
● Depending on the iPod/iPhone, the video sound may not be able t o be heard.
● Depending on the iPod/iPhone and the songs in the iPod/iPhone, a cover art may be dis-
played. This function can be changed to on/off. ( P.111) It may take time to display the
cover art, and the iPod/iPhone may not be operated while the co ver art display is in pro-
cess.
● When an iPod/iPhone is connected and the audio source is change d to iPod/iPhone
mode, the iPod/iPhone will resume playing from the same point i t was last used.
● Depending on the iPod/iPhone that is connected to the system, c ertain functions may not
be available.
● Tracks selected by operating a co nnected iPod/iPhone may not be recognized or dis-
played properly.
● The system may not function properly if a conversion adapter is used to connect a
device.
Page 103 of 326
103
3. MEDIA OPERATION
AUDIO/VISUAL SYSTEM
3
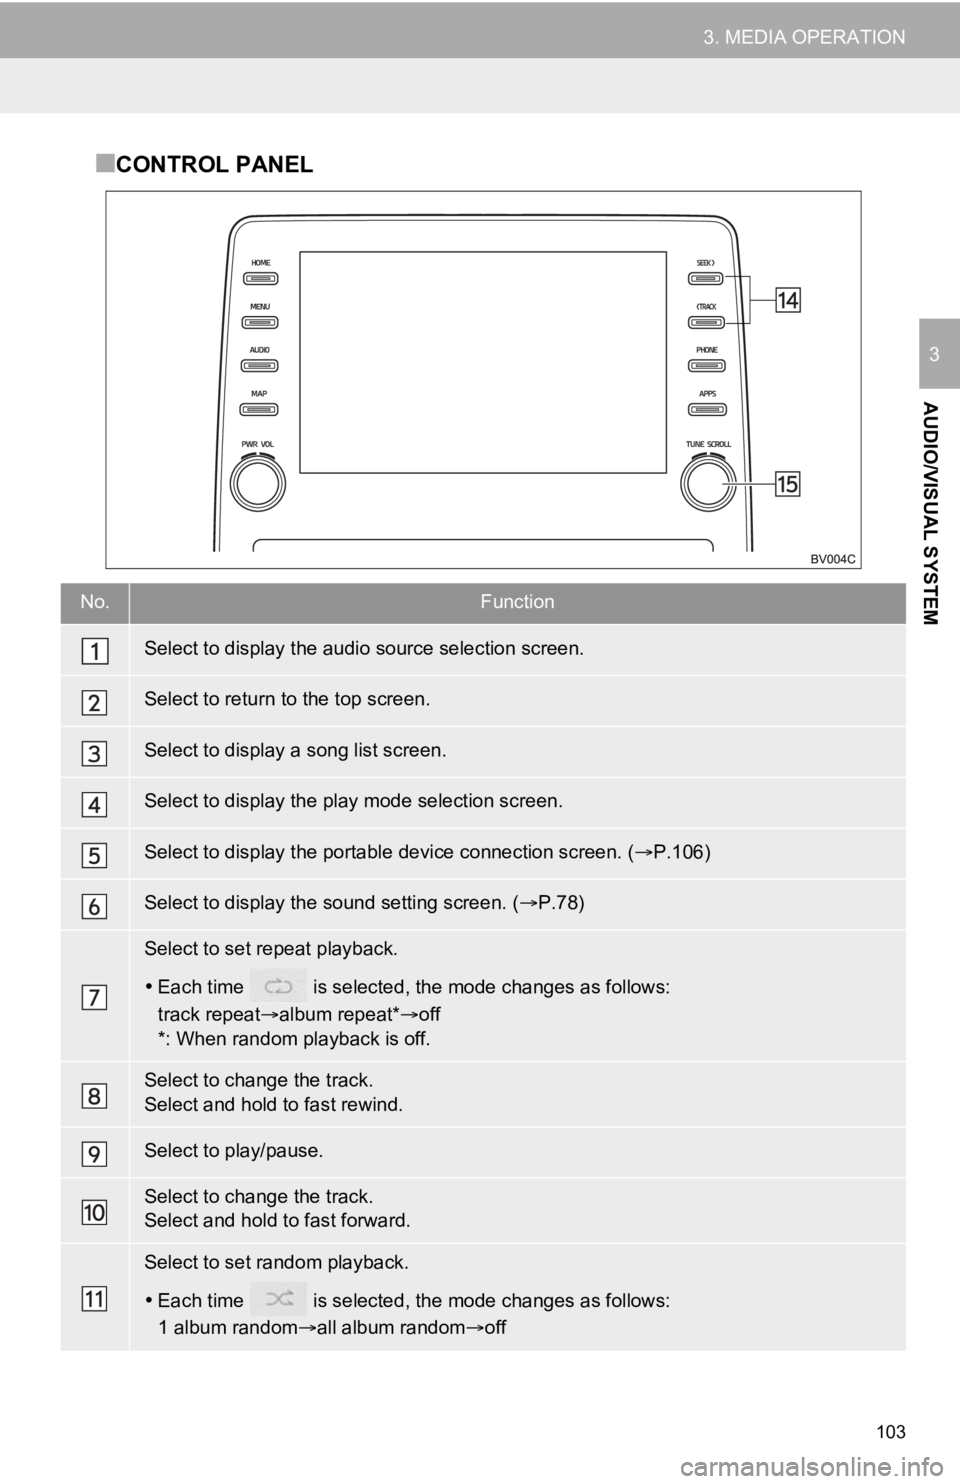
■CONTROL PANEL
No.Function
Select to display the audio source selection screen.
Select to return to the top screen.
Select to display a song list screen.
Select to display the play mode selection screen.
Select to display the portable device connection screen. ( P.106)
Select to display the sound setting screen. ( P.78)
Select to set repeat playback.
Each time is selected, the mode changes as follows:
track repeat album repeat*off
*: When random playback is off.
Select to change the track.
Select and hold to fast rewind.
Select to play/pause.
Select to change the track.
Select and hold to fast forward.
Select to set random playback.
Each time is selected, the mode changes as follows:
1 album random all album random off
Page 104 of 326
104
3. MEDIA OPERATION
Select to change the album.
Displays cover art
Press to change the track.
Press and hold to fast forward/rewind.
Turn to change the track.
Turn to move up/down the list. Also, the knob can be used to en ter selections on the
list screens by pressing it.
WA R N I N G
● Do not operate the player’s controls or connect to the Bluetoot h® audio system while driv-
ing.
● Your audio unit is fitted with Bluetooth
® antennas. People with implantable cardiac pace-
makers, cardiac resynchronization therapy-pacemakers or implant able cardioverter
defibrillators should maintain a reasonable distance between th emselves and the
Bluetooth
® antennas. The radio waves may affect the operation of such dev ices.
● Before using Bluetooth
® devices, users of any electrical medical device other than
implantable cardiac pacemakers, cardiac resynchronization thera py-pacemakers or
implantable cardioverter defibrillators should consult the manu facturer of the device for
information about its operation under the influence of radio waves. Radio waves could
have unexpected effects on the operation of such medical device s.
NOTICE
●Do not leave your portable player in the vehicle. In particular, high temperatures inside
the vehicle may damage the portable player.
No.Function
Page 106 of 326

106
3. MEDIA OPERATION
Registering an add itional device
1Display the Bluetooth® audio control
screen. ( P.102)
2Select “Connect” .
3Select “Add Device” .
When another Bluetooth® device is con-
nected, a confirmation screen will be dis-
played. To disconnect the Bluetooth
®
device, select “Yes”.
4Follow the steps in “REGISTERING A
Bluetooth
® PHONE FOR THE FIRST
TIME” from “STEP 5”. ( P.43)
Selecting a registered device
1Display the Bluetooth® audio control
screen. ( P.102)
2Select “Connect” .
3Select the desired device to be con-
nected.
4Check that a confirmation screen is
displayed when the connection is com-
plete.
If an error message is displayed, follow
the guidance on the screen to try again.
REGISTERING/CONNECTING
A Bluetooth® DEVICE
To use the Bluetooth® audio system, it
is necessary to register a Bluetooth
®
device with the system.
Page 107 of 326
107
3. MEDIA OPERATION
AUDIO/VISUAL SYSTEM
3
4. AUX
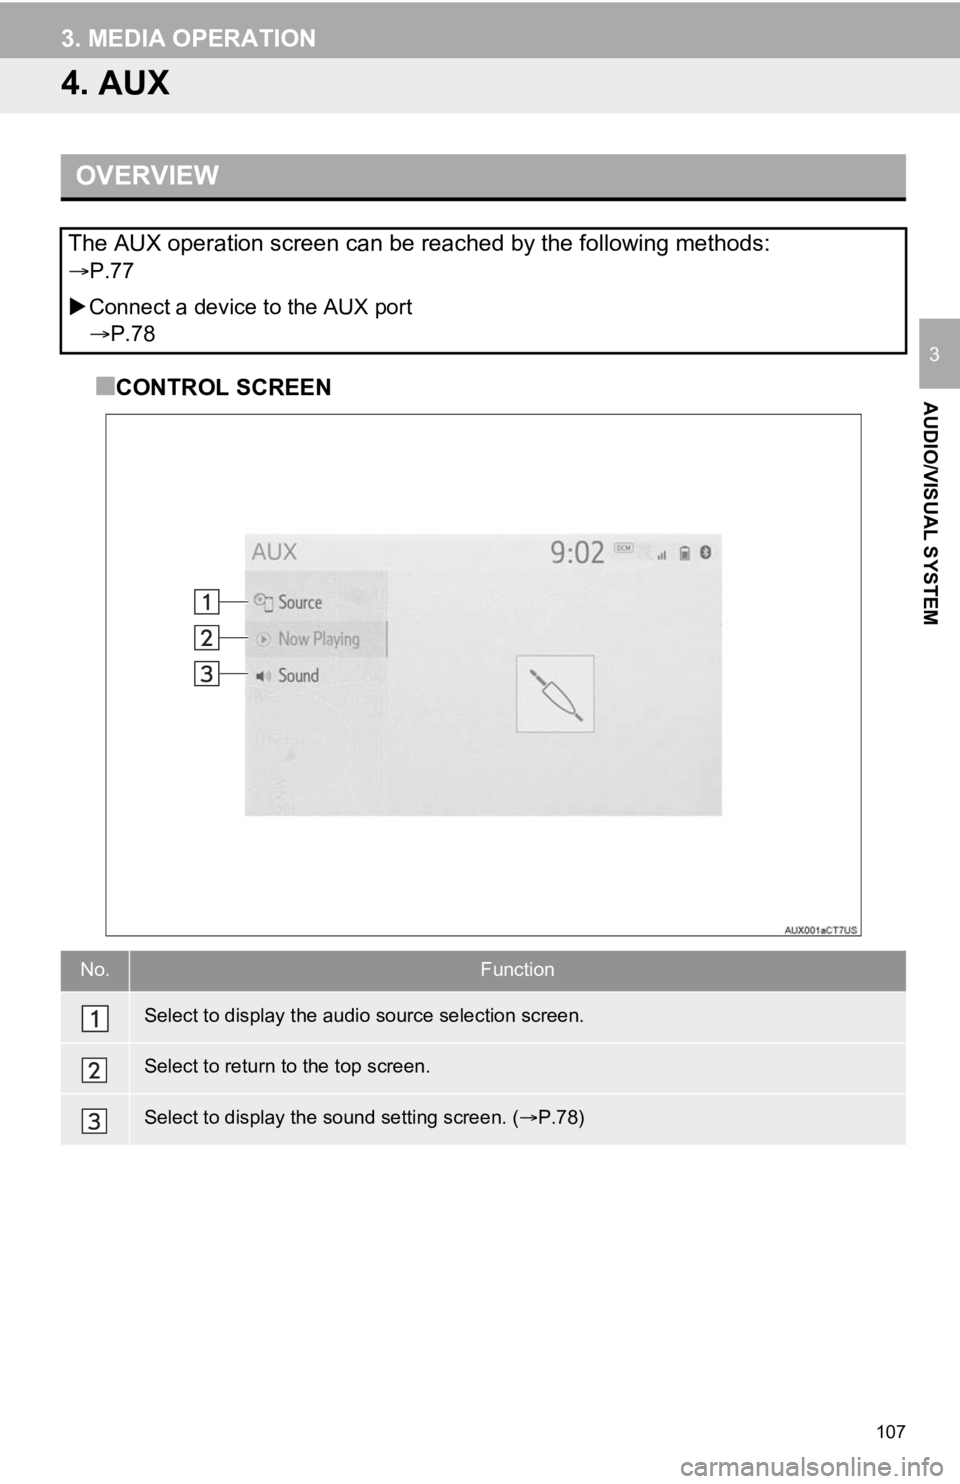
■CONTROL SCREEN
OVERVIEW
The AUX operation screen can be reached by the following methods:
P.77
Connect a device to the AUX port
P.78
No.Function
Select to display the audio source selection screen.
Select to return to the top screen.
Select to display the sound setting screen. ( P.78)
Page 111 of 326
111
AUDIO/VISUAL SYSTEM
3
5. SETUP
1. AUDIO SETTINGS
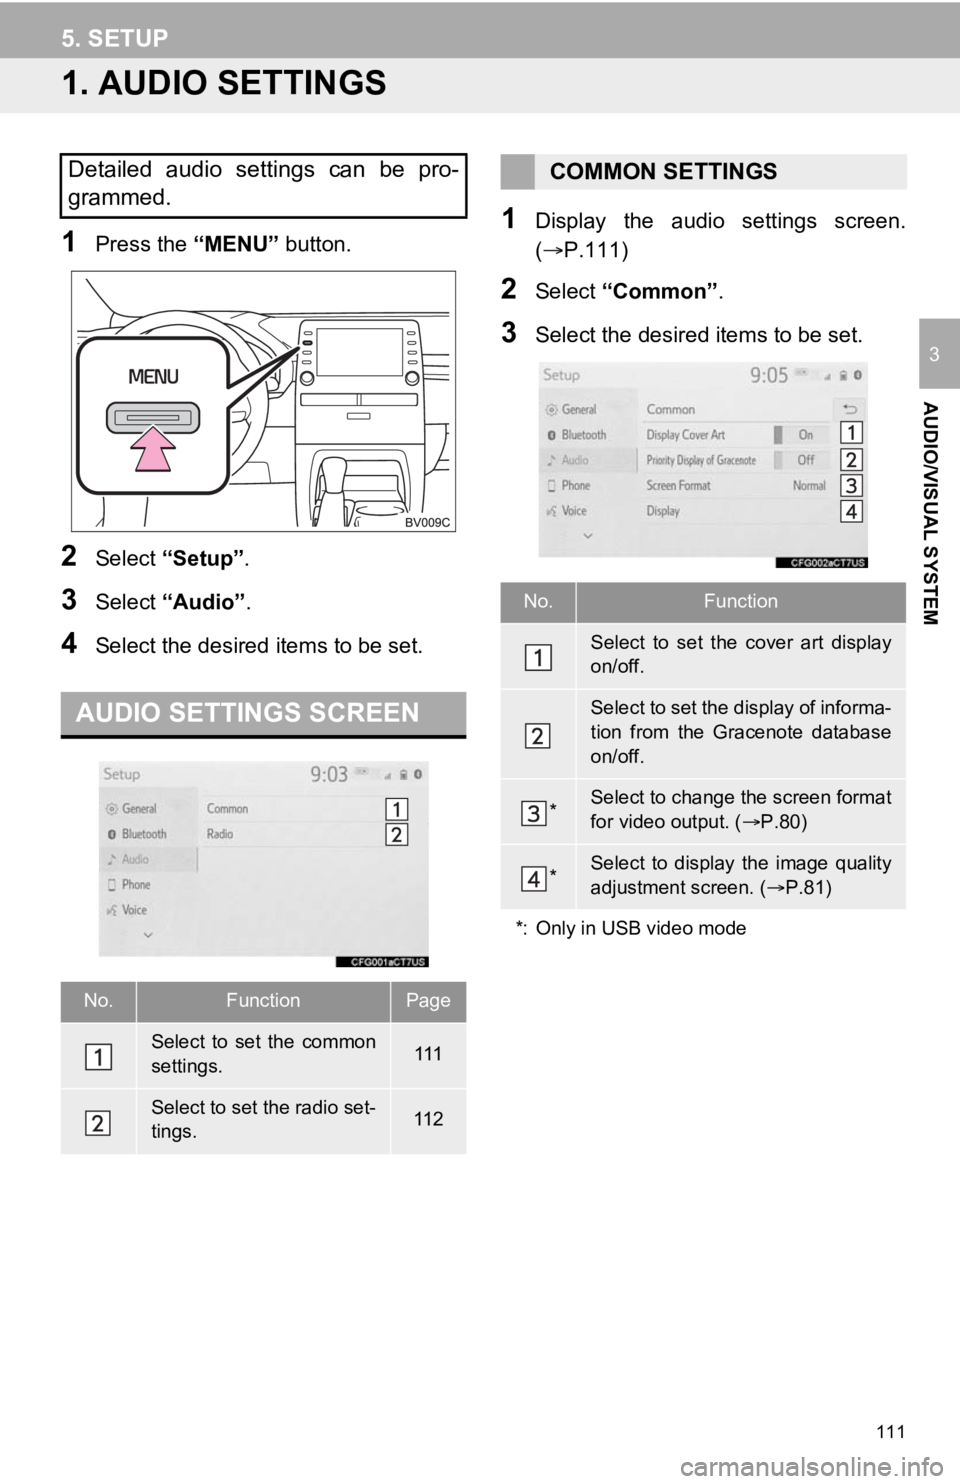
1Press the “MENU” button.
2Select “Setup” .
3Select “Audio” .
4Select the desired items to be set.
1Display the audio settings screen.
(P.111)
2Select “Common” .
3Select the desired items to be set.
Detailed audio settings can be pro-
grammed.
AUDIO SETTINGS SCREEN
No.FunctionPage
Select to set the common
settings.111
Select to set the radio set-
tings.11 2
COMMON SETTINGS
No.Function
Select to set the cover art display
on/off.
Select to set the display of informa-
tion from the Gracenote database
on/off.
*Select to change the screen format
for video output. ( P.80)
*Select to display the image quality
adjustment screen. ( P.81)
*: Only in USB video mode
Page 112 of 326
112
5. SETUP
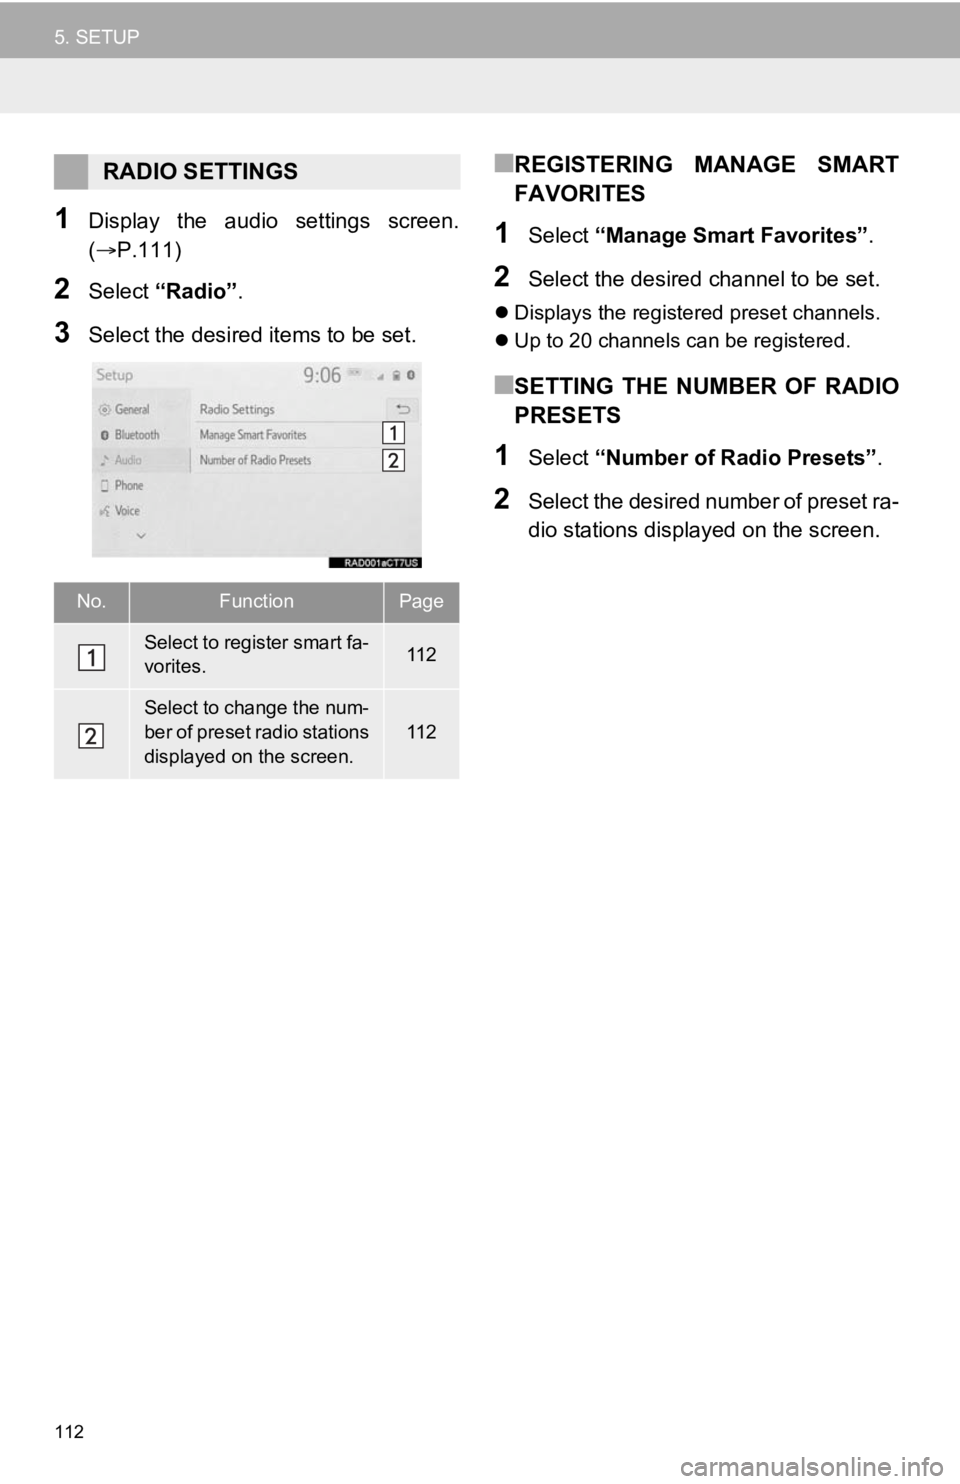
1Display the audio settings screen.
(P.111)
2Select “Radio” .
3Select the desired items to be set.
■REGISTERING MANAGE SMART
FAVORITES
1Select “Manage Smart Favorites” .
2Select the desired channel to be set.
Displays the registered preset channels.
Up to 20 channels can be registered.
■SETTING THE NUMBER OF RADIO
PRESETS
1Select “Number of Radio Presets” .
2Select the desired number of preset ra-
dio stations displayed on the screen.
RADIO SETTINGS
No.FunctionPage
Select to register smart fa-
vorites.11 2
Select to change the num-
ber of preset radio stations
displayed on the screen.11 2