TOYOTA HILUX 2012 Owners Manual (in English)
HILUX 2012
TOYOTA
TOYOTA
https://www.carmanualsonline.info/img/14/48593/w960_48593-0.png
TOYOTA HILUX 2012 Owners Manual (in English)
Trending: roof rack, service interval, oil level, 4WD, child lock, fold seats, headlight bulb
Page 411 of 636
411 3-3. Using the “touch screen”
3
Interior features
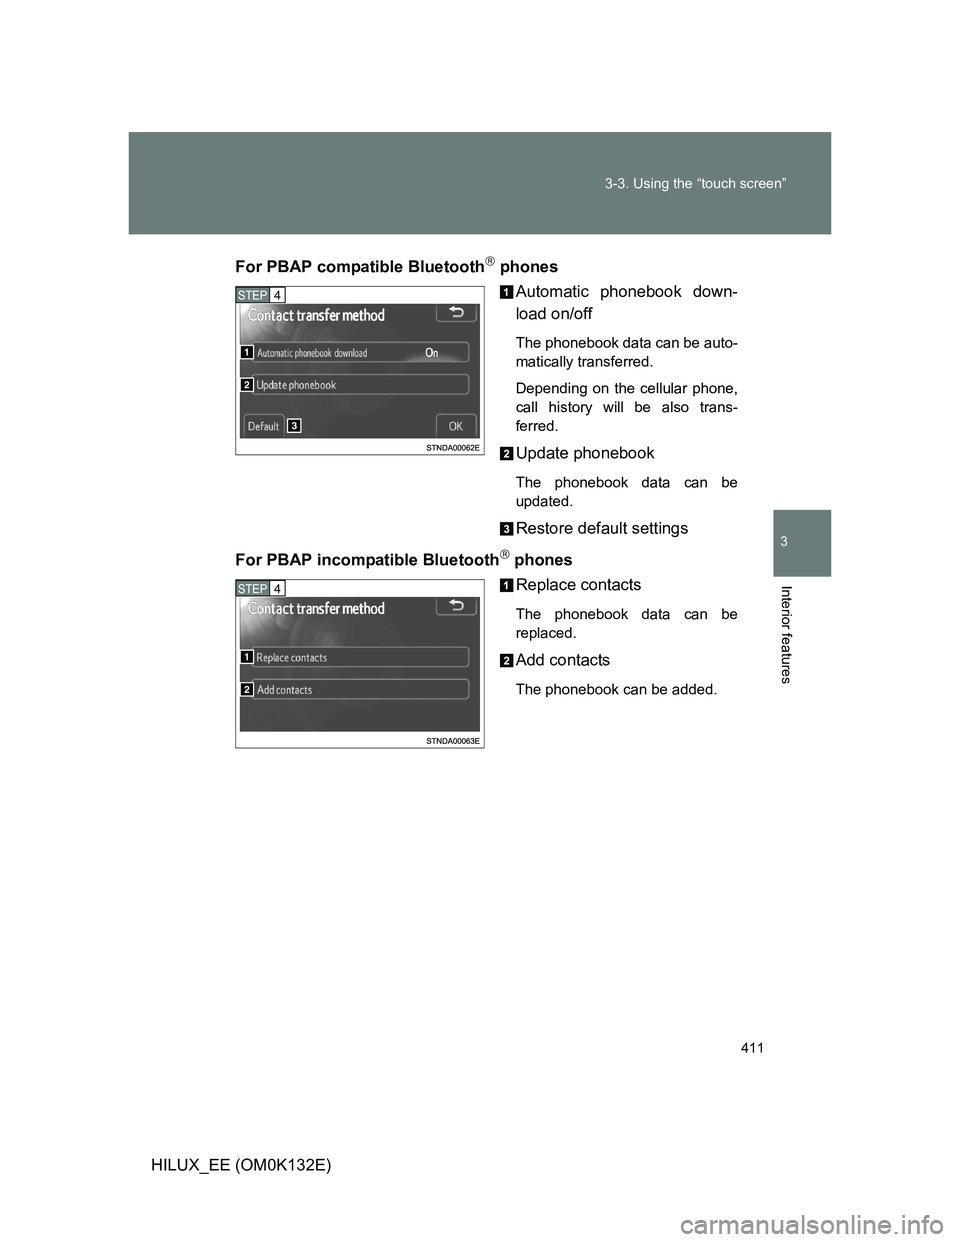
HILUX_EE (OM0K132E)For PBAP compatible Bluetooth
phones
Automatic phonebook down-
load on/off
The phonebook data can be auto-
matically transferred.
Depending on the cellular phone,
call history will be also trans-
ferred.
Update phonebook
The phonebook data can be
updated.
Restore default settings
For PBAP incompatible Bluetooth
phones
Replace contacts
The phonebook data can be
replaced.
Add contacts
The phonebook can be added.
STEP4
STEP4
Page 412 of 636
412 3-3. Using the “touch screen”
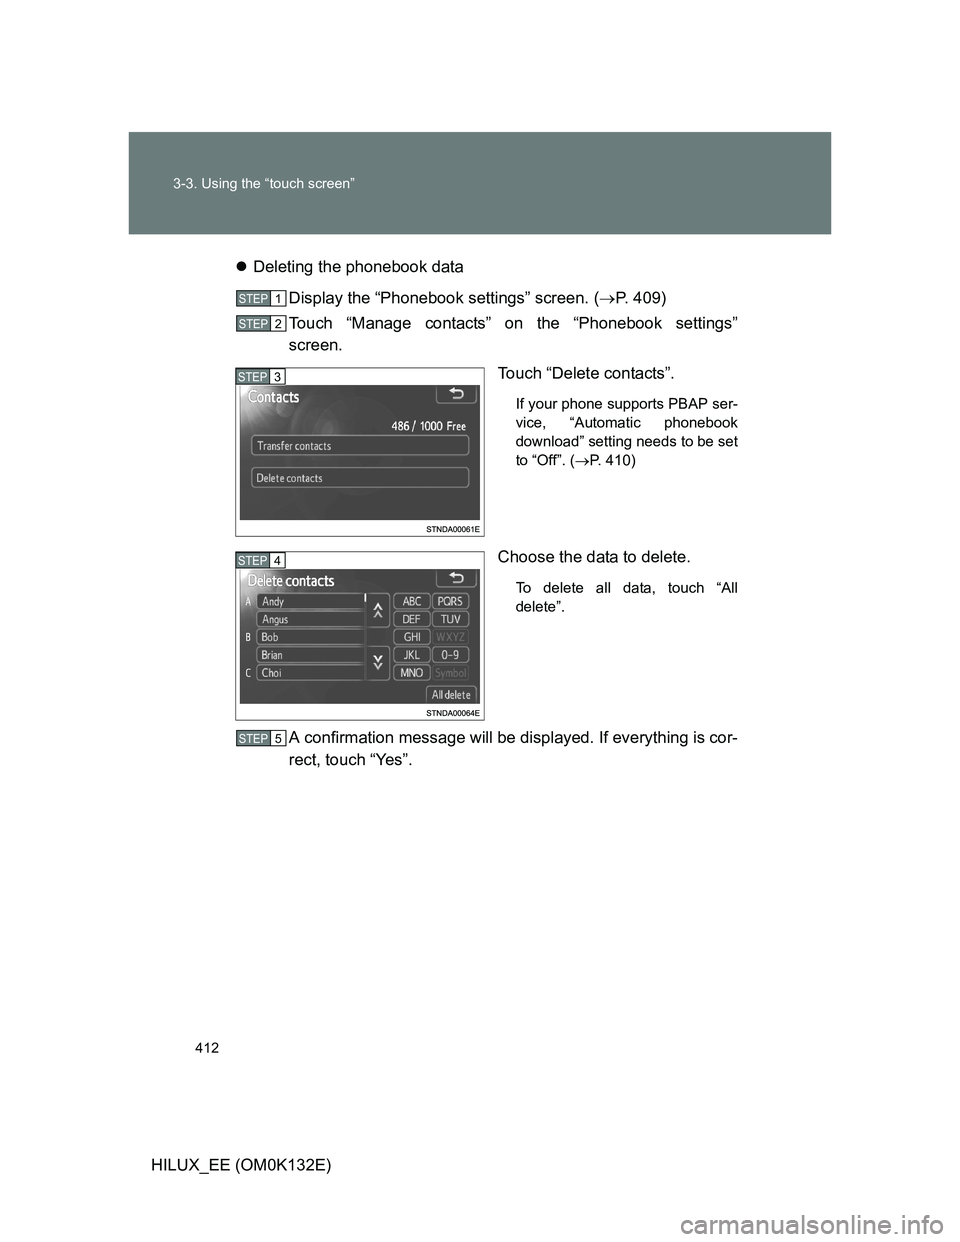
HILUX_EE (OM0K132E)Deleting the phonebook data
Display the “Phonebook settings” screen. (P. 409)
Touch “Manage contacts” on the “Phonebook settings”
screen.
Touch “Delete contacts”.
If your phone supports PBAP ser-
vice, “Automatic phonebook
download” setting needs to be set
to “Off”. (P. 410)
Choose the data to delete.
To delete all data, touch “All
delete”.
A confirmation message will be displayed. If everything is cor-
rect, touch “Yes”.
STEP1
STEP2
STEP3
STEP4
STEP5
Page 413 of 636
413 3-3. Using the “touch screen”
3
Interior features
HILUX_EE (OM0K132E)
Phonebook data
Phonebook data is managed for every registered phone. When another
phone is connecting, you cannot read the registered data.
Setting the phonebook in a different way (To display the “Contacts”
screen)
Display the “Telephone” screen. (P. 390)
Touch “Contacts” on the “Telephone” screen.
Touch “Options” on the “Contacts” screen.
Touch “Manage contacts” on the “Phonebook settings” screen.
When transferring a phone number
Transfer the phone number while engine is running.
If your cellular phone is OPP or PBAP compatible, you may need to input
“1234” by your cellular phone for OBEX certification.
When you have selected “Update phonebook” to transfer the phone
number
If your cellular phone does not support PBAP service, you cannot use
this function.
If your phone supports PBAP service, you can transfer the phonebook
data without operating your phone.
When you have selected “Replace contacts” or “Add contacts” to
transfer the phone number
If your cellular phone does not support OPP service, you cannot use these
functions. You can transfer the phonebook data only by operating your
phone.
STEP1
STEP3
STEP3
STEP4
Page 414 of 636
414 3-3. Using the “touch screen”
HILUX_EE (OM0K132E)
Transferring the phone number in a different way (To display the
“Contact transfer method” screen)
Display the “Telephone” screen. (P. 390)
Touch “Contacts” on the “Telephone” screen.
Touch “Transfer” on the “Contacts” screen.
Transferring the phone number while Bluetooth
audio is playing
Bluetooth
audio will disconnect. It will reconnect automatically when data
transfer finishes. It will not be reconnected depending on the phone you are
using.
Deleting the phonebook data in a different way
Display the “Telephone” screen. (P. 390)
Touch “Contacts” on the “Telephone” screen.
Choose the desired data from the list.
Touch “Options” on the “Contact” screen.
Touch “Delete” on the “Contact data” screen.
A confirmation message will be displayed. If everything is correct,
touch “Yes”.
If your phone supports PBAP service, “Automatic phonebook download” set-
ting needs to be set to “Off”. (P. 410)
When you delete a Bluetooth
phone, the phonebook data will be deleted at
the same time.
STEP1
STEP2
STEP3
STEP1
STEP2
STEP3
STEP4
STEP5
STEP6
Page 415 of 636
415 3-3. Using the “touch screen”
3
Interior features
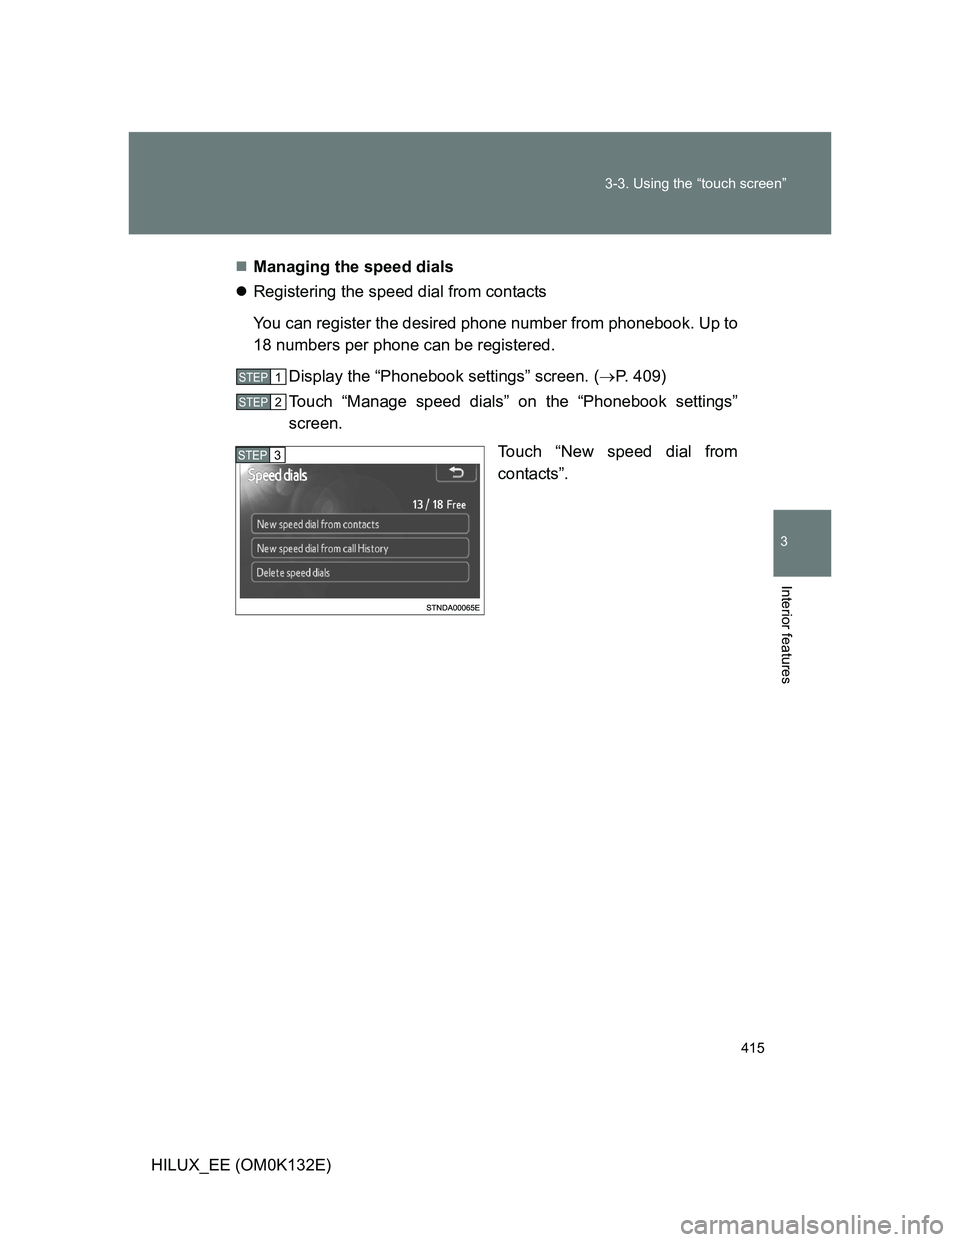
HILUX_EE (OM0K132E)Managing the speed dials
Registering the speed dial from contacts
You can register the desired phone number from phonebook. Up to
18 numbers per phone can be registered.
Display the “Phonebook settings” screen. (P. 409)
Touch “Manage speed dials” on the “Phonebook settings”
screen.
Touch “New speed dial from
contacts”.
STEP1
STEP2
STEP3
Page 416 of 636
416 3-3. Using the “touch screen”
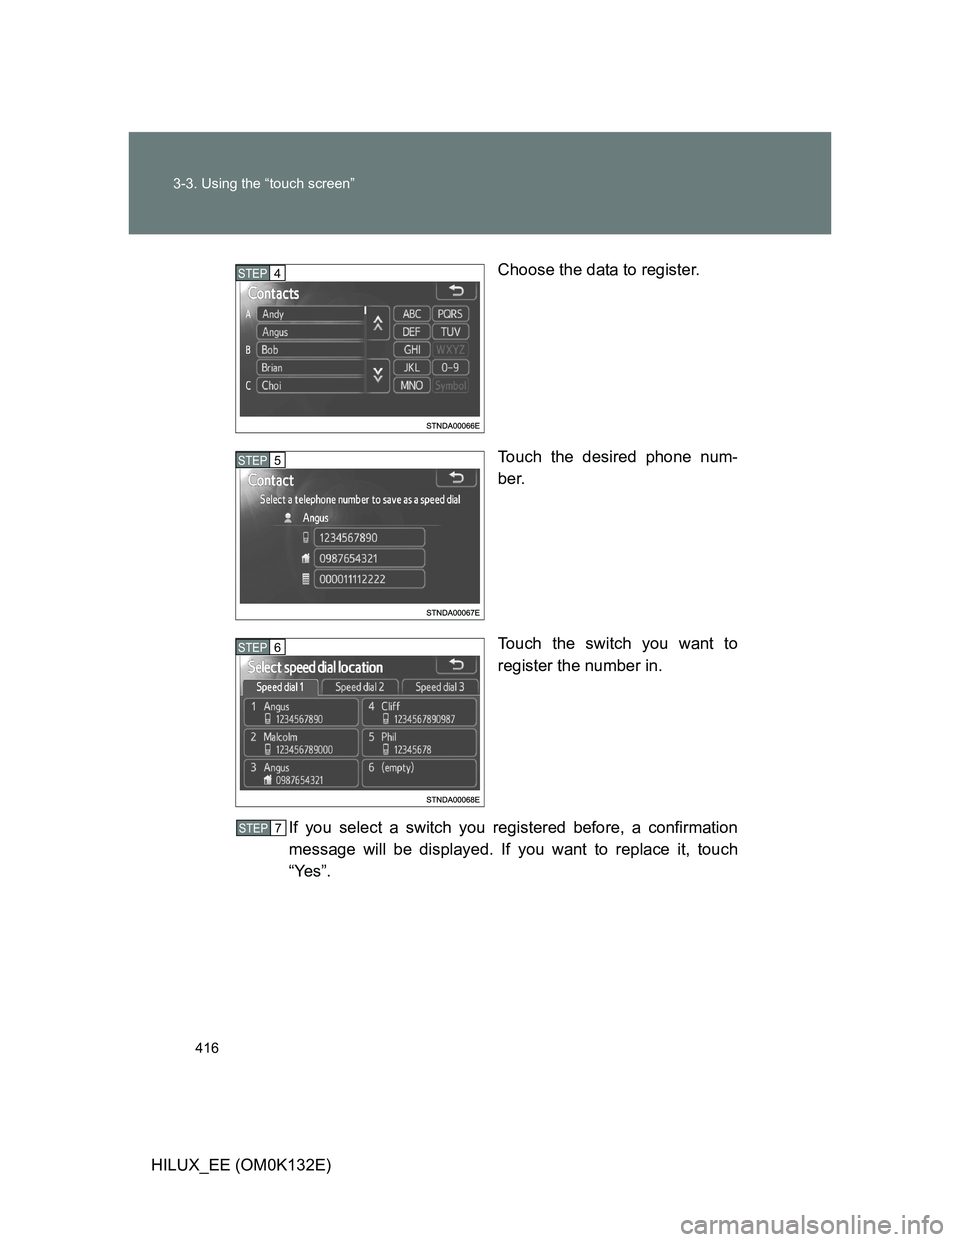
HILUX_EE (OM0K132E)Choose the data to register.
Touch the desired phone num-
ber.
Touch the switch you want to
register the number in.
If you select a switch you registered before, a confirmation
message will be displayed. If you want to replace it, touch
“Yes”.
STEP4
STEP5
STEP6
STEP7
Page 417 of 636
417 3-3. Using the “touch screen”
3
Interior features
HILUX_EE (OM0K132E)Registering the speed dial from call history
Display the “Phonebook settings” screen. (P. 409)
Touch “Manage speed dials” on the “Phonebook settings”
screen.
Touch “New speed dial from call
History”.
Choose the data to register.
STEP1
STEP2
STEP3
STEP4
Page 418 of 636
418 3-3. Using the “touch screen”
HILUX_EE (OM0K132E)Touch the switch you want to
register the number in.
If you select a switch you registered before, a confirmation
message will be displayed. If you want to replace it, touch
“Yes”.
Deleting the speed dial
Display the “Phonebook settings” screen. (P. 409)
Touch “Manage speed dials” on the “Phonebook settings”
screen.
Touch “Delete speed dials” on the “Speed dials” screen.
Choose the data to delete.
To delete all data, touch “All
delete”.
A confirmation message will be displayed. If everything is cor-
rect, touch “Yes”.
STEP5
STEP6
STEP1
STEP2
STEP3
STEP4
STEP5
Page 419 of 636
419 3-3. Using the “touch screen”
3
Interior features
HILUX_EE (OM0K132E)
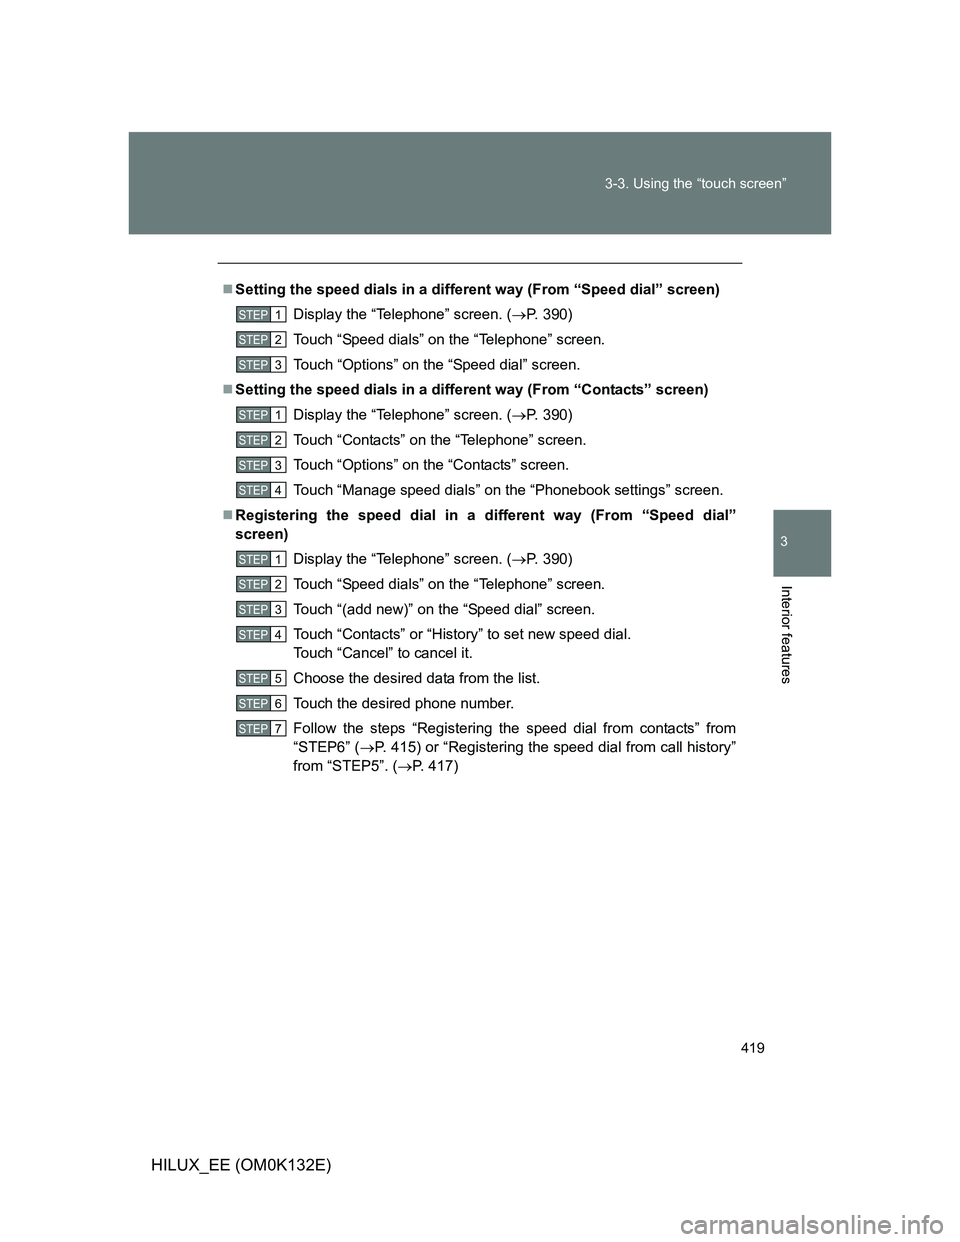
Setting the speed dials in a different way (From “Speed dial” screen)
Display the “Telephone” screen. (P. 390)
Touch “Speed dials” on the “Telephone” screen.
Touch “Options” on the “Speed dial” screen.
Setting the speed dials in a different way (From “Contacts” screen)
Display the “Telephone” screen. (P. 390)
Touch “Contacts” on the “Telephone” screen.
Touch “Options” on the “Contacts” screen.
Touch “Manage speed dials” on the “Phonebook settings” screen.
Registering the speed dial in a different way (From “Speed dial”
screen)
Display the “Telephone” screen. (P. 390)
Touch “Speed dials” on the “Telephone” screen.
Touch “(add new)” on the “Speed dial” screen.
Touch “Contacts” or “History” to set new speed dial.
Touch “Cancel” to cancel it.
Choose the desired data from the list.
Touch the desired phone number.
Follow the steps “Registering the speed dial from contacts” from
“STEP6” (P. 415) or “Registering the speed dial from call history”
from “STEP5”. (P. 417)
STEP1
STEP2
STEP3
STEP1
STEP2
STEP3
STEP4
STEP1
STEP2
STEP3
STEP4
STEP5
STEP6
STEP7
Page 420 of 636
420 3-3. Using the “touch screen”
HILUX_EE (OM0K132E)
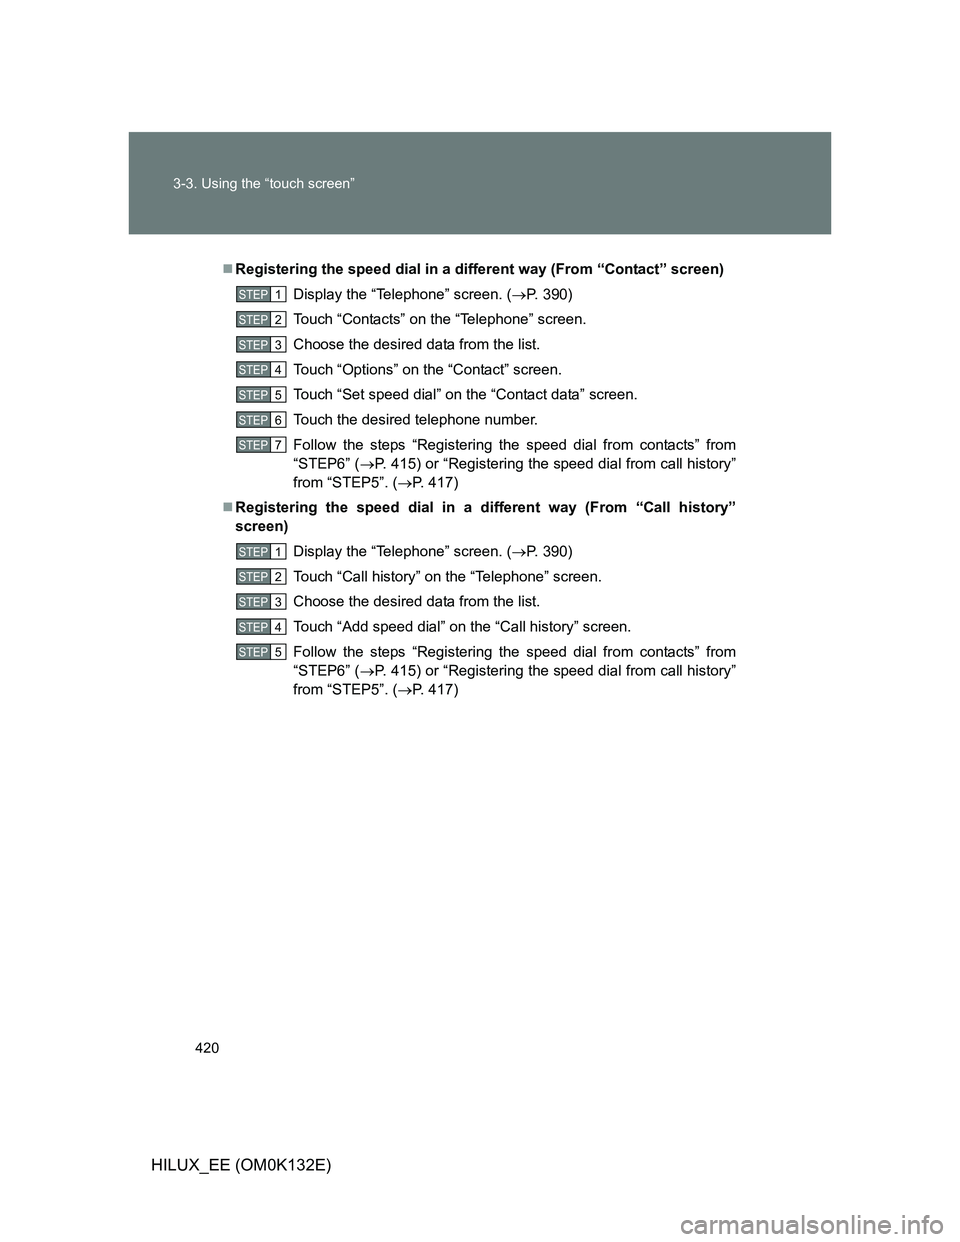
Registering the speed dial in a different way (From “Contact” screen)
Display the “Telephone” screen. (P. 390)
Touch “Contacts” on the “Telephone” screen.
Choose the desired data from the list.
Touch “Options” on the “Contact” screen.
Touch “Set speed dial” on the “Contact data” screen.
Touch the desired telephone number.
Follow the steps “Registering the speed dial from contacts” from
“STEP6” (P. 415) or “Registering the speed dial from call history”
from “STEP5”. (P. 417)
Registering the speed dial in a different way (From “Call history”
screen)
Display the “Telephone” screen. (P. 390)
Touch “Call history” on the “Telephone” screen.
Choose the desired data from the list.
Touch “Add speed dial” on the “Call history” screen.
Follow the steps “Registering the speed dial from contacts” from
“STEP6” (P. 415) or “Registering the speed dial from call history”
from “STEP5”. (P. 417)
STEP1
STEP2
STEP3
STEP4
STEP5
STEP6
STEP7
STEP1
STEP2
STEP3
STEP4
STEP5
Trending: tires, remote start, coolant capacity, fuel pressure, window, turn signal bulb, airbag disable
