power steering TOYOTA RAV4 HYBRID 2020 Owners Manual (in English)
[x] Cancel search | Manufacturer: TOYOTA, Model Year: 2020, Model line: RAV4 HYBRID, Model: TOYOTA RAV4 HYBRID 2020Pages: 744, PDF Size: 31.43 MB
Page 2 of 744
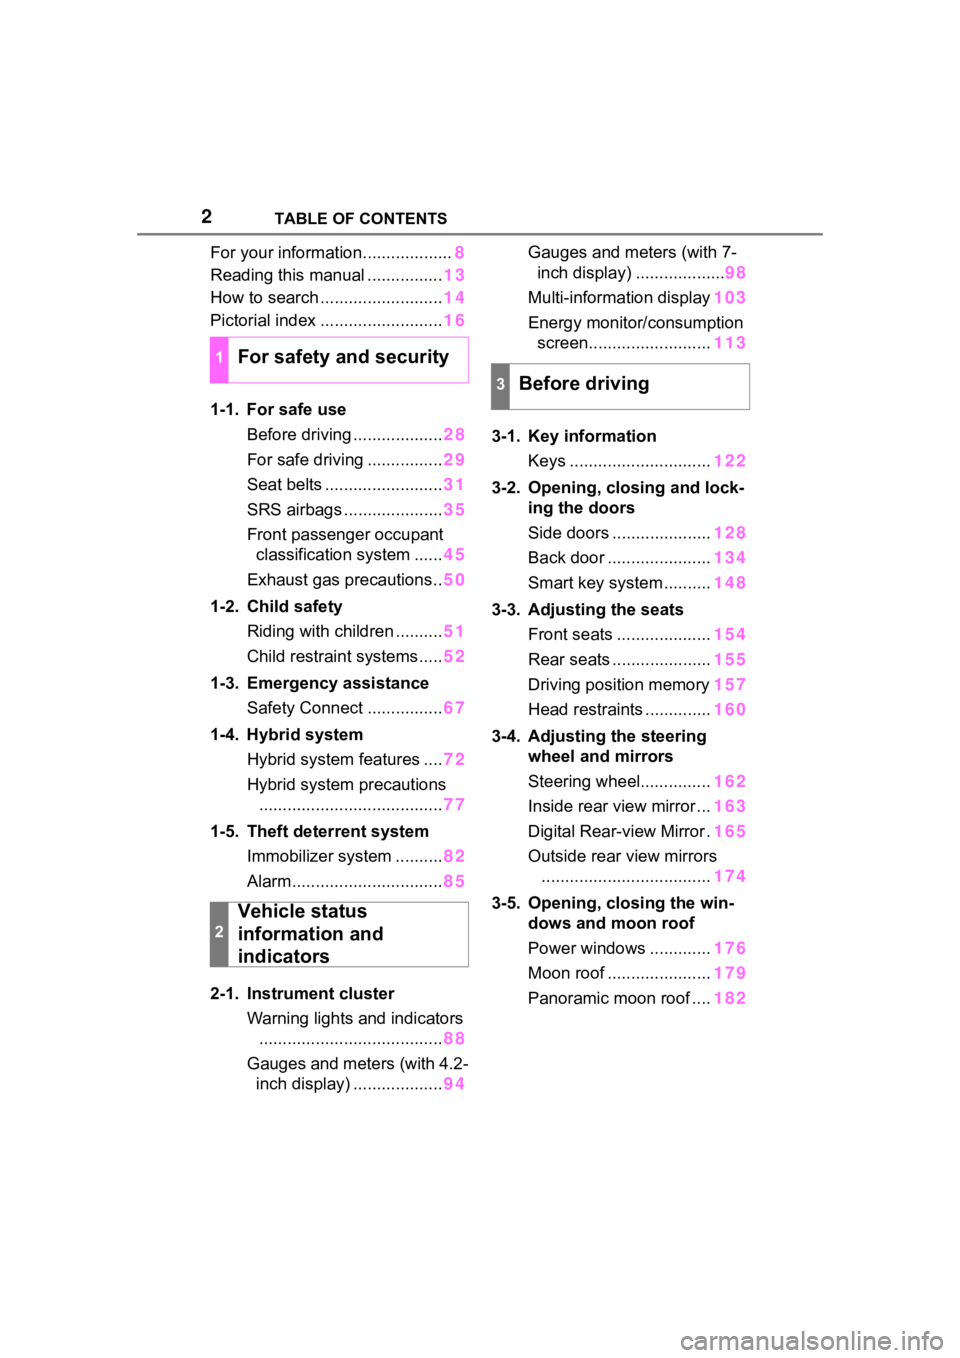
2TABLE OF CONTENTS
For your information...................8
Reading this manual ................ 13
How to search .......................... 14
Pictorial index .......................... 16
1-1. For safe use Before driving ................... 28
For safe driving ................ 29
Seat belts ......................... 31
SRS airbags ..................... 35
Front passenger occupant classification system ...... 45
Exhaust gas precautions.. 50
1-2. Child safety Riding with children .......... 51
Child restraint systems..... 52
1-3. Emergency assistance Safety Connect ................ 67
1-4. Hybrid system Hybrid system features .... 72
Hybrid system precautions ....................................... 77
1-5. Theft deterrent system Immobilizer system .......... 82
Alarm................................ 85
2-1. Instrument cluster Warning lights and indicators....................................... 88
Gauges and meters (with 4.2- inch display) ................... 94Gauges and meters (with 7-
inch display) ................... 98
Multi-information display 103
Energy monitor/ consumption
screen.......................... 113
3-1. Key information Keys .............................. 122
3-2. Opening, closing and lock- ing the doors
Side doors ..................... 128
Back door ...................... 134
Smart key system .......... 148
3-3. Adjusting the seats Front seats .................... 154
Rear seats ..................... 155
Driving position memory 157
Head restraints .............. 160
3-4. Adjusting the steering wheel and mirrors
Steering wheel............... 162
Inside rear view mirror ... 163
Digital Rear-view Mirror . 165
Outside rear view mirrors .................................... 174
3-5. Opening, closing the win- dows and moon roof
Power windows ............. 176
Moon roof ...................... 179
Panoramic moon roof .... 182
1For safety and security
2
Vehicle status
information and
indicators
3Before driving
Page 21 of 744
21Pictorial index
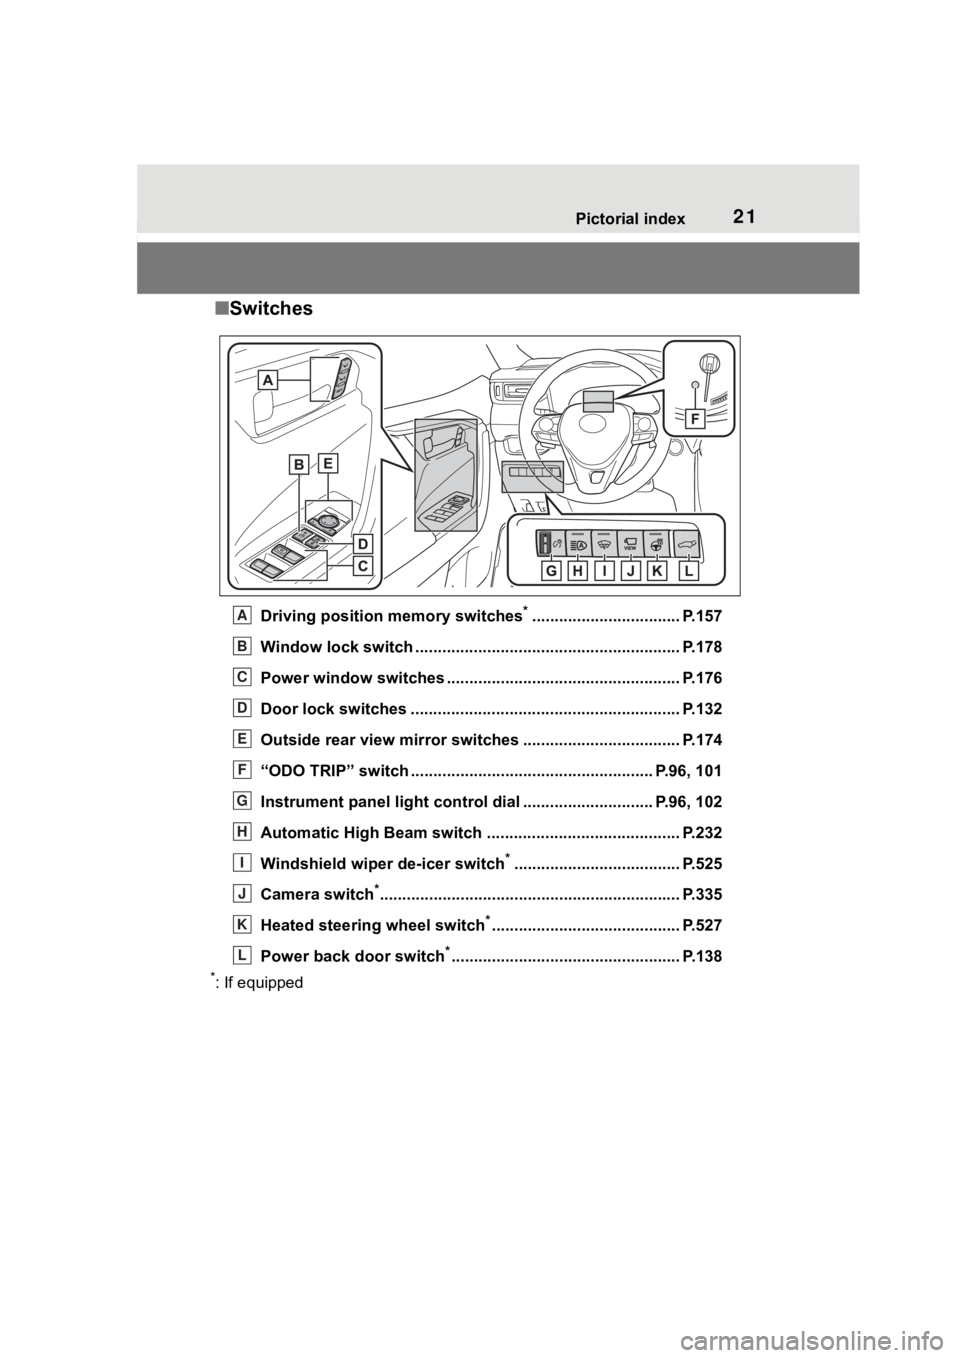
■Switches
Driving position memory switches*................................. P.157
Window lock switch ............................................. .............. P.178
Power window switches ....... ............................................. P.176
Door lock switches ............................................................ P.132
Outside rear view mirror swi tches ................................... P.174
“ODO TRIP” switch .............................................. ........ P.96, 101
Instrument panel light cont rol dial ............................. P.96, 102
Automatic High Beam switch ..................................... ...... P.232
Windshield wiper de-icer switch
*..................................... P.525
Camera switch
*............................................................... .... P.335
Heated steering wheel switch
*.......................................... P.527
Power back door switch
*................................................... P.138
*: If equipped
A
B
C
D
E
F
G
H
I
J
K
L
Page 104 of 744
1042-1. Instrument cluster
■The multi-information display is
displayed when
The power swit ch is in ON.
■When changing driving mode
Background color of the multi-infor-
mation display is changed following
the selected drivi ng mode or when
Trail Mode is turned on. ( P.365,
366)
■Liquid crystal display
Small spots or light spots may
appear on the display. This phenom-
enon is characteristi c of liquid crys-
tal displays, and there is no problem
continuing to use the display.
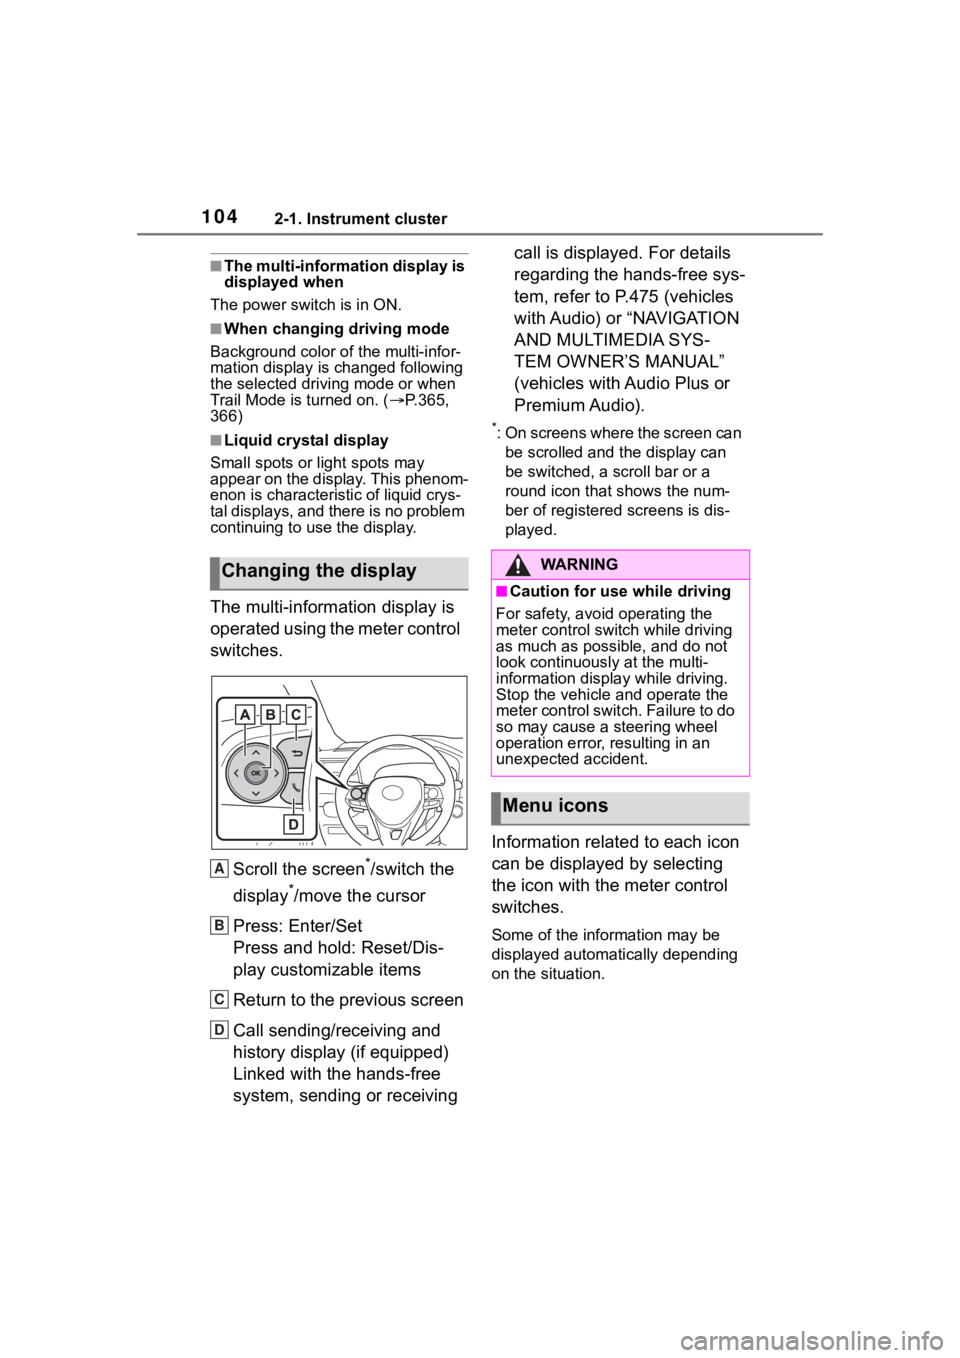
The multi-information display is
operated using the meter control
switches.
Scroll the screen
*/switch the
display
*/move the cursor
Press: Enter/Set
Press and hold: Reset/Dis-
play customizable items
Return to the previous screen
Call sending/receiving and
history display (if equipped)
Linked with the hands-free
system, sending or receiving call is displayed. For details
regarding the hands-free sys-
tem, refer to P.475 (vehicles
with Audio) or “NAVIGATION
AND MULTIMEDIA SYS-
TEM OWNER’S MANUAL”
(vehicles with Audio Plus or
Premium Audio).
*: On screens where the screen can
be scrolled and the display can
be switched, a scroll bar or a
round icon that shows the num-
ber of registered screens is dis-
played.
Information related to each icon
can be displayed by selecting
the icon with the meter control
switches.
Some of the information may be
displayed automatically depending
on the situation.
Changing the display
A
B
C
D
�:�$ �5 �1 �, �1 �*
■Caution for use while driving
For safety, avoid operating the
meter control switch while driving
as much as possible, and do not
look continuously at the multi-
information displa y while driving.
Stop the vehicle and operate the
meter control swit ch. Failure to do
so may cause a steering wheel
operation error, resulting in an
unexpected accident.
Menu icons
Page 116 of 744
1162-1. Instrument cluster
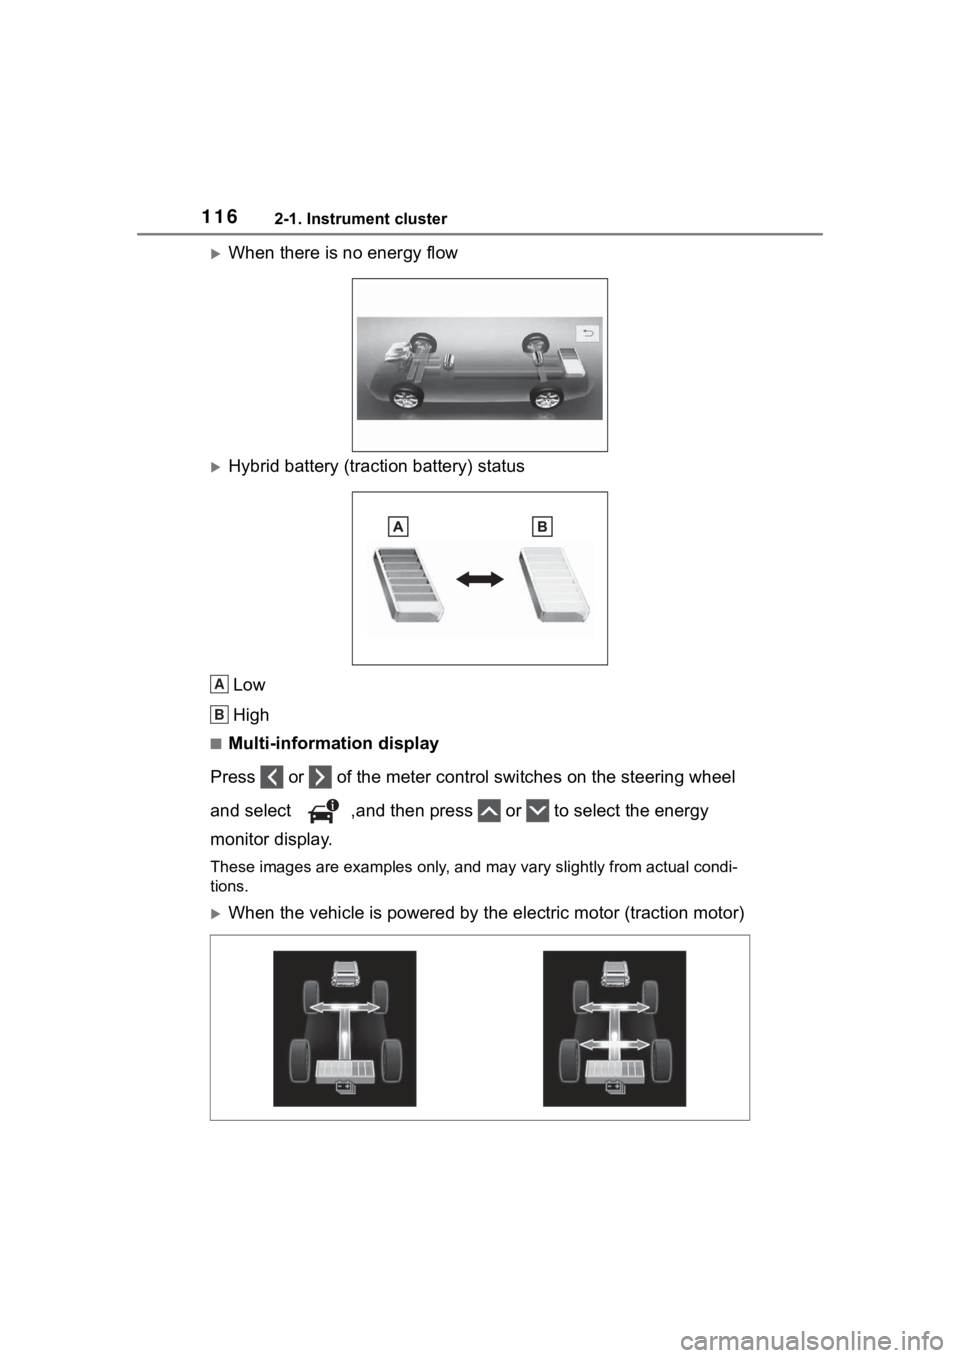
When there is no energy flow
Hybrid battery (traction battery) statusLow
High
■Multi-information display
Press or of the meter control switches on the steering wheel
and select ,and then press or to select the energy
monitor display.
These images are examples only, and may vary slightly from actual condi-
tions.
When the vehicle is powered by the electric motor (traction motor)
A
B
Page 121 of 744
121
3
3
Before driving
Before driving
3-1. Key informationKeys ............................ 122
3-2. Opening, closing and locking the doors
Side doors ................... 128
Back door .................... 134
Smart key system ....... 148
3-3. Adjusting the seats Front seats .................. 154
Rear seats................... 155
Driving position memory .................................. 157
Head restraints............ 160
3-4. Adjusting the steering wheel and mirrors
Steering wheel ............ 162
Inside rear view mirror 163
Digital Rear-view Mirror 165
Outside rear view mirrors .................................. 174
3-5. Opening, closing the win- dows and moon roof
Power windows ........... 176
Moon roof .................... 179
Panoramic moon roof.. 182
Page 158 of 744
1583-3. Adjusting the seats
ten.
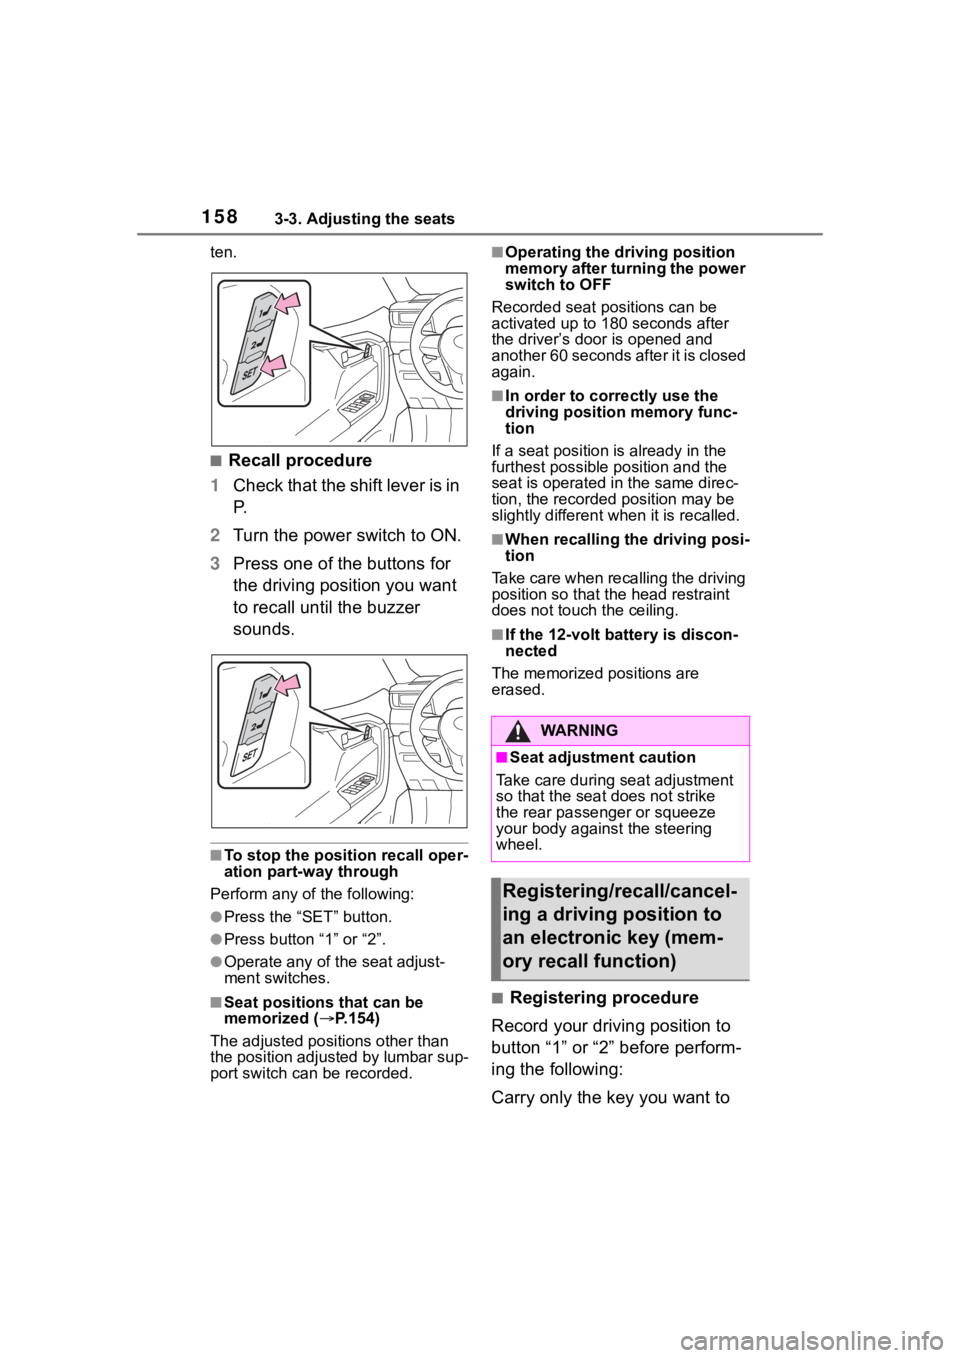
■Recall procedure
1 Check that the shift lever is in
P.
2 Turn the power switch to ON.
3 Press one of the buttons for
the driving position you want
to recall until the buzzer
sounds.
■To stop the position recall oper-
ation part-way through
Perform any of the following:
●Press the “SET” button.
●Press button “1” or “2”.
●Operate any of the seat adjust-
ment switches.
■Seat positions that can be
memorized ( P.154)
The adjusted positions other than
the position adjusted by lumbar sup-
port switch can be recorded.
■Operating the driving position
memory after turning the power
switch to OFF
Recorded seat positions can be
activated up to 180 seconds after
the driver’s door is opened and
another 60 seconds after it is closed
again.
■In order to corre ctly use the
driving position memory func-
tion
If a seat position is already in the
furthest possible position and the
seat is operated in the same direc-
tion, the recorded position may be
slightly different w hen it is recalled.
■When recalling the driving posi-
tion
Take care when recalling the driving
position so that the head restraint
does not touch the ceiling.
■If the 12-volt b attery is discon-
nected
The memorized positions are
erased.
■Registering procedure
Record your driving position to
button “1” or “2” before perform-
ing the following:
Carry only the key you want to
WA R N I N G
■Seat adjustment caution
Take care during seat adjustment
so that the seat does not strike
the rear passenger or squeeze
your body against the steering
wheel.
Registering/recall/cancel-
ing a driving position to
an electronic key (mem-
ory recall function)
Page 163 of 744
1633-4. Adjusting the steering wheel and mirrors
3
Before driving
*: If equipped
The height of the rear view mir-
ror can be adjusted to suit your
driving posture.
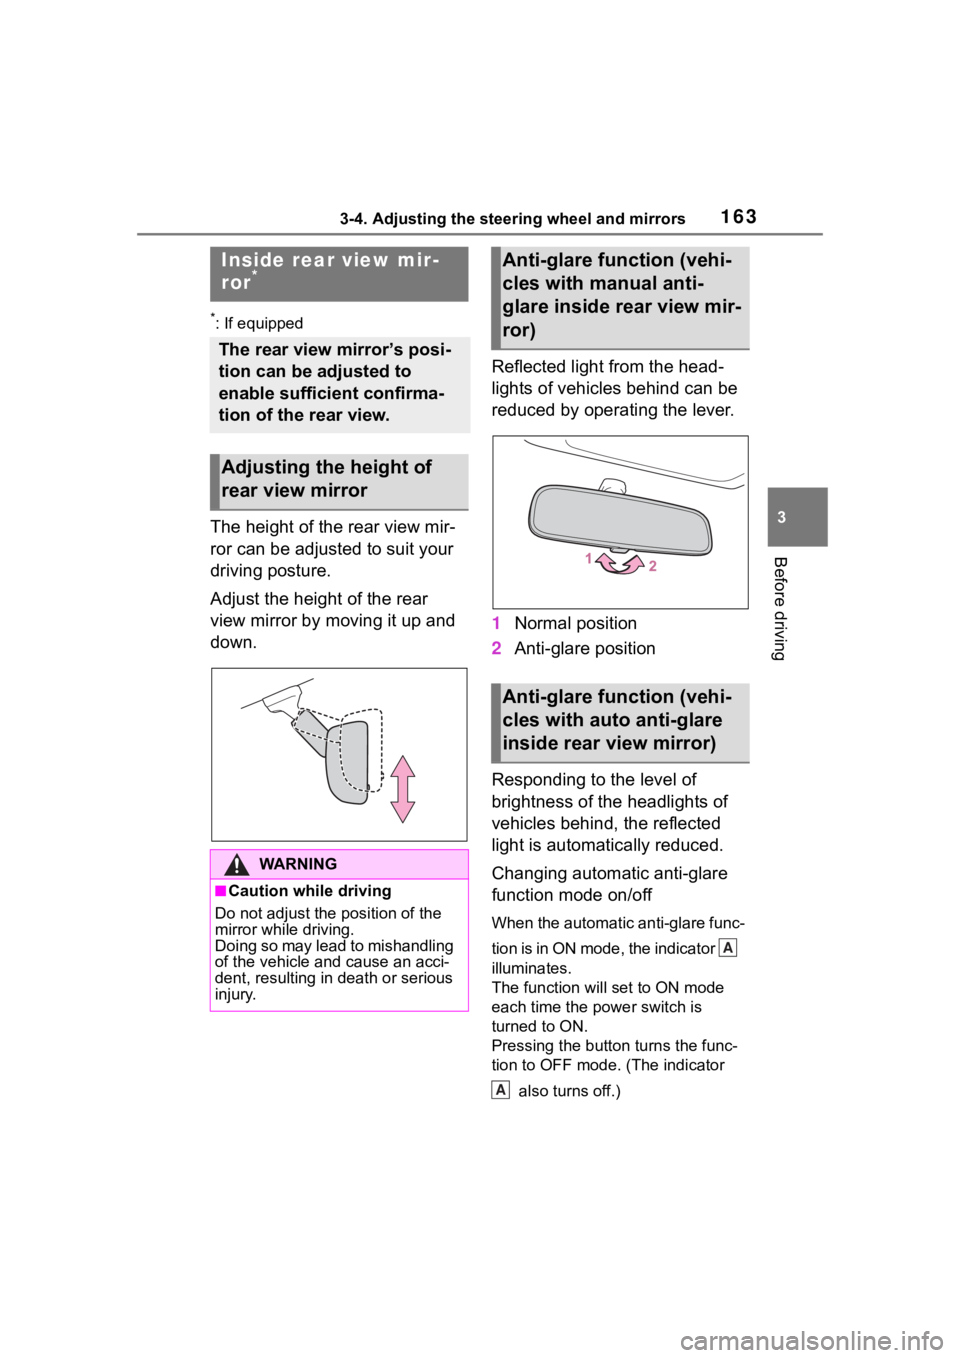
Adjust the height of the rear
view mirror by moving it up and
down.Reflected light from the head-
lights of vehicles behind can be
reduced by operating the lever.
1
Normal position
2 Anti-glare position
Responding to the level of
brightness of the headlights of
vehicles behind, the reflected
light is automatically reduced.
Changing automatic anti-glare
function mode on/off
When the automatic anti-glare func-
tion is in ON mode, the indicator
illuminates.
The function will set to ON mode
each time the power switch is
turned to ON.
Pressing the button turns the func-
tion to OFF mode. (The indicator also turns off.)
Inside rear view mir-
ror*
The rear view mirror’s posi-
tion can be adjusted to
enable sufficient confirma-
tion of the rear view.
Adjusting the height of
rear view mirror
WA R N I N G
■Caution while driving
Do not adjust the position of the
mirror while driving.
Doing so may lead to mishandling
of the vehicle and cause an acci-
dent, resulting in death or serious
injury.
Anti-glare function (vehi-
cles with manual anti-
glare inside rear view mir-
ror)
Anti-glare function (vehi-
cles with auto anti-glare
inside rear view mirror)
A
A
Page 166 of 744
1663-4. Adjusting the steering wheel and mirrors
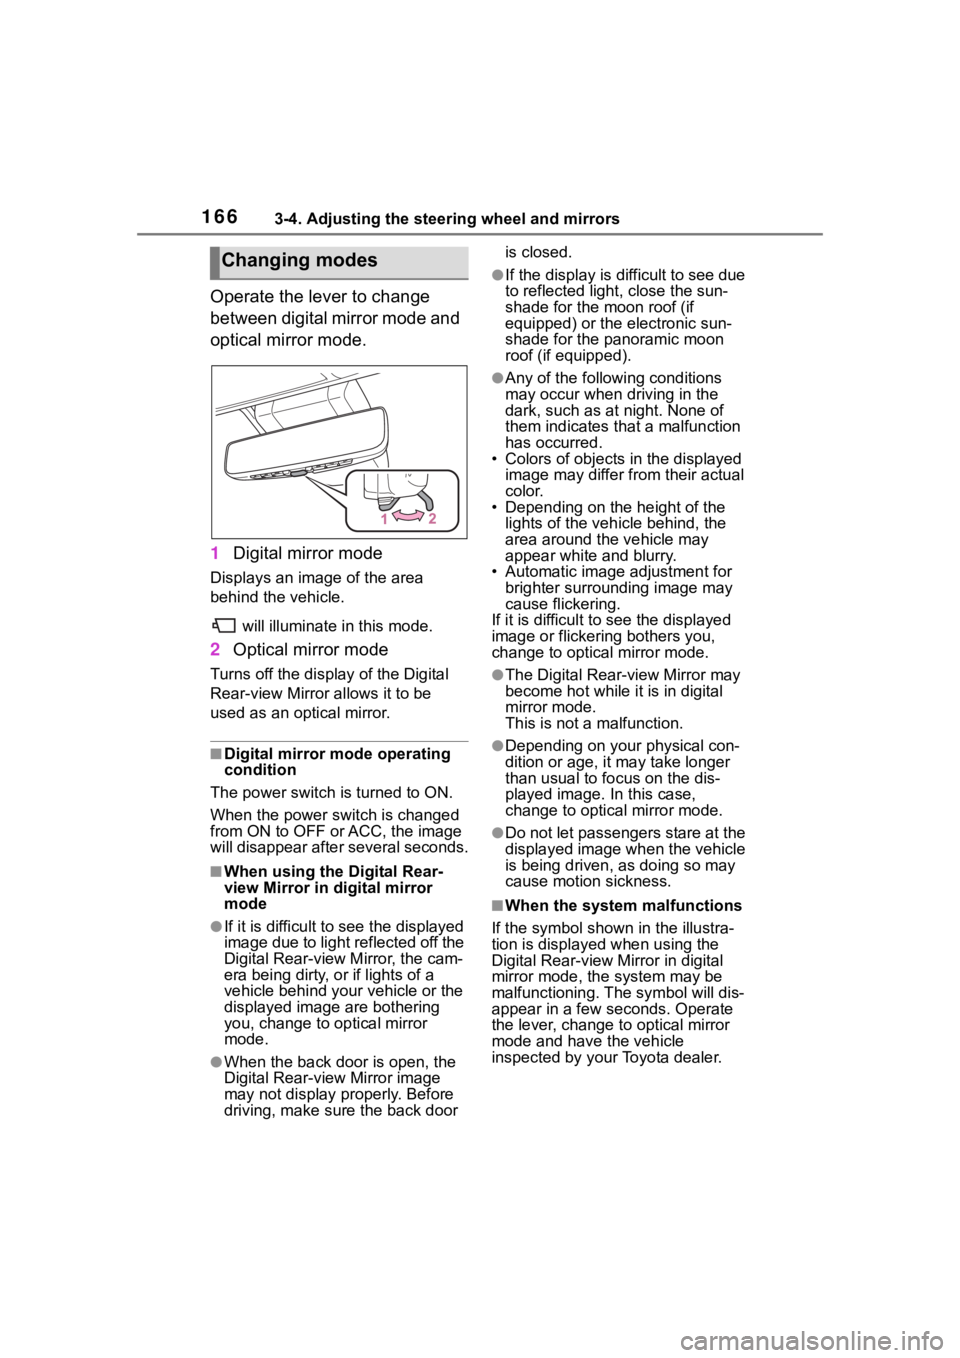
Operate the lever to change
between digital mirror mode and
optical mirror mode.
1Digital mirror mode
Displays an image of the area
behind the vehicle.
will illuminate in this mode.
2Optical mirror mode
Turns off the display of the Digital
Rear-view Mirror allows it to be
used as an optical mirror.
■Digital mirror mode operating
condition
The power switch is turned to ON.
When the power switch is changed
from ON to OFF or ACC, the image
will disappear afte r several seconds.
■When using the Digital Rear-
view Mirror in digital mirror
mode
●If it is difficult to see the displayed
image due to light reflected off the
Digital Rear-view M irror, the cam-
era being dirty, or if lights of a
vehicle behind your vehicle or the
displayed image are bothering
you, change to optical mirror
mode.
●When the back door is open, the
Digital Rear-view Mirror image
may not display properly. Before
driving, make sure the back door is closed.
●If the display is difficult to see due
to reflected light
, close the sun-
shade for the moon roof (if
equipped) or the electronic sun-
shade for the panoramic moon
roof (if equipped).
●Any of the following conditions
may occur when driving in the
dark, such as at night. None of
them indicates that a malfunction
has occurred.
• Colors of objects in the displayed
image may differ from their actual
color.
• Depending on the height of the
lights of the vehicle behind, the
area around the vehicle may
appear white and blurry.
• Automatic image adjustment for brighter surrounding image may
cause flickering.
If it is difficult to see the displayed
image or flickering bothers you,
change to optical mirror mode.
●The Digital Rear-view Mirror may
become hot while it is in digital
mirror mode.
This is not a malfunction.
●Depending on your physical con-
dition or age, it may take longer
than usual to fo cus on the dis-
played image. In this case,
change to optical mirror mode.
●Do not let passengers stare at the
displayed image when the vehicle
is being driven, as doing so may
cause motion sickness.
■When the system malfunctions
If the symbol shown in the illustra-
tion is displayed when using the
Digital Rear-view Mirror in digital
mirror mode, the system may be
malfunctioning. The symbol will dis-
appear in a few seconds. Operate
the lever, change to optical mirror
mode and have the vehicle
inspected by your Toyota dealer.
Changing modes
Page 168 of 744
1683-4. Adjusting the steering wheel and mirrors
*: This is a function for the optical
mirror mode, however, the setting
can also be changed while using
the digital mirror mode.
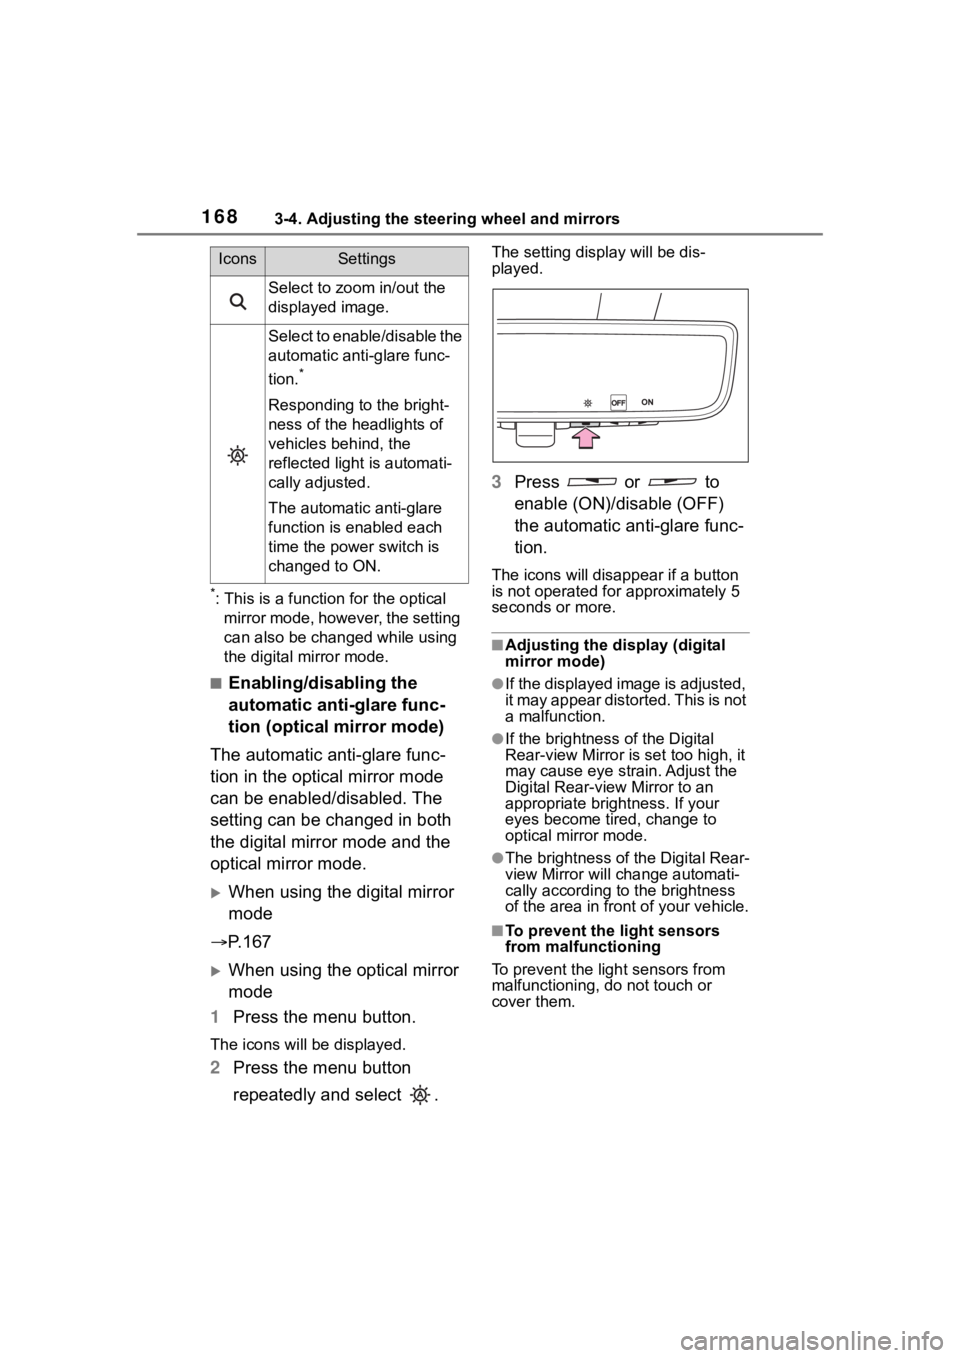
■Enabling/disabling the
automatic anti-glare func-
tion (optical mirror mode)
The automatic anti-glare func-
tion in the optical mirror mode
can be enabled/disabled. The
setting can be changed in both
the digital mirror mode and the
optical mirror mode.
When using the digital mirror
mode
P. 1 6 7
When using the optical mirror
mode
1 Press the menu button.
The icons will be displayed.
2Press the menu button
repeatedly and select .
The setting display will be dis-
played.
3Press or to
enable (ON)/disable (OFF)
the automatic anti-glare func-
tion.
The icons will disappear if a button
is not operated fo r approximately 5
seconds or more.
■Adjusting the display (digital
mirror mode)
●If the displayed image is adjusted,
it may appear distorted. This is not
a malfunction.
●If the brightness of the Digital
Rear-view Mirror is set too high, it
may cause eye strain. Adjust the
Digital Rear-view Mirror to an
appropriate brightness. If your
eyes become tired, change to
optical mirror mode.
●The brightness of the Digital Rear-
view Mirror will change automati-
cally according to the brightness
of the area in front of your vehicle.
■To prevent the light sensors
from malfunctioning
To prevent the light sensors from
malfunctioning, do not touch or
cover them.
Select to zoom in/out the
displayed image.
Select to enable/disable the
automatic anti-glare func-
tion.
*
Responding to the bright-
ness of the headlights of
vehicles behind, the
reflected light is automati-
cally adjusted.
The automatic anti-glare
function is enabled each
time the power switch is
changed to ON.
IconsSettings
Page 171 of 744
1713-4. Adjusting the steering wheel and mirrors
3
Before driving
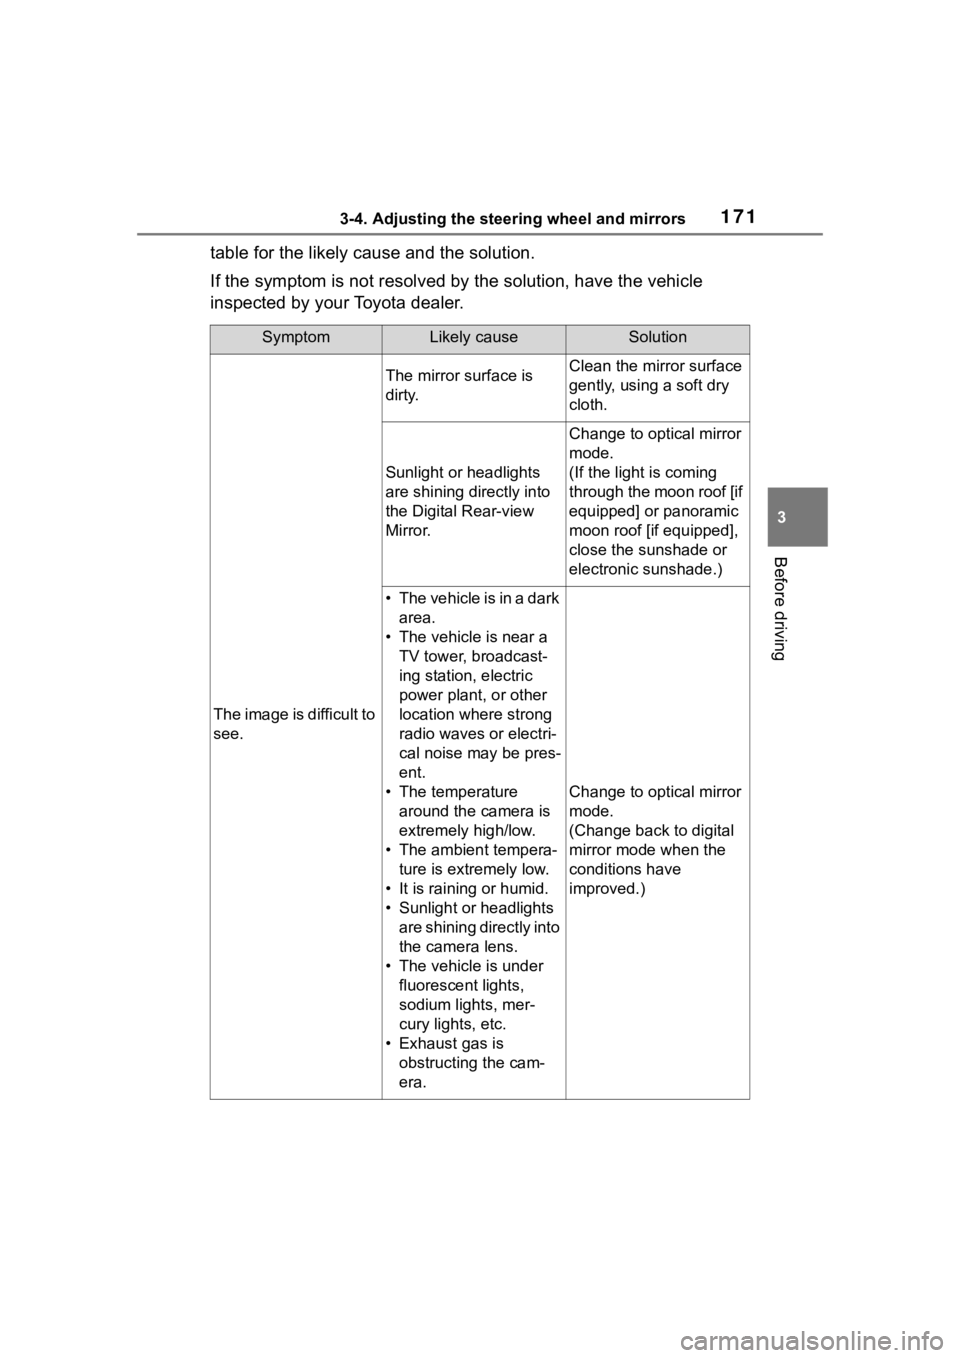
table for the likely cause and the solution.
If the symptom is not resolved by the solution, have the vehicle
inspected by your Toyota dealer.
SymptomLikely causeSolution
The image is difficult to
see.
The mirror surface is
dirty.Clean the mirror surface
gently, using a soft dry
cloth.
Sunlight or headlights
are shining directly into
the Digital Rear-view
Mirror.
Change to optical mirror
mode.
(If the light is coming
through the moon roof [if
equipped] or panoramic
moon roof [if equipped],
close the sunshade or
electronic sunshade.)
• T h e v e h i c l e i s i n a d a r k area.
• The vehicle is near a TV tower, broadcast-
ing station, electric
power plant, or other
location where strong
radio waves or electri-
cal noise may be pres-
ent.
• The temperature around the camera is
extremely high/low.
• The ambient tempera- ture is extremely low.
• It is raining or humid.
• Sunlight or headlights are shining directly into
the camera lens.
• The vehicle is under fluorescent lights,
sodium lights, mer-
cury lights, etc.
• Exhaust gas is obstructing the cam-
era.
Change to optical mirror
mode.
(Change back to digital
mirror mode when the
conditions have
improved.)