stop start TOYOTA RAV4 PLUG-IN HYBRID 2021 Repair Manual
[x] Cancel search | Manufacturer: TOYOTA, Model Year: 2021, Model line: RAV4 PLUG-IN HYBRID, Model: TOYOTA RAV4 PLUG-IN HYBRID 2021Pages: 666, PDF Size: 161.28 MB
Page 460 of 666
4586-1. Using the air conditioning system and defogger
tributing to increased fuel effi-
ciency.
Front seat concentrated airflow
mode operates in t he following situ-
ations.
No passengers are detected in
the rear seats
The windshield defogger is not
operating
While operating, illuminates.
■Manually turning front seat
concentrated airflow mode
on/off
In front seat conc entrated airflow
mode, directing airflow to the front
seats only and to all seats can be
switched via swi tch operation.
When the mode has been switched
manually, automati c airflow control
stops operating.
Press the on the air condition -
ing operation panel and switch the
airflow.
Indicator illuminated: Airflow to
the front seats only
Indicator off: Airflow to all the
seats
■Operation of automatic airflow con -
trol
●In order to maintain a comfortable
interior, airflow may be directed to seats without passengers immediately
after the hybrid syst em is started and
at other times depending on the out -
side temperature.
●After the hybrid system is started, if
passengers move around inside or
enter/exit the vehicle, the system can - not accurately detec t the presence of
passengers and au tomatic airflow
control will not operate.
■Operation of manual airflow control
Even if the function is manually switched
to directing airflow to only the front
seats, when a rear seat is occupied, it may automatically di rect airflow to all
seats.
■To return to automatic airflow con -
trol
1 With the indicator off, turn the power switch off.
2 After 60 minutes or more elapse,
turn the power switch to ON.
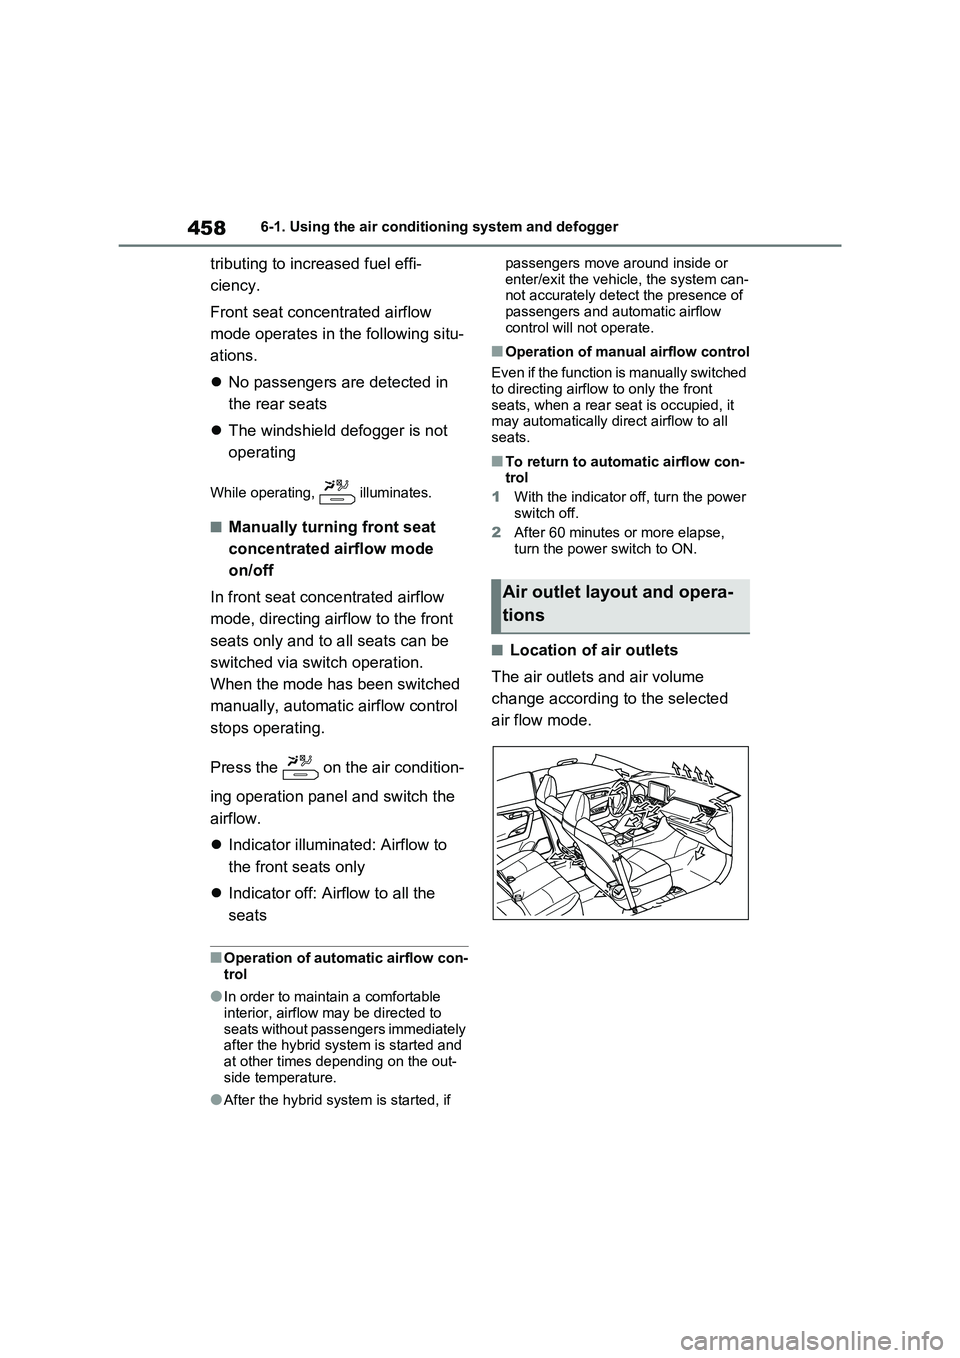
■Location of air outlets
The air outlets and air volume
change according to the selected
air flow mode.
Air outlet layout and opera -
tions
Page 482 of 666
4806-4. Using the other interior features
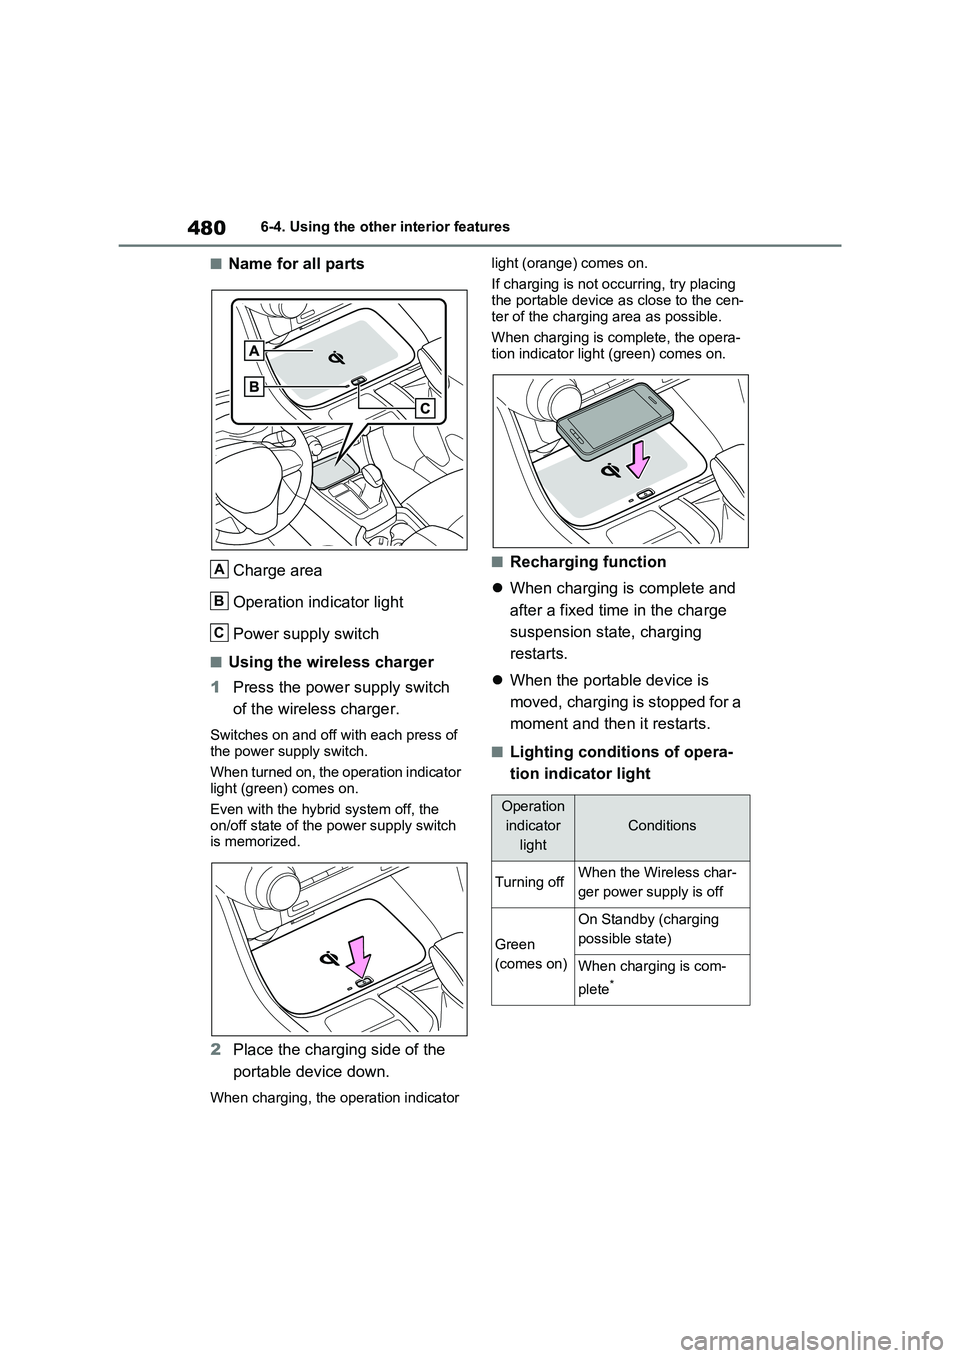
■Name for all parts
Charge area
Operation indicator light
Power supply switch
■Using the wireless charger
1 Press the power supply switch
of the wireless charger.
Switches on and off wi th each press of the power supply switch.
When turned on, the operation indicator
light (green) comes on.
Even with the hybr id system off, the
on/off state of the power supply switch
is memorized.
2 Place the charging side of the
portable device down.
When charging, the operation indicator
light (orange) comes on.
If charging is not occurring, try placing the portable device a s close to the cen-
ter of the charging area as possible.
When charging is complete, the opera - tion indicator light (green) comes on.
■Recharging function
When charging is complete and
after a fixed time in the charge
suspension state, charging
restarts.
When the portable device is
moved, charging is stopped for a
moment and then it restarts.
■Lighting conditions of opera -
tion indicator light
A
B
C
Operation
indicator
light
Conditions
Turning offWhen the Wireless char -
ger power supply is off
Green
(comes on)
On Standby (charging
possible state)
When charging is com -
plete*
Page 484 of 666
4826-4. Using the other interior features
• Repeatedly flashes 4 times con-
tinuously (Orange)
■The wireless charger can be oper -
ated when
The power switch is in ACC or ON.
■Usable portable devices
Qi standard wireless charge standard
can be used on compatible devices. However, not all Qi standard devices
and compatibility are guaranteed.
Starting with mobile phones and smartphones, it is aimed for low power
electrically supplie d portable devices of
no more than 5W.
■When covers and accessories are attached to portable devices
Do not charge in situations where cover
and accessories not able to handle Qi are attached to the portable device.
Depending on the type of cover and
accessory, it may n ot be possible to charge. When charging is not performed
even with the portable device placed on
the charge area, remove the cover and
accessories.
■While charging, noise enters the AM radio
Turn off the wireless charger and con -
firm that the noise has decreased. If the noise decreases, continuously pushing
the power supply switch of the wireless
charger for 2 seconds, the frequency of the charger can be changed and the
noise can be reduced.Also, on that
occasion, the operation indicator light will flash orange 2 times.
■Important points of the wireless
charger
●If the electronic key cannot be
detected withi n the vehicle interior,
charging cannot b e done. When the door is opened and closed, charging
may be temporarily suspended.
●When charging, the wireless charging
device and portable device will get
warmer, however this is not a mal - function.
When a portable device gets warm
while charging, c harging may stop due to the protecti on function on the
portable device side. In this case,
when the temperature of the portable device drops significantly, charge
again.
●Depending on usage of the portable
device, it may not be fully charged.
This is not a malfunction.
●When using a mobile phone near a
wireless charger, the call sensitivity and communication speed may be
reduced.
■Operation sounds
When the power supply is turned on, wh ile s e ar c hing fo r th e por t ab le de v ic e a
sound will be produced, however this is
not a malfunction.
■Cleaning the wireless charger
→ P.492
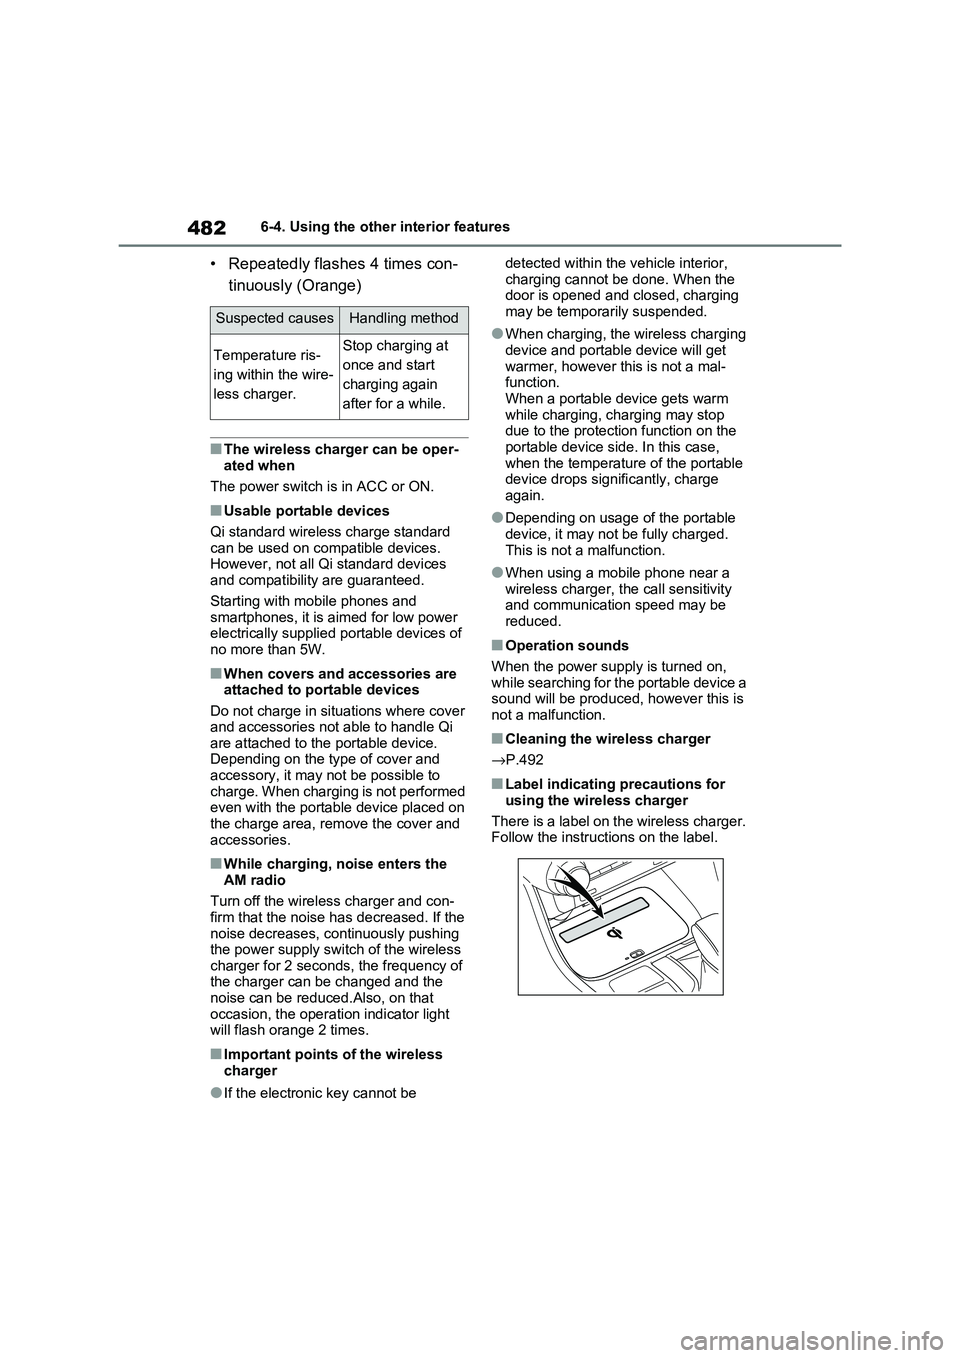
■Label indicating precautions for
using the wireless charger
There is a label on the wireless charger. Follow the instructions on the label.
Suspected causesHandling method
Temperature ris -
ing within the wire -
less charger.
Stop charging at
once and start
charging again
after for a while.
Page 540 of 666
5387-3. Do-it-yourself maintenance
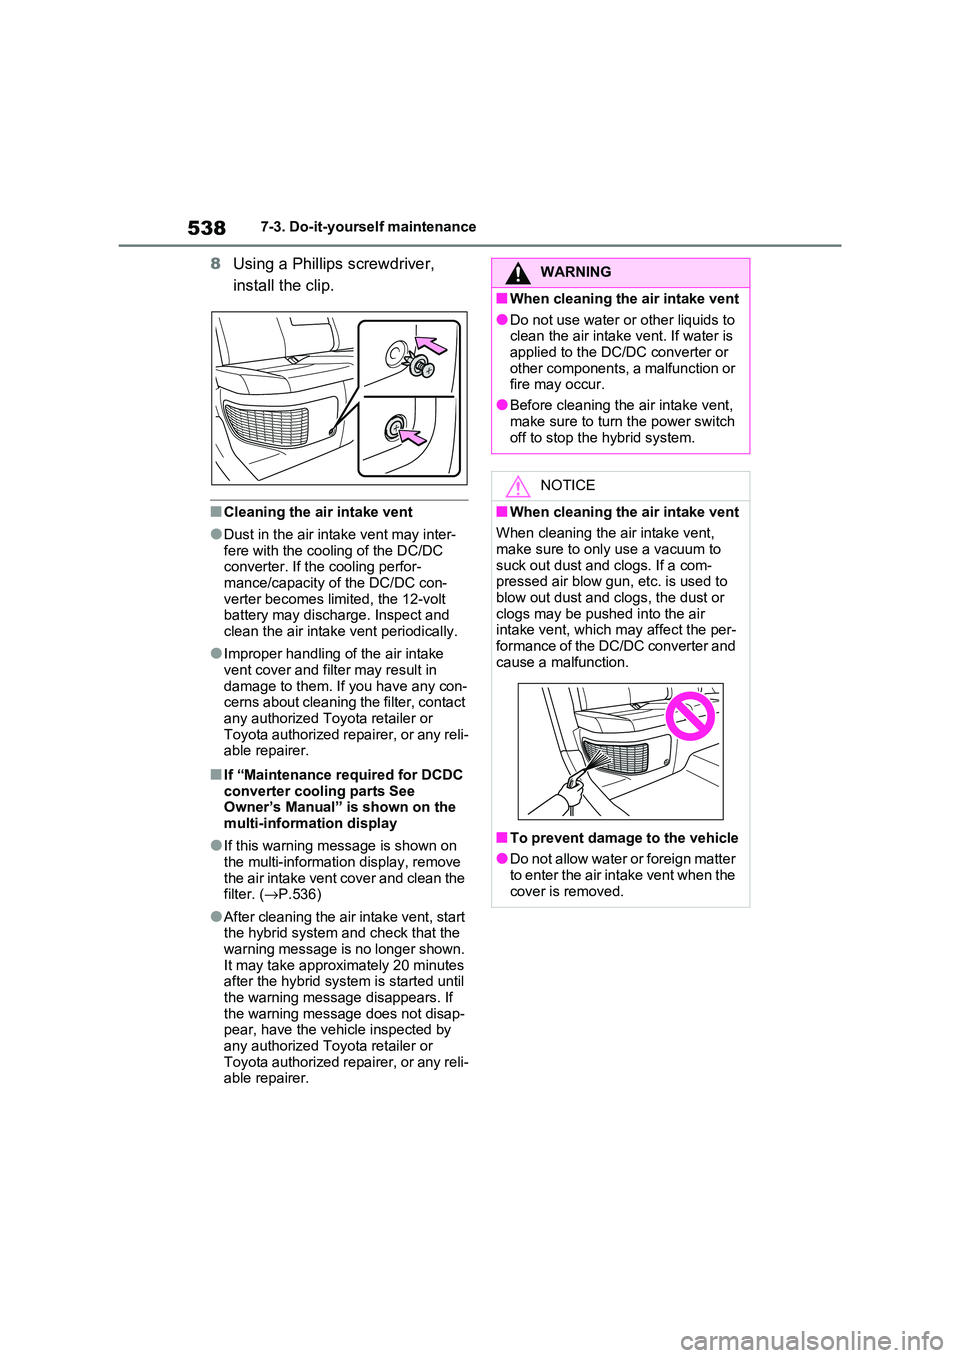
8Using a Phillips screwdriver,
install the clip.
■Cleaning the air intake vent
●Dust in the air intake vent may inter - fere with the cooling of the DC/DC
converter. If the cooling perfor -
mance/capacity of the DC/DC con - verter becomes limited, the 12-volt
battery may discharge. Inspect and
clean the air intake vent periodically.
●Improper handling of the air intake
vent cover and filter may result in damage to them. If you have any con -
cerns about cleaning the filter, contact
any authorized Toy ota retailer or Toyota authorized repairer, or any reli -
able repairer.
■If “Maintenance required for DCDC
converter cooling parts See Owner’s Manual” is shown on the
multi-information display
●If this warning message is shown on
the multi-informatio n display, remove
the air intake vent cover and clean the filter. ( →P.536)
●After cleaning the air intake vent, start the hybrid system and check that the
warning message is no longer shown.
It may take approximately 20 minutes
after the hybrid syst em is started until the warning message disappears. If
the warning message does not disap -
pear, have the vehicle inspected by any authorized Toy ota retailer or
Toyota authorized repairer, or any reli -
able repairer.
WARNING
■When cleaning the air intake vent
●Do not use water or other liquids to
clean the air intake vent. If water is applied to the DC/ DC converter or
other components, a malfunction or
fire may occur.
●Before cleaning th e air intake vent,
make sure to turn the power switch
off to stop the hybrid system.
NOTICE
■When cleaning the air intake vent
When cleaning the air intake vent,
make sure to only use a vacuum to suck out dust and clogs. If a com -
pressed air blow gun, etc. is used to
blow out dust and clogs, the dust or clogs may be pushed into the air
intake vent, which may affect the per-
formance of the DC/DC converter and cause a malfunction.
■To prevent damage to the vehicle
●Do not allow water or foreign matter to enter the air intake vent when the
cover is removed.
Page 543 of 666
541
7
7-3. Do-it-yours elf maintenance
Maintenance and care
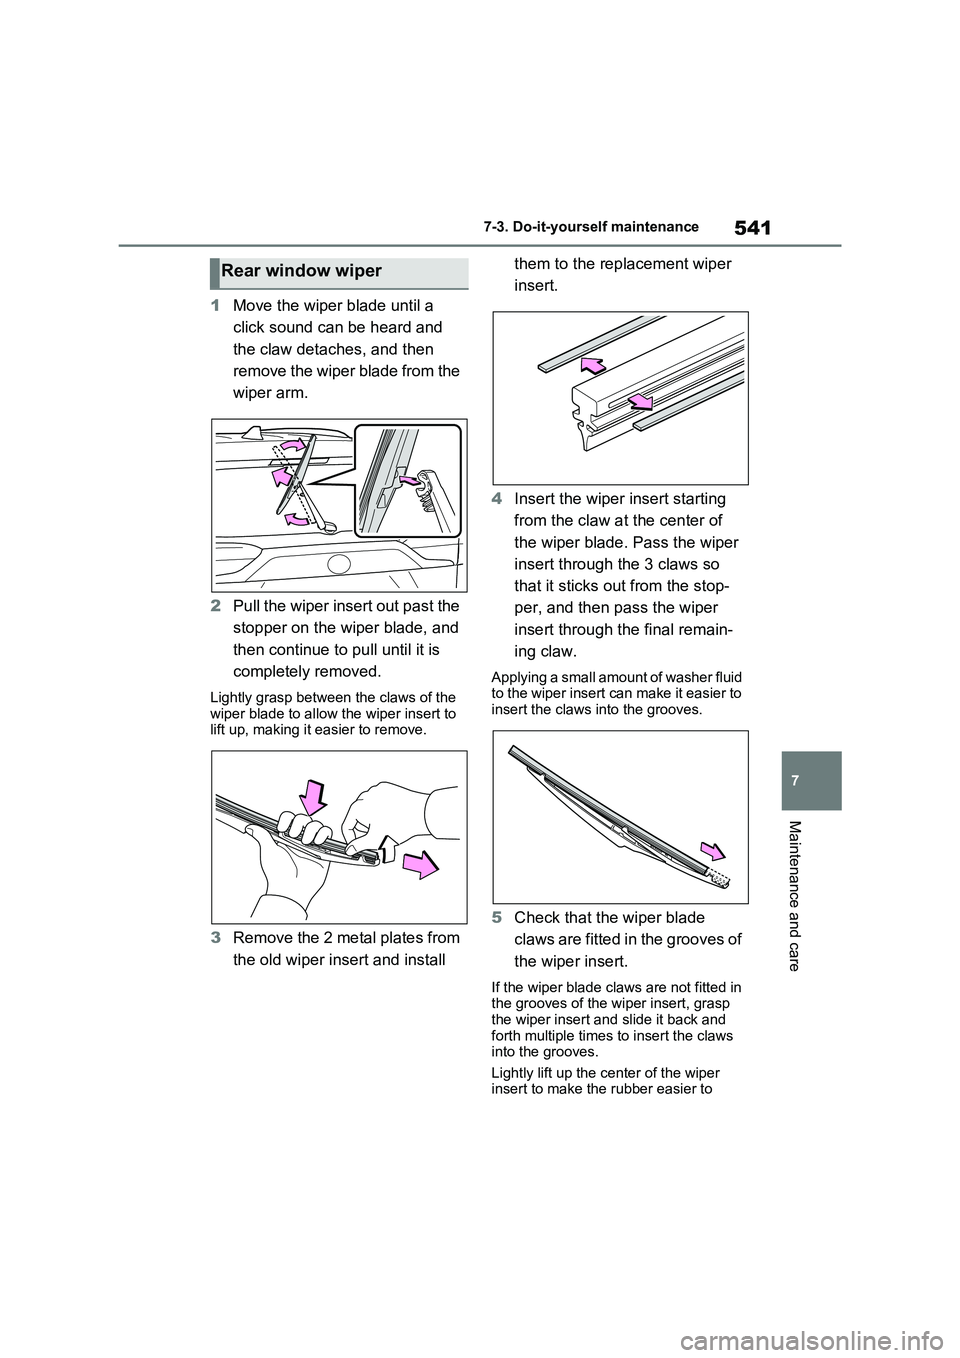
1Move the wiper blade until a
click sound can be heard and
the claw detaches, and then
remove the wiper blade from the
wiper arm.
2 Pull the wiper insert out past the
stopper on the wi per blade, and
then continue to pull until it is
completely removed.
Lightly grasp between the claws of the
wiper blade to allow the wiper insert to lift up, making it easier to remove.
3 Remove the 2 metal plates from
the old wiper insert and install
them to the replacement wiper
insert.
4 Insert the wiper insert starting
from the claw at the center of
the wiper blade. Pass the wiper
insert through the 3 claws so
that it sticks out from the stop -
per, and then pass the wiper
insert through the final remain -
ing claw.
A p p l y i n g a s m a l l a m o u n t o f w a s h e r f l u i d to the wiper insert can make it easier to
insert the claws into the grooves.
5 Check that the wiper blade
claws are fitted in the grooves of
the wiper insert.
If the wiper blade cla ws are not fitted in
the grooves of the wiper insert, grasp
the wiper insert and slide it back and forth multiple times to insert the claws
into the grooves.
Lightly lift up the c enter of the wiper insert to make the rubber easier to
Rear window wiper
Page 561 of 666
8
559
8
When trouble arises
When trouble arises
8-1. Essential information
Emergency flashers .......... 560
If your vehicle has to be
stopped in an emergency 560
If the vehicle is trapped in rising
water ............................... 561
8-2. Steps to take in an emer -
gency
If your vehicle needs to be
towed .............................. 563
If you think something is wrong
....................................... 566
If a warning light turns on or a
warning buzzer sounds... 568
If a warning message is dis -
played ............................. 578
If you have a flat tire (vehicles
without spare tire) ........... 582
If you have a flat tire (vehicles
with spare tire) ................ 593
If the hybrid system will not
start ................................ 601
If you lose your keys ......... 603
If the fuel filler door cannot be
opened ........................... 603
If the electronic key does not
operate properly ............. 604
If the 12-volt battery is dis -
charged .......................... 606
If your vehicle overheats... 611
If the vehicle becomes stuck
....................................... 615
Page 581 of 666
579
8
8-2. Steps to take in an emergency
When trouble arises
A warning message about an operation
of the brake pedal m ay be shown while
the driving suppor t systems such as
PCS (Pre-Collis ion system) (if
equipped) or the dynamic radar cruise
control with full- speed range (if
equipped) is operating. If a warning
message is shown, be sure to deceler -
ate the vehicle or follow an instruction
shown on the multi-in formation display.
• A warning message is shown when
Brake Override System operates. ( →P.301, 574)
• A warning message is shown when
Drive-Start Control or Parking Support Brake function (if equipped) operates
( →P.301, 420). Follow the instructions
on the multi-information display.
●If a message about an operation of
the power switch is shown
An instruction for operation of the power
switch is shown when the incorrect pro -
cedure for starting the hybrid system is
performed or the power switch is oper -
ated incorrectly. Follow the instructions
shown on the multi-in formation display
to operate the pow er switch again.
●If a message about a shift lever opera-
tion is shown
To prevent the shift lever from being
operated incorrectly or the vehicle from
moving unexpectedly, a message that
requires shifting the shift lever may be
shown on the multi-in formation display.
In that case, follow the instruction of the
message and shift the shift lever.
●If a message or image about an
open/close state of a part or replen-
ishment of a consumable is shown
Confirm the part indicated by the multi-
information display or a warning light,
and then perform the coping method
such as closing the open door or replen -
ishing a consumable.
■If a message that indicates the
need for visiting any authorized Toyota retailer or Toyota autho -
rized repairer, or any reliable
repairer is displayed
The system or part sh own on the multi-
information display is malfunctioning.
Have the vehicle inspected by any authorized Toyota r etailer or Toyota
authorized repairer, or any reliable
repairer immediately.
■If a message that indicates the need for referring to Owner’s Man -
ual is displayed
●If the following messages are shown,
follow the instructions, accordingly.
• “Blind Spot Monitor Unavailable” ( →P.394, 578)
• “RCTA Unavailable” ( →P.394, 578)
• “Engine Coolant Temp High” ( →P.611)
• “Exhaust Filter Full” ( →P.437)
●If the following messages are shown,
there may be a malfunction. Immedi -
ately stop the vehicle in a safe place and contact any authorized Toyota
retailer or Toyota authorized repairer,
or any reliable repairer. Continuing to drive the vehicle may be dangerous.
• “Plug-in charging system malfunction”
• “Hybrid System Malfunction” • “Charging System Malfunction”
• “Check Engine”
• “Hybrid Battery System Malfunction” • “Accelerator System Malfunction”
• “Smart Entry & Start System Malfunc -
tion”
●If the following messages are shown,
there may be a malfunction. Immedi - ately have the vehi cle inspected by
any authorized Toyota retailer or
Toyota authorized repairer, or any reli -
able repairer. • “Oil Pressure Low”
• “Braking Power Low”
●If any of the following messages are
shown on the multi-information dis -
play, the vehicle ma y have run out of fuel. Stop the vehicle in a safe place
and, if the fuel leve l is low, refuel the
Page 582 of 666
5808-2. Steps to take in an emergency
vehicle.
• “Hybrid System Stopped” • “Engine Stopped”
●If “Maintenance required for DCDC converter cooling parts See Owner’s
Manual” is shown, the filter may be
clogged, the air intake vent may be blocked, or there may be a gap in the
duct. Therefore, perform the following
correction procedure. • If the air intake v ent or filter of the
DC/DC converter are dirty, perform
the procedures on P.536 to clean them.
• If the warning message is shown
when the air intake vent and filter of the DC/DC converter are not dirty,
have the vehicle inspected at any
authorized Toyota retailer or Toyota authorized repairer, or any reliable
repairer.
●If “12-Volt Battery Charging System
Malfunction Stop in a Safe Place See
Owner’s Manual” is shown
Indicates a malfunct ion in the vehicle’s
charging system. Pull over and stop the
vehicle as soon as it is safe to do so.
While the message is displayed, the
functions of the air conditioning, etc.
may be partially limited in order to
reduce the power consumption of the
12-volt battery.
■If “Hybrid System Overheated Out - put Power Reduced” is shown
The message may be shown when driv -
ing under severe ope rating conditions. (For example, when driving up a long
steep hill or drivi ng up a steep hill in
reverse.)
Coping method: →P.611
■If “Traction Battery Needs to be Protected Refrain from the Use of N
Position” is shown
This message may be displayed when the shift lever is in N.
As the hybrid battery (traction battery)
cannot be charged when the shift lever
is in N, shift the shift lever to P when the
vehicle is stopped.
■If “Traction Battery Needs to be Protected Shift into P to Restart” is
shown
This message is displayed when the hybrid battery (trac tion battery) charge
has become extremely low because the
shift lever has been left in N for a certain amount of time.
When operating the vehicle, shift to P
and restart the hybrid system.
■If “Shift to P when Parked” is shown
Message is displayed when the driver’s
door is opened without turning the power switch to OFF with the shift lever
in any position other than P.
Shift the shif t lever to P.
■If “Shift is in N Release Accelerator Before Shifting” is shown
Message is displaye d when the acceler-
ator pedal has been depressed and the shift lever is in N. Release the accelera -
tor pedal and shift the shift lever to D or
R.
■If “Press Brake when Vehicle is Stopped Hybrid System may Over -
heat” is shown
Message is displaye d when the acceler- ator pedal is depressed to maintain the
vehicle position when stopped on a
upward slope, etc.
If this continues, the hybrid system may
overheat.
Release the accelerator pedal and depress the brake pedal.
■If “Auto Power OFF to Conserve
Battery” is shown
Power was turned off due to the auto -
matic power o ff function.
Next time when starting the hybrid sys -
tem, operate the hybrid system for
approximately 5 minutes to recharge the 12-volt battery.
Page 583 of 666
581
8
8-2. Steps to take in an emergency
When trouble arises
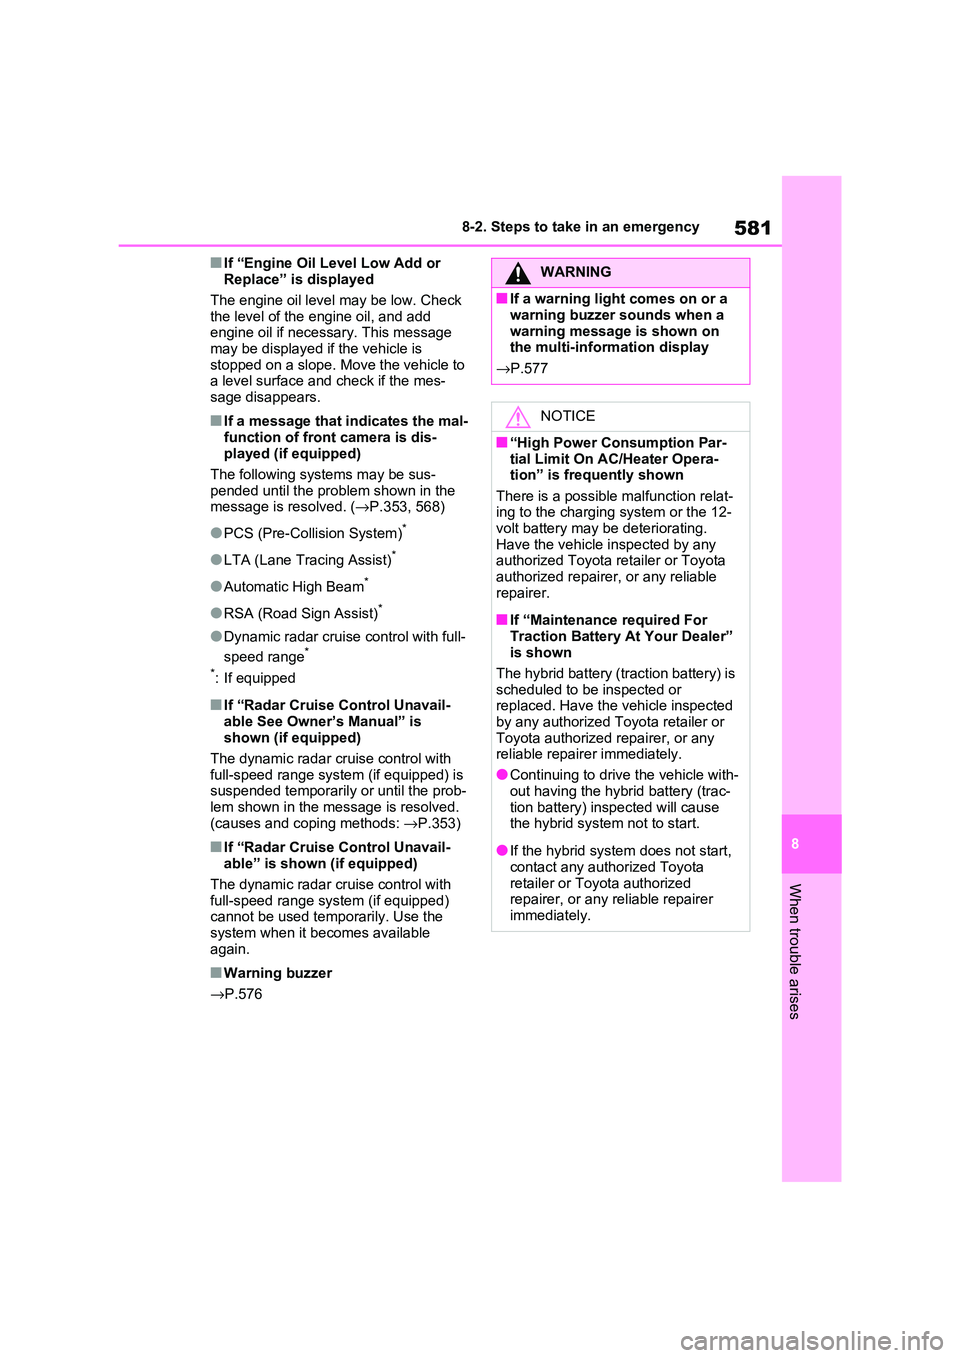
■If “Engine Oil Level Low Add or
Replace” is displayed
The engine oil level may be low. Check
the level of the engine oil, and add
engine oil if necessary. This message may be displayed if the vehicle is
stopped on a slope. Move the vehicle to
a level surface and check if the mes - sage disappears.
■If a message that indicates the mal -
function of fron t camera is dis-
played (if equipped)
The following systems may be sus -
pended until the prob lem shown in the
message is resolved. ( →P.353, 568)
●PCS (Pre-Collision System)*
●LTA (Lane Tracing Assist)*
●Automatic High Beam*
●RSA (Road Sign Assist)*
●Dynamic radar cruise control with full-
speed range*
*: If equipped
■If “Radar Cruise Control Unavail -
able See Owner ’s Manual” is
shown (if equipped)
The dynamic radar cru ise control with full-speed range system (if equipped) is
suspended temporarily or until the prob -
lem shown in the message is resolved. (causes and coping methods: →P.353)
■If “Radar Cruise Control Unavail-
able” is shown (if equipped)
The dynamic radar cru ise control with full-speed range system (if equipped)
cannot be used temporarily. Use the
system when it bec omes available again.
■Warning buzzer
→ P.576
WARNING
■If a warning light comes on or a
warning buzzer sounds when a
warning message is shown on the multi-information display
→ P.577
NOTICE
■“High Power Consumption Par- tial Limit On AC/Heater Opera -
tion” is frequently shown
There is a possible malfunction relat - ing to the chargin g system or the 12-
volt battery may b e deteriorating.
Have the vehicle inspected by any authorized Toyota retailer or Toyota
authorized repairer, or any reliable
repairer.
■If “Maintenance required For
Traction Battery A t Your Dealer” is shown
The hybrid battery (traction battery) is
scheduled to be inspected or
replaced. Have the vehicle inspected by any authorized Toyota retailer or
Toyota authorized repairer, or any
reliable repairer immediately.
●Continuing to drive the vehicle with -
out having the hybr id battery (trac-
tion battery) inspected will cause the hybrid system not to start.
●If the hybrid system does not start, contact any autho rized Toyota
retailer or Toyota authorized
repairer, or any reliable repairer immediately.
Page 597 of 666
595
8
8-2. Steps to take in an emergency
When trouble arises
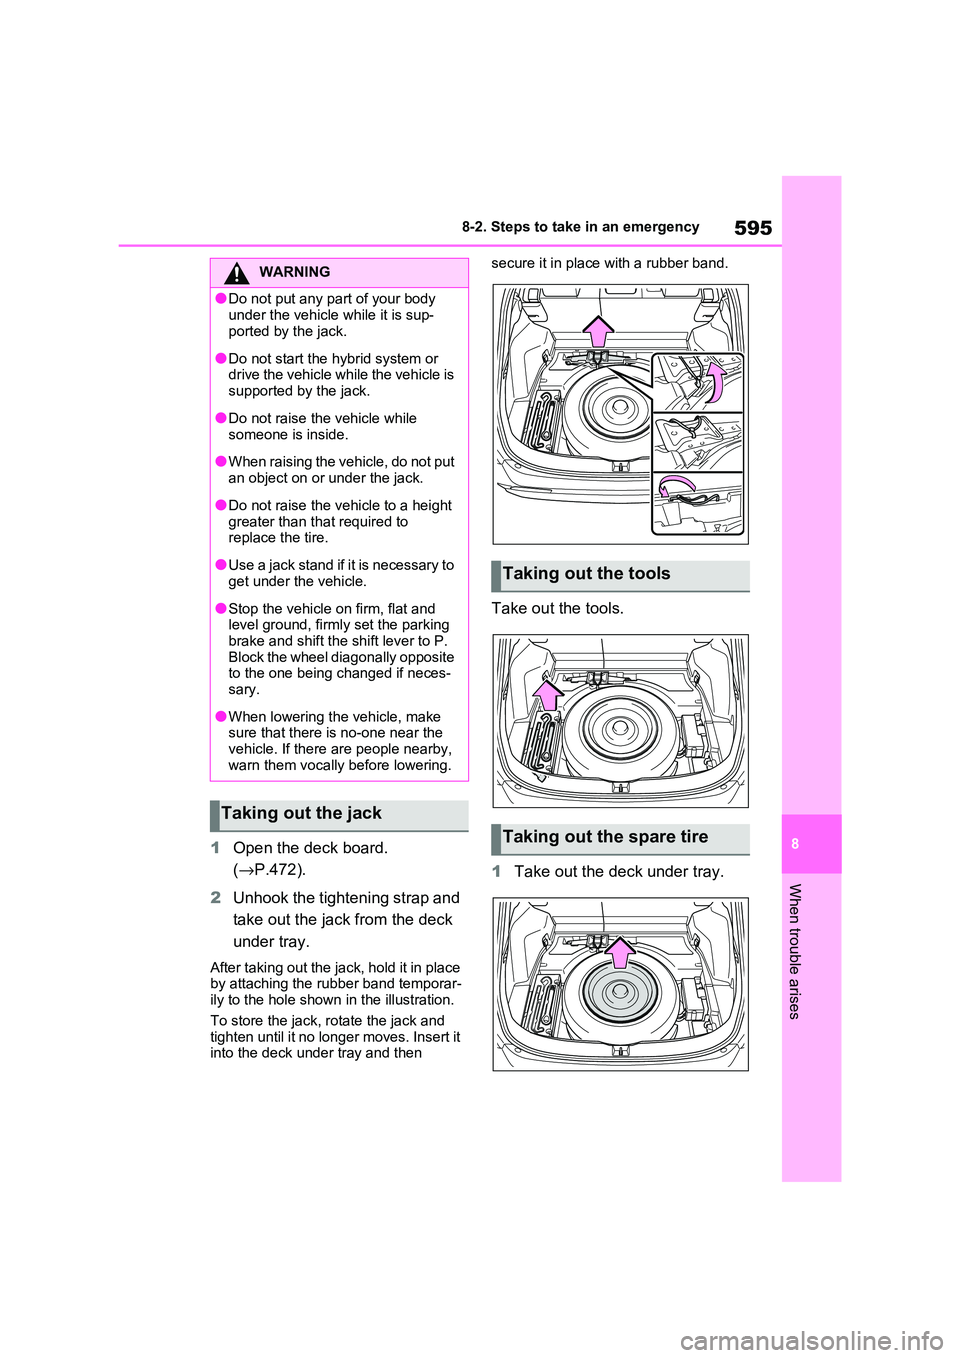
1 Open the deck board.
( →P.472).
2 Unhook the tightening strap and
take out the jack from the deck
under tray.
After taking out the jack, hold it in place
by attaching the r ubber band temporar- ily to the hole shown in the illustration.
To store the jack, rotate the jack and
tighten until it no longer moves. Insert it into the deck under tray and then
secure it in place with a rubber band.
Take out the tools.
1 Take out the deck under tray.
WARNING
●Do not put any part of your body
under the vehicle while it is sup-
ported by the jack.
●Do not start the h ybrid system or
drive the vehicle while the vehicle is supported by the jack.
●Do not raise the vehicle while
someone is inside.
●When raising the vehicle, do not put
an object on or under the jack.
●Do not raise the v ehicle to a height
greater than that required to replace the tire.
●Use a jack stand if it is necessary to get under the vehicle.
●Stop the vehicle on firm, flat and level ground, firml y set the parking
brake and shift the shift lever to P.
Block the wheel diagonally opposite to the one being changed if neces -
sary.
●When lowering the vehicle, make
sure that there is no-one near the
vehicle. If there a re people nearby, warn them vocally before lowering.
Taking out the jack
Taking out the tools
Taking out the spare tire