tow TOYOTA RAV4 PLUG-IN HYBRID 2021 Owners Manual
[x] Cancel search | Manufacturer: TOYOTA, Model Year: 2021, Model line: RAV4 PLUG-IN HYBRID, Model: TOYOTA RAV4 PLUG-IN HYBRID 2021Pages: 666, PDF Size: 161.28 MB
Page 5 of 666
3TABLE OF CONTENTS
1
6
5
4
3
2
8
7
9
Smart entry & start system . 223
4-3. Adjusting the seats
Front seats .......................... 270
Rear seats .......................... 271
Driving position memory ..... 273
Head restraints ................... 276
4-4. Adjusting the steering wheel
and mirrors
Steering wheel .................... 278
Inside rear view mirror ........ 279
Digital Rear-view Mirror ...... 280
Outside rear view mirrors.... 289
4-5. Opening, closing the win -
dows and moon roof
Power windows ................... 291
Panoramic moon roof ......... 294
5-1. Before driving
Driving the vehicle .............. 300
Cargo and luggage ............. 306
Trailer towing ...................... 308
5-2. Driving procedures
Power (ignition) switch ........ 317
Hybrid transmission ............ 321
Turn signal lever ................. 325
Parking brake...................... 326
Brake Hold .......................... 329
5-3. Operating the lights and wip -
ers
Headlight switch.................. 332
AHB (Automatic High Beam)
.......................................... 334
Fog light switch ................... 337
Windshield wipers and washer
.......................................... 338
Rear window wiper and washer
.......................................... 340
5-4. Refueling
Opening the fuel tank cap ... 342
5-5. Using the driving support sys -
tems
Toyota Safety Sense .......... 344
PCS (Pre-Collision System) 355
LTA (Lane Tracing Assist) .. 362
RSA (Road Sign Assist)...... 372
Dynamic radar cruise control
with full-speed range ........ 376
Cruise control...................... 388
Speed limiter ....................... 391
BSM (Blind Spot Monitor) ... 393
Toyota parking assist-sensor
.......................................... 414
PKSB (Parking Support Brake)
.......................................... 420
Parking Support Brake function
(static objects) .................. 424
Parking Support Brake function
(rear-crossing vehicles) .... 430
Driving mode select switch . 434
Trail Mode ........................... 435
GPF (Gasoline Particulate Filter)
system .............................. 437
Driving assist systems ........ 438
5-6. Driving tips
Winter driving tips ............... 445
Utility vehicle precautions ... 448
5Driving
Page 6 of 666
4TABLE OF CONTENTS
6-1. Using the air conditioning
system and defogger
Automatic air conditioning sys -
tem.................................... 452
Remote Air Conditioning System
.......................................... 460
Heated steering wheel/Front
seat heaters/Front seat heaters
and ventilators/Rear seat heat -
ers..................................... 462
6-2. Using the interior lights
Interior lights list .................. 465
6-3. Using the storage features
List of storage features ....... 468
Luggage compartment features
.......................................... 472
6-4. Using the other interior fea -
tures
Other interior features ......... 476
7-1. Maintenance and care
Cleaning and protecting the
vehicle exterior ................. 488
Cleaning and protecting the
vehicle interior .................. 491
7-2. Maintenance
Maintenance requirements . 494
7-3. Do-it-yourself maintenance
Do-it-yourself service precau -
tions .................................. 496
Hood ................................... 498
Positioning a floor jack ........ 499
Engine compartment........... 501
12-volt battery ..................... 506
Tires .................................... 509
Tire inflation pressure ......... 529
Wheels ................................ 530
Air conditioning filter ........... 532
Cleaning the DC/DC Converter
air intake vent and filter .... 536
Wiper insert replacement .... 539
Electronic key battery ......... 543
Checking and replacing fuses
.......................................... 545
Light bulbs .......................... 548
8-1. Essential information
Emergency flashers ............ 560
If your vehicle has to be stopped
in an emergency ............... 560
If the vehicle is trapped in rising
water ................................. 561
8-2. Steps to take in an emergency
If your vehicle needs to be towed
.......................................... 563
If you think something is wrong
.......................................... 566
If a warning light turns on or a
warning buzzer sounds..... 568
If a warning message is dis -
played ............................... 578
If you have a flat tire (vehicles
without spare tire) ............. 582
If you have a flat tire (vehicles
with spare tire) .................. 593
6Interior features
7Maintenance and care
8When trouble arises
Page 17 of 666
15Pictorial index
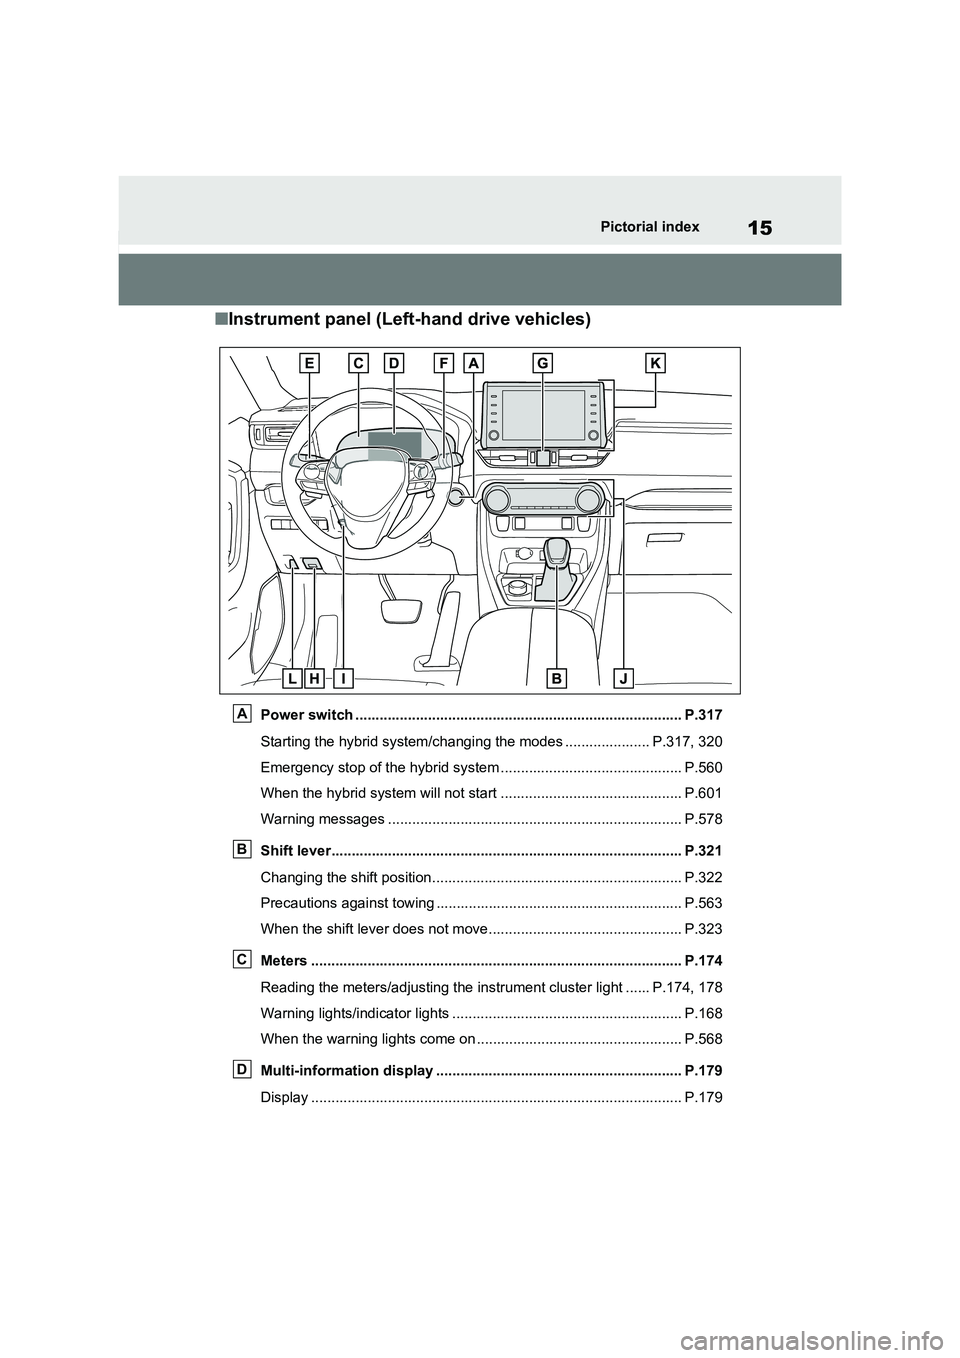
■Instrument panel (Left-hand drive vehicles)
Power switch ................................................................................. P.317
Starting the hybrid system/ch anging the modes ..................... P.317, 320
Emergency stop of the hybrid system ............................................. P.560
When the hybrid syst em will not start ............................................. P.601
Warning messages ............................................... .......................... P.578
Shift lever.................................................... ................................... P.321
Changing the shift position.. ............................................................ P.322
Precautions against towing ..................................... ........................ P.563
When the shift lever does not m ove................................................ P.323
Meters ......................................................... ................................... P.174
Reading the meters/adjusting the instrument cluster light ......P.174, 178
Warning lights/indicator lig hts ......................................................... P.168
When the warning lights come on ................................ ................... P.568
Multi-information display ...................................... ....................... P.179
Display ........................................................ .................................... P.179
A
B
C
D
Page 25 of 666

23Pictorial index
■Instrument panel (Right-hand drive vehicles)
Power switch ................................................................................. P.317
Starting the hybrid system/ch anging the modes ..................... P.317, 320
Emergency stop of the hybrid system ............................................. P.560
When the hybrid syst em will not start ............................................. P.601
Warning messages ............................................... .......................... P.578
Shift lever.................................................... ................................... P.321
Changing the shift position.. ............................................................ P.322
Precautions against towing ..................................... ........................ P.563
When the shift lever does not m ove................................................ P.323
Meters ......................................................... ................................... P.174
Reading the meters/adjusting the instrument cluster light ......P.174, 178
Warning lights/indicator lig hts ......................................................... P.168
When the warning lights come on ................................ ................... P.568
Multi-information display ...................................... ....................... P.179
Display ........................................................ .................................... P.179
A
B
C
D
Page 46 of 666
441-1. For safe use
WARNING
●The SRS driver airbag deploys with
considerable force, and can cause
death or serious injury especially if the driver is very close to the air-
bag.
Since the risk zone for the driver’s air -
bag is the first 50 - 75 mm (2 - 3 in.) of
inflation, placing yourself 250 mm (10
in.) from your drive r airbag provides
you with a clear margin of safety. This
distance is measured from the center
of the steering whee l to your breast-
bone. If you sit less than 250 mm (10
in.) away now, you can change your
driving position in several ways:
• Move your seat to the rear as far as
you can while still reaching the ped -
als comfortably.
• Slightly recline the back of the seat.
Although vehicle designs vary, many drivers can achieve the 250
mm (10 in.) distanc e, even with the
driver seat all th e way forward, sim- ply by reclining the back of the seat
somewhat. If reclin ing the back of
your seat makes i t hard to see the road, raise yourself by using a firm,
non-slippery cushion, or raise the
seat if your vehicle has that feature.
• If your steering wheel is adjustable,
tilt it downwa rd. This points the air- bag toward your chest instead of
your head and neck.
The seat should be adjusted as rec - ommended above, while still main -
taining control of the foot pedals,
steering wheel, and your view of the instrument panel controls.
●The SRS front passenger airbag also deploys with considerable
force, and can caus e death or seri-
ous injury especially if the front pas - senger is very clo se to the airbag.
The front passenger seat should be
as far from the airbag as possible with the seatback adjusted, so the
front passenger sits upright.
●Improperly seated and/or restrained
infants and children can be killed or
seriously injured by a deploying air - bag. An infant or child who is too
small to use a seat belt should be
properly secured using a child restraint system. Toyota strongly
recommends that all infants and
children be placed in the rear seats of the vehicle and properly
restrained. The rear seats are safer
for infants and children than the front passenger seat. ( →P.50)
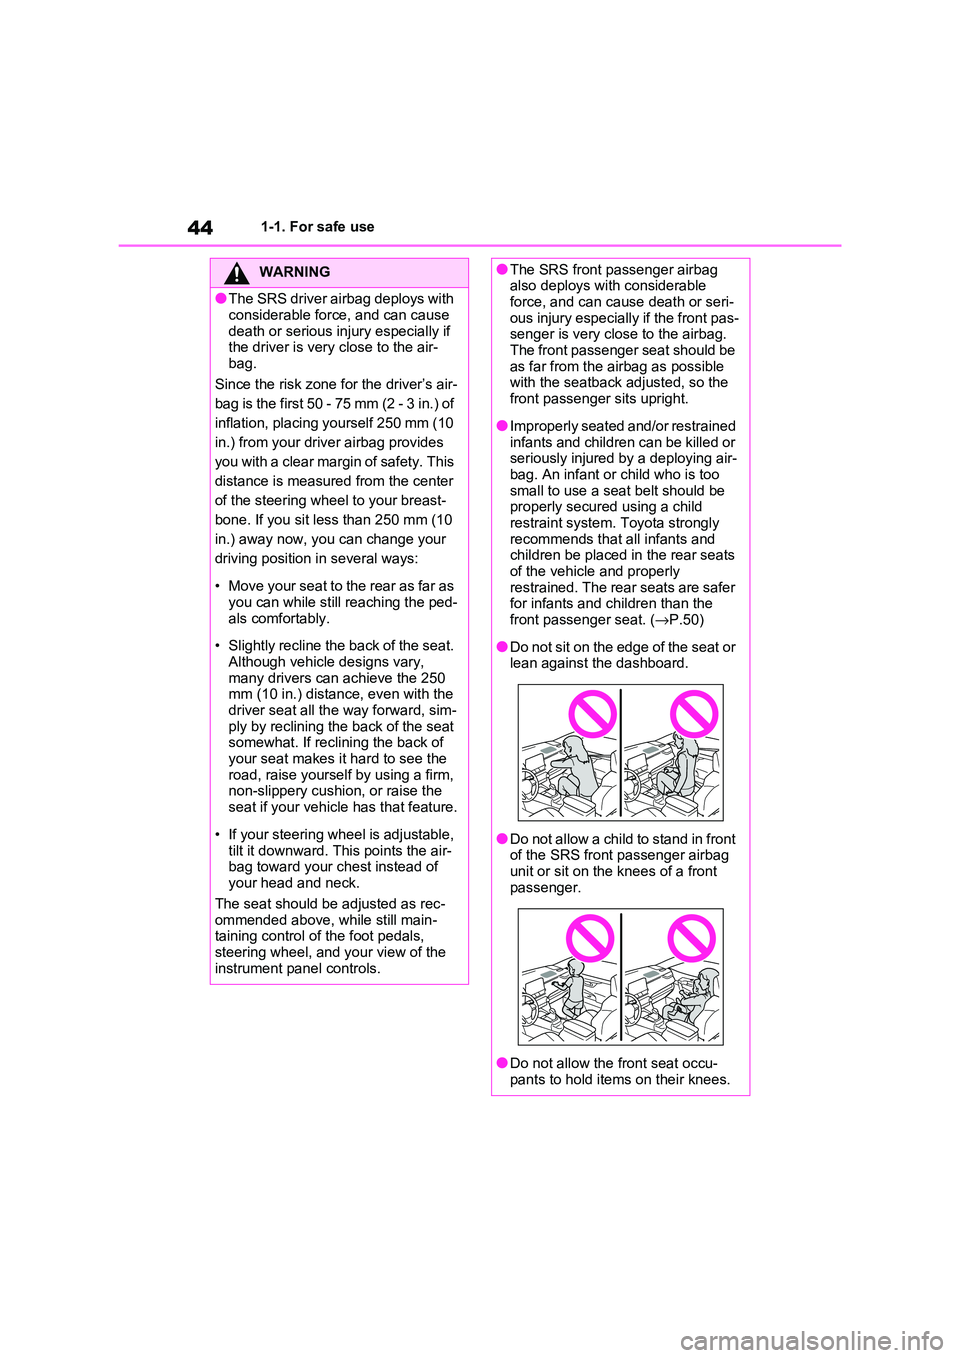
●Do not sit on the edge of the seat or lean against the dashboard.
●Do not allow a child to stand in front of the SRS front passenger airbag
unit or sit on the knees of a front
passenger.
●Do not allow the front seat occu-
pants to hold items on their knees.
Page 47 of 666
45
1
1-1. For safe use
For safety and security
WARNING
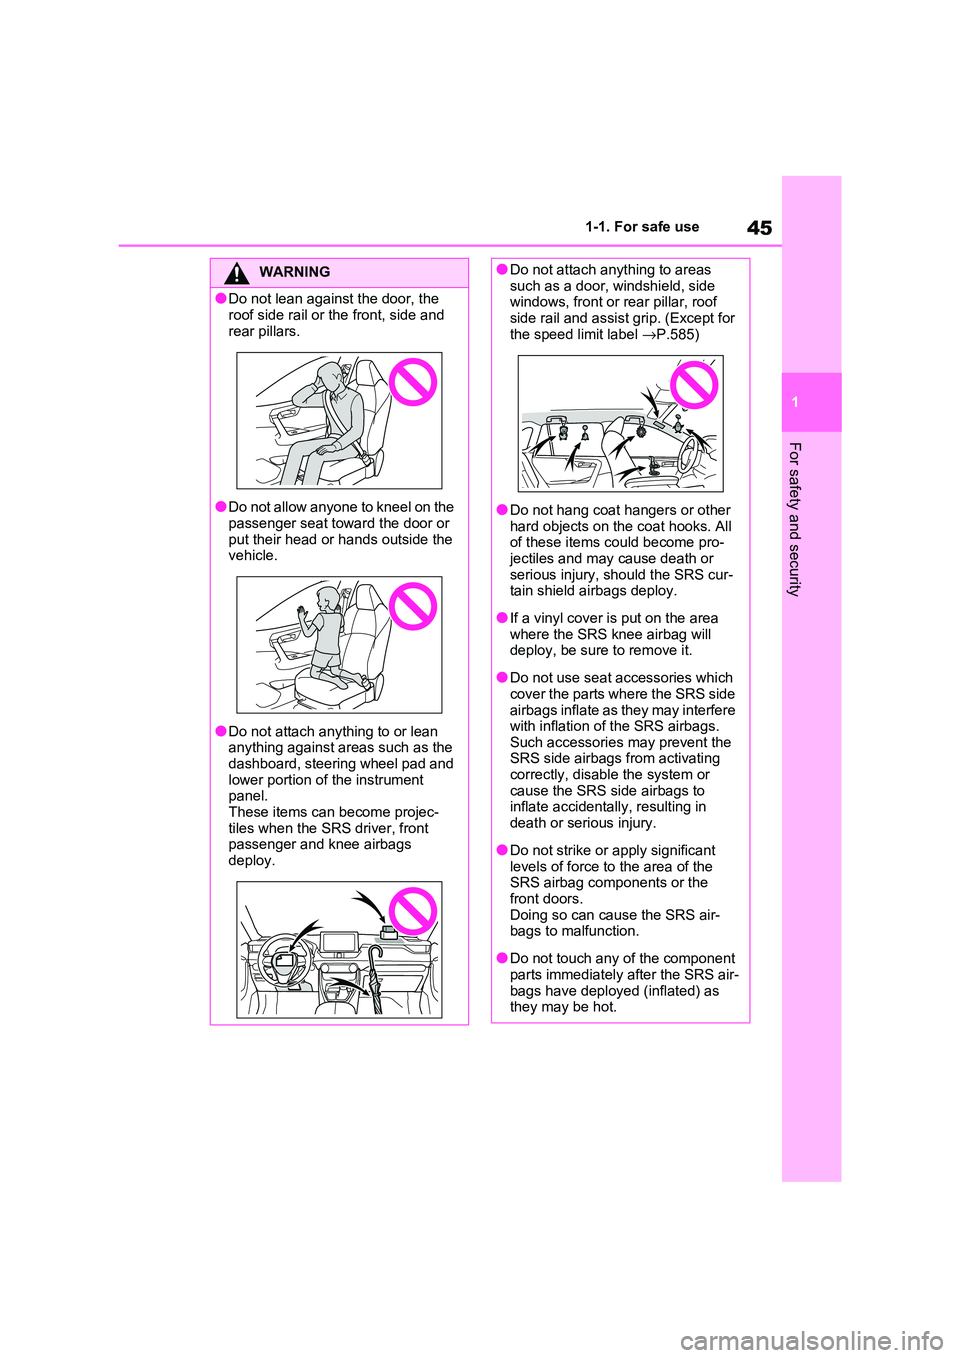
●Do not lean against the door, the
roof side rail or the front, side and
rear pillars.
●Do not allow anyone to kneel on the
passenger seat toward the door or
put their head or hands outside the vehicle.
●Do not attach anything to or lean anything against areas such as the
dashboard, steering wheel pad and
lower portion of the instrument panel.
These items can become projec -
tiles when the SRS driver, front passenger and knee airbags
deploy.
●Do not attach anything to areas such as a door, windshield, side
windows, front or rear pillar, roof
side rail and assist grip. (Except for the speed limit label →P.585)
●Do not hang coat hangers or other hard objects on th e coat hooks. All
of these items c ould become pro-
jectiles and may cause death or serious injury, should the SRS cur -
tain shield airbags deploy.
●If a vinyl cover is put on the area
where the SRS knee airbag will
deploy, be sure to remove it.
●Do not use seat a ccessories which
cover the parts wh ere the SRS side airbags inflate as they may interfere
with inflation of t he SRS airbags.
Such accessories may prevent the SRS side airbags from activating
correctly, disabl e the system or
cause the SRS side airbags to inflate accidentally, resulting in
death or serious injury.
●Do not strike or apply significant
levels of force to the area of the
SRS airbag components or the front doors.
Doing so can cause the SRS air -
bags to malfunction.
●Do not touch any of the component
parts immediately after the SRS air -
bags have deployed (inflated) as they may be hot.
Page 64 of 666
621-2. Child safety
■Removing a child restraint
system installed with a seat
belt
Press the buckle release button
and fully retract the seat belt.
When releasing the buckle, the child
restraint system may spring up due to
the rebound of the seat cushion.
Release the buckle while holding down
the child restraint system.
Since the seat belt automatically reels
itself, slowly return it to the stowing
position.
■When installing a child restraint
system
You may need a locking clip to install the child restraint s ystem. Follow the
instructions provided by the manufac -
turer of the system. If your child restraint system does not provide a locking clip,
you can purchase the following item
from any authorized Toyota retailer or Toyota authorized repairer, or any reli -
able repairer: Locking clip for child
restraint system (Part No. 73119-22010)
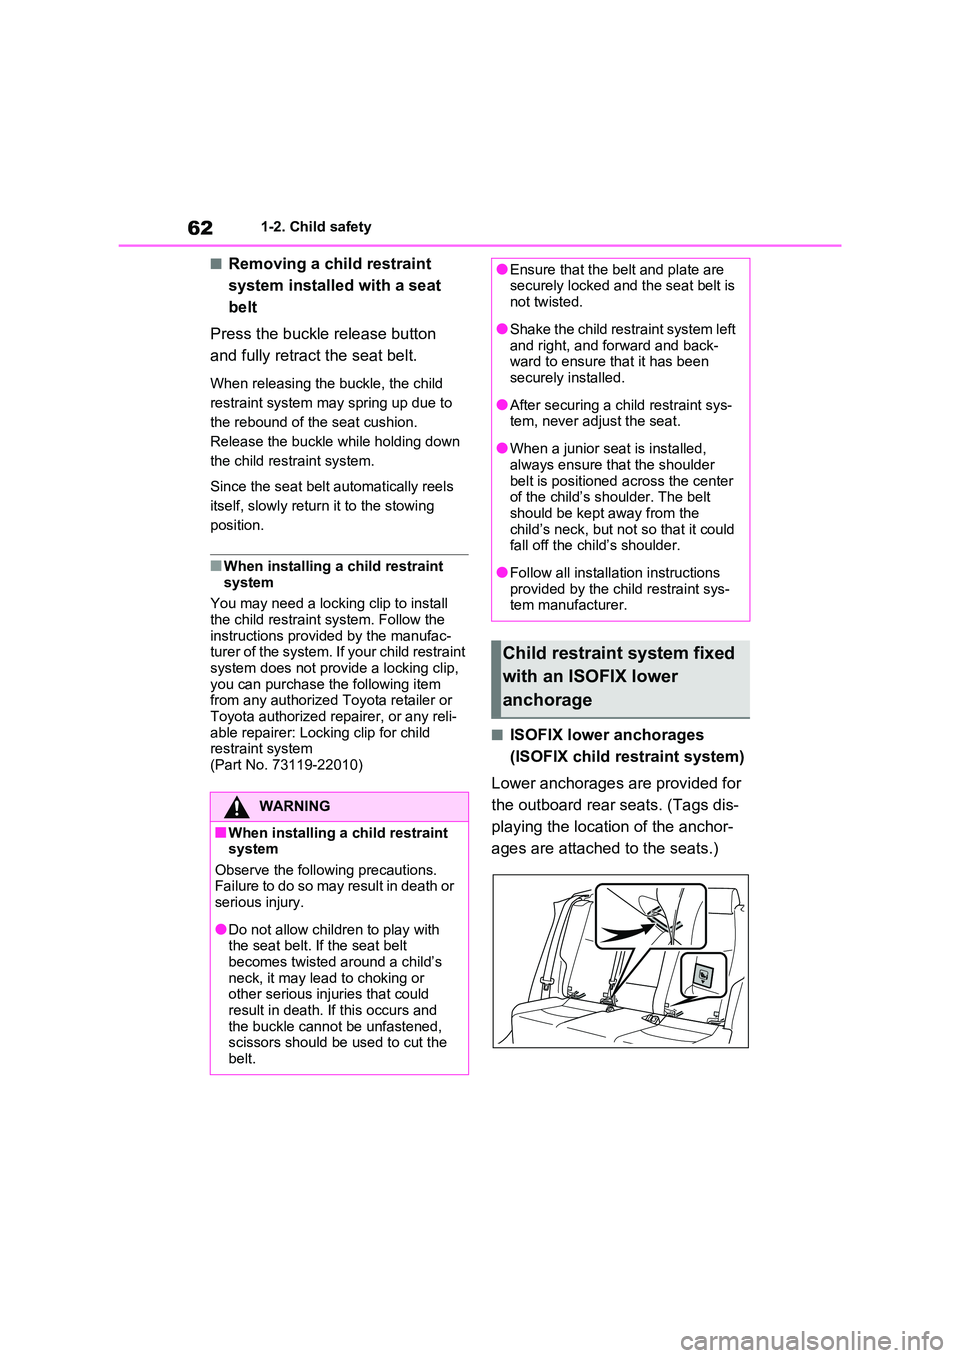
■ISOFIX lower anchorages
(ISOFIX child restraint system)
Lower anchorages are provided for
the outboard rear seats. (Tags dis -
playing the location of the anchor -
ages are attached to the seats.)
WARNING
■When installing a child restraint
system
Observe the following precautions. Failure to do so may result in death or
serious injury.
●Do not allow children to play with
the seat belt. I f the seat belt
becomes twisted around a child’s neck, it may lead to choking or
other serious injuries that could
result in death. If this occurs and the buckle cannot be unfastened,
scissors should be used to cut the
belt.
●Ensure that the bel t and plate are securely locked and the seat belt is
not twisted.
●Shake the child restraint system left
and right, and forward and back -
ward to ensure that it has been securely installed.
●After securing a ch ild restraint sys- tem, never adjust the seat.
●When a junior seat is installed, always ensure that the shoulder
belt is positioned a cross the center
of the child’s shoulder. The belt should be kept away from the
child’s neck, but not so that it could
fall off the chil d’s shoulder.
●Follow all installation instructions
provided by the child restraint sys - tem manufacturer.
Child restraint system fixed
with an ISOFIX lower
anchorage
Page 81 of 666
79
1
1-4. Theft dete rrent system
For safety and security
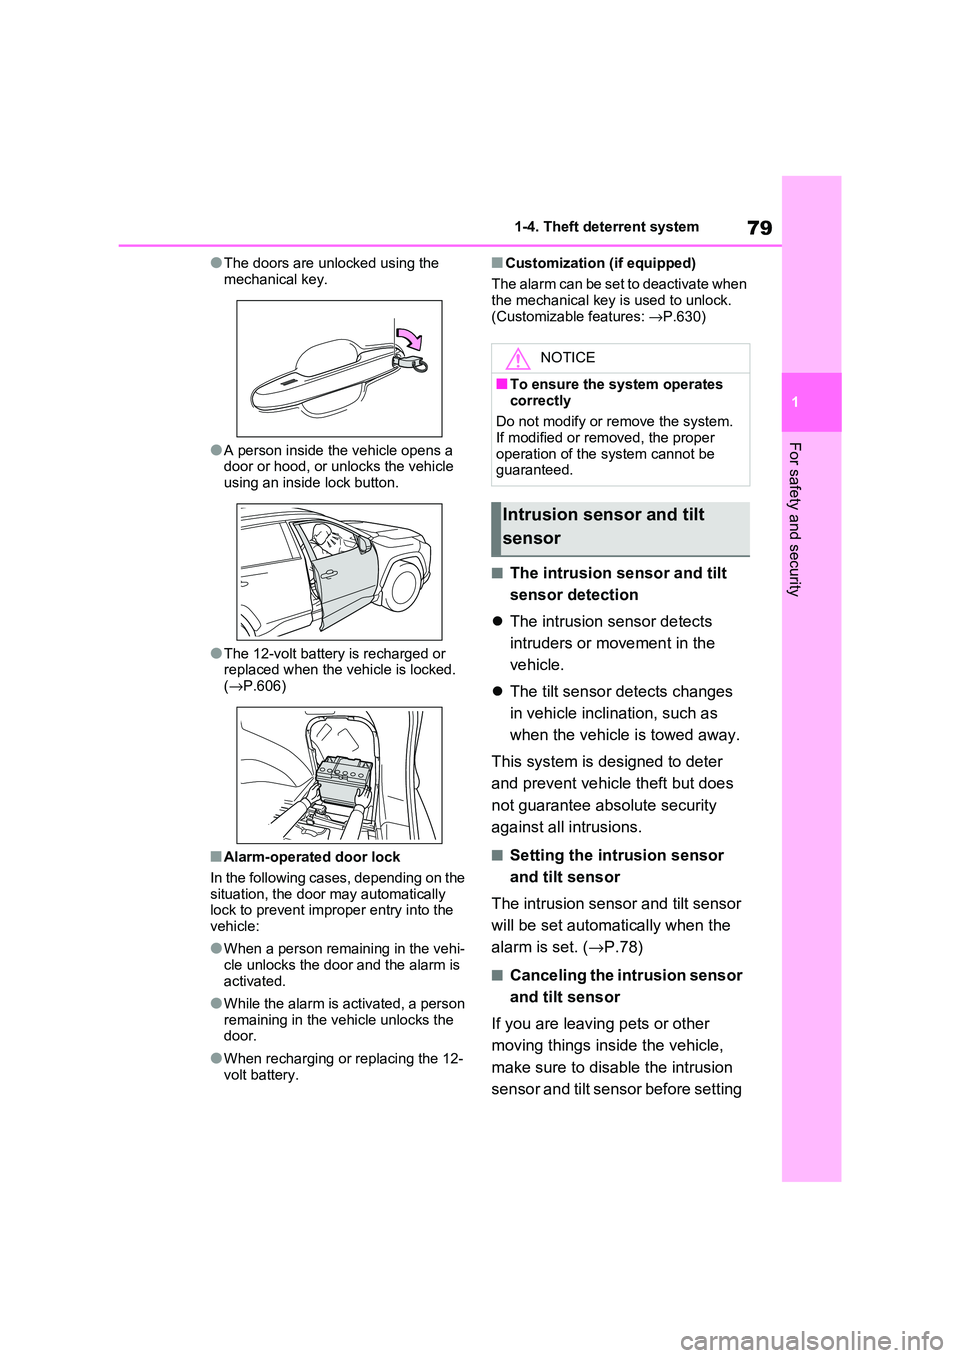
●The doors are unlocked using the
mechanical key.
●A person inside the vehicle opens a
door or hood, or unlocks the vehicle using an inside lock button.
●The 12-volt battery is recharged or replaced when the v ehicle is locked.
( →P.606)
■Alarm-operated door lock
In the following cases, depending on the
situation, the door may automatically lock to prevent impro per entry into the
vehicle:
●When a person rem aining in the vehi-
cle unlocks the door and the alarm is
activated.
●While the alarm is activated, a person
remaining in the v ehicle unlocks the door.
●When recharging or replacing the 12-
volt battery.
■Customization (if equipped)
The alarm can be set to deactivate when the mechanical key is used to unlock.
(Customizable features: →P.630)
■The intrusion sensor and tilt
sensor detection
The intrusion sensor detects
intruders or movement in the
vehicle.
The tilt sensor detects changes
in vehicle inclination, such as
when the vehicle is towed away.
This system is designed to deter
and prevent vehicle theft but does
not guarantee abs olute security
against all intrusions.
■Setting the intrusion sensor
and tilt sensor
The intrusion sensor and tilt sensor
will be set automa tically when the
alarm is set. ( →P.78)
■Canceling the intrusion sensor
and tilt sensor
If you are leaving pets or other
moving things inside the vehicle,
make sure to disable the intrusion
sensor and tilt sensor before setting
NOTICE
■To ensure the system operates correctly
Do not modify or r emove the system.
If modified or remo ved, the proper
operation of the system cannot be guaranteed.
Intrusion sensor and tilt
sensor
Page 98 of 666
962-1. Plug-in hybrid system
WARNING
●Never touch, disassemble, remove
or replace the high voltage parts,
cables or their connectors.
●The hybrid system will become hot
after starting a s the system uses high voltage. Be careful of both the
high voltage and the high tempera -
ture, and always obe y the caution
labels attached to the vehicle.
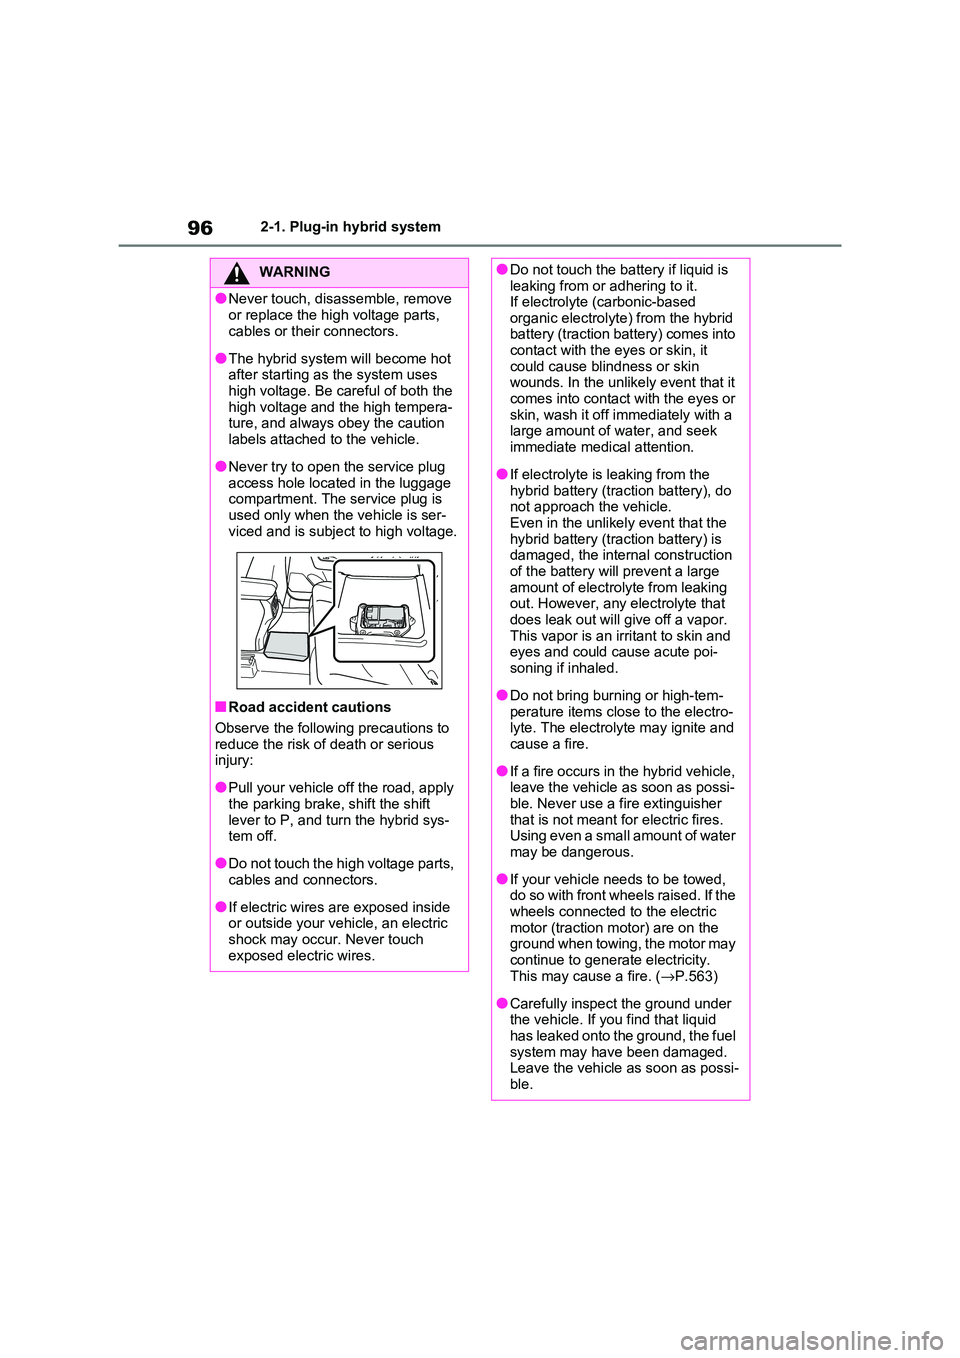
●Never try to open the service plug
access hole located in the luggage compartment. The service plug is
used only when the vehicle is ser-
viced and is subject to high voltage.
■Road accident cautions
Observe the following precautions to reduce the risk of d eath or serious
injury:
●Pull your vehicle off the road, apply
the parking brake, shift the shift
lever to P, and tu rn the hybrid sys- tem off.
●Do not touch the high voltage parts, cables and connectors.
●If electric wires are exposed inside or outside your vehi cle, an electric
shock may occur. Never touch
exposed electric wires.
●Do not touch the battery if liquid is leaking from or adhering to it.
If electrolyte ( carbonic-based
organic electrolyte) from the hybrid battery (traction battery) comes into
contact with the eyes or skin, it
could cause blindness or skin wounds. In the unlik ely event that it
comes into contact with the eyes or
skin, wash it off immediately with a large amount of w ater, and seek
immediate medical attention.
●If electrolyte is leaking from the
hybrid battery (traction battery), do
not approach the vehicle. Even in the unlikely event that the
hybrid battery (traction battery) is
damaged, the internal construction of the battery wil l prevent a large
amount of electrolyte from leaking
out. However, any electrolyte that does leak out will g ive off a vapor.
This vapor is an irritant to skin and
eyes and could c ause acute poi- soning if inhaled.
●Do not bring burning or high-tem - perature items close to the electro -
lyte. The electrolyte may ignite and
cause a fire.
●If a fire occurs in the hybrid vehicle,
leave the vehicle as soon as possi - ble. Never use a f ire extinguisher
that is not meant fo r electric fires.
Using even a small amount of water may be dangerous.
●If your vehicle nee ds to be towed, do so with front wheels raised. If the
wheels connected to the electric
motor (traction motor) are on the ground when towing, the motor may
continue to generate electricity.
This may cause a fire. ( →P.563)
●Carefully inspect the ground under
the vehicle. If you find that liquid
has leaked onto the ground, the fuel system may have been damaged.
Leave the vehicle as soon as possi -
ble.
Page 144 of 666
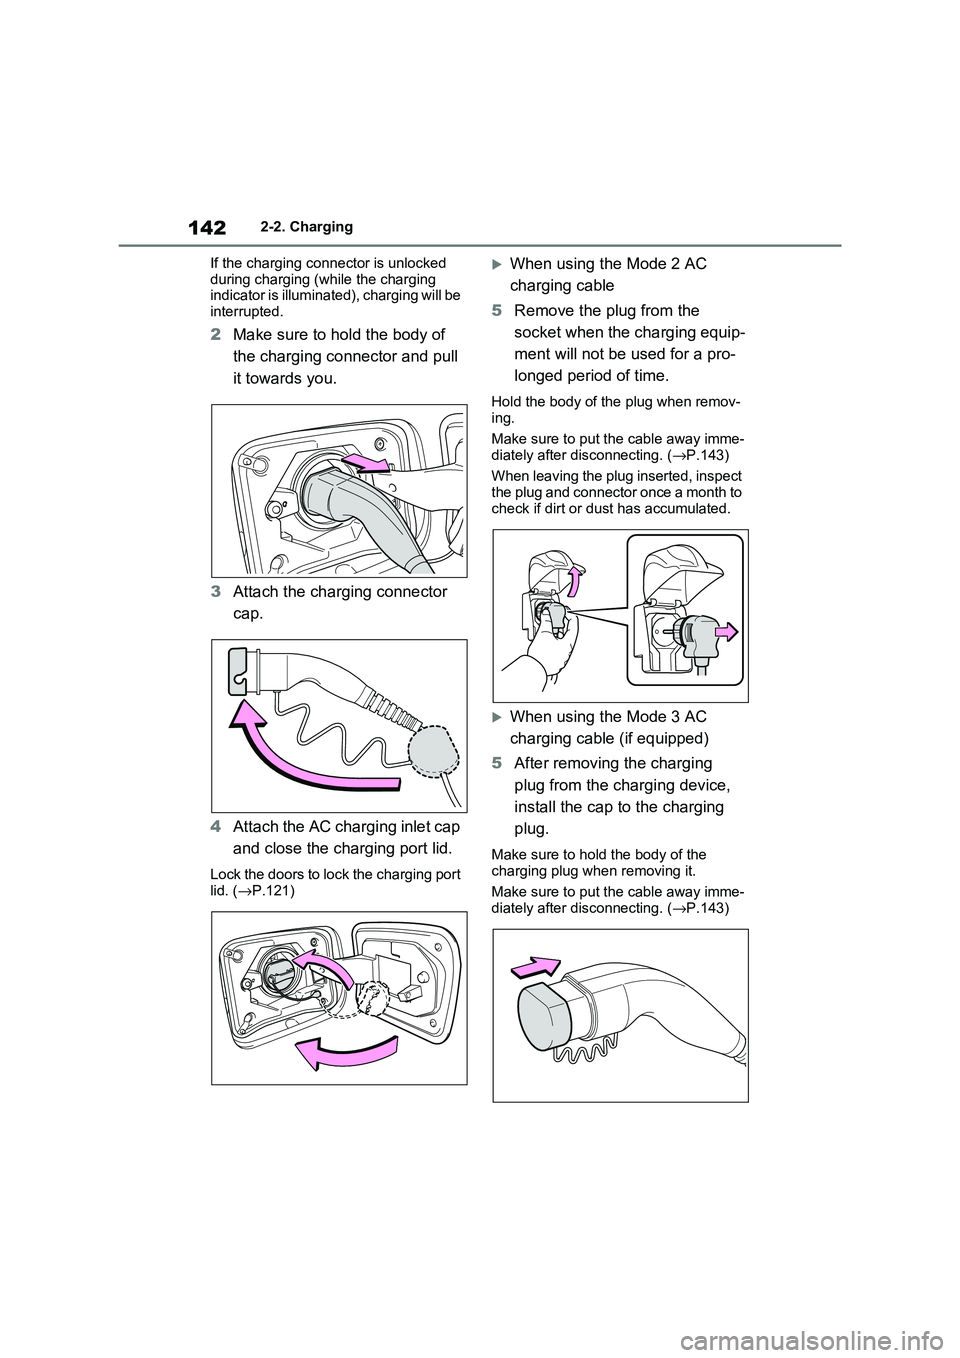
1422-2. Charging
If the charging connector is unlocked
during charging (while the charging indicator is illuminated), charging will be
interrupted.
2 Make sure to hold the body of
the charging connector and pull
it towards you.
3 Attach the charging connector
cap.
4 Attach the AC charging inlet cap
and close the charging port lid.
Lock the doors to lock the charging port lid. ( →P.121)
When using the Mode 2 AC
charging cable
5 Remove the plug from the
socket when the charging equip -
ment will not be used for a pro -
longed period of time.
Hold the body of the plug when remov -
ing.
Make sure to put the cable away imme - diately after disconnecting. ( →P.143)
When leaving the plug inserted, inspect
the plug and connector once a month to check if dirt or d ust has accumulated.
When using the Mode 3 AC
charging cable (if equipped)
5 After removing the charging
plug from the charging device,
install the cap to the charging
plug.
Make sure to hold the body of the
charging plug when removing it.
Make sure to put the cable away imme -
diately after disconnecting. ( →P.143)