My Car VOLVO S60 2018 Owner´s Manual
[x] Cancel search | Manufacturer: VOLVO, Model Year: 2018, Model line: S60, Model: VOLVO S60 2018Pages: 396, PDF Size: 9.4 MB
Page 85 of 396
INSTRUMENTS AND CONTROLS
}}
* Option/accessory.83
Electrically heated * steering wheel
The steering wheel can be heated electrically.
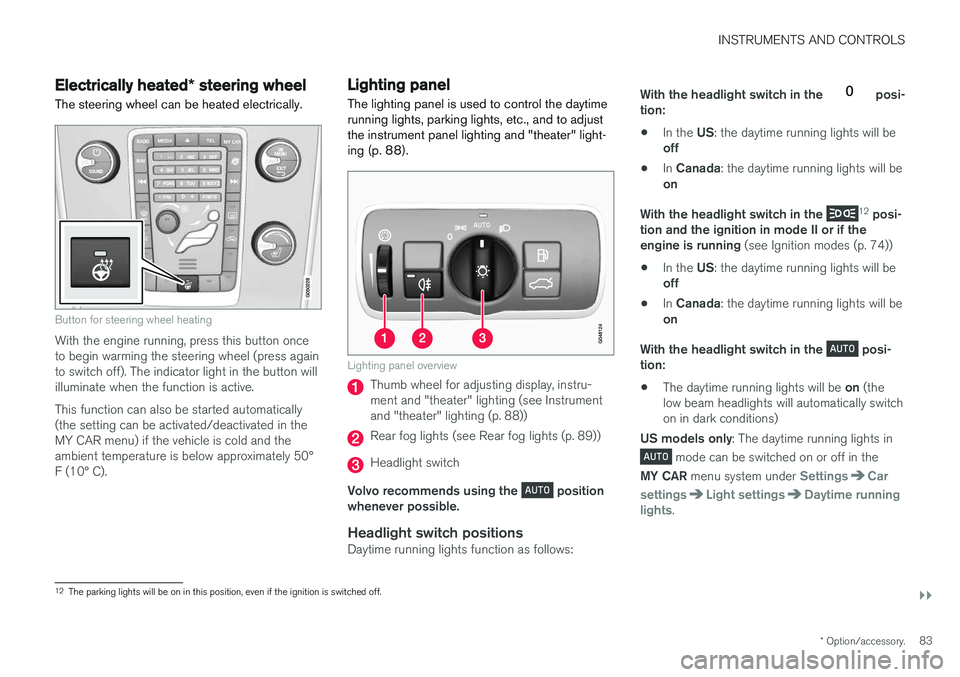
Button for steering wheel heating
With the engine running, press this button once to begin warming the steering wheel (press againto switch off). The indicator light in the button willilluminate when the function is active. This function can also be started automatically (the setting can be activated/deactivated in theMY CAR menu) if the vehicle is cold and theambient temperature is below approximately 50°F (10° C).
Lighting panel The lighting panel is used to control the daytime running lights, parking lights, etc., and to adjustthe instrument panel lighting and "theater" light-ing (p. 88).
Lighting panel overview
Thumb wheel for adjusting display, instru- ment and "theater" lighting (see Instrumentand "theater" lighting (p. 88))
Rear fog lights (see Rear fog lights (p. 89))
Headlight switch
Volvo recommends using the
position
whenever possible.
Headlight switch positionsDaytime running lights function as follows: With the headlight switch in the
posi-
tion: • In the
US: the daytime running lights will be
off
• In
Canada : the daytime running lights will be
on
With the headlight switch in the
12
posi-
tion and the ignition in mode II or if the engine is running (see Ignition modes (p. 74))
• In the
US: the daytime running lights will be
off
• In
Canada : the daytime running lights will be
on
With the headlight switch in the
posi-
tion: • The daytime running lights will be
on (the
low beam headlights will automatically switch on in dark conditions)
US models only : The daytime running lights in
mode can be switched on or off in the
MY CAR menu system under
SettingsCar
settings
Light settingsDaytime running
lights.
12 The parking lights will be on in this position, even if the ignition is switched off.
Page 89 of 396
INSTRUMENTS AND CONTROLS
* Option/accessory.87
NOTE
This function is only active in twilight or dark conditions, and only when the vehicle is inmotion.
If a fault should occur in the system, the symbol will illuminate and a message will be displayed asshown in the table.
SymbolDisplay Explanation
Headlamp failureServicerequiredThe system is not functioning properlyand should beinspected/repairedby a trained andqualified Volvo serv-ice technician.
Cornering lights 14
Models equipped with ABL also have front cor- nering lights that temporarily provide extra light tothe front left or right of the vehicle at low speedswhen making a sharp turn (for example, whenturning into a parking space) or when the turnsignals are used. This feature is activated when:
• High or low beam headlights are on and
• The vehicle's speed is below 20 mph (30 km/h)
The feature is also activated when the vehicle isbacking up. The cornering lights are deactivated when the vehicle's speed exceeds approx. 25 mph(40 km/h).
Related information
• Lighting panel (p. 83)
• High/low beam headlights (p. 84)
• Active high beams (AHB)
* (p. 85)
Auxiliary lights *
If the vehicle is fitted with auxiliary lights, the driver can use the MY CAR menu system to
choose to deactivate and turn these lights onand off along with the high beam headlights.
The auxiliary lights must be connected to the vehicle's electrical system, which should only bedone by a trained and authorized Volvo servicetechnician. See My Car – introduction (p. 71) formore information about the menu system.
14 Certain models only
Page 94 of 396
INSTRUMENTS AND CONTROLS
92
Rear interior lighting
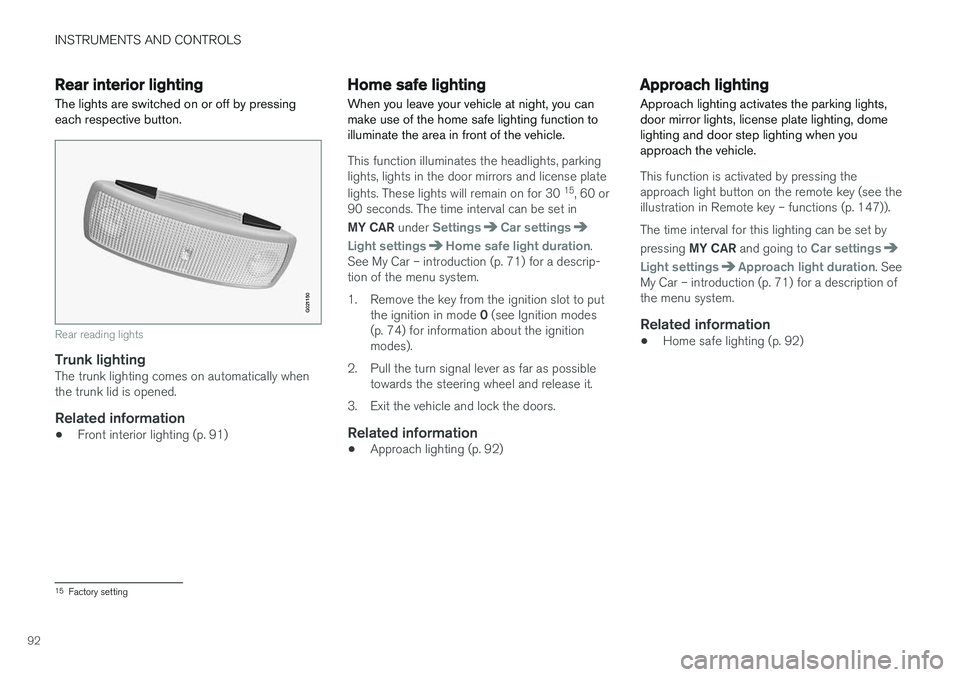
The lights are switched on or off by pressing each respective button.
G021150
Rear reading lights
Trunk lightingThe trunk lighting comes on automatically when the trunk lid is opened.
Related information
• Front interior lighting (p. 91)
Home safe lighting
When you leave your vehicle at night, you can make use of the home safe lighting function toilluminate the area in front of the vehicle.
This function illuminates the headlights, parking lights, lights in the door mirrors and license plate lights. These lights will remain on for 30 15
, 60 or
90 seconds. The time interval can be set in MY CAR under
SettingsCar settings
Light settingsHome safe light duration.
See My Car – introduction (p. 71) for a descrip- tion of the menu system.
1. Remove the key from the ignition slot to put
the ignition in mode 0 (see Ignition modes
(p. 74) for information about the ignition modes).
2. Pull the turn signal lever as far as possible towards the steering wheel and release it.
3. Exit the vehicle and lock the doors.
Related information
• Approach lighting (p. 92)
Approach lighting
Approach lighting activates the parking lights, door mirror lights, license plate lighting, domelighting and door step lighting when youapproach the vehicle.
This function is activated by pressing the approach light button on the remote key (see theillustration in Remote key – functions (p. 147)). The time interval for this lighting can be set by pressing MY CAR and going to
Car settings
Light settingsApproach light duration. See
My Car – introduction (p. 71) for a description of the menu system.
Related information
• Home safe lighting (p. 92)
15
Factory setting
Page 96 of 396
INSTRUMENTS AND CONTROLS
* Option/accessory.
94
Rain sensor *
The rain sensor automatically regulates wiper speed according to the amount of water on thewindshield.
The sensitivity of the rain sensor can be adjusted moving the thumb wheel up (the wipers willsweep the windshield more frequently) or down(the wipers will sweep the windshield less fre-quently).
NOTE
The wipers will make an extra sweep each time the thumb wheel is adjusted upward.
When the rain sensor is activated, the symbol
will illuminate in the instrument panel.
Activating and setting the sensitivity
When activating the rain sensor, the vehicle must be running or in ignition mode II and the wind-
shield wiper lever must be in position 0 or in the
single sweep position. Activate the rain sensor by pressing the button
. The windshield wipers will make one
sweep. Press the lever up for the wipers to make an extra sweep. The rain sensor returns to activemode when the stalk is released back to position 0 .
Deactivating
Deactivate the rain sensor by pressing the button
or press the lever down to another wiper
position. The rain sensor is automatically deactivated when the key is removed from the ignition slot or fiveminutes after the ignition has been switched off.
CAUTION
The rain sensor should be deactivated when washing the car in an automatic car wash, etc.If the rain sensor function is left on, the wip-ers will start inadvertently in the car wash andcould be damaged.
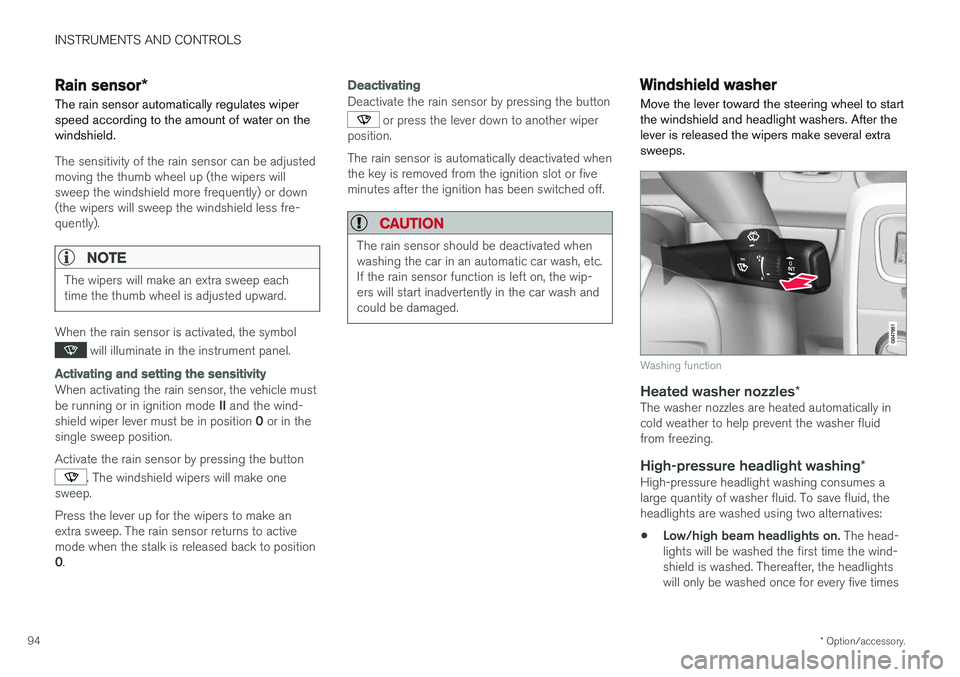
Windshield washer
Move the lever toward the steering wheel to start the windshield and headlight washers. After thelever is released the wipers make several extrasweeps.
Washing function
Heated washer nozzles *The washer nozzles are heated automatically in cold weather to help prevent the washer fluidfrom freezing.
High-pressure headlight washing *High-pressure headlight washing consumes alarge quantity of washer fluid. To save fluid, theheadlights are washed using two alternatives:
• Low/high beam headlights on.
The head-
lights will be washed the first time the wind-shield is washed. Thereafter, the headlightswill only be washed once for every five times
Page 99 of 396
INSTRUMENTS AND CONTROLS
}}
* Option/accessory.97
Sun shades
A sun shade can be integrated into the rear par- cel shelf.
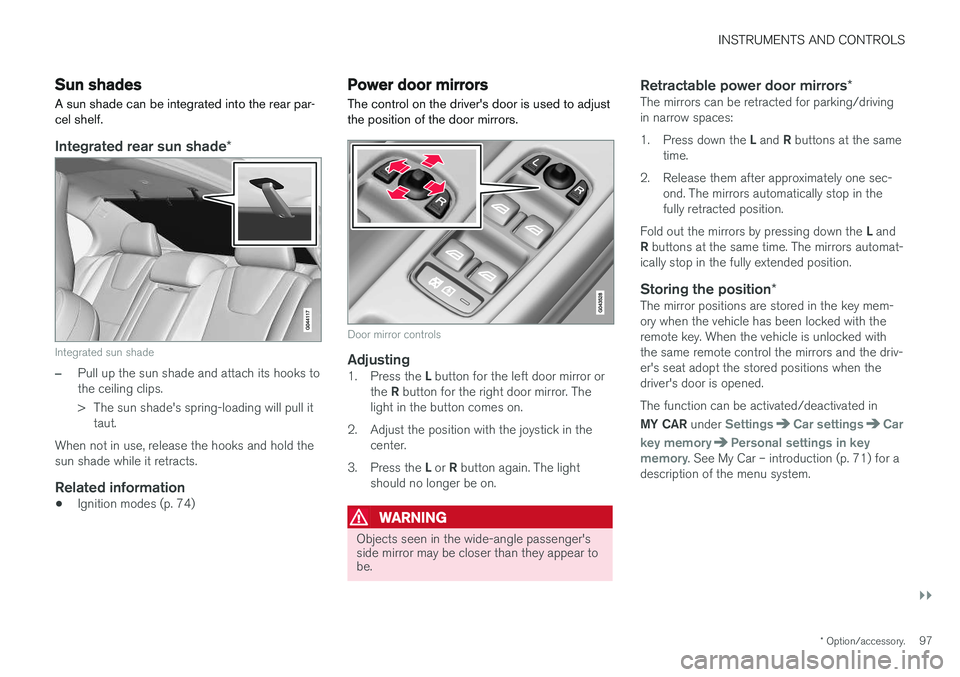
Integrated rear sun shade *
Integrated sun shade
–Pull up the sun shade and attach its hooks to the ceiling clips.
> The sun shade's spring-loading will pull it
taut.
When not in use, release the hooks and hold the sun shade while it retracts.
Related information
• Ignition modes (p. 74)
Power door mirrors
The control on the driver's door is used to adjust the position of the door mirrors.
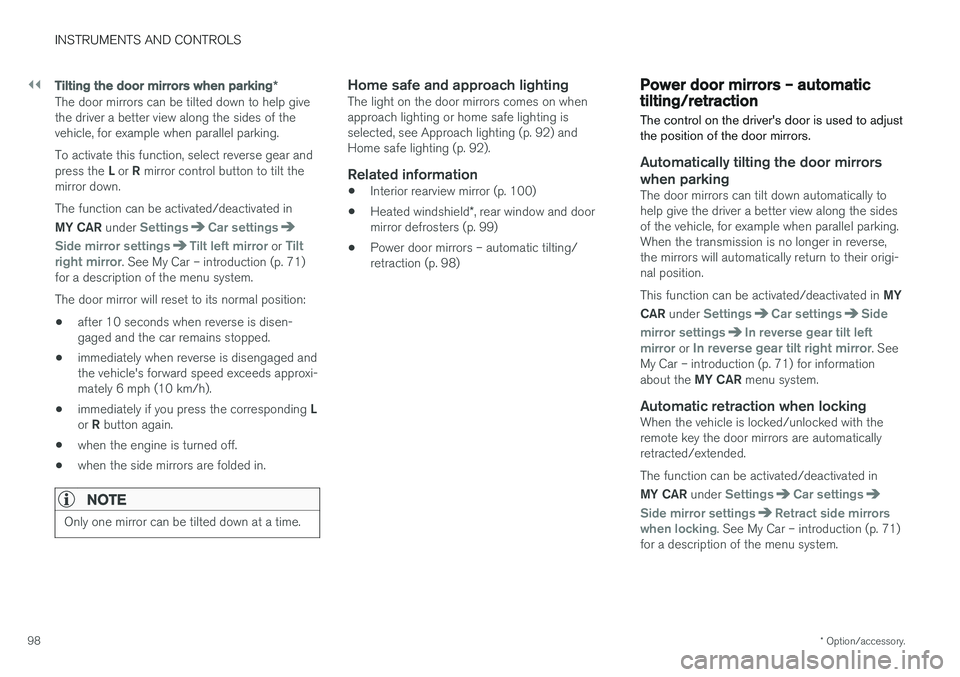
Door mirror controls
Adjusting1. Press the L button for the left door mirror or
the R button for the right door mirror. The
light in the button comes on.
2. Adjust the position with the joystick in the center.
3. Press the L or R button again. The light
should no longer be on.
WARNING
Objects seen in the wide-angle passenger's side mirror may be closer than they appear tobe.
Retractable power door mirrors *The mirrors can be retracted for parking/driving in narrow spaces: 1.
Press down the L and R buttons at the same
time.
2. Release them after approximately one sec- ond. The mirrors automatically stop in the fully retracted position.
Fold out the mirrors by pressing down the L and
R buttons at the same time. The mirrors automat-
ically stop in the fully extended position.
Storing the position *The mirror positions are stored in the key mem-ory when the vehicle has been locked with theremote key. When the vehicle is unlocked withthe same remote control the mirrors and the driv-er's seat adopt the stored positions when thedriver's door is opened. The function can be activated/deactivated in MY CAR under
SettingsCar settingsCar
key memory
Personal settings in key
memory. See My Car – introduction (p. 71) for a
description of the menu system.
Page 100 of 396
||
INSTRUMENTS AND CONTROLS
* Option/accessory.
98
Tilting the door mirrors when parking *
The door mirrors can be tilted down to help give the driver a better view along the sides of thevehicle, for example when parallel parking. To activate this function, select reverse gear and press the L or R mirror control button to tilt the
mirror down. The function can be activated/deactivated in MY CAR under
SettingsCar settings
Side mirror settingsTilt left mirror or Tilt
right mirror. See My Car – introduction (p. 71)
for a description of the menu system. The door mirror will reset to its normal position:
• after 10 seconds when reverse is disen- gaged and the car remains stopped.
• immediately when reverse is disengaged andthe vehicle's forward speed exceeds approxi-mately 6 mph (10 km/h).
• immediately if you press the corresponding
L
or R button again.
• when the engine is turned off.
• when the side mirrors are folded in.
NOTE
Only one mirror can be tilted down at a time.
Home safe and approach lightingThe light on the door mirrors comes on when approach lighting or home safe lighting isselected, see Approach lighting (p. 92) andHome safe lighting (p. 92).
Related information
•
Interior rearview mirror (p. 100)
• Heated windshield
*, rear window and door
mirror defrosters (p. 99)
• Power door mirrors – automatic tilting/retraction (p. 98)
Power door mirrors – automatic tilting/retraction
The control on the driver's door is used to adjust the position of the door mirrors.
Automatically tilting the door mirrors
when parking
The door mirrors can tilt down automatically to help give the driver a better view along the sidesof the vehicle, for example when parallel parking.When the transmission is no longer in reverse,the mirrors will automatically return to their origi-nal position. This function can be activated/deactivated in MY
CAR under
SettingsCar settingsSide
mirror settings
In reverse gear tilt left
mirror or In reverse gear tilt right mirror. See
My Car – introduction (p. 71) for information about the MY CAR menu system.
Automatic retraction when lockingWhen the vehicle is locked/unlocked with the remote key the door mirrors are automaticallyretracted/extended. The function can be activated/deactivated in MY CAR under
SettingsCar settings
Side mirror settingsRetract side mirrors
when locking. See My Car – introduction (p. 71)
for a description of the menu system.
Page 101 of 396
INSTRUMENTS AND CONTROLS
* Option/accessory.99
Resetting to neutralMirrors that have been moved out of position by an external force must be electrically reset to theneutral position for electric retracting/extendingto work. •Retract the mirrors with the
L and R buttons.
• Fold them out again with the
L and R but-
tons.
The mirrors are now reset in neutral position.
Related information
• Interior rearview mirror (p. 100)
• Heated windshield
*, rear window and door
mirror defrosters (p. 99)
Heated windshield *, rear window
and door mirror defrosters
The heating function is used to defrost/de-ice the windshield and/or the rear window and doormirrors.
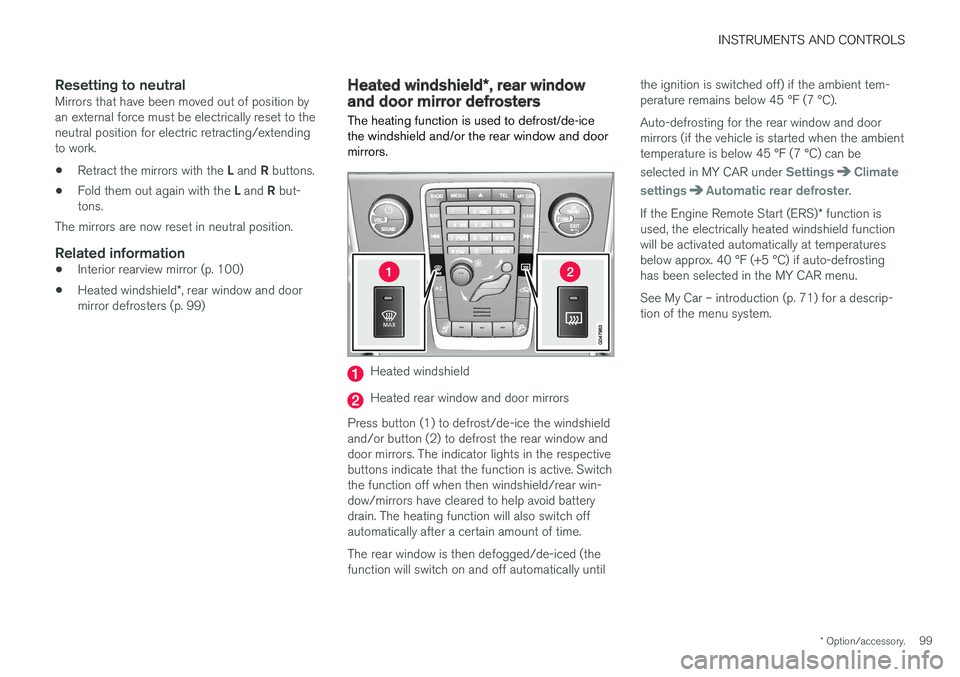
Heated windshield
Heated rear window and door mirrors
Press button (1) to defrost/de-ice the windshield and/or button (2) to defrost the rear window anddoor mirrors. The indicator lights in the respectivebuttons indicate that the function is active. Switchthe function off when then windshield/rear win-dow/mirrors have cleared to help avoid batterydrain. The heating function will also switch offautomatically after a certain amount of time. The rear window is then defogged/de-iced (the function will switch on and off automatically until the ignition is switched off) if the ambient tem-perature remains below 45 °F (7 °C). Auto-defrosting for the rear window and door mirrors (if the vehicle is started when the ambienttemperature is below 45 °F (7 °C) can be selected in MY CAR under
SettingsClimate
settings
Automatic rear defroster.
If the Engine Remote Start (ERS) * function is
used, the electrically heated windshield function will be activated automatically at temperaturesbelow approx. 40 °F (+5 °C) if auto-defrostinghas been selected in the MY CAR menu. See My Car – introduction (p. 71) for a descrip- tion of the menu system.
Page 118 of 396
INSTRUMENTS AND CONTROLS
* Option/accessory.
116
Trip computer – Supplementary information
General information for both Analog and Digital trip computer functions.
Average fuel consumptionFuel consumption since the last time this func- tion was reset.
Average speedThe vehicle's average speed since the last timethis function was reset.
Current fuel consumptionCurrent fuel consumption is calculated approxi-mately once a second. When the vehicle is mov-ing at low speed, fuel consumption is displayedper unit of time. At higher speeds, it is displayedin terms of distance. Miles or kilometers can be displayed, see the heading "Changing units".
Distance to emptyThis function shows the approximate distancethat can be driven on the fuel remaining in the tank. When
Distance to empty shows "----",
there is very little useable fuel remaining in that tank; refuel as soon as possible. The calculationis based on average fuel consumption during thelast 20 miles (30 km) of driving and the amountof fuel remaining in the tank (the accuracy of thisfigure may vary if your driving style changes). An economical driving style will generally increasethis distance. See Economical driving (p. 282) for information about driving economically.
Digital speed display
*Speed is expressed in the unit not used by theinstrument panel's speedometer e.g., if the nor-mal speedometer is in mph, the trip computer willdisplay in the speed in km/h and vice versa.
Resetting an analog instrument panel
Trip odometer(s) and average speed
1. Display trip odometer T1 or T1, or Average
speed.
2. Press and hold RESET until selected func-
tion is reset.
Each trip computer heading must be reset indi- vidually.
Resetting a digital instrument panel
Trip odometer
1. Turn the thumb wheel to select the combi-
nation of headings containing the trip odom- eter to be reset.
2. Press and hold RESET until selected trip
odometer is reset.
Average speed and fuel consumption
1. Select Trip computer reset and press OK. 2. Select one of the following alternatives using
the thumb wheel and press OK:
• mpg
• mph
• Reset both
3. Finish by pressing RESET.
Changing unitsTo change the unit (miles/km) used to measure distance and speed, go to
MY CARSettings
System optionsDistance and fuel units.
NOTE
In addition to changing units in the trip com- puter, this also changes the units used in the Volvo Navigation System (VNS) *.
Related information
• Trip computer – introduction (p. 110)
• Trip computer – functions, analog instrument panel (p. 111)
• Trip computer – functions, digital instrumentpanel (p. 114)
• Trip computer – Trip statistics (p. 117)
Page 119 of 396
INSTRUMENTS AND CONTROLS
* Option/accessory.117
Trip computer – Trip statistics
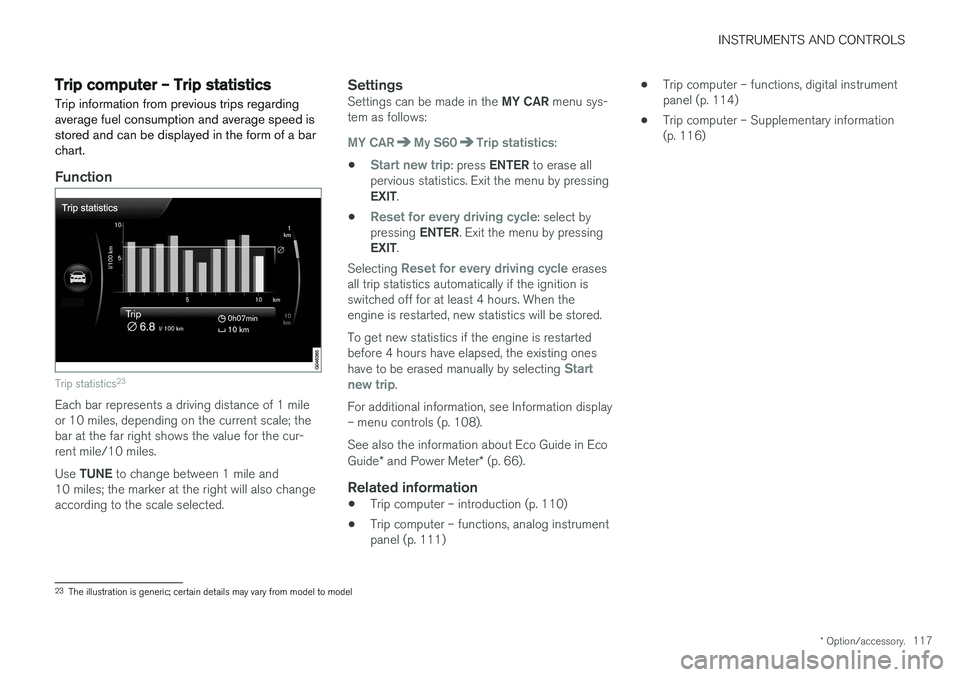
Trip information from previous trips regarding average fuel consumption and average speed isstored and can be displayed in the form of a barchart.
Function
Trip statistics 23
Each bar represents a driving distance of 1 mile or 10 miles, depending on the current scale; thebar at the far right shows the value for the cur-rent mile/10 miles. Use
TUNE to change between 1 mile and
10 miles; the marker at the right will also change according to the scale selected.
SettingsSettings can be made in the MY CAR menu sys-
tem as follows:
MY CARMy S60Trip statistics:
•
Start new trip: press ENTER to erase all
pervious statistics. Exit the menu by pressing EXIT .
•
Reset for every driving cycle: select by
pressing ENTER. Exit the menu by pressing
EXIT .
Selecting
Reset for every driving cycle erases
all trip statistics automatically if the ignition is switched off for at least 4 hours. When theengine is restarted, new statistics will be stored. To get new statistics if the engine is restarted before 4 hours have elapsed, the existing ones have to be erased manually by selecting
Start
new trip.
For additional information, see Information display – menu controls (p. 108). See also the information about Eco Guide in Eco Guide * and Power Meter * (p. 66).
Related information
• Trip computer – introduction (p. 110)
• Trip computer – functions, analog instrument panel (p. 111) •
Trip computer – functions, digital instrumentpanel (p. 114)
• Trip computer – Supplementary information(p. 116)
23
The illustration is generic; certain details may vary from model to model
Page 122 of 396
CLIMATE
120
Climate – general information
The vehicle is equipped with Electronic Climate
Control (ECC) (p. 125) that cools, heats or dehumidifies the air in the passenger compart-ment.
Air conditioning
NOTE
• The air conditioning can be switched off, but to ensure the best possible climatecomfort in the passenger compartmentand to prevent the windows from misting,it should always be on.
• In warm weather, a small amount of watermay accumulate under the car when ithas been parked. This water is condensa-tion from the A/C system and is normal.
Side windows and moonroofTo ensure that the air conditioning works opti- mally, the side windows, and the optional moon-roof should be closed.
Fog on the inside of the windowsThe defroster function (p. 128) should be usedto remove fog or mist from the inside of the win-dows. Keeping the windows clean with a com-mercially available window washing spray will alsohelp prevent fogging or misting.
Vents in the parcel shelf
NOTE
The air vents at the rear of the parcel shelf should never be obstructed.
Temporary shut-off of the air conditioning
The air conditioning (p. 128) is momentarily dis- engaged during full acceleration or when drivinguphill with a trailer. This may result in a temporaryincrease in cabin temperature.
Ice and snowAlways keep the air intake grille at the base ofthe windshield free of snow.
Climate system maintenanceSpecial tools and equipment are required tomaintain and carry out repairs on the climate sys-tem. Work of this type should only be done by atrained and qualified Volvo service technician.
RefrigerantVolvo cares about the environment. The air condi-tioning system in your car contains a CFC-freerefrigerant – R134a. This substance will notdeplete the ozone layer. The air conditioning sys-tem contains 1.76 lbs (800 g) of R134a. Thesystems uses PAG oil.
Related information
• Climate – sensors (p. 121)
• Climate – menu settings (p. 123)