My Car VOLVO S60 2018 Owner´s Manual
[x] Cancel search | Manufacturer: VOLVO, Model Year: 2018, Model line: S60, Model: VOLVO S60 2018Pages: 396, PDF Size: 9.4 MB
Page 123 of 396
CLIMATE
}}
* Option/accessory.121
Climate – sensors
The climate system utilizes a number of sensors to help regulate the temperature and humiditylevel in the passenger compartment.
Sensor location
• The sunlight sensor is located on the top side of the dashboard.
NOTE
The sunlight sensor monitors which side of the car that is most exposed to sunlight. Thiscan mean that the temperature may differbetween the right and left-side air vents, evenif the temperatures set for both sides of thepassenger compartment are the same.
•
The temperature sensor for the passenger compartment is located below the climatecontrol panel.
• The outside (ambient) temperature sensor islocated on the door mirror.
• The humidity sensor
* is located in the interior
rearview mirror.
NOTE
Do not cover or block the sensors with cloth- ing or other objects.
Related information
• Climate – general information (p. 120)
Air quality
The passenger compartment has been designed to be pleasant and comfortable, even for peoplewith asthma and contact allergies.
Passenger compartment filterReplace the cabin air filter with a new one at the recommended intervals. Please refer to your War-ranty and Service Records Information booklet, orconsult a trained and qualified Volvo service tech-nician for these intervals. The filter should bereplaced more often when driving under dirty anddusty conditions. The filter cannot be cleanedand therefore should always be replaced with anew one.
NOTE
There are different types of cabin air filters. Ensure that the correct type is installed.
Interior Air Quality System (IAQS)A multifilter helps reduce gases and particles in the incoming air, thereby reducing the levels ofodors and contaminants entering the vehicle. Theair quality sensor detects increased levels of con-taminants in the outside air. When the air qualitysensor detects contaminated outside air, the airintake closes and the air inside the passengercompartment is recirculated, i.e., no outside airenters the vehicle. The filter also cleans recircula-ted passenger compartment air.
Page 124 of 396
||
CLIMATE
* Option/accessory.
122
NOTE
Contact your Volvo retailer for IAQS air filter replacement intervals.
Materials used in the cabinThe materials used in the cabin have been devel- oped to help minimize the amount of dust andmake the cabin easier to keep clean. All floormats can be easily removed for cleaning. Use carcleaning products recommended by Volvo. Seealso the information in Cleaning the interior(p. 361).
Related information
• Climate – general information (p. 120)
• Interior Air Quality System (IAQS)
* (p. 122)
• Climate – menu settings (p. 123)
Interior Air Quality System (IAQS)
*
The Air Quality System (IAQS) consists of a mul- tifilter and an air quality sensor. The filter helpsremove gases and particles from the incomingair, thereby reducing the amounts of odors andcontaminants entering the vehicle.
The air quality (p. 121) sensor detects increased levels of contaminants in the outside air. Whenthe air quality sensor detects contaminated out-side air, the air intake closes and the air insidethe passenger compartment is recirculated, i.e.,no outside air enters the vehicle. The filter alsocleans recirculated passenger compartment air. When the AUTO (p. 127) button is depressed
the air quality sensor is always engaged. Activate or deactivate this function in
Climate
settings
Interior air quality system.
NOTE
• The air quality sensor should always be engaged in order to obtain the best air inthe passenger compartment.
• Recirculation is limited in cold weather toavoid fogging.
• If the insides of the windows start fog-ging, disengage the air quality sensor.Use the defroster function to increaseairflow to the front, side, and rear win-dows.
Related information
• Climate – general information (p. 120)
• Max. defroster and electrically heated wind- shield
* (p. 128)
Page 125 of 396
CLIMATE
}}
123
Climate – menu settings
The default settings for four of the climate sys-
tem's (p. 120) functions can be changed in themenu system.
• Blower speed (p. 127) in automatic mode (p. 127).
• Recirculation timer (p. 130) for passengercompartment air.
• Automatic rear window defrosting (p. 99).
• The optional Interior Air Quality Sys-tem (p. 122) (IAQS).
The functions can also be returned to factory set-tings in the menu system. See My Car – introduction (p. 71) for a descrip- tion of the menu system.
Related information
• Electronic climate control (ECC) (p. 125)
Air distribution – general
The incoming air is distributed through a number of different vents in the passenger compartment.
Air distribution is fully automatic in AUTO
mode (p. 127). If desired, air distribution can be controlled man- ually, see Air distribution – function (p. 129).
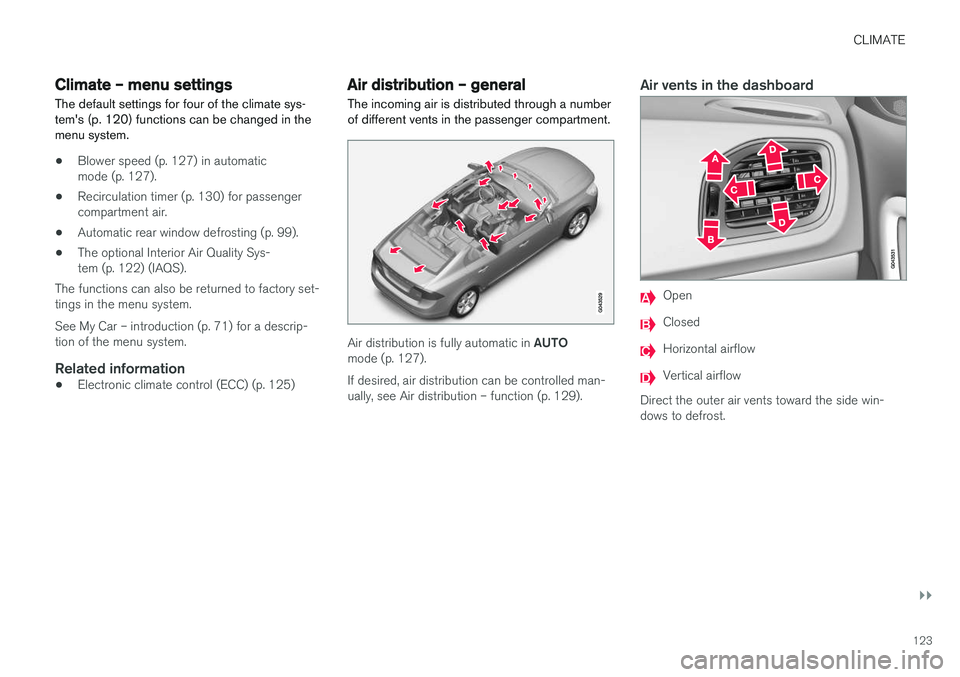
Air vents in the dashboard
Open
Closed
Horizontal airflow
Vertical airflow
Direct the outer air vents toward the side win- dows to defrost.
Page 128 of 396
CLIMATE
* Option/accessory.
126
Heated seats
The front seat heating has three levels to increase comfort for the driver and passenger incold weather. The rear outboard seat heating has three levels to increase comfort for the passengers in coldweather.
Heated front seats *
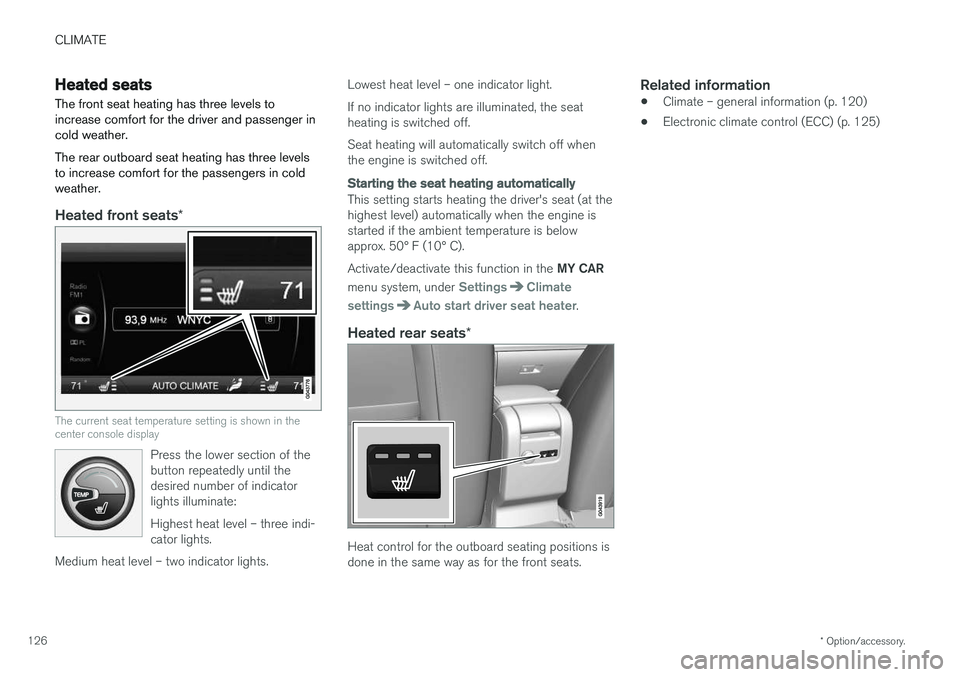
The current seat temperature setting is shown in the center console display
Press the lower section of the button repeatedly until thedesired number of indicatorlights illuminate: Highest heat level – three indi- cator lights.
Medium heat level – two indicator lights.
Lowest heat level – one indicator light. If no indicator lights are illuminated, the seat heating is switched off. Seat heating will automatically switch off when the engine is switched off.
Starting the seat heating automatically
This setting starts heating the driver's seat (at the highest level) automatically when the engine isstarted if the ambient temperature is belowapprox. 50° F (10° C). Activate/deactivate this function in the MY CAR
menu system, under
SettingsClimate
settings
Auto start driver seat heater.
Heated rear seats *
Heat control for the outboard seating positions is done in the same way as for the front seats.
Related information
•Climate – general information (p. 120)
• Electronic climate control (ECC) (p. 125)
Page 132 of 396
CLIMATE
130
Air distribution – recirculation Recirculation can be used to shut out exhaust fumes, smoke, etc., from the passenger com-partment.
The air in the passenger com- partment is then recirculated,i.e., no air from outside the caris taken into the car when thisfunction is activated. The indi-cator light in the button will illu-minate when recirculation is
selected. If the air in the car recirculates for too long, there is a risk of condensation forming on the insidesof the windows, especially in winter.
TimerThe timer function minimizes the risk of fogging, or stale air when the recirculation function isselected by automatically switching off the func-tion after a certain length of time, depending onthe ambient temperature. Activate/deactivate the function under
Climate settingsRecirculation timer. See My Car – introduction
(p. 71) for a description of the menu system.
NOTE
When Defroster is selected, recirculation is always deactivated.
Related information
• Climate – general information (p. 120)
• Air distribution – general (p. 123)
• Air distribution – function (p. 129)
• Air distribution – table (p. 131)
Page 139 of 396
LOADING AND STORAGE
* Option/accessory.137
Glove compartment
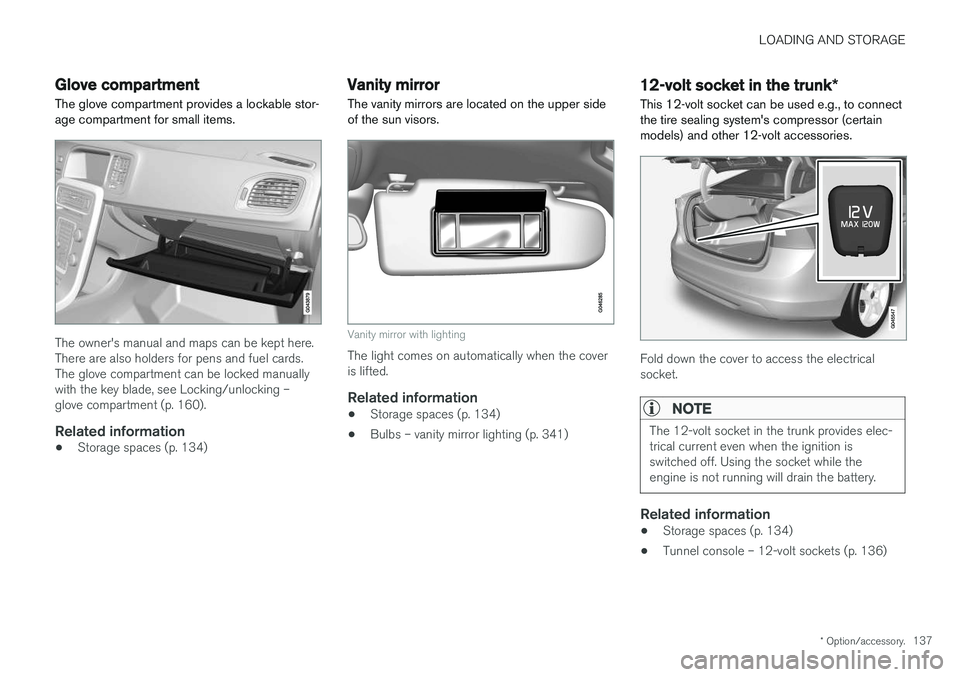
The glove compartment provides a lockable stor- age compartment for small items.
The owner's manual and maps can be kept here. There are also holders for pens and fuel cards.The glove compartment can be locked manuallywith the key blade, see Locking/unlocking –glove compartment (p. 160).
Related information
• Storage spaces (p. 134)
Vanity mirror
The vanity mirrors are located on the upper side of the sun visors.
Vanity mirror with lighting
The light comes on automatically when the cover is lifted.
Related information
• Storage spaces (p. 134)
• Bulbs – vanity mirror lighting (p. 341)
12-volt socket in the trunk
*
This 12-volt socket can be used e.g., to connect the tire sealing system's compressor (certainmodels) and other 12-volt accessories.
Fold down the cover to access the electrical socket.
NOTE
The 12-volt socket in the trunk provides elec- trical current even when the ignition isswitched off. Using the socket while theengine is not running will drain the battery.
Related information
• Storage spaces (p. 134)
• Tunnel console – 12-volt sockets (p. 136)
Page 140 of 396
LOADING AND STORAGE
138
Loading – general
The load carrying capacity of your vehicle is determined by factors such as the number ofpassengers, the amount of cargo, the weight ofany accessories that may be installed, etc.
To increase loading space, the rear seat back- rests can be folded down, see Rear seats – fold-
ing backrest (p. 81).
When loading the trunk, keep the following in
mind:
The trunk lid can be unlocked an pop-ped open slightly via the button locatedon the lighting panel, see Locking/
unlocking – trunk (p. 160).
• Load objects in the trunk against the back- rest whenever possible.
• Unstable loads can be secured to the loadanchoring eyelets with straps or web lash-ings to help keep them from shifting.
• Stop the engine and apply the parking brakewhen loading or unloading long objects. Thegear selector can be knocked out of positionby long loads, which could set the vehicle inmotion.
WARNING
• Stop the engine, put the gear selector in P
, and apply the parking brake when
loading or unloading long objects.
• The vehicle's driving characteristics may change depending on the weight and dis-tribution of the load.
• A 44-pound (20 kg) object produces aforce of 2,200 pounds (1,000 kg) in ahead-on collision at 30 mph (50 km/h).
• The rear seat should not be loaded to alevel higher than 2 in. (5 cm) below theupper edge of the rear side windows.Objects placed higher than this levelcould impede the function of the VolvoInflatable Curtain.
Related information
• Load anchoring eyelets (p. 140)
• Loading – roof load carriers (p. 139)
Ski hatch
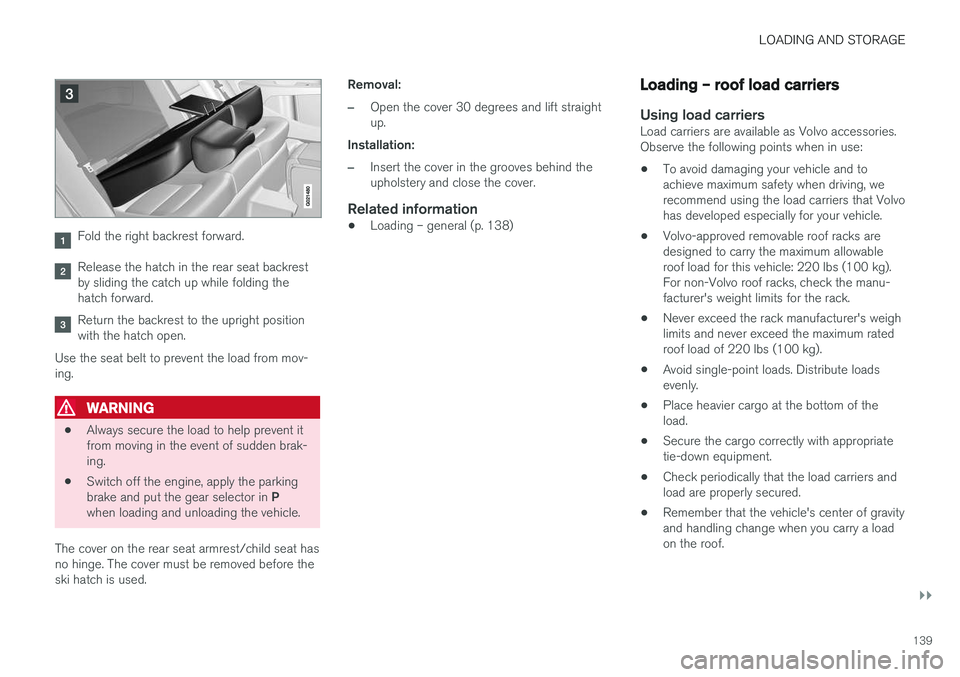
There is a hatch in the right section of the rear seat backrest that can be opened for transport-ing long objects.
Page 141 of 396
LOADING AND STORAGE
}}
139
Fold the right backrest forward.
Release the hatch in the rear seat backrest by sliding the catch up while folding thehatch forward.
Return the backrest to the upright position with the hatch open.
Use the seat belt to prevent the load from mov-ing.
WARNING
• Always secure the load to help prevent it from moving in the event of sudden brak-ing.
• Switch off the engine, apply the parking brake and put the gear selector in
P
when loading and unloading the vehicle.
The cover on the rear seat armrest/child seat has no hinge. The cover must be removed before theski hatch is used. Removal:
–Open the cover 30 degrees and lift straight up.
Installation:
–Insert the cover in the grooves behind the upholstery and close the cover.
Related information
• Loading – general (p. 138)
Loading – roof load carriers
Using load carriersLoad carriers are available as Volvo accessories. Observe the following points when in use:
• To avoid damaging your vehicle and toachieve maximum safety when driving, werecommend using the load carriers that Volvohas developed especially for your vehicle.
• Volvo-approved removable roof racks aredesigned to carry the maximum allowableroof load for this vehicle: 220 lbs (100 kg).For non-Volvo roof racks, check the manu-facturer's weight limits for the rack.
• Never exceed the rack manufacturer's weighlimits and never exceed the maximum ratedroof load of 220 lbs (100 kg).
• Avoid single-point loads. Distribute loadsevenly.
• Place heavier cargo at the bottom of theload.
• Secure the cargo correctly with appropriatetie-down equipment.
• Check periodically that the load carriers andload are properly secured.
• Remember that the vehicle's center of gravityand handling change when you carry a loadon the roof.
Page 142 of 396
||
LOADING AND STORAGE
140•
The vehicle's wind resistance and fuel con- sumption will increase with the size of theload.
• Drive smoothly. Avoid rapid starts, fast cor-nering and hard braking.
Related information
• Loading – general (p. 138)
• Load anchoring eyelets (p. 140)
Load anchoring eyelets
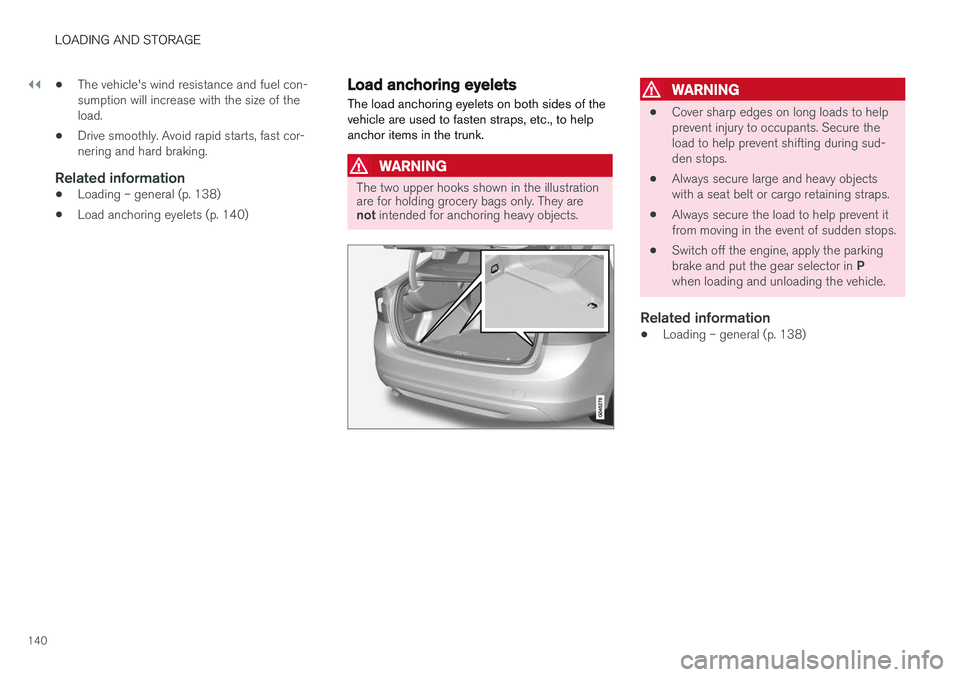
The load anchoring eyelets on both sides of the vehicle are used to fasten straps, etc., to helpanchor items in the trunk.
WARNING
The two upper hooks shown in the illustration are for holding grocery bags only. They are not intended for anchoring heavy objects.
WARNING
• Cover sharp edges on long loads to help prevent injury to occupants. Secure theload to help prevent shifting during sud-den stops.
• Always secure large and heavy objectswith a seat belt or cargo retaining straps.
• Always secure the load to help prevent itfrom moving in the event of sudden stops.
• Switch off the engine, apply the parking brake and put the gear selector in
P
when loading and unloading the vehicle.
Related information
• Loading – general (p. 138)
Page 146 of 396
LOCKS AND ALARM
144
Remote key and key blade
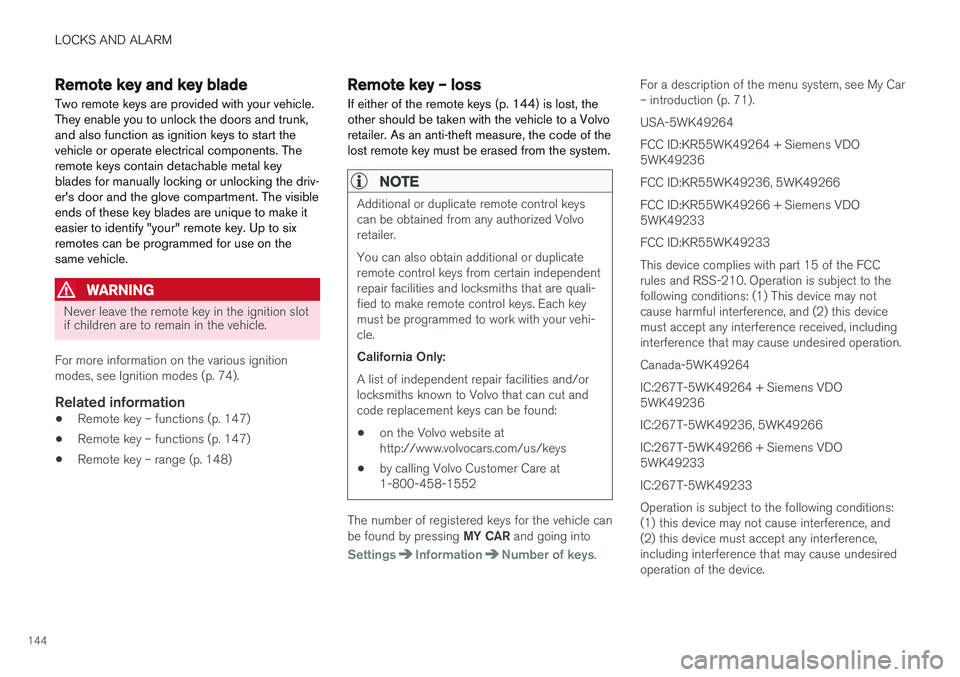
Two remote keys are provided with your vehicle. They enable you to unlock the doors and trunk,and also function as ignition keys to start thevehicle or operate electrical components. Theremote keys contain detachable metal keyblades for manually locking or unlocking the driv-er's door and the glove compartment. The visibleends of these key blades are unique to make iteasier to identify "your" remote key. Up to sixremotes can be programmed for use on thesame vehicle.
WARNING
Never leave the remote key in the ignition slot if children are to remain in the vehicle.
For more information on the various ignition modes, see Ignition modes (p. 74).
Related information
• Remote key – functions (p. 147)
• Remote key – functions (p. 147)
• Remote key – range (p. 148)
Remote key – loss
If either of the remote keys (p. 144) is lost, the other should be taken with the vehicle to a Volvoretailer. As an anti-theft measure, the code of thelost remote key must be erased from the system.
NOTE
Additional or duplicate remote control keys can be obtained from any authorized Volvoretailer. You can also obtain additional or duplicate remote control keys from certain independentrepair facilities and locksmiths that are quali-fied to make remote control keys. Each keymust be programmed to work with your vehi-cle. California Only: A list of independent repair facilities and/or locksmiths known to Volvo that can cut andcode replacement keys can be found: • on the Volvo website at http://www.volvocars.com/us/keys
• by calling Volvo Customer Care at1-800-458-1552
The number of registered keys for the vehicle can be found by pressing
MY CAR and going into
SettingsInformationNumber of keys.For a description of the menu system, see My Car – introduction (p. 71). USA-5WK49264FCC ID:KR55WK49264 + Siemens VDO 5WK49236 FCC ID:KR55WK49236, 5WK49266FCC ID:KR55WK49266 + Siemens VDO 5WK49233 FCC ID:KR55WK49233This device complies with part 15 of the FCC rules and RSS-210. Operation is subject to thefollowing conditions: (1) This device may notcause harmful interference, and (2) this devicemust accept any interference received, includinginterference that may cause undesired operation. Canada-5WK49264IC:267T-5WK49264 + Siemens VDO 5WK49236 IC:267T-5WK49236, 5WK49266IC:267T-5WK49266 + Siemens VDO 5WK49233 IC:267T-5WK49233Operation is subject to the following conditions: (1) this device may not cause interference, and(2) this device must accept any interference,including interference that may cause undesiredoperation of the device.