VOLVO S80 1999 Service Manual
Manufacturer: VOLVO, Model Year: 1999, Model line: S80, Model: VOLVO S80 1999Pages: 96, PDF Size: 2.27 MB
Page 41 of 96

Remote keyless entry system - replacing batteries
Each remote transmitter is powered by a three-volt, CR 2032 battery.
If the range of the transmitter is noticeably reduced, this indicates that the battery is weak and should be replaced.
Replacement: Remove the screw on the back of the transmitter cover. Replace the battery. Reinstall the cover and
tighten the screw to help protect the transmitter.
NOTE: The old battery should be disposed of properly at a recycling center or at your Volvo retailer.
pg. 58 Alarm
Alarm
The alarm is automatically set (armed) whenever you lock your car.
When armed (set), the alarm continuously monitors a number of points on the car. The following conditions will set off
the alarm:
· The hood is opened.
· The trunk is opened.
· A door is opened.
· The ignition switch is tampered with.
· If there is movement in the passenger compartment (if the car is equipped with the optional movement sensor).
· The car is lifted or towed (if the car is equipped with the optional inclination sensor).
· The battery is disconnected (while the alarm is set).
Arming (setting) the alarm
Press the LOCK button on the remote control, lock the car using the key in the driver's door or press the central lock
button on one of the front doors with the door open. One long flash of the turn signals will confirm that the alarm is
set.
Disarming the alarm
Press the UNLOCK button on the remote control or unlock the doors with the key.
Turning off (stopping) the alarm
If the alarm is sounding, it can be stopped by pressing the UNLOCK button on the remote control or by unlocking the
driver's door with the key.
ProCarManuals.com
Page 42 of 96
Visual alarm signal
The visual alarm signal is given by flashing all turn signals and turning on the interior lighting for approximately 5
minutes.
Audible alarm signal
An audible alarm signal is given by a battery powered siren. One alarm cycle lasts for 25 seconds.
"Panic" function
In an emergency situation, this feature can be used to attract attention.
Activate the "panic" function by pressing the red button on the remote control (see illustration on page 56
) for at least
3 seconds or by pressing this button twice within 3 seconds. The turn signals will flash, the interior lights will go on
and the car's horn will sound.
The function can be turned off by pressing any of the buttons on the remote control or will stop automatically
after 25 seconds.
NOTE: This button will NOT unlock the car.
pg. 59 Alarm
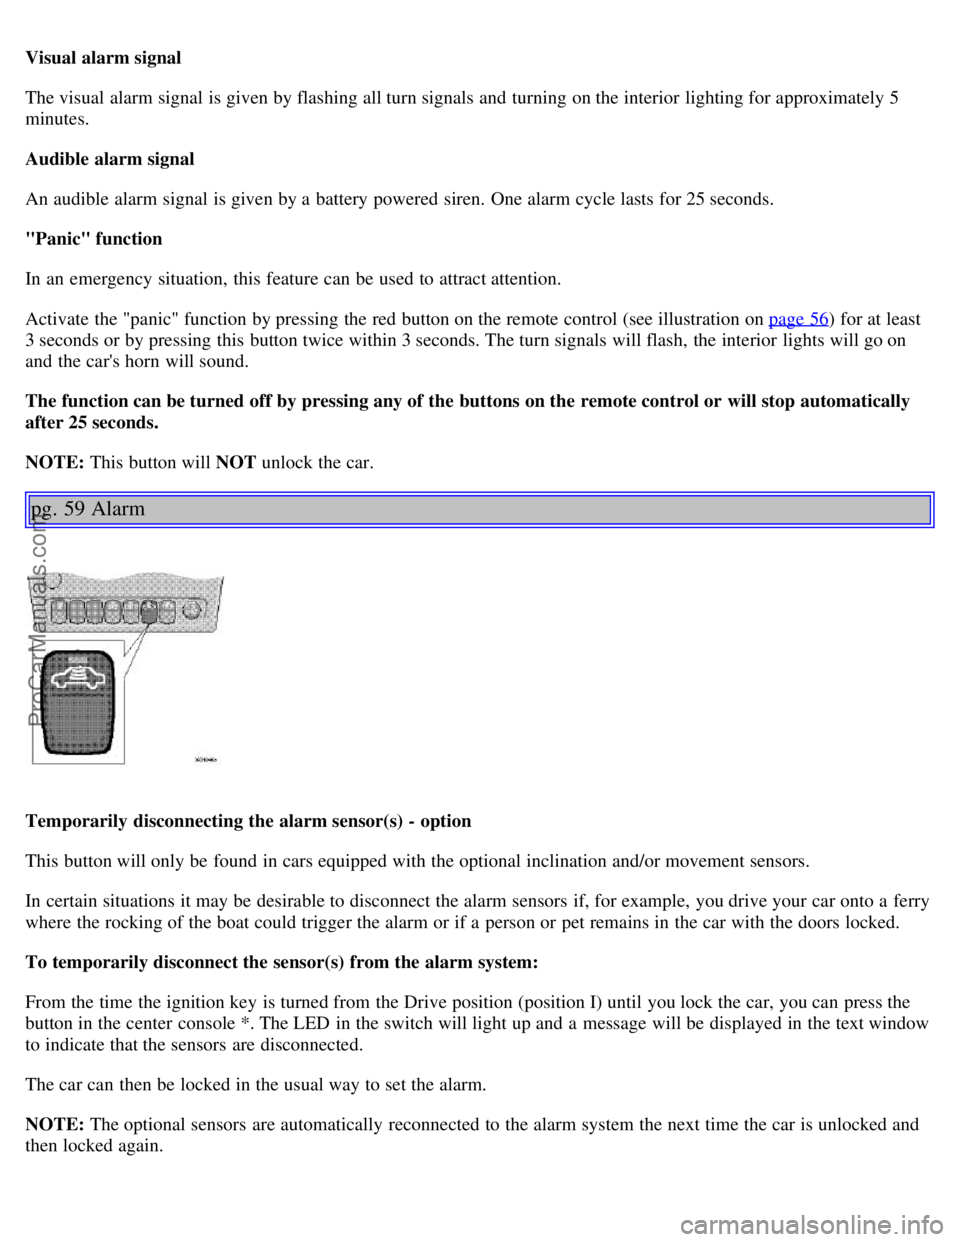
Temporarily disconnecting the alarm sensor(s) - option
This button will only be found in cars equipped with the optional inclination and/or movement sensors.
In certain situations it may be desirable to disconnect the alarm sensors if, for example, you drive your car onto a ferry
where the rocking of the boat could trigger the alarm or if a person or pet remains in the car with the doors locked.
To temporarily disconnect the sensor(s) from the alarm system:
From the time the ignition key is turned from the Drive position (position I) until you lock the car, you can press the
button in the center console *. The LED in the switch will light up and a message will be displayed in the text window
to indicate that the sensors are disconnected.
The car can then be locked in the usual way to set the alarm.
NOTE: The optional sensors are automatically reconnected to the alarm system the next time the car is unlocked and
then locked again.
ProCarManuals.com
Page 43 of 96
LED alarm status signals
The status of the alarm system is indicated by the red LED at the top of the dash:
· LED off - the alarm is not armed (set)
· LED flashes once per second - the alarm is armed (set)
· LED flashes rapidly before the ignition is switched on - the alarm has been triggered
· Fault in the alarm system: If a fault has been detected in the alarm system, a message will be displayed in the text
window. Contact a Volvo retailer.
Automatic reset function
If the car has been unlocked with the remote control, the locks will automatically reengage (re-lock) and the alarm will
reset after 2 minutes unless a door or the trunk has been opened.
* The position of this button may vary, depending on the specifications of your car.
pg. 60 Child safety locks - rear doors
Child safety lock control in left rear doorChild safety lock control in right rear door
Child safety locks - rear doors
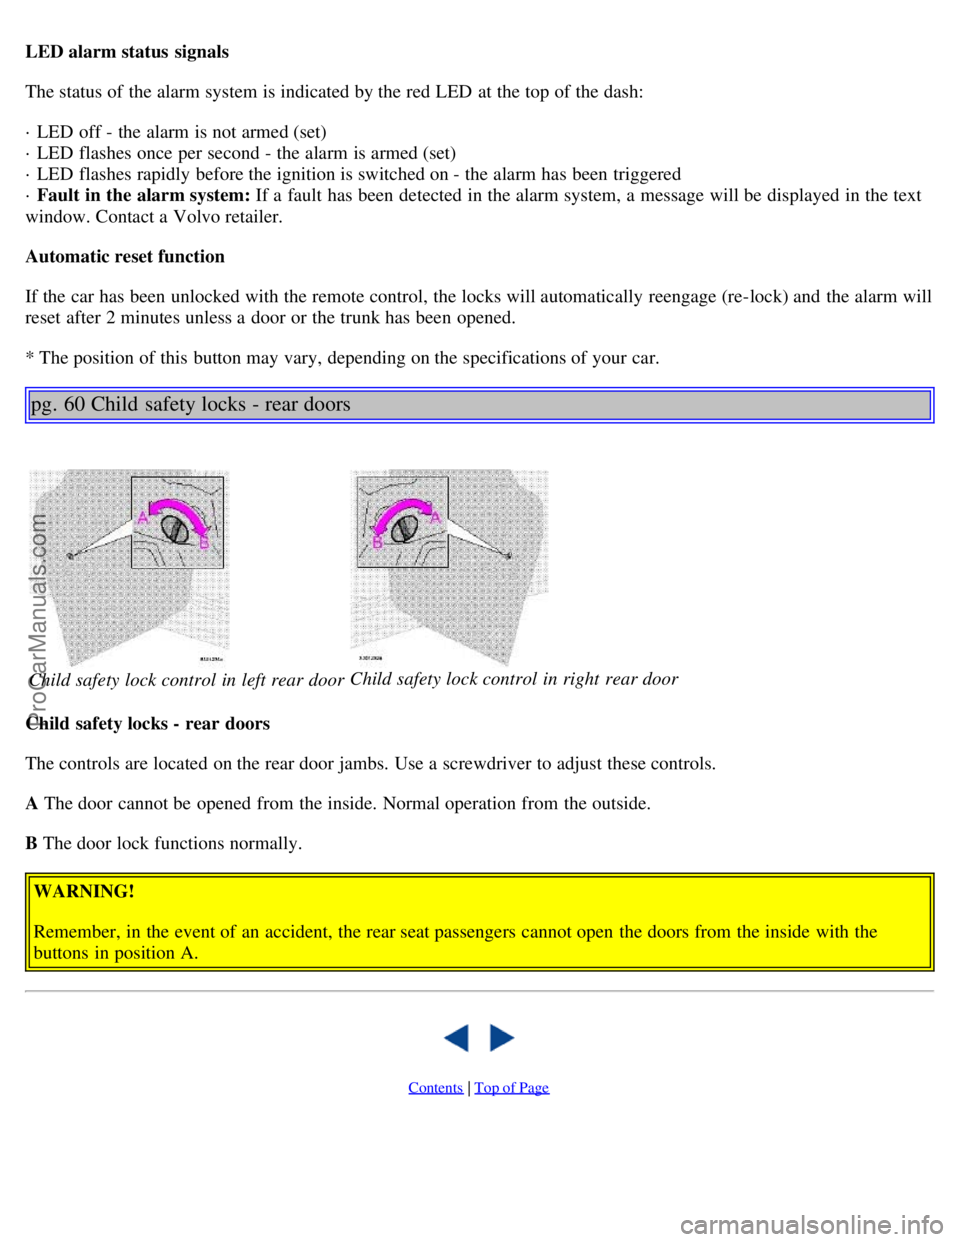
The controls are located on the rear door jambs. Use a screwdriver to adjust these controls.
A The door cannot be opened from the inside. Normal operation from the outside.
B The door lock functions normally.
WARNING!
Remember, in the event of an accident, the rear seat passengers cannot open the doors from the inside with the
buttons in position A.
Contents | Top of Page
ProCarManuals.com
Page 44 of 96
1 9 9 9
VOLVO S80
Chapter 6 - Starting and driving
pg. 61 Starting and driving
Break-in period, Fuel requirements62
Refueling63
Starting the engine64
Automatic transmission65
Driving economy69
Points to remember70
Emergency towing72
Vehicle towing information73
Towing a trailer74
Jump starting75
Winter driving76
Long distance trips77
Three-way catalytic converter78
pg. 62 Fuel requirements
Break-in Period
A new car should be broken in. Refrain from utilizing your car's full driving potential e.g., full-throttle acceleration,
during the first 1,200 miles (2000 km) including the "kickdown" function (automatic transmission).
NOTE ENGINE OIL:
Although some oil consumption occurs during normal engine operation, more oil is consumed when the engine is new
as the internal parts generate higher friction while wearingin to each other. From the time the engine is new until the
first service is performed, the oil consumption could be higher than normal. For this reason, it is especially
ProCarManuals.com
Page 45 of 96
important to check the oil every time you refuel your car during this period. See page 111.
Fuel requirements
Octane rating
Volvo engines are designed for optimum performance on unleaded premium gasoline with an octane rating. AKI of 91,
or above. AKI (ANTI KNOCK INDEX) is an average of the Research Octane Number, RON, and the Motor Octane
Number, MON. (RON + MON/2).
The minimum octane requirement is AKI 87 (RON 91).
Deposit control gasoline (detergent additives)
Volvo recommends the use of gasoline containing deposit control additives. These additives have shown to be efficient
in keeping injectors and intake valves clean. Consistent use of deposit control gasolines will help ensure good
driveability and fuel economy. If you are not sure whether the gasoline contains deposit control additives, check with
the service station operator.
Unleaded fuel
Each Volvo has a three-way catalytic converter and must use only unleaded gasoline. U.S. and Canadian regulations
require that pumps delivering unleaded gasoline be labelled "UNLEADED". Only these pumps have nozzles which fit
your car's filler inlet. It is unlawful to dispense leaded fuel into a vehicle labelled "unleaded gasoline only". Leaded
gasoline damages the three-way catalytic converter and the heated oxygen sensor system. Repeated use of leaded
gasoline will lessen the effectiveness of the emission control system and could result in loss of emission warranty
coverage. State and local vehicle inspection programs will make detection of misfueling easier, possibly resulting in
emission test failure for misfueled vehicles.
NOTE: Some U.S. and Canadian gasolines contain an octane enhancing additive called methyl-cyclopentadienyl
manganese tricarbonyl (MMT). If such fuels are used, your Emission Control System performance may be affected,
and the Malfunction Indicator Lamp located on your instrument panel may light. If this occurs, please return your
vehicle to an authorized Volvo retailer for service.
Gasoline containing alcohol and ethers
"Oxygenated fuels"
Some fuel suppliers sell gasoline containing "oxygenates" which are usually alcohols or ethers. In some areas, state or
local laws require that the service pump be marked indicating use of alcohols or ethers. However, there are areas in
which the pumps are unmarked. If you are not sure whether there is alcohol or ethers in the gasoline you buy, check
with the service station operator. To meet seasonal air quality standards, some areas require the use of "oxygenated"
fuel.
Volvo allows the use of the following "oxygenated fuels; however, the octane ratings listed on this page must still be
met.
Alcohol — Ethanol: Fuels containing up to 10% ethanol by volume may be used. Ethanol may also be referred to as
Ethyl alcohol, or "Gasohol".
Ethers — MTBE: Fuels containing up to 15% MTBE may be used.
pg. 63 Refueling
ProCarManuals.com
Page 46 of 96
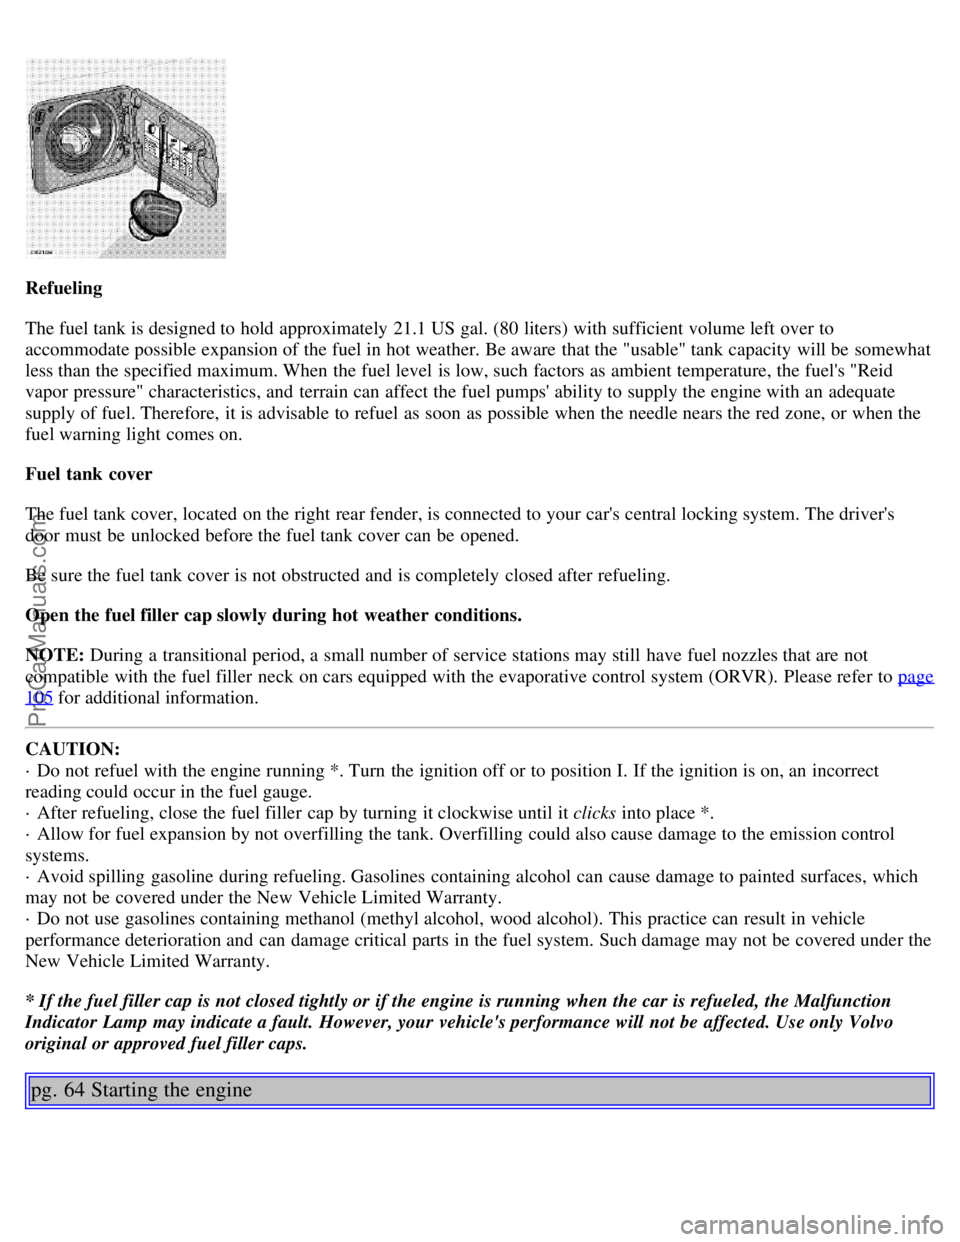
Refueling
The fuel tank is designed to hold approximately 21.1 US gal. (80 liters) with sufficient volume left over to
accommodate possible expansion of the fuel in hot weather. Be aware that the "usable" tank capacity will be somewhat
less than the specified maximum. When the fuel level is low, such factors as ambient temperature, the fuel's "Reid
vapor pressure" characteristics, and terrain can affect the fuel pumps' ability to supply the engine with an adequate
supply of fuel. Therefore, it is advisable to refuel as soon as possible when the needle nears the red zone, or when the
fuel warning light comes on.
Fuel tank cover
The fuel tank cover, located on the right rear fender, is connected to your car's central locking system. The driver's
door must be unlocked before the fuel tank cover can be opened.
Be sure the fuel tank cover is not obstructed and is completely closed after refueling.
Open the fuel filler cap slowly during hot weather conditions.
NOTE: During a transitional period, a small number of service stations may still have fuel nozzles that are not
compatible with the fuel filler neck on cars equipped with the evaporative control system (ORVR). Please refer to page
105 for additional information.
CAUTION:
· Do not refuel with the engine running *. Turn the ignition off or to position I. If the ignition is on, an incorrect
reading could occur in the fuel gauge.
· After refueling, close the fuel filler cap by turning it clockwise until it clicks into place *.
· Allow for fuel expansion by not overfilling the tank. Overfilling could also cause damage to the emission control
systems.
· Avoid spilling gasoline during refueling. Gasolines containing alcohol can cause damage to painted surfaces, which
may not be covered under the New Vehicle Limited Warranty.
· Do not use gasolines containing methanol (methyl alcohol, wood alcohol). This practice can result in vehicle
performance deterioration and can damage critical parts in the fuel system. Such damage may not be covered under the
New Vehicle Limited Warranty.
* If the fuel filler cap is not closed tightly or if the engine is running when the car is refueled, the Malfunction
Indicator Lamp may indicate a fault. However, your vehicle's performance will not be affected. Use only Volvo
original or approved fuel filler caps.
pg. 64 Starting the engine
ProCarManuals.com
Page 47 of 96
Starting the engine
1. Fasten the seat belt.WARNING!
Before starting, check that the seat, steering wheel and mirrors are adjusted properly. Make sure the brake pedal can
be depressed completely. Adjust the seat if necessary. See page 46
.
2. Apply the parking brake, if not already set. The gear selector is locked in the (P)ark position (SHIFTLOCK).
3. Without touching the accelerator pedal, turn the ignition key* to the starting position. Allow the starter to operate
for up to 5 seconds (turbo: 10 seconds). Release the key as soon as the engine starts. If the engine fails to start, repeat
this step.
For cold starts at altitudes above 6000 ft (1800 meters), depress the accelerator pedal halfway and turn the key to the
starting position. Release the pedal slowly when the engine starts.
4. To release the gear selector from the (P)ark position, the engine must be running (or the ignition key must be in
position II) and the brake pedal must be depressed.
5. Select the desired gear. The gear engages after a very slight delay which is especially noticeable when selecting R.
NOTE:
· Your car is equipped with a KEYLOCK system. When the engine is switched off, the gear selector must be in the
( P )ark position before the key can be removed from the ignition switch.
· When starting in cold weather, the transmission may shift up at slightly higher engine speeds than normal until the
automatic transmission fluid reaches normal operating temperature.
CAUTION :
· The engine should be idling when you move the gear selector. Never accelerate until after you feel the gear engage!
Accelerating immediately after selecting a gear will cause harsh gear engagement and premature transmission wear.
· Selecting P or N when idling at a standstill for prolonged periods of time will help prevent overheating of the
automatic transmission fluid.
· Do not race a cold engine immediately after starting. Oil flow may not reach some lubrication points fast enough to
prevent engine damage.
WARNING!
· Always place the gear selector in Park and apply the parking brake before leaving the vehicle. Never leave the car
unattended with the engine running.
· Always open the garage doors fully before starting the engine inside a garage to ensure adequate ventilation. The
exhaust gases contain carbon monoxide, which is invisible and odorless but very
poisonous.
* Your car is equipped with an electronic start inhibitor (immobilizer). The keys you received with your car are
specially coded. The code in the key is transmitted to an antenna in the ignition switch where it is compared to the
code stored in the start inhibitor module. The car can only be started if a properly coded key is used.
If two of the keys to your car are close together, e.g., on the same key ring, when you try to start the car, this could
cause interference in the immobilizer system and result in the car not starting. If this should occur, remove one of the
keys from the key ring before trying to start the car again.
ProCarManuals.com
Page 48 of 96
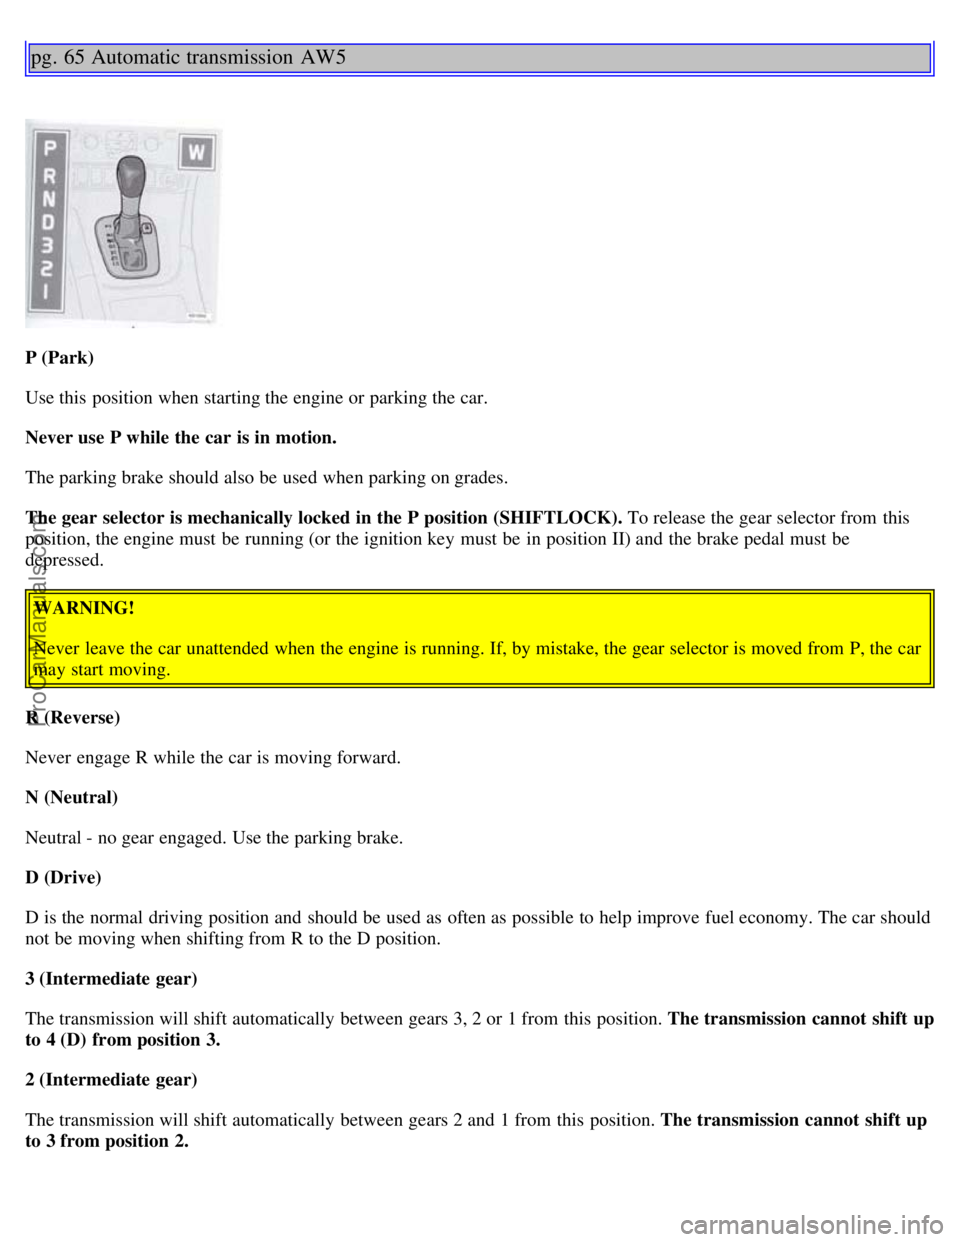
pg. 65 Automatic transmission AW5
P (Park)
Use this position when starting the engine or parking the car.
Never use P while the car is in motion.
The parking brake should also be used when parking on grades.
The gear selector is mechanically locked in the P position (SHIFTLOCK). To release the gear selector from this
position, the engine must be running (or the ignition key must be in position II) and the brake pedal must be
depressed.WARNING!
Never leave the car unattended when the engine is running. If, by mistake, the gear selector is moved from P, the car
may start moving.
R (Reverse)
Never engage R while the car is moving forward.
N (Neutral)
Neutral - no gear engaged. Use the parking brake.
D (Drive)
D is the normal driving position and should be used as often as possible to help improve fuel economy. The car should
not be moving when shifting from R to the D position.
3 (Intermediate gear)
The transmission will shift automatically between gears 3, 2 or 1 from this position. The transmission cannot shift up
to 4 (D) from position 3.
2 (Intermediate gear)
The transmission will shift automatically between gears 2 and 1 from this position. The transmission cannot shift up
to 3 from position 2.
ProCarManuals.com
Page 49 of 96
1 (Low gear)
The transmission is locked in the lowest gear when the selector is in this position. If you are driving above 31 mph (50
km/h) when the position 1 is selected, the transmission will automatically first shift to intermediate gear 2 until the
speed has dropped to under 31 mph (50 km/h).
NOTE:
· Gears 3, 2, or 1 can be used if you are driving in a mountainous area, towing a trailer or to increase engine braking
capacity.
· The transmission has a built-in function which is designed to help prevent excessive engine speeds (high rpm) when
gears 3, 2 or 1 are selected.
Automatic transmission - adaptive system
The automatic transmission is controlled by an adaptive guidance system that constantly monitors the way in which the
transmission functions. It senses and adapts each gear shift for optimal performance. The system also monitors your
particular driving style and adapts gear shifting accordingly.
pg. 66 Automatic transmission AW5
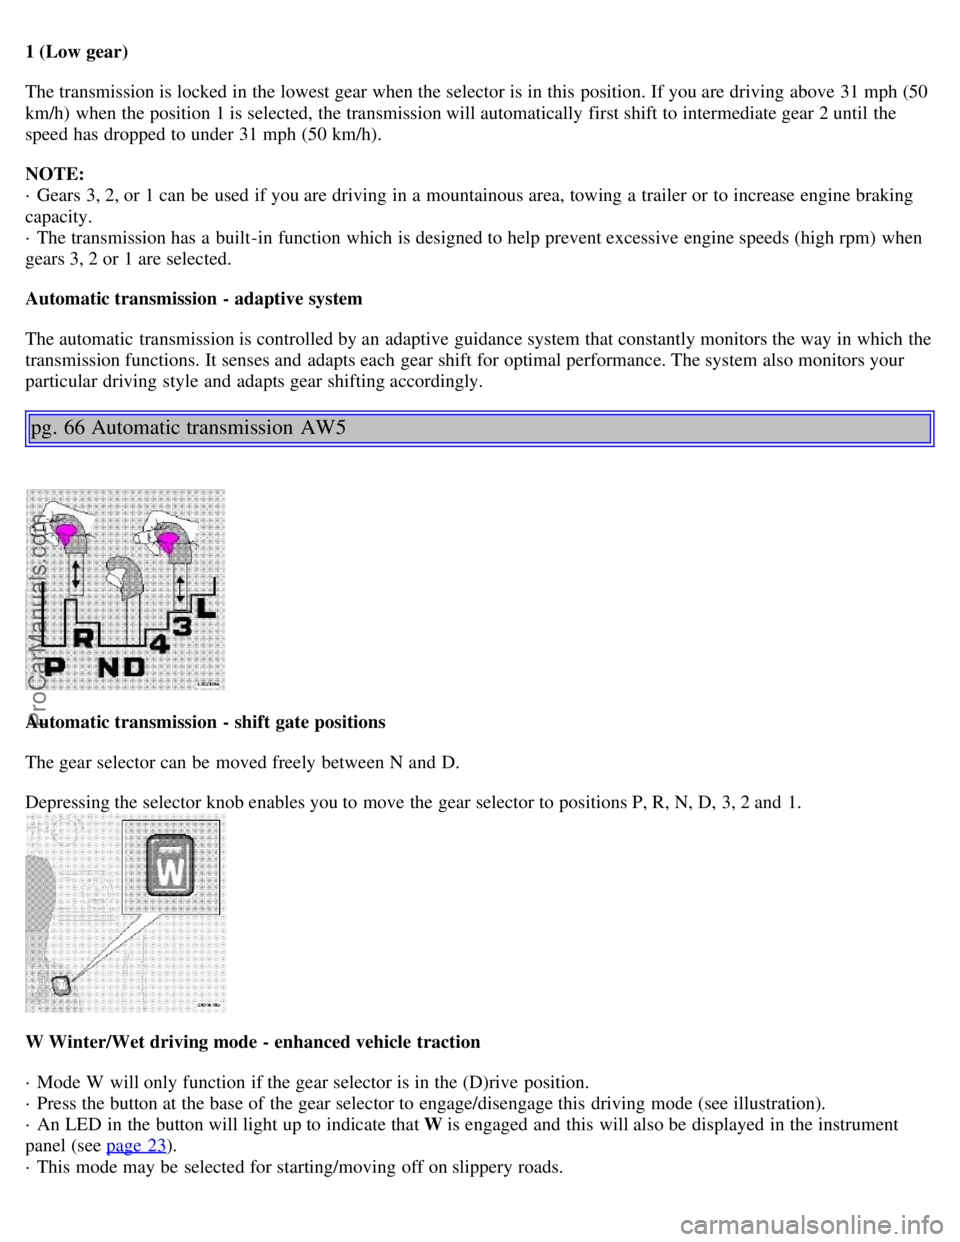
Automatic transmission - shift gate positions
The gear selector can be moved freely between N and D.
Depressing the selector knob enables you to move the gear selector to positions P, R, N, D, 3, 2 and 1.
W Winter/Wet driving mode - enhanced vehicle traction
· Mode W will only function if the gear selector is in the (D)rive position.
· Press the button at the base of the gear selector to engage/disengage this driving mode (see illustration).
· An LED in the button will light up to indicate that W is engaged and this will also be displayed in the instrument
panel (see page 23
).
· This mode may be selected for starting/moving off on slippery roads.
ProCarManuals.com
Page 50 of 96
Kickdown
Automatic shift to a lower gear (kickdown) is achieved by depressing the accelerator pedal fully and briskly. An
upshift will occur when approaching the top speed for a particular gear or by releasing the accelerator pedal slightly.
Kickdown can be used for maximum acceleration or when passing at highway speeds.
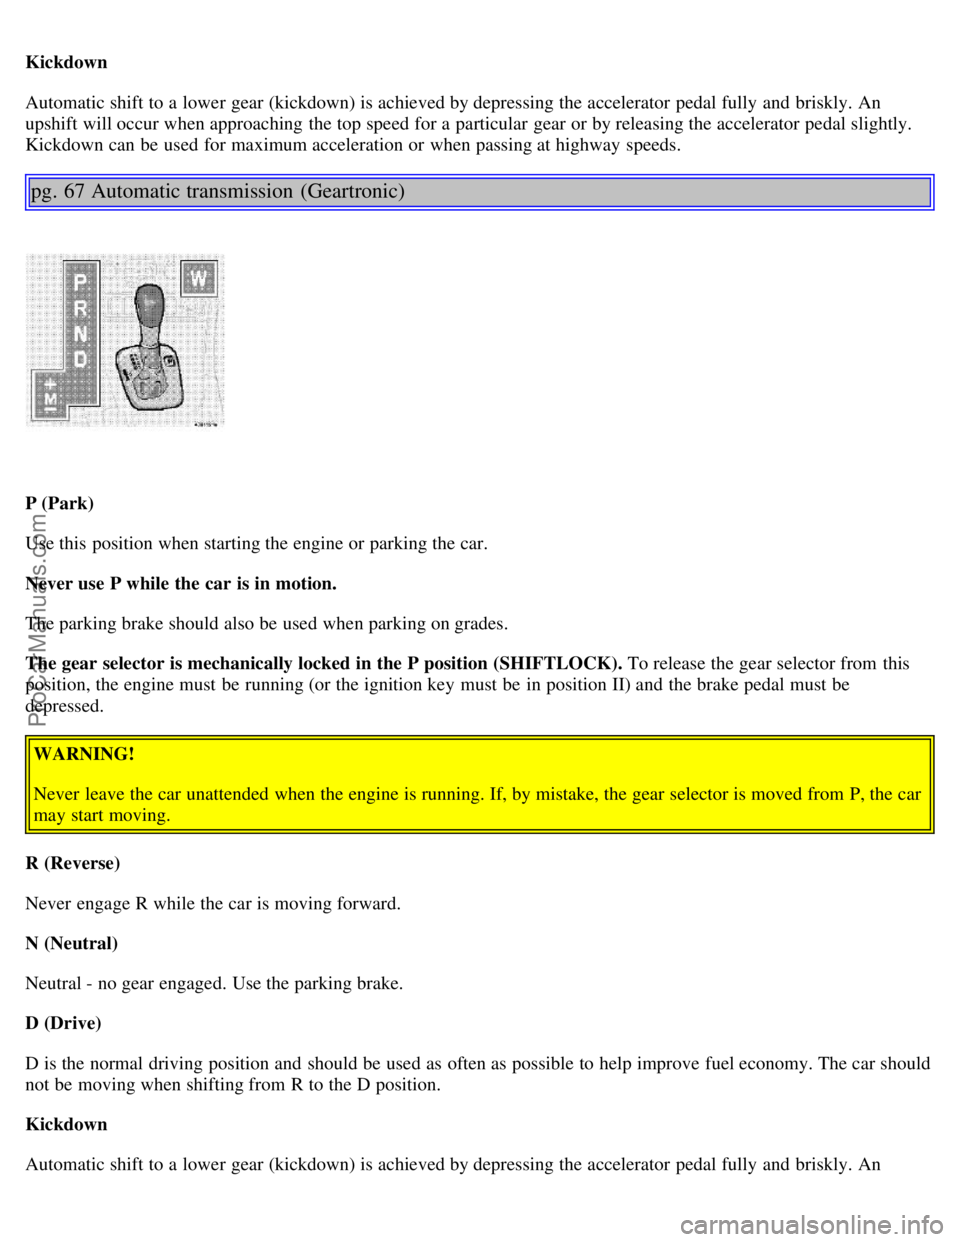
pg. 67 Automatic transmission (Geartronic)
P (Park)
Use this position when starting the engine or parking the car.
Never use P while the car is in motion.
The parking brake should also be used when parking on grades.
The gear selector is mechanically locked in the P position (SHIFTLOCK). To release the gear selector from this
position, the engine must be running (or the ignition key must be in position II) and the brake pedal must be
depressed.WARNING!
Never leave the car unattended when the engine is running. If, by mistake, the gear selector is moved from P, the car
may start moving.
R (Reverse)
Never engage R while the car is moving forward.
N (Neutral)
Neutral - no gear engaged. Use the parking brake.
D (Drive)
D is the normal driving position and should be used as often as possible to help improve fuel economy. The car should
not be moving when shifting from R to the D position.
Kickdown
Automatic shift to a lower gear (kickdown) is achieved by depressing the accelerator pedal fully and briskly. An
ProCarManuals.com