VOLVO V60 2013 Repair Manual
Manufacturer: VOLVO, Model Year: 2013, Model line: V60, Model: VOLVO V60 2013Pages: 422, PDF Size: 9.59 MB
Page 61 of 422
02 Locks and alarm
Locking/unlocking
02
59
dows simultaneously - for example, to quickly
ventilate the passenger compartment during
hot weather.
Automatic lockingThe doors and tailgate are locked automati-
cally when the car starts to move.
The function can be activated/deactivated in
the menu system MY CAR under Settings
Car settingsLock settingsAutomatic
door locking. For a description of the menu
system, see page 202.
Glovebox
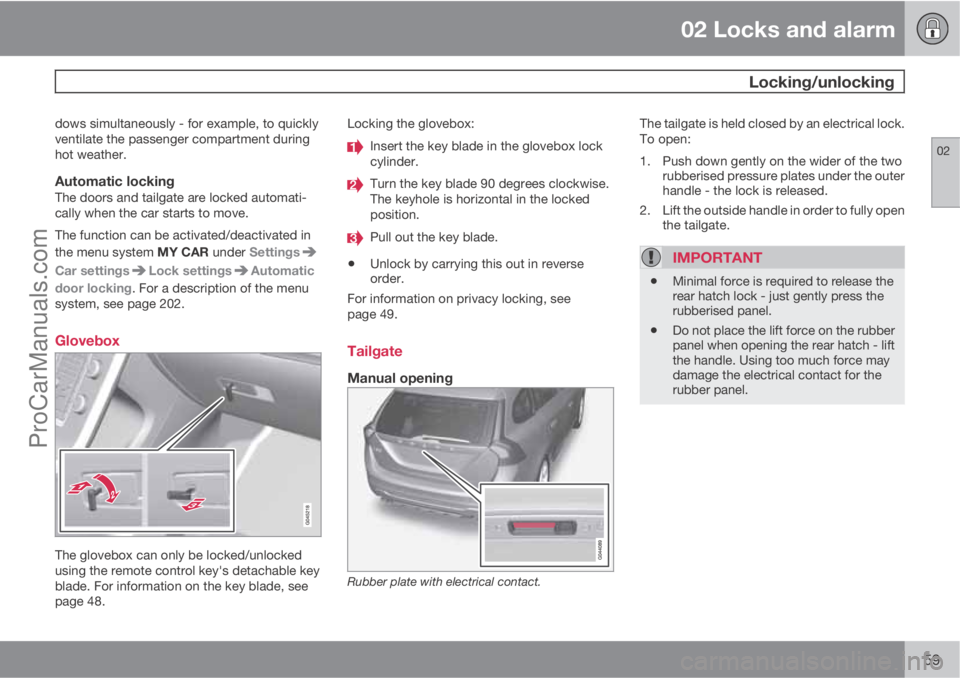
The glovebox can only be locked/unlocked
using the remote control key's detachable key
blade. For information on the key blade, see
page 48.Locking the glovebox:
Insert the key blade in the glovebox lock
cylinder.
Turn the key blade 90 degrees clockwise.
The keyhole is horizontal in the locked
position.
Pull out the key blade.
•Unlock by carrying this out in reverse
order.
For information on privacy locking, see
page 49.
Tailgate
Manual opening
Rubber plate with electrical contact.
The tailgate is held closed by an electrical lock.
To open:
1. Push down gently on the wider of the two
rubberised pressure plates under the outer
handle - the lock is released.
2. Lift the outside handle in order to fully open
the tailgate.
IMPORTANT
•Minimal force is required to release the
rear hatch lock - just gently press the
rubberised panel.
•Do not place the lift force on the rubber
panel when opening the rear hatch - lift
the handle. Using too much force may
damage the electrical contact for the
rubber panel.
ProCarManuals.com
Page 62 of 422
02 Locks and alarm
Locking/unlocking
02
60* Option/accessory, for more information, see Introduction.
Unlocking with the remote control key
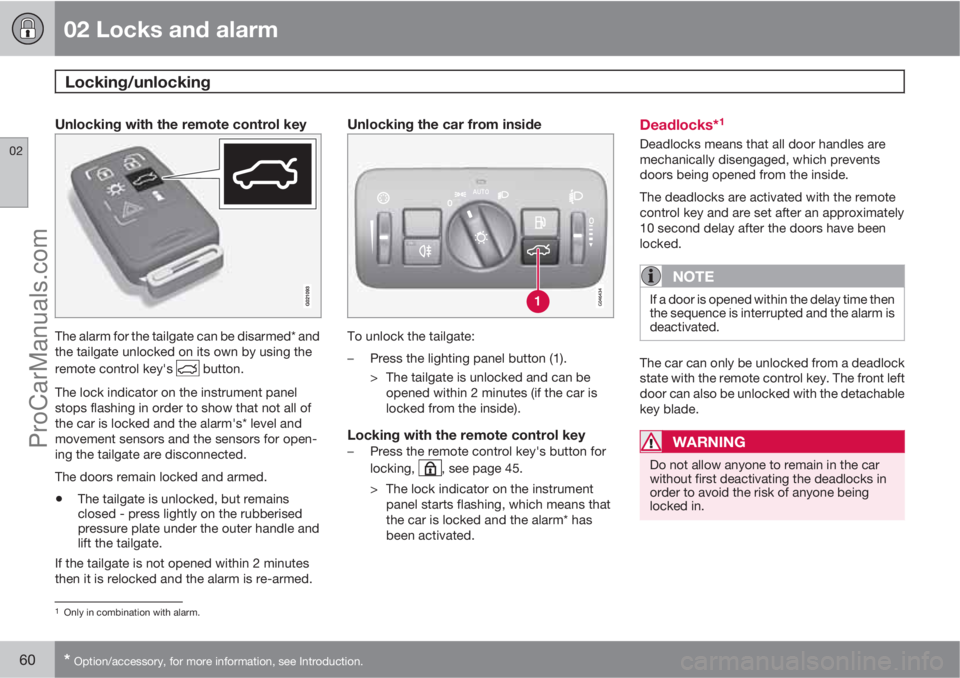
The alarm for the tailgate can be disarmed* and
the tailgate unlocked on its own by using the
remote control key's
button.
The lock indicator on the instrument panel
stops flashing in order to show that not all of
the car is locked and the alarm's* level and
movement sensors and the sensors for open-
ing the tailgate are disconnected.
The doors remain locked and armed.
•The tailgate is unlocked, but remains
closed - press lightly on the rubberised
pressure plate under the outer handle and
lift the tailgate.
If the tailgate is not opened within 2 minutes
then it is relocked and the alarm is re-armed.
Unlocking the car from inside
To unlock the tailgate:
–Press the lighting panel button (1).
> The tailgate is unlocked and can be
opened within 2 minutes (if the car is
locked from the inside).
Locking with the remote control key–Press the remote control key's button for
locking,
, see page 45.
> The lock indicator on the instrument
panel starts flashing, which means that
the car is locked and the alarm* has
been activated.
Deadlocks*1
Deadlocks means that all door handles are
mechanically disengaged, which prevents
doors being opened from the inside.
The deadlocks are activated with the remote
control key and are set after an approximately
10 second delay after the doors have been
locked.
NOTE
If a door is opened within the delay time then
the sequence is interrupted and the alarm is
deactivated.
The car can only be unlocked from a deadlock
state with the remote control key. The front left
door can also be unlocked with the detachable
key blade.
WARNING
Do not allow anyone to remain in the car
without first deactivating the deadlocks in
order to avoid the risk of anyone being
locked in.
1Only in combination with alarm.
ProCarManuals.com
Page 63 of 422
02 Locks and alarm
Locking/unlocking
02
* Option/accessory, for more information, see Introduction.61
Temporary deactivation
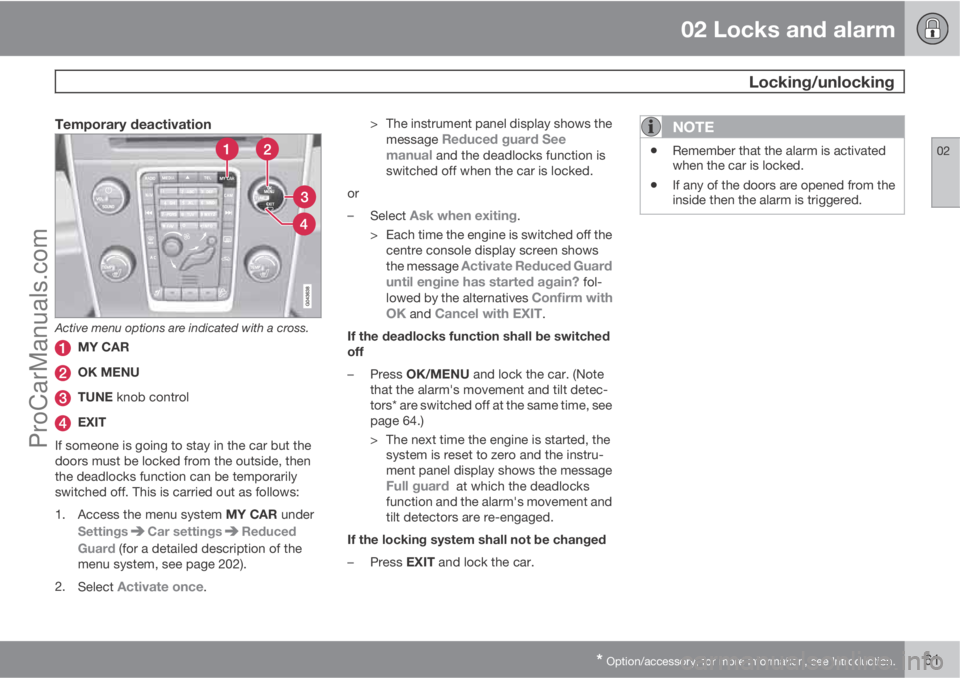
Active menu options are indicated with a cross.
MY CAR
OK MENU
TUNE knob control
EXIT
If someone is going to stay in the car but the
doors must be locked from the outside, then
the deadlocks function can be temporarily
switched off. This is carried out as follows:
1.
Access the menu system MY CAR under
Settings
Car settingsReduced
Guard (for a detailed description of the
menu system, see page 202).
2.
Select
Activate once.> The instrument panel display shows the
message
Reduced guard See
manual and the deadlocks function is
switched off when the car is locked.
or
–
Select
Ask when exiting.
> Each time the engine is switched off the
centre console display screen shows
the message
Activate Reduced Guard
until engine has started again? fol-
lowed by the alternatives Confirm with
OK and Cancel with EXIT.
If the deadlocks function shall be switched
off
–
Press OK/MENU and lock the car. (Note
that the alarm's movement and tilt detec-
tors* are switched off at the same time, see
page 64.)
> The next time the engine is started, the
system is reset to zero and the instru-
ment panel display shows the message
Full guard at which the deadlocks
function and the alarm's movement and
tilt detectors are re-engaged.
If the locking system shall not be changed
–
Press EXIT and lock the car.
NOTE
•Remember that the alarm is activated
when the car is locked.
•If any of the doors are opened from the
inside then the alarm is triggered.
ProCarManuals.com
Page 64 of 422
02 Locks and alarm
Child safety locks
02
62* Option/accessory, for more information, see Introduction.
Manual blocking of the rear doors
The child safety locks prevent children from
opening a rear door from the inside.
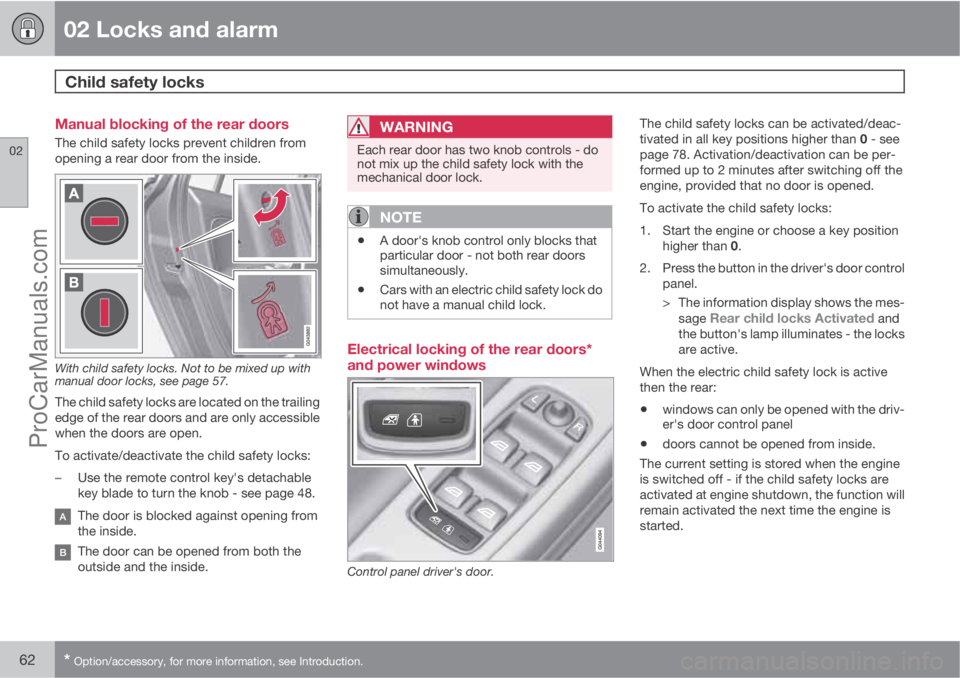
With child safety locks. Not to be mixed up with
manual door locks, see page 57.
The child safety locks are located on the trailing
edge of the rear doors and are only accessible
when the doors are open.
To activate/deactivate the child safety locks:
–Use the remote control key's detachable
key blade to turn the knob - see page 48.
The door is blocked against opening from
the inside.
The door can be opened from both the
outside and the inside.
WARNING
Each rear door has two knob controls - do
not mix up the child safety lock with the
mechanical door lock.
NOTE
•A door's knob control only blocks that
particular door - not both rear doors
simultaneously.
•Cars with an electric child safety lock do
not have a manual child lock.
Electrical locking of the rear doors*
and power windows
Control panel driver's door.
The child safety locks can be activated/deac-
tivated in all key positions higher than 0 - see
page 78. Activation/deactivation can be per-
formed up to 2 minutes after switching off the
engine, provided that no door is opened.
To activate the child safety locks:
1. Start the engine or choose a key position
higher than 0.
2. Press the button in the driver's door control
panel.
> The information display shows the mes-
sage
Rear child locks Activated and
the button's lamp illuminates - the locks
are active.
When the electric child safety lock is active
then the rear:
•windows can only be opened with the driv-
er's door control panel
•doors cannot be opened from inside.
The current setting is stored when the engine
is switched off - if the child safety locks are
activated at engine shutdown, the function will
remain activated the next time the engine is
started.
ProCarManuals.com
Page 65 of 422
02 Locks and alarm
Alarm*
02
* Option/accessory, for more information, see Introduction.63 General
Activated alarm is triggered if:
•a door, the bonnet or the tailgate is opened
•a movement is detected in the passenger
compartment (if fitted with a movement
detector*)
•the car is raised or towed away (if fitted
with a tilt detector*)
•the battery's cable is disconnected
•the siren is disconnected.
If there is a fault in the alarm system, the infor-
mation display shows a message. In which
case, contact a workshop - an authorised
Volvo workshop is recommended.
NOTE
The movement sensors trigger an alarm in
the event of movement in the passenger
compartment - air currents are also regis-
tered. For this reason the alarm is triggered
if the car is left with a window or the sunroof
open or if the passenger compartment
heater is used.
To avoid this: Close the window/sunroof
when leaving the car. If the car's integrated
passenger compartment heater (or a porta-
ble electric heater) shall be used - direct the
airflow from the air vents so that they are not
pointing upwards in the passenger com-
partment.
NOTE
Do not attempt to repair or modify alarm
system components. All such attempts
could affect the terms of insurance.
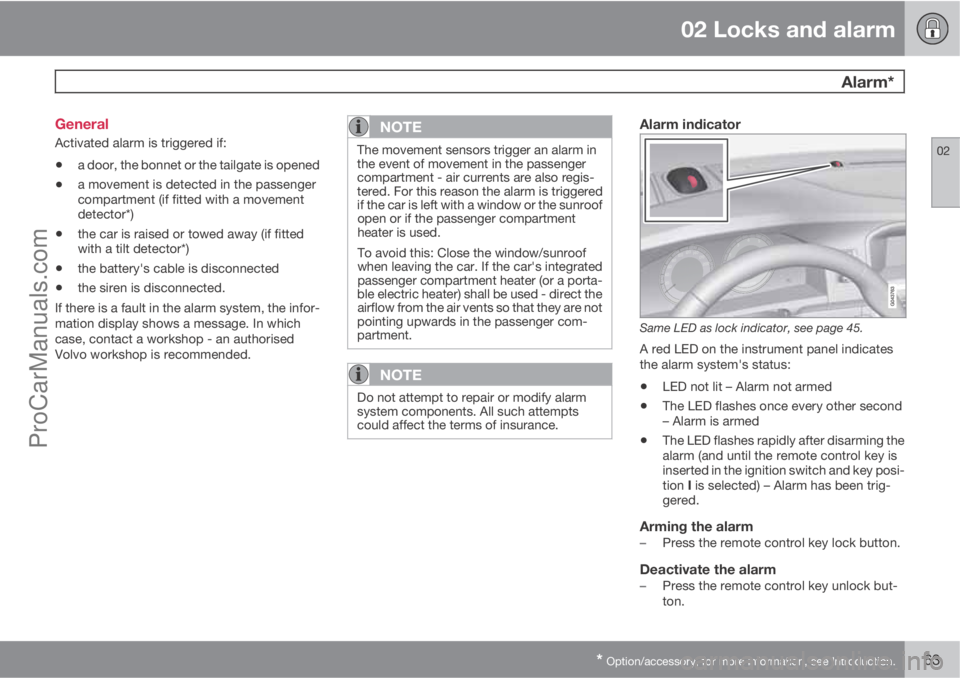
Alarm indicator
Same LED as lock indicator, see page 45.
A red LED on the instrument panel indicates
the alarm system's status:
•LED not lit – Alarm not armed
•The LED flashes once every other second
– Alarm is armed
•The LED flashes rapidly after disarming the
alarm (and until the remote control key is
inserted in the ignition switch and key posi-
tion I is selected) – Alarm has been trig-
gered.
Arming the alarm–Press the remote control key lock button.
Deactivate the alarm–Press the remote control key unlock but-
ton.
ProCarManuals.com
Page 66 of 422
02 Locks and alarm
Alarm*
02
64* Option/accessory, for more information, see Introduction.
Deactivating a triggered alarm–Press the remote control key unlock button
or insert the remote control key in the igni-
tion switch.
Other alarm functions
Automatic re-arming of the alarmThis function prevents the car being left with
the alarm disarmed unintentionally.
If the car is unlocked with the remote control
key (and the alarm is disarmed) but none of the
doors or the tailgate is opened within 2
minutes, then the alarm is automatically re-
armed. The car is relocked at the same time.
Remote control key not workingIf the alarm cannot be deactivated with the
remote control key, e.g. if the key's battery is
discharged - the car can be unlocked, dis-
armed and the engine started as follows:
1. Open the driver's door with the detachable
key blade - see page 54.
> The alarm is triggered, the alarm indica-
tor flashes rapidly and the siren sounds.
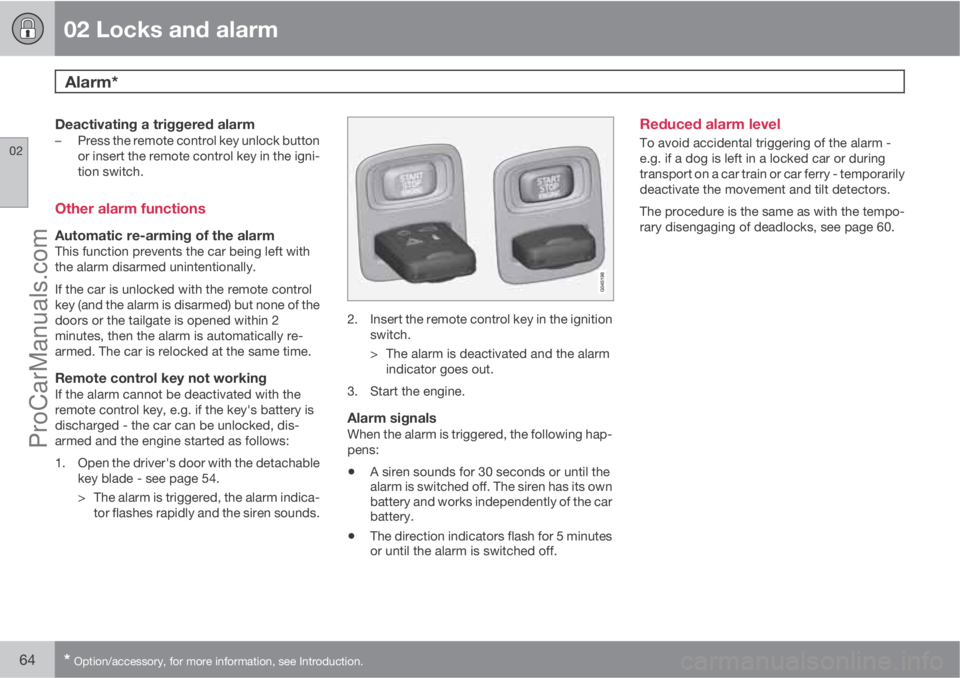
2. Insert the remote control key in the ignition
switch.
> The alarm is deactivated and the alarm
indicator goes out.
3. Start the engine.
Alarm signalsWhen the alarm is triggered, the following hap-
pens:
•A siren sounds for 30 seconds or until the
alarm is switched off. The siren has its own
battery and works independently of the car
battery.
•The direction indicators flash for 5 minutes
or until the alarm is switched off.
Reduced alarm level
To avoid accidental triggering of the alarm -
e.g. if a dog is left in a locked car or during
transport on a car train or car ferry - temporarily
deactivate the movement and tilt detectors.
The procedure is the same as with the tempo-
rary disengaging of deadlocks, see page 60.
ProCarManuals.com
Page 67 of 422
02 Locks and alarm
02
65ProCarManuals.com
Page 68 of 422
66* Option/accessory, for more information, see Introduction.
Instruments and controls........................................................................ 68
Volvo Sensus ......................................................................................... 77
Key positions.......................................................................................... 78
Seats....................................................................................................... 80
Steering wheel........................................................................................ 85
Lighting................................................................................................... 86
Wipers and washing................................................................................ 98
Windows, rearview and door mirrors....................................................101
Compass*.............................................................................................. 106
Power sunroof*..................................................................................... 107
Alcolock*............................................................................................... 109
Starting the engine................................................................................ 113
Starting the engine – Flexifuel............................................................... 118
Starting the engine – external battery................................................... 120
Gearboxes............................................................................................. 121
DRIVe Start/Stop*................................................................................. 127
All-wheel drive – AWD*.........................................................................134
Foot brake............................................................................................. 135
Parking brake........................................................................................ 137
HomeLink
�Ÿ *.......................................................................................... 141
ProCarManuals.com
Page 69 of 422
YOUR DRIVING ENVIRONMENT
ProCarManuals.com
Page 70 of 422
03 Your driving environment
Instruments and controls
03
68
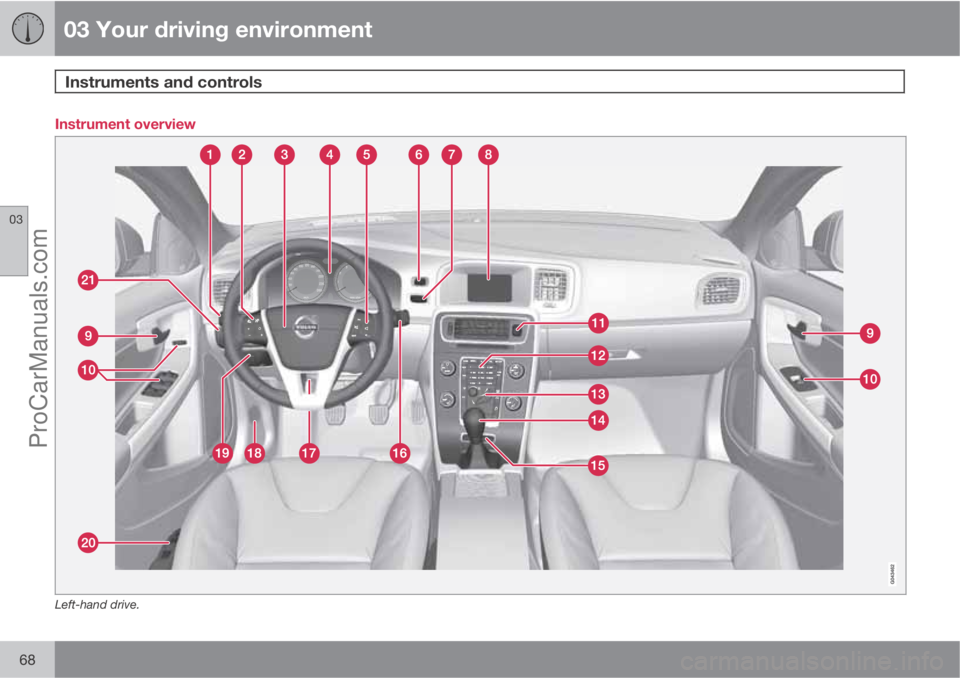
Instrument overview
Left-hand drive.
ProCarManuals.com