VOLVO V60 2014 Owners Manual
Manufacturer: VOLVO, Model Year: 2014, Model line: V60, Model: VOLVO V60 2014Pages: 442, PDF Size: 13.85 MB
Page 381 of 442
10 Maintenance and service
10
}}
379
Car washing
The car should be washed as soon as it becomes dirty. Wash the car in a car washwith oil separator. Use car shampoo.
Washing by hand
•Remove bird droppings from the paint- work as soon as possible. Bird droppingscontain chemicals that affect and discol-our paintwork very quickly. An authorisedVolvo workshop is recommended for theremoval of any discoloration.
• Hose down the underbody.
• Rinse the entire car until the dissolved dirthas been removed so as to reduce therisk of scratches from washing. Do notspray directly onto the locks.
• If necessary, use cold degreasing agenton very dirty surfaces. Note that in thiscase, the surfaces must not be hot fromthe sun!
• Wash using a sponge, car shampoo andplenty of lukewarm water.
• Clean the wiper blades with a lukewarmsoap solution or car shampoo.
• Dry the car using a clean, soft chamois ora water scraper. If you avoid allowingdrops of water to dry in strong sunlight,you reduce the risk of water drying stainswhich may need to be polished out.
WARNING
Always have the engine cleaned by a workshop. There is a risk of fire if theengine is hot.
IMPORTANT
Dirty headlamps have impaired functional- ity. Clean them regularly, when refuellingfor example. Do not use any corrosive cleaning agents but use water and a non-scratchingsponge instead.
NOTE
Outside lighting such as headlamps, fog lamps and rear lamps may temporarilyhave condensation on the inside of thelens. This is normal, all exterior lighting isdesigned to withstand this. Condensationis normally vented out of the lamp housingwhen the lamp has been switched on for atime.
Wiper bladesAsphalt, dust and salt residue on wiper blades, as well as insects, ice etc. on thewindscreen, impair the service life of wiperblades. For cleaning:- Set the wiper blades to the service position, see Wiper blades (p. 359).
NOTE
Wash the wiper blades and windscreen regularly with lukewarm soap solution orcar shampoo. Do not use any strong sol-vents.
Automatic car washesAn automatic car wash is a simple and quick way of washing the car, but it cannot reacheverywhere. Handwashing the car is recom-mended for achieving optimum results.
NOTE
The car must only be washed by hand over the first few months. This is becausethe paint is more delicate when it is new.
High-pressure washingWhen using high-pressure washing, use sweeping movements and make sure that thenozzle does not come closer than 30 cm tothe surface of the car (the distance applies toall exterior parts). Do not spray directly ontothe locks.
ProCarManuals.co’
Page 382 of 442
||
10 Maintenance and service
10
380
Testing the brakes
WARNING
Always test the brakes after washing the car, including the parking brake, to ensurethat moisture and corrosion do not attackthe brake linings and reduce braking per-formance.
Lightly depress the brake pedal now and then when driving long distances in rain or slush.The heat from the friction causes the brakelinings to warm up and dry. Do the samething after starting in very damp or coldweather.
Exterior plastic, rubber and trim
components
A special cleaning agent available from Volvodealers is recommended for the cleaning andcare of coloured plastic parts, rubber and trimcomponents, such as glossy trim mouldings.When using such a cleaning agent theinstructions must be followed carefully.
IMPORTANT
Avoid waxing and polishing on plastic and rubber. When using degreasant on plastic and rubber, only rub with light pressure if it isnecessary. Use a soft washing sponge. Polishing glossy trim mouldings could wear away or damage the glossy surfacelayer. Polishing agent that contains abrasive must not be used.
RimsOnly use rim cleaning agent recommended by Volvo. Strong rim cleaning agents can damage the surface and cause stains on chrome-platedaluminium rims.
Related information
• Polishing and waxing (p. 380)
• Cleaning the interior (p. 381)
• Water and dirt-repellent coating (p. 381)
Polishing and waxing
Polish and wax the car if the paintwork is dull or to give the paintwork extra protection. The car does not need to be polished until it is at least one year old. However, the car canbe waxed during this time. Do not polish orwax the car in direct sunlight. Wash and dry the car thoroughly before you begin polishing or waxing. Clean off asphaltand tar stains using tar remover or white spi-rit. More stubborn stains can be removedusing fine rubbing paste designed for carpaintwork. Polish first with a polish and then wax with liquid or solid wax. Follow the instructions onthe packaging carefully. Many preparationscontain both polish and wax.
IMPORTANT
Only paint treatment recommended by Volvo should be used. Other treatmentsuch as preserving, sealing, protection,lustre sealing or similar could damage thepaintwork. Paintwork damage caused bysuch treatments is not covered by Volvowarranty.
Related information
• Car washing (p. 379)
ProCarManuals.co’
Page 383 of 442
10 Maintenance and service
10
* Option/accessory, for more information, see Introduction.381
Water and dirt-repellent coating
The windows are treated with a surface coa- ting that improves visibility in difficult weatherconditions.
Water and dirt-repellent coating*There is natural wear of the water-repellent coating.
Maintenance:
• Never use products such as car wax, degreaser or similar on glass surfaces asthis could ruin their water-repellent prop-erties.
• Take care when cleaning so as not todamage the glass surface.
• To avoid damaging glass surfaces whenremoving ice – only use plastic ice scra-pers.
• Treatment with a special finishing agentavailable from Volvo dealers is recom-mended in order to maintain the water-repellent properties. This should be usedfirst after three years and then each year.
IMPORTANT
Do not use a metal ice scraper to remove ice from the windows. Use the heating toremove ice from the door mirrors, see Win-dows and rearview and door mirrors -heating (p. 96).
Related information
•Car washing (p. 379)
Rustproofing
The car received a thorough and complete rustproofing at the factory. Parts of the bodyare made of galvanised sheet metal. Theunderbody is protected by a wear-resistantanti-corrosion compound. A thin, penetratingrustproofing fluid was sprayed into theexposed members, cavities, closed sectionsand side doors.
Inspection and maintenanceDirt and road salt can lead to corrosion so itis important to keep the car clean. The car'srustproofing needs to be checked regularlyand touched-up if necessary in order for it tobe maintained. Under normal conditions the rustproofing does not require treatment for approximately12 years. After this period, it should be trea-ted at three-year intervals. Volvo recom-mends that you engage an authorised Volvoworkshop for assistance if the car needs fur-ther treatment.
Related information
•Paint damage (p. 383)
Cleaning the interior
Only use cleaning agents and car care prod- ucts recommended by Volvo. Clean regularlyand follow the instructions included with thecar care product. Vacuuming is important prior to using clean- ing agents.
Carpets and cargo areaRemove inlaid carpets for separate cleaningof the floor carpet and the inlaid carpets. Usea vacuum cleaner to remove dust and dirt.Each inlay mat is secured with pins. Take hold of the inlay mat at each pin and lift the mat straight up. Fit the inlay mat in place by pressing it in at each pin.
WARNING
Before setting off check that the inlaid mat in the driver area is firmly affixed andsecured in the bosses in order to avoidgetting caught adjacent to and under thepedals.
A special textile cleaner is recommended for stains on the floor mat after vacuuming. Floormats should be cleaned with agents recom-mended by your Volvo dealer.
ProCarManuals.co’
Page 384 of 442
||
10 Maintenance and service
10
382
Stains on fabric upholstery and roof
upholstery
A special fabric cleaning agent, available from authorised Volvo dealers, is recommended toavoid impairing the fire retardant qualities ofthe upholstery.
IMPORTANT
Sharp objects and Velcro may damage the fabric upholstery.
Stains on leather upholsteryVolvo's leather upholstery is treated to pre- serve its original appearance. Leather upholstery ages and acquires a beau- tiful patina over time. The leather is refinedand processed so that it retains its naturalcharacteristics. It is given a protective coa-ting, but regular cleaning is required in orderto maintain both characteristics and appear-ance. Volvo offers a comprehensive productfor the cleaning and treatment of leatherupholstery which, when used in accordancewith the instructions, preserves the leather'sprotective coating. After a period of use thenatural appearance of the leather will never-theless emerge, depending more or less onthe surface texture of the leather. This is anatural maturing of the leather and showsthat it is a natural product. To achieve best results Volvo recommendscleaning and the application of protectivecream once to four times per year (or more ifnecessary). The Volvo Leather Care kit isavailable from your Volvo dealer.
IMPORTANT
•
Certain items of coloured clothing (for example, jeans and suede garments)may stain the upholstery.
• Never use strong solvents. Such prod-ucts may damage fabric, vinyl andleather upholstery.
Washing instructions for leather upholstery
1. Pour the leather cleaner on the damp-
ened sponge and squeeze out a strong foam.
2. Work the dirt away with gentle circular movements.
3. Dab accurately with the sponge on the stains. Allow the sponge to absorb thestain. Do not rub.
4. Wipe off with soft paper or a cloth and allow the leather to dry completely.
Protective treatment of leather upholstery
1. Pour a small amount of the protective cream on the felted cloth and massage in a thin layer of cream with gentle circularmovements on the leather.
2. Allow the leather to dry for 20 minutes before use.
The leather has now been given improvedprotection against stains and improved UVprotection.
Washing instructions for the leather steering wheel
• Remove dirt and dust with a soft pre- moistened sponge and neutral soap.
• Leather needs to breathe. Never coverthe leather steering wheel with protectiveplastic.
• Use natural oils. Volvo's leather careagents are recommended for best results.
If the steering wheel has stains: Group 1 (ink, wine, coffee, milk, sweat and
blood)
–Use a soft cloth or sponge. Mix a 5% ammonia solution. (For blood stains, usea solution of 2 dl water and 25g salt.)
Group 2 (fats, oils, sauces and chocolate)
1. Same procedure as for group 1.
2. Polish with an absorbent paper or cloth.
ProCarManuals.co’
Page 385 of 442
10 Maintenance and service
10
383
Group 3
(dry dirt, dust)
1. Use a soft brush to remove the dirt.
2. Same procedure as for group 1.
Stains on interior plastic parts, metal parts and wood parts
A fibrillated fibre or microfibre cloth, lightly moistened with water, available from Volvodealers, is recommended for cleaning interiorparts and surfaces. Do not scrape or rub stains. Never use strong stain removers. A special cleaning agentavailable from Volvo dealers can be used formore difficult cleaning.
SeatbeltsUse water and a synthetic detergent. A spe-cial textile cleaning agent is available fromyour Volvo dealer. Make sure the seatbelt isdry before allowing it to retract.
Related information
• Car washing (p. 379)
Paint damage
Paint is an important part of the car's rust- proofing and should therefore be checkedregularly. The most common types of paint-work damage are stone chips, scratches, andmarks on the edges of wings, doors andbumpers.
Touching up minor paintwork damageTo avoid the onset of rust, damaged paint-work should be rectified immediately. Materials
• primer 17
- a special adhesive primer in a
spray can is available for e.g. plastic- coated bumpers
• basecoat and clearcoat - available in spray cans or as touch-up pens/sticks 18
• masking tape
• fine sand paper 17
.
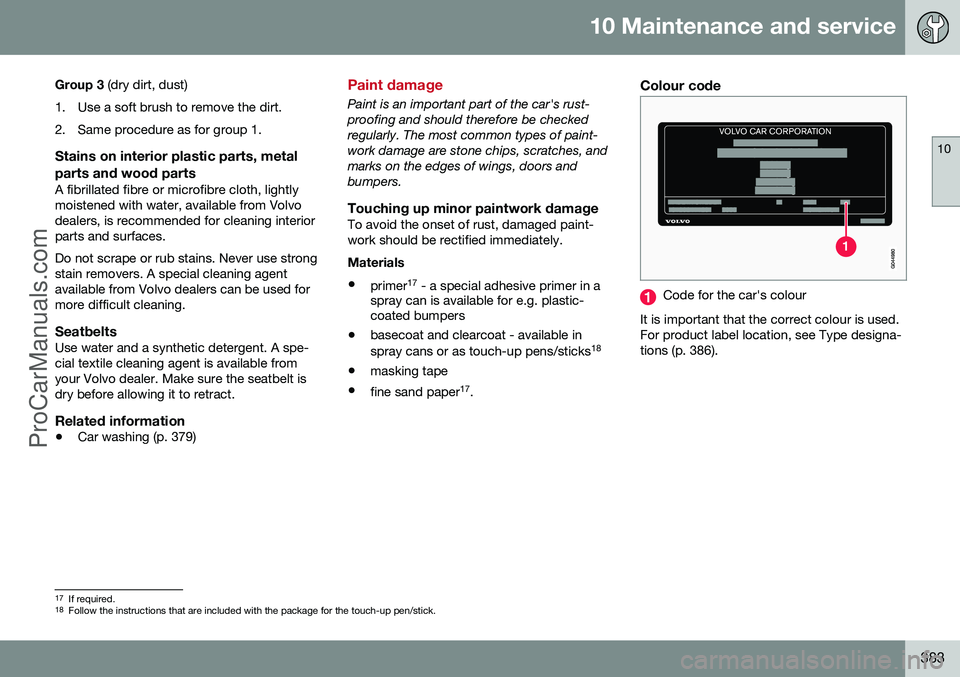
Colour code
Code for the car's colour
It is important that the correct colour is used. For product label location, see Type designa-tions (p. 386).
17 If required.
18 Follow the instructions that are included with the package for the touch-up pen/stick.
ProCarManuals.co’
Page 386 of 442
||
10 Maintenance and service
10
384
Repair minor paintwork damage such
as stone chips and scratches
G021832
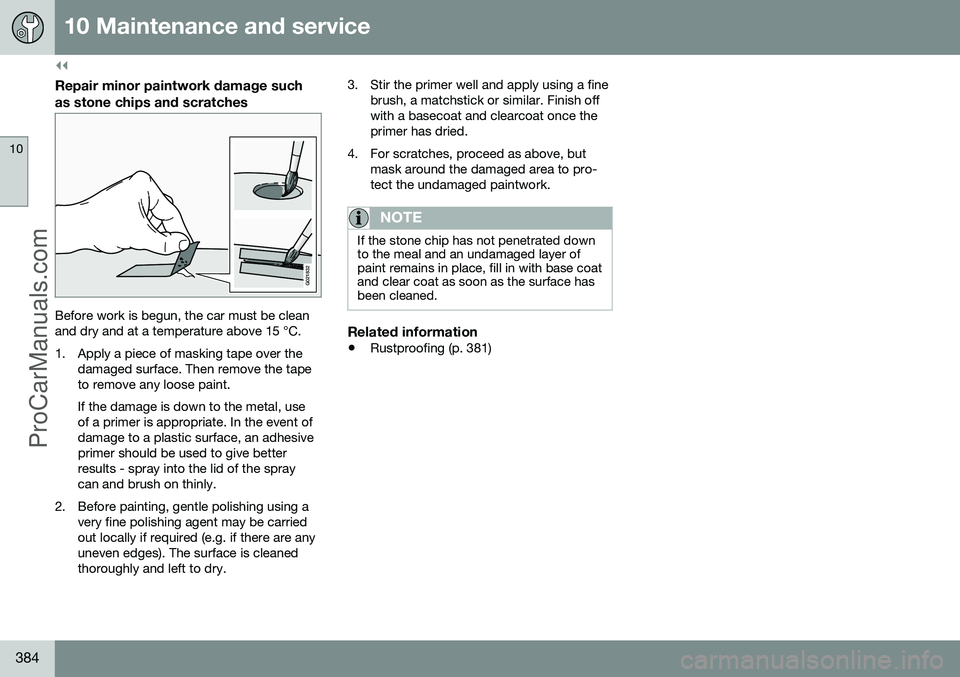
Before work is begun, the car must be clean and dry and at a temperature above 15 °C.
1. Apply a piece of masking tape over the damaged surface. Then remove the tape to remove any loose paint. If the damage is down to the metal, use of a primer is appropriate. In the event ofdamage to a plastic surface, an adhesiveprimer should be used to give betterresults - spray into the lid of the spraycan and brush on thinly.
2. Before painting, gentle polishing using a very fine polishing agent may be carriedout locally if required (e.g. if there are anyuneven edges). The surface is cleanedthoroughly and left to dry. 3. Stir the primer well and apply using a fine
brush, a matchstick or similar. Finish offwith a basecoat and clearcoat once theprimer has dried.
4. For scratches, proceed as above, but mask around the damaged area to pro-tect the undamaged paintwork.
NOTE
If the stone chip has not penetrated down to the meal and an undamaged layer ofpaint remains in place, fill in with base coatand clear coat as soon as the surface hasbeen cleaned.
Related information
• Rustproofing (p. 381)
ProCarManuals.co’
Page 387 of 442
S P E C I F I C A T I O N S
ProCarManuals.co’
Page 388 of 442
11 Specifications
11
386
Type designations
Type designation, vehicle identification num- ber, etc., i.e. information unique to the car,can be read on a label in the car.
ProCarManuals.com
Page 389 of 442
11 Specifications
11
}}
387
Label location
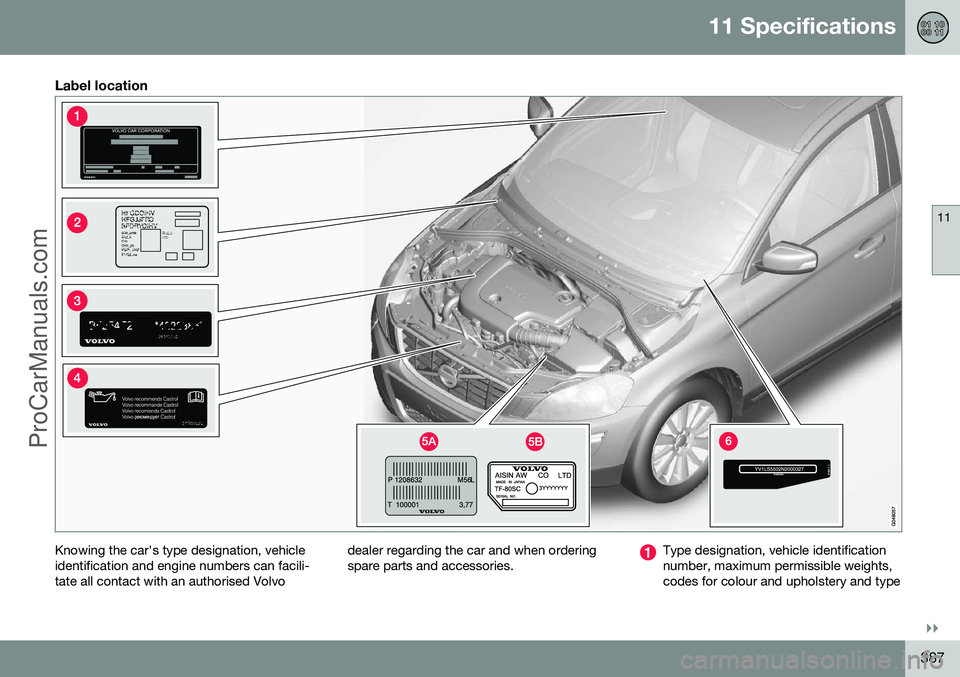
Knowing the car's type designation, vehicle identification and engine numbers can facili-tate all contact with an authorised Volvodealer regarding the car and when orderingspare parts and accessories.Type designation, vehicle identification number, maximum permissible weights,codes for colour and upholstery and type
ProCarManuals.co’
Page 390 of 442
||
11 Specifications
11
388
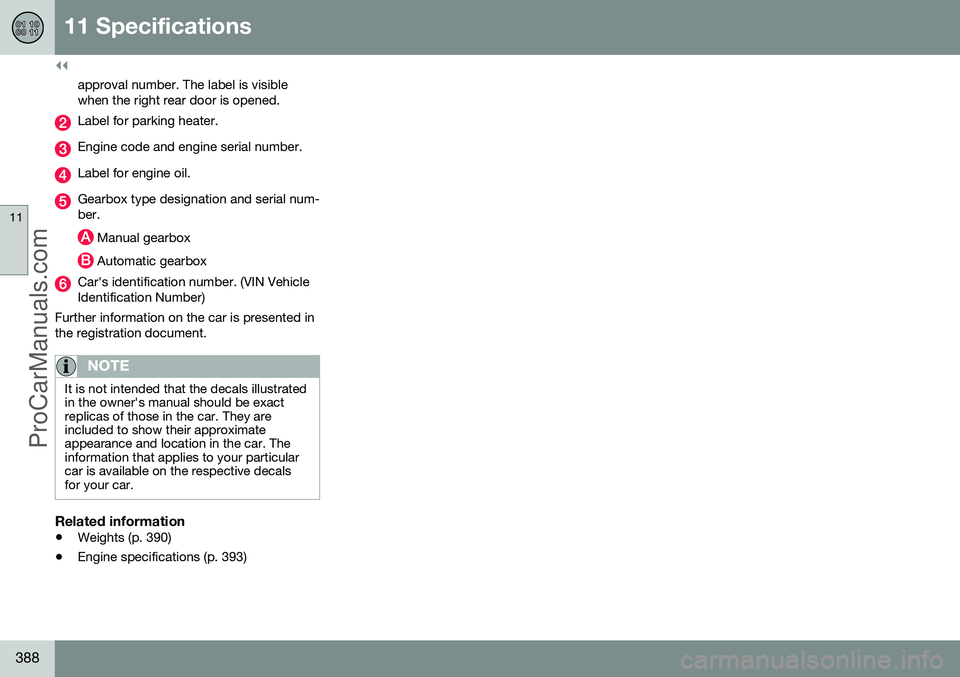
approval number. The label is visible when the right rear door is opened.
Label for parking heater.
Engine code and engine serial number.
Label for engine oil.
Gearbox type designation and serial num- ber.
Manual gearbox
Automatic gearbox
Car's identification number. (VIN Vehicle Identification Number)
Further information on the car is presented inthe registration document.
NOTE
It is not intended that the decals illustrated in the owner's manual should be exactreplicas of those in the car. They areincluded to show their approximateappearance and location in the car. Theinformation that applies to your particularcar is available on the respective decalsfor your car.
Related information
• Weights (p. 390)
• Engine specifications (p. 393)
ProCarManuals.co’