climate control VOLVO V90 2017 Owners Manual
[x] Cancel search | Manufacturer: VOLVO, Model Year: 2017, Model line: V90, Model: VOLVO V90 2017Pages: 594, PDF Size: 15.07 MB
Page 5 of 594
3
Table for location of i-Size child seats81
Integrated booster cushion *
82
Folding up the integrated booster cushion * 82
Folding down the integrated boostercushion * 84
INSTRUMENTS AND CONTROLS
Instruments and controls, left-hand drive car
86
Instruments and controls, right-handdrive car 87
Driver display 90
Driver display settings 94
Indicator symbols in the driver display 95
Warning symbols in the driver display 97
Outside temperature gauge 98
Clock 99
License agreement for the driver display 99
Application menu in the driver display 105
Using the application menu in thedriver display 105
Messages in the driver display andthe centre display 106
Managing messages in the driverdisplay and the centre display 108
Managing messages saved from thedriver display and centre display 110
Head-up display *
112
Voice recognition 115
Using voice recognition 116
Settings for voice recognition 117
Voice recognition control of the phone 118
Voice recognition control of radioand media 118
Voice recognition control of climate control119
Voice recognition and map navigation 120
Manual front seat 121
Power front seat *
121
Adjusting the power front seat *
122
Using the memory function in the power front seat * 122
Multi-functional front seat *
123
Adjusting functions in the multi-func-tional front seat * 124
Adjusting the passenger seat fromthe driver's seat * 127
Rear seat 128
Adjusting the head restraints in the rear seat 128
Lowering the backrests in the rear seat 130
Steering wheel 131
Adjusting the steering wheel 132
Headlamp control 134
Headlamp levelling 135
Position lamps 136
Daytime running lights 137
Dipped beam 137
Activating/deactivating main beam 138
Active bending lights *
141
Page 6 of 594

4
Adapting the beam pattern from the headlamps141
Front fog lamps/cornering lights *
142
Rear fog lamp 142
Brake lights 143
Hazard warning flashers 143
Using direction indicators 144
Passenger compartment lighting 145
Home safe light duration 148
Approach light duration 148
Using windscreen wipers 148
Activating/deactivating the rain sensor 149
Windscreen and headlamp washers 150
Rear window wiper and washer 151
Power windows 151
Operating power windows 152
Using the sun blind *
153
Adjusting the door mirrors 153
Interior rearview mirror 155
Compass *
156
Calibrating the compass *
157
Panorama roof *
158
Operating the panorama roof *
159
HomeLink ®
* 162
Programming HomeLink®
* 163
Trip computer 165
Show trip data in the driver display 166
Show trip statistics in the centre display 168
Settings view 169
Categories in the settings view 170
Changing system settings in the set- tings view 172
Resetting settings in the settings view 173
Driver profiles 174
Selecting driver profile 174
Editing a driver profile 175
Linking remote control key to driverprofile 176
Importing/exporting a driver profilefrom/to USB 177
Changing settings for apps 178
Resetting user data for change ofownership 179
CLIMATE CONTROL
Climate control
182
Climate control - sensors 183
Perceived temperature 183
Air quality 184
Passenger compartment filter 185
Clean Zone Interior Package *
185
Interior Air Quality System *
185
Climate controls 186
Climate controls in the centre display 187
Climate controls at the rear of the tunnel console * 188
Auto-regulating the climate 189
Activating/deactivating air conditioning 190
Regulating the temperature 190
Regulating the fan level 193
Activating/deactivating defrost of windows and door mirrors 194
Activating/deactivating air recirculation 196
Air distribution 197
Changing the air distribution 198
Opening/closing and aiming the air vents 199
Table of air distribution options 201
Activating/deactivating heating of the seats * 203
Activating/deactivating ventilation ofthe seats * 204
Page 7 of 594
5
Activating/deactivating heating of steering wheel* 205
Parking climate *
206
Starting/stopping preconditioning *
207
Timer for preconditioning *
208
Setting the timer for preconditioning *
208
Activating/deactivating the timer forpreconditioning * 210
Starting/switching off climate com-fort retention * 210
Symbols and messages for parkingclimate control * 212
Heater *
213
Parking heater *
214
Additional heater *
215
LOADING AND STORAGE
Passenger compartment interior
218
Tunnel console 219
Electrical sockets 220
Using the cigarette lighter *
224
Emptying ashtrays *
224
Using the glovebox 225
Sun visors 226
Cargo area 226
Loading 227
Load retaining eyelets 228
Bag hooks 228
Through-load hatch in the rear seat 229
Cargo cover *
230
Safety net *
232
Safety grille *
233
LOCKS AND ALARM
Remote control key
236
Remote control key range 238
Red Key - Restricted remote control key *
239
Antenna locations for the start and lock system 240
Locking/unlocking from the outside 241
Indication on locking/unlocking the car 243
Locking/unlocking from the inside 245
Deadlocks *
246
Locking/unlocking the tailgate 247
Using private locking 249
Detachable key blade 250
Locking/unlocking with the detacha-ble key blade 251
Power operated tailgate *
253
Opening/closing the tailgate with foot movement * 256
Replacing the battery in the remote control key 257
Immobiliser 260
Child safety locks 261
Alarm *
262
Automatic arming/rearming of the alarm *
264
Disarming the alarm * without work-
ing remote control key 264
Page 12 of 594
10
WHEELS AND TYRES
Tyres482
Tyres' rotation direction 483
Tread wear indicators on the tyres 484
Checking the tyre pressures 484
Tyre monitoring *
485
Checking tyre pressure with the tyre monitoring system * 487
Rectifying low tyre pressure with tyremonitoring * 488
Calibrating tyre monitoring *
489
Emergency puncture repair kit 490
Using the emergency puncture repair kit 491
Inflate tyres with the compressor from the emergency puncture repair kit 494
When changing wheels 495
Removing a wheel 495
Fitting the wheels 497
Wheel bolts 498
Spare wheel *
498
Winter wheels 499
Tool kit 500
Warning triangle 500
Jack *
501
First aid kit 501
Dimension designation for wheel rim 502
Dimension designation for tyre502
MAINTENANCE AND SERVICE
Volvo service programme506
Car status 506
Book service and repair 506
Inspection and service of the system for vehicle gas * 509
Remote updates 509
System updates 510
Data transmission between car and workshop 511
Raise the car 512
Opening and closing the bonnet 514
Engine compartment overview 515
Engine oil 516
Checking and filling with engine oil 517
Topping up coolant 518
Servicing the climate control system 520
Bulb replacement 520
Replacing the dipped beam bulb 522
Replacing the main beam lamp 523
Replacing daytime running lightbulb/position lamp bulb, front 524
Replacing the front direction indica-tor bulb 524
Replacing the reversing lamp bulb 525
Replacing the rear fog lamp bulb 526
Bulb specifications 526
Page 33 of 594
INTRODUCTION
* Option/accessory.31
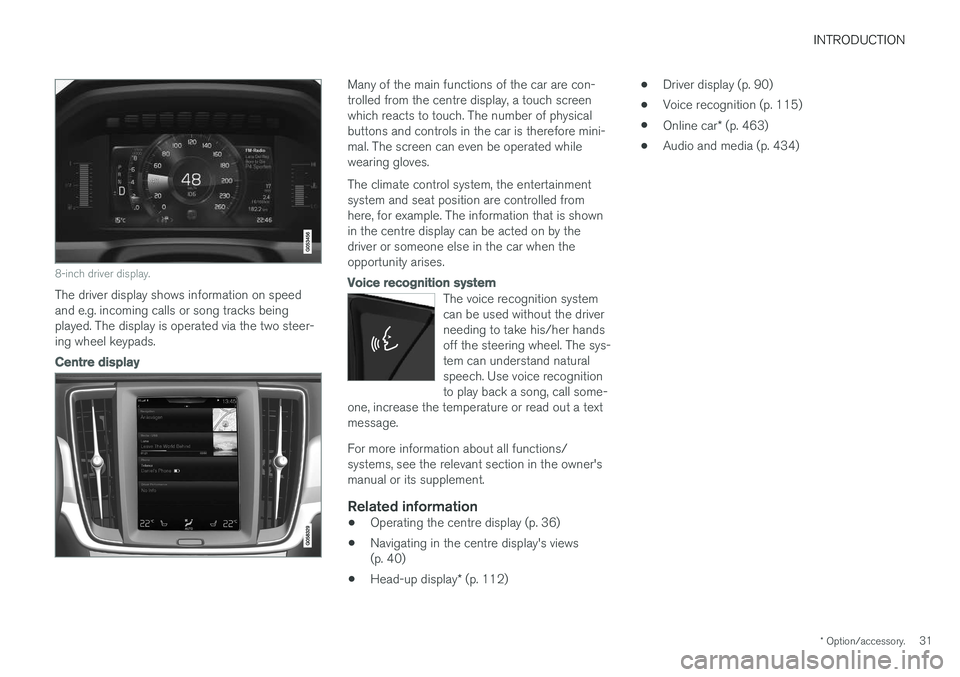
8-inch driver display.
The driver display shows information on speed and e.g. incoming calls or song tracks beingplayed. The display is operated via the two steer-ing wheel keypads.
Centre display
Many of the main functions of the car are con- trolled from the centre display, a touch screenwhich reacts to touch. The number of physicalbuttons and controls in the car is therefore mini-mal. The screen can even be operated whilewearing gloves. The climate control system, the entertainment system and seat position are controlled fromhere, for example. The information that is shownin the centre display can be acted on by thedriver or someone else in the car when theopportunity arises.
Voice recognition system
The voice recognition system can be used without the driverneeding to take his/her handsoff the steering wheel. The sys-tem can understand naturalspeech. Use voice recognitionto play back a song, call some-
one, increase the temperature or read out a textmessage.
For more information about all functions/ systems, see the relevant section in the owner'smanual or its supplement.
Related information
• Operating the centre display (p. 36)
• Navigating in the centre display's views(p. 40)
• Head-up display
* (p. 112) •
Driver display (p. 90)
• Voice recognition (p. 115)
• Online car
* (p. 463)
• Audio and media (p. 434)
Page 37 of 594
INTRODUCTION
* Option/accessory.35
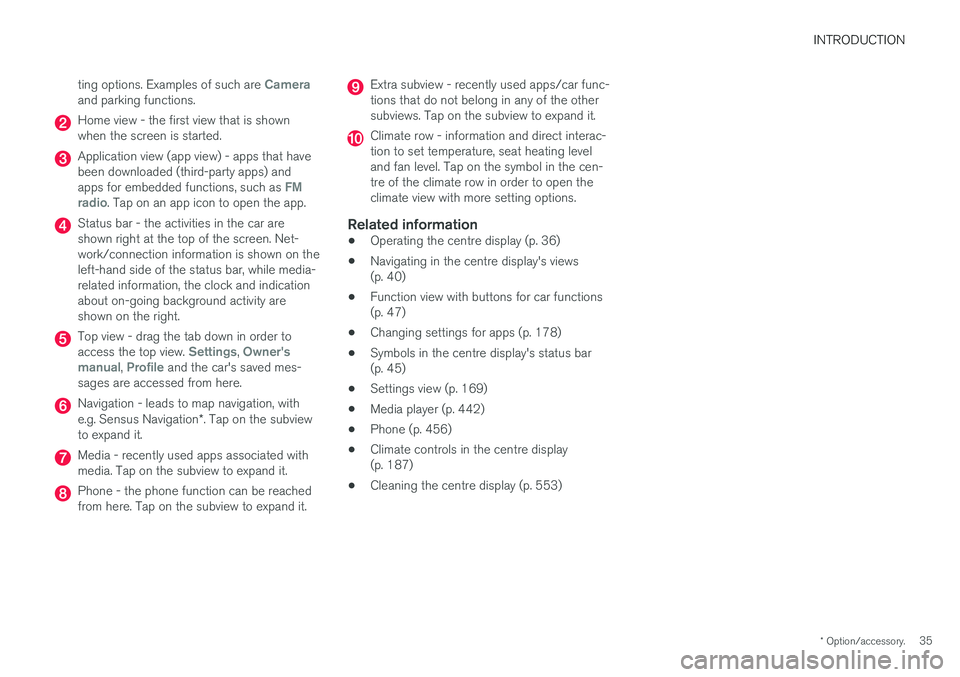
ting options. Examples of such are
Cameraand parking functions.
Home view - the first view that is shown when the screen is started.
Application view (app view) - apps that have been downloaded (third-party apps) and apps for embedded functions, such as
FM
radio. Tap on an app icon to open the app.
Status bar - the activities in the car are shown right at the top of the screen. Net-work/connection information is shown on theleft-hand side of the status bar, while media-related information, the clock and indicationabout on-going background activity areshown on the right.
Top view - drag the tab down in order to access the top view. Settings, Owner's
manual, Profile and the car's saved mes-
sages are accessed from here.
Navigation - leads to map navigation, with e.g. Sensus Navigation *. Tap on the subview
to expand it.
Media - recently used apps associated with media. Tap on the subview to expand it.
Phone - the phone function can be reached from here. Tap on the subview to expand it.
Extra subview - recently used apps/car func- tions that do not belong in any of the othersubviews. Tap on the subview to expand it.
Climate row - information and direct interac- tion to set temperature, seat heating leveland fan level. Tap on the symbol in the cen-tre of the climate row in order to open theclimate view with more setting options.
Related information
• Operating the centre display (p. 36)
• Navigating in the centre display's views(p. 40)
• Function view with buttons for car functions(p. 47)
• Changing settings for apps (p. 178)
• Symbols in the centre display's status bar(p. 45)
• Settings view (p. 169)
• Media player (p. 442)
• Phone (p. 456)
• Climate controls in the centre display(p. 187)
• Cleaning the centre display (p. 553)
Page 38 of 594

INTRODUCTION
* Option/accessory.
36
Operating the centre display
Many of the car's functions are controlled and regulated from the centre display. The centredisplay is a touch screen that reacts to touch.
Using the touch screen functionality in
the centre display
The screen reacts differently depending on whether you press, drag or swipe across it.Actions such as browsing between different views, marking objects, scrolling in a list and mov-ing apps can be performed by touching thescreen in different ways. An infrared film enables the screen to detect a finger that is just in front of the screen. This tech-nology makes it possible to use the screen evenwith gloves on. Two people can interact with the screen at the same time, e.g. to adjust the climate for the driverand passenger side respectively.
IMPORTANT
Do not use sharp objects on the screen as they may scratch it.
The table below presents the different proce- dures for operating the screen:
Procedure
Execution Result
Press once. Highlights an object, confirms a selection or activates a function. Press twice in quick suc- cession.Zooms in on a digital object, such as the map
*.
Press and hold. Grabs an object. Can be used to move apps or map points on the map *. Press and hold your finger against
the screen and at the same time drag the object to the desired location.
Tap once with two fingers. Zooms out from a digital object, such as the map *.
Page 40 of 594
||
INTRODUCTION
* Option/accessory.
38
Turn off the screen and reactivate it
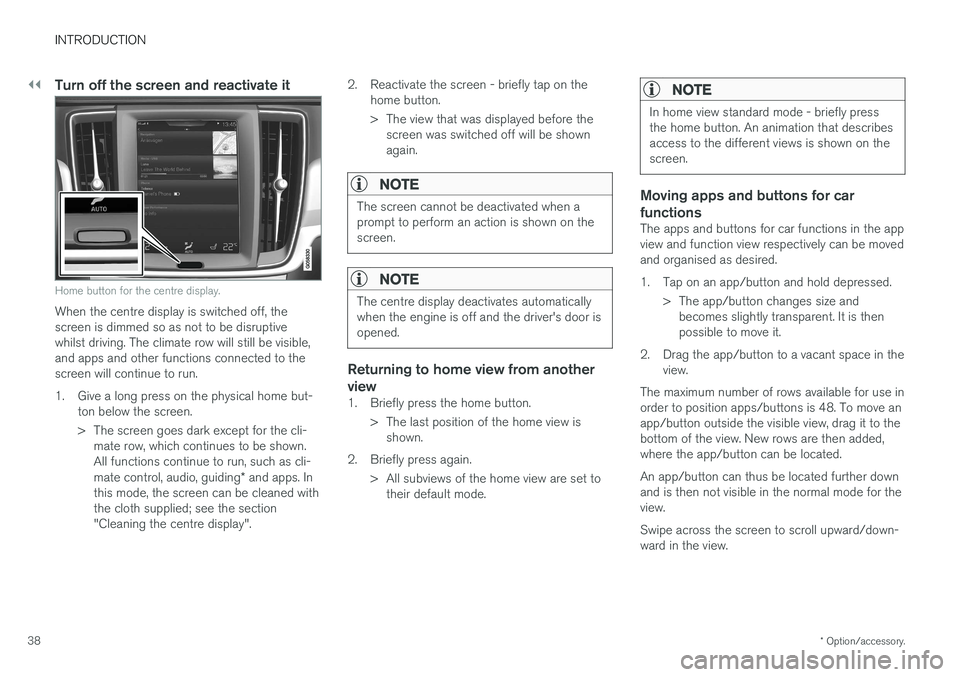
Home button for the centre display.
When the centre display is switched off, the screen is dimmed so as not to be disruptivewhilst driving. The climate row will still be visible,and apps and other functions connected to thescreen will continue to run.
1. Give a long press on the physical home but-
ton below the screen.
> The screen goes dark except for the cli-mate row, which continues to be shown. All functions continue to run, such as cli- mate control, audio, guiding * and apps. In
this mode, the screen can be cleaned with the cloth supplied; see the section"Cleaning the centre display". 2. Reactivate the screen - briefly tap on the
home button.
> The view that was displayed before thescreen was switched off will be shown again.
NOTE
The screen cannot be deactivated when a prompt to perform an action is shown on thescreen.
NOTE
The centre display deactivates automatically when the engine is off and the driver's door isopened.
Returning to home view from another view
1. Briefly press the home button.
> The last position of the home view isshown.
2. Briefly press again. > All subviews of the home view are set totheir default mode.
NOTE
In home view standard mode - briefly press the home button. An animation that describesaccess to the different views is shown on thescreen.
Moving apps and buttons for car functions
The apps and buttons for car functions in the app view and function view respectively can be movedand organised as desired.
1. Tap on an app/button and hold depressed.
> The app/button changes size andbecomes slightly transparent. It is then possible to move it.
2. Drag the app/button to a vacant space in the view.
The maximum number of rows available for use inorder to position apps/buttons is 48. To move anapp/button outside the visible view, drag it to thebottom of the view. New rows are then added,where the app/button can be located. An app/button can thus be located further down and is then not visible in the normal mode for theview. Swipe across the screen to scroll upward/down- ward in the view.
Page 46 of 594
||
INTRODUCTION
* Option/accessory.
44 app view, such as the number of unread text messages for
Messages.
Tap on an app to open it. It then opens in the subview to which it belongs, such as
Media.
Depending on the amount of apps, it is possible to scroll downward in the app view. Do this byswiping/dragging from the bottom and up. To move an app:
1. Tap on the app and hold depressed. > The app becomes slightly transparent andlarger when it is ready to be moved.
2. Drag the app to the desired location.
NOTE
Apps and car function buttons cannot be added to locations that are already occupied.
Go back to the home view again by swiping from left to right 9
across the screen, or by pressing the
home button.
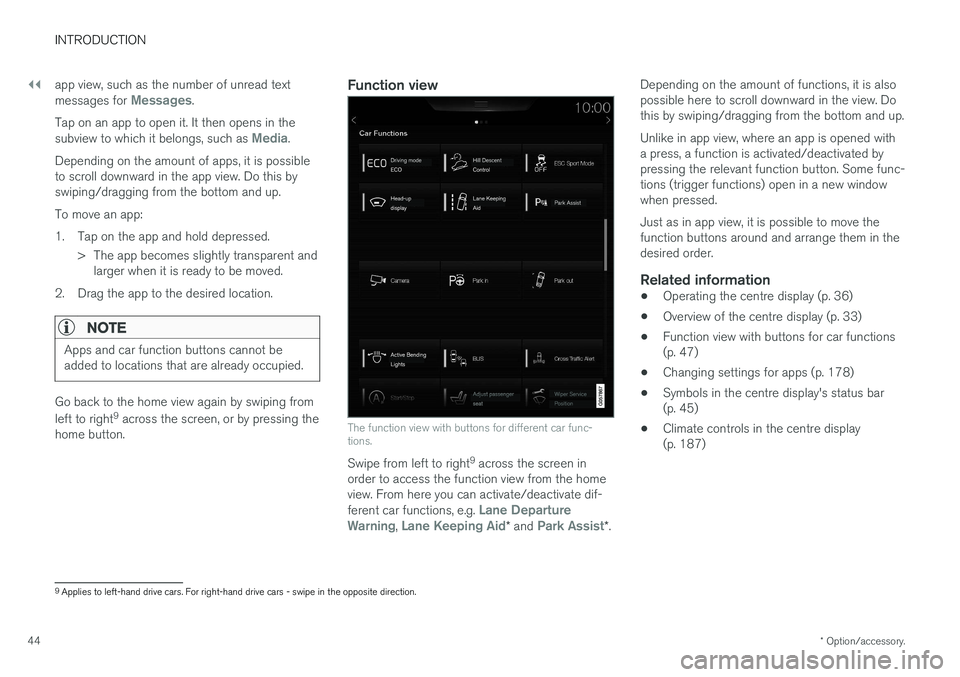
Function view
The function view with buttons for different car func- tions.
Swipe from left to right 9
across the screen in
order to access the function view from the home view. From here you can activate/deactivate dif- ferent car functions, e.g.
Lane Departure
Warning, Lane Keeping Aid* and Park Assist*. Depending on the amount of functions, it is also possible here to scroll downward in the view. Dothis by swiping/dragging from the bottom and up. Unlike in app view, where an app is opened with a press, a function is activated/deactivated bypressing the relevant function button. Some func-tions (trigger functions) open in a new windowwhen pressed. Just as in app view, it is possible to move the function buttons around and arrange them in thedesired order.
Related information
•
Operating the centre display (p. 36)
• Overview of the centre display (p. 33)
• Function view with buttons for car functions(p. 47)
• Changing settings for apps (p. 178)
• Symbols in the centre display's status bar(p. 45)
• Climate controls in the centre display(p. 187)
9
Applies to left-hand drive cars. For right-hand drive cars - swipe in the opposite direction.
Page 100 of 594
||
INSTRUMENTS AND CONTROLS
98
SymbolSpecification
Low oil pressure If this symbol illuminates during driving then the engine's oil pres-sure is too low. Stop the engineimmediately and check the engineoil level, top up if necessary. If thesymbol illuminates and the oil levelis normal, contact a workshop.Volvo recommends that an author-ised Volvo workshop is contacted.
Alternator not charging This symbol illuminates during driv- ing if a fault has occurred in theelectrical system. Visit a workshop.Volvo recommends that an author-ised Volvo workshop is contacted.
Reminder for doors, bonnet, tailgate and fuel filler flap
If the bonnet, tailgate, fuel filler flap or door is not closed properly then the information or warningsymbol and graphics illuminate in the driver dis-play.
Related information
•Driver display (p. 90)
• Indicator symbols in the driver display (p. 95)
• Door and seatbelt reminder (p. 62)
• Safety (p. 56)
Outside temperature gauge
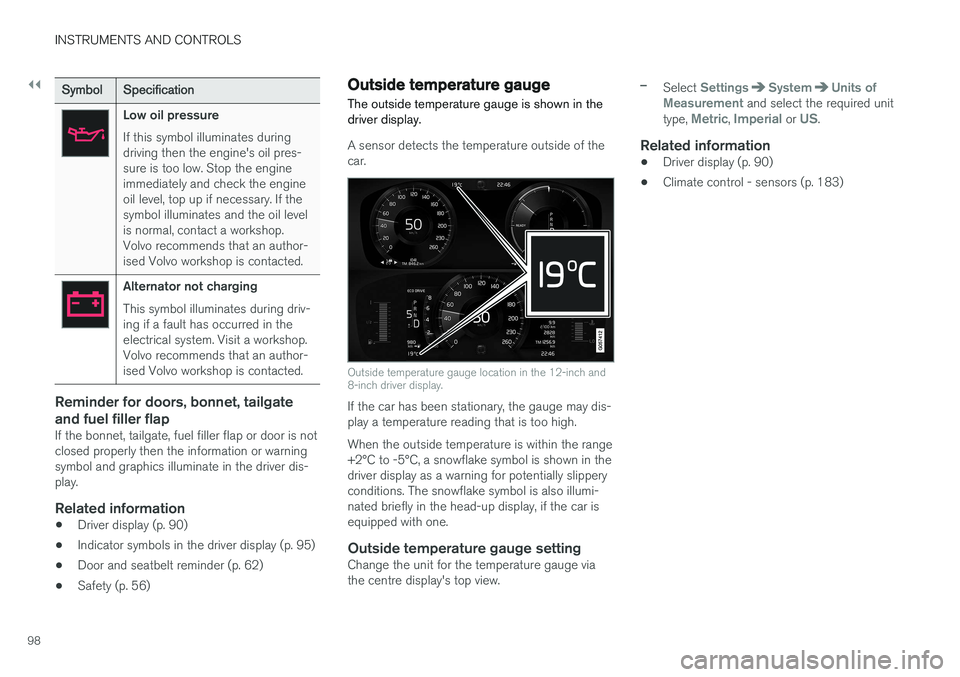
The outside temperature gauge is shown in the driver display.
A sensor detects the temperature outside of the car.
Outside temperature gauge location in the 12-inch and 8-inch driver display.
If the car has been stationary, the gauge may dis- play a temperature reading that is too high. When the outside temperature is within the range +2°C to -5°C, a snowflake symbol is shown in thedriver display as a warning for potentially slipperyconditions. The snowflake symbol is also illumi-nated briefly in the head-up display, if the car isequipped with one.
Outside temperature gauge settingChange the unit for the temperature gauge viathe centre display's top view.
–Select SettingsSystemUnits of
Measurement and select the required unit
type, Metric, Imperial or US.
Related information
• Driver display (p. 90)
• Climate control - sensors (p. 183)