warning YAMAHA MT-03 2012 Owner's Guide
[x] Cancel search | Manufacturer: YAMAHA, Model Year: 2012, Model line: MT-03, Model: YAMAHA MT-03 2012Pages: 98, PDF Size: 5.32 MB
Page 79 of 98
1
2
3
4
5
6
7
8
9
10
PERIODIC MAINTENANCE AND MINOR REPAIR
6-37
To service the rear wheel
Raise the rear wheel off the ground by
using a motorcycle stand or, if a mo-
torcycle stand is not available, by plac-
ing a jack either under each side of the
frame in front of the rear wheel or un-
der each side of the swingarm.EAU24360
Front wheelEAU34390
To remove the front wheel
EWA10820
WARNING0
●It is advisable to have a Yama-
ha dealer service the wheel.
●Securely support the motorcy-
cle so that there is no danger of
it falling over.
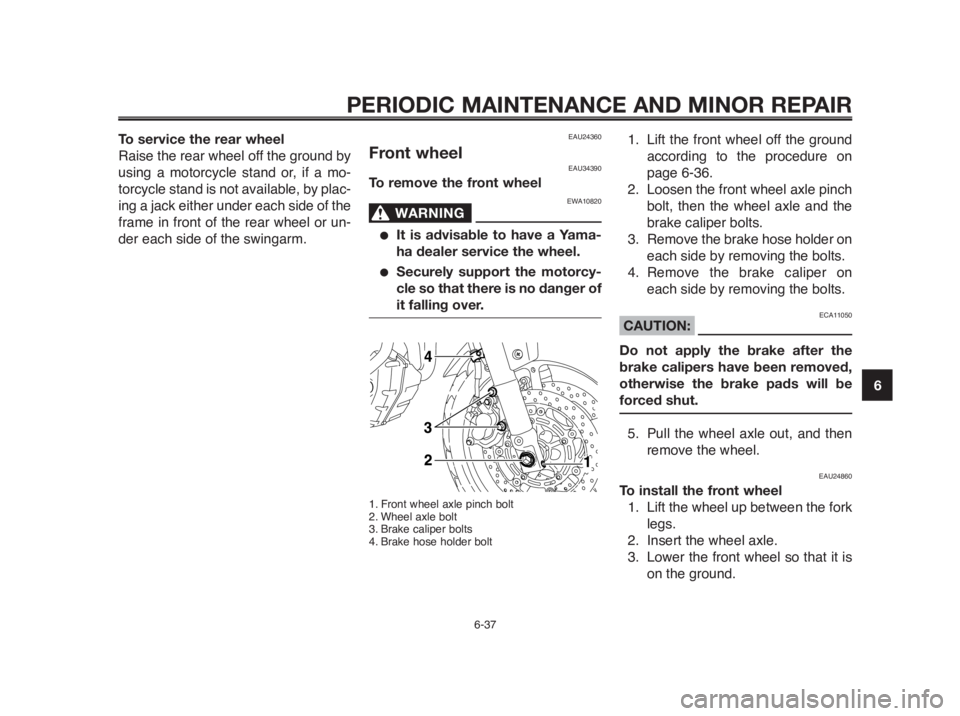
1. Front wheel axle pinch bolt
2. Wheel axle bolt
3. Brake caliper bolts
4. Brake hose holder bolt
1. Lift the front wheel off the ground
according to the procedure on
page 6-36.
2. Loosen the front wheel axle pinch
bolt, then the wheel axle and the
brake caliper bolts.
3. Remove the brake hose holder on
each side by removing the bolts.
4. Remove the brake caliper on
each side by removing the bolts.
ECA11050CAUTION:
Do not apply the brake after the
brake calipers have been removed,
otherwise the brake pads will be
forced shut.
5. Pull the wheel axle out, and then
remove the wheel.
EAU24860
To install the front wheel
1. Lift the wheel up between the fork
legs.
2. Insert the wheel axle.
3. Lower the front wheel so that it is
on the ground.
Page 80 of 98

PERIODIC MAINTENANCE AND MINOR REPAIR
6-38
1
2
3
4
5
6
7
8
9
10
EAU25080
Rear wheelEAU25311
To remove the rear wheelEWA10820
WARNING0
●It is advisable to have a Yama-
ha dealer service the wheel.
●Securely support the motorcy-
cle so that there is no danger of
it falling over.
1. Wheel axle nut
2. Drive chain slack adjusting bolt
3. Locknut
4. Drive chain
1. Wheel axle
2. Brake caliper bracket
1. Loosen the axle nut.
2. Lift the rear wheel off the ground
according to the procedure on
page 6-36.
3. Remove the axle nut.
4. Loosen the locknut on each side
of the swingarm.
5. Turn the drive chain slack adjust-
ing bolts fully in direction (a) and
push the wheel forward.
6. Remove the drive chain from the
rear sprocket.
4. Install the brake calipers by in-
stalling the bolts.
NOTE:
Make sure that there is enough space
between the brake pads before in-
stalling the brake calipers onto the
brake discs.
5. Install the brake hose holders by
installing the bolts.
6. Tighten the wheel axle, the front
wheel axle pinch bolt and the
brake caliper bolts to the speci-
fied torques.
Tightening torques:
Wheel axle:
72 Nm (7.2 m·kgf, 52 ft·lbf)
Front wheel axle pinch bolt:
14 Nm (1.4 m·kgf, 10 ft·lbf)
Brake caliper bolt:
40 Nm (4.0 m·kgf, 29 ft·lbf)
7. Push down hard on the handlebar
several times to check for proper
fork operation.
Page 82 of 98

PERIODIC MAINTENANCE AND MINOR REPAIR
1
2
3
4
5
6
7
8
9
10
EAU25921Troubleshooting charts
Starting problems or poor engine performance
WARNING0
Keep away open flames and do not smoke while checking or working on the fuel system.
1. Fuel
2. Compression
3. Ignition
4. Battery
Check the fuel level in the
fuel tank.
Operate the electric
starter.
Remove the spark plug
and check the electrodes.
Operate the electric
starter.
There is enough
fuel.
There is
compression.
Wet.
The engine turns
over quickly.
There is no fuel.
There is no
compression.
Dry.
The engine turns
over slowly.
Check the
compression.
Check the ignition.
Wipe off with a dry cloth and correct
the spark plug gap, or replace the
spark plug.
The battery is good.
Have a Yamaha dealer check the
vehicle.
Check the battery lead connections,
and charge the battery if necessary.
Open the throttle halfway and
operate the electric starter.
The engine does not start.
Check the battery.
The engine does
not start. Have a
Yamaha dealer
check the vehicle.
Supply fuel.
Have a Yamaha dealer check
the vehicle.
The engine does not start.
Check the compression.
6-40
Page 83 of 98
1
2
3
4
5
6
7
8
9
10
PERIODIC MAINTENANCE AND MINOR REPAIR
6-41
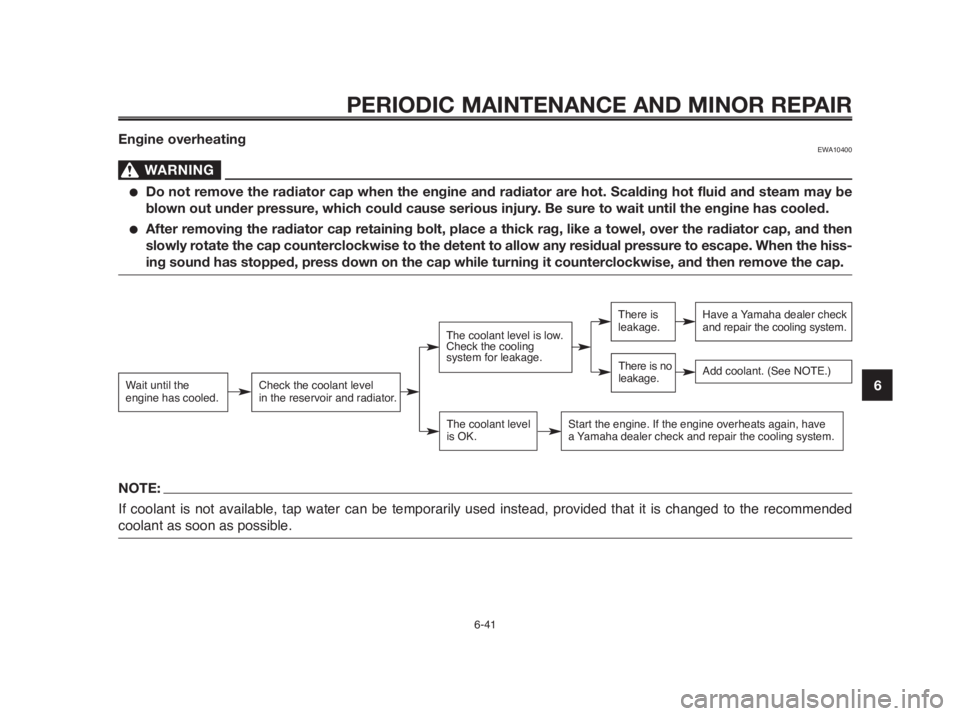
Engine overheatingEWA10400
WARNING0
●Do not remove the radiator cap when the engine and radiator are hot. Scalding hot fluid and steam may be
blown out under pressure, which could cause serious injury. Be sure to wait until the engine has cooled.
●After removing the radiator cap retaining bolt, place a thick rag, like a towel, over the radiator cap, and then
slowly rotate the cap counterclockwise to the detent to allow any residual pressure to escape. When the hiss-
ing sound has stopped, press down on the cap while turning it counterclockwise, and then remove the cap.
NOTE:
If coolant is not available, tap water can be temporarily used instead, provided that it is changed to the recommended
coolant as soon as possible.
Wait until the
engine has cooled.Check the coolant level
in the reservoir and radiator.
The coolant level is low.
Check the cooling
system for leakage.
The coolant level
is OK.
There is
leakage.
There is no
leakage.
Have a Yamaha dealer check
and repair the cooling system.
Start the engine. If the engine overheats again, have
a Yamaha dealer check and repair the cooling system.
Add coolant. (See NOTE.)
Page 86 of 98
MOTORCYCLE CARE AND STORAGE
7-3
1
2
3
4
5
6
7
8
9
10
EWA10930
WARNING0
●Make sure that there is no oil or
wax on the brakes or tires. If
necessary, clean the brake
discs and brake linings with a
regular brake disc cleaner or
acetone, and wash the tires
with warm water and a mild de-
tergent.
●Before operating the motorcy-
cle test its braking perfor-
mance and cornering behavior.
ECA10800CAUTION:
●Apply spray oil and wax spar-
ingly and make sure to wipe off
any excess
●Never apply oil or wax to any
rubber and plastic parts, but
treat them with a suitable care
product.
●Avoid using abrasive polishing
compounds as they will wear
away the paint.
NOTE:
Consult a Yamaha dealer for advice
on what products to use.
EAUM1900
Storage
Short-term
Always store your motorcycle in a cool,
dry place and, if necessary, protect it
against dust with a porous cover.
ECA10810CAUTION:
●Storing the motorcycle in a
poorly ventilated room or cov-
ering it with a tarp, while it is
still wet, will allow water and
humidity to seep in and cause
rust.
●To prevent corrosion, avoid
damp cellars, stables (because
of the presence of ammonia)
and areas where strong chemi-
cals are stored.
Page 87 of 98

1
2
3
4
5
6
7
8
9
10
MOTORCYCLE CARE AND STORAGE
7-4
Long-term
Before storing your motorcycle for
several months:
1. Follow all the instructions in the
“Care” section of this chapter.
2. Fill up the fuel tank and add fuel
stabilizer (if available) to prevent
the fuel tank from rusting and the
fuel from deteriorating.
3. Perform the following steps to
protect the cylinder, piston rings,
etc. from corrosion.
a. Remove the spark plug cap
and spark plug.
b. Pour a teaspoonful of engine
oil into the spark plug bore.
c. Install the spark plug cap onto
the spark plug, and then place
the spark plug on the cylinder
head so that the electrodes
are grounded. (This will limit
sparking during the next
step.)
d. Turn the engine over several
times with the starter. (This
will coat the cylinder wall with
oil.)e. Remove the spark plug cap
from the spark plug, and then
install the spark plug and the
spark plug cap.
EWA10950
WARNING0
To prevent damage or injury from
sparking, make sure to ground the
spark plug electrodes while turning
the engine over.
4. Lubricate all control cables and
the pivoting points of all levers
and pedals as well as of the side-
stand/centerstand.
5. Check and, if necessary, correct
the tire air pressure, and then lift
the motorcycle so that both of its
wheels are off the ground. Alter-
natively, turn the wheels a little
every month in order to prevent
the tires from becoming degraded
in one spot.
6. Cover the muffler outlets with
plastic bags to prevent moisture
from entering them.
7. Remove the battery and fully
charge it. Store it in a cool, dry
place and charge it once a month.
Do not store the battery in an ex-
cessively cold or warm place [less
than 0 °C (30 °F) or more than 30
°C (90 °F)]. For more information
on storing the battery, see
page 6-31.
NOTE:
Make any necessary repairs before
storing the motorcycle.
Page 90 of 98
SPECIFICATIONS
8-3
1
2
3
4
5
6
7
8
9
10
Electrical system:
Ignition system:
Transistorized coil ignition (digital)
Charging system:
A.C. magneto
Battery:
Model:
GT9B-4
Voltage, capacity:
12 V, 8 Ah
Headlight:
Bulb type:
Halogen bulb
Bulb voltage, wattage x quantity:
Headlight:
12 V, 55 W/60 W x 1
Auxiliary light:
12 V, 3 W x 1
Tail/brake light:
12 V, 5 W/21 W x 1
Front turn signal light:
12 V, 10 W x 2
Rear turn signal light:
12 V, 10 W x 2
Meter lighting:
LED (backlight)
Neutral indicator light:
LED
Turn signal indicator light:
LED
High beam indicator light:
LED
Fuel level warning light:
LEDCoolant temperature warning light:
LED
Engine trouble warning light:
LED
Immobilizer system indicator light:
LED
Fuses:Main fuse:
30 A
Headlight fuse:
20 A
Signaling system fuse:
10 A
Ignition fuse:
10 A
Parking lighting fuse:
10 A
Radiator fan fuse:
7.5 A
Fuel injection system fuse:
10 A
Backup fuse (for odometer, clock and
immobilizer):
10 A
Page 93 of 98
1
2
3
4
5
6
7
8
9
10
INDEX
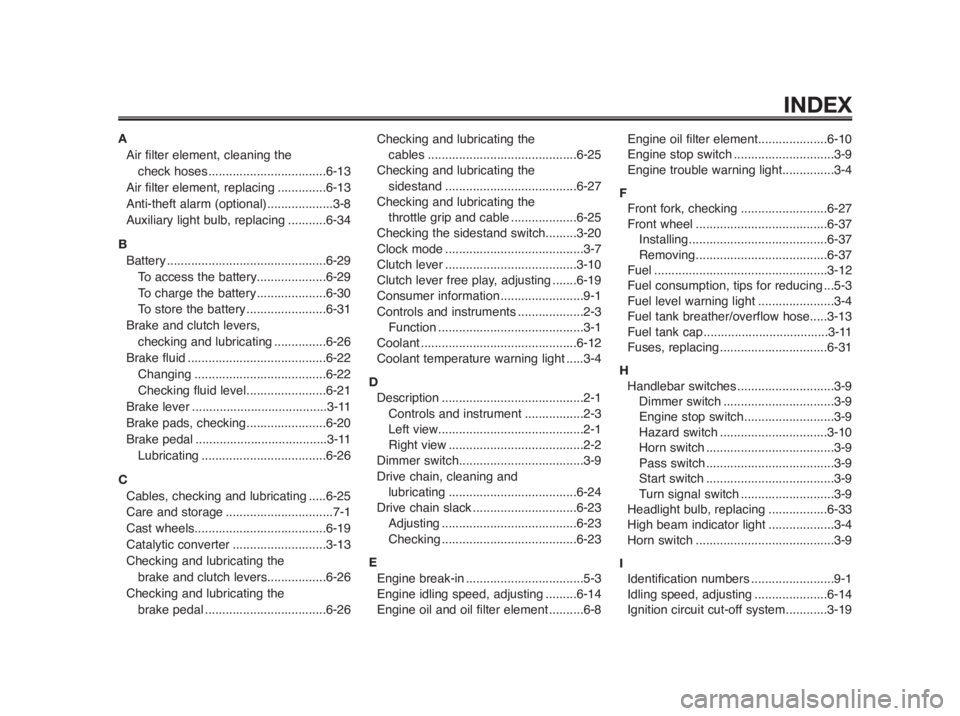
A
Air filter element, cleaning the
check hoses ..................................6-13
Air filter element, replacing ..............6-13
Anti-theft alarm (optional)...................3-8
Auxiliary light bulb, replacing ...........6-34
B
Battery ..............................................6-29
To access the battery....................6-29
To charge the battery....................6-30
To store the battery.......................6-31
Brake and clutch levers,
checking and lubricating ...............6-26
Brake fluid ........................................6-22
Changing......................................6-22
Checking fluid level.......................6-21
Brake lever .......................................3-11
Brake pads, checking.......................6-20
Brake pedal......................................3-11
Lubricating....................................6-26
C
Cables, checking and lubricating .....6-25
Care and storage...............................7-1
Cast wheels......................................6-19
Catalytic converter...........................3-13
Checking and lubricating the
brake and clutch levers.................6-26
Checking and lubricating the
brake pedal...................................6-26Checking and lubricating the
cables ...........................................6-25
Checking and lubricating the
sidestand......................................6-27
Checking and lubricating the
throttle grip and cable ...................6-25
Checking the sidestand switch.........3-20
Clock mode ........................................3-7
Clutch lever ......................................3-10
Clutch lever free play, adjusting .......6-19
Consumer information........................9-1
Controls and instruments ...................2-3
Function ..........................................3-1
Coolant.............................................6-12
Coolant temperature warning light .....3-4
D
Description .........................................2-1
Controls and instrument .................2-3
Left view..........................................2-1
Right view .......................................2-2
Dimmer switch....................................3-9
Drive chain, cleaning and
lubricating.....................................6-24
Drive chain slack ..............................6-23
Adjusting.......................................6-23
Checking.......................................6-23
E
Engine break-in ..................................5-3
Engine idling speed, adjusting .........6-14
Engine oil and oil filter element ..........6-8Engine oil filter element....................6-10
Engine stop switch.............................3-9
Engine trouble warning light...............3-4
F
Front fork, checking.........................6-27
Front wheel......................................6-37
Installing........................................6-37
Removing......................................6-37
Fuel ..................................................3-12
Fuel consumption, tips for reducing ...5-3
Fuel level warning light......................3-4
Fuel tank breather/overflow hose.....3-13
Fuel tank cap ....................................3-11
Fuses, replacing...............................6-31
H
Handlebar switches............................3-9
Dimmer switch................................3-9
Engine stop switch..........................3-9
Hazard switch ...............................3-10
Horn switch .....................................3-9
Pass switch .....................................3-9
Start switch .....................................3-9
Turn signal switch...........................3-9
Headlight bulb, replacing .................6-33
High beam indicator light ...................3-4
Horn switch ........................................3-9
I
Identification numbers........................9-1
Idling speed, adjusting .....................6-14
Ignition circuit cut-off system............3-19
Page 94 of 98
INDEX
1
2
3
4
5
6
7
8
9
10
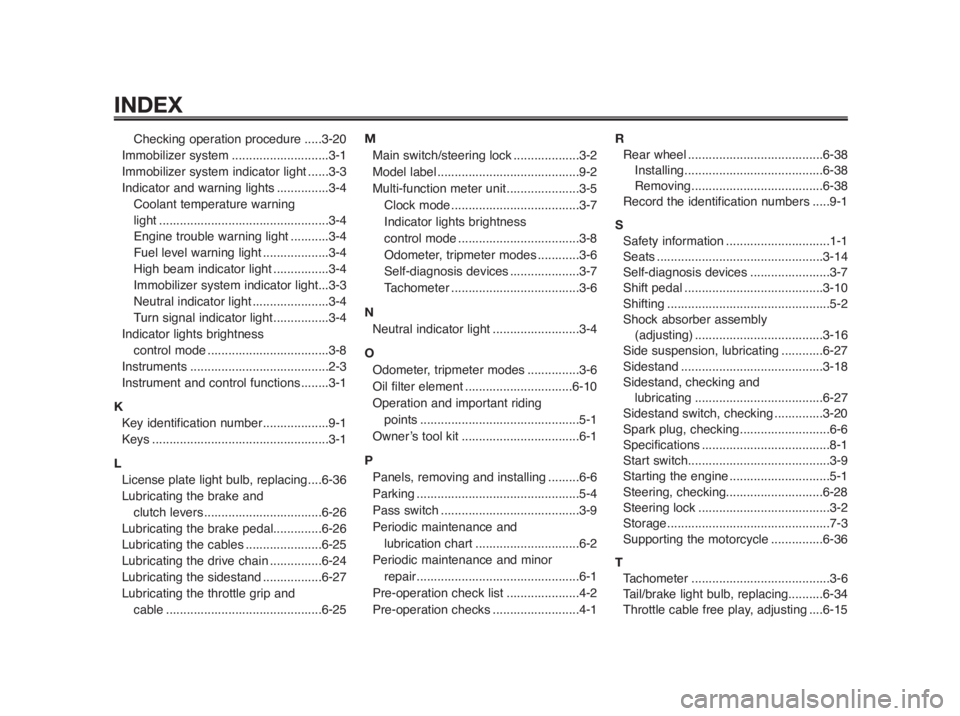
Checking operation procedure .....3-20
Immobilizer system............................3-1
Immobilizer system indicator light ......3-3
Indicator and warning lights ...............3-4
Coolant temperature warning
light .................................................3-4
Engine trouble warning light ...........3-4
Fuel level warning light...................3-4
High beam indicator light ................3-4
Immobilizer system indicator light...3-3
Neutral indicator light......................3-4
Turn signal indicator light................3-4
Indicator lights brightness
control mode...................................3-8
Instruments ........................................2-3
Instrument and control functions ........3-1
K
Key identification number...................9-1
Keys ...................................................3-1
L
License plate light bulb, replacing....6-36
Lubricating the brake and
clutch levers ..................................6-26
Lubricating the brake pedal..............6-26
Lubricating the cables......................6-25
Lubricating the drive chain ...............6-24
Lubricating the sidestand .................6-27
Lubricating the throttle grip and
cable .............................................6-25M
Main switch/steering lock ...................3-2
Model label.........................................9-2
Multi-function meter unit.....................3-5
Clock mode .....................................3-7
Indicator lights brightness
control mode...................................3-8
Odometer, tripmeter modes ............3-6
Self-diagnosis devices....................3-7
Tachometer .....................................3-6
N
Neutral indicator light.........................3-4
O
Odometer, tripmeter modes ...............3-6
Oil filter element...............................6-10
Operation and important riding
points ..............................................5-1
Owner’s tool kit..................................6-1
P
Panels, removing and installing .........6-6
Parking...............................................5-4
Pass switch ........................................3-9
Periodic maintenance and
lubrication chart ..............................6-2
Periodic maintenance and minor
repair...............................................6-1
Pre-operation check list .....................4-2
Pre-operation checks.........................4-1R
Rear wheel.......................................6-38
Installing........................................6-38
Removing......................................6-38
Record the identification numbers .....9-1
S
Safety information..............................1-1
Seats ................................................3-14
Self-diagnosis devices.......................3-7
Shift pedal ........................................3-10
Shifting ...............................................5-2
Shock absorber assembly
(adjusting).....................................3-16
Side suspension, lubricating............6-27
Sidestand.........................................3-18
Sidestand, checking and
lubricating.....................................6-27
Sidestand switch, checking ..............3-20
Spark plug, checking..........................6-6
Specifications .....................................8-1
Start switch.........................................3-9
Starting the engine.............................5-1
Steering, checking............................6-28
Steering lock ......................................3-2
Storage...............................................7-3
Supporting the motorcycle ...............6-36
T
Tachometer ........................................3-6
Tail/brake light bulb, replacing..........6-34
Throttle cable free play, adjusting ....6-15
Page 95 of 98
1
2
3
4
5
6
7
8
9
10
INDEX
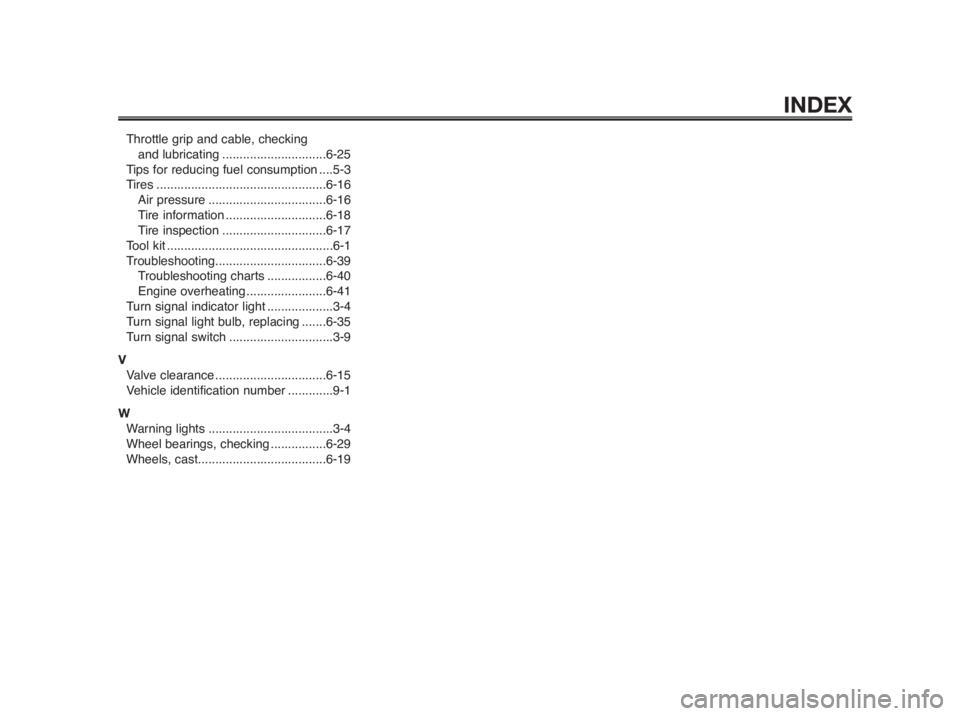
Throttle grip and cable, checking
and lubricating ..............................6-25
Tips for reducing fuel consumption ....5-3
Tires .................................................6-16
Air pressure ..................................6-16
Tire information .............................6-18
Tire inspection ..............................6-17
Tool kit ................................................6-1
Troubleshooting................................6-39
Troubleshooting charts .................6-40
Engine overheating .......................6-41
Turn signal indicator light ...................3-4
Turn signal light bulb, replacing .......6-35
Turn signal switch..............................3-9
V
Valve clearance ................................6-15
Vehicle identification number .............9-1
W
Warning lights ....................................3-4
Wheel bearings, checking ................6-29
Wheels, cast.....................................6-19